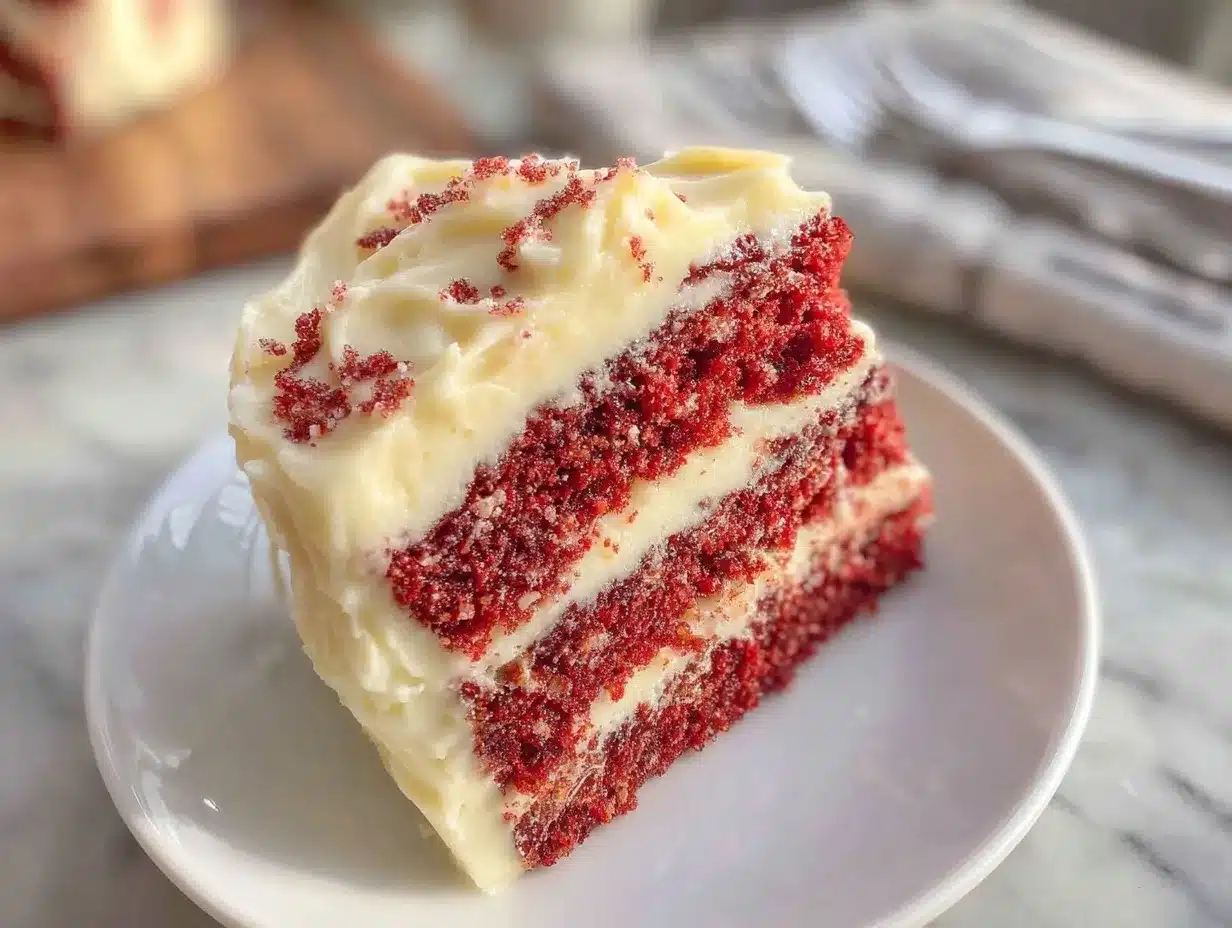
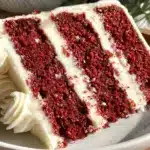
“You’ve got to see this,” my friend texted me one sweltering July afternoon, attaching a photo of a stunning red, white, and blue layered cake arranged like an American flag. I was skeptical at first—flag cakes always seemed a bit much, you know? But when she insisted it was surprisingly easy and actually delicious, I couldn’t resist trying it out for our neighborhood Fourth of July barbecue. Honestly, I wasn’t expecting much; I thought it would be all show and no taste. But as I sliced into that rich red velvet, layered with luscious cream cheese frosting, I realized this cake was something special. Moist, velvety, and with just the right tang from the frosting, it turned out to be a crowd favorite—kids and adults kept coming back for seconds (and thirds).
What caught me off guard was how doable the whole process was, even after a chaotic morning running errands and prepping the grill. The kitchen smelled like cocoa and vanilla, and the vibrant red layers felt like a little festive magic on the plate. I’ve since made this Decadent Red Velvet Flag Cake with Cream Cheese Frosting three times in one week—yeah, I’m obsessed—and it’s become my go-to celebration dessert. It’s not just for the Fourth of July, really; it’s that kind of cake that makes any day feel a little more special.
What sticks with me most is how this cake manages to be both visually stunning and genuinely delicious without requiring professional skills. The balance of flavors—the subtle cocoa in the cake, the smooth tang of the cream cheese frosting, and the fresh burst of blueberries and strawberries as decoration—feels just right. I love that it can quietly impress without needing a fancy presentation, and that everyone, regardless of age, seems to enjoy it.
So, if you’re looking for a dessert that feels like a celebration and tastes like pure indulgence, this recipe might just become your new favorite. It’s the kind of cake that invites smiles and lingers in memory long after the last crumb is gone.
Why You’ll Love This Recipe
After testing this Decadent Red Velvet Flag Cake with Cream Cheese Frosting several times, I’m confident it’s one of the best festive desserts you can make without stress or fancy ingredients. Here’s why it’s worth your time:
- Quick & Easy: Ready in under 2 hours from start to finish, including baking and decorating—perfect for last-minute celebrations or unexpected get-togethers.
- Simple Ingredients: Uses pantry staples and seasonal fresh fruit—no hunting down obscure items needed.
- Perfect for Summer Holidays: Whether it’s the 4th of July, Memorial Day, or a casual summer picnic, this cake’s patriotic look fits right in.
- Crowd-Pleaser: The cream cheese frosting balances the cake’s sweetness, making it a hit with both kids and adults alike.
- Unbelievably Delicious: The moist red velvet layers paired with the tangy frosting and fresh berries create a flavor combo that’s classic and comforting.
What sets this recipe apart is the layering technique and the frosting method. Instead of the usual crumbly mess, blending cream cheese with butter and powdered sugar creates an ultra-smooth, spreadable frosting that holds its shape beautifully. Plus, the flag design is straightforward enough that even a novice baker can create a show-stopping centerpiece. It’s not just pretty—it’s the kind of dessert that makes you close your eyes after the first bite and savor every crumb.
This cake is also flexible—whether you want to swap in dairy-free cream cheese or adjust the berry toppings based on what’s fresh, it adapts well without losing its charm. It’s comfort food with a twist, perfect for impressing guests without stress or complicated steps.
What Ingredients You Will Need
This Decadent Red Velvet Flag Cake recipe relies on a handful of wholesome, easy-to-find ingredients that come together to deliver that striking color and flavor combo. Most are pantry staples, and the fresh berries add the final patriotic touch.
- For the Red Velvet Cake Layers:
- All-purpose flour – 2 ½ cups (312 g), sifted for lightness
- Granulated sugar – 2 cups (400 g)
- Unsweetened cocoa powder – 2 tbsp (15 g), for that subtle chocolate note
- Baking soda – 1 ½ tsp
- Salt – 1 tsp
- Buttermilk – 1 ½ cups (360 ml), room temperature (adds moisture and tang)
- Vegetable oil – 1 cup (240 ml), neutral flavor
- Large eggs – 2, room temperature
- White vinegar – 1 tbsp (15 ml), reacts with baking soda for rise
- Vanilla extract – 2 tsp, for warmth
- Red food coloring – 2 tbsp (30 ml), gel or liquid
- For the Cream Cheese Frosting:
- Cream cheese – 16 oz (454 g), softened (Philadelphia brand works great)
- Unsalted butter – ½ cup (115 g), softened
- Powdered sugar – 4 cups (500 g), sifted to avoid lumps
- Vanilla extract – 1 tsp
- Pinch of salt (balances sweetness)
- For the Flag Decoration:
- Fresh strawberries – 1 ½ cups, hulled and sliced (for the red stripes)
- Fresh blueberries – 1 cup (for the blue field)
- Whipped cream or extra frosting – optional, for finishing touches
If you prefer a dairy-free version, swap the cream cheese and butter for coconut-based alternatives, and use almond milk mixed with a little lemon juice instead of buttermilk. For a gluten-free twist, almond or oat flour can work, but results may vary slightly in texture.
Equipment Needed
- Two 9×13 inch (23×33 cm) rectangular baking pans – for even layers
- Mixing bowls – medium and large sizes
- Electric mixer or stand mixer – makes frosting silky smooth and cake batter well combined
- Measuring cups and spoons – precise measurement is key here
- Rubber spatula – for scraping bowls clean
- Wire cooling rack – lets cakes cool evenly and prevents sogginess
- Offset spatula or butter knife – for spreading frosting evenly
- Fine mesh sieve – optional, for sifting flour and powdered sugar
- Sharp serrated knife – to level cake layers if needed
If you don’t have two pans, you can bake layers one at a time, but it will take longer. I’ve tried this recipe with a hand mixer and it works fine, though a stand mixer really saves your wrists. For budget-friendly options, silicone spatulas and no-brand measuring cups do the job well, but keep your pans greased or lined with parchment for easy release.
Preparation Method
- Preheat and prepare pans: Heat your oven to 350°F (175°C). Grease two 9×13 inch pans with butter or nonstick spray and lightly dust with flour, knocking out excess. This helps the cakes release cleanly after baking.
- Mix dry ingredients: In a large bowl, sift together 2 ½ cups flour, 2 cups sugar, 2 tbsp cocoa powder, 1 ½ tsp baking soda, and 1 tsp salt. Whisk to combine evenly. This ensures your cake layers bake up light with no clumps.
- Combine wet ingredients: In a separate bowl, whisk 1 ½ cups buttermilk, 1 cup vegetable oil, 2 eggs, 1 tbsp white vinegar, 2 tsp vanilla extract, and 2 tbsp red food coloring until smooth and uniform in color.
- Make the batter: Gradually pour the wet mixture into the dry ingredients, stirring gently with a rubber spatula until just combined. Avoid overmixing to keep the cake tender. The batter will be thick and vibrantly red.
- Divide and bake: Pour the batter evenly into the two prepared pans. Use an offset spatula or spoon to smooth the tops. Bake for 30–35 minutes, or until a toothpick inserted in the center comes out clean. Rotate pans halfway through baking for even cooking.
- Cool completely: Let the cakes cool in the pans for 10 minutes, then transfer to wire racks to cool fully. Cooling is crucial before frosting, or the cream cheese frosting will melt and slide off.
- Prepare the frosting: Using a stand or hand mixer, beat 16 oz softened cream cheese and ½ cup softened unsalted butter until creamy and smooth, around 2–3 minutes. Gradually add 4 cups powdered sugar, one cup at a time, mixing well after each addition. Stir in 1 tsp vanilla extract and a pinch of salt. The frosting should be thick but spreadable.
- Assemble the cake: Place one cake layer on your serving platter. Spread an even layer of frosting on top (about 1/3 of the total). Add the second cake layer and frost the entire top and sides smoothly. If needed, chill the cake for 15 minutes to firm up the frosting before decorating.
- Create the flag design: Arrange fresh blueberries in the top-left corner to represent the blue field. Then, lay sliced strawberries in horizontal stripes across the remaining top surface to mimic the red stripes of the flag. You can use dollops of leftover frosting or whipped cream to fill in the white stripes between the strawberries.
- Final chill and serve: Refrigerate the cake for at least 1 hour to set the frosting and allow flavors to meld. Bring to room temperature 15 minutes before serving for the best texture and flavor.
Tip: If your cake layers domed during baking, use a serrated knife to trim the tops so the layers stack evenly. This helps prevent frosting from sliding off and keeps the flag neat and tidy.
Cooking Tips & Techniques
Getting the perfect red velvet flag cake can feel tricky at first, but a few tips make all the difference. First, always use room temperature ingredients—cold eggs or buttermilk can cause the batter to curdle, affecting texture. When mixing the batter, combine wet and dry ingredients gently; overmixing develops gluten and leads to denser cake layers.
For the frosting, beat the cream cheese and butter until very smooth before adding powdered sugar. If the frosting feels too soft, pop it in the fridge for 10 minutes to firm up—this makes spreading easier and prevents sliding. I learned this the hard way after one messy attempt where frosting ran off the sides like a waterfall.
When creating the flag design, fresh fruit is best but slightly frozen berries can work in a pinch—just thaw and pat dry to avoid excess moisture. If you want cleaner lines, pipe thin stripes of frosting between the strawberries to represent the white stripes.
Timing-wise, bake the cakes in the morning and assemble in the afternoon if you’re preparing for an event. This lets the layers cool fully and the frosting set, so your flag looks sharp. You can store the cake covered in the fridge overnight; flavors develop nicely and the cake stays moist.
Multitasking helps here—while the cake bakes, I often prep the frosting and wash the berries, making the whole process less frantic. For a fail-safe finish, chill the cake again after decorating to hold everything in place, especially if you’re transporting it.
Variations & Adaptations
This red velvet flag cake recipe is a great canvas for personal tweaks and dietary adjustments. Here are some ideas I’ve tried or considered:
- Gluten-Free: Use a gluten-free all-purpose flour blend instead of regular flour. Add a teaspoon of xanthan gum if your blend doesn’t contain it, to help with structure.
- Dairy-Free: Swap cream cheese and butter for plant-based alternatives like vegan cream cheese and margarine. Use almond or coconut milk with a splash of apple cider vinegar instead of buttermilk.
- Flavor Twist: Add a teaspoon of espresso powder to the cake batter for a subtle mocha note that complements the cocoa. Or mix a handful of mini chocolate chips into the batter for texture.
- Fruit Variations: Depending on the season, replace strawberries and blueberries with raspberries, blackberries, or even kiwi slices for a different color palette.
- Mini Cakes: Make individual flag cakes in square pans for personal servings—perfect for parties or picnics.
One variation I loved personally was layering the cake with a homemade strawberry compote swirled into the frosting layers, which added a bright, fruity contrast to the creamy tang. It’s a fun way to customize the classic recipe for extra flavor depth.
Serving & Storage Suggestions
This cake shines best served at room temperature to let the cream cheese frosting soften just enough for a luscious bite. I usually slice it with a sharp serrated knife, wiping the blade clean between cuts to keep the layers neat.
Pair the cake with a simple cup of black coffee or a glass of cold milk to balance the richness. For a festive brunch, it complements savory dishes like crispy smashed potatoes or even a creamy roasted tomato basil soup beautifully—both recipes you can find on this site.
Store leftover cake in an airtight container in the refrigerator for up to 4 days. You can freeze individual slices wrapped tightly in plastic wrap and foil for up to 2 months. To thaw, leave in the fridge overnight and bring slices to room temperature before serving.
Flavors actually deepen after a day, with the cream cheese frosting and cake layers melding into a harmonious whole. Just remember to keep the cake covered to avoid drying out.
Nutritional Information & Benefits
Each slice of this red velvet flag cake (assuming 12 servings) contains approximately:
| Nutrient | Amount |
|---|---|
| Calories | 410 kcal |
| Fat | 22 g |
| Carbohydrates | 50 g |
| Protein | 5 g |
| Sugar | 38 g |
The cake includes protein and calcium from the cream cheese and eggs, while the buttermilk adds probiotics and tang. Using fresh berries boosts antioxidants and vitamin C, giving this indulgent dessert a slight nutritional edge. It’s not low-calorie, but it’s a satisfying treat with familiar ingredients and no artificial preservatives.
For those watching allergens, this recipe contains dairy, eggs, and gluten by default, but can be adapted as noted. It’s a balanced choice for special occasions, combining tradition with a touch of homemade goodness.
Conclusion
This Decadent Red Velvet Flag Cake with Cream Cheese Frosting is one of those recipes that proves stunning desserts don’t have to be complicated or intimidating. It’s approachable, delicious, and festive in a way that feels heartfelt, not forced. Whether it’s your first time baking red velvet or you’re looking for a patriotic showstopper, this cake is a winner.
Feel free to tweak the berries, try alternative frostings, or even make mini versions for easy sharing. I keep coming back to this recipe because it hits that sweet spot between classic comfort and celebratory flair, making every bite feel like a small moment worth savoring.
If you try making this cake, I’d love to hear how it turned out or what fun twists you added. Baking is better when shared, and this flag cake deserves a place at your next gathering!
Frequently Asked Questions
Can I make this red velvet flag cake ahead of time?
Yes! Bake the cake layers a day ahead and refrigerate them wrapped tightly. Assemble and decorate the day of serving for the freshest look and taste.
What if I don’t have buttermilk?
You can make a quick substitute by adding 1 ½ tablespoons of white vinegar or lemon juice to 1 ½ cups of milk. Let it sit for 5 minutes before using.
How do I get the cream cheese frosting perfectly smooth?
Make sure both the cream cheese and butter are softened to room temperature. Beat them together thoroughly before slowly adding powdered sugar. Sifting the sugar helps avoid lumps.
Can I use frozen berries for the decoration?
Frozen berries can work if thawed and patted dry to remove excess moisture. Fresh berries are preferable for a firmer texture and brighter color.
Is there a way to make this cake vegan?
Yes, substitute dairy ingredients with vegan cream cheese and butter, use plant-based milk with vinegar for buttermilk, and replace eggs with flax eggs or other vegan egg replacers.
For a savory dish to complement your cake, you might try the crispy garlic parmesan chicken sheet pan dinner or the creamy roasted tomato basil soup with crispy grilled cheese croutons, both perfect companions for a festive meal.
Pin This Recipe!

Decadent Red Velvet Flag Cake Recipe Easy 4th of July Dessert
A visually stunning and delicious red velvet layered cake with cream cheese frosting, decorated like an American flag with fresh berries. Perfect for summer holidays and celebrations.
- Prep Time: 30 minutes
- Cook Time: 35 minutes
- Total Time: 1 hour 45 minutes
- Yield: 12 servings 1x
- Category: Dessert
- Cuisine: American
Ingredients
- 2 ½ cups (312 g) all-purpose flour, sifted
- 2 cups (400 g) granulated sugar
- 2 tbsp (15 g) unsweetened cocoa powder
- 1 ½ tsp baking soda
- 1 tsp salt
- 1 ½ cups (360 ml) buttermilk, room temperature
- 1 cup (240 ml) vegetable oil
- 2 large eggs, room temperature
- 1 tbsp (15 ml) white vinegar
- 2 tsp vanilla extract
- 2 tbsp (30 ml) red food coloring, gel or liquid
- 16 oz (454 g) cream cheese, softened
- ½ cup (115 g) unsalted butter, softened
- 4 cups (500 g) powdered sugar, sifted
- 1 tsp vanilla extract
- Pinch of salt
- 1 ½ cups fresh strawberries, hulled and sliced
- 1 cup fresh blueberries
- Whipped cream or extra frosting (optional)
Instructions
- Preheat oven to 350°F (175°C). Grease two 9×13 inch pans with butter or nonstick spray and lightly dust with flour, knocking out excess.
- In a large bowl, sift together flour, sugar, cocoa powder, baking soda, and salt. Whisk to combine evenly.
- In a separate bowl, whisk buttermilk, vegetable oil, eggs, white vinegar, vanilla extract, and red food coloring until smooth and uniform in color.
- Gradually pour the wet mixture into the dry ingredients, stirring gently with a rubber spatula until just combined. Avoid overmixing.
- Pour the batter evenly into the two prepared pans. Smooth the tops with an offset spatula or spoon.
- Bake for 30–35 minutes, or until a toothpick inserted in the center comes out clean. Rotate pans halfway through baking.
- Let the cakes cool in the pans for 10 minutes, then transfer to wire racks to cool completely.
- Using a mixer, beat cream cheese and butter until creamy and smooth, about 2–3 minutes. Gradually add powdered sugar, one cup at a time, mixing well after each addition.
- Stir in vanilla extract and a pinch of salt. The frosting should be thick but spreadable.
- Place one cake layer on a serving platter. Spread about one-third of the frosting evenly on top.
- Add the second cake layer and frost the entire top and sides smoothly. Chill for 15 minutes if needed to firm up the frosting.
- Arrange fresh blueberries in the top-left corner to represent the blue field of the flag.
- Lay sliced strawberries in horizontal stripes across the remaining top surface to mimic the red stripes.
- Use dollops of leftover frosting or whipped cream to fill in the white stripes between the strawberries.
- Refrigerate the cake for at least 1 hour to set the frosting and allow flavors to meld.
- Bring to room temperature 15 minutes before serving.
Notes
Use room temperature ingredients to avoid curdling. Avoid overmixing the batter to keep cake tender. Chill frosting if too soft before spreading. Fresh berries are best for decoration; thaw frozen berries and pat dry if used. Trim domed cake tops with serrated knife for even layers. Cake can be made a day ahead and refrigerated. Bring to room temperature before serving for best texture.
Nutrition
- Serving Size: 1 slice (1/12 of cak
- Calories: 410
- Sugar: 38
- Fat: 22
- Carbohydrates: 50
- Protein: 5
Keywords: red velvet cake, flag cake, 4th of July dessert, cream cheese frosting, patriotic cake, summer dessert, berry decoration