“You seriously don’t need to bake this,” my friend Lisa said, flashing me a grin across the cluttered kitchen counter. It was one of those evenings where the idea of turning on the oven felt like a punishment—kids running wild, dinner barely done, and dessert nowhere in sight. Honestly, I was skeptical about a no-bake cheesecake that could actually satisfy my sweet tooth and the family’s dessert cravings. But with a handful of Oreos, cream cheese, and a little patience, this creamy no-bake Oreo cheesecake delight came together like a charm.
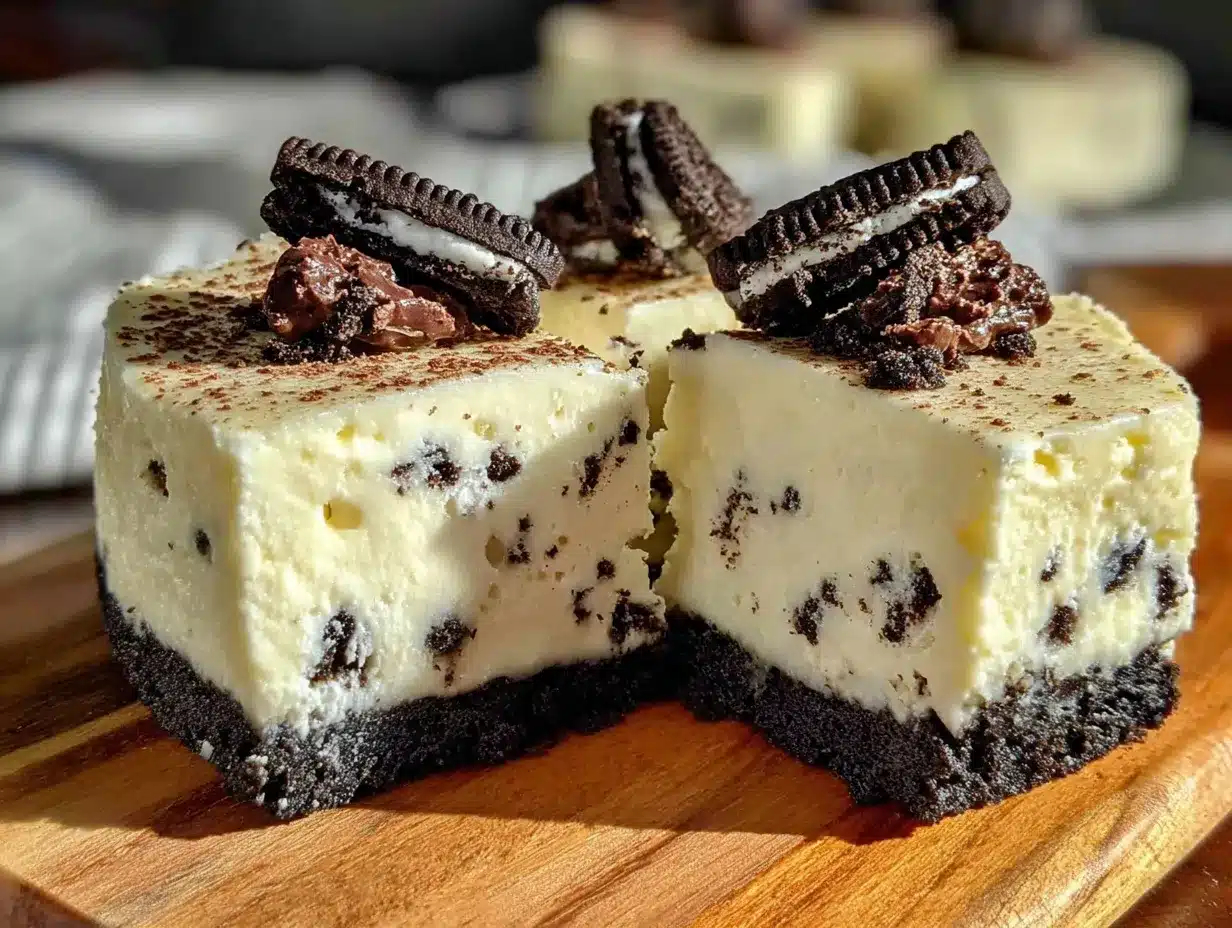
There’s this kind of magic when you realize a dessert can be so rich, so indulgent, yet require barely any effort. The crust — crumbly, chocolatey, and perfectly pressed — sets the stage for the silky, luscious filling. I found myself making it again and again that week, each time tweaking just a little, but never straying far from the original. My husband started asking for it by name, and the kids? Let’s just say the Oreo crumbs on their faces said it all.
What makes this recipe stick isn’t just the ease or the familiar Oreo crunch; it’s the way it feels like a little reward after a hectic day. It’s that quiet moment when you scoop up a bite, close your eyes, and just savor the creamy, sweet comfort. No oven, no fuss, just pure delight in a glass or a pie dish.
Why You’ll Love This Recipe
After testing this creamy no-bake Oreo cheesecake delight multiple times (and trust me, that was a delicious challenge), I’ve found it to be a dessert that truly delivers on all fronts. Here’s why it stands out:
- Quick & Easy: Ready in under 30 minutes, making it perfect for busy weeknights or last-minute dessert plans.
- Simple Ingredients: Uses pantry staples you likely already have—cream cheese, Oreos, and a touch of whipped cream.
- Perfect for Any Occasion: Whether it’s a casual family dinner or a potluck, this cheesecake wins hearts without stress.
- Crowd-Pleaser: Both kids and adults rave about the creamy texture combined with those crunchy cookie bits.
- Unbelievably Delicious: The no-bake filling is silky and smooth, with just enough Oreo crunch to keep things interesting.
What sets this apart from every other Oreo cheesecake recipe I’ve tried is the effortless mix of cream cheese and whipped cream that results in a light, airy filling—not too dense but still rich enough to feel indulgent. Plus, the crust is perfectly crumbly without being soggy, which can be a problem in no-bake desserts. It’s a recipe I trust to impress without the need for baking skills or fancy equipment.
This dessert isn’t just a recipe; it’s a little moment of calm and sweetness that anyone can whip up—and honestly, that’s why I find myself coming back to it time and again.
What Ingredients You Will Need
This creamy no-bake Oreo cheesecake delight relies on straightforward ingredients that come together to create a dessert that’s both satisfying and fuss-free. Most of these are pantry staples or easy to find in any grocery store.
- Oreos (about 24 cookies): Use classic Oreos for the best flavor and texture. For a gluten-free twist, there are Oreo-style cookies available.
- Unsalted butter (5 tablespoons, melted): Helps bind the crust; I prefer Kerry Gold for its rich flavor.
- Cream cheese (16 oz / 450 g, softened): The star of the filling. Philadelphia cream cheese gives the best creamy consistency.
- Powdered sugar (¾ cup / 90 g): Adds just the right amount of sweetness without graininess.
- Heavy whipping cream (1 cup / 240 ml, cold): Whipped to stiff peaks for that light, fluffy texture.
- Vanilla extract (1 teaspoon): Brings depth to the filling.
- Optional: a pinch of salt to balance sweetness, especially if using salted butter.
For the crust, I recommend crushing the Oreos finely but leaving a few chunks if you like a bit of crunch. The filling’s magic is in the smooth, whipped cream combined with rich cream cheese; using cold heavy cream helps it whip up beautifully. If you want to switch things up, you can substitute coconut cream for a dairy-free version, though the texture will be slightly different.
Equipment Needed
- Mixing bowls: One large for the crust, one medium for the filling.
- Electric mixer or stand mixer: A must for whipping cream to the perfect peaks. Hand whisks just don’t cut it here.
- Food processor or rolling pin: For crushing the Oreos finely. If you don’t have a food processor, place cookies in a sealed bag and crush with a rolling pin.
- 9-inch (23 cm) springform pan or pie dish: The springform pan makes it easy to unmold your cheesecake. A simple pie dish works too but serving might be less neat.
- Spatula: For folding the whipped cream gently into the cream cheese mixture.
If you’re tight on kitchen gadgets, a handheld mixer and a sturdy zip-top bag for crushing cookies will do. Just make sure your cream cheese is softened to room temperature; otherwise, mixing becomes a pain. I once tried rushing this step — let’s say lumps are no fun!
Preparation Method
- Prepare the crust (10 minutes): Crush 20 Oreos finely using a food processor or by placing them in a zip-top bag and smashing with a rolling pin. Mix the crushed Oreos with 5 tablespoons (70 g) of melted unsalted butter until well combined. Press the mixture firmly into the bottom of a 9-inch (23 cm) springform pan or pie dish. Use the back of a spoon or glass bottom to compact it evenly. Refrigerate while preparing the filling.
- Make the filling (15 minutes): In a large bowl, beat 16 oz (450 g) softened cream cheese with ¾ cup (90 g) powdered sugar and 1 teaspoon vanilla extract until smooth and creamy, about 2 minutes with an electric mixer.
- Whip the cream (5 minutes): In a separate chilled bowl, whip 1 cup (240 ml) cold heavy whipping cream until stiff peaks form. This means when you lift the whisk, peaks hold firm without drooping.
- Combine filling and cream (5 minutes): Gently fold the whipped cream into the cream cheese mixture using a spatula. Take your time here—folding preserves the airiness and gives that light, creamy texture.
- Add remaining Oreos (optional, 5 minutes): Roughly chop the remaining 4 Oreos and fold into the filling for extra cookie chunks throughout the cheesecake.
- Assemble and chill (minimum 4 hours, preferably overnight): Spoon the filling over the chilled crust and smooth the top with a spatula. Cover with plastic wrap and refrigerate for at least 4 hours so it sets properly.
- Serve: Release the cheesecake from the springform pan carefully. Slice with a sharp knife, wiping it clean between cuts for neat pieces.
Pro tip: If your cream cheese isn’t softened enough, your filling will be lumpy—don’t rush this! Also, pressing the crust firmly is key to avoid crumbling when slicing. I learned that the hard way when my first cheesecake fell apart like a cookie crumble disaster.
Cooking Tips & Techniques
Getting that creamy no-bake Oreo cheesecake delight just right is about a few simple but important techniques. Here’s what I’ve learned:
- Softening the cream cheese: Let it sit at room temperature for about 30 minutes before mixing. Cold cream cheese tears up the mixture and leaves lumps, which is frustrating.
- Whipping cream: Use a chilled bowl and beaters. Warm cream won’t whip properly and you’ll end up with a sad, runny mess. I keep my bowl in the freezer for 10 minutes before starting.
- Folding, not stirring: When combining whipped cream with the cream cheese, use a gentle folding motion with a spatula rather than mixing vigorously. This keeps the filling light and fluffy.
- Crust pressing: Firmly pressing the Oreo crust mixture ensures it holds together when slicing. I sometimes use the bottom of a measuring cup for this.
- Chilling time: Don’t skip the refrigeration. The cheesecake needs time to set properly, or it’ll be too soft to slice cleanly.
One time, I skipped whipping the cream stiff enough and ended up with a denser texture that wasn’t as dreamy. Since then, I’ve learned to trust the process and wait for those perfect peaks.
Variations & Adaptations
If you want to switch things up or cater to different tastes, this creamy no-bake Oreo cheesecake delight is pretty flexible:
- Peanut Butter Oreo Cheesecake: Add ½ cup (120 g) creamy peanut butter to the filling for a nutty twist. It pairs beautifully with classic Oreos.
- Mint Oreo Version: Swap classic Oreos for mint-flavored ones to give the cheesecake a refreshing note. Perfect for mint lovers!
- Gluten-Free Option: Use gluten-free chocolate sandwich cookies for the crust and mix to suit. The texture stays just as delicious.
- Individual Servings: Make mini cheesecakes in cups or jars for easy portion control and pretty presentation—great for parties.
- Dairy-Free Adaptation: Use coconut cream instead of heavy cream and a dairy-free cream cheese alternative. The texture changes slightly but still tasty.
Personally, I once made a batch using the mint Oreos and found it surprisingly refreshing on a hot summer day. For a bit of fun, try layering some crushed Oreos between the crust and filling for extra texture.
Serving & Storage Suggestions
This cheesecake is best served chilled — right out of the fridge — so you get that creamy, cool bite every time. I like to garnish mine with a few Oreo halves or a dusting of cocoa powder for a simple but elegant touch.
It pairs wonderfully with a cup of strong coffee or a glass of cold milk for the kids. For a party, consider serving it alongside other easy treats like these perfect firework cake pops or a fresh fruit salad.
To store, cover your cheesecake tightly with plastic wrap or an airtight lid and keep refrigerated for up to 5 days. You can also freeze slices individually wrapped for up to 2 months. When reheating, just thaw in the fridge overnight—microwaving tends to ruin the texture.
Interestingly, letting the cheesecake rest a day enhances the flavors, making it even better the next day. So, if you can hold off, it’s definitely worth the wait.
Nutritional Information & Benefits
One generous slice (about 1/12th of the cheesecake) contains approximately:
| Calories | 350 kcal |
|---|---|
| Fat | 25 g |
| Carbohydrates | 28 g |
| Protein | 5 g |
The key ingredients like cream cheese and heavy cream provide a good amount of calcium and vitamin A. Oreos add a sweet crunch but also bring some sugars and fats, so moderation is key. For those watching carbs, swapping Oreos for low-carb cookies can help.
This cheesecake is gluten-free if you use gluten-free cookies and offers a satisfying treat without complicated ingredients, perfect for both indulgence and simplicity. From a wellness perspective, it’s a dessert that doesn’t overwhelm with additives, making it a better choice compared to many store-bought sweets.
Conclusion
This creamy no-bake Oreo cheesecake delight has become my go-to when I want to treat myself and my family without the stress of baking. It’s a recipe that balances ease, flavor, and that comforting creaminess we all crave. Whether you’re new to no-bake desserts or a seasoned pro, I hope you’ll find this recipe as satisfying and dependable as I do.
Feel free to tweak the Oreos or try one of the variations I mentioned—this cheesecake is forgiving and fun to experiment with. If you give it a try, I’d love to hear how it turns out or what twist you added!
Here’s to easy, delicious desserts that bring a little sweetness to your day.
Frequently Asked Questions
Can I use low-fat cream cheese or whipped cream for this recipe?
Low-fat versions may affect the texture and richness. The cheesecake might be less creamy and more prone to being watery. For best results, stick to full-fat ingredients.
How long does the no-bake Oreo cheesecake need to chill?
At least 4 hours in the fridge, but overnight chilling is ideal to allow the filling to firm up and flavors to meld.
Can I make this cheesecake ahead of time for a party?
Absolutely! It’s perfect for making a day or two in advance and stores well refrigerated.
What’s the best way to crush Oreos if I don’t have a food processor?
Place them in a sealed plastic bag and crush with a rolling pin or the bottom of a heavy glass until finely ground.
Is it possible to freeze this cheesecake?
Yes, wrap individual slices tightly and freeze for up to 2 months. Thaw overnight in the fridge before serving.
For a fun twist on easy creamy desserts, you might enjoy the creamy lemon blueberry icebox cake or the no-churn strawberry shortcake ice cream—both share that effortless charm with distinct flavors.
Pin This Recipe!
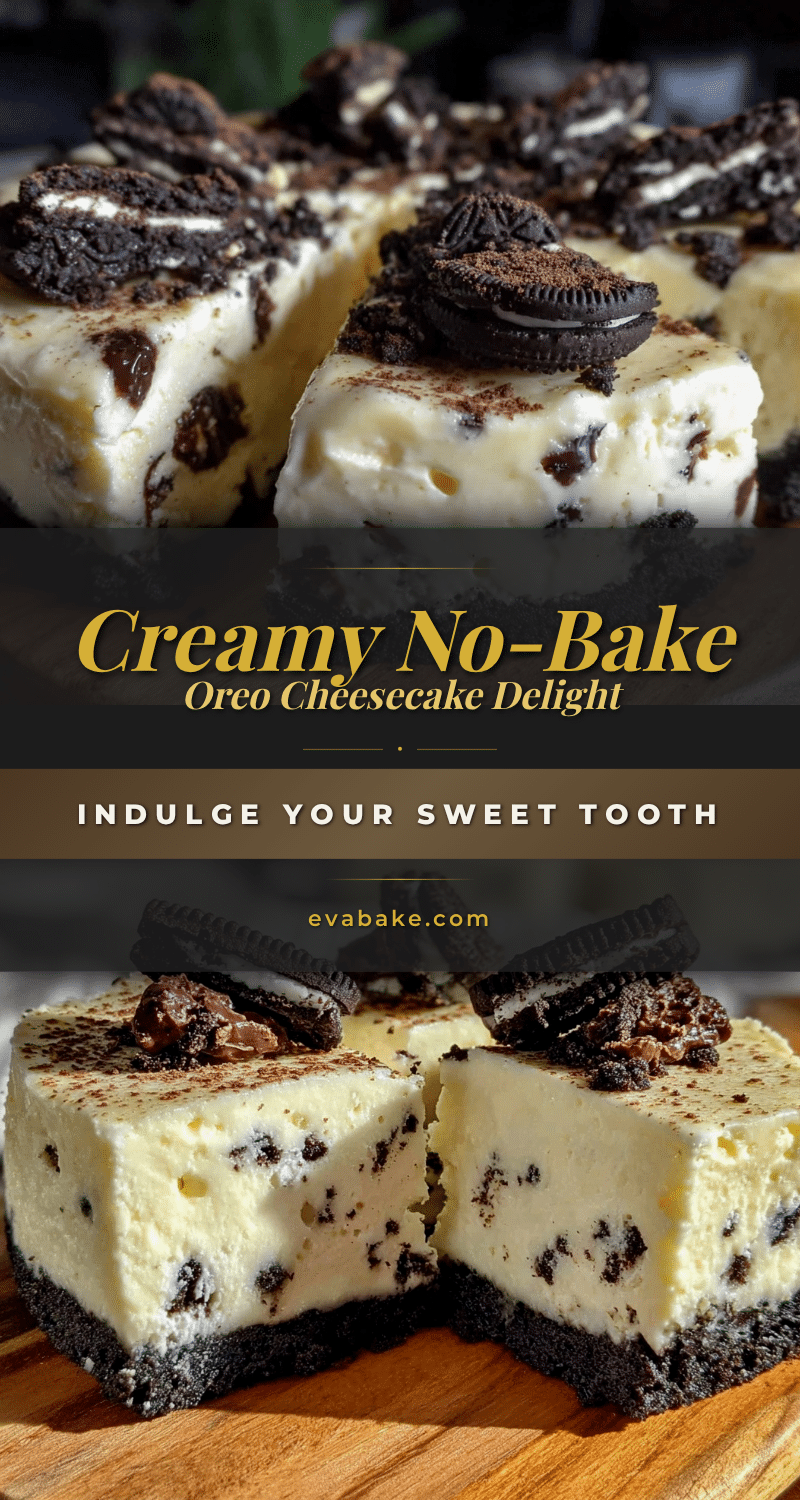
Creamy No-Bake Oreo Cheesecake Delight
A rich and indulgent no-bake Oreo cheesecake with a crumbly chocolate crust and a light, airy cream cheese and whipped cream filling. Perfect for busy weeknights or last-minute dessert plans.
- Prep Time: 20 minutes
- Cook Time: 0 minutes
- Total Time: 4 hours 20 minutes
- Yield: 12 servings 1x
- Category: Dessert
- Cuisine: American
Ingredients
- 24 Oreos (classic or gluten-free for a gluten-free option)
- 5 tablespoons unsalted butter, melted
- 16 oz (450 g) cream cheese, softened
- 3/4 cup (90 g) powdered sugar
- 1 cup (240 ml) heavy whipping cream, cold
- 1 teaspoon vanilla extract
- Optional: a pinch of salt
Instructions
- Prepare the crust: Crush 20 Oreos finely using a food processor or by placing them in a zip-top bag and smashing with a rolling pin.
- Mix the crushed Oreos with 5 tablespoons (70 g) melted unsalted butter until well combined.
- Press the mixture firmly into the bottom of a 9-inch (23 cm) springform pan or pie dish. Compact evenly and refrigerate while preparing the filling.
- Make the filling: Beat 16 oz (450 g) softened cream cheese with 3/4 cup (90 g) powdered sugar and 1 teaspoon vanilla extract until smooth and creamy, about 2 minutes with an electric mixer.
- Whip 1 cup (240 ml) cold heavy whipping cream in a chilled bowl until stiff peaks form.
- Gently fold the whipped cream into the cream cheese mixture using a spatula to preserve airiness.
- Optional: Roughly chop the remaining 4 Oreos and fold into the filling for extra cookie chunks.
- Spoon the filling over the chilled crust and smooth the top with a spatula.
- Cover with plastic wrap and refrigerate for at least 4 hours, preferably overnight, to set properly.
- Serve by releasing the cheesecake from the springform pan carefully and slicing with a sharp knife, wiping it clean between cuts.
Notes
Let cream cheese soften at room temperature for about 30 minutes before mixing to avoid lumps. Use a chilled bowl and beaters for whipping cream to stiff peaks. Fold whipped cream gently into cream cheese mixture to keep filling light and airy. Press crust firmly to avoid crumbling. Refrigerate at least 4 hours or overnight for best texture. Can freeze individual slices for up to 2 months.
Nutrition
- Serving Size: 1 slice (1/12th of c
- Calories: 350
- Sugar: 20
- Sodium: 250
- Fat: 25
- Saturated Fat: 15
- Carbohydrates: 28
- Fiber: 1
- Protein: 5
Keywords: no-bake cheesecake, Oreo cheesecake, easy dessert, no oven dessert, creamy cheesecake, Oreo dessert, quick dessert