I was sitting on my back porch last spring, half-listening to my neighbor Mrs. Gable complain about her hydrangeas, when she suddenly switched gears and started describing a dessert her grandmother used to make. She called it “Snow on a Hill” or something equally charming. I’d known her for three years and had no idea she had a secret family recipe tucked away. Honestly, she’s usually the type who brings store-bought cookies to the block party. But there she was, hands covered in potting soil, telling me about layers of sweetened cream cheese and cherry pie filling that made her entire family go quiet at the table. I grabbed a dirty gardening glove and scribbled the basics on the back of a seed packet. That night, I made it. And let me tell you—my kids, who usually argue over the last chicken nugget, sat there eating spoonfuls of it without saying a word. I knew right then this one was staying in our rotation forever.
This Family-Favorite Cherries in the Snow Cream Cheese Dessert is the kind of recipe that feels too simple to be this good. It’s creamy, it’s fruity, and it comes together in about twenty minutes flat. Maybe you’ve been there—standing in the kitchen at 7 p.m., realizing you promised dessert for tomorrow’s potluck or family dinner and you have absolutely nothing planned. This is your save. It looks fancy enough to impress, but it’s so easy you’ll almost feel guilty taking the credit. Almost.
Why You’ll Love This Recipe
Let’s be real for a second. Most desserts that look this good require a lot of effort or expensive ingredients. Not this one. I’ve made this Cherries in the Snow for birthday parties, Sunday dinners, and even a few holiday gatherings, and every single time someone asks for the recipe. Here’s why it works so well for real families like ours:
- Quick & Easy: From start to finish, you’re looking at about 20 minutes of hands-on time. No baking, no complicated techniques, no sweating over a hot oven. Just mix, layer, and chill.
- Simple Ingredients: You probably have most of this stuff in your fridge and pantry right now. Cream cheese, powdered sugar, whipped topping, vanilla wafers or graham crackers, and a can of cherry pie filling. That’s it.
- Perfect for Busy Weeknights: When you need a dessert that feels special but doesn’t require a trip to three different stores, this is it. I’ve thrown it together after soccer practice more times than I can count.
- Crowd-Pleaser: My kids devour it. My husband, who claims he doesn’t like “cold desserts,” goes back for seconds. Even my picky nephew, who only eats beige foods, cleaned his bowl.
- Unbelievably Delicious: The texture is what gets you. That creamy, sweet, slightly tangy cream cheese layer against the glossy cherry topping? It’s comfort food in a glass or bowl. No other way to describe it.
What makes this version different from the hundred other no-bake cheesecake-style desserts out there? It’s the balance. The cream cheese mixture isn’t too sweet, so it doesn’t fight with the cherry topping. And the crunch from the vanilla wafers or graham crackers gives it just enough texture to keep things interesting. It’s not just another dessert—it’s the one you’ll keep coming back to.
What Ingredients You Will Need
This recipe uses simple, wholesome ingredients that work together to create something truly satisfying. No weird stuff, no hunting down specialty items. Here’s what you’ll need:
For the Cream Cheese Layer
- 8 ounces cream cheese, softened — Make sure it’s at room temperature. Cold cream cheese will leave you with lumps, and nobody wants that. I usually take it out of the fridge about 30 minutes before I start. Philadelphia is my go-to brand for consistent texture.
- 1/2 cup powdered sugar — Also called confectioners’ sugar. This dissolves into the cream cheese smoothly, giving you that silky texture without any graininess.
- 1 teaspoon vanilla extract — Pure vanilla extract makes a difference here. If you only have imitation, it’ll still work, but the flavor won’t be quite as warm and rich.
- 1 1/2 cups whipped topping, thawed — Cool Whip is the standard, but any frozen whipped topping works. You can also whip your own heavy cream if you prefer—just add a tablespoon of powdered sugar and a splash of vanilla to stabilize it.
For the Crunchy Layer
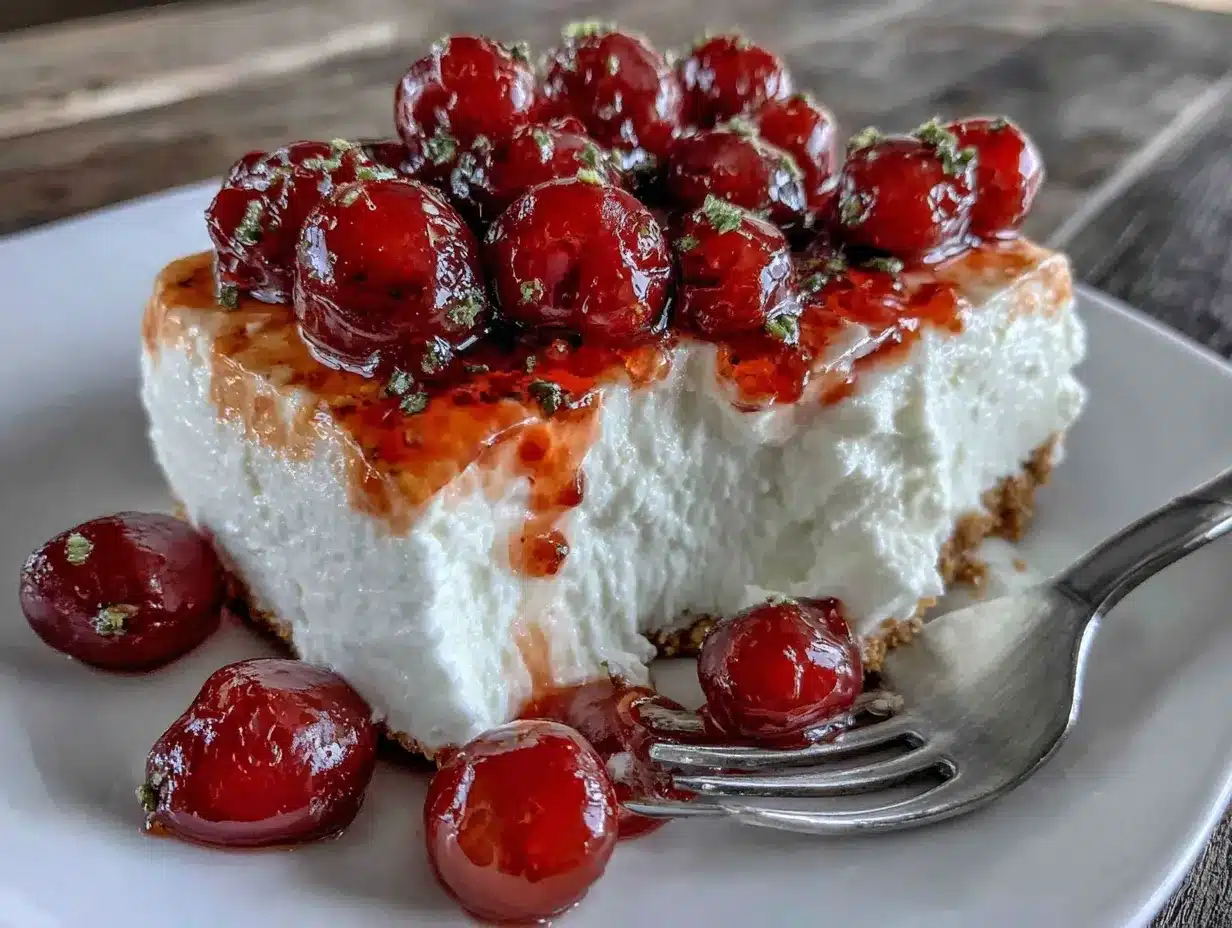
- 1 1/2 cups crushed vanilla wafers or graham crackers — I’ve used both, and honestly, they’re both great. Vanilla wafers give a slightly sweeter, buttery crunch. Graham crackers are a little more neutral and let the cream cheese shine. Nilla Wafers are my personal favorite for this.
- 2 tablespoons melted butter — This helps the crumbs stick together just enough to form a light crust. Unsalted butter is best so you control the salt level.
For the Cherry Topping
- 1 can (21 ounces) cherry pie filling — This is your shortcut, and it works beautifully. Look for a brand that uses real cherries and not too much high-fructose corn syrup if that matters to you. I’ve tried Lucky Leaf and Comstock—both are solid choices.
- Optional: 1/2 teaspoon almond extract — Stir this into the cherry pie filling for a subtle nutty flavor that pairs beautifully with cherries. Totally optional, but I love it.
For Garnish (Optional but Pretty)
- Fresh mint leaves — Just a few sprigs for color
- Extra whipped topping — A dollop on top looks lovely
- Chocolate shavings — White or dark chocolate, depending on your mood
If you’re looking to stretch your grocery budget, here’s a tip: store-brand cream cheese and whipped topping work just as well as the name brands for this recipe. I’ve tested it. No one will know the difference.
Equipment Needed
You don’t need a fancy kitchen to make this dessert. Here’s what you’ll actually use:
- Electric hand mixer or stand mixer — A hand mixer works perfectly for beating the cream cheese and powdered sugar together. If you’re really in a pinch, a sturdy whisk and some elbow grease will do, but your arm will thank you for using the mixer.
- Medium mixing bowl — For the cream cheese mixture
- Small bowl — For combining the crushed wafers and melted butter
- 9×9-inch dish or 8×8-inch dish — A square baking dish works great for this. You can also use a 9-inch pie plate or even individual dessert cups or mason jars for a fancier presentation.
- Ziploc bag and rolling pin — For crushing the cookies without making a mess. Put the wafers in the bag, seal it, and roll over them a few times. Easy cleanup.
- Spatula — For spreading the cream cheese layer evenly
If you don’t have a 9×9 dish, no worries. A 9-inch pie plate works beautifully, and it actually looks prettier for serving. I’ve also made this in a 9×13 pan for bigger crowds—just double the recipe.
Preparation Method
This Cherries in the Snow recipe comes together in layers, and each one is simple. Here’s exactly how to do it:
- Make the crust layer. Crush 1 1/2 cups of vanilla wafers or graham crackers into fine crumbs. You want them about the texture of sand, with a few slightly larger pieces for texture. In a small bowl, mix the crumbs with 2 tablespoons of melted butter until everything looks like wet sand. Press this mixture firmly into the bottom of your 9×9 dish. Don’t pack it too hard—you want it to hold together but still have a little give when you cut into it. Set it aside.
- Beat the cream cheese. In a medium mixing bowl, beat 8 ounces of softened cream cheese with an electric mixer on medium speed until it’s smooth and fluffy, about 2 minutes. Scrape down the sides of the bowl with a spatula halfway through. If you skip the softening step, you’ll end up with little white lumps, and you’ll be picking them out with a fork later. Trust me on this one.
- Add the sugar and vanilla. Add 1/2 cup of powdered sugar and 1 teaspoon of vanilla extract to the cream cheese. Beat on low speed at first so the sugar doesn’t fly everywhere, then increase to medium and beat for another minute until everything is combined and silky. The mixture should be thick but spreadable.
- Fold in the whipped topping. Add 1 1/2 cups of thawed whipped topping to the cream cheese mixture. Use a spatula to gently fold it in, turning the bowl as you go. Don’t stir vigorously—you want to keep the airiness so the layer stays light and fluffy. Fold until you don’t see any white streaks. This should take about 30 seconds.
- Spread the cream cheese layer. Spoon the cream cheese mixture over the crust and spread it evenly with your spatula. Take your time here. An even layer means every bite has the perfect ratio of creamy to crunchy. I like to get it as smooth as possible on top.
- Add the cherry topping. Open your can of cherry pie filling and spoon it gently over the cream cheese layer. Spread it evenly, but don’t press down—you want the cherries to sit on top, not sink into the cream cheese. If you’re using the almond extract, stir it into the pie filling before spooning it on.
- Chill, chill, chill. Cover the dish with plastic wrap or a lid and refrigerate for at least 4 hours, but overnight is even better. This step isn’t optional—the dessert needs time to set so the layers firm up and the flavors meld together. I know it’s hard to wait, but it’s worth it.
- Garnish and serve. Before serving, add a few fresh mint leaves, a dollop of whipped topping, or some chocolate shavings if you’re feeling fancy. Cut into squares and serve cold. Watch it disappear.
A quick note: if you’re making this in individual cups or jars, layer the crumbs, then the cream cheese, then the cherries. You can serve them immediately if you’re in a rush, but they’re better after an hour in the fridge.
Cooking Tips & Techniques
I’ve made this Cherries in the Snow dessert about a dozen times now, and I’ve learned a few things the hard way. Here are my best tips:
Room temperature cream cheese is non-negotiable. I know we’re all in a hurry, but microwaving cream cheese to soften it can backfire. It melts unevenly and can leave you with hot spots that ruin the texture. Just take it out of the fridge when you start prepping everything else. By the time your crumbs are crushed and your dish is ready, it’ll be soft enough.
Don’t overmix the cream cheese mixture. Once you add the whipped topping, fold gently. If you beat it with the mixer, you’ll deflate all that air, and your creamy layer will be dense instead of light and fluffy. I learned this the hard way when I made a batch that came out more like cream cheese cement. Still tasted good, but not as nice.
Let it chill long enough. Four hours is the minimum. If you try to cut into it after an hour, the layers will slide around and you’ll have a mess. Overnight is ideal because the flavors really settle in. The cherry flavor seeps into the cream cheese just a tiny bit, and the crust softens slightly—it’s perfect.
Use a sharp knife for clean slices. When you’re ready to serve, dip your knife in hot water, wipe it dry, and then cut. Wipe the blade clean between cuts. This gives you those beautiful, Instagram-worthy squares. Not that we’re all about looks, but it does make a difference when you’re serving company.
Make it ahead for better flavor. This is one of those desserts that actually improves with time. I’ve made it two days ahead of a party before, and it was even better than the day I made it. The layers marry together, and every bite is perfectly balanced.
Variations & Adaptations
One of the best things about this Cherries in the Snow recipe is how easy it is to change up. Here are some of my favorite variations:
Berry Bliss: Swap the cherry pie filling for blueberry, strawberry, or mixed berry pie filling. Each one gives a different flavor profile, and they’re all delicious. My sister-in-law makes it with blueberry every summer, and it’s a hit at barbecues.
Chocolate Cherry Dream: Use chocolate wafer cookies instead of vanilla wafers for the crust. The chocolate and cherry combo is classic for a reason. You can also add a layer of chocolate ganache between the cream cheese and the cherries if you’re feeling extra indulgent.
Lighter Version: Use reduced-fat cream cheese and light whipped topping. The texture will be slightly less rich, but it’s still creamy and satisfying. I’ve made this for a few friends who are watching their calories, and they didn’t even notice the difference.
Lemon Cherry Twist: Add 1 tablespoon of lemon zest to the cream cheese mixture. The bright citrus cuts through the sweetness and makes the cherry flavor pop. It’s a little unexpected, but it works beautifully.
Nutty Crunch: Add 1/4 cup of chopped pecans or almonds to the crust mixture. Toast them lightly in a dry pan first for extra flavor. The crunch is lovely against the creamy layers.
Individual Servings: Layer everything in small mason jars or dessert cups for a portable version. These are perfect for picnics, potlucks, or just portion control. Plus, they look adorable.
I personally love the chocolate cherry variation. I made it for a Valentine’s Day dinner last year, and my husband asked me to make it again the next week. It’s that good.
Serving & Storage Suggestions
This Cherries in the Snow dessert is best served cold, straight from the fridge. I like to let it sit out for about 5 minutes before cutting, just to take the edge off, but it should still be chilled.
For presentation, I cut it into clean squares and place them on a white platter or cake stand. A dollop of extra whipped topping on each square and a single fresh mint leaf on top makes it look like you spent way more time than you actually did. Sometimes I add a light dusting of powdered sugar around the plate for a snowy effect—cheesy, I know, but it fits the name!
Storage: Cover the dish tightly with plastic wrap or transfer leftovers to an airtight container. It will keep in the refrigerator for up to 5 days. The crust will soften over time, but that’s actually part of the charm. Some people prefer it that way.
Freezing: You can freeze this dessert, but I’d recommend doing it before adding the cherry topping. Freeze the crust and cream cheese layer for up to 2 months, then thaw in the fridge overnight and add the cherry topping before serving. The cherries don’t freeze well—they get watery and lose their texture.
Reheating: Don’t. This is a cold dessert. If you want it warm, you’re making a different recipe altogether. But honestly, the cold, creamy texture is what makes it special.
One thing I’ve noticed: the flavors really develop after a day in the fridge. So if you can make it the night before, you’ll be rewarded with an even better dessert. The cherry flavor seeps into the cream cheese just enough to make every bite perfectly balanced.
Nutritional Information & Benefits
Let’s be honest—this is a treat, not a health food. But that doesn’t mean it’s all bad. Here’s a rough estimate based on 9 servings:
- Calories: Approximately 320-350 per serving
- Fat: 18-20g
- Saturated Fat: 10-12g
- Carbohydrates: 38-42g
- Sugar: 28-32g
- Protein: 3-4g
- Calcium: About 4% of daily value
The cream cheese provides a small amount of calcium and protein, while the cherries offer antioxidants like anthocyanins, which are great for heart health. The vanilla wafers or graham crackers add a little fiber, depending on the brand.
Dietary Considerations: This recipe contains dairy and gluten. For a gluten-free version, use gluten-free graham crackers or vanilla wafers. For a dairy-free version, use dairy-free cream cheese and whipped topping—I’ve tried Kite Hill and Daiya, and both work reasonably well, though the texture is slightly different.
I’m not one to obsess over nutritional numbers, but I do like knowing what’s in my food. This dessert is indulgent, and that’s okay. It’s for special occasions, family dinners, and those nights when you just need something sweet and comforting. Balance is everything.
Conclusion
Look, I’ve made a lot of desserts in my time. Some were complicated, some were flops, and some became family legends. This Family-Favorite Cherries in the Snow Cream Cheese Dessert is one of those legends. It’s the dessert my kids ask for on their birthdays. It’s the one I bring to potlucks when I want to come home with an empty dish. It’s the one that makes me look like I tried way harder than I actually did.
And honestly? That’s exactly what I need on a busy weeknight. Something simple, something reliable, something that makes everyone at the table happy without costing a fortune or taking hours of prep. If you’ve been looking for a dessert that checks all those boxes, this is it.
I’d love to hear how it turns out for you. Did you try a different fruit topping? Add a little extra crunch? Forget to soften the cream cheese and had to scramble? (We’ve all been there.) Drop a comment below and let me know. Your version might just inspire someone else’s next family favorite.
Now go make some snow. Your family will thank you.
Frequently Asked Questions
Can I use fresh cherries instead of canned pie filling?
Absolutely, but it does take a little more work. You’ll need about 2 cups of pitted fresh cherries, plus 1/2 cup of sugar and 1 tablespoon of cornstarch. Cook them in a saucepan over medium heat until the mixture thickens, then let it cool completely before using. It’s a lovely option when cherries are in season.
How long does this dessert need to chill before serving?
At least 4 hours, but overnight is best. The chilling time allows the layers to set properly so you get clean slices. If you try to rush it, the cream cheese layer will be too soft and the dessert won’t hold its shape.
Can I make this dessert ahead of time for a party?
Yes, and I actually recommend it. You can make it up to 2 days in advance. Just keep it covered in the refrigerator. The flavors get better as it sits, and it takes one thing off your to-do list the day of the party.
What can I use instead of vanilla wafers for the crust?
Graham crackers are the most common substitute, but you can also use shortbread cookies, digestive biscuits, or even crushed pretzels for a sweet-salty twist. If you’re going gluten-free, use gluten-free graham crackers or certified gluten-free vanilla wafers.
Can I use homemade whipped cream instead of Cool Whip?
Definitely. Whip 3/4 cup of heavy cream with 2 tablespoons of powdered sugar and 1/2 teaspoon of vanilla extract until stiff peaks form. Fold it into the cream cheese mixture just like you would with the store-bought whipped topping. It’s a little more work, but the flavor is incredible.
Pin This Recipe!
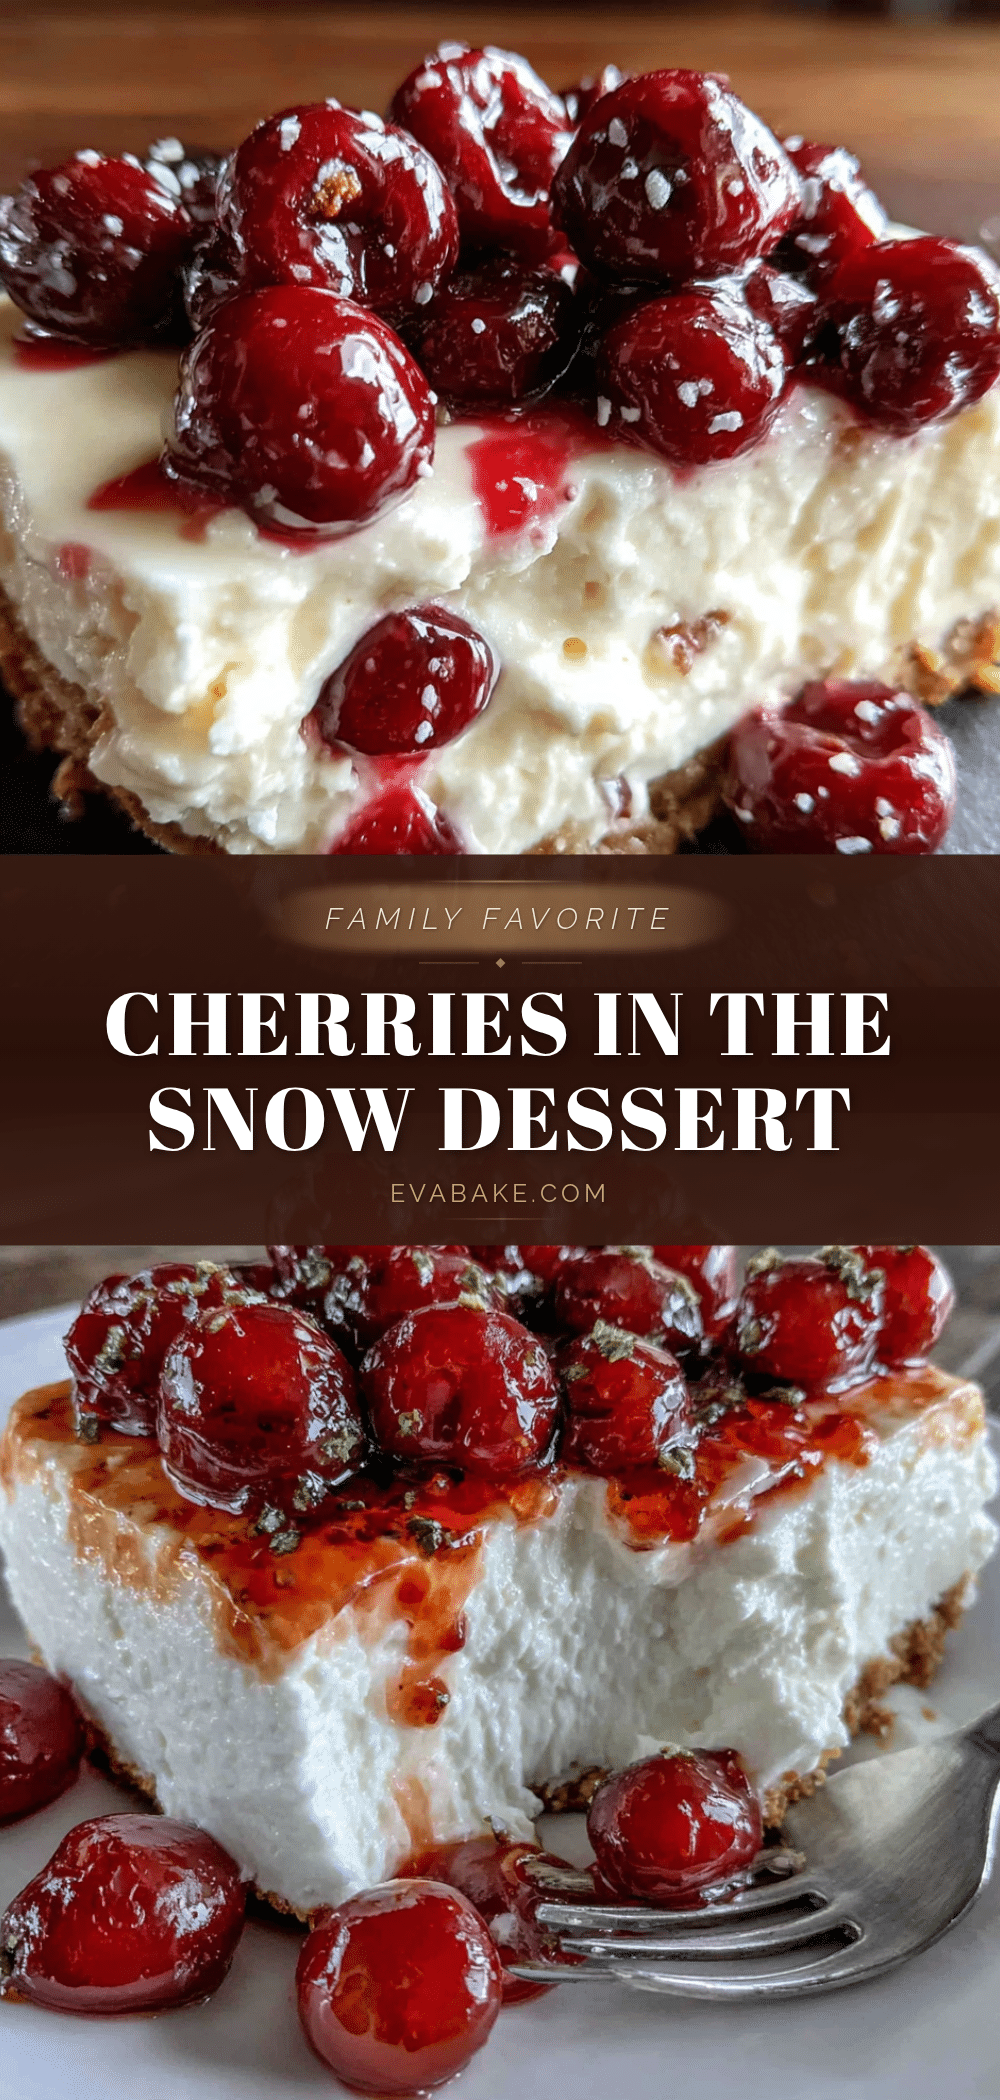
Family-Favorite Cherries in the Snow: Easy 20-Minute Dessert

This creamy, fruity no-bake dessert layers sweetened cream cheese, a crunchy vanilla wafer crust, and glossy cherry pie filling. It comes together in about 20 minutes and is perfect for busy weeknights, potlucks, or family dinners.
- Prep Time: 20 minutes
- Cook Time: 0 minutes
- Total Time: 4 hours 20 minutes (includes chilling)
- Yield: 9 servings 1x
- Category: Dessert
- Cuisine: American
Ingredients
- 8 ounces cream cheese, softened
- 1/2 cup powdered sugar
- 1 teaspoon vanilla extract
- 1 1/2 cups whipped topping, thawed
- 1 1/2 cups crushed vanilla wafers or graham crackers
- 2 tablespoons melted butter
- 1 can (21 ounces) cherry pie filling
- Optional: 1/2 teaspoon almond extract
- Optional garnish: fresh mint leaves, extra whipped topping, chocolate shavings
Instructions
- Make the crust layer: Crush 1 1/2 cups of vanilla wafers or graham crackers into fine crumbs. In a small bowl, mix the crumbs with 2 tablespoons of melted butter until it looks like wet sand. Press this mixture firmly into the bottom of a 9×9-inch dish. Set aside.
- Beat the cream cheese: In a medium mixing bowl, beat 8 ounces of softened cream cheese with an electric mixer on medium speed until smooth and fluffy, about 2 minutes. Scrape down the sides of the bowl halfway through.
- Add the sugar and vanilla: Add 1/2 cup of powdered sugar and 1 teaspoon of vanilla extract to the cream cheese. Beat on low speed at first, then increase to medium and beat for another minute until combined and silky.
- Fold in the whipped topping: Add 1 1/2 cups of thawed whipped topping to the cream cheese mixture. Use a spatula to gently fold it in until no white streaks remain, about 30 seconds.
- Spread the cream cheese layer: Spoon the cream cheese mixture over the crust and spread it evenly with a spatula.
- Add the cherry topping: Open the can of cherry pie filling and spoon it gently over the cream cheese layer. Spread evenly without pressing down. If using almond extract, stir it into the pie filling before spooning.
- Chill: Cover the dish with plastic wrap and refrigerate for at least 4 hours, preferably overnight.
- Garnish and serve: Before serving, add fresh mint leaves, a dollop of whipped topping, or chocolate shavings if desired. Cut into squares and serve cold.
Notes
Room temperature cream cheese is essential for a smooth texture. Do not overmix after adding whipped topping to keep the layer light and fluffy. Chilling for at least 4 hours is required for clean slices; overnight is best for flavor development. For a gluten-free version, use gluten-free graham crackers or vanilla wafers. For a dairy-free version, use dairy-free cream cheese and whipped topping.
Nutrition
- Serving Size: 1 square (1/9 of rec
- Calories: 320350
- Sugar: 2832
- Sodium: 200250
- Fat: 1820
- Saturated Fat: 1012
- Carbohydrates: 3842
- Protein: 34
Keywords: cherries in the snow, no-bake dessert, cream cheese dessert, cherry dessert, easy dessert, family favorite, potluck dessert