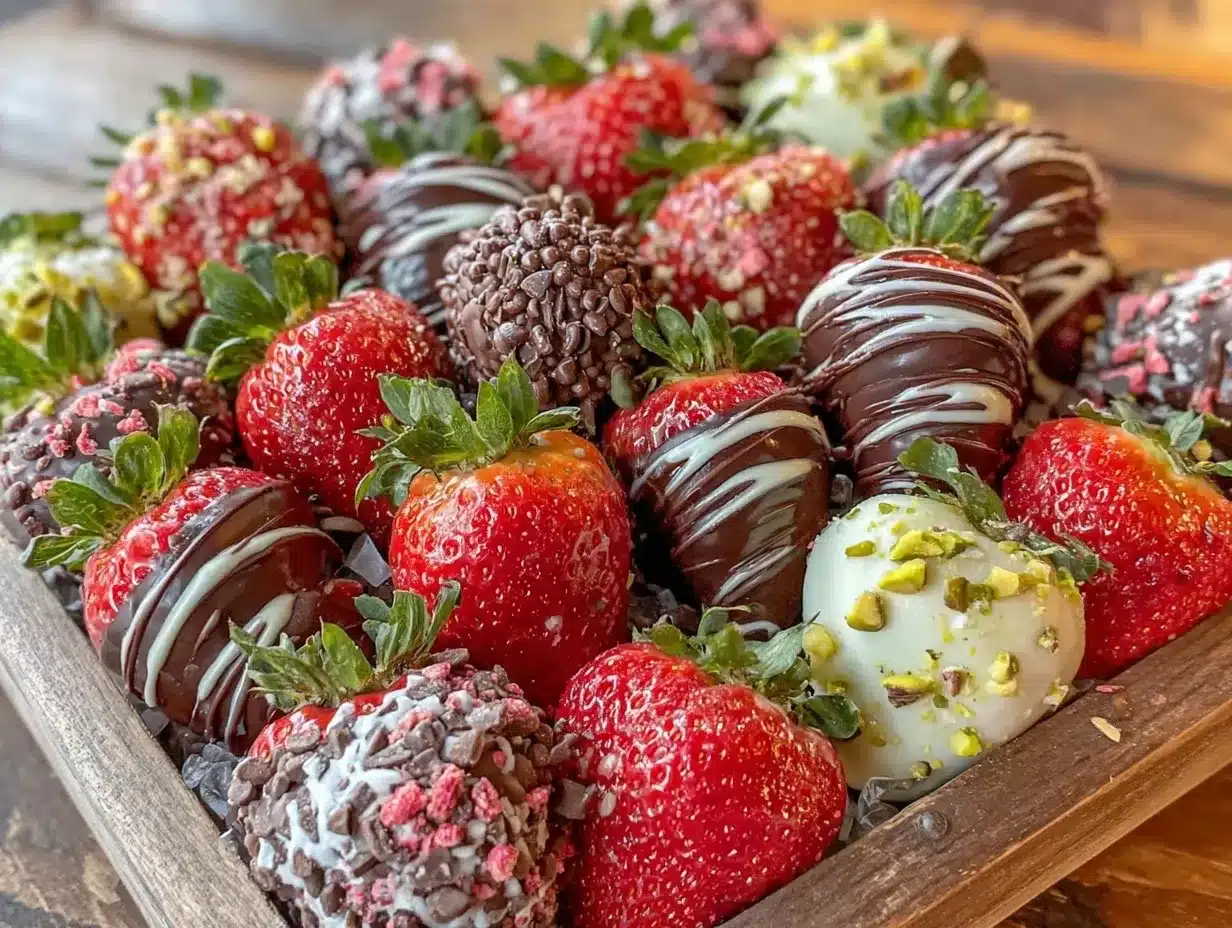
Picture this: a glossy, chocolatey aroma swirling through your kitchen, the kind that practically insists you pause and just breathe it in. There’s a gentle sizzle as melted chocolate coats plump, ruby-red strawberries—honestly, it’s almost impossible to resist sneaking a taste (or three) before they’ve even set. The first time I crafted a perfect chocolate-covered strawberry dessert board, it was on a rainy Saturday, and I remember thinking, “Why didn’t I do this for every party?” It hit me right then—this is the kind of recipe that feels like a celebration even before anyone takes their first bite.
My connection to chocolate-covered strawberries goes way back. When I was knee-high to a grasshopper, my grandma would let me dip berries in melted chocolate as a treat after Sunday dinner. We’d line them up on wax paper, and it always felt like a secret little ritual. Years later, when I tried assembling my first dessert board for a book club night, I was instantly hooked. There’s something downright magical about the combination of fresh fruit, rich chocolate, and a sprinkle of festive toppings—it’s pure, nostalgic comfort, but dressed up for a crowd. And you know what? My family couldn’t stop hovering over the table, sneaking strawberries and other goodies off the board (with chocolatey grins as evidence!).
This chocolate-covered strawberry dessert board is the answer to so many entertaining dilemmas. It brightens up a birthday spread, makes a romantic date night feel extra special, and it’s always the star of a baby shower or holiday party. Plus, it’s dangerously easy to put together. You can even let kids join in on the dipping—just be prepared for a little mess (and a lot of laughs). After plenty of “research” (read: taste-testing, purely professional!), this board has become a staple for family gatherings, gifting, and just-because treats. If you’re after a dessert that feels like a warm hug and looks absolutely stunning on your Pinterest board, you’re going to want to bookmark this one.
Why You’ll Love This Chocolate-Covered Strawberry Dessert Board
I’ve made more of these boards than I can count—at this point, my friends and family pretty much expect to see one at every get-together. Through trial (and, let’s be honest, a few chocolatey errors), I’ve figured out what makes this dessert board irresistible and foolproof. Here’s why it’ll be your new go-to for entertaining:
- Quick & Easy: Comes together in under 45 minutes, including chilling time. Perfect for those last-minute “Oh no, I forgot dessert!” moments.
- Simple Ingredients: No hunting down obscure candies or fancy chocolates. Everything you need is at your local grocery store.
- Perfect for Entertaining: Whether it’s a girls’ night, family movie marathon, or a Pinterest-worthy holiday spread, this board fits right in.
- Crowd-Pleaser: Kids go wild for the sprinkles, grown-ups appreciate the sophisticated chocolate-strawberry combo, and everyone finds something they love.
- Unbelievably Delicious: The snap of chocolate, the juicy burst of strawberry, and the extra treats tucked around the board—all those flavors and textures make each bite feel a little special.
So, what sets this chocolate-covered strawberry dessert board apart from the rest? For one, I’ve tested all sorts of chocolate brands and dipping techniques to get the smoothest, shiniest shell (hint: a little coconut oil in the chocolate is my secret for that perfect finish). You can customize your toppings—crushed pistachios, toasted coconut, sprinkles, or even a drizzle of white chocolate for extra flair. Plus, the board isn’t just about strawberries; I like to fill in the gaps with cookies, marshmallows, and whatever seasonal fruit is on hand.
This dessert isn’t just tasty—it’s the kind that has people pausing, savoring, and asking you for the “recipe,” even though it’s more of an art than a science. It’s comfort food that’s party-ready, designed for easy sharing and maximum fun. The best part? You can whip it up with zero stress, and it never fails to impress. Whether you’re looking to wow guests or treat yourself, this chocolate-covered strawberry dessert board is the answer. Trust me, you’ll get requests for it again and again!
What Ingredients You Will Need
This chocolate-covered strawberry dessert board keeps things simple, but the results are anything but basic. I love that you can use pantry staples and a few fresh items—no complicated shopping trips required. Feel free to get creative, but here’s what you’ll want on hand:
- For the Chocolate Strawberries:
- Fresh strawberries (about 2 pounds / 900 grams, rinsed and thoroughly dried—look for bright red, firm berries with fresh green tops)
- Semi-sweet chocolate chips or chunks (1 cup / 170 grams; I like Ghirardelli or Guittard for a silky finish)
- Milk chocolate chips or chunks (1 cup / 170 grams, for those who prefer something sweeter)
- White chocolate chips or chunks (1/2 cup / 85 grams, optional; makes pretty drizzles)
- Coconut oil (2 teaspoons / 10 ml, helps chocolate set shiny and smooth)
- Parchment or wax paper (for easy release; not an ingredient, but essential!)
- For the Board:
- Shortbread cookies (I love Walker’s brand—crisp and buttery)
- Mini marshmallows or large marshmallows, cut in half
- Fresh seasonal fruits (blueberries, raspberries, sliced kiwi, or grapes—add color and freshness)
- Pretzel rods or twists (the salty crunch is a must!)
- Chocolate truffles or bonbons (for a touch of luxury)
- Vanilla wafers or graham crackers (for dipping and munching)
- For Decorating:
- Sprinkles (rainbow, chocolate, or holiday-themed add a fun pop)
- Crushed nuts (pistachios, pecans, or almonds—great for crunch and color)
- Toasted coconut flakes
- Mini chocolate chips or toffee bits
Ingredient Tips: Try to use firm, just-ripe strawberries—overripe ones can get mushy. If you need this board to be gluten-free, just swap the cookies and pretzels for GF options. For dairy-free, use Enjoy Life or Hu Kitchen chocolate, and check your marshmallows. When berries aren’t in season, you can use dried fruit or chocolate-dipped banana slices (just eat those quickly, or they brown!).
Equipment Needed
You don’t need fancy gadgets for this dessert board—just a few tried-and-true tools. Here’s what I reach for every time:
- Microwave-safe bowls or a double boiler (for melting chocolate; a regular glass bowl works fine if you don’t have a double boiler)
- Forks or dipping tools (a regular fork or toothpicks can do the trick in a pinch)
- Baking sheet lined with parchment or wax paper (keeps things tidy and prevents sticking)
- Large serving board, platter, or even a rimmed baking tray (wooden boards look extra Pinterest-worthy, but any large surface works)
- Small bowls or ramekins (for holding sprinkles, nuts, or candies)
- Paper towels (for drying strawberries well—this matters!)
If you’re on a budget, don’t sweat it—a simple dinner plate or cutting board makes a great base. I’ve even used a pizza peel for a rustic look! For easy cleanup, I always use parchment, and if you’re making this with kids, lay out an extra kitchen towel for drips. Pro tip: a cheap silicone spatula is perfect for scraping every last bit of melted chocolate out of the bowl.
Preparation Method
-
Prep Your Strawberries: Rinse 2 pounds (900 grams) of fresh strawberries under cool water. Pat them completely dry with paper towels. (Any moisture makes the chocolate seize—believe me, I’ve learned this the hard way!) Set aside.
Estimated time: 5 minutes. -
Melt the Chocolate: In a microwave-safe bowl, combine 1 cup (170 grams) of semi-sweet chocolate chips and 1 teaspoon (5 ml) coconut oil. Microwave in 20-second bursts, stirring between each, until smooth and glossy (about 1 minute total). Repeat with 1 cup (170 grams) milk chocolate and 1/2 teaspoon (2.5 ml) coconut oil in another bowl. If using white chocolate, do the same in a third bowl.
Estimated time: 5 minutes.
Note: If using a double boiler, melt chocolate over barely simmering water, stirring constantly. -
Dip the Strawberries: Hold each strawberry by the stem and dip into the melted chocolate, swirling gently. Let excess chocolate drip off, then place on a parchment-lined baking sheet.
Tip: If the chocolate thickens, microwave for 10 seconds to loosen it up. -
Add Toppings: While the chocolate is still wet, sprinkle strawberries with your choice of toppings: sprinkles, crushed nuts, or mini chocolate chips. For a white chocolate drizzle, dip a fork in melted white chocolate and wave it back and forth over the berries.
Warning: Work quickly—the chocolate sets fast! - Chill to Set: Transfer the baking sheet to the fridge and chill strawberries until chocolate is firm, about 20-30 minutes.
-
Assemble the Dessert Board: On a large serving board, arrange chocolate-covered strawberries in the center. Fill in around them with cookies, marshmallows, pretzels, fresh fruits, and truffles. Use small bowls for sprinkles or candies.
Tip: Play with color and shape for a beautiful, overflowing look. - Serve and Enjoy: Let the board sit at room temperature for 10-15 minutes before serving (the flavors pop more when not ice-cold). Watch as everyone gravitates toward it!
Troubleshooting: If your chocolate gets grainy, add a few drops of coconut oil and stir until smooth. If strawberries sweat after chilling, just wipe gently with a paper towel before arranging. And if you run out of chocolate, just call it “artistic placement” and fill in with extra cookies!
Cooking Tips & Techniques
Over the years, I’ve picked up a few tricks to make chocolate-covered strawberries look and taste their absolute best. Here’s what I’ve learned—sometimes the hard way!
- Dry Strawberries Thoroughly: Any water on your berries will cause the chocolate to seize and slide off. I let mine air-dry for a few minutes after patting dry—worth every second.
- Use Room-Temperature Fruit: Cold strawberries can make melted chocolate stiffen up too quickly, leading to clumps. Let berries sit out for 10 minutes before dipping.
- Melt Chocolate Slowly: Whether you’re using the microwave or a double boiler, go low and slow. If you rush, you’re asking for scorched chocolate (been there, regretted that).
- Don’t Overcrowd the Board: It’s tempting to pile everything on, but leaving a little space makes it easier for guests to grab what they want—plus, it keeps things looking tidy.
- Multitasking: While the chocolate sets in the fridge, prep your cookies, fruit, and marshmallows. This keeps the process moving and gets you to the fun part—arranging—faster.
- Consistency Is Key: If your chocolate seems too thick, add a bit more coconut oil. Too runny? Let it cool for a minute until it thickens just enough to coat.
- Have Fun With Decoration: Let kids or guests decorate their own berries with sprinkles or nuts. It’s interactive, and everyone gets what they like.
Honestly, I’ve made my fair share of lumpy, sticky, and downright wonky strawberries. But as long as you focus on freshness and flavor, they always disappear fast! The board doesn’t need to be perfect—it just needs to be made with love and a sense of fun.
Variations & Adaptations
The beauty of a chocolate-covered strawberry dessert board is how easily you can make it your own. Here are some of my favorite ways to switch it up:
- Dietary Swaps: For a vegan board, use dairy-free chocolate chips (like Enjoy Life) and swap marshmallows for a vegan brand. Gluten-free? Choose GF pretzels and cookies—nobody will miss the wheat.
- Seasonal Twists: In spring, add pastel candies or edible flowers for a fresh vibe. Around Christmas, use crushed peppermint or red and green sprinkles. For autumn, drizzle with caramel and add dried apple rings.
- Flavor Boosts: Add a pinch of sea salt to melted chocolate for a sweet-salty kick. Try orange zest or a dash of cinnamon in the white chocolate for a subtle twist (so good with berries!).
- Different Fruits: Dip banana slices, pineapple chunks, or even dried apricots alongside the strawberries. Just be sure to eat fresh fruit soon after dipping.
- Nut-Free Option: Omit nuts and use sunflower seeds or pumpkin seeds for crunch if allergies are a concern.
One personal favorite? I once made a “breakfast board” version with chocolate-dipped strawberries, mini pancakes, and Nutella for dipping—my kids still ask for it on special mornings!
Serving & Storage Suggestions
This dessert board is all about sharing, so I love serving it at room temperature, right in the middle of the table, where everyone can dig in. The strawberries are their juiciest and most flavorful when they’ve been out of the fridge for about 15 minutes.
For special occasions, add a little garnish—like a mint sprig or edible flowers—right before serving. Pair with bubbly (champagne, anyone?), coffee, or even a pitcher of lemonade for a family-friendly touch. For a full dessert spread, surround your board with small bowls of whipped cream or a tangy yogurt dip.
Storage: Leftover chocolate-covered strawberries can be stored in a single layer in an airtight container in the fridge for up to 2 days. Place parchment between layers to prevent sticking. Cookies and marshmallows are best stored separately, as the fridge will make them soften. If you want to prep ahead, dip the strawberries a few hours before your event, then assemble the board right before guests arrive.
Tip: The flavors of the chocolate and strawberries meld beautifully overnight, but the berries will start to release juice after a day or so—if you’re lucky enough to have leftovers, enjoy them soon!
Nutritional Information & Benefits
Depending on your toppings and add-ins, each serving (about 4-5 chocolate strawberries plus extras) has approximately 180-220 calories, with a nice balance of carbs, fats, and a little protein from nuts. Strawberries are loaded with vitamin C and antioxidants, and using dark chocolate adds a dose of flavonoids for heart health. If you make the board gluten-free or dairy-free, it’s easy to accommodate different needs.
Potential allergens include dairy (in most chocolates), nuts (if using), and gluten (in cookies). Always check your ingredient labels. Personally, I love that this dessert board encourages everyone to eat more fruit, with a little indulgence on the side—balance in every bite!
Conclusion
There’s a reason this chocolate-covered strawberry dessert board has found its way into every celebration at my house—it’s quick, customizable, and, let’s face it, downright irresistible. Whether you’re hosting a big bash or just want to make a Tuesday night feel a little extra special, this board brings people together and makes every occasion sweeter.
Don’t be afraid to mix things up and add your own flair—you might just stumble upon a new family tradition. Honestly, this is one of those recipes I never get tired of, and I hope it brings as much joy (and chocolatey fingers) to your kitchen as it has to mine. If you give it a try, let me know in the comments how you made it your own, or tag me on Pinterest with your beautiful boards. Happy dipping, and happy entertaining!
FAQs About Chocolate-Covered Strawberry Dessert Boards
How far in advance can I make chocolate-covered strawberries for my dessert board?
You can make them up to 24 hours ahead. Just store them in a single layer in the fridge, and bring them to room temperature for about 15 minutes before serving for the best texture and flavor.
Can I use frozen strawberries for this board?
Fresh strawberries work best, as frozen ones tend to get mushy and don’t hold the chocolate coating well. If out of season, try dipping dried fruit or other fresh berries instead.
What kind of chocolate is best for dipping strawberries?
Semi-sweet or milk chocolate chips work great. For extra shine and smoothness, add a little coconut oil. White chocolate is perfect for drizzling or a sweeter option.
How do I keep the chocolate from cracking or sweating on the strawberries?
Make sure strawberries are completely dry before dipping, and let them come to room temperature before chilling. Don’t move them until the chocolate is fully set, and serve them slightly chilled—not ice-cold.
What else can I add to the dessert board besides strawberries?
Try cookies, marshmallows, pretzels, other fresh fruits (like kiwi or grapes), chocolate truffles, or even small candies. Mix and match based on what your guests love and what’s in season!
Pin This Recipe!
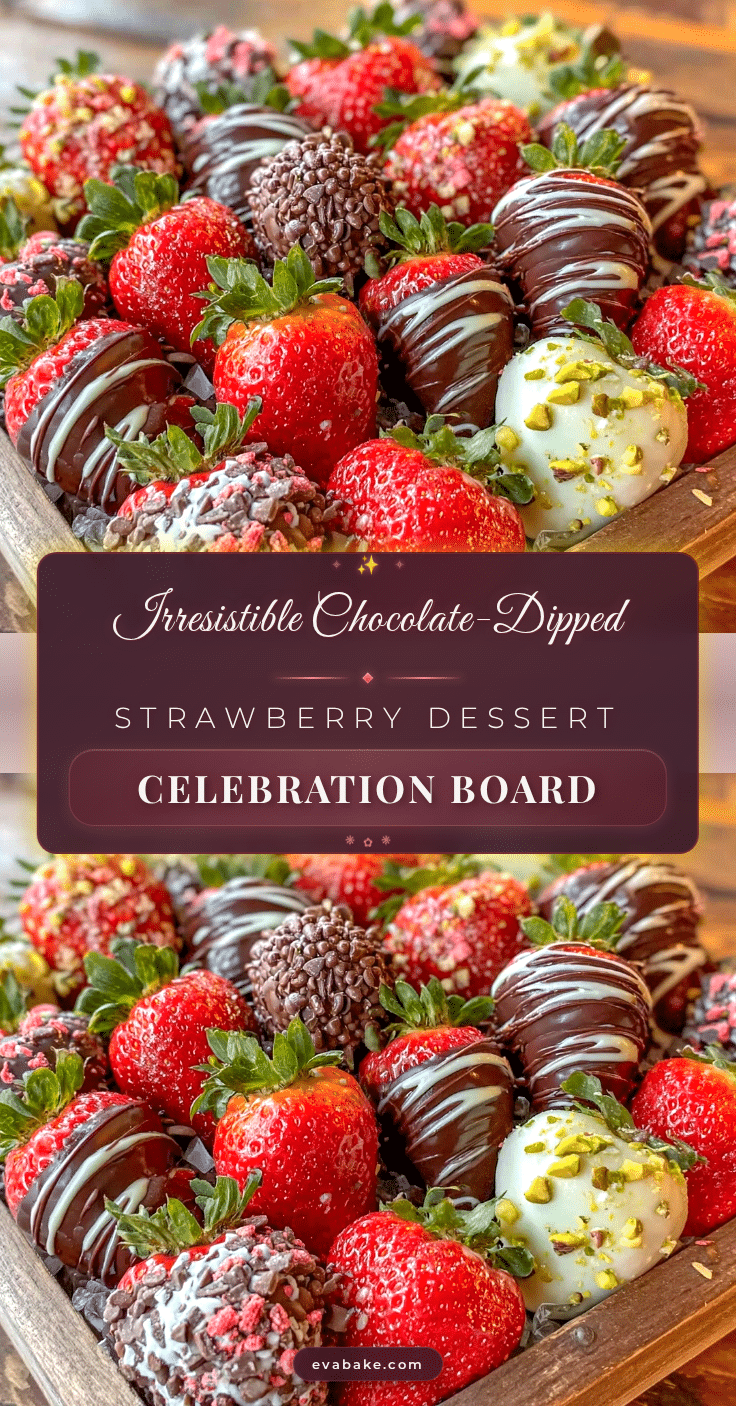
Chocolate-Covered Strawberry Dessert Board

This chocolate-covered strawberry dessert board is a show-stopping, customizable treat perfect for parties, date nights, or family gatherings. With juicy strawberries dipped in glossy chocolate and surrounded by cookies, marshmallows, and fresh fruit, it’s an easy, crowd-pleasing dessert that looks as good as it tastes.
- Prep Time: 15 minutes
- Cook Time: 5 minutes
- Total Time: 45 minutes
- Yield: 8 servings 1x
- Category: Dessert
- Cuisine: American
Ingredients
- 2 pounds fresh strawberries, rinsed and thoroughly dried
- 1 cup semi-sweet chocolate chips or chunks
- 1 cup milk chocolate chips or chunks
- 1/2 cup white chocolate chips or chunks (optional, for drizzling)
- 2 teaspoons coconut oil, divided
- Shortbread cookies
- Mini marshmallows or large marshmallows, cut in half
- Fresh seasonal fruits (blueberries, raspberries, sliced kiwi, or grapes)
- Pretzel rods or twists
- Chocolate truffles or bonbons
- Vanilla wafers or graham crackers
- Sprinkles (rainbow, chocolate, or holiday-themed)
- Crushed nuts (pistachios, pecans, or almonds)
- Toasted coconut flakes
- Mini chocolate chips or toffee bits
- Parchment or wax paper (for lining baking sheet)
Instructions
- Rinse strawberries under cool water and pat completely dry with paper towels. Set aside.
- In a microwave-safe bowl, combine 1 cup semi-sweet chocolate chips and 1 teaspoon coconut oil. Microwave in 20-second bursts, stirring between each, until smooth and glossy (about 1 minute total). Repeat with milk chocolate and coconut oil in another bowl. If using white chocolate, melt in a third bowl.
- Hold each strawberry by the stem and dip into the melted chocolate, swirling gently. Let excess chocolate drip off, then place on a parchment-lined baking sheet.
- While the chocolate is still wet, sprinkle strawberries with your choice of toppings: sprinkles, crushed nuts, or mini chocolate chips. For a white chocolate drizzle, dip a fork in melted white chocolate and wave it back and forth over the berries.
- Transfer the baking sheet to the fridge and chill strawberries until chocolate is firm, about 20-30 minutes.
- On a large serving board, arrange chocolate-covered strawberries in the center. Fill in around them with cookies, marshmallows, pretzels, fresh fruits, and truffles. Use small bowls for sprinkles or candies.
- Let the board sit at room temperature for 10-15 minutes before serving.
Notes
For best results, use firm, just-ripe strawberries and dry them thoroughly before dipping. Customize your board with gluten-free or dairy-free treats as needed. Let the strawberries come to room temperature for 10-15 minutes before serving for the best flavor. Store leftovers in a single layer in the fridge for up to 2 days.
Nutrition
- Serving Size: 4-5 chocolate-covere
- Calories: 200
- Sugar: 19
- Sodium: 40
- Fat: 10
- Saturated Fat: 6
- Carbohydrates: 26
- Fiber: 3
- Protein: 2
Keywords: chocolate covered strawberries, dessert board, entertaining, party dessert, easy dessert, fruit platter, chocolate strawberries, holiday dessert, Valentine's Day, gluten-free option, dairy-free option