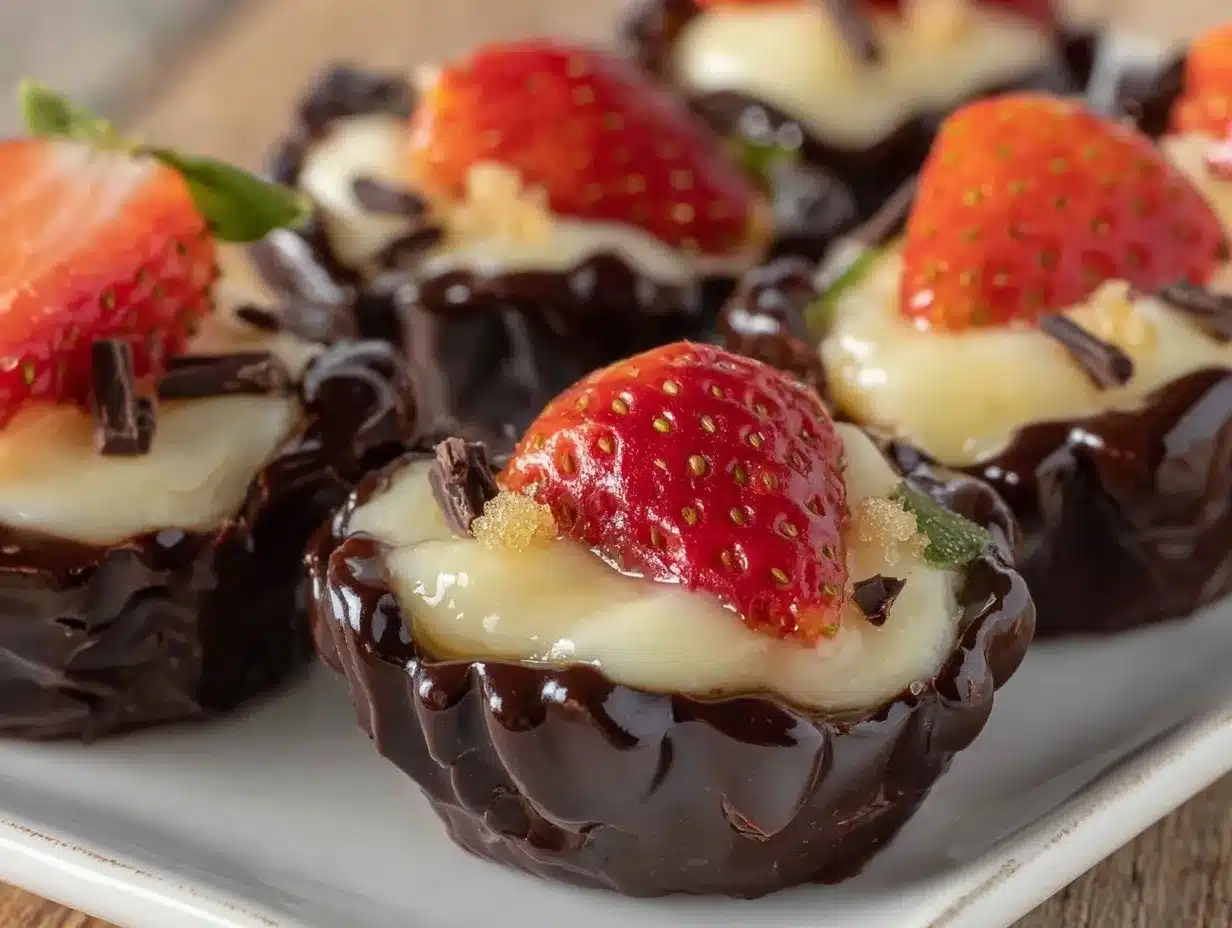
Picture this: you open your fridge, and there they are—rows of creamy chocolate-covered strawberry cheesecake cups, each one topped with a shiny chocolate shell and nestled in a perfectly sweet cookie crust. The scent is a mix of rich cocoa and fresh strawberries, with a hint of tangy cream cheese drifting up the moment you peel back the cupcake liner. It’s the kind of moment where you stop, spoon in hand, and just know you’ve stumbled onto something that could turn a plain old Tuesday into a mini celebration.
The first time I whipped up these cheesecake cups, I was trying to impress my little cousins at a family barbecue. I wanted something that looked showy but was dangerously easy and didn’t require turning on the oven. Well, let’s just say, they disappeared so fast I barely got to snag one for “quality control” (you know, the chef’s privilege). Watching everyone’s eyes light up as they bit into the creamy filling and hit that chocolate crackle—honestly, it made my whole week.
Growing up, strawberries dipped in chocolate were a big deal around here (usually reserved for birthdays or when the strawberries were practically bursting with juice). This recipe is like that classic treat met a cheesecake at a summer picnic and, honestly, I wish I’d thought of it years ago. My grandma used to say, “If it’s got fruit and it’s cold, it counts as breakfast,” and I’m not about to argue with that logic.
Perfect for potlucks, birthday parties, or just brightening up your Pinterest dessert board, these creamy chocolate-covered strawberry cheesecake cups are now a staple for family gatherings, gifting, or sneaking a sweet bite after dinner. I’ve tested them more times than I care to admit (in the name of research, of course), and every batch feels like a little hug in dessert form. Trust me, you’re going to want to bookmark this one.
Why You’ll Love These Creamy Chocolate-Covered Strawberry Cheesecake Cups
As someone who’s spent years tinkering with dessert recipes—sometimes to the delight of my family, sometimes not so much—I can tell you these cheesecake cups are special. They’re more than just a pretty treat; they’re the kind of dessert that checks all the boxes, whether you’re a beginner or you know your way around a stand mixer. Here’s what makes them a must-try:
- Quick & Easy: No oven, no water baths, no fancy techniques. You’ll have these ready to chill in under 30 minutes, which is perfect for when that sweet craving hits or you need a last-minute party dessert.
- Simple Ingredients: Everything you need is probably already in your fridge or pantry—no wild goose chases for obscure stuff.
- Perfect for Any Occasion: These cheesecake cups look stunning on a dessert platter for brunches, birthdays, or even Valentine’s Day. They’re cute enough for Pinterest but down-to-earth enough for a backyard barbecue.
- Crowd-Pleaser: I’ve never met a kid or adult who could resist the creamy filling, juicy strawberry center, and chocolate shell. Major bonus: they’re individually portioned, so no messy slicing.
- Unbelievably Delicious: The filling is ultra-smooth and creamy, the crust is sweet and buttery, and the chocolate shell adds that perfect bit of crunch. It’s pure comfort, but with a playful twist.
What sets these apart from other no-bake cheesecakes? First off, blending the cream cheese with a touch of Greek yogurt gives you a slightly tangy, super silky texture (not too dense, not too fluffy—just right). The strawberry surprise in the middle is fresh, not jam or syrup, so you get that real berry flavor in every bite. And the chocolate shell? It’s not just a drizzle, it’s a full-on crackly topping that makes every spoonful fun.
This recipe is the kind you want to bring out for guests, knowing you’ll get a chorus of “How did you make these?!” But honestly, they’re just as perfect for a Tuesday night treat. It’s the best of both worlds: all the nostalgia of chocolate-covered strawberries and creamy cheesecake, but without the stress or fuss. If you want a showstopper dessert that never lets you down, this one’s for you.
What Ingredients You Will Need
These creamy chocolate-covered strawberry cheesecake cups are built on a foundation of simple, honest ingredients that come together for a flavor explosion. Most of these are probably kitchen staples, but I’ll share a few tips and swaps just in case you need them. Here’s what you’ll need:
- For the Crust:
- Graham crackers (about 1 cup/100g, crushed fine) – classic, but you can use chocolate wafers for a deeper flavor
- Unsalted butter (4 tbsp/57g, melted) – helps hold the crust together and adds richness
- Granulated sugar (2 tbsp/25g) – just a bit for sweetness
- Pinch of salt – brings out the buttery flavor
- For the Cheesecake Filling:
- Cream cheese (8 oz/225g, full-fat, softened) – I like Philadelphia for consistency, but any block cream cheese will work
- Greek yogurt (1/3 cup/80g, plain, full-fat or 2%) – adds tang and makes the filling extra creamy
- Powdered sugar (1/2 cup/60g) – dissolves easily for that smooth texture
- Vanilla extract (1 tsp/5ml) – a must for that classic cheesecake flavor
- Fresh strawberries (6-8 medium, tops trimmed, whole) – choose ripe, bright berries for best results
- For the Chocolate Shell:
- Semi-sweet chocolate chips or chopped chocolate (1 cup/175g) – I use Ghirardelli, but any good-quality chocolate works
- Coconut oil (2 tsp/10ml) – gives the chocolate that perfect snap and shine (use refined for no coconut flavor)
Ingredient Tips & Swaps:
- No graham crackers? Try vanilla wafers, chocolate cookies, or even shortbread. Gluten-free cookies work too.
- Dairy-free? Use a plant-based cream cheese and coconut yogurt—the texture stays lovely.
- No fresh strawberries? You can use thawed frozen ones, but pat them dry very well first.
- No coconut oil? Butter or neutral oil works in a pinch, but the shell might not be as crisp.
- Sweeter or less sweet? Adjust the powdered sugar to taste, just don’t add granulated or it’ll be grainy.
I usually just grab whatever berries look best at the store, but in summer, nothing beats picking your own. For best results, use full-fat dairy, but don’t stress if you only have light—your cheesecake cups will still be deliciously creamy.
Equipment Needed
You don’t need a bunch of fancy gear for these creamy chocolate-covered strawberry cheesecake cups. In fact, you can probably make them with whatever you have on hand. Here’s what works best:
- 12-cup muffin tin – standard size, though mini tins work for bite-size versions
- Paper or silicone cupcake liners – makes removing the cups a breeze (trust me, don’t skip these!)
- Mixing bowls – one medium for crust, one large for filling
- Electric mixer or stand mixer – makes the filling super smooth, but you can use a sturdy whisk if you’ve got arm strength
- Spatula and spoon – for mixing and scooping, nothing fancy needed
- Microwave-safe bowl – for melting chocolate, or use a double boiler if you’re old school
- Measuring cups and spoons – accuracy matters for the crust and filling
If you don’t have a muffin tin, you can use small ramekins, but they’re a bit trickier to unmold. I’ve even used silicone ice cube trays for mini versions—just be sure to freeze them for easier popping out.
For budget-friendly tools, check your local dollar store for liners and spatulas. If you use nonstick pans, a quick wipe with a paper towel before adding liners helps prevent sticking. And always dry your equipment well after washing—moisture can mess with your chocolate shell.
How to Make Creamy Chocolate-Covered Strawberry Cheesecake Cups
-
Prep the Muffin Tin: Line all 12 cups with paper or silicone liners. This helps with easy removal later and keeps the chocolate shell neat.
Time: 2 minutes -
Make the Crust: In a medium bowl, combine 1 cup (100g) finely crushed graham crackers, 4 tbsp (57g) melted butter, 2 tbsp (25g) granulated sugar, and a pinch of salt. Mix with a fork until the texture resembles wet sand.
Tip: If the mixture seems dry, add an extra teaspoon of melted butter.
Time: 3 minutes -
Press the Crust: Spoon about 1 heaping tablespoon (8g) of crust mixture into each liner. Press firmly with the back of a spoon or small glass until compact.
Sensory cue: The crust should feel firm and hold its shape.
Time: 5 minutes
Personal tip: If you have a shot glass, it works wonders for even pressing. -
Chill the Crust: Pop the tin in the freezer while you make the filling. This keeps the crust from crumbling later.
Time: 10 minutes (passive) -
Make the Cheesecake Filling: In a large bowl, beat 8 oz (225g) softened cream cheese with 1/3 cup (80g) Greek yogurt, 1/2 cup (60g) powdered sugar, and 1 tsp (5ml) vanilla extract. Beat on medium speed for 2-3 minutes until smooth, scraping the sides as needed.
Troubleshooting: If the filling looks lumpy, your cream cheese may have been too cold—just keep mixing, or let it sit for 5 minutes and try again.
Time: 5 minutes -
Assemble the Cups: Remove the muffin tin from the freezer. Place one whole, trimmed strawberry (about 14g each) upside-down in the middle of each crust.
Note: If your strawberries are huge, slice off the tip to fit.
Time: 2 minutes -
Add the Filling: Spoon or pipe the cheesecake filling over each strawberry, covering completely. Smooth the tops with a spatula or the back of a spoon.
Sensory cue: The filling should be thick, not runny.
Time: 5 minutes
Personal tip: A zip-top bag with the corner snipped off makes for easy, mess-free filling. - Chill Again: Place the muffin tin in the fridge for at least 2 hours, or 30 minutes in the freezer if you’re in a rush. The filling should feel firm to the touch.
-
Make the Chocolate Shell: In a microwave-safe bowl, combine 1 cup (175g) semi-sweet chocolate chips with 2 tsp (10ml) coconut oil. Microwave in 30-second bursts, stirring well each time, until smooth and glossy (usually 1-1.5 minutes total).
Warning: Don’t overheat or the chocolate can seize—stir in between bursts.
Personal tip: If you don’t have a microwave, melt gently over simmering water. -
Top with Chocolate: Spoon about 1 tablespoon (15g) melted chocolate over each chilled cheesecake cup, tilting the tin to spread evenly. The chocolate should set quickly on the cold filling.
Sensory cue: The shell will look shiny at first, then turn matte as it sets.
Time: 5 minutes - Final Chill: Refrigerate at least 30 more minutes, or until the chocolate is firm.
- Serve: Carefully peel off the liners and enjoy! For the cleanest look, use a sharp knife to cut in half and reveal the strawberry surprise.
Make-Ahead: These keep beautifully for 2-3 days in the fridge, so you can prep them in advance for parties (or, you know, for yourself).
Cooking Tips & Techniques for Cheesecake Cup Success
I’ve made these creamy chocolate-covered strawberry cheesecake cups more times than I can count, and let’s just say I’ve learned a thing or two about what works (and what can go sideways). Here’s how to make them come out perfect every single time:
- Softening Cream Cheese Right: Don’t rush this step! Let it sit at room temperature for at least 30 minutes. Cold cream cheese leads to lumps, and nobody wants a chunky filling.
- Crust Compression: Really press that crust down—if it’s loose, your cups will crumble when you peel the liner. I’ve used everything from espresso tampers to shot glasses.
- Fresh Strawberries Only: If you use frozen, dry them completely or they’ll make the filling watery. Trust me, I learned this the hard way—soggy cheesecakes are no fun.
- Chocolate Melting Tips: Always melt in short bursts and stir gently. If it seizes, add a tiny bit more coconut oil and stir until smooth.
- Chilling for Structure: Don’t skip the fridge time! The filling needs to firm up so it stands up to the chocolate shell. If you’re impatient (guilty!), the freezer works in a pinch, but don’t forget them or they’ll be too icy to bite into.
- Peeling Liners: For the prettiest edges, let the cups sit at room temp for 5 minutes before peeling the liners off. If you try too soon, the chocolate may crack unevenly.
- Batching for Parties: You can easily double this recipe—just make sure you have enough fridge space for two muffin tins!
- Flavor Layering: A tiny pinch of salt in the crust and a dash in the chocolate make the flavors pop. It’s a little chef trick that takes things to the next level.
And if you ever end up with a little extra filling (it happens), just grab some graham crackers and spread it on top for a quick snack. No shame—call it “chef’s treat” and enjoy every bite.
Variations & Adaptations
One of the best parts about these creamy chocolate-covered strawberry cheesecake cups is how easy they are to customize. Whether you’re dealing with allergies, picky eaters, or just want to shake things up, here are a few of my favorite twists:
- Gluten-Free: Swap the graham crackers for gluten-free cookies or almond flour. The crust stays buttery and delicious—no one will know the difference.
- Dairy-Free: Use your favorite plant-based cream cheese (like Kite Hill or Miyoko’s) and coconut yogurt. The texture is still dreamy, and the chocolate shell works just the same.
- Berry Swap: Not a strawberry fan? Try raspberries or blueberries for a fun twist. I once made these with a blackberry in the center and got rave reviews.
- Chocolate Crust: Use chocolate cookies instead of graham crackers for a double chocolate hit. Kids especially love this one.
- Nutty Crunch: Stir in a handful of chopped toasted almonds or hazelnuts into the crust for extra crunch and flavor depth.
- Mini Cups: Use a mini muffin tin for bite-sized treats—just chop the strawberries smaller and watch the chill time (they set even faster).
- White Chocolate Shell: Swap semi-sweet for white chocolate and drizzle with dark chocolate for a fancy finish.
Personally, my favorite adaptation is a peanut butter version—just swirl a spoonful of peanut butter into the filling before topping with chocolate. It’s like a PB&J meets cheesecake, and it’s always a hit at parties.
Serving & Storage Suggestions
These creamy chocolate-covered strawberry cheesecake cups are best enjoyed cold, straight from the fridge. I love to serve them on a pretty platter with a few extra strawberries scattered around for a pop of color. They’re also adorable on cupcake stands for parties or tucked into lunchboxes as a sweet surprise.
Pair with a cup of coffee, a cold glass of milk, or even a little sparkling wine if you’re feeling fancy. For a dessert spread, they go well alongside fruit salad or a platter of cookies.
To store, keep the cheesecake cups in an airtight container in the refrigerator for up to 3 days. If stacking, place a piece of parchment between layers to prevent sticking. For longer storage, freeze in a single layer until solid, then transfer to a zip-top bag and freeze for up to 1 month. Thaw in the fridge overnight before serving—though the chocolate might lose a tiny bit of shine, the taste is still spot on.
Bonus tip: the flavors actually deepen after a day in the fridge, so feel free to make these ahead for an even richer treat!
Nutritional Information & Benefits
Each creamy chocolate-covered strawberry cheesecake cup (based on 12 servings) is approximately 210 calories, with 13g fat, 18g carbs, and 4g protein. The Greek yogurt adds a nice little protein boost, and the fresh strawberry in the center gives you a dose of vitamin C and natural sweetness.
If you use gluten-free or dairy-free swaps, the numbers will shift a bit, but they stay fairly balanced for a treat. The individual portioning helps with mindful snacking and makes these a nice option for anyone keeping an eye on serving sizes.
Allergens to be aware of: dairy, gluten (unless using substitutes), and coconut (in the chocolate shell). From a wellness perspective, I love that these give you a sweet treat with real fruit and simple ingredients—no weird preservatives or artificial flavors here.
Conclusion
There’s a reason these creamy chocolate-covered strawberry cheesecake cups are always the first thing gone at family parties—they’re cute, easy, and taste like a cross between a chocolate-dipped strawberry and your favorite cheesecake. Honestly, it’s the kind of dessert that makes you look like a baking whiz, even if you barely spent 30 minutes in the kitchen.
Don’t be afraid to tweak the ingredients or try different berries—this recipe is super forgiving. If you’re looking for a sweet treat that brings smiles to everyone (and maybe a few recipe requests), this is it. I make them for birthdays, brunches, and sometimes just because it’s a Tuesday and I need a little chocolate comfort.
If you try these, I’d love to hear how you made them your own! Drop a comment, share your photos, or tag me if you post on Pinterest. Happy (no) baking, and remember: dessert should always be this fun and stress-free!
FAQs About Creamy Chocolate-Covered Strawberry Cheesecake Cups
Can I make these cheesecake cups ahead of time?
Absolutely! They’re actually better after a night in the fridge, as the flavors meld and the texture gets even creamier. Store in an airtight container until you’re ready to serve.
What’s the best way to melt chocolate for the topping?
Use a microwave in 30-second bursts, stirring each time, or melt gently over a pot of simmering water (double boiler method). Go slow to avoid burning or seizing the chocolate.
Can I use other fruits instead of strawberries?
Yes! Raspberries, blueberries, or blackberries work well. Just make sure they’re fresh and dry before adding to the center of the cups.
How do I make these gluten-free?
Just swap the graham crackers for your favorite gluten-free cookies or use almond flour. The rest of the recipe stays the same.
What if I don’t have a muffin tin?
You can use small ramekins or even silicone ice cube trays for mini versions. Make sure to line or grease them for easy removal.
Pin This Recipe!
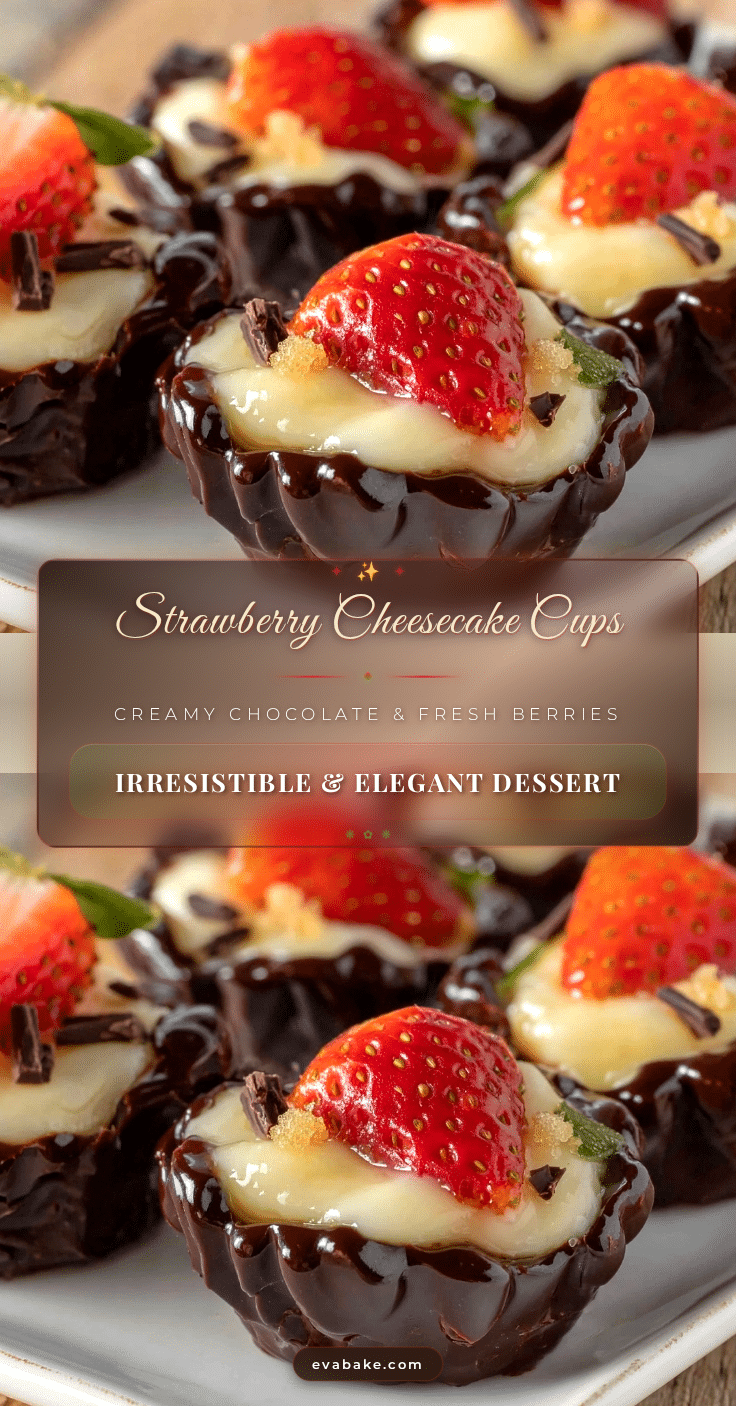
Creamy Chocolate-Covered Strawberry Cheesecake Cups – Easy No-Bake Dessert

These no-bake cheesecake cups feature a sweet graham cracker crust, creamy cheesecake filling with a fresh strawberry center, and a crackly chocolate shell. Perfect for parties, gifting, or a simple weeknight treat—no oven required!
- Prep Time: 20 minutes
- Cook Time: 0 minutes
- Total Time: 2 hours 50 minutes (includes chilling time)
- Yield: 12 cups 1x
- Category: Dessert
- Cuisine: American
Ingredients
- 1 cup (about 8 sheets) graham crackers, finely crushed (100g)
- 4 tablespoons unsalted butter, melted (57g)
- 2 tablespoons granulated sugar (25g)
- Pinch of salt
- 8 ounces cream cheese, full-fat, softened (225g)
- 1/3 cup plain Greek yogurt, full-fat or 2% (80g)
- 1/2 cup powdered sugar (60g)
- 1 teaspoon vanilla extract (5ml)
- 6–8 medium fresh strawberries, tops trimmed, whole
- 1 cup semi-sweet chocolate chips or chopped chocolate (175g)
- 2 teaspoons coconut oil (10ml)
Instructions
- Line a 12-cup muffin tin with paper or silicone liners.
- In a medium bowl, combine crushed graham crackers, melted butter, granulated sugar, and a pinch of salt. Mix until the texture resembles wet sand.
- Spoon about 1 heaping tablespoon of crust mixture into each liner. Press firmly with the back of a spoon or small glass until compact.
- Freeze the crusts for 10 minutes while preparing the filling.
- In a large bowl, beat softened cream cheese, Greek yogurt, powdered sugar, and vanilla extract on medium speed for 2-3 minutes until smooth.
- Remove the muffin tin from the freezer. Place one whole, trimmed strawberry upside-down in the middle of each crust.
- Spoon or pipe the cheesecake filling over each strawberry, covering completely. Smooth the tops.
- Chill the assembled cups in the fridge for at least 2 hours (or 30 minutes in the freezer) until the filling is firm.
- In a microwave-safe bowl, combine chocolate chips and coconut oil. Microwave in 30-second bursts, stirring each time, until smooth and glossy (about 1-1.5 minutes).
- Spoon about 1 tablespoon melted chocolate over each chilled cheesecake cup, tilting the tin to spread evenly. The chocolate should set quickly.
- Refrigerate at least 30 more minutes, or until the chocolate is firm.
- Carefully peel off the liners and serve. For a clean look, cut in half to reveal the strawberry center.
Notes
For best results, use room temperature cream cheese and full-fat dairy. Press the crust firmly to prevent crumbling. Chill thoroughly for clean layers and a crisp chocolate shell. Swap graham crackers for gluten-free or chocolate cookies as desired. Store in an airtight container in the fridge for up to 3 days or freeze for up to 1 month.
Nutrition
- Serving Size: 1 cheesecake cup
- Calories: 210
- Sugar: 13
- Sodium: 90
- Fat: 13
- Saturated Fat: 8
- Carbohydrates: 18
- Fiber: 1
- Protein: 4
Keywords: no-bake cheesecake, chocolate-covered strawberry, cheesecake cups, easy dessert, party dessert, summer dessert, individual cheesecake, kid-friendly, make-ahead dessert