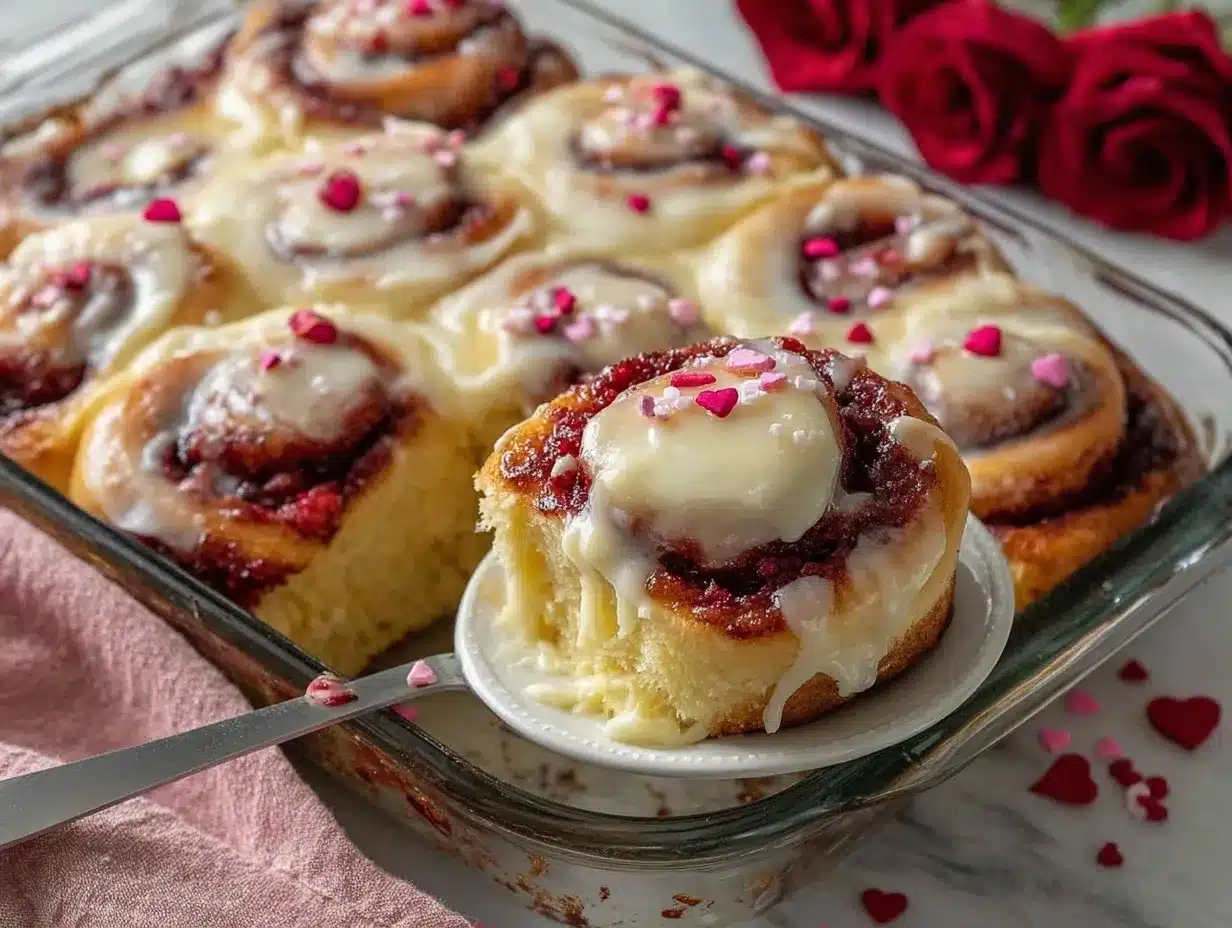
Let me paint the scene for you: the sweet, cocoa-rich aroma of fresh-baked dough swirling through your kitchen, a hint of cinnamon dancing in the air, and that unmistakable tang of cream cheese glaze just waiting to drizzle down warm, pillowy rolls. That’s exactly what you get with these Red Velvet Cinnamon Rolls—a treat so visually stunning and decadently delicious, it’s practically tailor-made for Valentine’s Day. The first time I pulled these beauties out of the oven, I couldn’t help but grin from ear to ear. They’re the kind of treat that makes you pause, take a deep breath, and just savor the moment. You know you’ve hit the jackpot.
Years ago, I was knee-high to a grasshopper, watching my grandma whip up cinnamon rolls for Sunday brunch. She always said, “The secret’s in the swirl!” Fast forward to a rainy February weekend, I found myself craving that nostalgic comfort but with a fun, romantic twist. Enter: the red velvet cinnamon roll. I wish I’d thought of this combination sooner, because let’s face it—red velvet and cinnamon are a match made in dessert heaven.
Honestly, my family couldn’t stop sneaking bites off the cooling rack (and I can’t really blame them). The vibrant red dough with that creamy glaze just begs for a spot on your Pinterest board or a special breakfast table. Whether you’re baking for a sweetheart, sharing with friends, or just treating yourself, this recipe is dangerously easy and delivers pure, cozy joy. After testing it more times than I’ll admit (in the name of research, of course), it’s become a staple for gifting, brunches, and every Valentine’s celebration. Trust me, this is one you’re going to want to bookmark—the kind of recipe that feels like a warm hug and looks as good as it tastes.
Why You’ll Love This Recipe
Having baked countless batches of cinnamon rolls over the years—some flops, some family favorites—I can promise you these Red Velvet Cinnamon Rolls stand out for all the right reasons. Here’s why you’ll be swooning over every swirl:
- Quick & Easy: Ready from start to finish in about 2 hours (great for spontaneous celebrations or busy mornings).
- Simple Ingredients: Everything on the ingredient list is straightforward—nothing fussy, no specialty stores needed.
- Perfect for Valentine’s Day: The rich red velvet color and creamy glaze make these rolls a showstopper for romantic breakfasts, brunch parties, or sweet gifts.
- Crowd-Pleaser: Kids, partners, and friends always ask for seconds. These rolls have a way of disappearing fast!
- Unbelievably Delicious: The combo of cocoa-kissed dough, gooey cinnamon sugar filling, and tangy cream cheese glaze hits every comfort food craving.
What sets this Red Velvet Cinnamon Rolls recipe apart? For starters, the dough is extra-soft thanks to buttermilk and just the right touch of cocoa powder. The cinnamon filling is buttery and bold, while the glaze is luxuriously creamy—no skimping here! Unlike some versions, this recipe makes use of active yeast for that authentic bakery-style pull-apart texture (no shortcuts, just honest flavor).
As someone who’s spent more mornings than I care to admit troubleshooting dough, I’ve streamlined each step for maximum success. You won’t just get a pretty picture—you’ll get bakery-worthy results every time. This recipe isn’t just good, it’s the kind that makes you close your eyes after the first bite. Comfort food, but with a festive twist. Whether you’re impressing guests or just treating yourself, these rolls are guaranteed to turn an ordinary morning into something truly special.
What Ingredients You Will Need
This red velvet cinnamon rolls recipe uses classic, wholesome ingredients that come together for maximum flavor and that unforgettable soft texture. Most of these are pantry staples, and there are plenty of ways to swap or adapt to your taste or dietary needs.
- For the Dough:
- All-purpose flour (about 3 1/2 cups / 440g) – use unbleached for best results
- Unsweetened cocoa powder (2 tablespoons / 12g) – Dutch process for richer color
- Granulated sugar (1/4 cup / 50g) – for a touch of sweetness
- Active dry yeast (2 1/4 teaspoons / 7g, one packet)
- Buttermilk (1 cup / 240ml, room temp) – adds tenderness and tang
- Unsalted butter (1/4 cup / 57g, melted)
- Large eggs (2, room temp)
- Red food coloring (2-3 tablespoons, gel preferred for vibrant color)
- Salt (1 teaspoon / 5g)
- For the Cinnamon Filling:
- Unsalted butter (1/2 cup / 113g, softened)
- Brown sugar (3/4 cup / 150g, packed)
- Ground cinnamon (2 tablespoons / 14g)
- Pinch of salt
- For the Cream Cheese Glaze:
- Cream cheese (4 ounces / 113g, softened)
- Powdered sugar (1 cup / 120g, sifted for smoothness)
- Unsalted butter (2 tablespoons / 28g, softened)
- Vanilla extract (1 teaspoon / 5ml)
- Milk or heavy cream (2-3 tablespoons / 30-45ml, adjust for consistency)
- Pinch of salt
Ingredient Tips: For the red velvet cinnamon rolls, I always reach for King Arthur flour and Ghirardelli cocoa powder for the best texture and flavor. If you need a gluten-free option, swap in a trusted 1:1 baking flour like Bob’s Red Mill. You can use dairy-free butter, buttermilk, and cream cheese for a plant-based version—just make sure they’re unsalted and plain. For the food coloring, gel is the way to go for that deep, true red velvet hue (liquid might make the dough too wet).
Seasonal swaps: In spring, toss in a handful of chopped strawberries with the filling for a fruity twist. If you’re out of buttermilk, just add a tablespoon of lemon juice or vinegar to regular milk and let sit for 5 minutes—it’s a kitchen hack I learned years ago. And honestly, if you want less sugar, reduce the powdered sugar in the glaze and let the cinnamon shine.
Everything comes together with simple pantry staples, but don’t be afraid to experiment with what you have. These red velvet cinnamon rolls are all about making the recipe your own!
Equipment Needed
- Large Mixing Bowl: For making and kneading the dough (a stand mixer bowl works great, but hand mixing is totally doable!)
- Whisk and Wooden Spoon: For blending dry ingredients and stirring wet ones
- Rolling Pin: Essential for getting an even dough thickness—if you don’t have one, a clean wine bottle does the trick (been there, done that)
- 9×13-inch Baking Pan: Glass or metal, both work well—just grease it lightly
- Measuring Cups and Spoons: Accuracy counts for red velvet cinnamon rolls, especially for yeast and cocoa powder
- Pastry Brush: For spreading melted butter (fingers work in a pinch, but a brush gives a nice even layer)
- Plastic Wrap or Clean Kitchen Towel: To cover dough during rising
- Sharp Knife or Dental Floss: For cutting even rolls—dental floss is a quirky tip my grandma swore by for clean slices
- Small Saucepan: Optional, for warming buttermilk slightly (cold buttermilk slows yeast rising)
- Hand Mixer or Stand Mixer: For a velvety smooth glaze—a whisk and some elbow grease work fine too
Honestly, you don’t need fancy equipment for these red velvet cinnamon rolls. If you’re on a budget, a basic set of measuring spoons, a sturdy bowl, and a rolling pin will get you there. I always wipe down my rolling pin with a little flour to keep the dough from sticking—easy cleanup is key. Just be sure your baking pan is deep enough for fluffy rolls and your whisk isn’t bent (learned that the hard way after a few hand-me-downs). Maintenance tip: wash and dry your wooden spoons and rolling pins right after use to prevent dough build-up.
Preparation Method
- Activate the Yeast: In a large mixing bowl, combine 1 cup (240ml) warm buttermilk (about 110°F/43°C), 1/4 cup (50g) granulated sugar, and 2 1/4 teaspoons (7g) active dry yeast. Stir gently and let sit for 5-10 minutes until frothy. If it doesn’t foam up, your yeast may be past its prime—grab a fresh packet.
- Mix the Wet Ingredients: Add 2 large eggs (room temperature), 1/4 cup (57g) melted unsalted butter, and 2-3 tablespoons red food coloring (gel for best color) to the yeast mixture. Whisk until well combined.
- Combine Dry Ingredients: In a separate bowl, whisk together 3 1/2 cups (440g) all-purpose flour, 2 tablespoons (12g) unsweetened cocoa powder, and 1 teaspoon (5g) salt. Slowly add dry ingredients to the wet mixture, stirring until a shaggy dough forms.
- Knead the Dough: Transfer dough to a floured surface and knead for 8-10 minutes (or use a stand mixer with dough hook for about 5 minutes) until smooth and slightly tacky. If dough is too sticky, add flour 1 tablespoon at a time.
- First Rise: Place dough in a greased bowl, cover with plastic wrap or a towel, and let rise in a warm spot for 60-75 minutes, until doubled in size. I like to preheat my oven for a minute then turn it off, making a cozy proofing chamber.
- Prepare the Filling: In a small bowl, mix 1/2 cup (113g) softened unsalted butter, 3/4 cup (150g) packed brown sugar, 2 tablespoons (14g) cinnamon, and a pinch of salt until smooth.
- Roll Out the Dough: Punch down the risen dough and turn it onto a lightly floured surface. Roll into a 16×12-inch (40x30cm) rectangle, about 1/4-inch (0.6cm) thick. The color should be deep red and the surface soft but not sticky.
- Spread the Filling: Use a pastry brush or spoon to gently spread the cinnamon sugar filling evenly over the dough, right to the edges. Don’t skimp—every swirl counts!
- Shape and Cut: Starting from the long side, roll the dough tightly into a log. Slice into 12 equal pieces using a sharp knife or dental floss for clean edges.
- Second Rise: Arrange rolls in a greased 9×13-inch pan, cut sides up. Cover and let rise for 30-40 minutes until puffy. If your kitchen is chilly, let the rolls rise in a slightly warmed oven (turned off).
- Bake: Preheat oven to 350°F (175°C). Bake rolls for 22-25 minutes, until tops are set and edges just begin to brown. The kitchen will smell heavenly!
- Make the Glaze: While rolls bake, beat together 4 ounces (113g) softened cream cheese, 2 tablespoons (28g) butter, 1 cup (120g) powdered sugar, 1 teaspoon (5ml) vanilla, and 2-3 tablespoons (30-45ml) milk. Mix until smooth and pourable—add more milk if needed.
- Finish and Serve: Let rolls cool for 10 minutes, then drizzle generously with cream cheese glaze. Serve warm for best gooey texture.
Prep tip: If you’re in a rush, you can make the rolls ahead, refrigerate overnight, and bake fresh in the morning. If the dough seems sluggish, give it a little more time to rise—a slow rise sometimes gives the best flavor. Trust your senses: the dough should be soft, slightly elastic, and a beautiful red velvet shade. And if your glaze is too thick, just splash in a bit more milk—it’s all part of the fun!
Cooking Tips & Techniques
Let me be straight with you: red velvet cinnamon rolls aren’t hard, but a few pro tricks take them from good to unforgettable. First, always use room temperature eggs and buttermilk—cold ingredients slow yeast activity and you’ll end up with dense rolls (learned the hard way after a few hockey-puck batches). If your yeast doesn’t foam, don’t gamble—start over! Fresh yeast is key.
When rolling the dough, keep the surface lightly floured but not too much. Too much flour dries the dough, too little and you’ll be scraping sticky bits off your counter. I like to roll from the long edge for bigger swirls and more filling in every bite. To slice, dental floss beats a knife for clean, bakery-style spirals (it feels weird, but trust me!).
For multitasking, make the cream cheese glaze while the rolls bake. If you want perfectly gooey rolls, don’t overbake—edges should be set, centers just barely cooked. Overbaking dries them out. If you’re prepping for a crowd, double the filling—it’s the secret to that caramelized, gooey pull-apart texture everyone loves.
Consistency tip: Weigh your flour if you can, or spoon and level to avoid packing. If your dough feels tough, let it rest for 10 minutes before final rolling—it relaxes the gluten and makes shaping easier. And here’s a little lesson learned from a messy Valentine’s party: line your pan with parchment for easy cleanup and prettier serving. Don’t worry about perfection—every roll is unique and that’s what makes homemade so special!
Variations & Adaptations
These red velvet cinnamon rolls are versatile—there’s plenty of room to play, whether you’re baking for dietary needs, seasonal flavors, or just craving something different. Here are my favorite twists:
- Gluten-Free: Substitute all-purpose flour with a 1:1 gluten-free baking blend (like Cup4Cup). Add an extra tablespoon of buttermilk if the dough feels dry.
- Vegan Version: Use plant-based butter, almond milk with a splash of lemon for “buttermilk,” and vegan cream cheese for the glaze. Egg replacer (like Bob’s Red Mill) works well to bind the dough.
- Berry Swirl: Toss in 1/2 cup of chopped strawberries or raspberries with the cinnamon filling for a burst of fruity flavor—perfect for spring or summer brunch.
- Nutty Addition: Sprinkle 1/2 cup chopped pecans or walnuts over the filling for crunch (my uncle swears by this).
- Chocolate Lover’s: Mix mini chocolate chips into the filling for extra gooeyness—my kids call these “double velvet rolls.”
If you prefer less sweetness, halve the glaze and let the cinnamon shine. For a stovetop version, cook the rolls in a covered skillet over low heat (about 20 minutes)—they’re a little denser, but deliciously rustic. Allergens? Swap out dairy and eggs for plant-based alternatives. I’ve made the vegan version for a friend’s birthday, and honestly, nobody could tell the difference. Play with spices: add cardamom or nutmeg for a cozy twist, or a splash of orange zest for brightness. The sky’s the limit!
Serving & Storage Suggestions
Red velvet cinnamon rolls taste best served warm, right out of the oven with the glaze melting into every swirl. For a stunning presentation, arrange rolls on a pretty platter and drizzle extra glaze across the top—add a sprinkle of pink sugar or mini heart candies for extra Valentine’s vibes. Pair with hot coffee, tea, or even a sparkling berry mimosa for a festive brunch.
If you’re making ahead, store cooled rolls in an airtight container in the refrigerator for up to 3 days. They’ll stay soft and flavorful. For longer storage, wrap tightly and freeze for up to 2 months—just thaw overnight and reheat in a low oven (300°F/150°C) for 10 minutes, or in the microwave for 30 seconds. The glaze may need a fresh drizzle after reheating.
Honestly, the flavors deepen overnight—cinnamon and cocoa mingle, making leftovers even better. For gifting, wrap individual rolls in wax paper and tie with ribbon. If you like a crisp edge, reheat uncovered; for extra gooeyness, cover loosely with foil. No matter how you serve them, these rolls are guaranteed to brighten up any table or snack break.
Nutritional Information & Benefits
Each roll (with glaze) is roughly 350 calories, 6g protein, 12g fat, and 52g carbs. Cocoa powder adds a dose of antioxidants, while buttermilk and eggs bring protein and calcium. Cinnamon is known for its anti-inflammatory and blood sugar balancing properties—so you’re getting a little wellness boost with every bite.
This recipe can be adapted to be lower in sugar (use less powdered sugar and brown sugar) or dairy-free if needed. Allergens include wheat, dairy, and eggs, but swaps are easy for most dietary needs. As someone who tries to balance indulgence with wholesome ingredients, I love that you can pack in extra fiber (using whole wheat pastry flour) or add nuts for healthy fats.
It’s a treat, sure, but with real ingredients and a touch of nostalgia—it’s a sweet way to celebrate without too much guilt!
Conclusion
So there you have it—these Red Velvet Cinnamon Rolls are everything you could wish for in a Valentine’s treat: gorgeous, cozy, and dangerously delicious. Whether you’re baking for a crowd or just for yourself, this recipe puts a festive spin on classic comfort food. It’s a recipe I come back to every year, not just because it’s easy, but because it never fails to bring smiles and sweet memories.
I encourage you to tweak it for your favorite flavors, swap ingredients as needed, and make it your own signature roll. Honestly, there’s no wrong way to enjoy them. If you try the recipe, leave a comment below—share your variations, your family’s reactions, or even your kitchen mishaps. Pin it, share it, and spread the love (and the glaze!).
The best recipes are the ones that bring people together—and I hope these red velvet cinnamon rolls do just that. Happy baking, and may your Valentine’s Day be extra sweet!
Frequently Asked Questions
How can I make Red Velvet Cinnamon Rolls ahead of time?
You can prepare the rolls up to the second rise, cover tightly, and refrigerate overnight. In the morning, let them come to room temperature and rise for 30 minutes, then bake as usual.
Can I freeze these Red Velvet Cinnamon Rolls?
Absolutely! Freeze baked (and cooled) rolls in an airtight container for up to 2 months. Thaw overnight, then reheat gently before adding the glaze.
What if I don’t have buttermilk?
No problem—just add 1 tablespoon of lemon juice or vinegar to 1 cup of regular milk, stir, and let sit for 5 minutes. Works like a charm!
Can I make these rolls dairy-free?
Yes! Use dairy-free butter, plant-based milk with a splash of lemon (for “buttermilk”), and dairy-free cream cheese for the glaze. The taste is still amazing.
Why did my dough not rise?
Could be inactive yeast or cold ingredients. Make sure your yeast is fresh and buttermilk is warm (not hot). If your kitchen is chilly, let the dough rise in a slightly warmed oven (turned off).
Pin This Recipe!
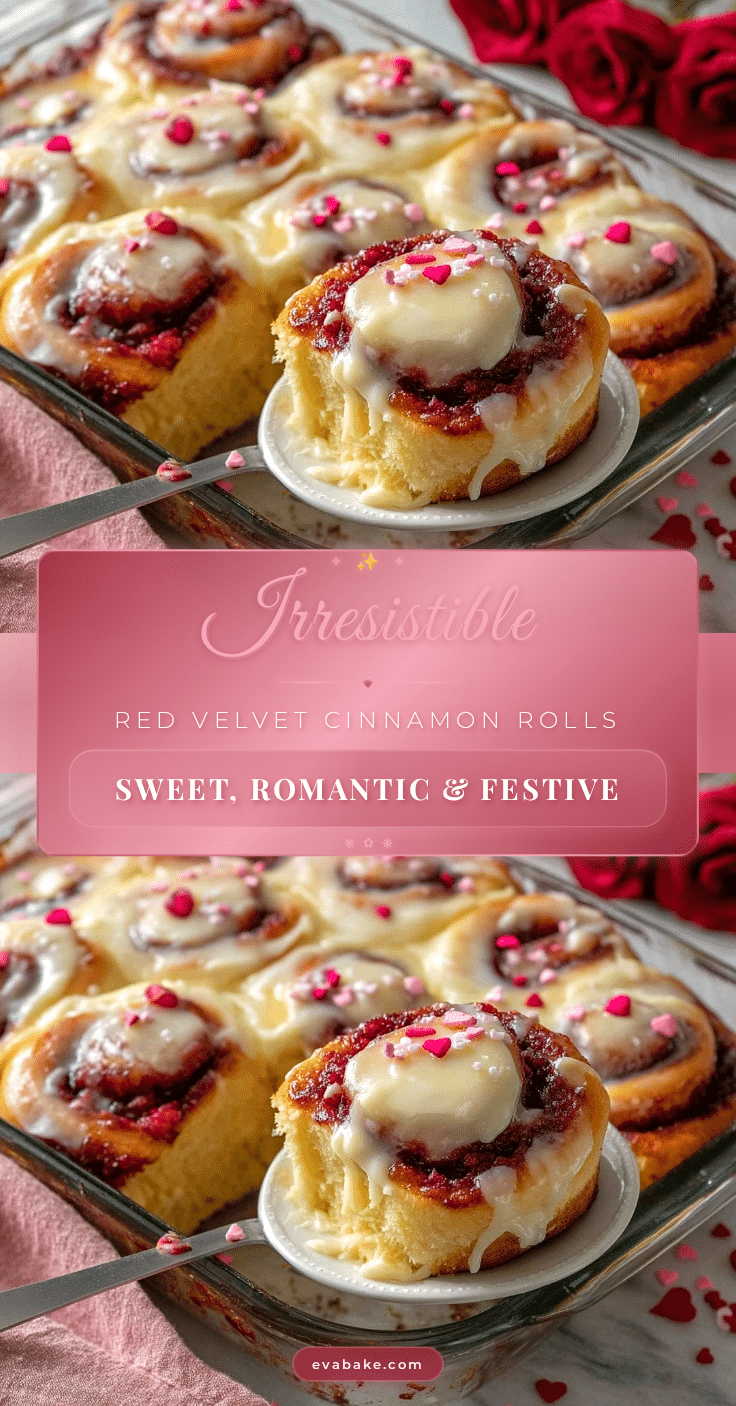
Red Velvet Cinnamon Rolls

These Red Velvet Cinnamon Rolls are a visually stunning and decadently delicious treat, featuring cocoa-kissed dough, a gooey cinnamon sugar filling, and a tangy cream cheese glaze. Perfect for Valentine’s Day or any special breakfast, they’re soft, flavorful, and guaranteed to bring smiles.
- Prep Time: 30 minutes
- Cook Time: 25 minutes
- Total Time: 2 hours
- Yield: 12 rolls 1x
- Category: Breakfast, Brunch, Dessert
- Cuisine: American
Ingredients
- 3 1/2 cups all-purpose flour (unbleached recommended)
- 2 tablespoons unsweetened cocoa powder (Dutch process preferred)
- 1/4 cup granulated sugar
- 2 1/4 teaspoons active dry yeast (1 packet)
- 1 cup buttermilk, room temperature
- 1/4 cup unsalted butter, melted
- 2 large eggs, room temperature
- 2–3 tablespoons red food coloring (gel preferred)
- 1 teaspoon salt
- 1/2 cup unsalted butter, softened (for filling)
- 3/4 cup brown sugar, packed (for filling)
- 2 tablespoons ground cinnamon (for filling)
- Pinch of salt (for filling)
- 4 ounces cream cheese, softened (for glaze)
- 1 cup powdered sugar, sifted (for glaze)
- 2 tablespoons unsalted butter, softened (for glaze)
- 1 teaspoon vanilla extract (for glaze)
- 2–3 tablespoons milk or heavy cream (for glaze)
- Pinch of salt (for glaze)
Instructions
- In a large mixing bowl, combine warm buttermilk (about 110°F), granulated sugar, and active dry yeast. Stir gently and let sit for 5-10 minutes until frothy.
- Add eggs, melted butter, and red food coloring to the yeast mixture. Whisk until well combined.
- In a separate bowl, whisk together flour, cocoa powder, and salt. Gradually add dry ingredients to wet mixture, stirring until a shaggy dough forms.
- Transfer dough to a floured surface and knead for 8-10 minutes (or use a stand mixer with dough hook for about 5 minutes) until smooth and slightly tacky. Add flour 1 tablespoon at a time if too sticky.
- Place dough in a greased bowl, cover, and let rise in a warm spot for 60-75 minutes, until doubled in size.
- Prepare the filling: In a small bowl, mix softened butter, brown sugar, cinnamon, and a pinch of salt until smooth.
- Punch down the risen dough and turn onto a lightly floured surface. Roll into a 16×12-inch rectangle, about 1/4-inch thick.
- Spread the cinnamon sugar filling evenly over the dough, right to the edges.
- Starting from the long side, roll the dough tightly into a log. Slice into 12 equal pieces using a sharp knife or dental floss.
- Arrange rolls in a greased 9×13-inch pan, cut sides up. Cover and let rise for 30-40 minutes until puffy.
- Preheat oven to 350°F. Bake rolls for 22-25 minutes, until tops are set and edges just begin to brown.
- While rolls bake, beat together cream cheese, butter, powdered sugar, vanilla, and milk until smooth and pourable.
- Let rolls cool for 10 minutes, then drizzle generously with cream cheese glaze. Serve warm.
Notes
Use room temperature eggs and buttermilk for best rise. If yeast doesn’t foam, start over with fresh yeast. For clean slices, use dental floss. Rolls can be made ahead and refrigerated overnight before baking. For a vegan or gluten-free version, substitute with plant-based or gluten-free alternatives. Don’t overbake for gooey texture. Line pan with parchment for easy cleanup.
Nutrition
- Serving Size: 1 roll with glaze
- Calories: 350
- Sugar: 22
- Sodium: 320
- Fat: 12
- Saturated Fat: 7
- Carbohydrates: 52
- Fiber: 2
- Protein: 6
Keywords: red velvet cinnamon rolls, Valentine’s Day, cream cheese glaze, brunch, breakfast, sweet rolls, easy cinnamon rolls, homemade, yeast dough, cocoa, holiday baking