Introduction
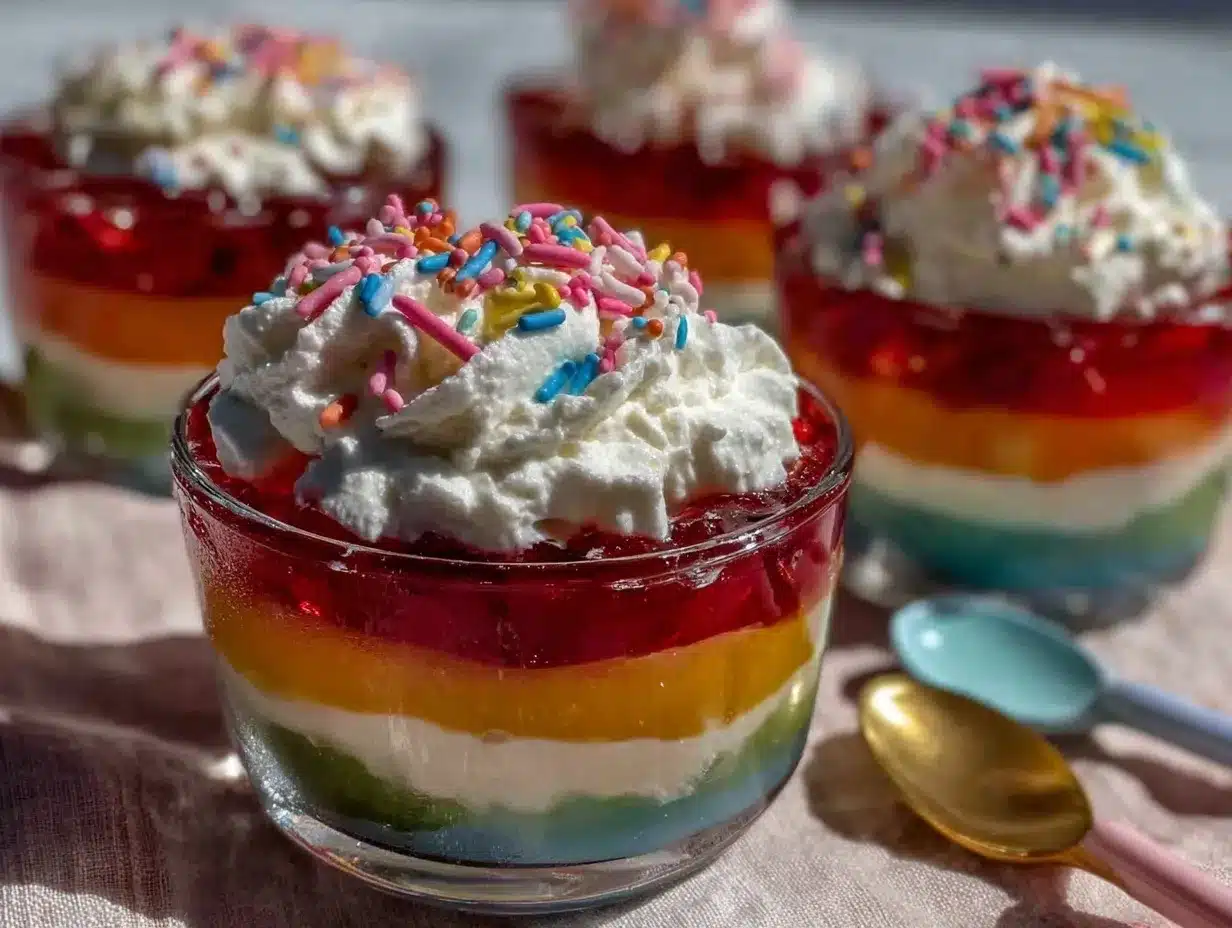
Close your eyes for a second and imagine a row of dazzling, jewel-toned rainbow Jell-O cups lined up on your kitchen counter—each one shimmering with bold, bright colors that look straight out of a Dr. Seuss book. The first time I made these Fun Dr. Seuss Rainbow Jell-O Cups for a kids’ party, the kitchen was filled with giggles (and a little bit of sticky chaos, to be honest). The scent of fruity gelatin mingled with the sweet anticipation in the air, and I knew this wasn’t just any dessert—it was pure, edible joy.
I remember being knee-high to a grasshopper, clutching a plastic spoon at my cousin’s birthday, and thinking those rainbow treats looked like magic. Years later, after a rainy weekend stuck indoors with my own kids, I decided to recreate that magic—only this time, with a playful Dr. Seuss twist. The first time I unmolded a perfect rainbow cup, I actually paused, took a deep breath, and just grinned. You know that moment when you realize you’ve stumbled onto something truly special? This was it.
Honestly, the reactions from friends and family were priceless. My youngest couldn’t stop poking the wiggly layers (he said they looked “like real Cat in the Hat stripes!”), and even the grown-ups couldn’t resist sneaking one or two off the tray. These Dr. Seuss Rainbow Jell-O Cups are more than a party snack—they’re a conversation starter, a memory-maker, and, let’s face it, dangerously easy to throw together for any celebration. They’re perfect for birthday bashes, school events, or just brightening up your Pinterest rainbow board. After making them at least a dozen times (in the name of research, of course!), these have become a staple in our family’s party playbook. If you’re looking for a treat that feels like a warm, happy hug—and guarantees a table full of smiles—you’re going to want to bookmark this one.
Why You’ll Love This Recipe
Let’s talk about why these Fun Dr. Seuss Rainbow Jell-O Cups are a must-make for your next kids’ party—or, honestly, any time you need a splash of color and cheer. I’ve tested this recipe more times than I can count, from chaotic birthday mornings to last-minute classroom snacks, and it never disappoints. Here’s why you’ll be hooked after just one batch:
- Quick & Easy: Each layer sets in about 20-30 minutes, so you can prep these in an afternoon—even with little helpers right by your side. No baking, no fuss, just simple steps and pure fun.
- Simple Ingredients: You don’t need a fancy shopping list. Just grab a handful of classic Jell-O flavors, some water, and a can of whipped cream. I bet you already have most of this in your pantry.
- Perfect for Parties: These rainbow Jell-O cups are a showstopper for birthday parties, Dr. Seuss Day celebrations, classroom treats, or even as a special after-school surprise. Trust me, they’ll be the first thing gone from the dessert table.
- Crowd-Pleaser: Little ones (and grown-ups, too) love the wiggly, jiggly layers and the sweet fruity flavors. I’ve never met a kid who could resist their colorful charm.
- Unbelievably Delicious: The combination of flavors and the creamy whipped topping make these more than just eye candy. You get a little bit of everything in each spoonful—sweet, tangy, creamy, and oh-so-refreshing.
What sets these Dr. Seuss Rainbow Jell-O Cups apart is the method I’ve honed over many parties: pour each layer slowly for perfect stripes, chill just long enough for clean lines, and top with a swirl of whipped cream and a cherry (if you’re feeling extra fancy). This isn’t just another layered gelatin dessert—it’s my best version, stress-tested by dozens of sugar-happy kids. It’s comfort food with a playful twist, and it’s made to impress without breaking a sweat.
Most importantly, these cups have heart. They’re the kind of treat that makes you close your eyes and smile after the first bite—and they bring people together, sparking laughter and stories at every gathering. Whether you’re a busy parent, a classroom hero, or just a Seuss-lover at heart, these Jell-O cups will turn an ordinary day into a colorful celebration.
What Ingredients You Will Need
This recipe for Dr. Seuss Rainbow Jell-O Cups keeps things simple, colorful, and customizable. Everything you need is easy to find, and you can swap flavors or colors to fit your party theme. Here’s what you’ll need to work that Seussical magic:
- For the Rainbow Jell-O Layers:
- 1 (3 oz/85g) box strawberry Jell-O (or red flavor of choice)
- 1 (3 oz/85g) box orange Jell-O
- 1 (3 oz/85g) box lemon Jell-O (or pineapple for a twist)
- 1 (3 oz/85g) box lime Jell-O
- 1 (3 oz/85g) box blue raspberry Jell-O
- 1 (3 oz/85g) box grape Jell-O
- Note: Feel free to swap flavors based on what your kids love or what’s available. Cherry instead of strawberry? Go for it! Want to add a pink layer? Try watermelon or raspberry.
- For the Water:
- 6 cups (1.4 L) boiling water (1 cup/240 ml per layer)
- 6 cups (1.4 L) cold water (1 cup/240 ml per layer)
- Tip: Use filtered water for the cleanest flavor, or just good old tap—this dessert is very forgiving.
- For the Creamy Layer (Optional, for stripes):
- 1 (14 oz/397g) can sweetened condensed milk
- 2 envelopes (about 0.5 oz/14g) unflavored gelatin
- 2 cups (480 ml) boiling water
- Note: This creamy layer is optional, but it makes the stripes pop! For dairy-free, use sweetened coconut condensed milk.
- For Topping:
- 1 can whipped cream (or homemade, if you’re feeling ambitious)
- Maraschino cherries (optional, for that Cat in the Hat look)
- Sprinkles (because who can resist?)
Ingredient Tips: I like using classic Jell-O brand for the brightest colors, but generic works, too. For a natural take, try Simply Delish or other natural gelatin brands (colors will be softer). In summer, I sometimes add sliced fresh strawberries or blueberries between layers for extra texture.
Substitutions: Want it sugar-free? Use sugar-free gelatin. Allergic to dairy? Skip the creamy layer or use coconut condensed milk. Making ahead? These set beautifully overnight, just keep the whipped cream off until serving.
Equipment Needed
You don’t need a fancy kitchen setup to make these Dr. Seuss Rainbow Jell-O Cups—just a few basics and you’re good to go:
- Clear Plastic Cups (8–9 oz/240–270 ml): The clear sides show off your rainbow layers. I recommend sturdy party cups—no glass needed for little hands. If you want mini versions, use 4 oz (120 ml) cups for more servings.
- Heatproof Mixing Bowls: You’ll need one for mixing each color. Glass or stainless steel works great.
- Whisk or Spoon: For dissolving gelatin and stirring in water.
- Measuring Cups: For portioning water and gelatin.
- Small Ladle or Squeeze Bottle: For neat layer pouring. In a pinch, a small measuring cup works fine—just go slow.
- Baking Tray: To keep all the cups steady and move them in/out of the fridge without spills.
- Refrigerator Space: You’ll need a shelf with enough room for your tray of cups to chill undisturbed.
Personal Note: I’ve used everything from thrift-store cups to fancy mason jars, but disposable clear cups are my favorite for parties (easier cleanup, too). If you don’t have a ladle, a turkey baster works in a pinch! Just rinse between colors.
To keep your cups looking sharp, wipe the insides dry before starting, and keep your tray level while moving it around. Budget tip: Dollar store cups work just as well as pricier brands!
Preparation Method
- Set Up Your Cups: Arrange 8–10 clear plastic cups on a baking tray. Make sure they’re clean and dry. This makes moving them in and out of the fridge a breeze (especially if you have little helpers bumping elbows).
- Prepare First Jell-O Layer (Red): In a mixing bowl, add 1 box (3 oz/85g) strawberry Jell-O. Pour in 1 cup (240 ml) boiling water and whisk until dissolved (about 2 minutes). Add 1 cup (240 ml) cold water and stir. Pour a thin layer (about 1/2 inch/1.2 cm) into the bottom of each cup—roughly 1/4 cup (60 ml) per cup. Refrigerate cups for 20–25 minutes, or until set but not firm.
- Add Optional Creamy Layer: If you want white stripes, combine 2 envelopes unflavored gelatin with 1/2 cup (120 ml) cold water in a bowl. Let stand 5 minutes, then add 2 cups (480 ml) boiling water and whisk until dissolved. Stir in 1 can (14 oz/397g) sweetened condensed milk. Cool to room temperature. Pour a thin layer (2–3 tablespoons/30–45 ml) over the set red layer. Chill another 15–20 minutes.
- Repeat with Remaining Colors: Mix and pour the orange Jell-O (follow same steps as red), chill until set, then add another creamy layer if using. Continue with yellow, green, blue, and grape, chilling each layer 20–25 minutes between additions. Tip: If a layer isn’t set enough, the colors will bleed—don’t rush! If you accidentally poke through a layer, just smooth it out with a spoon and keep going.
- Final Chill: Once all layers are set, chill the cups for at least 2 hours (or overnight) to firm up completely. The colors will look even brighter after a good chill.
- Top and Serve: Just before serving, add a generous swirl of whipped cream, a maraschino cherry, and sprinkles. Serve cold and watch those smiles appear!
Troubleshooting Tips: If your fridge is crowded, layers might set unevenly. Rotate the tray halfway through chilling. If you forget a layer, don’t sweat it—just keep going, and call it “Seuss-inspired abstract art.”
Efficiency Hack: Prep your next Jell-O color while the previous layer is chilling—just don’t pour hot liquid over unset gelatin!
Cooking Tips & Techniques
Making rainbow Jell-O cups is part science, part art—and I’ve learned a few tricks along the way. Here’s how to get those crisp stripes and perfect jiggle every time:
- Work in Batches: Only prepare the next Jell-O flavor when you’re ready to pour, or it’ll set in the bowl. If it does, just microwave for 10-second bursts until pourable again.
- Don’t Rush the Layers: If you pour a new layer too soon, colors will blend (I’ve made this mistake in my excitement more than once!). Chill each layer until just set—not sticky to the touch—before adding the next.
- Go Slow with the Creamy Layer: Pour the sweetened condensed milk mixture gently over a spoon to avoid breaking through the colored layer. Patience pays off!
- Keep Things Level: If your fridge shelf is crooked, your rainbow stripes will be too. Use a baking tray and check it’s sitting flat before chilling.
- Multitasking: While one layer is chilling, wash your bowls and prep the next color. This keeps things moving and your kitchen less chaotic.
- Consistency: Use the same measuring cup for each layer to keep stripes even. Don’t worry if a bit spills—the kids will think it’s extra “Seussical.”
- Temperature Matters: Let each new layer cool to lukewarm before pouring, or the heat may melt the previous layer. Learned that the hard way—my first batch was more tie-dye than rainbow!
Remember, the most important ingredient is a sense of fun. If the stripes aren’t perfect, just call them “Whoville Waves” and carry on. The smiles at the table will be just as big.
Variations & Adaptations
One of the best things about Dr. Seuss Rainbow Jell-O Cups is how flexible they are. Over the years, I’ve tried more twists than I can count! Here are some fun ways to make these your own:
- Dietary Variations: For a dairy-free version, skip the creamy layer or use sweetened coconut condensed milk. If you need sugar-free, grab sugar-free gelatin (the layers set the same way!)
- Seasonal Swaps: In spring, I like to add pastel colors (think peach, lemon, and berry). For a winter party, try red and green only for a Grinchy twist. Around Halloween, orange and grape with a black licorice “hat” are a hit!
- Flavor Fun: Mix up the order of the colors, or use all the berry flavors for a “Berry Seuss” theme. If your kids love tropical, try pineapple, mango, and coconut layers.
- Cooking Methods: Want to make these in a large pan for slicing? Use a 9×13-inch (23×33 cm) glass dish and follow the same layering process. Slice into cubes or shapes with cookie cutters before serving.
- Personal Twist: My family’s favorite is adding mini marshmallows between layers for a “cloud” effect—totally not traditional, but so much fun!
Allergen note: For gluten-free, check your gelatin brand. Most are safe, but always read the label. For nut-allergies, keep add-ins simple and skip almond-based toppings.
Honestly, the best part is seeing what kids come up with—let them pick flavors or add sprinkles between layers for extra whimsy. You never know what new Seuss-inspired combo you’ll create!
Serving & Storage Suggestions
These Dr. Seuss Rainbow Jell-O Cups are best served cold, straight from the fridge, with a big swirl of whipped cream and a cherry on top. If you’re making them for a crowd, line them up on a bright tray for maximum wow-factor—perfect for party tables or classroom celebrations.
They pair well with simple snacks like popcorn, fruit kabobs, or little sandwiches. For drinks, lemonade or fruit punch keeps things colorful and kid-friendly. I’ve even served them with mini Cat in the Hat cookies for extra Seuss vibes!
Storing: Cover each cup with plastic wrap and keep in the refrigerator up to 3 days (without whipped cream). Add the cream and cherries just before serving to prevent sogginess. If you need to make them ahead, stack cups in a deep container with a lid to save fridge space.
Freezing is not recommended—the texture gets icy and weird. If you have leftovers (rare in my house!), keep them cold and enjoy as an after-school snack. The flavors actually get a little more intense after a day or two, and the layers stay just as bright.
Honestly, these are so fun to look at, you might find yourself opening the fridge just for a peek!
Nutritional Information & Benefits
Each Dr. Seuss Rainbow Jell-O Cup (without whipped cream) contains roughly:
- Calories: 110
- Sugar: 20g
- Fat: 0g (add 3g if using whipped cream or creamy layer)
- Protein: 2g (if using milk layer)
- Gluten-free (if using certified gelatin)
Key ingredients like gelatin can support healthy hair and nails, and the recipe is naturally low in fat. If you’re watching sugar, swap in sugar-free gelatin for a lighter version. For allergies, always check labels—most gelatins are nut- and gluten-free, but toppings can vary.
Honestly, these aren’t health food—but they’re a lighter, allergy-friendly option compared to most frosted cakes. Plus, the joy and laughter they spark are good for the soul. As a parent, that’s a win in my book!
Conclusion
If you’re looking for a party treat that’s just as fun to make as it is to eat, these Dr. Seuss Rainbow Jell-O Cups are your answer. They’re colorful, easy, and guaranteed to bring out the kid in everyone (even Uncle Bob!). With simple ingredients, easy steps, and room for creativity, you really can’t go wrong.
I love this recipe because it brings back happy memories and creates new ones every time. Whether you stick to the classic rainbow stripes or try your own wacky twist, these cups are sure to be a family favorite. Don’t be afraid to play with colors, flavors, and toppings—half the fun is making them your own!
So, what do you think? Will you make these for your next party, or just because? Leave a comment below with your favorite flavor combination, share this recipe with your friends, or tag me with your Seussical creations! Can’t wait to see your rainbow cups shine.
FAQs About Dr. Seuss Rainbow Jell-O Cups
Can I make these rainbow Jell-O cups ahead of time?
Yes! You can make the cups up to 2–3 days in advance. Just keep them covered in the fridge and add whipped cream right before serving for the best look and taste.
What if I don’t have all the Jell-O colors?
No problem—use whatever colors you have! The stripes will still look festive. You can repeat colors or skip one if needed.
How do I prevent the layers from mixing together?
Let each layer set in the fridge until firm before adding the next. Pour gently, and make sure the new layer is cool (not hot) to avoid melting the one below.
Can I make these cups dairy-free?
Absolutely! Skip the creamy layer, or use dairy-free sweetened condensed coconut milk for the white stripes. Whipped coconut cream works for the topping, too.
How do I serve these to a large group?
Set the finished cups on a colorful tray and top with whipped cream just before serving. For classroom parties, make mini versions in 4 oz (120 ml) cups for easy, individual portions.
Pin This Recipe!
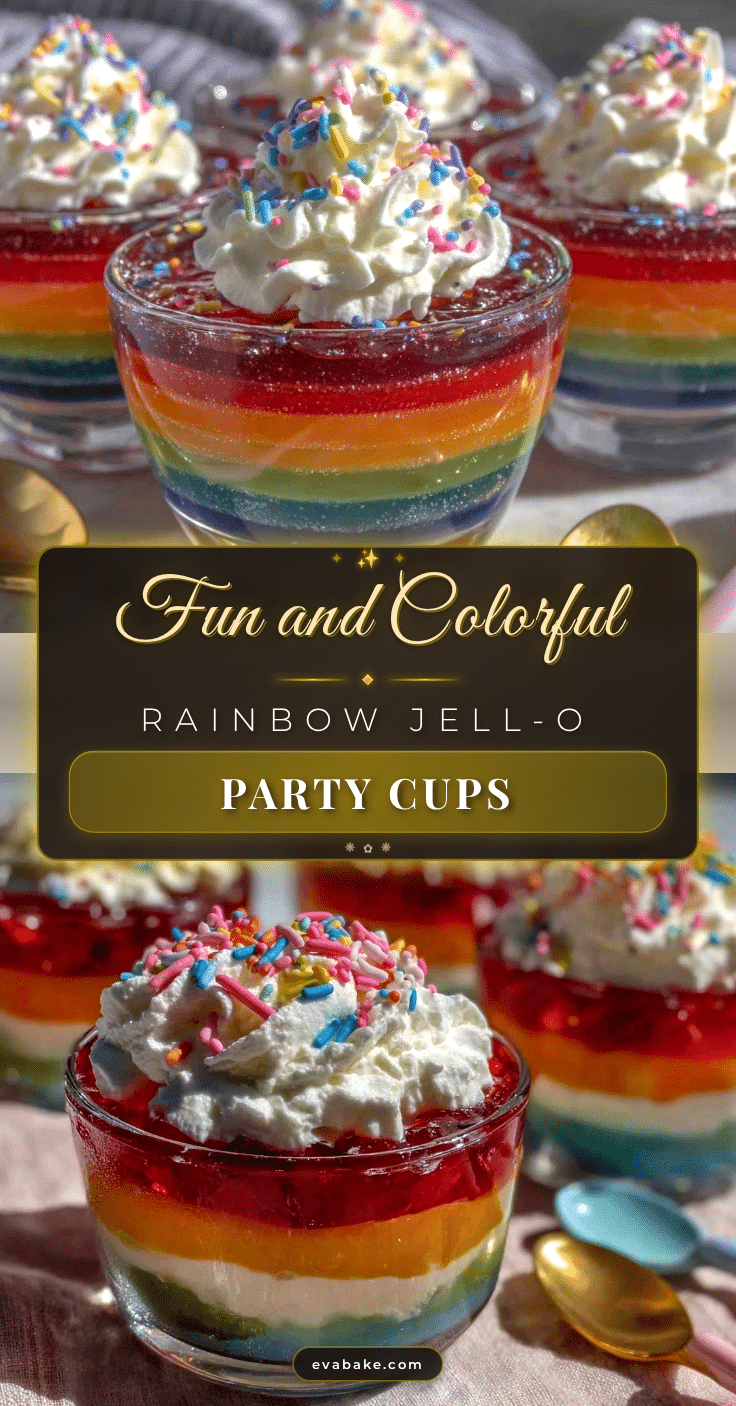
Dr. Seuss Rainbow Jell-O Cups – Easy Kids Party Treats
These colorful, layered Dr. Seuss Rainbow Jell-O Cups are a fun, easy, and crowd-pleasing treat perfect for kids’ parties, school events, or any celebration. With vibrant stripes and a creamy optional layer, they’re as delightful to make as they are to eat.
- Prep Time: 30 minutes
- Cook Time: 0 minutes
- Total Time: 3 hours
- Yield: 8–10 servings 1x
- Category: Dessert
- Cuisine: American
Ingredients
- 1 (3 oz) box strawberry Jell-O (or red flavor of choice)
- 1 (3 oz) box orange Jell-O
- 1 (3 oz) box lemon Jell-O (or pineapple for a twist)
- 1 (3 oz) box lime Jell-O
- 1 (3 oz) box blue raspberry Jell-O
- 1 (3 oz) box grape Jell-O
- 6 cups boiling water (1 cup per layer)
- 6 cups cold water (1 cup per layer)
- 1 (14 oz) can sweetened condensed milk (optional, for creamy layer)
- 2 envelopes (about 0.5 oz) unflavored gelatin (optional, for creamy layer)
- 2 cups boiling water (for creamy layer, optional)
- 1 can whipped cream (for topping)
- Maraschino cherries (optional, for topping)
- Sprinkles (optional, for topping)
Instructions
- Arrange 8–10 clear plastic cups (8–9 oz each) on a baking tray. Make sure they’re clean and dry.
- For the first Jell-O layer (red): In a mixing bowl, add 1 box strawberry Jell-O. Pour in 1 cup boiling water and whisk until dissolved (about 2 minutes). Add 1 cup cold water and stir. Pour a thin layer (about 1/4 cup) into each cup. Refrigerate for 20–25 minutes, until set but not firm.
- Optional creamy layer: Combine 2 envelopes unflavored gelatin with 1/2 cup cold water in a bowl. Let stand 5 minutes, then add 2 cups boiling water and whisk until dissolved. Stir in 1 can sweetened condensed milk. Cool to room temperature. Pour a thin layer (2–3 tablespoons) over the set red layer. Chill another 15–20 minutes.
- Repeat with remaining Jell-O colors (orange, yellow, green, blue, grape): Prepare each flavor as above, pour over the previous layer, and chill 20–25 minutes between layers. Add creamy layers between colors if desired.
- After the final layer, chill cups for at least 2 hours (or overnight) to set completely.
- Just before serving, top each cup with whipped cream, a maraschino cherry, and sprinkles. Serve cold.
Notes
For best stripes, let each layer set until just firm before adding the next. Use sugar-free gelatin for a lighter version, or coconut condensed milk for dairy-free. Add whipped cream and toppings just before serving. Mini cups (4 oz) work well for classroom parties. Not recommended for freezing.
Nutrition
- Serving Size: 1 cup (about 8–9 oz)
- Calories: 110
- Sugar: 20
- Sodium: 75
- Carbohydrates: 22
- Protein: 2
Keywords: rainbow jello cups, kids party treats, Dr. Seuss dessert, layered jello, easy party dessert, gluten-free, dairy-free option, colorful dessert, birthday snack, school party treat