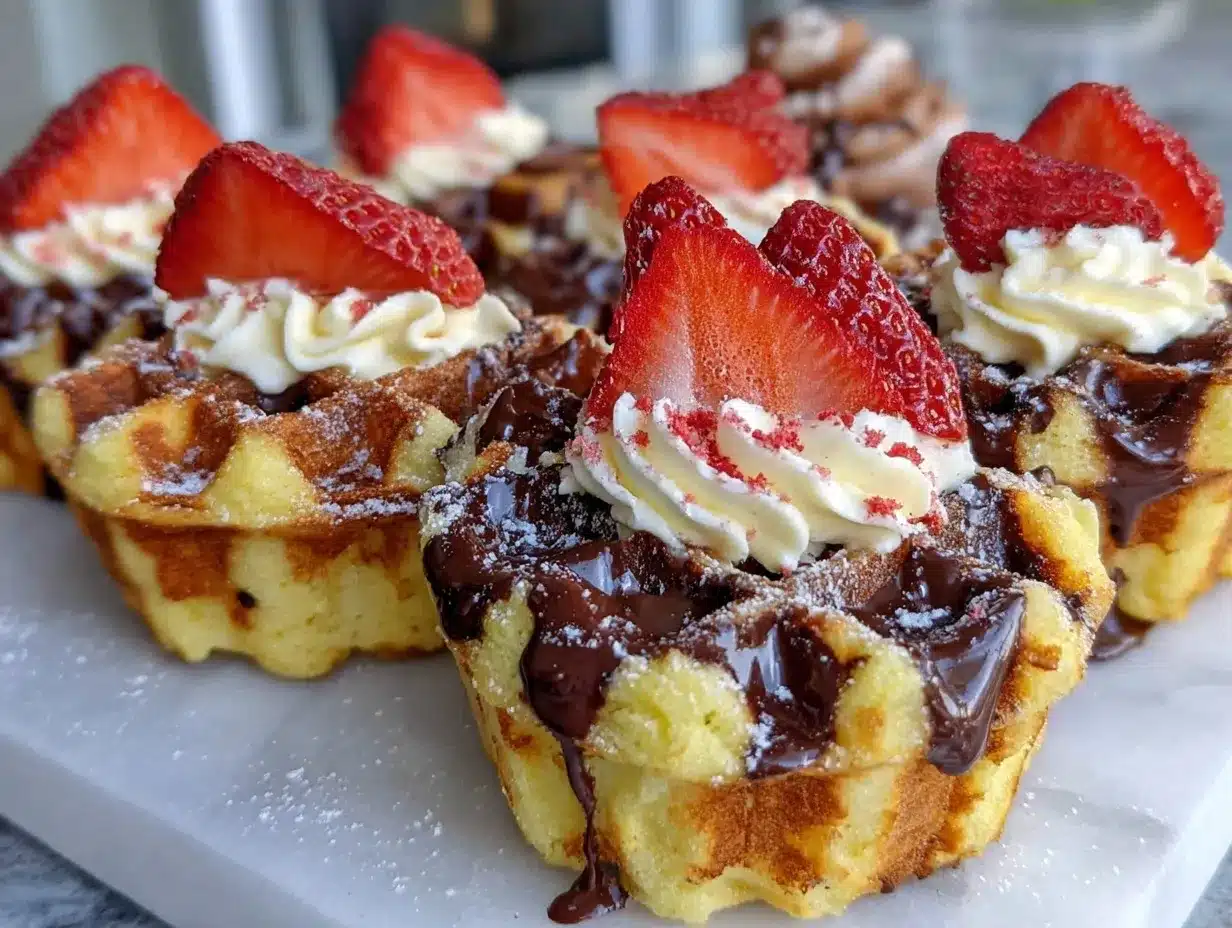
Imagine this: the sweet scent of strawberries and vanilla swirling through your kitchen, the sizzle of batter hitting a hot waffle iron, and the unmistakable aroma of melted chocolate drifting in from the next room. That’s exactly how it felt the first time I made these Fluffy Chocolate-Dipped Strawberry Cupcake Waffles. Honestly, the anticipation alone is enough to make your stomach do a little happy dance. When I finally pulled that first golden waffle from the iron—its edges crisp, the center pillowy, and flecked with juicy strawberries—I knew I was in for a treat. The moment I dipped that warm, fluffy creation into glossy chocolate, it was the kind of moment you pause, take a deep breath, and just grin because you know you’ve stumbled upon something truly special.
These cupcake waffles have a backstory too. Years ago, when I was knee-high to a grasshopper, my grandma would make the best strawberry cupcakes for Sunday brunch. Fast forward to a rainy weekend not long ago, I found myself craving that same nostalgic flavor but with a fun twist. I started tinkering around, mixing my favorite cupcake batter with my trusty waffle iron (that’s seen more breakfasts than I can count), and the result? Pure brunch magic. I wish I’d discovered this combo years ago, honestly.
Now, my family can’t keep their hands off them—even before the chocolate sets! Sometimes I’ll catch my kids sneaking bites straight off the rack, and my partner claims they’re the “best thing to happen to breakfast since cinnamon rolls.” These waffles are dangerously easy to make and bring pure, nostalgic comfort—perfect for Pinterest-worthy brunch boards, holiday mornings, or just because you want to spoil yourself. I’ve tested the recipe more times than I care to admit (in the name of research, of course), and it’s become a staple for family gatherings and gifting. If you’re after a recipe that feels like a warm hug and tastes like happiness, you’re going to want to bookmark this one.
Why You’ll Love This Fluffy Chocolate-Dipped Strawberry Cupcake Waffles Recipe
I’ve baked, tested, and devoured more waffle recipes than I can count, but these Fluffy Chocolate-Dipped Strawberry Cupcake Waffles are truly something else. Here’s why I know you’ll be obsessed (just like everyone in my house):
- Quick & Easy: Ready in under 30 minutes, so you can whip them up for a leisurely brunch or a last-minute sweet craving. No hours-long prep here!
- Simple Ingredients: No specialty store runs required—most of these goodies are already sitting in your pantry or fridge. I’ve made these on a whim with what I had on hand, and they never disappoint.
- Perfect for Any Occasion: Whether you’re hosting a cozy brunch, celebrating a birthday, or just want to surprise your kids on a Saturday morning, these cupcake waffles fit right in. They’re also a hit on Valentine’s Day (hint, hint) or for a fun dessert tray.
- Crowd-Pleaser: I haven’t met a person who can resist these. Kids love the chocolate dip, adults swoon over the strawberry-vanilla flavor, and they disappear fast at potlucks. These are the kind of waffles that bring everyone to the kitchen.
- Unbelievably Delicious: The texture is what gets me every time—soft, fluffy, and almost cake-like, with bursts of fresh strawberries and a crisp chocolate shell. Each bite is pure comfort food, but with a playful twist.
The secret sauce? Blending classic cupcake batter with the magic of waffle irons. That means you get a cloud-like interior with a crisp, golden exterior—no dry, crumbly waffles here! I add a splash of buttermilk for tang and moisture, and the chocolate dip is the cherry on top (literally and figuratively). You can even swap in your favorite berries or chocolate type for a personal touch.
This isn’t just another strawberry waffle recipe. It’s the one that makes people pause, savor, and reach for seconds. It’s comfort food’s playful cousin—lighter, quicker, and just as satisfying. Impress your brunch guests, treat yourself after a long week, or create a new family tradition. I promise, you’ll be making these on repeat.
What Ingredients You Will Need for Fluffy Chocolate-Dipped Strawberry Cupcake Waffles
This recipe uses simple, wholesome ingredients to deliver bold strawberry flavor and a satisfying, cupcake-like texture without any complicated steps. Most of these are basic pantry staples, with a few fresh touches to make them pop. Here’s what you need:
- For the Waffle Batter:
- All-purpose flour (1 3/4 cups / 220g) – gives structure and fluffiness
- Granulated sugar (1/2 cup / 100g) – for just the right sweetness
- Baking powder (2 tsp / 8g) – makes the waffles rise and become airy
- Baking soda (1/2 tsp / 2g) – helps with browning and texture
- Salt (1/4 tsp / 1g) – brings out the flavors
- Large eggs (2, room temperature) – adds richness and binds the batter
- Buttermilk (1 cup / 240ml) – keeps the waffles moist and tender (use regular milk with 1 tbsp vinegar or lemon juice if needed)
- Unsalted butter (1/3 cup / 75g, melted and slightly cooled) – for flavor and that classic cupcake richness
- Pure vanilla extract (2 tsp / 10ml) – adds warmth and depth
- Fresh strawberries (1 cup / 150g, finely chopped) – the star of the show! If out of season, frozen works, just thaw and pat dry first
- For the Chocolate Dip:
- Semi-sweet chocolate chips (1 cup / 170g) – melts smoothly, but you can use milk or dark chocolate if you prefer
- Coconut oil or vegetable shortening (1 tbsp / 15ml) – makes the chocolate glossy and perfect for dipping
- Optional Garnishes:
- Extra chopped strawberries (for topping)
- Sprinkles or mini chocolate chips (for a fun, Pinterest-worthy finish!)
- Powdered sugar (just a dusting, if you want a classic look)
Ingredient Notes & Tips: For best results, use ripe, fragrant strawberries—local farmers’ market berries are phenomenal if you can get them. I love King Arthur or Gold Medal flour for consistent texture. If you need a dairy-free option, swap the buttermilk for oat milk with a splash of lemon juice and use dairy-free chocolate. For a gluten-free version, a good cup-for-cup gluten-free flour blend works (like Bob’s Red Mill 1-to-1). Don’t be afraid to mix in some blueberries or raspberries if you want a berry medley. This recipe is super forgiving!
Equipment Needed
You don’t need a fancy kitchen to make these Fluffy Chocolate-Dipped Strawberry Cupcake Waffles. Here’s what I use (and a few swaps if you’re in a pinch):
- Waffle Iron: A standard Belgian or classic waffle iron works great. I’ve used both, and honestly, the only difference is the size of the pockets. If you don’t have a waffle iron, a grill pan can work, but the texture will be more like pancakes with crisp edges.
- Mixing Bowls: Two medium bowls—one for wet, one for dry ingredients. I prefer glass because I can see if everything’s combined, but plastic or metal works too.
- Whisk & Spatula: A sturdy whisk for blending batter and a silicone spatula for folding in strawberries and scraping every last bit of batter out (no waste!).
- Measuring Cups & Spoons: Accurate measurements mean no surprises. I recommend investing in a good set; they last forever.
- Microwave-Safe Bowl or Double Boiler: For melting chocolate. If you’re low on kitchen gadgets, a heatproof glass bowl over a simmering pot works fine.
- Wire Rack: For cooling and letting the chocolate set. In a pinch, use a baking sheet lined with parchment or foil.
My waffle iron is a hand-me-down, and I just give it a quick wipe with a damp towel after each use—no soap, so it stays nonstick. If you’re on a budget, thrift shops often have gently-used waffle makers for a steal. Don’t stress if you don’t have every gadget—these waffle cupcakes are forgiving!
How to Make Fluffy Chocolate-Dipped Strawberry Cupcake Waffles
-
Prep Your Ingredients (5 minutes):
Wash, hull, and finely chop the strawberries. Melt the butter and let it cool slightly (so it doesn’t cook the eggs). Measure out all dry and wet ingredients. Preheat your waffle iron according to manufacturer’s directions. -
Mix Dry Ingredients (2 minutes):
In a medium bowl, whisk together 1 3/4 cups (220g) all-purpose flour, 1/2 cup (100g) sugar, 2 tsp (8g) baking powder, 1/2 tsp (2g) baking soda, and 1/4 tsp (1g) salt. Make sure everything’s evenly combined—no clumps! -
Combine Wet Ingredients (3 minutes):
In another bowl, whisk together 2 eggs, 1 cup (240ml) buttermilk, 1/3 cup (75g) melted butter, and 2 tsp (10ml) vanilla extract until smooth and creamy. -
Make the Batter (2 minutes):
Pour the wet ingredients into the dry. Gently whisk until just combined—don’t overmix, or your waffles might turn out tough. A few small lumps are totally fine! -
Fold in Strawberries (1 minute):
Using a spatula, gently fold in 1 cup (150g) chopped strawberries. The batter should be thick but scoopable. If it’s too runny, sprinkle in another tablespoon of flour. -
Cook the Waffles (10-15 minutes):
Lightly grease your waffle iron with nonstick spray or a bit of melted butter. Spoon the batter onto the preheated iron (about 1/3 cup / 80ml per waffle, but follow your iron’s size). Close and cook until golden brown and crisp—usually 3-4 minutes per batch. Waffles should release easily; if they stick, let them cook another 30 seconds.
Tip: If your first waffle is pale, turn up the heat slightly. If it’s too dark, lower it a notch. -
Cool on a Rack (2 minutes):
Transfer cooked waffles to a wire rack. This keeps them crisp and prevents sogginess while you finish the batch. Resist stacking them—they’ll steam and lose their crunch! -
Make the Chocolate Dip (5 minutes):
In a microwave-safe bowl, combine 1 cup (170g) chocolate chips and 1 tbsp (15ml) coconut oil. Microwave in 20-30 second bursts, stirring between each, until smooth and glossy. (Or melt over a double boiler if you prefer.) -
Dip and Decorate (5-10 minutes):
Once waffles are cool enough to handle, dip one edge into the melted chocolate. Lay dipped waffles back on the wire rack and sprinkle with extra chopped strawberries, sprinkles, or mini chips if you like. Let the chocolate set for 10-15 minutes (you can pop them in the fridge to speed this up). -
Serve and Enjoy!
Waffles are best eaten fresh, but leftovers keep well (more on that below). Dig in while the chocolate is still just a bit melty for the ultimate treat.
Troubleshooting: If your waffles stick, your iron may not be hot enough or needs a touch more grease. If the batter seems too thick, add a splash more buttermilk. Too runny? Stir in extra flour, 1 tbsp at a time. And if you’re new to waffles, don’t worry—after the first one or two, you’ll get the hang of it. I promise!
Cooking Tips & Techniques
Over the years, I’ve picked up a few tricks to make sure these Fluffy Chocolate-Dipped Strawberry Cupcake Waffles come out perfect every time. Here’s what I swear by:
- Preheat Your Waffle Iron: I can’t tell you how many waffles I ruined before learning this trick. A properly preheated iron is key for crispy outsides and fluffy middles. I usually let mine heat up for at least 5 minutes before adding any batter.
- Don’t Overmix the Batter: It’s tempting to whisk until perfectly smooth, but a few lumps are good—overmixing can make your waffles tough. Fold just until you don’t see flour streaks.
- Grease Well, but Not Too Much: A light coating of nonstick spray or melted butter is enough. Too much oil can make the waffles greasy (ask me how I know!).
- Test the First Waffle: The first one is always a bit of a “sacrifice” waffle. Use it to adjust heat, batter amount, and cooking time. Sometimes it’ll stick or be pale, but don’t sweat it—you’ll find your groove fast.
- Use Room Temperature Eggs and Buttermilk: This helps everything blend smoothly and gives the batter a lighter texture. If you forget, just set your eggs in warm water for a few minutes.
- Cool on a Wire Rack: Don’t stack your waffles or put them on a plate, or you’ll lose that crisp edge. A rack keeps them airy and perfect for dipping in chocolate.
- Chocolate Dipping: Let waffles cool slightly before dipping, so the chocolate sets instead of sliding right off. If your kitchen’s warm, set the dipped waffles in the fridge for a few minutes to harden the shell.
- Multitasking: While one batch is cooking, prep your next batch of batter or melt the chocolate. I usually keep my toppings ready in little bowls so I can sprinkle as soon as I dip.
If you ever end up with soggy waffles, it’s usually from steam—try increasing the heat, or cool each one separately. And if you forget to add the strawberries (it’s happened to me!), just sprinkle them on top before serving—they’ll still be delicious.
Consistency is all about practice. After a few tries, you’ll know exactly when your waffle iron is ready and how much batter makes the perfect round. Don’t be afraid of a little mess—it’s all part of the fun!
Variations & Adaptations
One of the best things about these Fluffy Chocolate-Dipped Strawberry Cupcake Waffles is how customizable they are. Whether you’re working around dietary needs, changing with the seasons, or just craving something a little different, here are my favorite tweaks:
- Gluten-Free Version: Swap the all-purpose flour for a 1-to-1 gluten-free blend (like Bob’s Red Mill or King Arthur). The texture stays fluffy, and you won’t miss a thing.
- Dairy-Free Waffles: Use oat or almond milk with 1 tbsp lemon juice instead of buttermilk, and coconut oil or vegan butter for the melted butter. For the chocolate dip, choose dairy-free chips (Enjoy Life is a great brand).
- Berry Medley: Mix in blueberries, raspberries, or even blackberries instead of (or alongside) strawberries. In winter, frozen berries work—just defrost and pat them dry so your batter isn’t watery.
- Chocolate Lovers’ Dream: Stir mini chocolate chips into the batter for a double chocolate twist. You can also use white or ruby chocolate for the dip if you’re feeling adventurous.
- Nutty Crunch: Add 1/4 cup (30g) chopped toasted pecans or walnuts to the batter for a lovely crunch and extra flavor.
- Allergen-Friendly: For egg-free waffles, use a flax egg (1 tbsp ground flax + 2.5 tbsp water, let sit 5 minutes). If you need to avoid coconut, just use vegetable oil in the chocolate dip.
- Mini Waffles: Make smaller, kid-friendly waffles for snacking or party platters. They’re adorable and perfect for little hands.
I’ve made these with every berry under the sun, and once for a birthday brunch, I even added a swirl of strawberry jam to the batter for an extra punch of flavor. The possibilities are endless—let your cravings (and pantry) guide you!
Serving & Storage Suggestions
These Fluffy Chocolate-Dipped Strawberry Cupcake Waffles are best enjoyed fresh, right out of the iron, with the chocolate still just a touch melty. But they’re honestly amazing at room temperature too—the perfect sweet for brunch boards, dessert trays, or even a cheeky breakfast-for-dinner night!
- Serving: Serve warm, stacked on a pretty platter, with extra strawberries, a dusting of powdered sugar, and maybe a dollop of whipped cream or vanilla yogurt. For a fancier look, line up chocolate-dipped waffles in a row and add a sprinkle of colorful sprinkles or edible flowers.
- Pairings: These go beautifully with fresh coffee, a mimosa, or a berry smoothie. For a brunch spread, I like to add bacon, scrambled eggs, or a simple fruit salad on the side.
- Storage: Store leftover (undipped) waffles in an airtight container at room temp for up to 2 days, or refrigerate for up to 4 days. If already dipped in chocolate, layer with parchment so they don’t stick together.
- Freezing: Freeze undipped waffles in a zip-top bag for up to 2 months. To serve, pop straight from freezer into the toaster or oven at 350°F (175°C) for 5-7 minutes. Dip in fresh chocolate once thawed for best results.
- Reheating: Avoid microwaving if you want that crispy edge—use a toaster oven or regular oven instead.
The flavors actually deepen overnight, so leftovers (if you have any!) are a real treat. I’ve even packed cooled, dipped waffles in lunchboxes—they hold up surprisingly well and always get rave reviews.
Nutritional Information & Benefits
Here’s a quick look at what you’re getting with each Fluffy Chocolate-Dipped Strawberry Cupcake Waffle (per serving, based on a batch of 8 waffles):
- Calories: Approximately 260
- Carbohydrates: 33g
- Protein: 5g
- Fat: 12g
- Fiber: 2g
- Sugar: 14g
Health Benefits: Strawberries are packed with vitamin C and antioxidants, and using real fruit instead of jam or syrup keeps things on the fresher side. Buttermilk adds a little tang and calcium, and a touch of chocolate satisfies your sweet tooth without going overboard.
Dietary Notes: These can be made gluten-free and dairy-free with simple substitutions. They do contain eggs, wheat, and dairy by default, so be mindful for allergies. I love that you can tweak them to suit your needs without sacrificing flavor—makes it easy to share with friends and family, no matter their preferences.
Conclusion
So there you have it—these Fluffy Chocolate-Dipped Strawberry Cupcake Waffles truly are a brunch (or anytime!) treat that’s as fun to make as it is to eat. They blend the best parts of cupcakes, waffles, and chocolate-dipped strawberries into one playful, crowd-pleasing recipe. I’ve made these for birthdays, lazy Sundays, and just-because mornings, and they always disappear in a flash.
Don’t be afraid to get creative—add your favorite berries, switch up the chocolate, or pile on those toppings. I hope this recipe brings as much joy to your kitchen as it does to mine. If you try it, I’d love to hear how it goes (leave a comment, share your photo, or tag me online!). Let’s make brunch a little more magical, one fluffy, chocolatey bite at a time.
Frequently Asked Questions
Can I make these cupcake waffles ahead of time?
Yes! You can prepare the batter up to 12 hours ahead and keep it in the fridge. Cooked waffles can be stored and reheated in the toaster or oven for a quick treat.
What if I don’t have buttermilk?
No worries—just use regular milk and stir in 1 tablespoon of lemon juice or white vinegar. Let it sit for 5 minutes before using.
How do I keep the waffles crisp?
Cool them on a wire rack in a single layer and avoid stacking. For extra crispiness, reheat briefly in a toaster or oven before serving.
Can I use frozen strawberries?
Absolutely—just thaw them and pat very dry before folding into the batter. This prevents excess moisture from making the waffles soggy.
Are these waffles freezer-friendly?
Yes! Freeze undipped waffles in a zip-top bag for up to 2 months. Reheat in the toaster or oven, then dip in chocolate just before serving for best results.
Pin This Recipe!
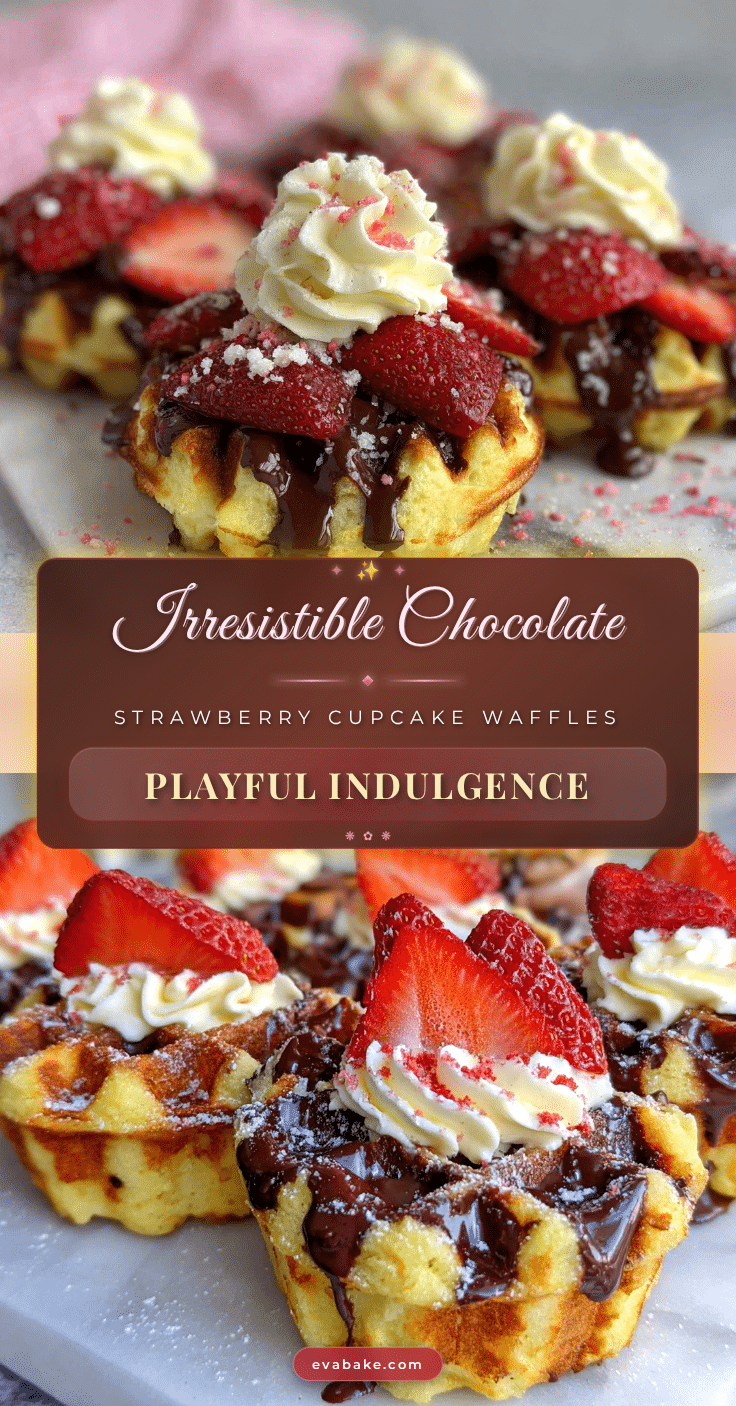
Fluffy Chocolate-Dipped Strawberry Cupcake Waffles

These fluffy cupcake-style waffles are studded with juicy strawberries, dipped in glossy chocolate, and perfect for brunch, dessert, or a special breakfast treat. Quick to make and endlessly customizable, they bring together the best of cupcakes, waffles, and chocolate-dipped strawberries in every bite.
- Prep Time: 10 minutes
- Cook Time: 15 minutes
- Total Time: 25 minutes
- Yield: 8 waffles 1x
- Category: Breakfast, Brunch, Dessert
- Cuisine: American
Ingredients
- 1 3/4 cups all-purpose flour (220g)
- 1/2 cup granulated sugar (100g)
- 2 teaspoons baking powder (8g)
- 1/2 teaspoon baking soda (2g)
- 1/4 teaspoon salt (1g)
- 2 large eggs, room temperature
- 1 cup buttermilk (240ml) (or regular milk with 1 tbsp vinegar or lemon juice)
- 1/3 cup unsalted butter, melted and slightly cooled (75g)
- 2 teaspoons pure vanilla extract (10ml)
- 1 cup fresh strawberries, finely chopped (150g; thawed and patted dry if using frozen)
- 1 cup semi-sweet chocolate chips (170g; or milk/dark/white chocolate as preferred)
- 1 tablespoon coconut oil or vegetable shortening (15ml)
- Optional: Extra chopped strawberries for topping
- Optional: Sprinkles or mini chocolate chips
- Optional: Powdered sugar for dusting
Instructions
- Prep your ingredients: Wash, hull, and finely chop the strawberries. Melt the butter and let it cool slightly. Measure out all dry and wet ingredients. Preheat your waffle iron according to manufacturer’s directions.
- Mix dry ingredients: In a medium bowl, whisk together flour, sugar, baking powder, baking soda, and salt until evenly combined.
- Combine wet ingredients: In another bowl, whisk together eggs, buttermilk, melted butter, and vanilla extract until smooth.
- Make the batter: Pour the wet ingredients into the dry ingredients. Gently whisk until just combined; do not overmix.
- Fold in strawberries: Using a spatula, gently fold in the chopped strawberries. The batter should be thick but scoopable.
- Cook the waffles: Lightly grease your waffle iron. Spoon about 1/3 cup of batter per waffle onto the preheated iron. Close and cook until golden brown and crisp, about 3-4 minutes per batch. Repeat with remaining batter.
- Cool on a rack: Transfer cooked waffles to a wire rack to keep them crisp. Do not stack.
- Make the chocolate dip: In a microwave-safe bowl, combine chocolate chips and coconut oil. Microwave in 20-30 second bursts, stirring between each, until smooth and glossy. Alternatively, melt over a double boiler.
- Dip and decorate: Once waffles are cool enough to handle, dip one edge into the melted chocolate. Place on the wire rack and decorate with extra strawberries, sprinkles, or mini chips if desired. Let chocolate set for 10-15 minutes (refrigerate to speed up).
- Serve and enjoy: Enjoy waffles fresh, while the chocolate is still slightly melty. Store leftovers as directed.
Notes
For best results, use ripe, fragrant strawberries. Do not overmix the batter for fluffiest texture. Cool waffles on a rack to keep them crisp. For gluten-free, use a 1-to-1 gluten-free flour blend. For dairy-free, use oat or almond milk with lemon juice and dairy-free chocolate. Waffles can be frozen undipped and reheated in a toaster or oven.
Nutrition
- Serving Size: 1 waffle
- Calories: 260
- Sugar: 14
- Sodium: 180
- Fat: 12
- Saturated Fat: 7
- Carbohydrates: 33
- Fiber: 2
- Protein: 5
Keywords: strawberry waffles, chocolate dipped waffles, cupcake waffles, brunch, easy waffle recipe, strawberry dessert, family breakfast, kid friendly, spring brunch, chocolate strawberry