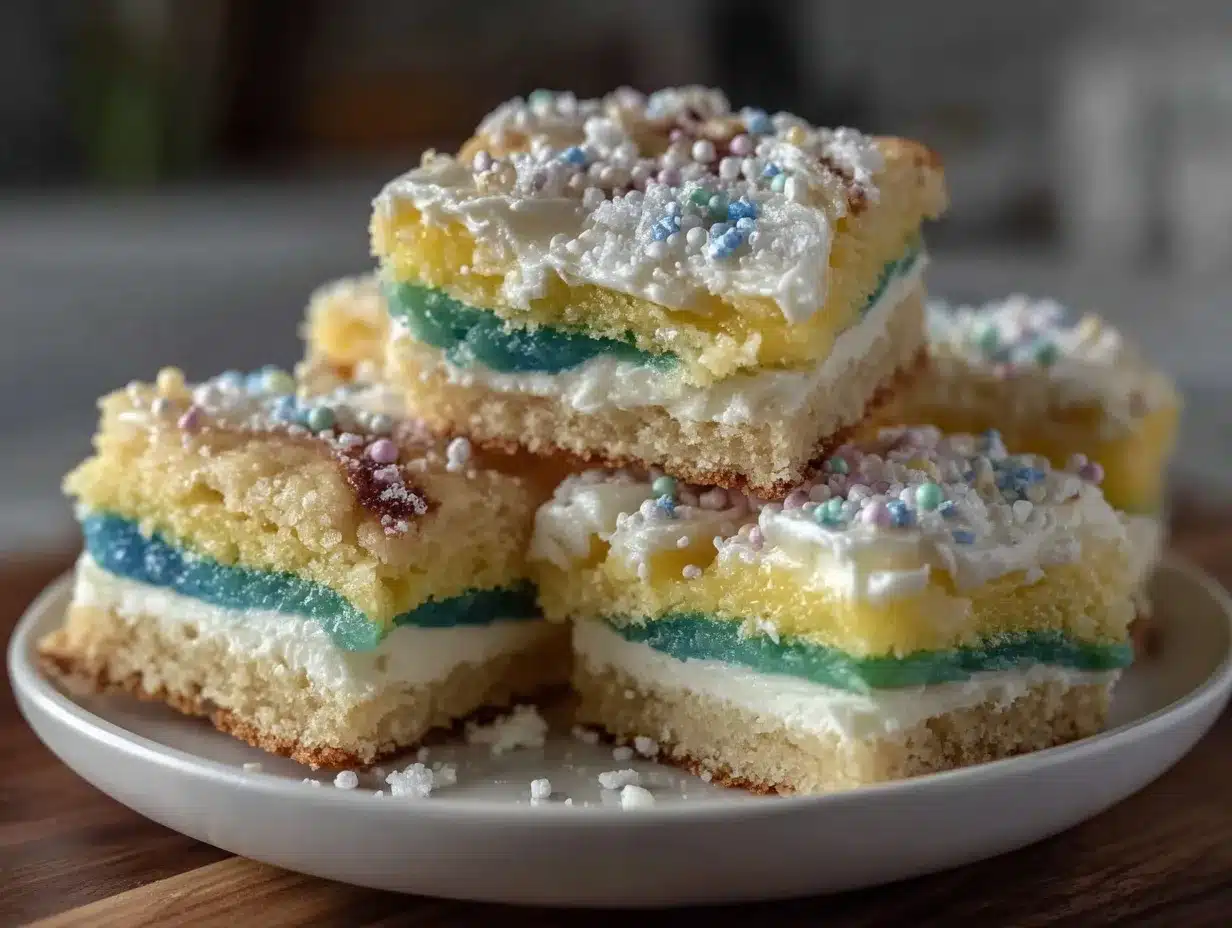
One chilly afternoon, I found myself rummaging through the pantry, hunting for something sweet yet simple to lift the gloomy mood hanging over the house. The kids were home from school, restless and a bit moody, and honestly, so was I. I wanted something cozy, something that felt like a warm hug but didn’t require me to haul out every flour sack and mixing bowl in sight. That’s when these cozy sugar cookie bars with colorful school frosting came into play—a recipe born from necessity and a pinch of nostalgia. The frosting, bright and playful, reminded me of those classroom days when the world felt big and anything was possible. I was skeptical at first about turning classic sugar cookies into bars, and the idea of “school frosting” seemed oddly specific, but as the bars baked and the frosting colors came to life, it became clear this was a keeper.
Fast forward, and these bars have become a quiet tradition whenever the weather turns crisp and the house needs a little extra warmth. The soft, buttery cookie base paired with that cheerful frosting isn’t just a treat; it’s a moment of calm, a shared smile, a sprinkle of joy on an ordinary day. It’s easy to whip up, forgiving if you’re not a baker (trust me, I’m not), and just downright satisfying. Every batch reminds me why sometimes the simplest recipes are the ones that stick with you—long after the last crumb is gone.
Why You’ll Love This Recipe
- Quick & Easy: Comes together in under 45 minutes, perfect for busy weeknights or when you need a last-minute sweet fix.
- Simple Ingredients: Pantry staples like butter, sugar, and flour—no fancy or hard-to-find items needed.
- Perfect for Any Occasion: Whether it’s a school bake sale, an after-school snack, or a cozy night in, these bars fit right in.
- Crowd-Pleaser: Kids love the colorful frosting, and adults appreciate the buttery, tender cookie base.
- Unbelievably Delicious: The soft, chewy texture combined with the creamy, vibrant frosting is like comfort food with a cheerful twist.
- Unique Touch: Instead of rolling and cutting cookies, baking them as bars saves time and mess. The “school frosting” technique uses simple royal icing tinted with vivid colors to recreate those fun, nostalgic frosting moments.
This recipe isn’t just another sugar cookie bar. It’s the one that feels like a warm kitchen on a rainy day, the one you’ll want to make again and again. It’s simple, forgiving, and packed with that subtle homemade charm that makes you close your eyes and savor the moment.
What Ingredients You Will Need
This recipe uses simple, wholesome ingredients to deliver bold flavor and satisfying texture without the fuss. Most are pantry staples, and you can easily swap a few to fit dietary needs or preferences.
- For the Sugar Cookie Bars:
- 1 cup (226g) unsalted butter, softened (I prefer Kerrygold for its creaminess)
- 1 cup (200g) granulated sugar
- 1 large egg, room temperature
- 1 teaspoon pure vanilla extract
- 2 ½ cups (312g) all-purpose flour
- 1 teaspoon baking powder
- ½ teaspoon salt
- For the Colorful School Frosting:
- 3 cups (360g) powdered sugar, sifted
- 2 tablespoons meringue powder
- 5 tablespoons water (adjust for desired consistency)
- Gel food coloring in assorted bright colors (AmeriColor or Wilton brands work great)
- Optional: ½ teaspoon vanilla extract or lemon juice for flavor enhancement
Ingredient tips: Look for meringue powder labeled for royal icing to get that perfect glossy finish. If you want gluten-free bars, swap the all-purpose flour for a 1-to-1 gluten-free baking blend. For dairy-free, use vegan butter sticks. The gel colors let you get vibrant hues without watering down the frosting.
Equipment Needed
- 9×13-inch baking pan (metal or glass works fine; I prefer glass because it heats evenly)
- Mixing bowls (medium and large)
- Electric hand mixer or stand mixer (makes creaming butter and sugar much easier)
- Measuring cups and spoons (for accuracy)
- Spatula (silicone preferred for scraping bowls clean)
- Wire rack (for cooling the bars before frosting)
- Disposable piping bags or small zip-top bags (for piping colorful frosting)
- Fine piping tips (optional, but helpful for neat frosting lines)
If you don’t have a stand mixer, a sturdy hand mixer does the job just fine. For piping, if you don’t have piping bags, simply snip the corner of a zip-top bag and squeeze gently. I’ve found that a silicone spatula lasts longer and scrapes better than plastic ones, so it’s worth the upgrade if you’re baking often.
Preparation Method
- Preheat the oven: Set to 350°F (175°C). Grease your 9×13-inch pan or line it with parchment paper for easier removal. This step helps prevent sticking and makes cleanup a breeze. (5 minutes)
- Cream the butter and sugar: In a large bowl, beat 1 cup softened butter with 1 cup granulated sugar using a hand or stand mixer on medium speed until light and fluffy, about 3-4 minutes. The mixture should look pale and slightly airy—this step is crucial for soft bars.
- Add egg and vanilla: Beat in 1 large egg and 1 teaspoon vanilla extract until fully incorporated. Make sure the egg is room temperature to avoid curdling.
- Mix dry ingredients: In a separate bowl, whisk together 2 ½ cups all-purpose flour, 1 teaspoon baking powder, and ½ teaspoon salt. This ensures even distribution of the leavening agent and salt throughout the dough.
- Combine wet and dry: Gradually add the dry ingredients to the wet mixture, mixing on low speed just until combined. Don’t overmix here; you want the dough tender, not tough. The dough will be soft but manageable.
- Press dough into pan: Transfer the dough to your prepared pan, pressing evenly to cover the bottom. Using slightly damp hands or the back of a flat measuring cup helps smooth the surface without sticking. (5 minutes)
- Bake: Place in oven and bake for 20-25 minutes. The edges should be lightly golden but the center still soft to the touch. Avoid overbaking or the bars will dry out.
- Cool completely: Remove from oven and let cool in the pan on a wire rack for at least 30 minutes before frosting. This step is key to prevent the frosting from melting.
- Prepare the frosting: In a medium bowl, whisk together 3 cups sifted powdered sugar and 2 tablespoons meringue powder. Gradually add 5 tablespoons water, adjusting to get a thick but pipeable consistency. Add vanilla or lemon juice if desired for flavor.
- Divide and color: Split the frosting into separate bowls and tint each with gel food coloring to your liking. Use vibrant, schoolyard colors like red, blue, yellow, and green for a fun look.
- Frost the bars: Using piping bags or zip-top bags with a small snip, pipe stripes, dots, or any colorful pattern you like across the cooled bars. Let the frosting set at room temperature for 1-2 hours until firm.
- Slice and serve: Use a sharp knife to cut into squares or rectangles. Wipe the knife blade clean between cuts for neat edges.
Cooking Tips & Techniques
Getting the texture right on sugar cookie bars can be tricky, but a few tricks help every time. First, don’t skimp on creaming the butter and sugar; that airiness makes the bars tender and soft. Also, measure flour carefully—too much flour makes the bars dry and crumbly.
When mixing, avoid overworking the dough after adding flour; a few streaks of flour are okay. It keeps the bars from toughening up. For frosting, meringue powder is a game-changer—it helps the frosting dry firm without cracking. Adding gel colors slowly lets you control intensity and prevents the frosting from thinning out.
One mistake I made early on was frosting the bars too soon when still warm. That led to a frosting mess. Patience here means a cleaner, prettier finish. Lastly, if you want perfectly straight frosting lines but don’t have piping tools, use a toothpick to nudge and sharpen edges once piped.
Variations & Adaptations
- Dietary swaps: Use almond flour or a gluten-free blend to make these bars gluten-free. Substitute vegan butter and egg replacer for dairy-free and egg-free options.
- Flavor twists: Add a teaspoon of almond extract or lemon zest to the dough for a fresh twist. You can also mix mini chocolate chips or sprinkles into the dough before baking.
- Frosting alternatives: Swap royal icing for a simple cream cheese frosting dyed in your favorite colors for a tangier, softer finish.
- Seasonal themes: Change frosting colors to match holidays—orange and black for Halloween, pastels for spring, or red and green for Christmas.
- Personal favorite: I once tried swirling two frosting colors together for a marbled effect, which was a hit at a kid’s party. It adds visual interest without extra fuss.
Serving & Storage Suggestions
Serve these sugar cookie bars at room temperature to enjoy the soft, buttery crumb and the smooth, firm frosting. They look lovely on a bright plate or a rustic wooden board, especially with a cup of hot tea or cocoa nearby.
Store leftovers in an airtight container at room temperature for up to 3 days or in the fridge for up to a week. For longer storage, freeze unfrosted bars wrapped tightly in plastic, then frost after thawing. To reheat, bring to room temperature before serving to keep the frosting intact.
These bars taste even better the next day, when the flavors meld and the frosting firms up nicely. If refrigerated, let them sit out for 15 minutes before eating so the butter softens slightly.
Nutritional Information & Benefits
Each serving (one bar) roughly contains:
| Calories | 210 kcal |
|---|---|
| Fat | 10g |
| Carbohydrates | 30g |
| Protein | 2g |
The key ingredients—unsalted butter and eggs—offer healthy fats and protein to keep you satisfied. While these bars are a sweet treat, using real butter and fresh eggs keeps them wholesome compared to heavily processed alternatives. For those mindful of gluten or dairy, easy swaps are available without sacrificing taste. The bright frosting is mainly sugar, so moderation is key, but the joy it brings can’t be measured in calories.
Conclusion
These cozy sugar cookie bars with colorful school frosting aren’t just another dessert; they’re a simple pleasure that brings a little brightness and warmth to any day. They’re easy enough for a casual afternoon bake but pretty enough to impress at a party or school event. I love how forgiving the recipe is, making it perfect for those “not really a baker” moments when you want something sweet without stress.
Feel free to tweak the frosting colors, add your own flavors, or swap ingredients to suit your family’s tastes. The best part is how this recipe becomes yours with every batch. If you try it, I’d love to hear how you made it your own—drop a comment or share your colorful frosting creations. Here’s to cozy kitchens and sweet moments shared one bar at a time!
FAQs
- Can I make the sugar cookie bars ahead of time? Yes! You can bake them a day in advance and frost them just before serving, or frost and refrigerate overnight.
- What if I don’t have meringue powder for the frosting? You can substitute with egg whites, but be cautious about food safety. Alternatively, use a simple buttercream or cream cheese frosting.
- How do I keep the frosting from cracking? Avoid making the frosting too thick or too dry. Let it dry at room temperature, not in the fridge, for best results.
- Can I use this recipe to make regular cut-out sugar cookies? Absolutely! The dough works well for rolling and cutting, just chill it for 1 hour before rolling.
- How do I store leftover frosted bars? Keep them in an airtight container at room temperature for up to 3 days or refrigerate for up to a week. Bring to room temperature before eating for best texture.
Pin This Recipe!
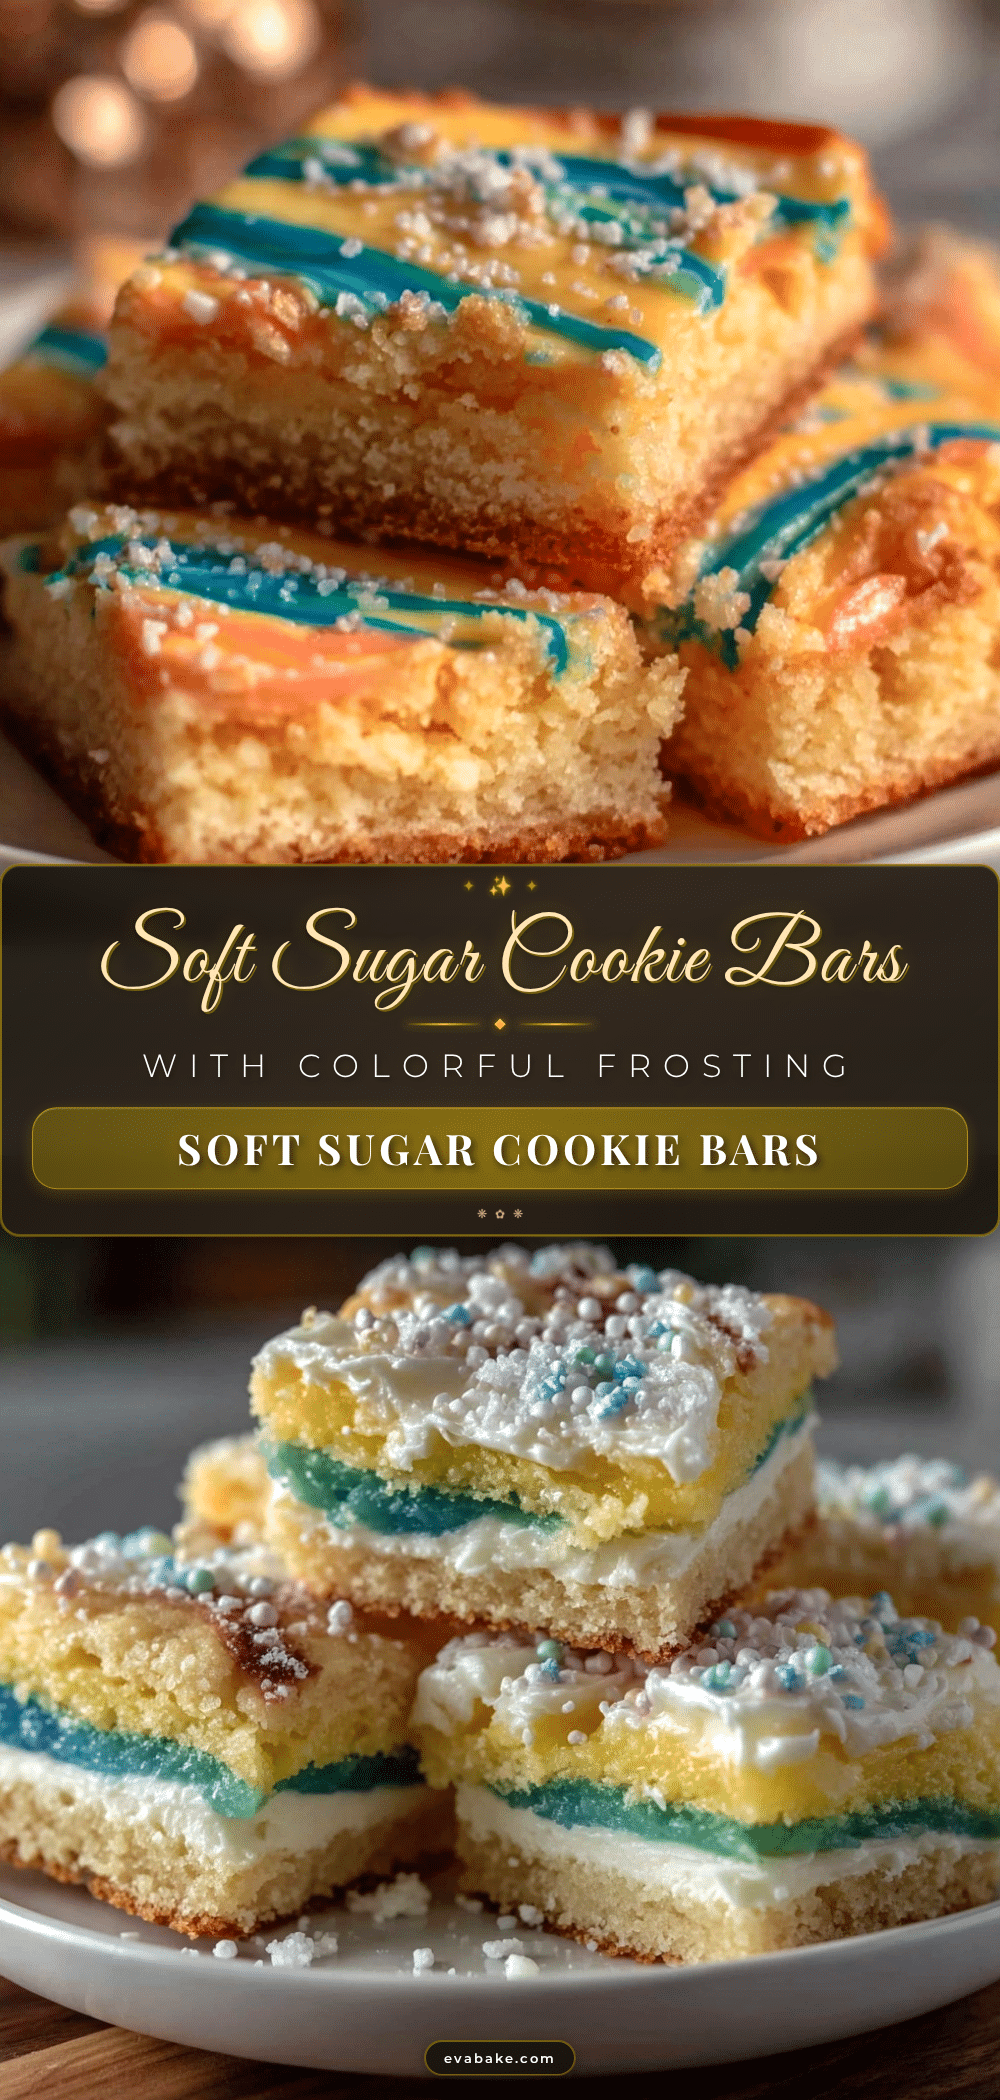
Cozy Sugar Cookie Bars Recipe with Easy Colorful School Frosting Tutorial
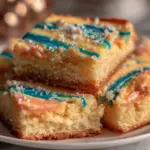
These cozy sugar cookie bars feature a soft, buttery base topped with vibrant, playful school-style frosting. Perfect for a quick, comforting treat that’s easy to make and loved by kids and adults alike.
- Prep Time: 15 minutes
- Cook Time: 25 minutes
- Total Time: 45 minutes
- Yield: 24 bars 1x
- Category: Dessert
- Cuisine: American
Ingredients
- 1 cup (226g) unsalted butter, softened
- 1 cup (200g) granulated sugar
- 1 large egg, room temperature
- 1 teaspoon pure vanilla extract
- 2 ½ cups (312g) all-purpose flour
- 1 teaspoon baking powder
- ½ teaspoon salt
- 3 cups (360g) powdered sugar, sifted
- 2 tablespoons meringue powder
- 5 tablespoons water (adjust for desired consistency)
- Gel food coloring in assorted bright colors
- Optional: ½ teaspoon vanilla extract or lemon juice for frosting flavor
Instructions
- Preheat the oven to 350°F (175°C). Grease a 9×13-inch pan or line it with parchment paper.
- In a large bowl, cream 1 cup softened butter with 1 cup granulated sugar using a mixer on medium speed until light and fluffy, about 3-4 minutes.
- Beat in 1 large egg and 1 teaspoon vanilla extract until fully incorporated.
- In a separate bowl, whisk together 2 ½ cups all-purpose flour, 1 teaspoon baking powder, and ½ teaspoon salt.
- Gradually add the dry ingredients to the wet mixture, mixing on low speed just until combined. Do not overmix.
- Press the dough evenly into the prepared pan using slightly damp hands or the back of a flat measuring cup.
- Bake for 20-25 minutes until edges are lightly golden but center is still soft to the touch.
- Cool completely in the pan on a wire rack for at least 30 minutes before frosting.
- To make frosting, whisk together 3 cups sifted powdered sugar and 2 tablespoons meringue powder in a medium bowl.
- Gradually add 5 tablespoons water, adjusting to a thick but pipeable consistency. Add vanilla or lemon juice if desired.
- Divide frosting into separate bowls and tint each with gel food coloring.
- Pipe colorful frosting patterns onto cooled bars using piping bags or zip-top bags with a small snip.
- Let frosting set at room temperature for 1-2 hours until firm.
- Slice into squares or rectangles using a sharp knife, wiping blade clean between cuts.
Notes
Do not overmix the dough after adding flour to keep bars tender. Cool bars completely before frosting to prevent melting. Use meringue powder for a glossy, firm frosting finish. If piping bags are unavailable, use zip-top bags with a small corner snip. For gluten-free or dairy-free options, substitute flour and butter accordingly.
Nutrition
- Serving Size: 1 bar
- Calories: 210
- Fat: 10
- Carbohydrates: 30
- Protein: 2
Keywords: sugar cookie bars, school frosting, easy dessert, colorful frosting, kid-friendly dessert, quick baking, buttery cookie bars