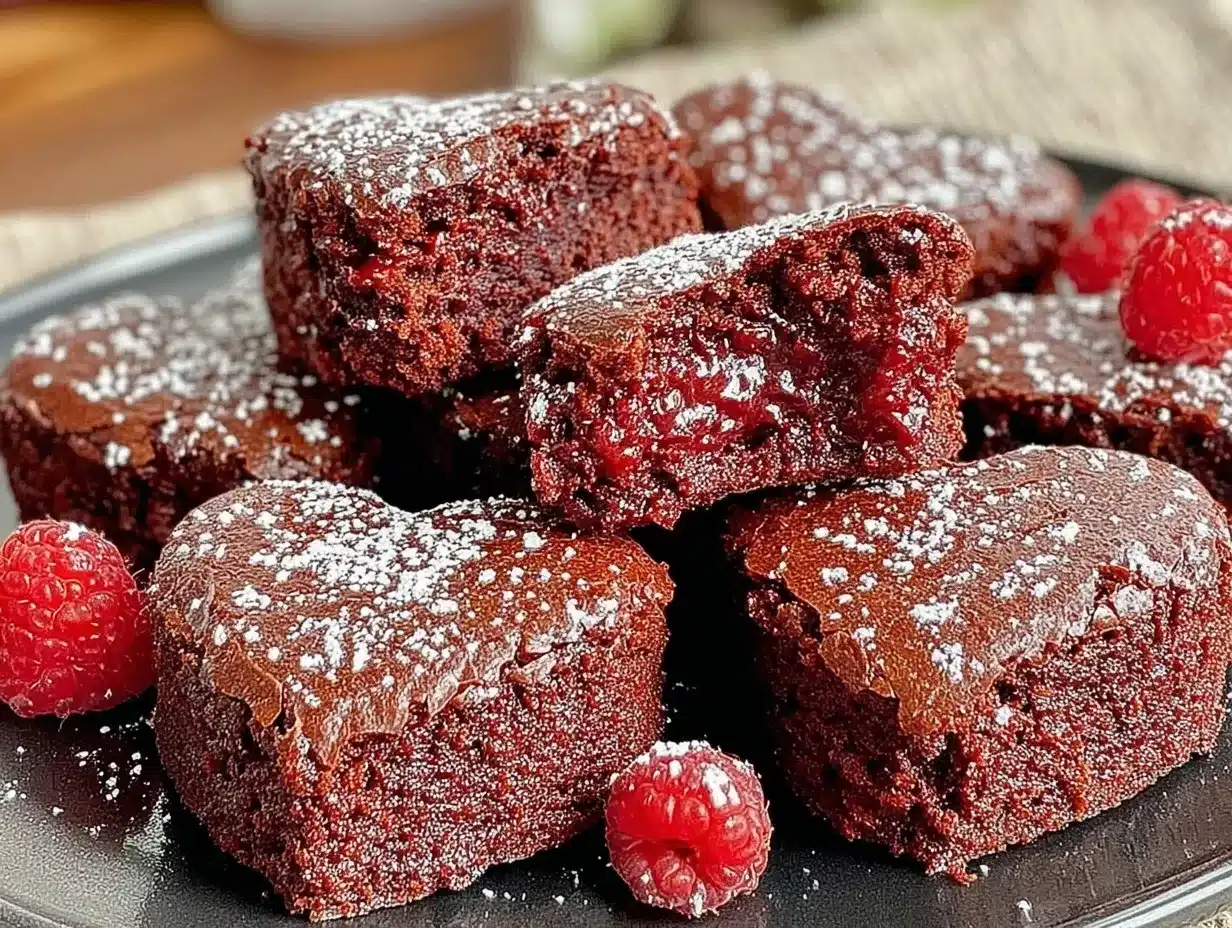
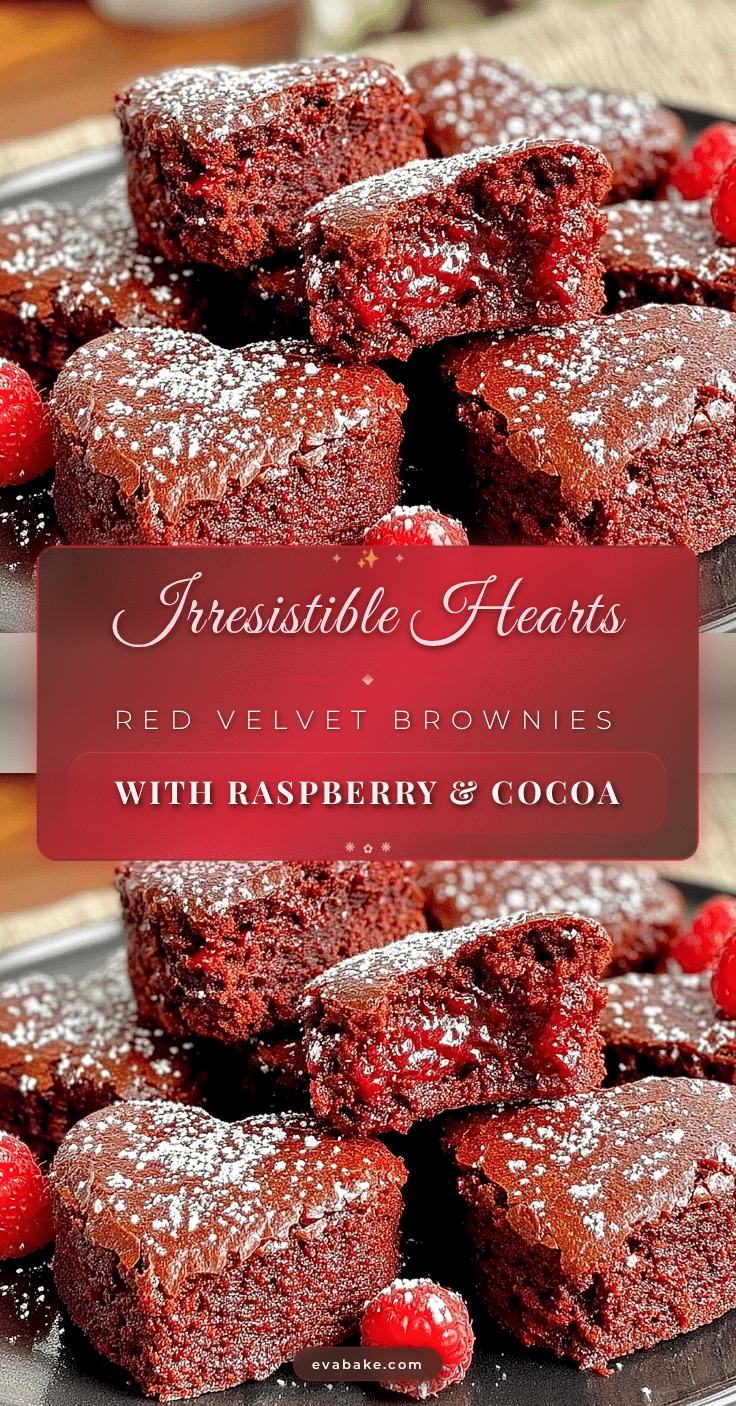
It hits you the second you open the oven door—the sweet, slightly tangy aroma of cocoa and vanilla, swirling together with that unmistakable whiff of melted butter. The glossy, crackly tops shimmer in the light, and beneath the surface, a fudgy red interior promises pure Valentine’s Day magic. I still remember the first time I cut these red velvet brownie hearts out for my daughter’s class party—her eyes lit up, and suddenly the kitchen felt like the happiest corner of the world. That was the kind of moment where you pause, take a deep breath, and just smile because you know you’re onto something truly special.
Growing up, my grandma used to bake classic red velvet cake for every birthday. But I was knee-high to a grasshopper before I realized you could spin that same flavor into brownies. One rainy February afternoon, I tried it—half out of nostalgia, half because I was craving something gooey and chocolatey without waiting for a layer cake to cool. Let’s face it, patience is not my strong suit when brownies are involved. The result? Absolute bliss, and a recipe I wish I’d stumbled upon years ago.
Honestly, these red velvet brownies have become a staple for family gatherings, neighborly gifts, and (let’s be honest) sneaky midnight snacks. My husband claims they’re better than anything from a bakery, and my kids can’t stop sneaking bites off the cooling rack (I can’t blame them). Shaped into hearts, they’re perfect for Valentine’s Day, but I’ve whipped them up for anniversaries, birthdays, and even just because Monday needed a little love.
Dangerously easy, ridiculously pretty, and full of pure, nostalgic comfort—these brownies are everything you want in a sweet treat. After testing them more times than I’ll admit (all in the name of research, of course), I can promise you’re going to want to bookmark this one. The next time you’re searching for the ultimate red velvet brownie, trust me—this recipe will be your new favorite.
Why You’ll Love This Red Velvet Brownie Recipe
I’ve baked countless batches of brownies over the years, but these decadent red velvet brownie hearts stand out for more reasons than I can count. Here’s the inside scoop (from plenty of taste tests and kitchen experiments!):
- Quick & Easy: These brownies come together in under 45 minutes, including bake time. Perfect for when you need a last-minute Valentine’s surprise or a sweet treat for a cozy night in.
- Simple Ingredients: No wild goose chases at the grocery store. You probably have everything you need in your pantry already—just a splash of red food coloring, a handful of cocoa, and the basics.
- Perfect for Special Occasions: Whether you’re whipping them up for Valentine’s Day, anniversaries, or as a thoughtful gift, these heart-shaped brownies always make people smile.
- Crowd-Pleaser: I have yet to meet someone who can resist the fudgy, chocolatey bite of these brownies. They’re kid-approved, but adults go wild for them too (especially with a cup of coffee or a scoop of ice cream).
- Unbelievably Delicious: The combination of a crackly top, a dense and gooey center, and that tangy cream cheese swirl is pure comfort food. It’s the kind of dessert that makes you close your eyes and savor each bite.
So, what makes this red velvet brownie recipe different from the rest? For starters, I blend a touch of white vinegar and buttermilk into the batter for that signature red velvet tang—just like grandma’s cake, but in brownie form. The cocoa isn’t overpowering, so the vanilla shines through, and the heart shapes make them Pinterest-worthy every single time.
This isn’t just another red velvet brownie recipe churned out for clicks; it’s the one I’ve fine-tuned through trial and error. I’ve tested bake times, swapped out flours, and experimented with cream cheese ratios to get the swirl just right. The result? A brownie that’s fudgy but not heavy, bold in flavor without being too sweet, and so pretty you’ll want to show them off.
Why do I keep coming back to these? Because they’re more than dessert—they’re a memory in the making. They’re for those moments when you want to spoil someone (or yourself!) with a treat that feels extra-special but doesn’t require a culinary degree. They’re comfort food reimagined—quicker, cozier, and bursting with love. The next time you need a fail-proof way to make someone’s day, this red velvet brownie recipe is your answer.
What Ingredients You Will Need
This red velvet brownie recipe uses simple, wholesome ingredients to deliver bold flavor and a rich, fudgy texture—no complicated steps or fancy flours required. Most of these are pantry staples, but I’ll share my favorite brands and a few tips for the best results.
- For the Brownie Batter:
- All-purpose flour (120g) – I recommend King Arthur for consistent results.
- Unsalted butter, melted (1/2 cup / 113g) – Use good quality, like Kerrygold, for extra richness.
- Granulated sugar (1 cup / 200g)
- Brown sugar, packed (1/4 cup / 50g) – Adds a hint of caramel flavor and chewiness.
- Large eggs (2), room temperature – This helps the batter blend smoothly.
- Pure vanilla extract (2 tsp / 10ml)
- Unsweetened cocoa powder (2 tbsp / 15g) – Dutch-process or natural both work, but I like Hershey’s Special Dark for a deeper color.
- Red gel food coloring (2 tsp / 10ml) – Gel gives a vivid hue without thinning the batter.
- Buttermilk (1 tbsp / 15ml) – Adds moisture and that classic red velvet tang.
- White vinegar (1/2 tsp / 2ml) – Yes, it sounds odd, but it boosts the tanginess and activates the cocoa. Don’t leave it out!
- Salt (1/4 tsp / 1g)
- For the Cream Cheese Swirl (optional but highly recommended):
- Cream cheese, softened (4 oz / 113g) – Philadelphia brand is always reliable.
- Granulated sugar (2 tbsp / 25g)
- Large egg yolk (1) – Makes the swirl extra creamy.
- Pure vanilla extract (1/2 tsp / 2ml)
- For Cutting & Decorating:
- Heart-shaped cookie cutter (about 2 or 3-inch size)
- Powdered sugar or white chocolate drizzle (for garnish, optional)
- Sprinkles or freeze-dried raspberries (for a pop of color, optional)
Ingredient Tips:
- If you want gluten-free brownies, swap the all-purpose flour for a 1:1 gluten-free baking blend (I’ve had luck with Bob’s Red Mill).
- No buttermilk? Mix 1 tablespoon milk with 1/2 teaspoon lemon juice and let it stand for a minute.
- Dairy-free? Use plant-based butter and vegan cream cheese.
- For deeper chocolate flavor, you can add an extra tablespoon of cocoa powder, but the classic red velvet flavor is all about balance.
- Gel food coloring is less messy than liquid, and you need less of it for a bold red color.
These ingredients are easy to find, easy to swap, and work together to give you that perfect red velvet brownie texture and flavor—no fuss, just sweet results.
Equipment Needed
- 8-inch (20cm) Square Baking Pan: Metal pans work best for even heat. In a pinch, you can use a 9-inch, but reduce bake time by a few minutes.
- Parchment Paper: For easy lifting and neat edges. If you’re out, generously grease the pan with butter.
- Mixing Bowls: One large for the batter, one medium for the cream cheese swirl.
- Whisk & Spatula: A sturdy whisk for the batter, spatula for folding and swirling.
- Measuring Cups & Spoons: Accurate measuring is key—especially for baking.
- Electric Mixer (optional): Makes the cream cheese swirl a breeze, but elbow grease works too.
- Heart-Shaped Cookie Cutter: About 2-3 inches wide. Stainless steel ones keep their shape better. If you don’t have one, use a sharp knife to freehand the hearts—it’s quirky but cute!
- Wire Rack: For cooling. If you don’t own one, let the brownies cool in the pan before cutting.
Honestly, most of these tools are kitchen staples. I’ve made these brownies with just a bowl and a spoon in a rental cabin, and they turned out just fine (though the heart shapes were a bit wonky that time!). If you invest in a quality cookie cutter and a good nonstick pan, you’ll get clean, Pinterest-worthy results every time. Just don’t forget to line your pan—scraping stuck brownies isn’t fun, and trust me, you want every crumb.
How to Make Decadent Red Velvet Brownie Hearts
-
Prep Your Pan & Gather Ingredients (5 minutes):
Line an 8-inch (20cm) square pan with parchment, letting the paper hang over the sides for easy lifting. Preheat oven to 350°F (175°C). Measure all your ingredients—you’ll thank yourself later. -
Make the Brownie Batter (10 minutes):
In a large mixing bowl, whisk 1/2 cup (113g) melted unsalted butter, 1 cup (200g) granulated sugar, and 1/4 cup (50g) brown sugar until glossy and combined. Beat in 2 large eggs, one at a time, stirring until smooth. Mix in 2 teaspoons (10ml) vanilla extract, 2 teaspoons (10ml) red gel food coloring, 1 tablespoon (15ml) buttermilk, and 1/2 teaspoon (2ml) white vinegar. The batter should look velvety and deep red. -
Add the Dry Ingredients (2 minutes):
Sift in 2 tablespoons (15g) unsweetened cocoa powder, 3/4 cup (120g) all-purpose flour, and 1/4 teaspoon (1g) salt. Fold gently with a spatula until just combined—don’t overmix, or your brownies might get cakey. -
Make the Cream Cheese Swirl (5 minutes, optional):
In a separate bowl, beat 4 oz (113g) softened cream cheese, 2 tablespoons (25g) granulated sugar, 1 egg yolk, and 1/2 teaspoon (2ml) vanilla extract until smooth and creamy. -
Assemble & Swirl (3 minutes):
Pour brownie batter into the prepared pan and smooth the top. Dollop spoonfuls of the cream cheese mixture over the batter. Use a butter knife or skewer to gently swirl the two together—don’t overdo it, or you’ll lose those pretty marbled ribbons. -
Bake (22-28 minutes):
Bake on the center rack for 22-28 minutes. The edges should look set, and a toothpick inserted in the center should come out with a few moist crumbs (not raw batter). If you like fudgier brownies, check at 22 minutes; for cakier, let them go a bit longer. -
Cool Completely (at least 30 minutes):
This part is tough, but let the brownies cool fully in the pan on a wire rack! Warm brownies are too soft to cut into hearts (and the cream cheese swirl sets as they cool). -
Cut Into Hearts:
Lift the cooled brownies out by the parchment. Press your heart-shaped cookie cutter firmly into the slab, wiggling a little to get clean edges. If the cutter sticks, dip it in hot water and wipe dry between cuts. -
Decorate (optional):
Dust with powdered sugar, drizzle with melted white chocolate, or sprinkle with festive toppings. Go wild! -
Serve & Enjoy:
Arrange on a platter or package in little treat bags for gifting. Watch them disappear!
Troubleshooting Tips:
- If the brownies seem raw in the center, bake for 2-3 more minutes and check again.
- Crumbly brownies? They were probably overbaked or your flour measurement was off—scoop and level, don’t pack!
- Can’t get clean shapes? Chill the entire slab in the fridge for 20 minutes before cutting.
My favorite trick: keep a warm, damp cloth nearby to wipe your cookie cutter clean after each cut. It makes for bakery-perfect hearts every time.
Cooking Tips & Techniques for the Best Red Velvet Brownies
- Use Gel Food Coloring: It’s less messy than liquid and gives your brownies a vibrant, true-red color without thinning the batter. I learned this the hard way after one too many pale-pink batches!
- Don’t Overmix: Once you add the flour, mix just until you can’t see any dry streaks. Overmixing makes for tough, dry brownies (I’ve been there, trust me).
- Swirl Gently: For the prettiest marbled effect, use a light hand when swirling. Drag a skewer or butter knife through the batter in figure-eights. Too much swirling, and you’ll lose those beautiful ribbons.
- Watch the Bake Time: Every oven is a little different. Start checking at 22 minutes. The edges should be set, but the center should still look a bit soft—brownies firm up as they cool. Overbaking dries them out fast.
- Cool Completely Before Cutting: This is the hardest part, but it really matters. Warm brownies fall apart or stick to your cutter. I sometimes pop the whole pan in the fridge to speed things up (impatience is my middle name).
- Cookie Cutter Issues: If your cutter sticks, dip it in hot water and wipe dry between cuts. It’s a little detail that makes a big difference in presentation—especially if you’re sharing photos on Pinterest or Instagram.
- Make-Ahead Tip: Brownies taste even better the next day. The flavors deepen, and the texture is extra fudgy.
- Don’t Fear the Vinegar: A tiny splash boosts the cocoa’s flavor and gives you that signature tang. You won’t taste “vinegar” in the final product—just trust the process!
Honestly, every batch teaches me something new—like the time I forgot the parchment and spent ten minutes chiseling brownies out of the pan. Learn from my mistakes, and you’ll have bakery-perfect red velvet brownie hearts every time.
Red Velvet Brownie Variations & Adaptations
- Gluten-Free: Swap the all-purpose flour for a 1:1 gluten-free baking blend. I’ve tried Bob’s Red Mill with great results—nobody could even tell the difference!
- Dairy-Free: Use vegan butter and plant-based cream cheese for the swirl. Silk or Violife are my go-to brands for a creamy, dairy-free finish.
- Nutty Twist: Fold in 1/2 cup (60g) chopped pecans or walnuts for a crunchy surprise. Toast the nuts first for extra flavor.
- Extra Chocolatey: Stir in 1/2 cup (85g) mini chocolate chips or drizzle with melted dark chocolate after baking.
- Cheesecake Layer: Double the cream cheese swirl for a thick, tangy cheesecake brownie. Bake an extra 3-5 minutes to set the layer fully.
- Fruity Swirl: Drop spoonfuls of raspberry or strawberry jam into the batter and swirl for a berry-kissed Valentine’s Day treat.
- No Cookie Cutter? Simply cut the cooled brownies into squares or triangles. They’ll still taste dreamy!
I once made these with a gluten-free friend in mind, and the batch vanished before anyone realized they were allergen-friendly. Whether you need to adjust for dietary needs or just want to try a new flavor combo, this red velvet brownie recipe is super flexible. Sometimes I’ll even swap the heart shape for stars or circles when I want to mix things up—because love comes in all shapes, right?
Serving & Storage Suggestions
These red velvet brownie hearts are best served at room temperature for ultimate fudginess. I love arranging them on a pretty platter, dusting with powdered sugar, and adding a few fresh berries for a pop of color. If you’re feeling extra, a drizzle of melted white chocolate or a scoop of vanilla ice cream takes things over the top.
- For Gifting: Stack two or three hearts in clear treat bags, tie with a ribbon, and voilà—Pinterest-worthy Valentine’s gifts!
- Pairings: Serve with hot coffee, a mug of cocoa, or a glass of cold milk (my kids’ favorite combo). For grown-ups, a little espresso or red wine is pure bliss.
- Storing: Keep brownies in an airtight container at room temp for up to 3 days. They stay moist and chewy, though I doubt they’ll last that long.
- Freezing: Wrap individual hearts in plastic wrap and pop them in a zip-top bag. Freeze for up to 2 months. To serve, thaw at room temperature or microwave for 10 seconds for a warm, gooey treat.
- Flavor Tip: The brownies actually taste even better on day two—the red velvet flavor deepens, and the texture becomes super fudgy.
Pro tip: If you’re prepping for a party or classroom event, bake and cut the brownies a day ahead, then decorate right before serving. Easy, stress-free, and always a hit!
Nutritional Information & Benefits
Each red velvet brownie heart (about 1/12 of the batch) contains approximately:
- Calories: 210
- Fat: 10g
- Carbohydrates: 28g
- Protein: 3g
Key ingredients like cocoa powder provide a small boost of antioxidants, and the cream cheese adds a little calcium. These brownies are naturally nut-free (unless you add nuts), and you can easily make them gluten-free or dairy-free with the swaps above. If you need to avoid eggs or dairy, see the variations section for simple alternatives. As always, enjoy in moderation—though with treats this good, that’s easier said than done!
From a wellness perspective, I love that you can control the ingredients—no preservatives or artificial stuff, just classic homemade flavor. And honestly, a little chocolate now and then is good for the soul.
Conclusion
If you’re searching for the ultimate red velvet brownie recipe, this one is a keeper. It’s rich, fudgy, and filled with that classic red velvet flavor, all wrapped up in a heart-shaped package that’s sure to impress. Whether you’re baking for Valentine’s Day, a birthday, or just because, these brownies deliver every single time.
Don’t be afraid to play around—try different shapes, add a swirl, or toss in some chocolate chips. That’s the beauty of a recipe like this: it’s forgiving and fun. These red velvet brownie hearts have become a tradition in my family, and I hope they bring as much joy to your table as they do to ours.
If you make them, let me know in the comments! I love seeing your creations and hearing about your twists and tips. Pin this recipe, share it with a friend, or bookmark it for your next baking day. Here’s to sweet moments, big smiles, and brownies that taste like a warm hug. Happy baking!
FAQs About Red Velvet Brownie Hearts
Can I make these brownies without a heart-shaped cutter?
Absolutely! Simply cut the cooled brownies into squares, rectangles, or any shape you like. The taste stays just as delicious, even if the shape isn’t fancy.
Can I use natural food coloring instead of gel?
Yes, but the color might be less vibrant. Beet powder or natural red food coloring works, but you may need a little extra to achieve a bold red hue.
How do I know when the brownies are done baking?
Start checking at 22 minutes. The edges should look set, and a toothpick inserted in the center should come out with a few moist crumbs (but not wet batter). They’ll firm up as they cool.
What’s the best way to store leftovers?
Store brownies in an airtight container at room temperature for up to 3 days, or freeze individually wrapped hearts for up to 2 months. Thaw at room temperature before serving.
Can I double the recipe for a bigger batch?
Yes! Double all the ingredients and bake in a 9×13-inch (23x33cm) pan. Start checking for doneness around 28-32 minutes.
Pin This Recipe!
Red Velvet Brownie
These decadent red velvet brownies are fudgy, rich, and swirled with a tangy cream cheese layer. Perfect for Valentine’s Day, birthdays, or any occasion that calls for a sweet, nostalgic treat.
- Prep Time: 15 minutes
- Cook Time: 22-28 minutes
- Total Time: 45 minutes
- Yield: 12 heart-shaped brownies 1x
- Category: Dessert
- Cuisine: American
Ingredients
- 3/4 cup (120g) all-purpose flour
- 1/2 cup (113g) unsalted butter, melted
- 1 cup (200g) granulated sugar
- 1/4 cup (50g) brown sugar, packed
- 2 large eggs, room temperature
- 2 teaspoons (10ml) pure vanilla extract
- 2 tablespoons (15g) unsweetened cocoa powder
- 2 teaspoons (10ml) red gel food coloring
- 1 tablespoon (15ml) buttermilk
- 1/2 teaspoon (2ml) white vinegar
- 1/4 teaspoon (1g) salt
- For the Cream Cheese Swirl (optional):
- 4 oz (113g) cream cheese, softened
- 2 tablespoons (25g) granulated sugar
- 1 large egg yolk
- 1/2 teaspoon (2ml) pure vanilla extract
- For Cutting & Decorating:
- Powdered sugar or white chocolate drizzle (optional)
- Sprinkles or freeze-dried raspberries (optional)
Instructions
- Line an 8-inch (20cm) square pan with parchment paper, letting the paper hang over the sides for easy lifting. Preheat oven to 350°F (175°C). Measure all your ingredients.
- In a large mixing bowl, whisk together melted butter, granulated sugar, and brown sugar until glossy and combined.
- Beat in eggs, one at a time, stirring until smooth. Mix in vanilla extract, red gel food coloring, buttermilk, and white vinegar until the batter is velvety and deep red.
- Sift in cocoa powder, flour, and salt. Fold gently with a spatula until just combined. Do not overmix.
- For the cream cheese swirl (optional): In a separate bowl, beat softened cream cheese, granulated sugar, egg yolk, and vanilla extract until smooth and creamy.
- Pour brownie batter into the prepared pan and smooth the top. Dollop spoonfuls of the cream cheese mixture over the batter. Use a butter knife or skewer to gently swirl the two together.
- Bake on the center rack for 22-28 minutes. The edges should look set, and a toothpick inserted in the center should come out with a few moist crumbs.
- Let the brownies cool completely in the pan on a wire rack (at least 30 minutes).
- Lift the cooled brownies out by the parchment. Press your heart-shaped cookie cutter firmly into the slab to cut shapes. If the cutter sticks, dip it in hot water and wipe dry between cuts.
- Decorate with powdered sugar, melted white chocolate, or sprinkles as desired.
- Arrange on a platter or package in treat bags for gifting. Serve and enjoy!
Notes
For gluten-free brownies, use a 1:1 gluten-free flour blend. For dairy-free, substitute plant-based butter and vegan cream cheese. Brownies taste even better the next day as the flavors deepen. If you don’t have a heart-shaped cutter, simply cut into squares. Chill brownies before cutting for clean shapes. Don’t overbake for fudgy texture.
Nutrition
- Serving Size: 1 heart-shaped brown
- Calories: 210
- Sugar: 20
- Sodium: 90
- Fat: 10
- Saturated Fat: 6
- Carbohydrates: 28
- Fiber: 1
- Protein: 3
Keywords: red velvet brownies, Valentine’s Day dessert, cream cheese swirl brownies, fudgy brownies, heart-shaped brownies, easy brownies, homemade brownies