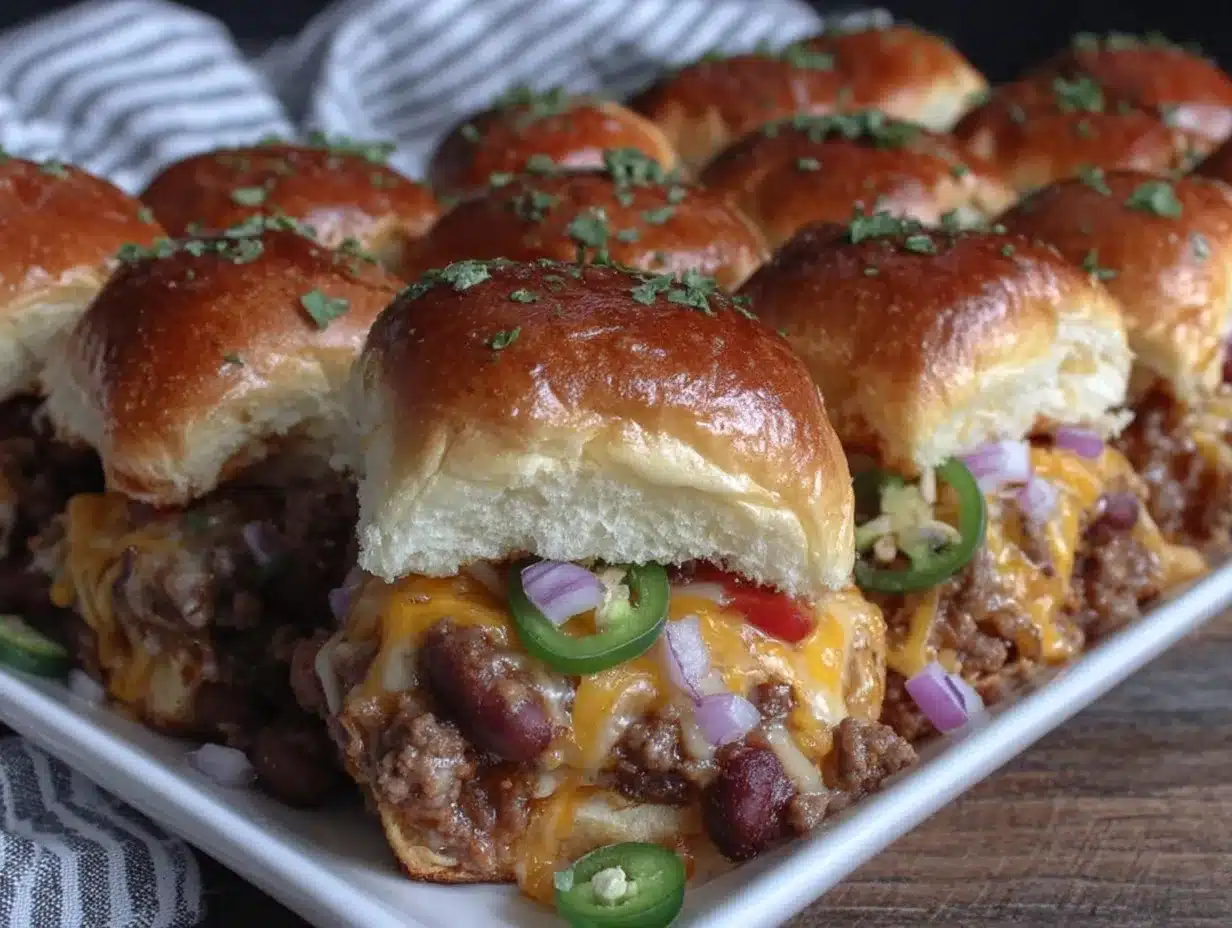
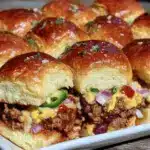
Picture this: the room buzzing with anticipation, jerseys everywhere, and the unmistakable aroma of sizzling hot dogs, tangy chili, and freshly baked slider buns filling the air. That’s what happened at our house last Super Bowl Sunday when I pulled a pan of these savory Super Bowl chili dog sliders out of the oven. The cheese was bubbling, the tops were golden and a little crisp, and the chili was just begging to ooze out with every bite. Honestly, it’s the sort of smell that drags everyone into the kitchen before you can even set plates out. There’s something about chili dogs that just feels like pure celebration and comfort—like you’re a kid again at a tailgate or backyard cookout.
The first time I made these chili dog sliders, I was trying to recreate that stadium vibe at home. I’d seen versions floating around Pinterest, but let’s face it—most were either way too messy or kind of bland. So, one rainy weekend, I decided to experiment until I nailed it (and, you know what, my family didn’t complain about being test subjects). That first bite was one of those “pause and smile” moments—warm, tangy, meaty, and just the right amount of melty cheese. The kind of food that makes you want to high-five the cook (even if that’s just you).
It didn’t take long for these chili dog sliders to become a game day staple. My kids can’t resist sneaking one off the tray, and my husband? Well, I caught him “taste-testing” more than once before kickoff. They’re dangerously easy to assemble, ridiculously fun to eat, and perfect for sharing—whether you’re hosting a crowd or just want a simple, comforting dinner that brings everyone to the table. If you want to brighten up your Pinterest board, impress your friends, or just find a new favorite for family movie night, keep this recipe handy. I’ve tested and retested (all in the name of research, of course), and every single time, these sliders come out a winner. Trust me, you’re going to want to bookmark this one.
Why You’ll Love These Super Bowl Chili Dog Sliders
- Quick & Easy: You can have these crowd-pleasers on the table in under 45 minutes, which means more time cheering and less time in the kitchen.
- Simple Ingredients: No weird stuff here—just hot dogs, good chili, soft slider buns, cheese, and a few flavor-boosters you probably already have.
- Perfect for Game Day Gatherings: These sliders are built for sharing. They’re portable, hand-held, and irresistibly snackable, making them the ultimate finger food for your Super Bowl spread.
- Crowd-Pleaser: I’ve yet to meet a person—kid or adult—who didn’t grab a second (or third) slider. They’re a guaranteed hit, even with picky eaters.
- Unbelievably Delicious: The combo of smoky, snappy hot dogs, rich chili, gooey cheese, and sweet, buttery buns is honestly next-level. It’s like a chili dog and a slider had the most glorious food baby.
What sets my Super Bowl chili dog sliders recipe apart? I use a quick stovetop chili with a hint of smoked paprika and cumin for depth (not just canned chili here!), and I brush the buns with a buttery, garlicky topping that gets them perfectly golden. I’ve also found that slicing the hot dogs in half lengthwise lets you get that perfect hot dog-in-every-bite ratio, so no one ends up with a sad, bun-only corner.
As someone who’s made more than a few game day appetizers, I can tell you: these sliders are the kind that disappear before halftime. They’re fast, fun, and comforting—no forks, no fuss, just pure, shareable joy. Whether you’re a chili dog fanatic or just want something new for the big game, these sliders are a total win. And honestly? They’re just as tasty the next day (if you’re lucky enough to have leftovers). They’re the kind of food that brings everyone together, makes your kitchen feel like the heart of the party, and leaves you with zero regrets—except maybe not making a double batch.
What Ingredients You Will Need
This Super Bowl chili dog sliders recipe is all about bold flavors and easy prep. Most of these ingredients are pantry or fridge staples, but you can swap in what you’ve got if needed. Here’s what you’ll need to make a batch big enough for a hungry game day crowd:
- For the Sliders:
- 12 slider buns or Hawaiian rolls (soft, pull-apart style; King’s Hawaiian is my go-to for that sweet, pillowy texture)
- 6 hot dogs, cut in half lengthwise (I like using all-beef franks for the best snap—Nathan’s or Hebrew National are winners)
- 1 ½ cups (about 360 ml) chili (homemade or your favorite canned; I’ll share a quick stovetop chili below if you want to go the extra mile)
- 1 ½ cups (170 g) shredded cheddar cheese (sharp or medium, or swap in Monterey Jack for a milder melt)
- ½ cup (60 g) chopped onions (optional, but adds a nice crunch and bite)
- Pickled jalapeños, sliced (optional, for a touch of heat)
- For the Quick Stovetop Chili (if making from scratch):
- ½ pound (225 g) ground beef or turkey
- 1 small onion, finely diced
- 2 cloves garlic, minced
- 1 (8 oz / 227 g) can tomato sauce
- 1 tablespoon chili powder
- ½ teaspoon cumin
- ½ teaspoon smoked paprika
- Salt and pepper to taste
- For the Buttery Topping:
- 3 tablespoons (45 g) unsalted butter, melted
- 1 teaspoon garlic powder
- 1 teaspoon dried parsley or chives
- 1 teaspoon poppy seeds (optional, for a classic slider look)
Ingredient Tips & Swaps:
- Buns: If you can’t find slider buns, use dinner rolls and slice them horizontally; just make sure they’re soft and pull-apart style for that classic look.
- Hot Dogs: Turkey or plant-based hot dogs work great for lighter or vegetarian versions.
- Chili: Canned chili is a solid shortcut, but if you have extra time, homemade chili makes all the difference in flavor.
- Cheese: Pre-shredded works, but freshly grated cheese melts smoother.
- Onions & Jalapeños: Totally optional—leave them out for picky eaters or swap for sweet bell peppers for less heat.
Everything here is easy to double or halve depending on your crowd. In summer, I sometimes add fresh chopped tomatoes or swap in sweet corn for a twist. And if you’re gluten-free, use your favorite GF buns and check your hot dogs and chili for hidden wheat—some brands sneak it in!
Equipment Needed
You don’t need a fancy kitchen to pull off these Super Bowl chili dog sliders. Here’s what I use every time (and a few budget-friendly swaps if you’re in a pinch):
- 9×13-inch (23×33 cm) baking dish or sheet pan: Glass, ceramic, or metal all work. If you only have a slightly smaller or bigger dish, just adjust the number of sliders—no stress.
- Sharp knife or bread knife: For slicing the buns in half evenly and splitting the hot dogs lengthwise.
- Medium skillet: For making quick stovetop chili (if you go the homemade route). Nonstick is easiest for cleanup.
- Small saucepan or microwave-safe bowl: For melting the butter for your topping.
- Pastry brush (optional): Handy for spreading that buttery topping evenly over the buns, but you can use the back of a spoon if needed.
- Measuring cups and spoons: To make sure you get the ratios just right.
I’ve made these using a disposable foil pan for easy cleanup (especially when bringing them to a friend’s house). If you don’t have a pastry brush, a clean paper towel works in a pinch for spreading the butter. For the chili, any deep skillet will do—just keep an eye on the simmer so it doesn’t scorch. And if you want to keep things extra tidy, line your baking dish with parchment paper.
Preparation Method
- Preheat & Prep: Preheat your oven to 350°F (175°C). Lightly grease a 9×13-inch (23×33 cm) baking dish or line with parchment paper for easy cleanup.
- Make the Quick Chili (if using homemade): In a medium skillet over medium heat, add ½ pound (225 g) ground beef or turkey. Cook, breaking it up, until browned and cooked through (about 5-6 minutes). Drain any excess fat. Add 1 small diced onion and 2 minced garlic cloves; cook until softened, about 2 minutes. Stir in 1 can (8 oz / 227 g) tomato sauce, 1 tablespoon chili powder, ½ teaspoon cumin, ½ teaspoon smoked paprika, and salt and pepper to taste. Simmer for 10 minutes, stirring occasionally. The chili should be thick but still spoonable.
- Slice the Slider Buns: Keeping the buns attached, carefully slice them in half horizontally using a serrated knife. Place the bottom halves in your prepared baking dish.
- Layer the Hot Dogs: Arrange the split hot dogs evenly over the bottom buns—one half per slider. They should fit snugly; if your buns are smaller, trim the hot dogs as needed.
- Add the Chili: Spoon the chili evenly over the hot dogs. Don’t be afraid to get generous, but avoid drenching the buns (soggy bottoms are no fun). Use about 1-2 tablespoons per slider.
- Cheese It Up: Sprinkle 1 ½ cups (170 g) shredded cheddar cheese evenly over the chili layer. Add chopped onions and pickled jalapeños if you like a little bite and heat.
- Top and Butter: Place the top halves of the buns over the cheese layer. In a small bowl, mix 3 tablespoons (45 g) melted butter with 1 teaspoon garlic powder, 1 teaspoon dried parsley or chives, and 1 teaspoon poppy seeds (if using). Brush this mixture generously over the tops of the buns.
- Bake: Cover the dish loosely with foil and bake for 15 minutes. Remove the foil and bake another 8-10 minutes, until the cheese is melted and the tops are golden brown and a bit crispy.
- Cool & Serve: Let the sliders cool for 5 minutes (trust me, the cheese is lava-hot right out of the oven). Use a spatula to separate and serve. They’re best eaten warm, but honestly, they’re still fantastic at room temp.
Prep Tips:
- If your chili is too soupy, simmer a bit longer to thicken. You want it scoopable, not runny.
- Use a serrated knife for clean bun slices—press gently to avoid squishing.
- To save time, prep the chili and slice the hot dogs ahead of time. Assemble and bake when you’re ready!
Don’t stress if a little cheese escapes or the chili peeks out—those crispy edges are the best bites. And if the buns brown too quickly, loosely tent with foil. I’ve learned the hard way not to rush the cooling step—those first few molten bites have burned more than one eager taste-tester in my house!
Cooking Tips & Techniques
After making these Super Bowl chili dog sliders for more gatherings than I can count, I’ve picked up a few tricks (and made a few messes) along the way:
- Even Layering is Key: Make sure your chili is thick and not too watery. If it’s too loose, the buns will soak it up and turn soggy—nobody likes a mushy slider.
- Slice Hot Dogs Lengthwise: Slicing them in half gives you better coverage and makes every bite feel balanced. If you leave them whole, someone always gets a bite of just bun.
- Don’t Overload: Pile on the chili, but leave a little room for the cheese to melt and seal everything together. Too much chili, and you’ll be stuck with a messy pile (tasty, but hard to serve).
- Butter Topping Magic: Don’t skip the buttery topping! It helps the buns brown evenly and adds that rich, garlicky finish. I once forgot it, and the sliders just weren’t the same.
- Bake Covered, Then Uncovered: This two-step bake keeps the sliders soft and gooey inside but crisps up the tops perfectly. If you leave the foil on the whole time, you’ll miss that irresistible golden crust.
- Let Them Cool Slightly: I know it’s tempting, but let the sliders rest for a few minutes before cutting. The cheese sets up, and you won’t lose half your filling to the spatula.
- Batch Cooking: Making sliders for a huge crowd? Prep two trays, bake side by side, and keep the first batch warm in a low oven (about 200°F/95°C) while the second batch bakes.
Honestly, the first time I made these for a crowd, I tried to skip the cooling step—big mistake! Now, I always let them rest, and they hold together perfectly. If your buns start to get too brown, just tent with foil for the last few minutes. A little patience goes a long way with these sliders.
Variations & Adaptations
One of the best things about this Super Bowl chili dog sliders recipe is how customizable it is. Here are a few of my favorite ways to mix things up:
- Vegetarian Version: Use vegetarian or vegan hot dogs and swap in a hearty lentil or black bean chili. Vegan cheese melts beautifully, too—just check labels for your favorite brand.
- Low-Carb/Keto: Use almond flour buns or lettuce wraps. Opt for turkey dogs and a beanless chili to keep carbs in check.
- Spicy Southwest Sliders: Stir chopped chipotle peppers into your chili, add pepper jack cheese, and top with pickled jalapeños for an extra kick.
- Cheesy Garlic Bread Sliders: Mix shredded mozzarella with the cheddar and add a sprinkle of parmesan on top before baking for an even more indulgent, pizza-inspired bite.
- Gluten-Free: Use gluten-free slider buns (Schar and Canyon Bakehouse make good ones) and double-check your hot dogs and chili ingredients for hidden gluten.
I’ve also tried making these on the grill in a foil pan for summer cookouts—they get a smoky flavor that’s hard to beat. If you’re feeding little ones, keep the chili mild and skip the jalapeños. And for anyone allergic to dairy, swap in your favorite non-dairy cheese or just skip the cheese layer (they’re still deliciously saucy!).
The possibilities are endless. Sometimes I add chopped bell peppers to the chili for sneaky veggies, or use turkey hot dogs for a lighter twist. The best part? You can make a few different versions in the same pan—just section them off with a strip of foil. Everyone gets what they want, and you look like a genius.
Serving & Storage Suggestions
These Super Bowl chili dog sliders are at their best fresh from the oven, but they’re pretty forgiving if you need to keep them warm or save a few for later (if you’re lucky enough to have leftovers!).
- Serving Temperature: Serve them hot for melty cheese and the perfect chili-to-bun ratio. If they cool off, a quick reheat in the oven does the trick.
- Presentation Ideas: Place the whole tray on a board with a spatula for self-serve style, or arrange sliders on a platter with extra toppings (diced onions, jalapeños, ketchup, mustard) on the side.
- Pairings: These sliders are awesome with crunchy coleslaw, crispy potato chips, or a simple green salad. For drinks, you can’t go wrong with ice-cold sodas, beer, or lemonade.
- Storage: Leftover sliders can be wrapped tightly in foil or stored in an airtight container in the refrigerator for up to 3 days. The buns might soften a bit, but they’re still super tasty.
- Reheating: Warm in the oven at 300°F (150°C) for about 10 minutes, or microwave individual sliders for 30 seconds. If you want to crisp the tops, use a toaster oven.
Pro tip: If you’re prepping ahead, assemble the sliders (minus the buttery topping), cover, and refrigerate. Add the butter and bake just before serving—your kitchen will smell incredible, and you’ll look like a snack-time superstar. Flavors get even better as they sit, so don’t worry if things meld together a bit!
Nutritional Information & Benefits
Here’s a rough estimate for each Super Bowl chili dog slider (based on using beef hot dogs, standard buns, and homemade chili):
- Calories: About 270 per slider
- Protein: 10g
- Carbohydrates: 24g
- Fat: 14g
- Fiber: 2g
These sliders have a nice balance of protein and carbs, making them filling enough for a main dish but not so heavy you’ll miss kickoff. If you go with turkey or veggie dogs and lean ground turkey in the chili, you can cut the fat and calories. The onions and optional jalapeños add a little vitamin C and zing. Just watch for allergens: standard recipes contain wheat (buns), dairy (cheese and butter), and possibly soy or gluten in some hot dog and chili brands. From my own experience, swapping in gluten-free buns and dairy-free cheese works beautifully for friends with allergies, so everyone can dig in without worry.
Conclusion
When it comes to game day, you want food that’s easy, shareable, and—let’s be real—a little bit irresistible. These Super Bowl chili dog sliders check all those boxes and then some. They’re fun to make, even more fun to eat, and always the first thing gone at our house. Whether you tweak them to fit your crew’s tastes or stick with the classic version, you really can’t go wrong.
Honestly, this is one of my favorite recipes because it brings everyone together—no forks, no fuss, just hands-on, cheesy, chili goodness. I hope you give these a try for your next party (or just a cozy night in). Let me know how you make them your own—drop a comment, share with your friends, or pin this recipe for later. Go ahead, bookmark it—you’ll be glad you did next time game day rolls around. Happy snacking, and may the best team win!
Frequently Asked Questions
Can I make Super Bowl chili dog sliders ahead of time?
Yes! Assemble the sliders up to the buttery topping, cover, and refrigerate for up to 24 hours. Add the butter just before baking. They bake up perfectly and taste just as fresh.
What’s the best way to keep sliders warm for a party?
Keep them covered with foil in a low oven (200°F/95°C) until you’re ready to serve. They’ll stay warm and melty without drying out.
Can I use canned chili instead of homemade?
Absolutely. Use your favorite canned chili to save time. Just make sure it’s thick enough so the sliders don’t get soggy.
Are these sliders freezer-friendly?
Yes! Bake, cool completely, then wrap tightly in foil and freeze for up to 2 months. Reheat wrapped in the oven at 325°F (160°C) until warmed through.
What’s the best way to make these gluten-free or dairy-free?
Use gluten-free slider buns and check your hot dogs and chili for hidden gluten. For dairy-free sliders, use vegan cheese and plant-based butter—they melt and taste great in this recipe!
Pin This Recipe!
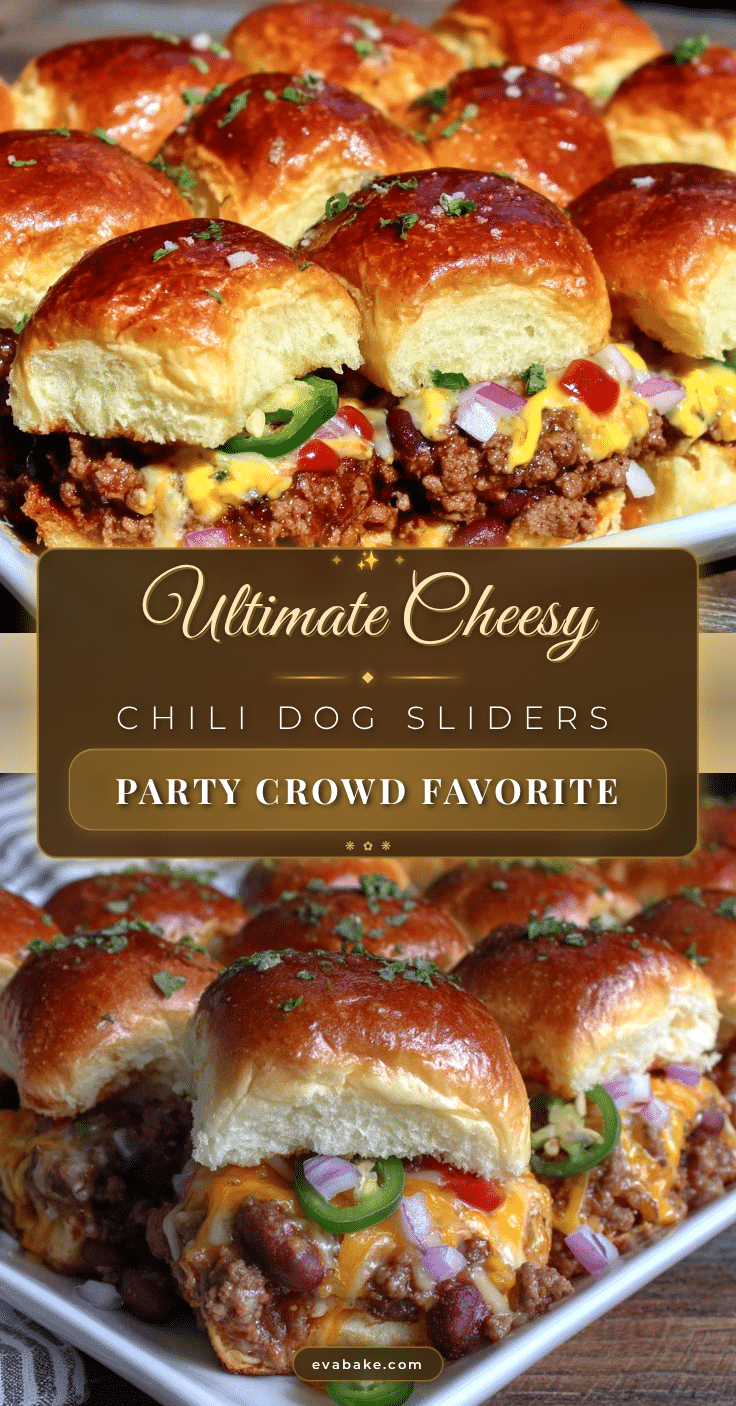
Super Bowl Chili Dog Sliders
These Super Bowl chili dog sliders are the ultimate game day crowd-pleaser, featuring hot dogs, tangy chili, melty cheese, and buttery slider buns baked to golden perfection. Quick to assemble and easy to customize, they’re perfect for sharing at any party or family gathering.
- Prep Time: 15 minutes
- Cook Time: 25 minutes
- Total Time: 40 minutes
- Yield: 12 sliders 1x
- Category: Appetizer
- Cuisine: American
Ingredients
- 12 slider buns or Hawaiian rolls (soft, pull-apart style; King’s Hawaiian recommended)
- 6 hot dogs, cut in half lengthwise (all-beef franks preferred)
- 1 1/2 cups chili (homemade or canned)
- 1 1/2 cups shredded cheddar cheese
- 1/2 cup chopped onions (optional)
- Pickled jalapeños, sliced (optional)
- 3 tablespoons unsalted butter, melted
- 1 teaspoon garlic powder
- 1 teaspoon dried parsley or chives
- 1 teaspoon poppy seeds (optional)
- For homemade chili (optional):
- 1/2 pound ground beef or turkey
- 1 small onion, finely diced
- 2 cloves garlic, minced
- 1 (8 oz) can tomato sauce
- 1 tablespoon chili powder
- 1/2 teaspoon cumin
- 1/2 teaspoon smoked paprika
- Salt and pepper to taste
Instructions
- Preheat your oven to 350°F (175°C). Lightly grease a 9×13-inch baking dish or line with parchment paper.
- If making homemade chili: In a medium skillet over medium heat, cook ground beef or turkey until browned (about 5-6 minutes). Drain excess fat. Add diced onion and minced garlic; cook until softened, about 2 minutes. Stir in tomato sauce, chili powder, cumin, smoked paprika, salt, and pepper. Simmer for 10 minutes until thick but spoonable.
- Keeping the slider buns attached, slice them in half horizontally. Place the bottom halves in the prepared baking dish.
- Arrange the split hot dogs evenly over the bottom buns.
- Spoon chili evenly over the hot dogs (about 1-2 tablespoons per slider).
- Sprinkle shredded cheddar cheese evenly over the chili. Add chopped onions and pickled jalapeños if desired.
- Place the top halves of the buns over the cheese layer.
- In a small bowl, mix melted butter with garlic powder, dried parsley or chives, and poppy seeds (if using). Brush this mixture generously over the tops of the buns.
- Cover the dish loosely with foil and bake for 15 minutes. Remove foil and bake another 8-10 minutes, until cheese is melted and tops are golden brown.
- Let sliders cool for 5 minutes before serving. Use a spatula to separate and serve warm.
Notes
For gluten-free sliders, use GF buns and check hot dogs and chili for hidden gluten. For dairy-free, use vegan cheese and plant-based butter. Let sliders cool slightly before serving to avoid burns. If making ahead, assemble up to the buttery topping, refrigerate, then bake before serving. Leftovers can be stored in the fridge for up to 3 days or frozen for up to 2 months.
Nutrition
- Serving Size: 1 slider
- Calories: 270
- Sugar: 4
- Sodium: 650
- Fat: 14
- Saturated Fat: 7
- Carbohydrates: 24
- Fiber: 2
- Protein: 10
Keywords: chili dog sliders, Super Bowl appetizers, game day food, party sliders, easy chili dogs, crowd-pleaser, baked sliders, hot dog sliders