My niece stared at the cooling cookie cake, her face scrunched in concentration. “It doesn’t look like a spiderweb,” she declared, arms crossed. I’d promised we’d make something spooky together for her Halloween party at school, and honestly, what I’d pulled from the oven looked more like a happy accident than a web. The cookie base was perfectly golden, sure, but it was just a round, flat disc of chocolate chip goodness. Not exactly terrifying.
Then I grabbed the piping bag filled with warm chocolate ganache. I started swirling, and something clicked. The glossy, dark chocolate ribbons began to weave across the surface, and with a quick drag of a toothpick from the center outward, the magic happened. The web appeared, clean and intentional, like it had always been there. My niece gasped, and I knew we’d stumbled onto something special. That first bite, with the crisp edges and the fudgy center, sealed the deal. We ended up making three more that week for various Halloween get-togethers, and honestly, I wasn’t mad about it.
This Perfect Spiderweb Halloween Cookie Cake with Chocolate Ganache isn’t just a pretty face. It’s the kind of dessert that makes people stop and ask, “Wait, you made that?” The best part? It’s deceptively simple. You get the satisfying chew of a giant chocolate chip cookie, topped with a silky, rich ganache that just happens to look like a masterpiece. No artistic talent required — just a steady hand and a toothpick. It’s become my go-to for spooky season, and I have a feeling it’ll become yours too.
Why You’ll Love This Recipe
Let’s be real — Halloween baking can be a total headache. Between the complicated fondant decorations and the finicky candy melts, it’s easy to get overwhelmed. This cookie cake flips the script. It delivers maximum visual impact with minimal actual effort. Here’s why it’s a keeper:
- One Giant Cookie, Zero Stress: Forget rolling out individual cookies. You press this dough into one pan, bake it, and you’re halfway there. It’s the lazy baker’s dream come true.
- No Fancy Equipment: You don’t need a stand mixer or special piping tips. A bowl, a spoon, and a piping bag (or even a zip-top bag with a corner snipped off) are all you need.
- Perfect for Halloween Parties: This cake is a showstopper on any dessert table. It’s easy to slice and serve, and kids and adults alike go nuts for the spiderweb design.
- Rich, Not Overwhelming: The cookie base is buttery and chewy, and the chocolate ganache is smooth and decadent without being cloying. It’s the perfect balance of textures and flavors.
- Make-Ahead Friendly: You can bake the cookie base a day in advance and add the ganache the day of your party. It actually gets better as it sits — the flavors meld together beautifully.
I’ve tested this recipe a dozen times, tweaking the ratios until the cookie stayed soft in the center and the ganache set with that perfect, glossy sheen. It’s the kind of dessert that makes you look like a hero with very little work. Honestly, that’s my favorite kind of recipe.
What Ingredients You Will Need
This recipe relies on pantry staples, which is exactly what you want when you’re already juggling Halloween decorations and costume planning. Each ingredient plays a specific role, and I’ll walk you through why they matter.
For the Cookie Cake Base
- 1 ½ cups (190g) all-purpose flour: The foundation of the cookie. I use unbleached all-purpose flour for the best texture. Spoon it into your measuring cup and level it off with a knife — don’t scoop directly from the bag or you’ll pack in too much flour, resulting in a dry cookie.
- ½ teaspoon baking soda: This helps the cookie spread just enough while still holding its shape. Too much, and it’ll puff up and deflate. Too little, and it’ll be dense.
- ½ teaspoon salt: A crucial ingredient that balances the sweetness and enhances the chocolate flavor. I prefer fine sea salt for even distribution.
- ½ cup (113g) unsalted butter, softened: Butter brings richness and flavor. Make sure it’s truly softened — you should be able to press a finger into it and leave an indent. Don’t melt it, or the cookie will spread too thin.
- ½ cup (100g) granulated sugar: Adds sweetness and helps create those slightly crispy edges.
- ½ cup (100g) packed light brown sugar: This is the secret to a chewy, tender center. The molasses in brown sugar adds moisture and a subtle caramel flavor.
- 1 large egg, at room temperature: Binds everything together and adds structure. A cold egg can seize the butter, so let it sit out for 30 minutes before you start.
- 1 teaspoon vanilla extract: Pure vanilla extract is worth the splurge here. It rounds out the flavors beautifully.
- 1 cup (170g) semi-sweet chocolate chips: I’m partial to Ghirardelli or Guittard for their rich flavor and smooth melt. You can also use dark chocolate chips if you prefer a less sweet cookie.
For the Chocolate Ganache
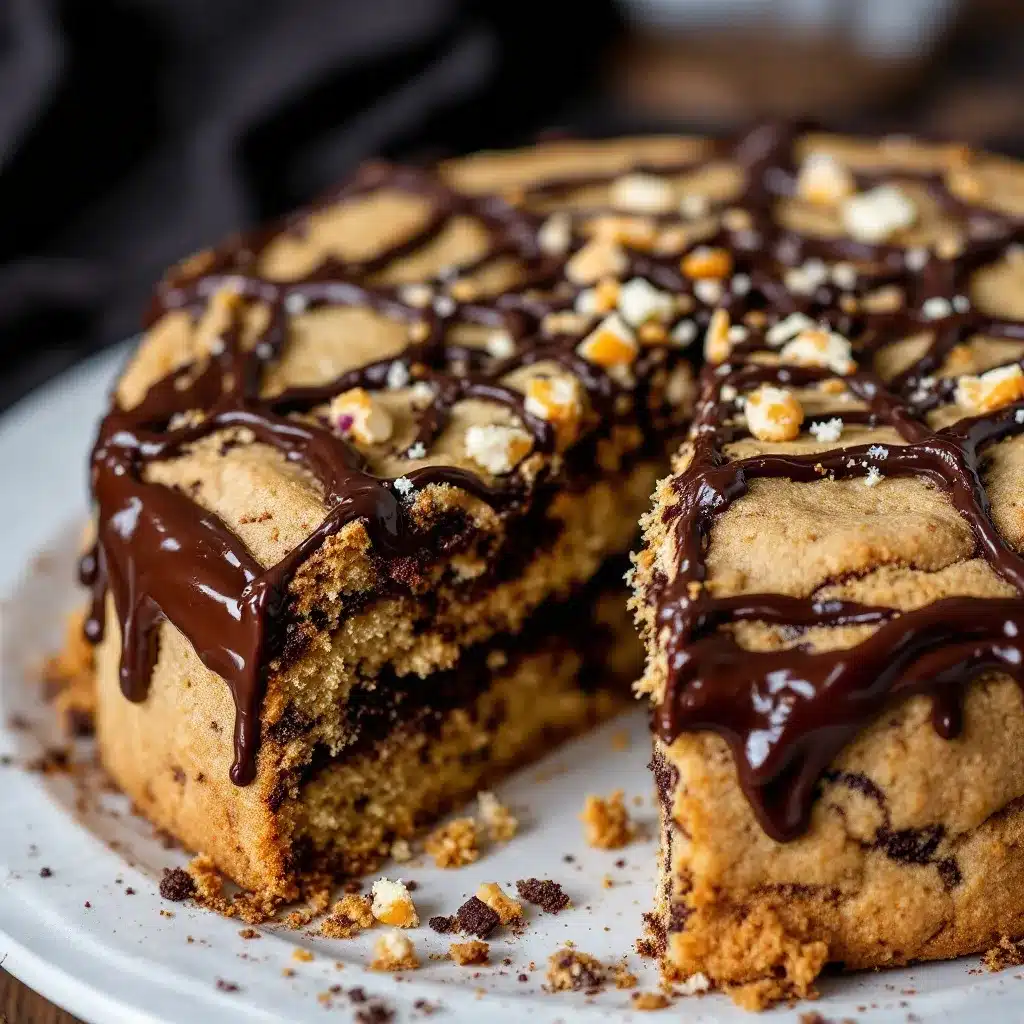
- ½ cup (120ml) heavy cream: The higher the fat content, the richer and glossier your ganache will be. Don’t substitute half-and-half or milk — the ganache won’t set properly.
- 1 cup (170g) semi-sweet chocolate chips or finely chopped chocolate: Again, quality matters. I’ve had the best luck with chocolate bars chopped into small pieces, but good-quality chips work perfectly too.
- 1 tablespoon unsalted butter: This adds a beautiful shine and a touch of extra creaminess to the ganache.
That’s it. Ten ingredients, and you’re on your way to a show-stopping Halloween dessert. The beauty of this recipe is its simplicity — no weird extracts or hard-to-find decorations required.
Equipment Needed
You don’t need a fully stocked bakery to pull this off. Here’s what you’ll want to have on hand:
- 9-inch round cake pan or springform pan: A springform pan makes it easier to remove the cookie cake cleanly, but a regular cake pan lined with parchment works great too.
- Parchment paper: Non-negotiable. Line the bottom of your pan so the cookie lifts out without sticking.
- Mixing bowls: One large bowl for the dry ingredients and one for the wet ingredients.
- Electric hand mixer or stand mixer: A hand mixer is perfectly fine here. You could even do it by hand with a wooden spoon if you’re feeling strong, but the mixer makes creaming the butter and sugars much easier.
- Rubber spatula: For folding in the chocolate chips and scraping down the bowl.
- Small saucepan: For heating the cream for the ganache. You can also use a microwave-safe bowl.
- Piping bag or zip-top bag: For creating the spiderweb design. A small round piping tip (like Wilton #3 or #4) gives you more control, but snipping the corner of a zip-top bag works in a pinch.
- Toothpick or skewer: The star of the show. This is what creates the web effect.
- Cooling rack: Essential for letting the cookie cool completely before adding the ganache.
I’ve made this with both a springform pan and a regular cake pan, and honestly, both work. If you’re using a regular pan, just make sure to run a knife around the edge before you flip it out. A tip from someone who learned the hard way — let the cookie cool completely in the pan before you try to move it. It’s fragile when warm.
Preparation Method
Alright, let’s get to the good part. Here’s how to make this spiderweb cookie cake from start to finish. Take your time with each step — the results are worth it.
Step 1: Prep Your Pan and Oven
Preheat your oven to 350°F (175°C). Grease a 9-inch round cake pan or springform pan, then line the bottom with a circle of parchment paper. This step is crucial — the cookie will release cleanly without any tearing. Set the pan aside.
Step 2: Mix the Dry Ingredients
In a medium bowl, whisk together 1 ½ cups (190g) all-purpose flour, ½ teaspoon baking soda, and ½ teaspoon salt. Whisking aerates the flour and ensures the leavening is evenly distributed. Set this bowl aside.
Step 3: Cream the Butter and Sugars
In a large mixing bowl, beat ½ cup (113g) softened unsalted butter with ½ cup (100g) granulated sugar and ½ cup (100g) packed light brown sugar until light and fluffy. This should take about 2-3 minutes with a hand mixer on medium speed. You’re looking for a pale, creamy mixture that’s noticeably lighter in color. Scrape down the sides of the bowl with a rubber spatula halfway through.
Step 4: Add the Egg and Vanilla
Add 1 large room-temperature egg and 1 teaspoon vanilla extract to the butter-sugar mixture. Beat on medium speed until fully combined, about 30 seconds. The mixture might look slightly curdled — that’s totally normal. Don’t overmix at this stage.
Step 5: Combine Wet and Dry Ingredients
Gradually add the dry flour mixture to the wet ingredients, mixing on low speed until just combined. Stop the mixer as soon as you no longer see streaks of flour. Overmixing at this point will develop the gluten and make your cookie cake tough.
Step 6: Fold in the Chocolate Chips
Using a rubber spatula, gently fold 1 cup (170g) semi-sweet chocolate chips into the dough. Make sure they’re evenly distributed throughout. The dough will be thick and slightly sticky — that’s exactly what you want.
Step 7: Press the Dough into the Pan
Transfer the dough to your prepared pan. Use your fingers or the back of a spoon to press it into an even layer. Don’t press too hard — just smooth it out so it’s level. The dough should be about ½-inch thick.
Step 8: Bake the Cookie Cake
Bake for 18-22 minutes, or until the edges are golden brown and the center is just set. The center should look slightly puffed but still soft when you gently press it. A toothpick inserted into the center should come out with a few moist crumbs, not wet batter. Every oven runs a little differently, so start checking at 18 minutes. My oven usually takes exactly 20 minutes.
Step 9: Cool Completely
Let the cookie cake cool in the pan on a wire rack for 10 minutes. Then run a knife around the edge if needed, and carefully transfer the cookie cake (still on the parchment) to the cooling rack. Let it cool completely — this is important. A warm cookie will melt the ganache into a puddle.
Step 10: Make the Ganache
While the cookie cools, make the ganache. Place 1 cup (170g) semi-sweet chocolate chips in a heatproof bowl. In a small saucepan, heat ½ cup (120ml) heavy cream over medium heat until it just begins to simmer — you’ll see small bubbles around the edges. Don’t let it boil vigorously. Pour the hot cream over the chocolate chips and let it sit for 2-3 minutes without stirring. Then add 1 tablespoon unsalted butter and gently whisk until the mixture is smooth and glossy. If there are a few stubborn lumps, microwave it in 10-second bursts, stirring between each, until smooth.
Step 11: Create the Spiderweb Design
Let the ganache cool for about 5 minutes — it should still be pourable but not hot. Transfer the ganache to a piping bag fitted with a small round tip (or a zip-top bag with a tiny corner snipped off). Pipe a spiral of ganache onto the cooled cookie cake, starting from the center and working your way outward. The spiral should have about 1-inch gaps between the lines. Immediately, before the ganache sets, use a toothpick to drag lines from the center outward through the spiral. Wipe the toothpick clean after each line. You’ll see the web pattern emerge! Repeat this step, dragging lines from the center to the edge, until you’ve gone all the way around.
Step 12: Let the Ganache Set
Allow the spiderweb cookie cake to sit at room temperature for about 30 minutes so the ganache can set. If you’re in a hurry, you can pop it in the fridge for 15 minutes. The ganache should be firm to the touch but still glossy.
Cooking Tips & Techniques
I’ve made this cookie cake more times than I care to count, and I’ve learned a few things along the way. Here are the tips that make the biggest difference:
Don’t Overbake the Cookie. This is the number one mistake people make. The cookie will continue to bake from residual heat as it cools on the counter. If you bake it until it looks fully done in the oven, it’ll be dry and hard by the time it cools. Pull it out when the edges are golden and the center is still soft and slightly puffy.
Room Temperature Ingredients Matter. I know, I know — it’s an extra step. But cold butter won’t cream properly with the sugar, and a cold egg can seize the butter mixture. Set your butter and egg out on the counter 30-45 minutes before you start. Your cookie will thank you.
Patience with the Ganache. The ganache needs to cool slightly before you pipe it. If it’s too hot, it’ll run right off the cookie and create a mess. If it’s too cold, it’ll be too thick to pipe smoothly. Aim for a consistency that’s like warm honey — pourable but not runny.
The Toothpick Trick. For the cleanest spiderweb design, wipe your toothpick clean after each drag. If you don’t, the ganache will smear and the lines will look muddy. I keep a small bowl of water and a paper towel handy for this.
Chill for Clean Slices. For the neatest slices, refrigerate the assembled cookie cake for about 20 minutes before cutting. Use a sharp knife and wipe it clean between cuts. This is especially helpful if you’re serving it at a party and want those Instagram-worthy slices.
I once made the mistake of piping the ganache onto a warm cookie — it turned into a chocolate soup situation. Not my finest moment. Learn from my error and wait until the cookie is completely cool.
Variations & Adaptations
One of the best things about this recipe is how customizable it is. Here are a few ways to make it your own:
White Chocolate Spiderweb: Swap the semi-sweet chocolate chips in the ganache for white chocolate chips. The contrast of the white web against a dark chocolate cookie base is striking. Just be careful — white chocolate can seize more easily, so make sure your cream isn’t too hot.
Peanut Butter Twist: Add ¼ cup (60g) creamy peanut butter to the cookie dough along with the butter. The peanut butter adds a savory note that pairs beautifully with the chocolate ganache. If you’re feeling extra, drizzle some melted peanut butter over the top along with the ganache.
Gluten-Free Option: Substitute the all-purpose flour with a 1:1 gluten-free baking flour blend. I’ve tested this with Bob’s Red Mill 1:1 Baking Flour, and it works perfectly. The texture is slightly more tender, but the flavor is spot on.
Spooky Sprinkle Edition: Before the ganache sets completely, sprinkle the edges of the cookie cake with orange and black Halloween sprinkles. It adds a fun crunch and a pop of color. My niece loves this version — she calls it the “party web.”
Dark Chocolate Lover’s Version: Use dark chocolate chips (60-70% cacao) in both the cookie and the ganache. The bitterness of the dark chocolate cuts through the sweetness of the cookie base, creating a more sophisticated dessert. This is my personal favorite for adult gatherings.
I’ve tried a version with a pumpkin coffee cake twist by adding ¼ cup of pumpkin puree and a teaspoon of pumpkin pie spice to the cookie dough. It was delicious, but the texture was a bit more cake-like than cookie-like. Still worth trying if you’re feeling adventurous!
Serving & Storage Suggestions
This spiderweb cookie cake is best served at room temperature. The cookie is soft and chewy, and the ganache is firm but still melts in your mouth. Here’s how to serve and store it:
Serving: Slice the cookie cake into wedges like a pizza. I usually get 8-10 generous slices from a 9-inch cake. Serve it on its own, or go all out with a scoop of vanilla ice cream and a drizzle of caramel sauce. For a Halloween party, arrange the slices on a platter and garnish with a few candy spiders or gummy worms — the kids go crazy for it.
Storage: Store any leftovers in an airtight container at room temperature for up to 3 days. The cookie will stay soft, and the ganache will remain glossy. If your kitchen is warm, you can store it in the refrigerator, but let it come to room temperature before serving — the cookie will be too firm straight from the fridge.
Freezing: You can freeze the baked, undecorated cookie cake for up to 2 months. Wrap it tightly in plastic wrap, then in a layer of aluminum foil. When you’re ready to use it, thaw it at room temperature, then make the ganache and decorate. The ganache doesn’t freeze well, so always add it fresh.
Make-Ahead Tip: I often bake the cookie base a day or two before I need it. Once it’s completely cool, I wrap it in plastic wrap and store it at room temperature. The day of the party, I make the ganache and decorate. It’s one less thing to worry about when you’re already stressed about costumes and decorations.
If you’re serving this at a Halloween party, consider pairing it with a Halloween coffee bar for a truly spooky spread. The black sesame latte is surprisingly good with the chocolate cookie.
Nutritional Information & Benefits
Let’s be honest — this is a treat, not a health food. But here’s a rough estimate of what you’re working with per slice (based on 10 slices):
- Calories: Approximately 380-420 per slice
- Fat: 22g
- Carbohydrates: 48g
- Protein: 5g
- Sugar: 32g
That said, there are a few bright spots. Dark chocolate is rich in antioxidants and can help lower blood pressure. The butter and cream provide a good dose of Vitamin A, and the egg adds a bit of protein. But let’s not pretend this is anything other than a delicious, indulgent Halloween treat.
If you’re looking for a healthier option for the kids’ lunchboxes, I’d recommend checking out these no-bake peanut butter energy balls instead. They’re perfect for school snacks and won’t have the sugar crash.
As always, this recipe contains gluten, dairy, and eggs. If you have allergies, please check the variations section for substitution ideas.
Conclusion
This Perfect Spiderweb Halloween Cookie Cake with Chocolate Ganache is the dessert you’ve been looking for. It’s impressive enough to steal the show at any Halloween party, yet simple enough to whip up on a Tuesday night when you’re craving something sweet. The combination of a soft, chewy chocolate chip cookie base and a silky, glossy ganache is pure magic — and the spiderweb design is the kind of detail that makes people think you spent hours on it.
I love this recipe because it brings people together. There’s something about the process of piping the ganache and dragging the toothpick through it that feels almost meditative. And when you finally cut into that first slice and see the web pattern? Pure satisfaction.
Don’t be afraid to make this your own. Swap the chocolate chips for white chocolate, add some sprinkles, or go wild with a peanut butter version. The base recipe is forgiving and versatile. And if you make it, I’d love to hear about it. Drop a comment below and let me know how it turned out — did the spiderweb work? Did the kids love it? Did you eat the whole thing in one sitting? (No judgment here.)
Frequently Asked Questions
Can I use a different size pan for this cookie cake?
Absolutely. You can use an 8-inch pan for a thicker cookie cake — just increase the baking time by 3-5 minutes. For a 10-inch pan, the cookie will be thinner, so reduce the baking time by 2-3 minutes. Keep an eye on it and use the visual cues (golden edges, soft center) to determine doneness.
Why did my ganache turn out grainy?
Grainy ganache usually happens when the cream is too hot or when water gets into the chocolate. Make sure your cream is just simmering, not boiling. Also, avoid using a wooden spoon to stir — wood can retain moisture. A whisk or rubber spatula is best. If your ganache does seize, you can try whisking in a tablespoon of warm cream to smooth it out.
Can I make this recipe dairy-free?
Yes, with a few substitutions. Use a high-quality vegan butter (like Miyoko’s) in the cookie base, and replace the heavy cream in the ganache with full-fat coconut cream from a can. Use dairy-free chocolate chips. The texture will be slightly different, but it’s still delicious. I’ve tested this with a friend who’s lactose intolerant, and she gave it two thumbs up.
How do I get clean slices without the ganache smearing?
Chill the cookie cake in the refrigerator for about 20 minutes before slicing. Use a sharp, thin-bladed knife and wipe it clean with a damp paper towel between each cut. This gives you those beautiful, Instagram-worthy slices without the messy edges.
Can I use store-bought cookie dough instead of making it from scratch?
You can, but I wouldn’t recommend it. Homemade cookie dough has a much better texture and flavor, and it’s honestly not much more work. If you’re really short on time, use a high-quality refrigerated dough and press it into the pan. Just know that the texture will be more cake-like and less chewy. The ganache will still save the day, though!
Pin This Recipe!
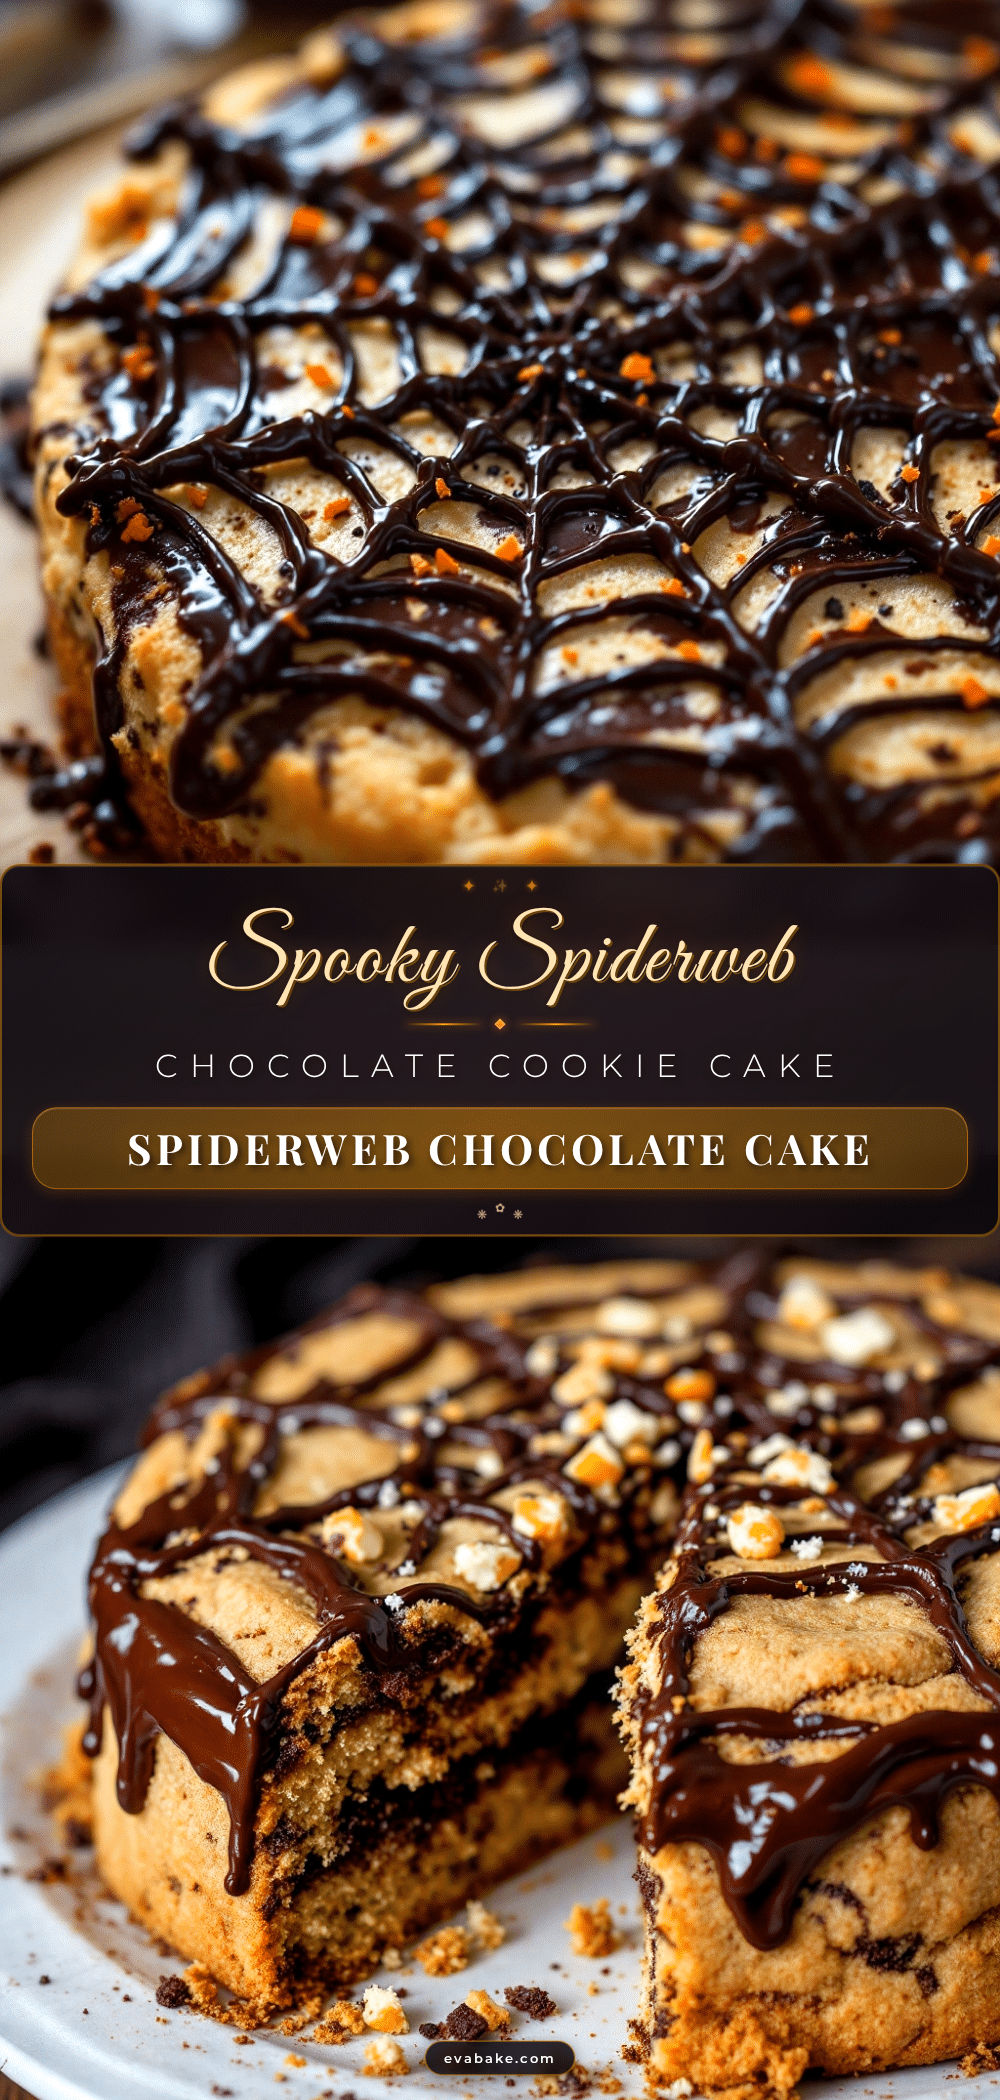
Perfect Spiderweb Halloween Cookie Cake with Easy Ganache
A giant chocolate chip cookie cake topped with a silky chocolate ganache spiderweb design. This deceptively simple Halloween dessert delivers maximum visual impact with minimal effort, requiring no artistic talent—just a steady hand and a toothpick.
- Prep Time: 20 minutes
- Cook Time: 20 minutes
- Total Time: 40 minutes
- Yield: 8-10 servings 1x
- Category: Dessert
- Cuisine: American
Ingredients
- 1 ½ cups (190g) all-purpose flour
- ½ teaspoon baking soda
- ½ teaspoon salt
- ½ cup (113g) unsalted butter, softened
- ½ cup (100g) granulated sugar
- ½ cup (100g) packed light brown sugar
- 1 large egg, at room temperature
- 1 teaspoon vanilla extract
- 1 cup (170g) semi-sweet chocolate chips
- ½ cup (120ml) heavy cream
- 1 cup (170g) semi-sweet chocolate chips or finely chopped chocolate
- 1 tablespoon unsalted butter
Instructions
- Preheat oven to 350°F (175°C). Grease a 9-inch round cake pan or springform pan and line the bottom with parchment paper.
- In a medium bowl, whisk together flour, baking soda, and salt.
- In a large bowl, beat softened butter, granulated sugar, and brown sugar until light and fluffy (2-3 minutes).
- Add egg and vanilla extract; beat until combined.
- Gradually add dry ingredients to wet ingredients, mixing on low until just combined.
- Fold in 1 cup semi-sweet chocolate chips with a rubber spatula.
- Press dough evenly into prepared pan (about ½-inch thick).
- Bake 18-22 minutes until edges are golden and center is just set. Cool in pan 10 minutes, then transfer to wire rack to cool completely.
- For ganache: Place 1 cup chocolate chips in a heatproof bowl. Heat heavy cream until simmering, pour over chocolate, let sit 2-3 minutes, then add 1 tablespoon butter and whisk until smooth.
- Let ganache cool 5 minutes until pourable but not hot. Transfer to piping bag with small round tip.
- Pipe a spiral of ganache onto cooled cookie cake starting from center outward, leaving 1-inch gaps. Immediately drag a toothpick from center outward through spiral lines, wiping clean after each line.
- Let ganache set at room temperature 30 minutes (or 15 minutes in fridge) until firm but glossy.
Notes
Don’t overbake the cookie—it continues to cook from residual heat. Room temperature ingredients are important for proper creaming. For clean slices, chill the assembled cookie cake 20 minutes before cutting. The ganache should be like warm honey consistency for piping. Wipe toothpick clean after each drag for best spiderweb design.
Nutrition
- Serving Size: 1 slice (based on 10
- Calories: 400
- Sugar: 32
- Sodium: 180
- Fat: 22
- Saturated Fat: 13
- Carbohydrates: 48
- Fiber: 2
- Protein: 5
Keywords: Halloween cookie cake, spiderweb cookie, chocolate ganache, chocolate chip cookie cake, Halloween dessert, easy Halloween recipe, giant cookie


