My sister-in-law, Jen, wasn’t trying to impress anyone. I’d stopped by to drop off a casserole dish I’d borrowed, and the smell hit me before I even got through the front door. It was warm, spicy, and sweet all at once, like Christmas had been distilled into a single scent. I stood there in the hallway, holding the dish, just breathing it in.
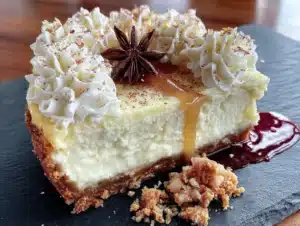
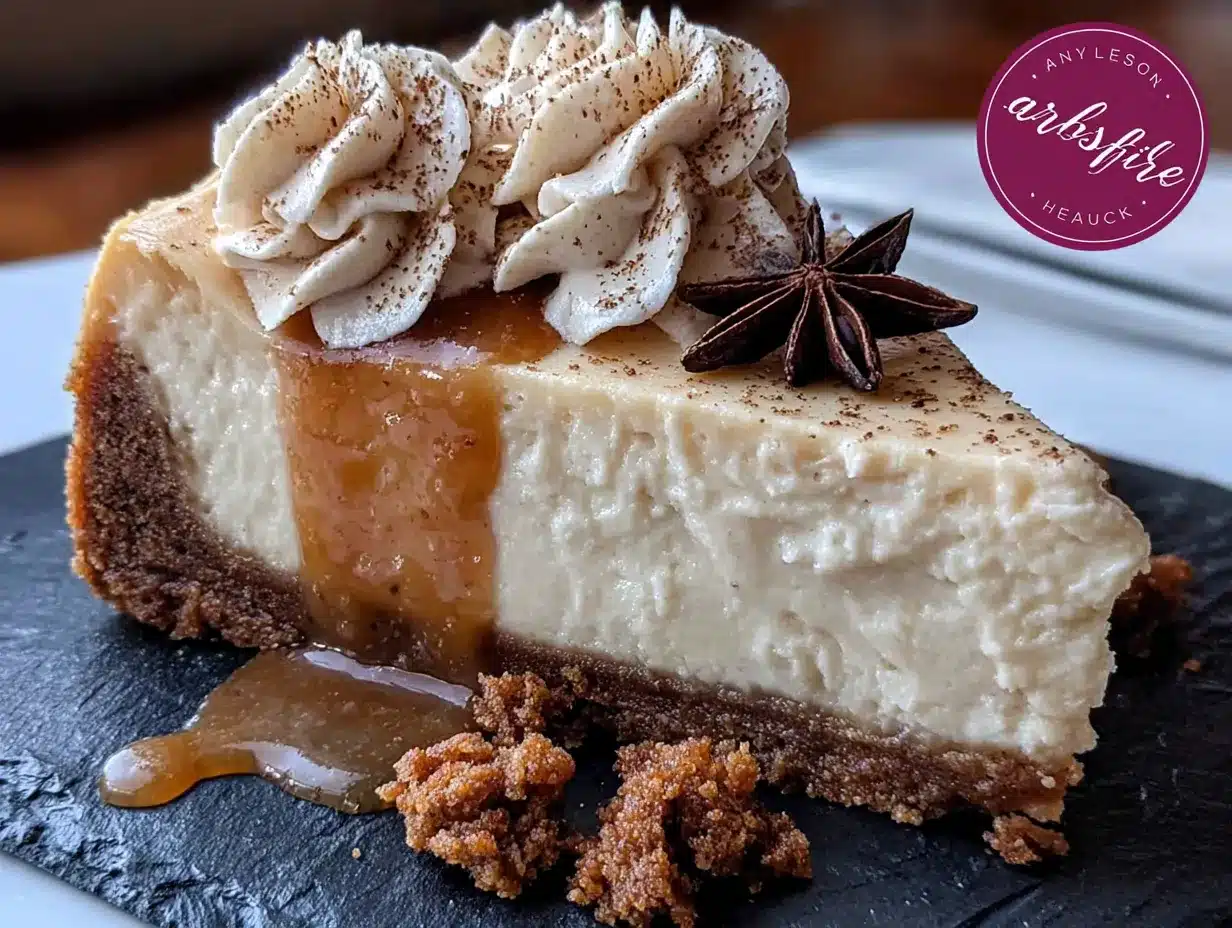
She was in the kitchen, pulling this gorgeous cheesecake out of the oven. The top was perfectly set, a pale golden color with just the faintest crack along the edge. And the crust—oh, the crust. It was dark and looked crunchy, made from those gingersnap cookies you can buy in the big bag. “It’s just the eggnog cheesecake,” she said, waving her hand like it was nothing. “I make it every year for the holiday party.”
Just the eggnog cheesecake. Honestly, I almost laughed. This wasn’t just a dessert. This was the kind of thing you dream about in July when the weather is hot and you’re wishing for snow. She let me have a slice while it was still warm, and I swear, I closed my eyes for that first bite. The filling was so creamy and light, with that unmistakable taste of eggnog—nutmeg, a little vanilla, that rich, custardy flavor. And the crust? It was buttery and snappy, the perfect contrast to the smooth cheesecake.
Jen wasn’t even watching me eat it. She was already wiping down the counter, thinking about the next thing on her to-do list. But I was having a moment. Maybe you’ve been there—you taste something so good at someone else’s house, and you know you have to figure out how to make it yourself. That was me, standing in her kitchen with a fork in my hand, already planning my next grocery run.
I’ve been making this best eggnog cheesecake with gingersnap crust ever since, and let me tell you, it’s become my secret weapon for the holidays. It feeds a crowd, it looks stunning on a dessert table, and it tastes like winter in a slice. But more than that, it reminds me of that afternoon at Jen’s house—how something so special can come from someone who doesn’t think they’re doing anything special at all. That’s the kind of recipe worth holding onto.
Why You’ll Love This Recipe
This isn’t just another cheesecake recipe. After testing this thing about six times (my family was happy to help with quality control, trust me), I can tell you exactly why this one works. It’s the combination of the rich, tangy cream cheese filling with the warm, spiced flavor of eggnog, all sitting on top of that crunchy, buttery gingersnap crust. It’s a match made in holiday heaven.
- Feeds a Crowd: This recipe makes a full 9-inch cheesecake, and it’s rich enough that a small slice is plenty. You can easily get 12 to 16 servings out of it, which is perfect for a holiday party or a big family dinner. No one leaves the table hungry.
- Simple Ingredients: You don’t need to hunt down anything fancy at the store. Cream cheese, sugar, eggs, eggnog, and a bag of gingersnaps. Most of this stuff is probably in your kitchen right now, especially if you’ve already started your holiday baking.
- Make-Ahead Friendly: This is the kind of dessert you can make two days before you need it. Cheesecake actually gets better after a day or two in the fridge—the flavors meld together and the texture gets even creamier. That’s a huge win for busy holiday schedules.
- Always a Crowd-Pleaser: I’ve brought this to three different holiday parties, and every single time, people ask for the recipe. Kids love it because it’s sweet and creamy. Adults love it because it tastes like a grown-up dessert. It’s the kind of thing that disappears fast.
- Unbelievably Delicious: The texture is what gets me every time. The filling is so smooth and velvety, almost like a custard, but it holds its shape perfectly when you cut into it. And that gingersnap crust adds this little bit of crunch and spice that just works.
What makes this recipe different from all the other eggnog cheesecakes out there? It’s the balance. I’ve tried versions that were too sweet, too heavy on the nutmeg, or had a crust that turned soggy by the next day. This one is just right. The filling has enough tang from the cream cheese to keep it from being cloying, and the crust stays crisp because we pre-bake it. It’s comfort food reimagined—familiar, but somehow better than you remember.
This recipe is the kind that makes you close your eyes after the first bite. It’s perfect for impressing guests without any stress, or for turning a simple holiday meal into something truly memorable. And honestly, on a cold December night, there’s nothing better than a slice of this with a cup of coffee.
What Ingredients You Will Need
This recipe uses simple, wholesome ingredients to deliver that bold, festive flavor without any fuss. Most of these are pantry staples during the holiday season, which makes this an easy recipe to throw together on a whim.
For the Gingersnap Crust
- 2 cups (about 240g) crushed gingersnap cookies – You’ll need about 40 cookies from a standard 16-ounce bag. I like the Nabisco brand, but any store brand works great too. The key is to crush them finely, almost like sand, so the crust holds together well. You can do this in a food processor or by putting them in a zip-top bag and smashing them with a rolling pin—which is honestly a great way to work out some holiday stress.
- 1/4 cup (50g) granulated sugar – Just a little sweetness to balance the spice of the gingersnaps.
- 6 tablespoons (85g) unsalted butter, melted – Use real butter here, not margarine. It makes a huge difference in the flavor and texture of the crust. Let it cool slightly before mixing it with the crumbs.
For the Eggnog Cheesecake Filling
- 32 ounces (910g) cream cheese, softened – That’s four standard 8-ounce blocks. Make sure they’re at room temperature, or you’ll end up with a lumpy filling. I usually take them out of the fridge about two hours before I start baking. I recommend Philadelphia brand for the creamiest texture.
- 1 cup (200g) granulated sugar – Adds just the right amount of sweetness without overpowering the eggnog flavor.
- 1/4 cup (60g) all-purpose flour – This helps stabilize the cheesecake and prevents cracking. Don’t skip it, even if you’re tempted.
- 4 large eggs, room temperature – Cold eggs can seize up the batter and make it lumpy. Let them sit on the counter for 30 minutes before you start.
- 2 large egg yolks, room temperature – The extra yolks add richness and a beautiful silky texture.
- 1 1/2 cups (360ml) good quality eggnog – This is the star of the show, so use a brand you actually like to drink. I’ve used both full-fat and low-fat versions, and both work, but full-fat gives you a richer result. Avoid the “light” eggnog if you can.
- 1 teaspoon vanilla extract – Pure vanilla extract is best, but imitation works in a pinch.
- 1/2 teaspoon ground nutmeg, plus more for garnish – Freshly grated nutmeg is amazing here, but pre-ground works perfectly fine. The nutmeg really brings out that classic eggnog flavor.
- 1/4 teaspoon ground cinnamon – Just a hint to warm up the flavor profile.
- Pinch of salt – Balances the sweetness and enhances all the other flavors.
For the Topping (Optional but Recommended)
- 1 cup (240ml) heavy whipping cream – For making fresh whipped cream. It’s the perfect finishing touch.
- 2 tablespoons powdered sugar – Sweetens the cream without making it grainy.
- 1/2 teaspoon vanilla extract – Adds a little extra flavor to the whipped cream.
- Extra crushed gingersnaps and a sprinkle of nutmeg for garnish – Makes it look pretty and adds a little extra crunch.
Equipment Needed
You don’t need a ton of fancy equipment to make this best eggnog cheesecake, but a few key tools will make your life a whole lot easier.
- 9-inch springform pan – This is non-negotiable for cheesecake. The removable sides make it so much easier to get the cheesecake out without destroying it. I have a basic one from a kitchen supply store that cost about $15, and it works perfectly.
- Electric mixer (stand or hand-held) – You can mix cheesecake batter by hand, but it’s a lot of work and you risk over-mixing. A hand mixer is fine, but a stand mixer is even better. I use my KitchenAid for this.
- Food processor or rolling pin – For crushing the gingersnaps. A food processor is faster, but a rolling pin and a zip-top bag work just as well. It’s a good arm workout.
- Large mixing bowls – You’ll need at least two: one for the crust and one for the filling.
- Measuring cups and spoons – Accurate measurements matter in baking, so use proper measuring tools.
- Rubber spatula – For scraping down the sides of the bowl and getting every last bit of batter into the pan.
- Roasting pan or large baking dish – For the water bath. It needs to be big enough to hold your springform pan.
- Aluminum foil – To wrap the bottom of the springform pan so water doesn’t leak in. Use heavy-duty foil if you have it.
If you don’t have a springform pan, you can use a deep 9-inch cake pan lined with parchment paper, but it’s harder to get the cheesecake out cleanly. A springform pan is worth the investment if you make cheesecake more than once a year.
Preparation Method
Alright, let’s get to the good part. This recipe takes a little time, but most of it is hands-off baking and chilling. Here’s how to make the best eggnog cheesecake with gingersnap crust that feeds a crowd.
- Preheat your oven to 350°F (175°C). While it’s heating up, start working on the crust. You want the oven nice and hot for that first bake.
- Make the crust. In a medium bowl, combine the crushed gingersnap cookies and the 1/4 cup of sugar. Pour the melted butter over the top and stir with a fork until all the crumbs are moistened. It should look like wet sand and clump together when you squeeze it in your hand.
- Press the crust into the pan. Pour the crumb mixture into your 9-inch springform pan. Use the bottom of a measuring cup or a flat-bottomed glass to press it firmly into an even layer across the bottom and about 1 inch up the sides. Don’t pack it too tight, but make sure it’s solid. A loose crust will fall apart when you cut the cheesecake.
- Pre-bake the crust. Place the pan on the middle rack of your oven and bake for 10 minutes. It should be fragrant and just slightly darker around the edges. Remove it from the oven and set it on a wire rack to cool while you make the filling. Leave the oven on at 350°F (175°C).
- Wrap the springform pan. While the crust cools, take a large piece of heavy-duty aluminum foil and wrap it tightly around the outside of the springform pan, covering the bottom and going up the sides. You want a watertight seal. If you’re worried about leaks, use two layers of foil. This is the most important step for a water bath.
- Start the filling. In a large mixing bowl (or the bowl of your stand mixer), beat the softened cream cheese with the paddle attachment on medium speed until it’s completely smooth and creamy. This takes about 2 minutes. Scrape down the sides and bottom of the bowl with your spatula.
- Add the sugar and flour. Add the 1 cup of sugar and the 1/4 cup of flour to the cream cheese. Beat on medium-low speed until everything is combined and smooth. Don’t beat too fast or you’ll incorporate too much air, which can cause the cheesecake to puff up and crack.
- Add the eggs one at a time. With the mixer on low speed, add the eggs and the extra yolks one at a time, mixing just until each one is incorporated before adding the next. Over-mixing at this stage is the number one cause of cracks, so be gentle. Scrape down the bowl after every two eggs.
- Mix in the wet ingredients. Add the eggnog, vanilla extract, ground nutmeg, ground cinnamon, and the pinch of salt. Mix on low speed just until everything is combined and the batter looks smooth and pale. It should be thin enough to pour easily. Give it one last scrape with your spatula to make sure there are no lumps hiding at the bottom.
- Pour the filling into the crust. Gently pour the cheesecake batter over the pre-baked crust. It will fill the pan almost to the top. Use your spatula to smooth out the top if needed.
- Prepare the water bath. Place your wrapped springform pan into a large roasting pan. Carefully pour hot water (from the tap is fine) into the roasting pan until it comes about halfway up the sides of the springform pan. Be very careful not to splash any water onto the cheesecake batter. The water bath creates a humid environment that helps the cheesecake bake evenly and prevents cracks.
- Bake the cheesecake. Carefully transfer the roasting pan to the oven (an oven rack pulled out partway is helpful here). Bake at 350°F (175°C) for 55 to 65 minutes. The cheesecake is done when the edges are set and slightly puffed, but the center still jiggles slightly when you gently shake the pan. It should look like a firm jello, not liquid. If the top starts to brown too quickly, tent it loosely with a piece of foil for the last 15 minutes.
- Cool the cheesecake slowly. Turn off the oven and crack the door open. Let the cheesecake sit in the water bath in the oven for 1 hour. This slow cooling helps prevent the dreaded crack. After an hour, remove the roasting pan from the oven, take the springform pan out of the water, and remove the foil wrapping. Place the cheesecake on a wire rack to cool completely to room temperature. This will take another 1 to 2 hours.
- Chill overnight. Once the cheesecake is at room temperature, cover it loosely with plastic wrap or foil and refrigerate for at least 6 hours, but overnight is better. This is the hardest part—waiting. But trust me, the texture will be so much better after a full night in the fridge. The flavors deepen and the cheesecake sets perfectly.
- Make the whipped cream (optional). Just before serving, pour the heavy cream into a chilled bowl. Add the powdered sugar and vanilla extract. Beat with a hand mixer on medium-high speed until soft peaks form. Don’t over-beat or you’ll end up with butter.
- Serve and enjoy. Run a thin knife around the edge of the pan before releasing the springform clasp. Slice the cheesecake with a sharp knife, wiping the blade clean between each cut. Top each slice with a dollop of whipped cream, a sprinkle of nutmeg, and a few crushed gingersnaps. Watch it disappear.
Cooking Tips & Techniques
I’ve made this best eggnog cheesecake about eight times now, and I’ve learned a few things the hard way. Here are my best tips to make sure yours turns out perfect the first time.
Room temperature ingredients are not optional. I know it’s tempting to use cold cream cheese straight from the fridge, but don’t do it. Cold cream cheese doesn’t blend smoothly, and you’ll end up with little lumps in your batter. Set everything out on the counter 2 hours before you start. If you’re in a hurry, you can cut the cream cheese into cubes and microwave it in 10-second bursts, but be careful not to melt it.
Don’t over-mix the batter. This is the most common mistake I see. Once you add the eggs, you want to mix just until everything is combined. Over-mixing incorporates too much air, which causes the cheesecake to rise quickly and then fall, creating cracks on the surface. Mix on low speed and stop as soon as the streaks disappear.
The water bath is your friend. Some people skip the water bath because it’s a hassle, but it makes a huge difference. The steam from the hot water keeps the oven moist and helps the cheesecake bake evenly. Without it, you’re much more likely to get a dry, cracked cheesecake. Just make sure your foil wrapping is watertight. I learned that one the hard way when I ended up with a soggy crust.
Let it cool slowly. The shock of going from a hot oven to a cold counter is what causes most cracks. Letting it cool in the oven with the door cracked open for an hour allows the temperature to drop gradually. Then let it come to room temperature on the counter before you put it in the fridge. Patience is key here.
Use a sharp knife to slice. A dull knife will drag through the cheesecake and make a mess. Run your knife under hot water and wipe it dry between each slice for clean, beautiful pieces. It’s a small thing, but it makes the cheesecake look like it came from a bakery.
Variations & Adaptations
One of the best things about this recipe is how easy it is to change up. Here are a few variations I’ve tried and loved.
Bourbon Eggnog Cheesecake: For an adult version, add 2 tablespoons of bourbon to the filling along with the eggnog. The bourbon adds a warm, oaky flavor that pairs beautifully with the nutmeg and ginger. I made this for a New Year’s Eve party and it was a huge hit. Just don’t tell the kids what’s in it.
Gluten-Free Version: Use gluten-free gingersnap cookies for the crust. Most major brands make a gluten-free version now, or you can make your own. The rest of the ingredients are naturally gluten-free, so this is an easy swap. I’ve tested it with the gluten-free gingersnaps from the store, and honestly, no one could tell the difference.
Chocolate Swirl Eggnog Cheesecake: Melt 1/2 cup of semi-sweet chocolate chips and swirl it into the batter before baking. Drop spoonfuls of the melted chocolate on top of the batter, then use a knife to gently swirl it through. It creates a beautiful marbled effect and adds a rich chocolate flavor that contrasts with the spicy eggnog. This is my husband’s favorite version.
Pumpkin Eggnog Cheesecake: Substitute 1/2 cup of the eggnog with 1/2 cup of pumpkin puree. Add an extra teaspoon of pumpkin pie spice to the filling. This makes a fantastic dessert for Thanksgiving or any fall gathering. The pumpkin and eggnog flavors are surprisingly good together.
Mini Cheesecakes: Use a muffin tin lined with paper liners instead of a springform pan. Press the crust mixture into the bottom of each liner (about 1 tablespoon each) and fill with the batter. Bake for 18 to 22 minutes at 350°F (175°C). These are perfect for parties where people want their own individual dessert. Plus, they’re easier to serve and store.
Serving & Storage Suggestions
This cheesecake is best served cold, straight from the fridge. The texture is firmer and cleaner when it’s chilled, and the flavors are more pronounced. Let it sit at room temperature for about 10 minutes before slicing to take the chill off, but don’t let it get warm or it will get soft.
Presentation: I like to serve this on a large cake stand or a pretty platter. Top each slice with a generous dollop of whipped cream, a sprinkle of freshly grated nutmeg, and a few crushed gingersnaps for crunch. A drizzle of caramel sauce is also amazing if you want to go all out. For a holiday party, I sometimes add a few sugared cranberries and a sprig of rosemary for color.
What to Serve With It: A cup of strong coffee or a mug of hot cider is the perfect accompaniment. The bitterness of the coffee balances the sweetness of the cheesecake beautifully. If you’re serving it for dessert after a big meal, keep the portions small—this is a rich dessert.
Storage: Store any leftover cheesecake in the refrigerator, tightly covered, for up to 5 days. The flavors actually get better after a day or two. I usually keep it in the springform pan with a piece of plastic wrap pressed directly onto the surface to keep it from drying out.
Freezing: This cheesecake freezes beautifully. Wrap the entire cheesecake (or individual slices) tightly in plastic wrap, then in a layer of aluminum foil. Freeze for up to 3 months. To thaw, move it to the refrigerator and let it defrost overnight. Don’t try to thaw it at room temperature or it will get weepy. The texture will still be creamy and delicious after freezing.
Reheating? I don’t recommend reheating this cheesecake. It’s meant to be served cold. If you want a warm dessert, try it with a warm caramel sauce drizzled over the cold cheesecake. The temperature contrast is lovely.
Nutritional Information & Benefits
Let’s be real—this is a holiday dessert, not a health food. But knowing what’s in it can help you plan your indulgences. Here’s the estimated nutritional breakdown per serving (based on 16 servings):
| Nutrient | Amount per Serving |
|---|---|
| Calories | 410 |
| Total Fat | 28g |
| Saturated Fat | 16g |
| Cholesterol | 145mg |
| Sodium | 310mg |
| Total Carbohydrates | 34g |
| Dietary Fiber | 1g |
| Sugars | 26g |
| Protein | 8g |
While it’s not low-calorie, there are a few redeeming qualities. The cream cheese provides a decent amount of protein and calcium. The eggnog adds vitamin A and vitamin D, especially if you use a fortified brand. And the gingersnaps contain ginger, which is known for its anti-inflammatory properties and can help with digestion after a big meal.
If you’re watching your sugar intake, you can reduce the sugar in the filling to 3/4 cup. The cheesecake will be slightly less sweet, but still delicious. You can also use a low-fat cream cheese, but the texture won’t be as rich and creamy. For a lighter option, serve smaller slices—this cheesecake is so rich that a thin slice is often enough to satisfy your sweet tooth.
This recipe contains dairy, eggs, and gluten (from the gingersnaps). It is not suitable for vegans or those with dairy or egg allergies. The gluten-free variation mentioned above works well for those with gluten sensitivities.
Conclusion
This best eggnog cheesecake with gingersnap crust has become my go-to holiday dessert for a reason. It’s the perfect balance of creamy, spicy, and sweet, and it feeds a crowd without any last-minute stress. Whether you’re hosting Christmas dinner, bringing a dessert to a party, or just want something special for a cozy night in, this cheesecake delivers every single time.
I love that it feels fancy enough for a celebration but is actually pretty simple to put together. The hardest part is waiting for it to chill! And honestly, the way it makes the whole house smell like the holidays while it’s baking is worth the effort alone.
Don’t be afraid to make this recipe your own. Swap in different cookies for the crust, add a swirl of caramel, or skip the whipped cream if you’re feeling lazy. It’s forgiving and flexible, which is exactly what a good recipe should be.
I’d love to hear how yours turns out! Leave a comment below and let me know if you tried any variations. And if you share a photo on social media, tag me so I can see your beautiful creation. Happy baking, friends—here’s to a holiday season full of good food and even better company.
Frequently Asked Questions
Can I use store-bought eggnog for this recipe?
Absolutely! Store-bought eggnog works perfectly. In fact, I usually use it because it’s consistent and easy. Just pick a brand you enjoy drinking, as the flavor will come through in the cheesecake. Full-fat eggnog gives the richest result.
Why did my cheesecake crack?
Cracks usually happen for one of three reasons: over-mixing the batter (which incorporates too much air), baking it too long, or cooling it too quickly. Using a water bath and letting the cheesecake cool slowly in the oven can help prevent cracks. And remember, a little crack is totally normal—your whipped cream will cover it up!
Can I make this cheesecake ahead of time?
Yes, this is a perfect make-ahead dessert. You can make it up to 2 days in advance and keep it covered in the refrigerator. The flavors actually get better after a day or two as they meld together. You can also freeze it for up to 3 months.
How do I know when the cheesecake is done baking?
The edges should be set and slightly puffed, but the center should still jiggle slightly when you gently shake the pan. It should look like a firm jello, not liquid. If you insert a toothpick near the center, it should come out with a few moist crumbs attached, not wet batter.
Can I use a different type of cookie for the crust?
Definitely! While gingersnaps are traditional and give that wonderful spicy flavor, you can use graham crackers, vanilla wafers, or even shortbread cookies. If you use a sweeter cookie, you might want to reduce the sugar in the crust slightly. Speculoos cookies (like Biscoff) are also amazing here.
Pin This Recipe!
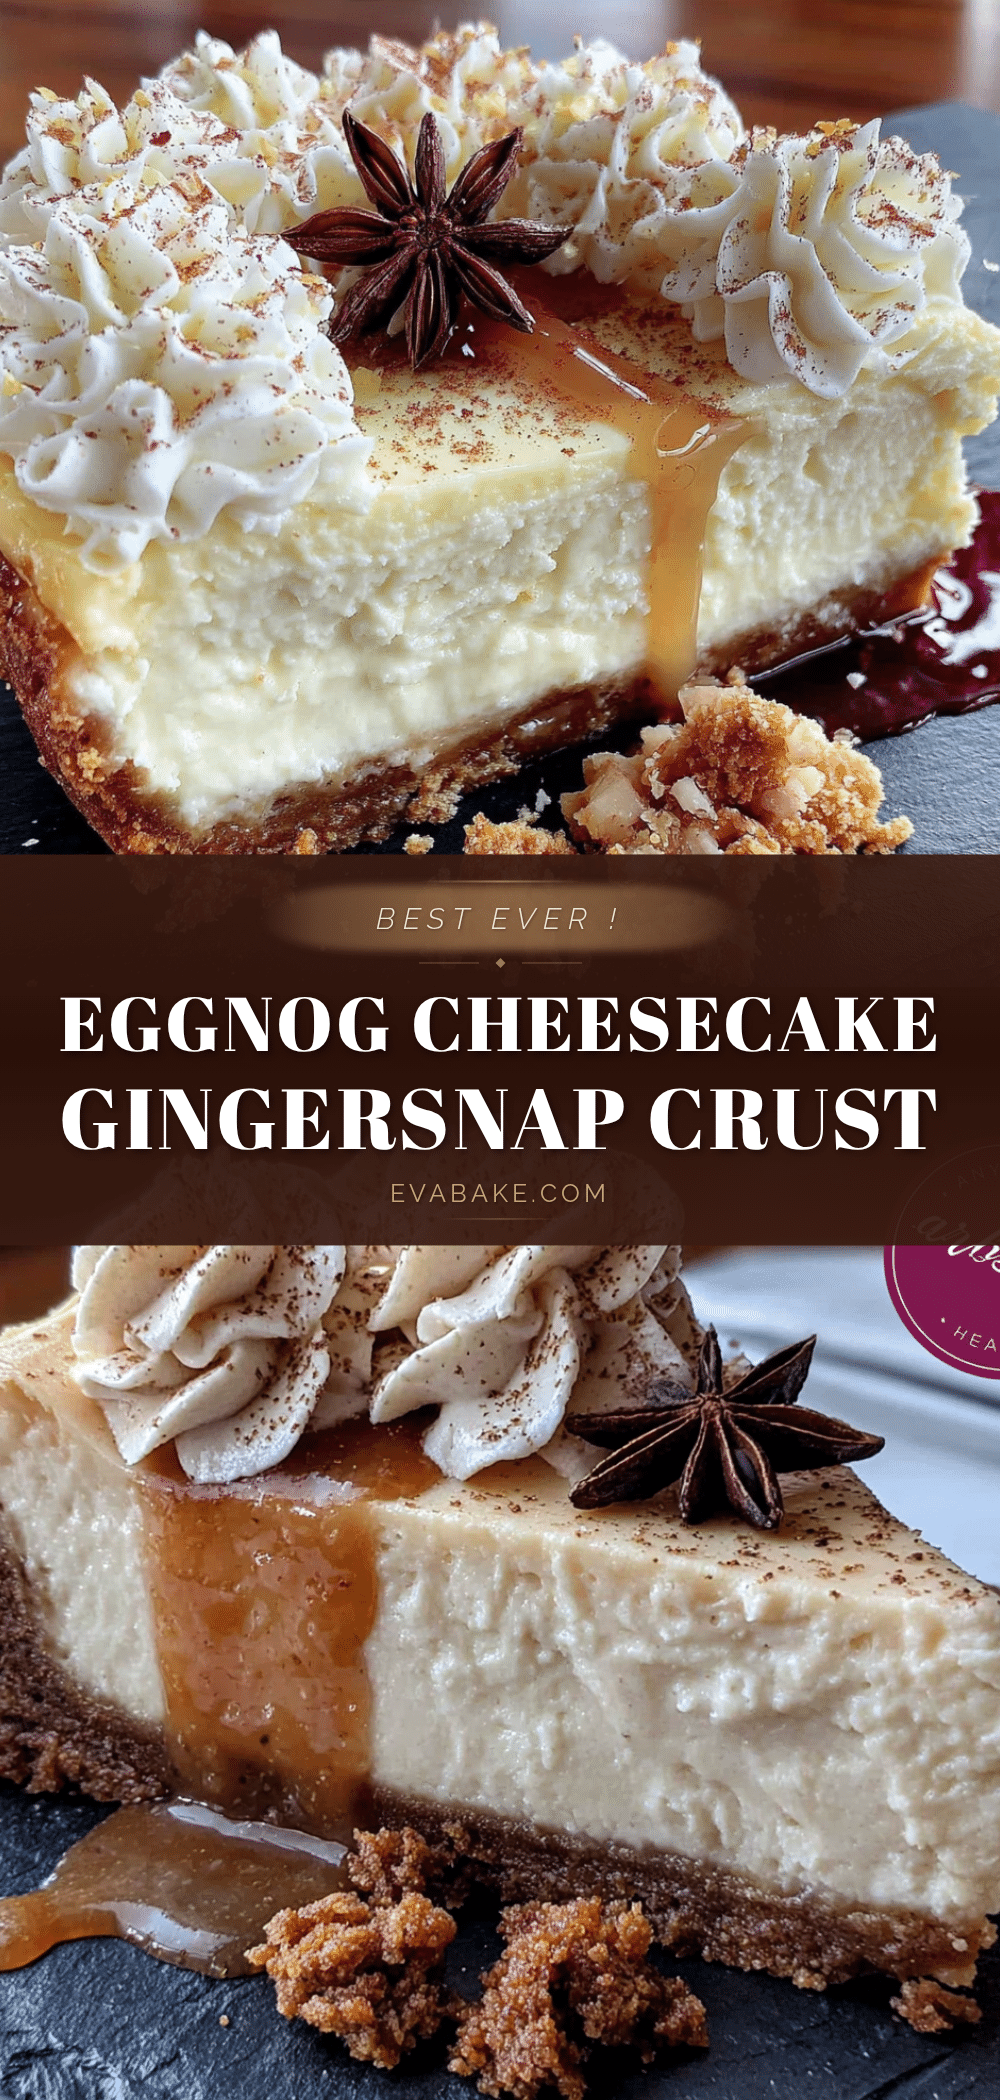
Best Eggnog Cheesecake Recipe with Gingersnap Crust
This creamy, rich eggnog cheesecake sits on a crunchy gingersnap crust, making it the perfect holiday dessert that feeds a crowd. It’s make-ahead friendly and always a crowd-pleaser.
- Prep Time: 30 minutes
- Cook Time: 65 minutes
- Total Time: 8 hours (including chilling time)
- Yield: 12 to 16 servings 1x
- Category: Dessert
- Cuisine: American
Ingredients
- 2 cups (about 240g) crushed gingersnap cookies (about 40 cookies)
- 1/4 cup (50g) granulated sugar
- 6 tablespoons (85g) unsalted butter, melted
- 32 ounces (910g) cream cheese, softened (four 8-ounce blocks)
- 1 cup (200g) granulated sugar
- 1/4 cup (60g) all-purpose flour
- 4 large eggs, room temperature
- 2 large egg yolks, room temperature
- 1 1/2 cups (360ml) good quality eggnog
- 1 teaspoon vanilla extract
- 1/2 teaspoon ground nutmeg, plus more for garnish
- 1/4 teaspoon ground cinnamon
- Pinch of salt
- 1 cup (240ml) heavy whipping cream (for topping, optional)
- 2 tablespoons powdered sugar (for topping, optional)
- 1/2 teaspoon vanilla extract (for topping, optional)
- Extra crushed gingersnaps and a sprinkle of nutmeg for garnish (optional)
Instructions
- Preheat your oven to 350°F (175°C).
- Make the crust: In a medium bowl, combine the crushed gingersnap cookies and 1/4 cup sugar. Pour the melted butter over the top and stir with a fork until all the crumbs are moistened.
- Press the crust into the pan: Pour the crumb mixture into a 9-inch springform pan. Use the bottom of a measuring cup or a flat-bottomed glass to press it firmly into an even layer across the bottom and about 1 inch up the sides.
- Pre-bake the crust: Place the pan on the middle rack of your oven and bake for 10 minutes. Remove from oven and set on a wire rack to cool. Leave the oven on at 350°F (175°C).
- Wrap the springform pan: Take a large piece of heavy-duty aluminum foil and wrap it tightly around the outside of the springform pan, covering the bottom and going up the sides to create a watertight seal.
- Start the filling: In a large mixing bowl, beat the softened cream cheese with the paddle attachment on medium speed until completely smooth and creamy, about 2 minutes. Scrape down the sides and bottom of the bowl.
- Add the sugar and flour: Add 1 cup sugar and 1/4 cup flour to the cream cheese. Beat on medium-low speed until combined and smooth.
- Add the eggs one at a time: With the mixer on low speed, add the eggs and extra yolks one at a time, mixing just until each one is incorporated before adding the next. Scrape down the bowl after every two eggs.
- Mix in the wet ingredients: Add the eggnog, vanilla extract, ground nutmeg, ground cinnamon, and pinch of salt. Mix on low speed just until combined and the batter looks smooth and pale.
- Pour the filling into the crust: Gently pour the cheesecake batter over the pre-baked crust. Smooth the top with a spatula if needed.
- Prepare the water bath: Place the wrapped springform pan into a large roasting pan. Carefully pour hot water into the roasting pan until it comes about halfway up the sides of the springform pan.
- Bake the cheesecake: Carefully transfer the roasting pan to the oven. Bake at 350°F (175°C) for 55 to 65 minutes. The cheesecake is done when the edges are set and slightly puffed, but the center still jiggles slightly when gently shaken.
- Cool the cheesecake slowly: Turn off the oven and crack the door open. Let the cheesecake sit in the water bath in the oven for 1 hour. Then remove from the water bath and place on a wire rack to cool completely to room temperature, about 1 to 2 hours.
- Chill overnight: Once at room temperature, cover loosely with plastic wrap or foil and refrigerate for at least 6 hours, but overnight is better.
- Make the whipped cream (optional): Just before serving, pour the heavy cream into a chilled bowl. Add the powdered sugar and vanilla extract. Beat with a hand mixer on medium-high speed until soft peaks form.
- Serve and enjoy: Run a thin knife around the edge of the pan before releasing the springform clasp. Slice with a sharp knife, wiping the blade clean between each cut. Top each slice with whipped cream, a sprinkle of nutmeg, and crushed gingersnaps.
Notes
Room temperature ingredients are essential for a smooth batter. Don’t over-mix once eggs are added to prevent cracks. The water bath helps prevent cracking. Let the cheesecake cool slowly in the oven for best results. For best texture, chill overnight before serving.
Nutrition
- Serving Size: 1 slice (based on 16
- Calories: 410
- Sugar: 26
- Sodium: 310
- Fat: 28
- Saturated Fat: 16
- Carbohydrates: 34
- Fiber: 1
- Protein: 8
Keywords: eggnog cheesecake, gingersnap crust, holiday dessert, Christmas cheesecake, creamy cheesecake, make-ahead dessert