My phone buzzed with a text from my sister last October. “Can you bring cookies for the school Halloween party? Something creepy but not, you know, actually scary.” I stared at my pantry. A bag of slivered almonds. Some butter. Flour. And then it hit me — those witch finger cookies I’d seen floating around for years. The ones that look disgustingly realistic but taste like buttery shortbread.
I’ll be honest, I was skeptical. Would they actually look like fingers? Would the almond nails stay on? Would the kids be weirded out or delighted? I made a batch that same afternoon, and by the time my husband got home, he refused to try one because “they look too real.” That’s when I knew I had a winner.
These Easy Witch’s Finger Cookies with Almond Nails have become our Halloween tradition. They’re the perfect mix of spooky and delicious — the kind of thing that makes people do a double-take before laughing and grabbing a handful. And the best part? They’re surprisingly simple to pull off.
No fancy piping bags. No complicated techniques. Just a straightforward shortbread dough, some almond slices, and a little bit of food coloring. You don’t need to be a professional baker to make these look genuinely creepy. Trust me, if I can pull these off while helping with homework and pretending the laundry doesn’t exist, anyone can.
Why You’ll Love These Witch Finger Cookies
These aren’t just another Halloween cookie. Here’s why they’ve earned a permanent spot in my fall baking rotation:
- Surprisingly Simple: The dough comes together in one bowl with basic pantry ingredients. No chilling required before shaping — which means less waiting and more baking.
- Naturally Creepy: The almond nail effect is pure genius. A single slivered almond pressed into the dough creates that unmistakable witchy look without any fancy tools.
- Kid-Friendly Fun: My kids love helping shape the fingers and adding the “wrinkles.” It’s messy, silly, and creates the best Halloween memories. Plus, they’re not too scary for younger kids.
- Perfect for Parties: These cookies are total conversation starters. I brought them to a Halloween potluck and people couldn’t stop taking pictures. They disappear faster than any candy bowl.
- Customizable Creepiness: Want them extra gory? Add some red jam “blood” at the base. Prefer a more subtle spooky look? Skip the food coloring and let the almond nails do the talking.
What makes these different from other Halloween cookies? It’s the texture. This shortbread base is buttery and tender, not hard or crumbly. The almond adds a subtle nutty crunch that balances the sweetness perfectly. I’ve tested this recipe at least six times to get the ratio right — not too dry, not too soft, just sturdy enough to hold that finger shape without falling apart.
These cookies are the kind that make people stop mid-conversation and say, “Wait, those are cookies?” And honestly, that reaction never gets old.
What Ingredients You Will Need
This recipe relies on simple, everyday ingredients to create something that looks anything but ordinary. Most of these are probably already sitting in your kitchen.
For the Cookie Dough
- 1 cup (226g) unsalted butter, softened — Use good-quality butter here. It’s the star of the show, and cheap butter can make the cookies spread too much. I prefer Kerrygold or Land O’Lakes for consistent results.
- 1 cup (200g) granulated sugar — Regular white sugar works perfectly. Don’t substitute brown sugar; it changes the color and moisture level.
- 1 large egg — Bring it to room temperature for easier mixing. If you forget, place the egg in warm water for 5 minutes.
- 1 teaspoon vanilla extract — Pure vanilla makes a difference, but imitation works fine for these cookies since the almond flavor takes center stage.
- 1 teaspoon almond extract — This is non-negotiable. It gives the cookies that distinct marzipan-like flavor that makes them taste like real witch fingers. I use McCormick or Nielsen-Massey.
- 2 ½ cups (312g) all-purpose flour — Spoon and level your flour for accuracy. Scooping directly from the bag packs in too much flour and makes dry cookies.
- 1 teaspoon baking powder — Helps the cookies puff slightly without spreading too much.
- ½ teaspoon salt — Balances the sweetness and enhances the buttery flavor.
For the Decoration
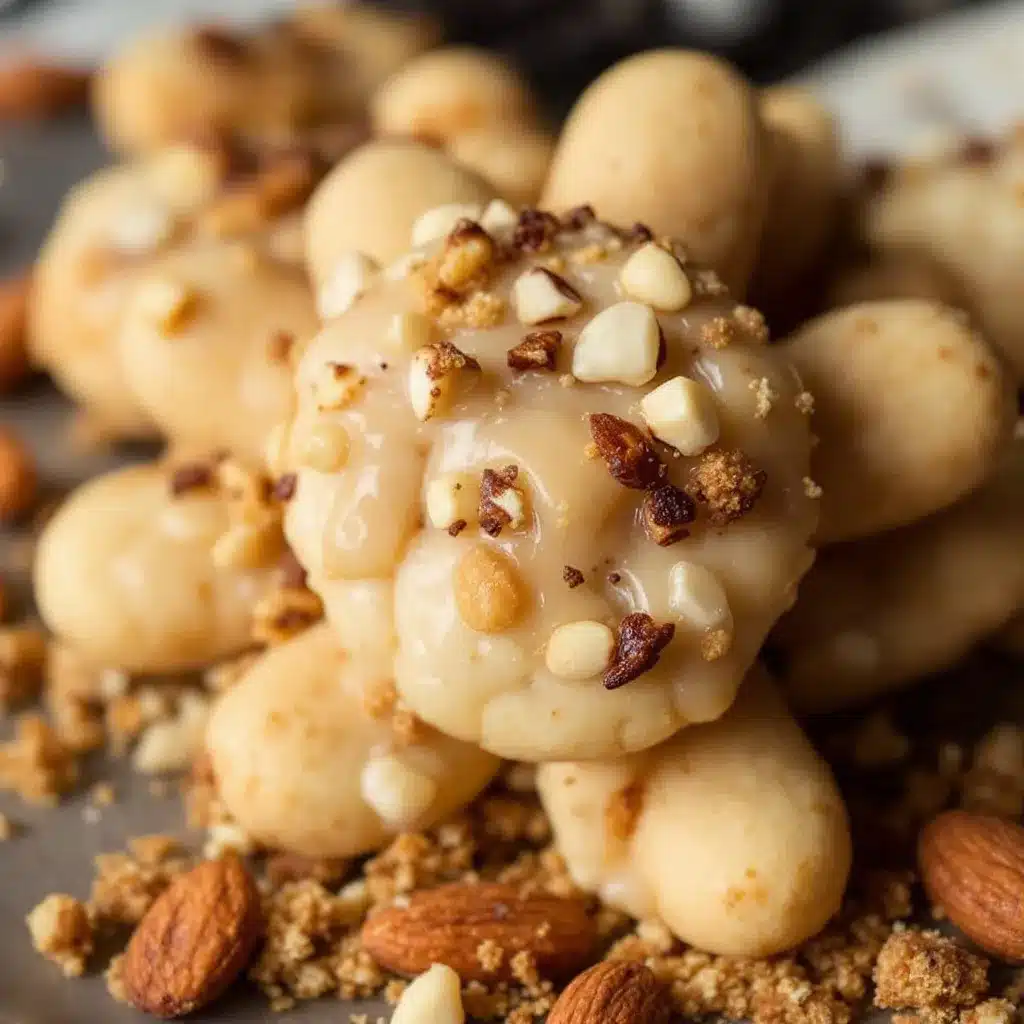
- About 60 whole blanched slivered almonds — Look for slivered almonds that are relatively flat and uniform. I like Blue Diamond brand. If your almonds are too curved, they won’t sit flat on the finger.
- Green food coloring (gel or paste preferred) — Gel coloring gives you that deep, witchy green without thinning the dough. Liquid food coloring works but you’ll need more drops, which adds moisture.
- Red jam or jelly (optional) — For that “bloody” effect at the base of the nail. Strawberry or raspberry jam works beautifully. I’ve used Smucker’s and Bonne Maman — both work great.
- Powdered sugar for dusting (optional) — Gives them an aged, dusty look. Totally optional but adds a nice touch.
Ingredient swaps: For a dairy-free version, use vegan butter sticks (I like Earth Balance). The texture will be slightly different but still delicious. You can skip the almond extract if you have a nut allergy, but the cookies won’t have that signature flavor. For nut-free nails, use a sliced date or a piece of dried apricot instead of almonds.
Equipment Needed
Nothing fancy here. You probably already own everything you need:
- Large mixing bowl — Any bowl will do, but I prefer a wide ceramic bowl for easy mixing.
- Electric hand mixer or stand mixer — You can cream the butter and sugar by hand, but a mixer makes it much faster. I use my KitchenAid stand mixer for the whole process.
- Baking sheets — Two standard half-sheet pans work perfectly. Line them with parchment paper for easy cleanup.
- Parchment paper — Non-negotiable. These cookies are delicate when warm, and parchment prevents sticking.
- Small offset spatula or butter knife — For creating the knuckle lines and wrinkles. A butter knife works just fine.
- Cooling rack — Lets air circulate so the cookies cool evenly without getting soggy on the bottom.
- Small bowl for almond extract — You’ll dip the almond “nails” in extract before pressing them on. Trust me, this little step makes a big difference.
Budget tip: Don’t have an offset spatula? Use the back of a butter knife. No cooling rack? Let cookies cool on the baking sheet for 5 minutes, then transfer to a plate. I’ve baked these in a tiny apartment kitchen with minimal tools and they turned out perfectly.
Preparation Method
Let’s get creepy. Follow these steps carefully, and you’ll have a batch of witch fingers that look like they came straight from a haunted kitchen.
- Cream the butter and sugar. In a large mixing bowl, beat the softened butter and granulated sugar together until light and fluffy — about 3-4 minutes with an electric mixer on medium speed. You want the mixture to look pale and airy. Scrape down the sides of the bowl halfway through.
- Add the wet ingredients. Beat in the egg, vanilla extract, and almond extract until fully combined. The mixture might look slightly curdled at this point — that’s totally normal. Don’t panic.
- Add the food coloring. Add about 15-20 drops of green gel food coloring (or 30-40 drops of liquid) and mix until the color is evenly distributed. You want a deep, slightly sickly green — think classic witch skin. If you’re unsure, go a shade darker than you think; the color lightens slightly during baking.
- Mix the dry ingredients. In a separate bowl, whisk together the all-purpose flour, baking powder, and salt. Gradually add the dry mixture to the wet mixture, mixing on low speed until just combined. Stop as soon as the flour disappears — overmixing makes tough cookies.
- Shape the fingers. Scoop about 1 tablespoon of dough (roughly the size of a walnut) and roll it into a log shape about 3 inches long. Place it on your prepared baking sheet. Gently taper one end to look like a fingertip and make the other end slightly thicker to resemble the palm side. Repeat with remaining dough, spacing fingers about 2 inches apart.
- Create the knuckles. Using the back of a butter knife or your offset spatula, gently press horizontal lines into each finger to create knuckle creases. Make 2-3 lines per finger, spacing them naturally. Don’t press too deep — you want indentations, not cuts.
- Add the almond nails. Pour a few drops of almond extract into a small bowl. Dip each slivered almond into the extract, then press it gently onto the tapered end of each finger. The almond should look like a fingernail growing out of the fingertip. Press firmly enough that it stays put during baking.
- Add wrinkles and details. Use the tip of a toothpick or the point of a knife to add tiny wrinkles around the knuckles and the base of the nail. You can also gently pinch the sides of the finger to create a more organic, lumpy shape. Real fingers aren’t perfectly smooth!
- Chill (optional but helpful). Place the baking sheets in the refrigerator for 15-20 minutes. This helps the cookies hold their shape during baking. If you’re in a rush, you can skip this step, but the cookies might spread slightly more.
- Bake. Preheat your oven to 325°F (163°C). Bake the cookies for 12-15 minutes, or until the edges are just barely golden. The centers should still look slightly pale and soft. Remember: they continue baking on the hot sheet after you pull them out.
- Cool and add details. Let the cookies cool on the baking sheet for 5 minutes, then transfer to a cooling rack. If you’re using red jam for a bloody effect, dab a tiny amount at the base of each almond nail while the cookies are still warm. The jam will set as they cool.
- Final touch (optional). Lightly dust the cooled cookies with powdered sugar for an aged, dusty look. This step is totally optional but adds a nice spooky finish.
Sensory cues: When you press the almond into the dough, you should feel it sink slightly but stay secure. The dough should feel smooth and pliable, not sticky. When baked, the cookies should be pale green with just a hint of golden brown at the edges. The almond nails will be lightly toasted and fragrant.
Cooking Tips & Techniques
I’ve made these cookies at least a dozen times, and I’ve learned a few things the hard way. Here’s what I wish someone had told me:
The dough temperature matters. If your kitchen is warm and the dough feels too soft to shape, pop it in the fridge for 10 minutes. I once tried to shape fingers with overly soft dough and ended up with green blobs that looked more like alien slugs than witch fingers. Not my finest moment.
Don’t overbake. The biggest mistake people make is leaving these in the oven too long. You want them just set — the edges should be barely golden. Overbaked cookies turn hard and lose that delicate shortbread texture. Pull them out when they still look slightly underdone in the center.
Make the almond nails stick. Dipping the almonds in almond extract before pressing them on serves two purposes: it adds flavor and helps the almond adhere to the dough. I’ve tried skipping this step, and the almonds tend to fall off during baking. The extract acts like a natural glue.
Work in batches. Shape 6-8 fingers at a time, then bake them. If you try to shape all 30 at once, the first ones will start spreading before they hit the oven. Keep the shaped cookies in the fridge while you work on the next batch.
Use a light touch. When creating knuckle lines and wrinkles, gentle pressure is key. Press too hard and you’ll cut through the dough, causing the fingers to break apart during baking. Think of it as drawing lines on the surface, not carving into it.
Timing strategy: I like to make the dough the night before and refrigerate it overnight. The next day, I shape and bake while my kids are at school. It breaks up the work and makes the process feel less rushed.
Variations & Adaptations
These witch fingers are surprisingly versatile. Here are some ways to make them your own:
Dietary Variations
- Gluten-Free: Substitute the all-purpose flour with a 1:1 gluten-free baking flour blend. I’ve tested this with Bob’s Red Mill and King Arthur Measure for Measure — both work well. The texture will be slightly more crumbly, so handle gently.
- Vegan: Use vegan butter sticks and a flax egg (1 tablespoon ground flaxseed + 3 tablespoons water, let sit for 5 minutes). The cookies won’t be as rich, but they’ll still be delicious and creepy.
- Nut-Free: Skip the almond extract and use extra vanilla. For the nails, use a small piece of dried apricot or a sliced date. They won’t look exactly the same, but they’ll still be finger-like.
Flavor Twists
- Chocolate Witch Fingers: Replace ¼ cup of flour with unsweetened cocoa powder. Skip the green food coloring and let the chocolate color speak for itself. These look like chocolate-dipped fingers — totally different vibe but equally spooky.
- Lemon Witch Fingers: Add 1 tablespoon lemon zest and replace the almond extract with lemon extract. Use yellow food coloring instead of green. These look less creepy but taste amazing with tea.
- Spiced Pumpkin Fingers: Add 1 teaspoon pumpkin pie spice and replace ¼ cup flour with pumpkin puree. Use orange food coloring. These are perfect for a Halloween-Thanksgiving crossover.
Creepiness Levels
- Mildly Spooky: Skip the food coloring and let the cookies be pale golden. The almond nails alone give them a subtle creepy factor without looking too intense.
- Moderately Creepy: Use green food coloring and add red jam at the nail base. This is my go-to level — spooky enough to impress but not so scary that kids refuse to eat them.
- Full Horror Mode: Add red jam “blood” dripping from the nail base and along the finger. Dust with powdered sugar for a “mummified” look. These are for adults-only parties where shock value is the goal.
I once made a batch with purple food coloring and called them “zombie fingers” for a Halloween movie night. They were a hit, and now my kids request them every year.
Serving & Storage Suggestions
These cookies are best served at room temperature, arranged on a platter that looks like it came from a haunted house. Here’s how to make them shine:
Serving ideas: Arrange the fingers on a black or dark purple platter. For extra creepiness, place them in a small clay pot or a wooden box lined with moss (available at craft stores). You can also stick them upright in a bowl of green-tinted frosting to look like they’re reaching out of the ground.
Pairings: These cookies pair beautifully with a warm cup of spiced cider, hot chocolate, or a pumpkin spice latte. For an adult gathering, serve them alongside a dark red wine or a smoky mezcal cocktail. If you’re hosting a Halloween party, consider adding these to a Halloween coffee bar for a truly spooky spread.
Storage: Store the cookies in an airtight container at room temperature for up to 5 days. Place a piece of bread in the container to keep them soft — the bread absorbs excess moisture and releases it slowly. Change the bread every 2 days.
Freezing: These cookies freeze beautifully. Arrange them in a single layer on a baking sheet and freeze until solid, then transfer to a freezer-safe bag or container. They’ll keep for up to 3 months. Thaw at room temperature for 30 minutes before serving.
Reheating: If you want that just-baked texture, pop the cookies in a 300°F (150°C) oven for 3-5 minutes. Let them cool slightly before serving. The almond nails will become fragrant again, and the cookies will be perfectly tender.
Flavor development: Like many shortbread cookies, these actually taste better the next day. The almond flavor deepens and the texture becomes more tender. If you can resist eating them all on day one, you’re in for a treat on day two.
Nutritional Information & Benefits
Let’s be real — these are Halloween cookies, not health food. But here’s the breakdown per cookie (based on 30 cookies):
| Nutrient | Amount per Cookie |
|---|---|
| Calories | 145 kcal |
| Total Fat | 9g |
| Saturated Fat | 5g |
| Cholesterol | 25mg |
| Sodium | 65mg |
| Total Carbohydrates | 16g |
| Sugar | 7g |
| Protein | 2g |
Health highlights: Almonds are a good source of vitamin E and healthy fats. The butter provides vitamin A and calcium. Sure, these aren’t going to replace your green smoothie, but they’re made with real ingredients — no preservatives, no artificial flavors. And honestly, sometimes a little indulgence is exactly what you need.
Dietary considerations: This recipe contains wheat, dairy, eggs, and tree nuts (almonds). For allergen-friendly options, see the variations section above.
My take: I believe in balance. These cookies are a special treat for a special occasion. They’re meant to be enjoyed, shared, and remembered. Don’t stress about the numbers — just enjoy the moment and the smiles they bring.
Frequently Asked Questions
Can I make the dough ahead of time?
Absolutely! You can prepare the dough up to 3 days in advance and store it in the refrigerator. Let it sit at room temperature for about 10 minutes before shaping so it’s easier to work with. You can also freeze the shaped, unbaked cookies on a baking sheet, then transfer them to a freezer bag. Bake straight from frozen, adding 2-3 minutes to the baking time.
Why did my cookies spread too much?
This usually happens for one of three reasons: your butter was too soft, you didn’t chill the shaped cookies, or your baking powder was expired. Next time, make sure your butter is just softened (not melted), chill the shaped fingers for at least 15 minutes, and check that your baking powder is less than 6 months old. If your kitchen is warm, chill the dough between batches too.
Can I use different nuts for the nails?
Yes! Sliced almonds are the most realistic, but you can use whole almonds (cut in half lengthwise), pecan pieces, or even sunflower seeds for a nut-free option. Pistachios create a green nail effect that’s pretty cool. Just make sure whatever you use is flat enough to sit on the dough without rolling off.
How do I get the green color right?
Start with 15-20 drops of green gel food coloring and mix well. If you want a deeper shade, add more gradually. The color will lighten slightly during baking, so aim for a shade darker than you want. If you’re using liquid food coloring, you’ll need about double the amount, but be careful not to add too much liquid or the dough will become sticky.
My almond nails keep falling off. What am I doing wrong?
This is the most common issue! First, make sure you’re dipping the almonds in almond extract before pressing them on — this helps them stick. Second, press firmly enough that the almond is partially embedded in the dough. Third, don’t skip the chilling step. If the dough is too warm, the almond won’t stay put during baking. If all else fails, you can press a small amount of dough over the base of the almond after baking to “glue” it in place.
Conclusion
These Easy Witch’s Finger Cookies with Almond Nails are proof that Halloween baking doesn’t have to be complicated to be spectacular. They’re fun to make, hilarious to serve, and genuinely delicious. I’ve made them for school parties, Halloween dinners, and even a grown-up costume party where they were the most talked-about item on the dessert table.
What I love most about this recipe is how it brings people together. There’s something about handing someone a cookie that looks like a witch’s finger that makes everyone laugh. Kids squeal with delight. Adults do double-takes. And then everyone eats them and realizes they’re actually really good shortbread cookies.
Don’t be afraid to make these your own. Add extra wrinkles. Experiment with different colors. Use strawberry jam for a bloodier effect. The beauty of these cookies is that they’re meant to look imperfect — the more irregular and lumpy, the better. So go ahead, get a little weird with it.
I’d love to hear how yours turn out! Drop a comment below and share your witch finger creations. Did your kids help shape them? Did your guests freak out? Did you come up with a fun variation? Let’s keep the Halloween baking tradition alive and creepy.
Happy haunting, and happy baking!
Pin This Recipe!
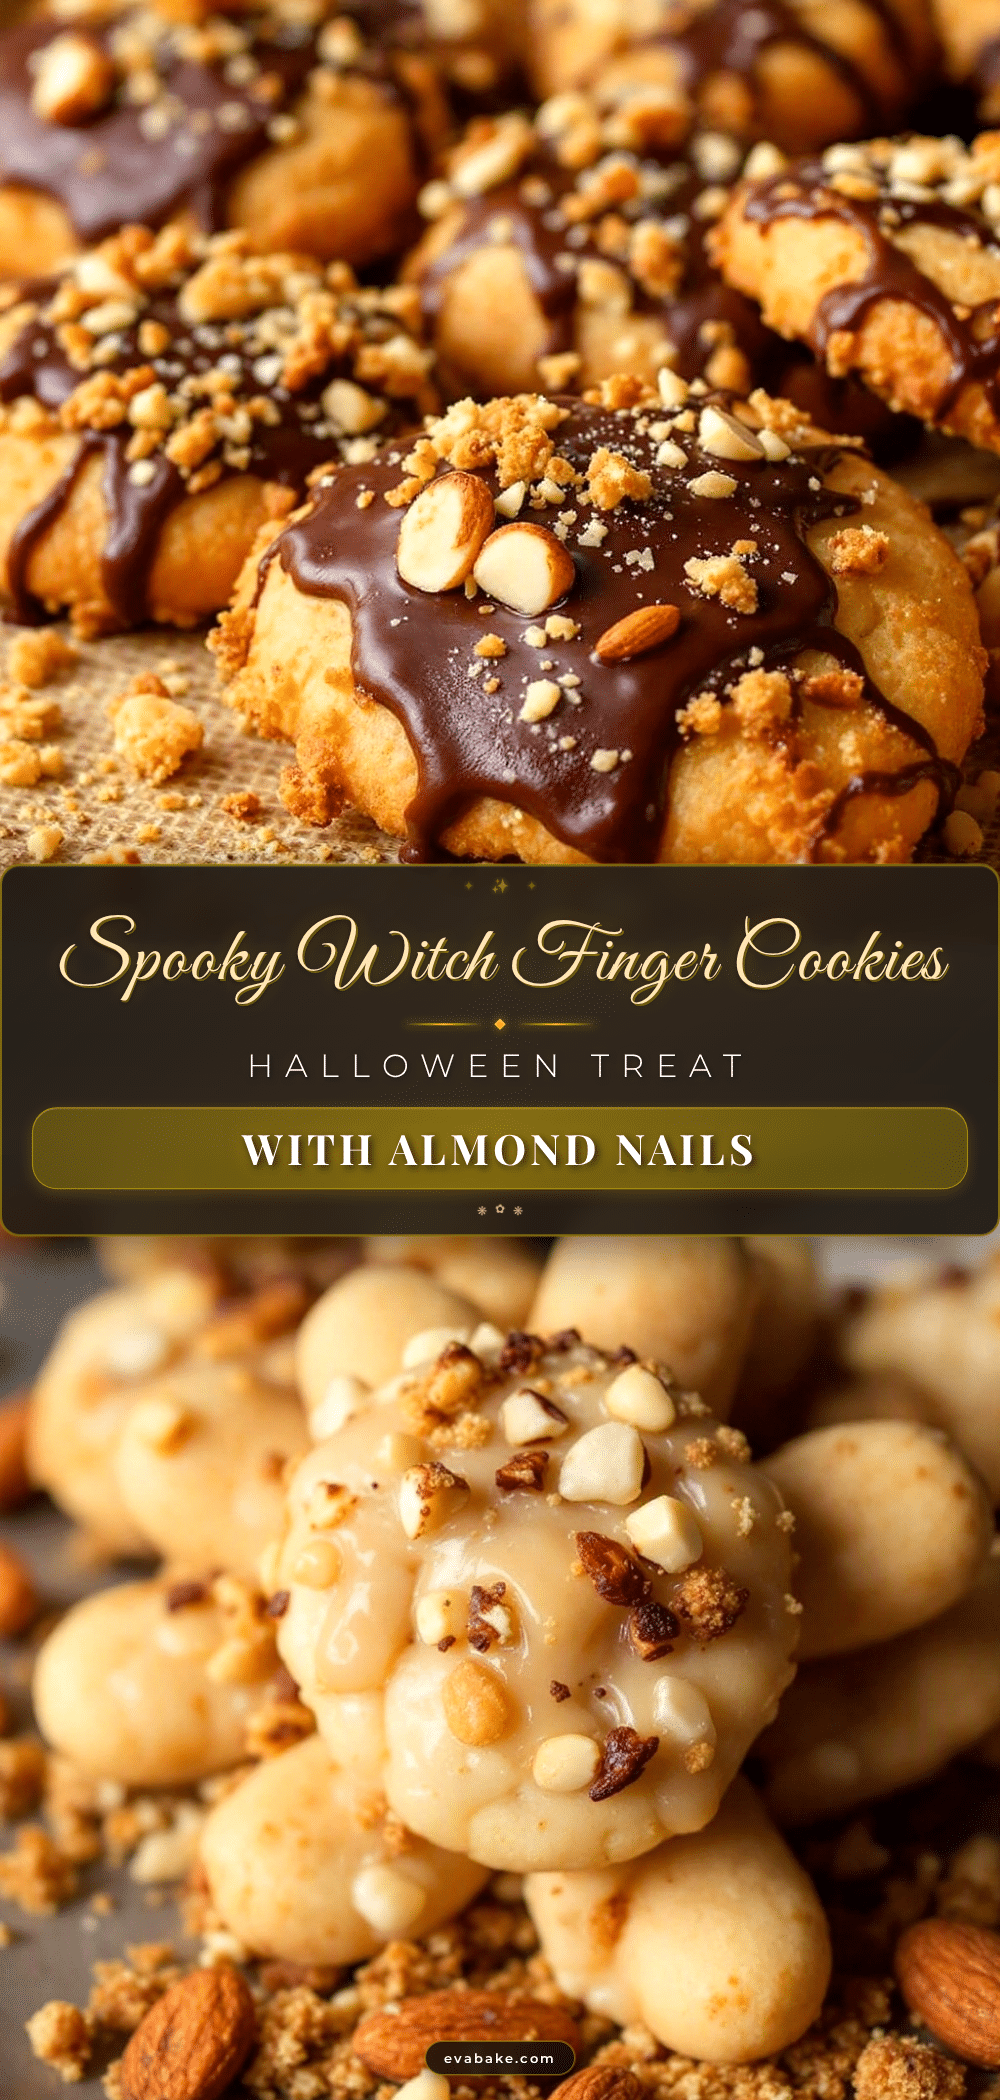
Best Easy Witch’s Finger Cookies with Almond Nails

These spooky but delicious witch finger cookies are made with buttery shortbread dough, green food coloring, and almond slice nails. Perfect for Halloween parties, they look disgustingly realistic but taste amazing.
- Prep Time: 30 minutes
- Cook Time: 15 minutes
- Total Time: 45 minutes
- Yield: 30 cookies 1x
- Category: Dessert
- Cuisine: American
Ingredients
- 1 cup (226g) unsalted butter, softened
- 1 cup (200g) granulated sugar
- 1 large egg, room temperature
- 1 teaspoon vanilla extract
- 1 teaspoon almond extract
- 2 ½ cups (312g) all-purpose flour
- 1 teaspoon baking powder
- ½ teaspoon salt
- About 60 whole blanched slivered almonds
- Green food coloring (gel or paste preferred)
- Red jam or jelly (optional)
- Powdered sugar for dusting (optional)
Instructions
- Cream the butter and sugar. In a large mixing bowl, beat the softened butter and granulated sugar together until light and fluffy — about 3-4 minutes with an electric mixer on medium speed. Scrape down the sides of the bowl halfway through.
- Add the wet ingredients. Beat in the egg, vanilla extract, and almond extract until fully combined. The mixture might look slightly curdled — that’s normal.
- Add the food coloring. Add about 15-20 drops of green gel food coloring (or 30-40 drops of liquid) and mix until evenly distributed. Aim for a deep, slightly sickly green.
- Mix the dry ingredients. In a separate bowl, whisk together the all-purpose flour, baking powder, and salt. Gradually add to the wet mixture, mixing on low speed until just combined. Do not overmix.
- Shape the fingers. Scoop about 1 tablespoon of dough and roll into a log about 3 inches long. Place on prepared baking sheet. Taper one end to look like a fingertip and make the other end slightly thicker. Repeat, spacing fingers about 2 inches apart.
- Create the knuckles. Using the back of a butter knife or offset spatula, gently press 2-3 horizontal lines into each finger to create knuckle creases. Press lightly to make indentations, not cuts.
- Add the almond nails. Pour a few drops of almond extract into a small bowl. Dip each slivered almond into the extract, then press gently onto the tapered end of each finger. Press firmly so it stays during baking.
- Add wrinkles and details. Use a toothpick or knife tip to add tiny wrinkles around knuckles and nail base. Gently pinch sides of fingers for a more organic shape.
- Chill (optional but helpful). Place baking sheets in the refrigerator for 15-20 minutes to help cookies hold their shape during baking.
- Bake. Preheat oven to 325°F (163°C). Bake for 12-15 minutes, until edges are just barely golden. Centers should still look slightly pale and soft.
- Cool and add details. Let cookies cool on baking sheet for 5 minutes, then transfer to a cooling rack. If using red jam, dab a tiny amount at the base of each almond nail while cookies are still warm.
- Final touch (optional). Lightly dust cooled cookies with powdered sugar for an aged, dusty look.
Notes
For best results, dip almonds in almond extract before pressing onto dough to help them stick. Don’t overbake; cookies should be just set with barely golden edges. Chilling shaped cookies for 15-20 minutes helps prevent spreading. For a dairy-free version, use vegan butter sticks. For nut-free nails, use sliced dates or dried apricot pieces. Cookies can be stored in an airtight container at room temperature for up to 5 days or frozen for up to 3 months.
Nutrition
- Serving Size: 1 cookie
- Calories: 145
- Sugar: 7
- Sodium: 65
- Fat: 9
- Saturated Fat: 5
- Carbohydrates: 16
- Protein: 2
Keywords: Halloween cookies, witch finger cookies, shortbread cookies, almond cookies, spooky cookies, easy Halloween recipe, creepy cookies, almond nail cookies