The butter was browning on the stove, and I was elbow-deep in a batch of cookie dough that just wasn’t coming together. It was one of those afternoons where nothing in the kitchen felt right—the eggs were too cold, the mixer was making that weird noise again, and I was this close to ordering takeout. Then my phone buzzed. A friend from my old cooking class had sent a text: “Remember those bars we had at the fall festival? I need the recipe.” I didn’t have it. But I remembered the taste—deep, nutty, buttery, with that smoky-sweet warmth that only bourbon can bring.
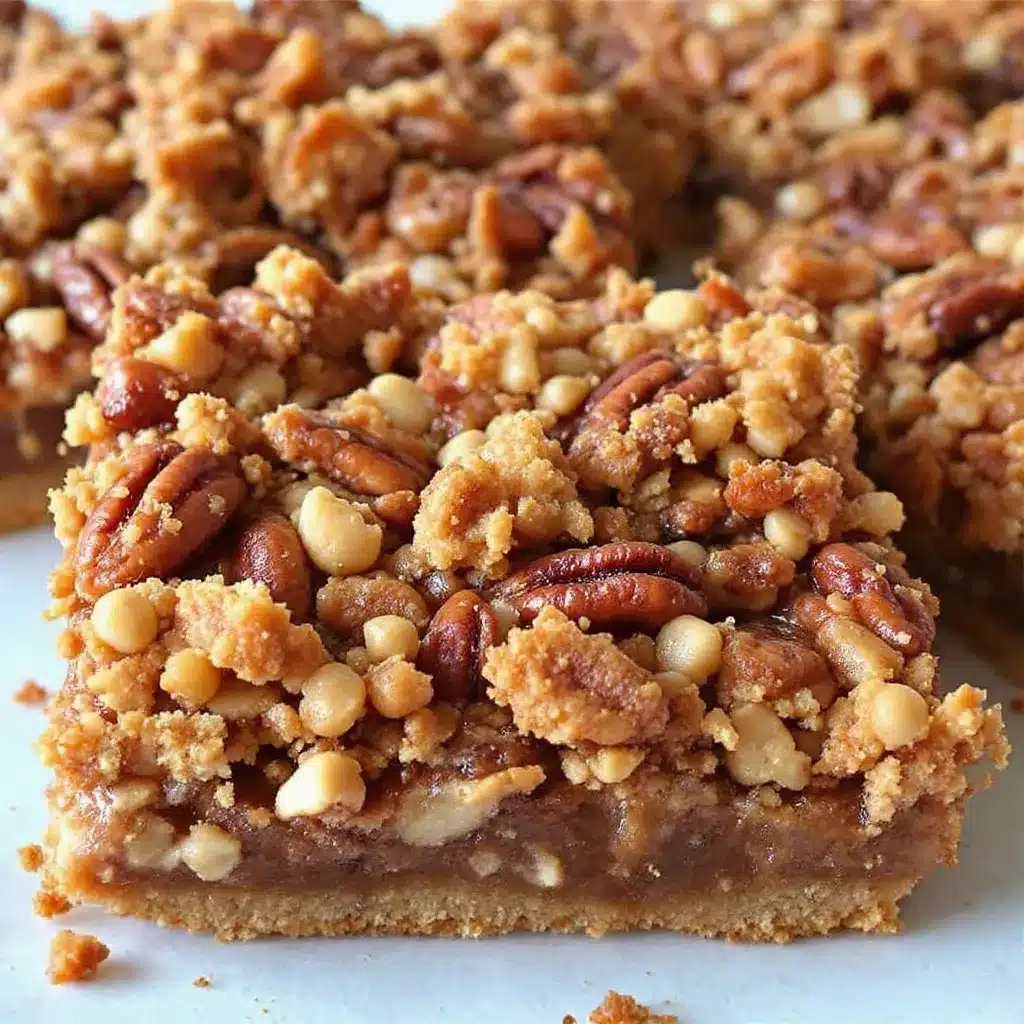
So I did what any stubborn home cook would do. I abandoned the cookie dough, poured myself a small glass of maple bourbon (for inspiration, obviously), and started experimenting. Three batches later—one that was too gooey, one that crumbled into a thousand pieces, and one that was just right—these Perfect Maple Bourbon Pecan Pie Bars were born. The filling is rich and custardy without being cloying, the pecan topping is perfectly toasted, and the shortbread crust holds everything together like a warm hug on a plate.
Honestly, I think these bars are even better than traditional pecan pie. No fussy pastry crust to roll out, no worrying about the filling being underbaked in the center. Just a buttery shortbread base, a luscious maple-bourbon filling, and plenty of crunchy pecans on top. They’re the kind of dessert that makes people close their eyes after the first bite. And the best part? They come together in a fraction of the time it takes to make a full pie. These Perfect Maple Bourbon Pecan Pie Bars have become my go-to for every fall gathering, and I have a feeling they’ll become yours too.
Why You’ll Love This Recipe
Let me tell you why these bars have earned a permanent spot in my baking rotation. After testing this recipe at least six times (and forcing friends, neighbors, and my skeptical father-in-law to be taste-testers), I can say with confidence that this version is the one.
- Quick & Easy: From start to finish, these bars take about 45 minutes of active time. No rolling dough, no blind baking, no fuss. Just press, pour, top, and bake.
- Simple Ingredients: You probably have most of these in your pantry right now. Butter, flour, sugar, eggs, pecans. The only “special” ingredients are maple syrup and bourbon—and trust me, they’re worth the trip to the store.
- Perfect for Entertaining: These bars are made for sharing. They slice cleanly, travel well, and look gorgeous on a dessert table. I’ve brought them to summer grazing boards and holiday parties alike, and they always disappear first.
- Crowd-Pleaser: Even people who claim they “don’t like pecan pie” love these bars. The crust-to-filling ratio is perfect—not too sweet, not too sticky, just right.
- Unbelievably Delicious: The combination of browned butter, rich maple syrup, and a hint of bourbon creates a flavor that’s complex and comforting all at once. It’s the kind of dessert that feels fancy but is secretly simple.
What makes these bars different from every other pecan bar recipe out there? It’s the technique. Browning the butter for the crust adds a nutty depth that regular butter just can’t match. And blooming the bourbon with the maple syrup before adding it to the filling ensures the alcohol cooks off but the flavor lingers. I tested this with cheap bourbon and good bourbon—and honestly, use what you like to drink. The flavor will be slightly different, but both versions are fantastic.
These bars aren’t just good. They’re the kind of dessert that makes you close your eyes after the first bite. It’s comfort food reimagined—familiar enough to feel like home, but special enough to impress anyone.
What Ingredients You Will Need
This recipe uses simple, wholesome ingredients to deliver bold flavor and satisfying texture without any fuss. Most of these are pantry staples, and the few that aren’t are easy to find at any grocery store.
For the Shortbread Crust
- 1 ½ cups all-purpose flour (190g) — I use King Arthur Flour for consistent results, but any brand works
- ½ cup powdered sugar (60g) — This keeps the crust tender, not crunchy
- ¼ teaspoon salt — Just enough to balance the sweetness
- ¾ cup unsalted butter (170g), cold and cut into small cubes — Cold butter is crucial for a flaky shortbread texture
- 1 teaspoon vanilla extract — Pure vanilla, not imitation, makes a difference here
For the Pecan Filling
- ¾ cup pure maple syrup (180ml) — Not pancake syrup! Real maple syrup is non-negotiable here. Grade A dark amber is my favorite for its robust flavor
- ¼ cup bourbon (60ml) — Use a bourbon you enjoy drinking. I prefer Bulleit or Maker’s Mark for their smooth, slightly sweet profile
- ½ cup packed light brown sugar (100g) — Adds depth and moisture to the filling
- ¼ cup unsalted butter (57g) — Melted and slightly cooled
- 2 large eggs — Room temperature, which helps them incorporate smoothly
- 1 teaspoon vanilla extract — Because you can never have too much vanilla
- ¼ teaspoon salt — Balances the sweetness and enhances the nutty flavor
- 2 cups pecan halves (200g) — I prefer whole halves for a prettier presentation, but chopped pecans work too
Ingredient Selection Tips: For the best texture, use fresh pecans. Stale pecans will taste bitter and ruin the whole dish. Store your pecans in the freezer if you don’t use them often—they stay fresh for up to a year. If you’re looking for a bourbon substitute, try using 2 teaspoons of bourbon extract mixed with enough water to make ¼ cup. The flavor won’t be quite as complex, but it’s a good non-alcoholic option.
For a dairy-free version, you can use vegan butter in both the crust and the filling. I’ve tested this with Miyoko’s European Style Cultured Vegan Butter, and the results were surprisingly good—the crust was still tender and the filling set perfectly.
Equipment Needed
You don’t need a fancy kitchen to make these bars, but having the right tools makes the process smoother. Here’s what you’ll need:
- 9×13-inch baking pan — Metal or glass both work, but metal gives a crisper crust. If using glass, reduce the oven temperature by 25°F
- Parchment paper — This is non-negotiable for easy removal. Leave overhang on two sides to create “handles”
- Food processor or pastry cutter — For cutting the butter into the flour. A fork works in a pinch, but a food processor is faster
- Medium saucepan — For browning the butter and heating the maple-bourbon mixture
- Large mixing bowl — For whisking the filling ingredients
- Whisk — A sturdy one for combining the filling without lumps
- Spatula — For spreading the filling evenly over the crust
- Cooling rack — Essential for letting the bars cool completely before slicing
Budget-Friendly Tip: If you don’t have a food processor, you can make the crust by hand. Just rub the cold butter into the flour mixture using your fingertips until it resembles coarse meal. It takes a few extra minutes, but the result is the same.
Preparation Method
Let’s walk through this step by step. I’ve included all my hard-won tips and tricks so you can nail these bars on your first try.
Step 1: Preheat and Prepare the Pan
Preheat your oven to 350°F (175°C). Line a 9×13-inch baking pan with parchment paper, leaving about 2 inches of overhang on the long sides. This creates “handles” that make lifting the bars out a breeze. Lightly spray the parchment with non-stick cooking spray for extra insurance.
Step 2: Make the Shortbread Crust
In a food processor, combine 1 ½ cups all-purpose flour, ½ cup powdered sugar, and ¼ teaspoon salt. Pulse a few times to mix. Add ¾ cup cold cubed butter and 1 teaspoon vanilla extract. Pulse until the mixture looks like coarse sand—about 10-12 pulses. You should see small pea-sized pieces of butter throughout. Don’t over-process; those butter bits are what make the crust tender.
If you’re making the crust by hand, whisk the dry ingredients together in a bowl, then cut in the cold butter using a pastry cutter or two forks until the mixture resembles coarse meal. Stir in the vanilla.
Step 3: Press and Par-Bake the Crust
Transfer the crust mixture to your prepared pan. Press it firmly and evenly into the bottom. I use the bottom of a measuring cup to really pack it down—this prevents the filling from seeping underneath later. Prick the crust all over with a fork (this prevents bubbling).
Bake for 15-18 minutes, until the edges are just starting to turn golden. The center will still look slightly pale. Remove from the oven and let it cool on a wire rack while you make the filling. Keep the oven on.
Step 4: Brown the Butter for the Filling
In a medium saucepan over medium heat, melt ¼ cup unsalted butter. Swirl the pan occasionally as it melts. The butter will foam, then the foam will subside, and you’ll see brown specks forming at the bottom. This takes about 3-4 minutes. The moment it smells nutty and turns a warm amber color, remove it from the heat immediately. Burnt butter is bitter butter—trust me, I’ve ruined a batch this way.
Step 5: Combine the Maple-Bourbon Mixture
Add ¾ cup maple syrup and ¼ cup bourbon to the saucepan with the browned butter. Whisk to combine. Return to medium heat and bring to a gentle simmer. Let it bubble for 2 minutes, stirring occasionally. This step cooks off the alcohol from the bourbon and thickens the mixture slightly. Remove from heat and let it cool for 5 minutes.
Step 6: Make the Filling
In a large bowl, whisk together ½ cup packed light brown sugar, 2 large eggs, 1 teaspoon vanilla extract, and ¼ teaspoon salt until smooth. Slowly pour the warm maple-bourbon mixture into the egg mixture while whisking constantly. This is called tempering—it prevents the eggs from scrambling. Pour slowly and whisk fast.
Stir in 2 cups of pecan halves. The filling will look thin, but don’t worry—it sets beautifully as it bakes.
Step 7: Assemble and Bake
Pour the filling over the warm crust, spreading the pecans evenly with a spatula. Bake at 350°F (175°C) for 25-30 minutes, until the edges are set and the center is slightly jiggly. It will continue to set as it cools. The filling should be golden brown and bubbly around the edges.
Sensory Cue: When it’s done, the filling will look puffed and glossy, and your kitchen will smell like a cozy fall cabin. If you gently shake the pan, the center should wobble just slightly—like a firm Jell-O.
Step 8: Cool Completely
This is the hardest part. Let the bars cool in the pan on a wire rack for at least 2 hours at room temperature, then refrigerate for another 1-2 hours. Chilling them makes slicing clean and easy. I know it’s tempting to dig in while they’re warm, but warm bars will fall apart. Patience pays off here.
Once fully cooled and chilled, use the parchment handles to lift the bars out of the pan. Place on a cutting board and slice into squares or rectangles. I like to wipe the knife clean between cuts for the neatest edges.
Cooking Tips & Techniques
After making these bars more times than I care to admit, I’ve collected a few tricks that make a real difference. Here are the ones I wish someone had told me before my first attempt.
Don’t skip the par-bake. The first time I made these, I was impatient and poured the filling directly onto the raw crust. The result was a soggy, undercooked bottom that collapsed when I tried to slice it. Par-baking the crust for 15 minutes ensures it stays crisp and holds up to the wet filling.
Room temperature eggs matter. Cold eggs will seize up the warm maple-bourbon mixture and create a lumpy filling. Take your eggs out of the fridge 30 minutes before you start, or place them in a bowl of warm water for 5 minutes to take the chill off.
Watch the bourbon carefully. When you simmer the maple syrup and bourbon together, keep an eye on it. The mixture can foam up quickly and boil over if you’re not paying attention. I learned this the hard way and spent 20 minutes scrubbing sticky syrup off my stovetop.
Use a sharp knife for slicing. A dull knife will drag through the filling and mess up your clean edges. Run your knife under hot water, wipe it dry, then slice. Wipe the blade clean between each cut for the prettiest presentation.
Let them set overnight. If you have the time, let the bars chill in the refrigerator overnight before slicing. The flavors meld together beautifully, and the texture becomes perfectly fudgy. I actually prefer the bars the day after baking—the maple and bourbon flavors deepen overnight.
Timing tip: Make the crust and filling while the oven preheats. By the time the crust is par-baked, your filling ingredients will be at room temperature and ready to go. This saves about 15 minutes of waiting around.
Variations & Adaptations
One of the best things about this recipe is how easily it adapts to different tastes and dietary needs. Here are some variations I’ve tried and loved.
Chocolate Maple Bourbon Pecan Bars
For a decadent twist, melt ½ cup of dark chocolate chips with the butter when browning it. The chocolate adds a rich, bittersweet layer that pairs beautifully with the maple and bourbon. I made these for a holiday party and they disappeared within minutes.
Gluten-Free Version
Substitute the all-purpose flour with a 1:1 gluten-free baking flour blend. I’ve tested this with Bob’s Red Mill 1-to-1 Baking Flour, and the crust comes out tender and flaky—no one will know the difference. Just make sure your blend contains xanthan gum for structure.
Vegan Version
Use vegan butter in both the crust and filling. Replace the eggs with a flax egg mixture (2 tablespoons ground flaxseed mixed with 6 tablespoons water, let sit for 5 minutes). The texture will be slightly less custardy, but the flavor is still incredible. I tested this for a friend with egg allergies, and she asked for the recipe immediately.
Spiced Pecan Bars
Add 1 teaspoon of pumpkin pie spice or a mix of cinnamon, nutmeg, and cloves to the filling. This gives the bars a warm, cozy flavor that’s perfect for fall. I like to add a pinch of cayenne pepper too—just enough for a subtle heat that catches you off guard in the best way.
Bourbon-Free Version
If you’re cooking for kids or avoiding alcohol, replace the bourbon with ¼ cup of apple cider or strong brewed coffee. The flavor won’t be exactly the same, but both options add depth and complexity. Apple cider gives a fruity sweetness, while coffee enhances the maple and nutty notes.
Serving & Storage Suggestions
These bars are versatile enough for any occasion, from casual weeknight desserts to fancy holiday tables.
Serving Temperature: I prefer these bars at room temperature or slightly chilled. If you’ve refrigerated them, let them sit out for 15-20 minutes before serving. This takes the chill off and lets the flavors open up. For an extra-special touch, warm individual bars in the microwave for 10-15 seconds and serve with a scoop of vanilla bean ice cream or a dollop of lightly sweetened whipped cream.
Presentation Ideas: Dust the bars with a light sprinkle of flaky sea salt just before serving—it cuts through the sweetness and makes the flavors pop. Arrange them on a wooden board or a simple white platter for a rustic look. For holiday parties, cut them into small bite-sized squares and serve in mini cupcake liners.
Complementary Pairings: These bars pair beautifully with a cup of hot coffee, a mug of spiced chai, or a glass of bourbon on the rocks. For a dessert spread, serve them alongside pumpkin coffee cake or brown butter banana bread for a fall-themed dessert table that will have everyone asking for recipes.
Storage Instructions: Store the bars in an airtight container at room temperature for up to 3 days, or in the refrigerator for up to a week. Layer them between sheets of parchment paper to prevent sticking. The bars actually improve after a day or two—the flavors meld and the texture becomes perfectly fudgy.
Freezing Instructions: These bars freeze beautifully. Wrap individual bars tightly in plastic wrap, then place them in a freezer-safe bag or container. They’ll keep for up to 3 months. To thaw, let them sit at room temperature for about 30 minutes, or pop them in the microwave for 15-20 seconds for a warm treat.
Reheating Tip: If you prefer warm bars, reheat them in a 300°F (150°C) oven for 5-7 minutes. This crisps up the crust without overheating the filling. The microwave works in a pinch, but the crust won’t be as crisp.
Nutritional Information & Benefits
Let’s be real—these bars are a treat, not a health food. But that doesn’t mean they don’t have some redeeming qualities.
Estimated Nutritional Values (per bar, based on 16 servings):
- Calories: 320
- Total Fat: 20g
- Saturated Fat: 9g
- Cholesterol: 55mg
- Sodium: 115mg
- Total Carbohydrates: 33g
- Dietary Fiber: 2g
- Sugars: 22g
- Protein: 4g
Health Highlights: Pecans are packed with healthy monounsaturated fats, fiber, and antioxidants. They’re one of the best nuts for heart health and can help lower cholesterol levels. Maple syrup contains antioxidants and minerals like zinc and manganese, though it should still be used in moderation. The butter and eggs provide vitamin A and protein, respectively.
Dietary Considerations: This recipe contains gluten, dairy, eggs, and tree nuts (pecans). For a gluten-free version, use a 1:1 gluten-free flour blend. For a dairy-free version, substitute vegan butter. For an egg-free version, use flax eggs as described in the variations section. This recipe is naturally vegetarian.
My Personal Take: I believe in balance. These bars are a special occasion dessert, not an everyday snack. When I make them, I savor every bite and don’t feel guilty about it. Life is too short to skip dessert, especially when it’s this good.
Conclusion
These Perfect Maple Bourbon Pecan Pie Bars are everything I want in a dessert—buttery, nutty, sweet with a hint of warmth, and incredibly satisfying. They’re easier than traditional pecan pie, more portable, and honestly, I think they taste even better. The shortbread crust is a game-changer, the filling is perfectly balanced, and the pecans add that irresistible crunch.
I’ve made these bars for Thanksgiving, Friendsgiving, Christmas parties, and random Tuesday nights when I needed a little comfort. Every single time, someone asks for the recipe. And now you have it. I hope you make them your own—add a little extra bourbon if that’s your thing, swap in chocolate chips, or leave out the bourbon entirely for a family-friendly version. The beauty of this recipe is how forgiving it is.
When you make these bars—and I know you will—come back and let me know how they turned out. Did you add a twist? Did they disappear at your party? Did someone ask for the recipe? I genuinely love hearing about your kitchen wins. Leave a comment below, share a photo on social media, or just send me a message. Happy baking, friends. You’ve got this.
Frequently Asked Questions
Can I use light corn syrup instead of maple syrup?
You can, but the flavor will be significantly different. Corn syrup is much sweeter and lacks the complex, woody notes that real maple syrup brings. If you’re in a pinch, use a 50/50 mix of corn syrup and maple syrup for a closer flavor profile. But honestly, real maple syrup is worth the splurge here.
How do I know when the bars are fully baked?
The edges should be set and golden brown, and the center should jiggle slightly when you shake the pan—like a firm Jell-O. If the center is still liquidy, give it another 5 minutes. If the edges are browning too quickly, tent the pan loosely with foil for the last 10 minutes of baking.
Can I make these bars ahead of time?
Absolutely. These bars are actually better the next day. Bake them a day ahead, let them cool completely, then refrigerate overnight. Slice and serve at room temperature the next day. They also freeze beautifully for up to 3 months.
Why did my crust turn out soggy?
This usually happens if the crust wasn’t par-baked long enough, or if the filling was poured on while the crust was still hot. Make sure to par-bake the crust for the full 15-18 minutes until it’s lightly golden. Let it cool for at least 10 minutes before adding the filling. Also, pressing the crust firmly into the pan prevents the filling from seeping underneath.
Can I use chopped pecans instead of pecan halves?
Yes, chopped pecans work perfectly. The texture will be slightly different—more uniform and less dramatic—but the flavor is the same. If using chopped pecans, reduce the amount to 1 ½ cups since they pack more densely than halves. I actually prefer halves for the visual appeal, but chopped pecans make the bars easier to slice cleanly.
Pin This Recipe!
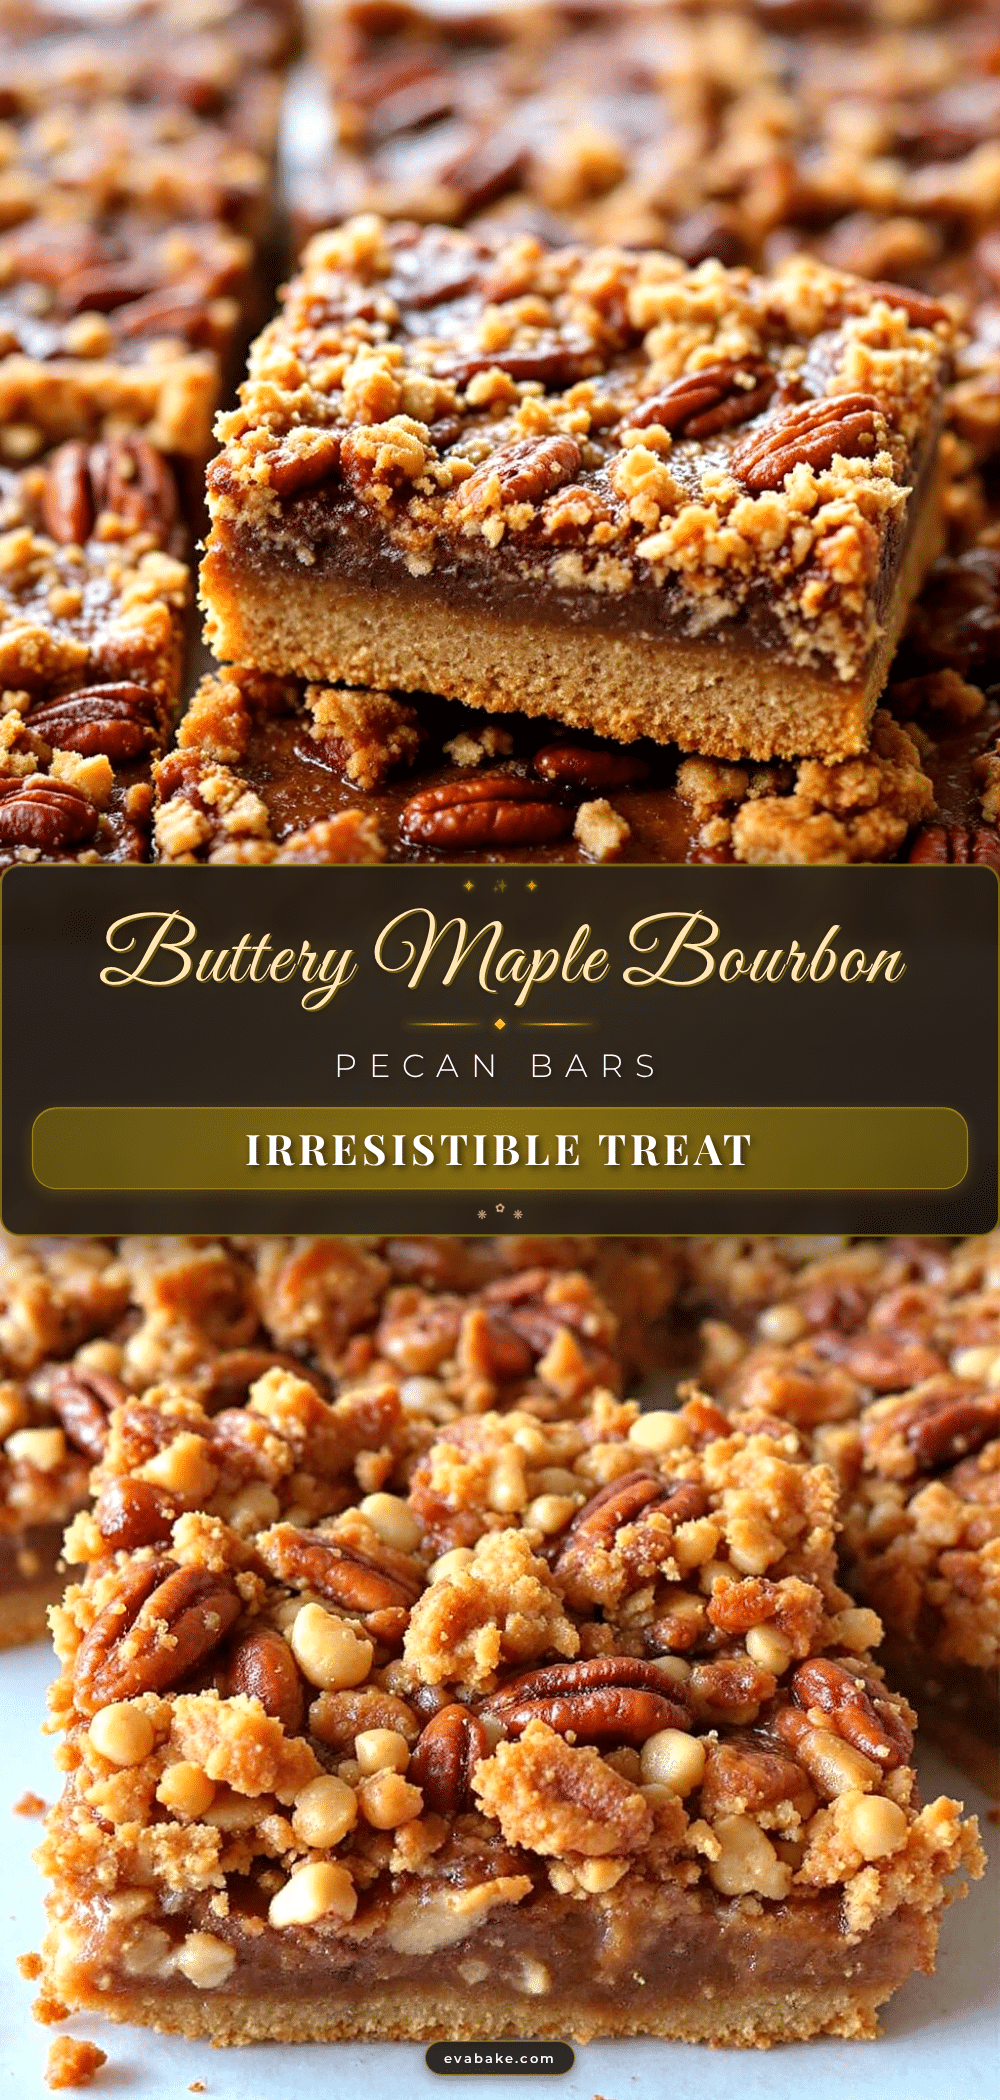
Perfect Maple Bourbon Pecan Pie Bars – Easy Recipe
These Perfect Maple Bourbon Pecan Pie Bars feature a buttery shortbread crust, a rich maple-bourbon custard filling, and plenty of crunchy pecans. They’re easier than traditional pecan pie, perfect for entertaining, and come together in a fraction of the time.
- Prep Time: 20 minutes
- Cook Time: 45 minutes
- Total Time: 1 hour 5 minutes (plus cooling and chilling time)
- Yield: 16 servings 1x
- Category: Dessert
- Cuisine: American
Ingredients
- 1 ½ cups all-purpose flour (190g)
- ½ cup powdered sugar (60g)
- ¼ teaspoon salt
- ¾ cup unsalted butter (170g), cold and cut into small cubes
- 1 teaspoon vanilla extract
- ¾ cup pure maple syrup (180ml)
- ¼ cup bourbon (60ml)
- ½ cup packed light brown sugar (100g)
- ¼ cup unsalted butter (57g), melted and slightly cooled
- 2 large eggs, room temperature
- 1 teaspoon vanilla extract
- ¼ teaspoon salt
- 2 cups pecan halves (200g)
Instructions
- Preheat oven to 350°F (175°C). Line a 9×13-inch baking pan with parchment paper, leaving overhang on the long sides. Lightly spray with non-stick cooking spray.
- In a food processor, combine flour, powdered sugar, and salt. Pulse to mix. Add cold cubed butter and vanilla extract. Pulse until mixture resembles coarse sand (about 10-12 pulses).
- Transfer crust mixture to prepared pan. Press firmly and evenly into the bottom. Prick all over with a fork. Bake for 15-18 minutes until edges are just golden. Let cool on a wire rack while making filling. Keep oven on.
- In a medium saucepan over medium heat, melt ¼ cup unsalted butter. Swirl occasionally until butter foams, then brown specks form and it smells nutty (about 3-4 minutes). Remove from heat immediately.
- Add maple syrup and bourbon to the saucepan with browned butter. Whisk to combine. Return to medium heat and bring to a gentle simmer. Let bubble for 2 minutes, stirring occasionally. Remove from heat and cool for 5 minutes.
- In a large bowl, whisk together brown sugar, eggs, vanilla extract, and salt until smooth. Slowly pour the warm maple-bourbon mixture into the egg mixture while whisking constantly (tempering). Stir in pecan halves.
- Pour filling over warm crust, spreading pecans evenly. Bake at 350°F (175°C) for 25-30 minutes until edges are set and center is slightly jiggly.
- Cool bars in pan on a wire rack for at least 2 hours at room temperature, then refrigerate for 1-2 hours. Use parchment handles to lift bars out. Slice into squares with a sharp knife, wiping clean between cuts.
Notes
Don’t skip par-baking the crust to avoid sogginess. Use room temperature eggs to prevent lumpy filling. Let bars cool completely and chill before slicing for clean edges. Bars improve after a day—flavors meld overnight.
Nutrition
- Serving Size: 1 bar
- Calories: 320
- Sugar: 22
- Sodium: 115
- Fat: 20
- Saturated Fat: 9
- Carbohydrates: 33
- Fiber: 2
- Protein: 4
Keywords: pecan pie bars, maple bourbon, shortbread crust, fall dessert, easy pecan bars, Thanksgiving dessert


