Thanksgiving morning, and I’m standing at the stove in my pajamas at 7 a.m., stirring a pot of turkey drippings while my family sleeps. The turkey isn’t even in the oven yet, but the gravy is already done. That was the year I stopped pretending I could pull off a perfect gravy while also roasting a bird, mashing potatoes, and keeping the dog from stealing the dinner rolls off the counter. It just wasn’t happening. For years, I accepted that gravy would be the last-minute scramble, the thing I’d rush through while everyone else was already seated. And honestly, it showed. Lumpy, greasy, or just plain bland — my gravy was always the weak link.
Then I started thinking about brown butter. If you’ve ever watched butter turn golden and nutty in a pan, you know it’s basically magic. And sage? That earthy, slightly peppery herb that smells like stuffing and cozy sweaters. I figured if I could build the gravy’s flavor base ahead of time — before the chaos of the big meal — I could actually enjoy Thanksgiving morning instead of sweating through it. So I browned the butter, fried the sage, and made the roux the day before. I prepped the stock, wrote myself a sticky note, and crossed my fingers.
That first batch of make-ahead brown butter sage turkey gravy was a game-changer. It was rich without being heavy, silky without being greasy, and it had this deep, almost toasty flavor that made everyone at the table pause mid-bite. My brother-in-law asked for the recipe. My mom asked if I’d cater next year. I just smiled and poured myself another glass of wine. This gravy is the kind of thing that makes you look like you’ve been doing this for decades — even if you’re still figuring out the turkey situation.
And the best part? You can make it up to three days ahead. That’s right — no last-minute whisking, no panicking over lumps while your guests are waiting. Just reheat, stir, and serve. It might be the smartest thing you do all holiday season.
Why You’ll Love This Recipe
Let me tell you why this gravy is going to become your new Thanksgiving secret weapon. I’ve tested this recipe at least a dozen times across different holidays, and it never fails. Here’s what makes it stand out:
- Make-Ahead Magic : Prep this gravy up to three days before the big meal. It saves beautifully in the fridge, and the flavors actually get better as they sit together. Less stress on the day of means more time for pie.
- Brown Butter Depth : Regular butter is fine. Brown butter is unforgettable. It adds a nutty, caramelized richness that regular gravy just can’t touch. You’ll taste the difference in every single spoonful.
- Sage Without the Sog : Instead of just stirring dried sage into the gravy (which can taste dusty), we fry fresh sage leaves in the brown butter. They get crispy and aromatic, then get stirred in at the end. It’s a small step that makes a huge impact.
- No Lumps, No Drama : The roux-based method is foolproof if you follow the steps. We’re whisking constantly and adding stock slowly — no lumps, no surprises. Just smooth, velvety gravy every time.
- Crowd-Pleaser Approved : I’ve served this at Friendsgiving, Thanksgiving, Christmas dinner, and even random Tuesday potlucks. It disappears fast. People who claim they don’t like gravy suddenly change their minds.
- Better Than Store-Bought : Look, I get it. Jarred gravy is convenient. But this homemade version tastes like a hug from someone who actually knows how to cook. And once you realize how easy it is, you’ll never go back.
This isn’t just another gravy recipe. It’s the one that solves the biggest Thanksgiving problem: timing. You get deeply flavorful, restaurant-quality gravy without the last-minute panic. That’s the kind of win we all need during the holidays.
What Ingredients You Will Need
This recipe uses simple, wholesome ingredients to deliver bold flavor and satisfying texture without the fuss. Most of these are pantry staples or easy to find at any grocery store. Let’s break down what each one does.
For the Brown Butter Base:
- Unsalted butter, 1 cup (2 sticks or 226g) — Use unsalted so you control the salt level. I prefer Kerrygold or Challenge for their rich flavor. The butter gets browned until golden and nutty, which is the backbone of this gravy.
- Fresh sage leaves, 12-15 leaves — Fresh sage is non-negotiable here. Dried sage won’t give you the same aromatic punch. Look for leaves that are bright green and not wilted. You’ll fry them in the butter until crispy.
For the Roux:
- All-purpose flour, ½ cup (60g) — This thickens the gravy. You can substitute with gluten-free all-purpose flour if needed, though the texture will be slightly different. Whisk it into the brown butter until smooth and golden.
For the Gravy Base:
- Low-sodium turkey or chicken stock, 4 cups (960ml) — Homemade stock is ideal, but good-quality store-bought works perfectly. I recommend Swanson or Kitchen Basics. Low-sodium is key so you can season to taste without oversalting.
- Turkey drippings (optional), ¼ cup (60ml) — If you’re making this ahead and roasting a turkey later, save the drippings and stir them in when reheating. It adds incredible depth. If you don’t have drippings, the gravy is still fantastic without them.
- Dry white wine (optional), ¼ cup (60ml) — A splash of wine adds acidity that balances the richness. Use something drinkable like Sauvignon Blanc or Pinot Grigio. You can skip it or substitute with additional stock.
For Seasoning:
- Kosher salt, 1 teaspoon (or to taste) — I use Diamond Crystal. Start with less and add more at the end.
- Freshly ground black pepper, ½ teaspoon — Freshly ground makes a difference. Pre-ground pepper just doesn’t have the same pop.
- Fresh thyme leaves, 1 teaspoon — Optional but lovely. Adds an earthy, lemony note that pairs beautifully with sage.
- Bay leaf, 1 — Simmered in the stock for subtle herbal depth. Remove before serving.
Ingredient Tips I’ve Learned the Hard Way:
- Don’t skip browning the butter. It takes about 5-7 minutes, and you’ll smell when it’s ready — nutty and toasty. Watch it carefully because it can go from brown to burnt fast.
- Fresh sage is worth seeking out. I’ve tried dried sage in a pinch, and it just doesn’t bloom the same way. The crispy fried leaves are also a gorgeous garnish.
- If you’re using store-bought stock, taste it first. Some brands are saltier than others. Adjust your seasoning accordingly.
- The wine is optional, but I really recommend it. That little bit of acidity cuts through the richness and makes the gravy feel lighter on the palate.
Equipment Needed
You don’t need a fancy kitchen to make this gravy. Here’s what you’ll need:
- Large skillet or saucepan (10-12 inches) — A heavy-bottomed pan works best for even browning. I use my trusty stainless steel pan, but non-stick works too.
- Whisk — A good whisk is your best friend here. Silicone or metal, either works. Just make sure it’s sturdy enough to handle constant stirring.
- Wooden spoon or silicone spatula — For scraping up any browned bits from the pan.
- Fine-mesh strainer — Optional but helpful if you want to strain out the sage leaves and any solids for a super smooth gravy. I usually leave them in for texture.
- Measuring cups and spoons — Precision matters with the flour and liquid ratios.
- Liquid measuring cup (4-cup capacity) — For measuring and holding the stock.
- Small bowl — For whisking the flour into the butter if you prefer to make a paste first (I just add it directly to the pan).
- Storage container — A glass jar or airtight container for storing the finished gravy in the fridge.
- Medium saucepan — For reheating the gravy on the day of serving.
Budget-Friendly Alternatives: If you don’t have a fine-mesh strainer, you can skip it — the gravy will have a slightly rustic texture but still tastes amazing. No whisk? A fork works in a pinch, though you’ll work a little harder. And if you don’t have a heavy-bottomed pan, just watch the heat carefully to prevent scorching.
Preparation Method

Step 1: Brown the Butter (5-7 minutes)
Place your large skillet or saucepan over medium heat. Add the 1 cup of unsalted butter. Let it melt completely, then continue cooking, swirling the pan occasionally. You’ll see the butter foam up, then subside. Keep watching — small brown specks will start forming at the bottom. Swirl gently. The butter will smell nutty and toasty, like toasted hazelnuts. Once it’s a deep golden amber color, remove it from the heat immediately. Don’t walk away during this step — brown butter can burn in seconds.
Step 2: Fry the Sage (1-2 minutes)
While the butter is still hot, drop in the 12-15 fresh sage leaves. They’ll sizzle and crisp up almost immediately. Use a slotted spoon or tongs to transfer them to a paper towel-lined plate. They’ll get crunchy as they cool. Set them aside for later. The butter will have absorbed some sage flavor — perfect.
Step 3: Make the Roux (2-3 minutes)
Return the pan with the brown butter to medium heat. Sprinkle in the ½ cup of all-purpose flour. Whisk constantly — you want a smooth paste with no lumps. Cook for about 2 minutes, whisking the whole time, until the roux turns a light golden color and smells slightly nutty. This cooks out the raw flour taste. If you’re making this ahead, you can stop here, let the roux cool, cover it, and refrigerate for up to 3 days.
Step 4: Add the Stock (5-7 minutes)
Slowly pour in the 4 cups of low-sodium turkey or chicken stock, whisking constantly. Start with a thin stream, then increase as the mixture smooths out. Add the bay leaf if using. Bring the gravy to a gentle simmer — you’ll see small bubbles around the edges. Reduce the heat to low and let it cook, stirring occasionally, for about 5-7 minutes. It will thicken nicely. It should coat the back of a spoon without being too thick.
Step 5: Season and Finish (2 minutes)
Remove the bay leaf. Stir in the kosher salt, black pepper, and fresh thyme if using. Taste it. Adjust the salt and pepper to your preference. If you’re using the white wine, stir it in now and let it simmer for another minute. If you have turkey drippings, stir them in at this point for extra richness. Finally, crumble the crispy sage leaves over the top and stir gently. They’ll soften slightly but keep their flavor.
Step 6: Cool and Store (10 minutes)
Let the gravy cool to room temperature (about 30-45 minutes). Transfer it to an airtight container and refrigerate for up to 3 days. The gravy will thicken as it cools — that’s normal. When you reheat it, you may need to add a splash of stock or water to thin it back to the right consistency.
Reheating Instructions:
On the day of serving, pour the gravy into a saucepan. Warm it over medium-low heat, whisking occasionally. If it’s too thick, add stock or water 1 tablespoon at a time until it reaches your desired consistency. Taste and adjust seasoning before serving. If you have fresh turkey drippings, stir them in now for that just-roasted flavor.
Cooking Tips & Techniques
After making this gravy more times than I can count, here are the things I wish someone had told me sooner:
Watch the Butter Like a Hawk. I burned my first batch of brown butter while answering a text. The line between perfectly nutty and acridly burnt is about 30 seconds. Swirl the pan, trust your nose, and pull it off the heat the moment it smells like toasted nuts. If it smells like burnt popcorn, you’ve gone too far.
Whisk Like You Mean It. When you add the flour to the butter, don’t be gentle. Whisk vigorously to prevent lumps. A smooth roux means a smooth gravy. If you do end up with lumps, don’t panic — a quick pass through a fine-mesh strainer will fix it.
Low and Slow for the Stock. Adding cold stock to a hot roux can cause splattering and lumps. I warm my stock slightly in the microwave (about 30 seconds) before adding it. It incorporates more smoothly and reduces the risk of a lumpy mess.
Season in Layers. Don’t dump all the salt in at once. Add half, taste, then add more. Remember that if you’re adding turkey drippings later, they’ll bring salt too. I’ve oversalted gravy before, and there’s no fixing it — trust me.
Make Extra. This gravy is amazing on mashed potatoes, stuffing, biscuits, and even leftover turkey sandwiches. I always double the recipe because it disappears fast. It freezes beautifully too — up to 3 months in a freezer-safe container.
My Biggest Failure: One year, I tried to rush the roux by cranking up the heat. The flour scorched, and the gravy tasted bitter and burnt. I had to start over. Low and slow is your friend. Patience pays off here.
Variations & Adaptations
This recipe is flexible, and I’ve tried several variations over the years. Here are some of my favorites:
Herb Swap: Not a fan of sage? Substitute with fresh rosemary or thyme. Rosemary adds a piney, aromatic note that’s lovely with brown butter. Thyme is more subtle and earthy. You can also use a mix of all three for a complex herbal gravy.
Dairy-Free Version: Use a high-quality vegan butter (I like Miyoko’s or Country Crock Plant Butter) and unsweetened oat milk or vegetable stock. The brown butter effect won’t be exactly the same, but you’ll still get a rich, savory gravy. Use gluten-free flour for a gluten-free option too.
Extra Rich Gravy: Swap 1 cup of the stock for heavy cream or half-and-half. Stir it in at the end for a decadent, almost creamy gravy. Perfect for holiday indulgence.
Mushroom Lover’s Gravy: Sauté 8 ounces of finely chopped cremini mushrooms in the butter before adding the flour. Cook until they release their liquid and start browning. Then proceed with the roux. It adds an incredibly savory, umami depth that pairs beautifully with the sage.
Spicy Kick: Add a pinch of cayenne pepper or red pepper flakes along with the salt and pepper. It won’t make the gravy spicy, but it’ll add a subtle warmth that wakes up your taste buds.
Personal Variation I Love: I once added a splash of balsamic vinegar at the end instead of wine. It gave the gravy a slightly sweet, tangy complexity that was incredible with roasted vegetables. Try it if you’re feeling adventurous.
Serving & Storage Suggestions
Serving Temperature: Serve this gravy hot, straight from the stove. It should be steaming but not boiling. If it’s too thick, thin it with a little warm stock or water.
Presentation: Pour the gravy into a warmed gravy boat or serving pitcher. Garnish with a few fresh sage leaves or a sprinkle of fresh thyme for a pretty finish. It looks gorgeous on a holiday table.
What to Serve It With: This gravy is incredible on roasted turkey (obviously), but don’t stop there. Spoon it over mashed potatoes, stuffing, biscuits, roasted vegetables, or even poutine-style over fries. It also makes a fantastic sauce for leftover turkey sandwiches the next day.
Storage Instructions: Store the gravy in an airtight container in the refrigerator for up to 3 days. The flavors will meld and deepen, so it might taste even better the next day. For longer storage, freeze it in a freezer-safe container for up to 3 months. Thaw overnight in the fridge before reheating.
Reheating Tips: Reheat gently over medium-low heat, whisking occasionally. If the gravy has thickened too much, add stock or water 1 tablespoon at a time until it reaches the right consistency. Don’t microwave it — it can heat unevenly and develop a weird texture.
Flavor Development: This gravy actually gets better after a day or two in the fridge. The herbs and spices meld together, creating a more complex flavor. That’s the beauty of a make-ahead recipe — it works with your schedule and tastes amazing.
Nutritional Information & Benefits
Here’s the estimated nutritional breakdown for a ¼-cup serving of this gravy (without turkey drippings):
- Calories: 120
- Total Fat: 11g
- Saturated Fat: 7g
- Cholesterol: 30mg
- Sodium: 250mg (varies with stock and added salt)
- Total Carbohydrates: 5g
- Dietary Fiber: 0g
- Sugars: 1g
- Protein: 1g
Health Benefits of Key Ingredients: Brown butter contains butyrate, a fatty acid that supports gut health. Sage is rich in antioxidants and has anti-inflammatory properties. Thyme is packed with vitamin C and vitamin A. While gravy isn’t a health food, using real, whole ingredients means you’re getting more nutrients than from a powdered mix or jarred version.
Dietary Considerations: This recipe is naturally nut-free and can be made gluten-free with a 1:1 gluten-free flour blend. For dairy-free, use vegan butter and adjust the technique slightly. Always check your stock for hidden allergens if serving to others.
Personal Wellness Perspective: I believe in enjoying holiday meals without guilt. A serving of this gravy is about 120 calories — totally reasonable for a celebration. The make-ahead aspect also reduces stress, which is good for your mental health. That’s a win-win in my book.
Frequently Asked Questions
Can I make this gravy without turkey drippings?
Absolutely. This recipe is designed to be delicious even without drippings. The brown butter and sage provide so much flavor that you won’t miss them. If you’re roasting a turkey later, you can stir the drippings in when reheating for an extra boost.
How do I fix lumpy gravy?
Don’t panic. Pour the gravy through a fine-mesh strainer into a clean saucepan, pressing on the solids with a spatula. Then whisk it smooth. For future batches, make sure you whisk the flour into the butter thoroughly and add the stock slowly while whisking constantly.
Can I freeze this gravy?
Yes! Let it cool completely, then transfer to a freezer-safe container. It will keep for up to 3 months. Thaw overnight in the fridge, then reheat gently on the stove. You may need to whisk in a little stock or water to restore the consistency.
Why is my gravy too thin?
It likely needs more cooking time. Let it simmer uncovered for another 5-10 minutes to reduce and thicken. If it’s still thin, mix 1 tablespoon of cornstarch with 2 tablespoons of cold water, then whisk it into the simmering gravy. Cook for another minute until thickened.
Can I use dried sage instead of fresh?
You can, but the flavor won’t be as bright or aromatic. Use 1 teaspoon of dried sage, and add it with the stock rather than frying it in the butter. The texture will be different too — no crispy leaves to garnish with. Fresh sage really is worth the effort here.
Conclusion
This make-ahead brown butter sage turkey gravy is the kind of recipe that changes how you approach holiday cooking. It’s rich, flavorful, and completely stress-free — you make it ahead, forget about it, and reheat it when you need it. No last-minute whisking, no panicking over lumps, no sacrificing flavor for convenience.
I love this recipe because it proves that you don’t have to choose between homemade and easy. The brown butter adds a depth that store-bought gravy can’t touch, and the sage brings that unmistakable holiday aroma. Every time I serve it, someone asks for the recipe. That’s the kind of compliment that never gets old.
So go ahead — make this gravy a few days before your big meal. Free up your Thanksgiving morning for something more important, like sipping coffee in your pajamas or sneaking a slice of pie before anyone else is awake. You deserve it.
If you try this recipe, I’d love to hear about it. Drop a comment below, share your photos, or tag me on social media. And if you’re looking for more holiday inspiration, check out my brown butter chocolate chip cookies or this brown butter peach upside-down skillet cake for dessert. Happy cooking, friends!
Pin This Recipe!
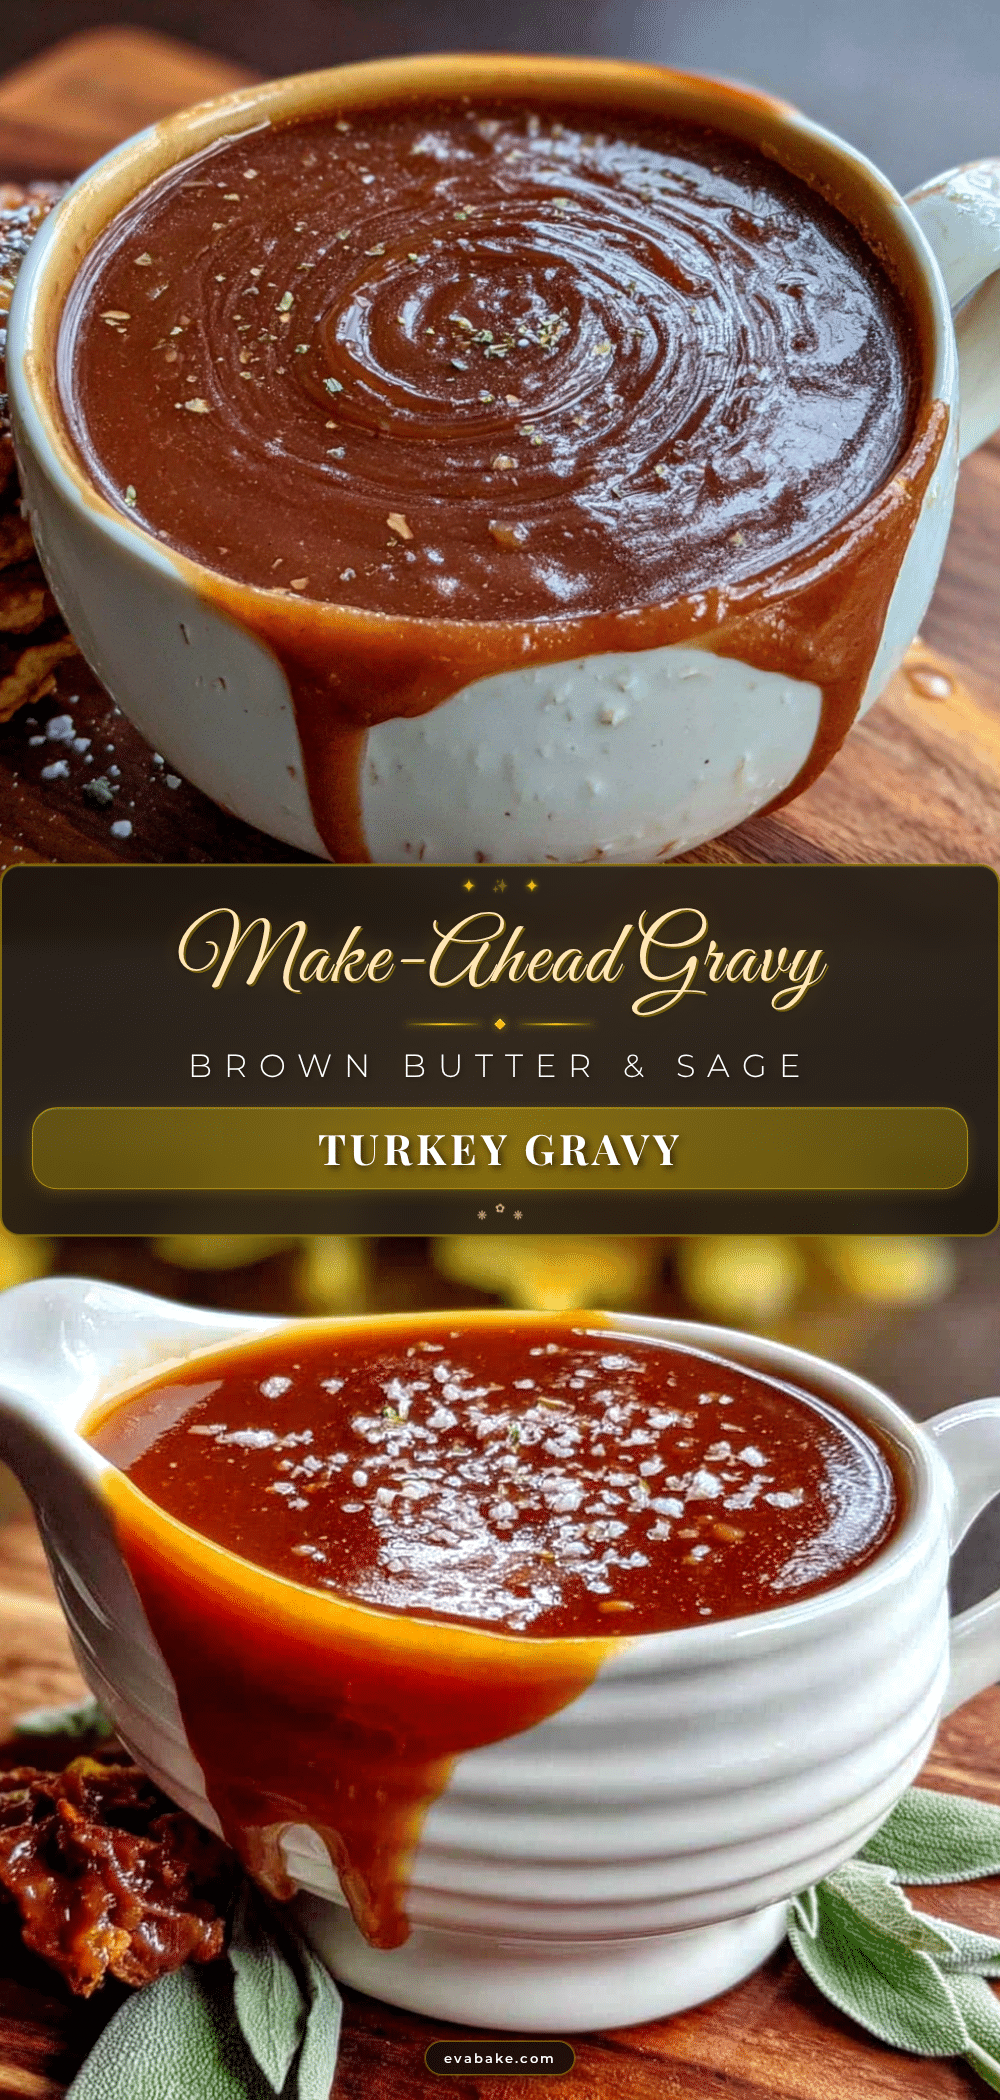
Best Make-Ahead Brown Butter Sage Turkey Gravy

This make-ahead brown butter sage turkey gravy is rich, flavorful, and completely stress-free. Made up to three days in advance, it features nutty brown butter, crispy fried sage, and a silky smooth texture that will elevate any holiday meal.
- Prep Time: 15 minutes
- Cook Time: 20 minutes
- Total Time: 35 minutes
- Yield: 4 cups (16 servings of ¼ cup each) 1x
- Category: Sauce
- Cuisine: American
Ingredients
- 1 cup (2 sticks or 226g) unsalted butter
- 12–15 fresh sage leaves
- ½ cup (60g) all-purpose flour
- 4 cups (960ml) low-sodium turkey or chicken stock
- ¼ cup (60ml) turkey drippings (optional)
- ¼ cup (60ml) dry white wine (optional)
- 1 teaspoon kosher salt (or to taste)
- ½ teaspoon freshly ground black pepper
- 1 teaspoon fresh thyme leaves (optional)
- 1 bay leaf
Instructions
- Brown the Butter: Place a large skillet or saucepan over medium heat. Add 1 cup unsalted butter. Let it melt completely, then continue cooking, swirling occasionally, until the butter foams, subsides, and turns a deep golden amber color with a nutty aroma (5-7 minutes). Remove from heat immediately.
- Fry the Sage: While the butter is still hot, add 12-15 fresh sage leaves. They will sizzle and crisp up in 1-2 minutes. Use a slotted spoon to transfer them to a paper towel-lined plate. Set aside.
- Make the Roux: Return the pan with the brown butter to medium heat. Sprinkle in ½ cup all-purpose flour. Whisk constantly until smooth and cook for 2 minutes until the roux turns light golden and smells nutty. (If making ahead, cool, cover, and refrigerate for up to 3 days.)
- Add the Stock: Slowly pour in 4 cups low-sodium turkey or chicken stock, whisking constantly. Add the bay leaf if using. Bring to a gentle simmer, then reduce heat to low and cook for 5-7 minutes, stirring occasionally, until thickened and coats the back of a spoon.
- Season and Finish: Remove the bay leaf. Stir in 1 teaspoon kosher salt, ½ teaspoon black pepper, and 1 teaspoon fresh thyme (if using). Taste and adjust seasoning. If using white wine, stir in ¼ cup and simmer 1 minute. If using turkey drippings, stir them in now. Crumble the crispy sage leaves over the top and stir gently.
- Cool and Store: Let the gravy cool to room temperature (about 30-45 minutes). Transfer to an airtight container and refrigerate for up to 3 days. The gravy will thicken as it cools.
- Reheat: On serving day, pour gravy into a saucepan and warm over medium-low heat, whisking occasionally. If too thick, add stock or water 1 tablespoon at a time until desired consistency. Taste and adjust seasoning before serving.
Notes
Watch the butter carefully when browning; it can go from perfect to burnt in seconds. For a smoother gravy, warm the stock slightly before adding to the roux. This gravy freezes well for up to 3 months. If you don’t have fresh sage, use 1 teaspoon dried sage added with the stock.
Nutrition
- Serving Size: ¼ cup
- Calories: 120
- Sugar: 1
- Sodium: 250
- Fat: 11
- Saturated Fat: 7
- Carbohydrates: 5
- Protein: 1
Keywords: brown butter gravy, sage gravy, make-ahead gravy, turkey gravy, Thanksgiving gravy, holiday gravy, homemade gravy


