I figured a five-ingredient peppermint bark would be a simple, straightforward project—something I could whip up while watching a movie and not think twice about. It took about one batch of seized chocolate and a countertop dusted in crushed candy cane shrapnel for that assumption to fall apart completely. The first time I tried it, I was in a rush, using whatever chocolate bars I had in the pantry, and the result was a greasy, streaky mess that looked more like a science experiment gone wrong than a holiday treat. Honestly, it was a little humbling.
But here’s the thing—once you get the technique down, this really is the easiest, most forgiving candy you can make. The key isn’t fancy ingredients or a candy thermometer; it’s about patience and a little bit of respect for how chocolate behaves. I’ve since made this bark for cookie exchanges, teacher gifts, and lazy Sunday afternoons when the house smells like pine and I need something sweet. It’s the kind of recipe that looks like you spent hours on it, but really, it’s just a few minutes of active work and a lot of waiting for the fridge to do its job.
This easy peppermint bark has become my go-to holiday gift, the one I can make in bulk without breaking a sweat. It’s crisp, it’s festive, and it has that perfect snap when you break it into pieces. And the best part? You probably already have most of the ingredients in your kitchen right now. That’s the kind of recipe I can get behind—no stress, no fuss, just a beautiful result that makes you look like a pro.
Why You’ll Love This Recipe
Let’s be real—holiday baking can get complicated fast. Between rolling out dough, watching for burning, and cleaning up sticky messes, it’s easy to feel overwhelmed. This easy peppermint bark is the antidote to all of that. It’s the recipe you turn to when you need something impressive but don’t have the energy for a full production.
- Quick & Easy: Comes together in about 15 minutes of active work. The rest is just waiting for the chocolate to set in the fridge.
- Simple Ingredients: No fancy grocery trips needed. You likely already have chocolate, peppermint extract, and candy canes in your kitchen.
- Perfect for Gifting: This bark looks stunning in a little cellophane bag tied with a ribbon. It’s the kind of gift that says “I thought about you” without the stress of baking a whole cake.
- Crowd-Pleaser: Everyone loves it—kids, adults, even the picky eaters who claim they don’t like sweets. The peppermint is refreshing, not overwhelming.
- Unbelievably Delicious: The contrast between the smooth, creamy chocolate and the crunchy, minty candy cane pieces is pure magic. It’s the kind of texture combo that makes you reach for just one more piece.
What makes this recipe different from the rest? It’s all about the technique. I’ve learned the hard way that not all chocolate is created equal. Using high-quality chocolate chips or bars makes a world of difference in the final texture. And the secret to that perfect snap? Letting the bark set completely before breaking it into pieces. This isn’t just another version of peppermint bark—it’s the best version I’ve ever made.
This recipe is the kind that makes you close your eyes after the first bite. It’s comfort food reimagined—simpler, faster, but with the same soul-soothing satisfaction. Perfect for impressing guests without stress, or turning a simple evening into something memorable.
What Ingredients You Will Need
This easy peppermint bark uses simple, wholesome ingredients to deliver bold flavor and satisfying texture without the fuss. Most of these are pantry staples, especially during the holiday season.
- 12 oz (340g) semi-sweet chocolate chips – I recommend Ghirardelli or Guittard for the best melt and flavor. The quality of the chocolate really matters here; cheap chocolate can seize or taste waxy.
- 12 oz (340g) white chocolate chips – Again, go for a good brand. White chocolate can be finicky, so using a higher-quality chip helps it melt smoothly. Look for ones that contain cocoa butter for the best texture.
- 1 teaspoon (5ml) peppermint extract – Pure peppermint extract is best. The imitation stuff can taste a little artificial. You can find it in the baking aisle near the vanilla.
- 1/2 cup (60g) crushed candy canes – About 6-8 standard candy canes. You can crush them in a bag with a rolling pin or use a food processor for a finer crumb. I like to leave some larger pieces for texture.
- Optional: 1/2 teaspoon (2.5ml) coconut oil or vegetable shortening – This helps thin the chocolate for a smoother spread. It’s not strictly necessary, but it makes the process a little easier. Use it only if you’re struggling with thick chocolate.
Ingredient Selection Tips: For the best results, use chocolate chips that are labeled “real” or “pure” chocolate. Avoid chocolate that has added vegetable oils or stabilizers, as these can affect the melt and final snap. For the candy canes, you can use any flavor—traditional peppermint, wintergreen, or even strawberry—but classic peppermint is the most festive. If you’re short on time, you can buy pre-crushed candy cane pieces, but I find they’re often too fine and don’t give that satisfying crunch.
Substitution Guidance: If you’re dairy-free, use dairy-free chocolate chips. The process works the same. For a gluten-free option, just check your candy cane labels—most are naturally gluten-free, but it’s always good to verify. You can also swap the peppermint extract for vanilla or almond extract for a different flavor profile, though it won’t be the same holiday classic.
Equipment Needed
You don’t need a lot of fancy tools for this recipe, which is one of the reasons I love it. Here’s what you’ll need:
- Baking sheet (13×18 inches or similar) – A standard rimmed baking sheet works perfectly. Line it with parchment paper for easy removal.
- Parchment paper or wax paper – Essential for keeping the bark from sticking. Parchment is better because it’s non-stick and heat-resistant.
- Medium microwave-safe bowls (2) – For melting the chocolate separately. Glass or ceramic bowls work best.
- Spatula or offset spatula – For spreading the chocolate evenly. An offset spatula gives you more control, but a regular spatula works fine.
- Ziploc bag or rolling pin – For crushing the candy canes. A food processor works too, but I prefer the bag-and-rolling-pin method for more control over the texture.
- Sharp knife – For cutting or breaking the bark after it sets. A chef’s knife works well.
Budget-Friendly Options: If you don’t have an offset spatula, just use the back of a spoon. A meat mallet or even a heavy skillet can substitute for a rolling pin when crushing candy canes. The key is to make do with what you have—this recipe is forgiving.
Preparation Method

Let’s get into the actual process. This is where the magic happens. Follow these steps carefully, and you’ll have perfect bark every time.
- Prepare your baking sheet. Line a baking sheet with parchment paper, making sure the paper hangs over the edges a bit. This will help you lift the bark out later. Set it aside.
- Crush the candy canes. Place the candy canes in a Ziploc bag and seal it. Use a rolling pin or a heavy skillet to crush them into small pieces. You want a mix of fine crumbs and slightly larger chunks—about the size of small pebbles. Set aside about 2 tablespoons for the top garnish.
- Melt the semi-sweet chocolate. Place the semi-sweet chocolate chips in a microwave-safe bowl. Microwave in 30-second intervals, stirring well after each, until the chocolate is completely smooth. Be careful not to overheat it—chocolate burns easily. If it looks thick, stir in 1/2 teaspoon of coconut oil to thin it out. Stir in 1/2 teaspoon of the peppermint extract.
- Spread the first layer. Pour the melted semi-sweet chocolate onto the prepared baking sheet. Use a spatula to spread it into an even, thin layer—about 1/8-inch thick. Don’t worry if it’s not perfect; the white chocolate layer will cover any imperfections. Place the baking sheet in the refrigerator for about 10 minutes, or until the chocolate is firm but not rock-hard.
- Melt the white chocolate. While the first layer sets, melt the white chocolate chips in a separate microwave-safe bowl using the same 30-second interval method. Stir in the remaining 1/2 teaspoon of peppermint extract. White chocolate can be a little thicker than semi-sweet, so you may want to add a small amount of coconut oil if needed.
- Add the second layer. Remove the baking sheet from the fridge. Pour the melted white chocolate over the set semi-sweet layer. Use the spatula to spread it evenly, making sure it reaches the edges. Work quickly so the white chocolate doesn’t start to set on you.
- Add the candy cane topping. Immediately sprinkle the crushed candy canes (including the reserved 2 tablespoons) evenly over the white chocolate layer. Gently press the pieces into the chocolate with your fingers or the back of a spoon so they stick.
- Set the bark. Place the baking sheet back in the refrigerator for at least 30 minutes, or until the bark is completely firm. You’ll know it’s ready when it lifts easily from the parchment paper and has a clean snap when you break it.
- Break into pieces. Once the bark is fully set, lift it from the baking sheet using the parchment paper edges. Place it on a cutting board. Use your hands to break it into rustic pieces, or use a sharp knife for cleaner edges. I like a mix of sizes—some big shards, some smaller bites.
Troubleshooting Tips: If your chocolate seizes (turns into a grainy, thick mess), you’ve overheated it. Start over with fresh chocolate and be more careful with the microwave. If the white chocolate is too thick to spread, add a tiny bit of coconut oil. If the bark doesn’t set properly, it might be because the chocolate wasn’t fully melted or the fridge isn’t cold enough. Give it more time.
Cooking Tips & Techniques
I’ve made this bark more times than I can count, and I’ve learned a few things along the way. Here are my best tips for perfect results every time.
Don’t rush the melting process. Chocolate is sensitive. Microwave in short bursts and stir frequently. If you’re in a hurry, you can use a double boiler on the stove, but the microwave is faster and just as effective if you’re patient. I once tried to melt chocolate on high power for a full minute—it burned and I had to start over. Learn from my mistake.
Let the first layer set completely. This is crucial. If the semi-sweet layer isn’t firm enough, the white chocolate will mix into it, creating a muddy, streaky mess. Give it a full 10 minutes in the fridge, and test it with a gentle touch. It should feel solid, not tacky.
Work quickly with the white chocolate. White chocolate sets faster than dark chocolate, so once you pour it, spread it immediately. If it starts to thicken before you’re done, pop the bowl back in the microwave for 10 seconds to loosen it up.
Use a light hand with the candy canes. You want them to stick, but you don’t want to press them so hard that they sink into the chocolate. A gentle press is all you need. And don’t skimp on the topping—the crunch is what makes this bark special.
Store it properly. This bark keeps well in an airtight container in the refrigerator for up to two weeks. Let it sit at room temperature for a few minutes before serving to take the chill off. It also freezes beautifully for up to three months—just wrap it tightly in plastic wrap and then foil.
Variations & Adaptations
This easy peppermint bark is a blank canvas. Here are a few ways to make it your own.
- Dark Chocolate Base: Swap the semi-sweet chocolate for dark chocolate (60-70% cocoa) for a richer, less sweet bark. The bitterness of the dark chocolate pairs beautifully with the minty candy canes.
- Milk Chocolate Twist: Use milk chocolate instead of semi-sweet for a creamier, sweeter bark. This is great for kids or anyone with a serious sweet tooth.
- Add Toppings: Sprinkle crushed pretzels, toasted coconut flakes, or chopped nuts over the white chocolate layer along with the candy canes. The salty-sweet combo is addictive.
- Flavor Variations: Swap the peppermint extract for orange, lemon, or even coffee extract. You can also use different flavored candy canes—strawberry, wintergreen, or even sour apple for a fun twist.
- Dietary Adaptations: Use dairy-free chocolate and white chocolate for a vegan version. For a lower-sugar option, use sugar-free chocolate chips and candy canes. The process is the same.
I once made a version with crushed freeze-dried raspberries mixed into the white chocolate layer. It was tangy, sweet, and absolutely gorgeous. Don’t be afraid to experiment—this recipe is forgiving enough to handle it.
Serving & Storage Suggestions
This bark is perfect for holiday gatherings, but it’s also great for any time you need a quick, impressive treat.
Serving Temperature: Serve the bark at room temperature for the best texture. If it’s been in the fridge, let it sit out for 5-10 minutes before serving. The chocolate will be more tender and the candy canes will have that perfect crunch.
Presentation: Arrange the broken pieces on a festive platter or in a glass jar. For gift-giving, place pieces in a cellophane bag tied with a ribbon, or layer them in a tin with parchment paper between layers. It looks stunning next to a plate of bakery-style brown butter chocolate chip cookies or a slice of brown butter banana bread.
Storage: Store the bark in an airtight container in the refrigerator for up to two weeks. If you’re stacking pieces, place a sheet of parchment paper between layers to prevent sticking. The bark also freezes well for up to three months. Thaw it in the refrigerator overnight before serving.
Reheating: You don’t need to reheat this bark, but if you want a slightly softer texture, let it sit at room temperature for 15-20 minutes. The flavors actually develop over time—the peppermint becomes more pronounced after a day or two.
Flavor Development: This bark tastes even better the next day. The peppermint extract mellows out and blends with the chocolate, creating a more balanced flavor. So don’t worry if it seems a little strong right after you make it—it will settle down.
Nutritional Information & Benefits
This easy peppermint bark is a treat, so it’s not exactly health food. But here’s a rough estimate for a 1-ounce serving (about 2-3 pieces):
- Calories: 150-180
- Fat: 9-11g
- Carbohydrates: 18-22g
- Sugar: 16-19g
- Protein: 1-2g
Health Benefits: Dark chocolate (if you use it) is rich in antioxidants and can be good for heart health in moderation. Peppermint is known for its digestive benefits and can help soothe an upset stomach. So while this isn’t a health food, it’s not completely devoid of redeeming qualities.
Dietary Considerations: This recipe can be made dairy-free, gluten-free, and vegan with simple substitutions. It’s also nut-free, making it a safe option for school parties or gatherings. Be aware that white chocolate contains dairy, so use a dairy-free version if needed.
Allergens: This recipe contains dairy and may contain soy (depending on the chocolate). It does not contain nuts, but always check labels to be sure. The candy canes are typically gluten-free, but verify the brand if you have celiac disease.
Personal Wellness Perspective: I believe in balance. This bark is a treat, and it’s meant to be enjoyed in moderation. I make it for special occasions and gift-giving, not for everyday snacking. And honestly, a small piece of this bark is so satisfying that I don’t need more than that.
Conclusion
This easy peppermint bark is the kind of recipe that becomes a tradition. It’s simple enough to make on a whim, but impressive enough to give as a gift. The combination of smooth, creamy chocolate and crunchy, minty candy canes is pure holiday magic.
I love this recipe because it’s forgiving. You don’t need to be a pastry chef to get it right. You just need a little patience and a willingness to learn from your mistakes. And honestly, even a slightly imperfect batch of bark is still delicious. That’s the beauty of it.
So go ahead and make a batch. Customize it with your favorite toppings, experiment with different chocolates, and share it with the people you love. And when you do, come back and let me know how it turned out. I’d love to hear about your variations and successes. Happy holidays, and happy baking!
Frequently Asked Questions
Can I use chocolate bars instead of chips?
Yes, absolutely. Chocolate bars melt just as well as chips. Just chop them into small, uniform pieces so they melt evenly. High-quality bars like Lindt or Ghirardelli work great.
Why did my white chocolate seize up?
White chocolate is more sensitive to heat than dark or milk chocolate. It seizes when it gets too hot or comes into contact with a small amount of water. Always melt it slowly in short bursts, and make sure your bowl and spatula are completely dry.
Can I make this bark without a microwave?
Yes, you can use a double boiler on the stovetop. Fill a saucepan with an inch of water, bring it to a simmer, and place a heatproof bowl on top. Make sure the bowl doesn’t touch the water. Stir the chocolate until melted, then proceed with the recipe.
How do I get clean edges when cutting the bark?
If you want clean, straight edges, let the bark set completely, then use a sharp chef’s knife to cut it into squares or rectangles. Run the knife under hot water and dry it before each cut for the cleanest lines. For rustic pieces, just break it with your hands.
Can I use other extracts instead of peppermint?
Definitely. Try orange, lemon, almond, or even coconut extract for a different flavor profile. Just keep the amount the same—1 teaspoon total. If you’re using a strong extract like almond, you might want to start with 1/2 teaspoon and taste as you go.
Pin This Recipe!
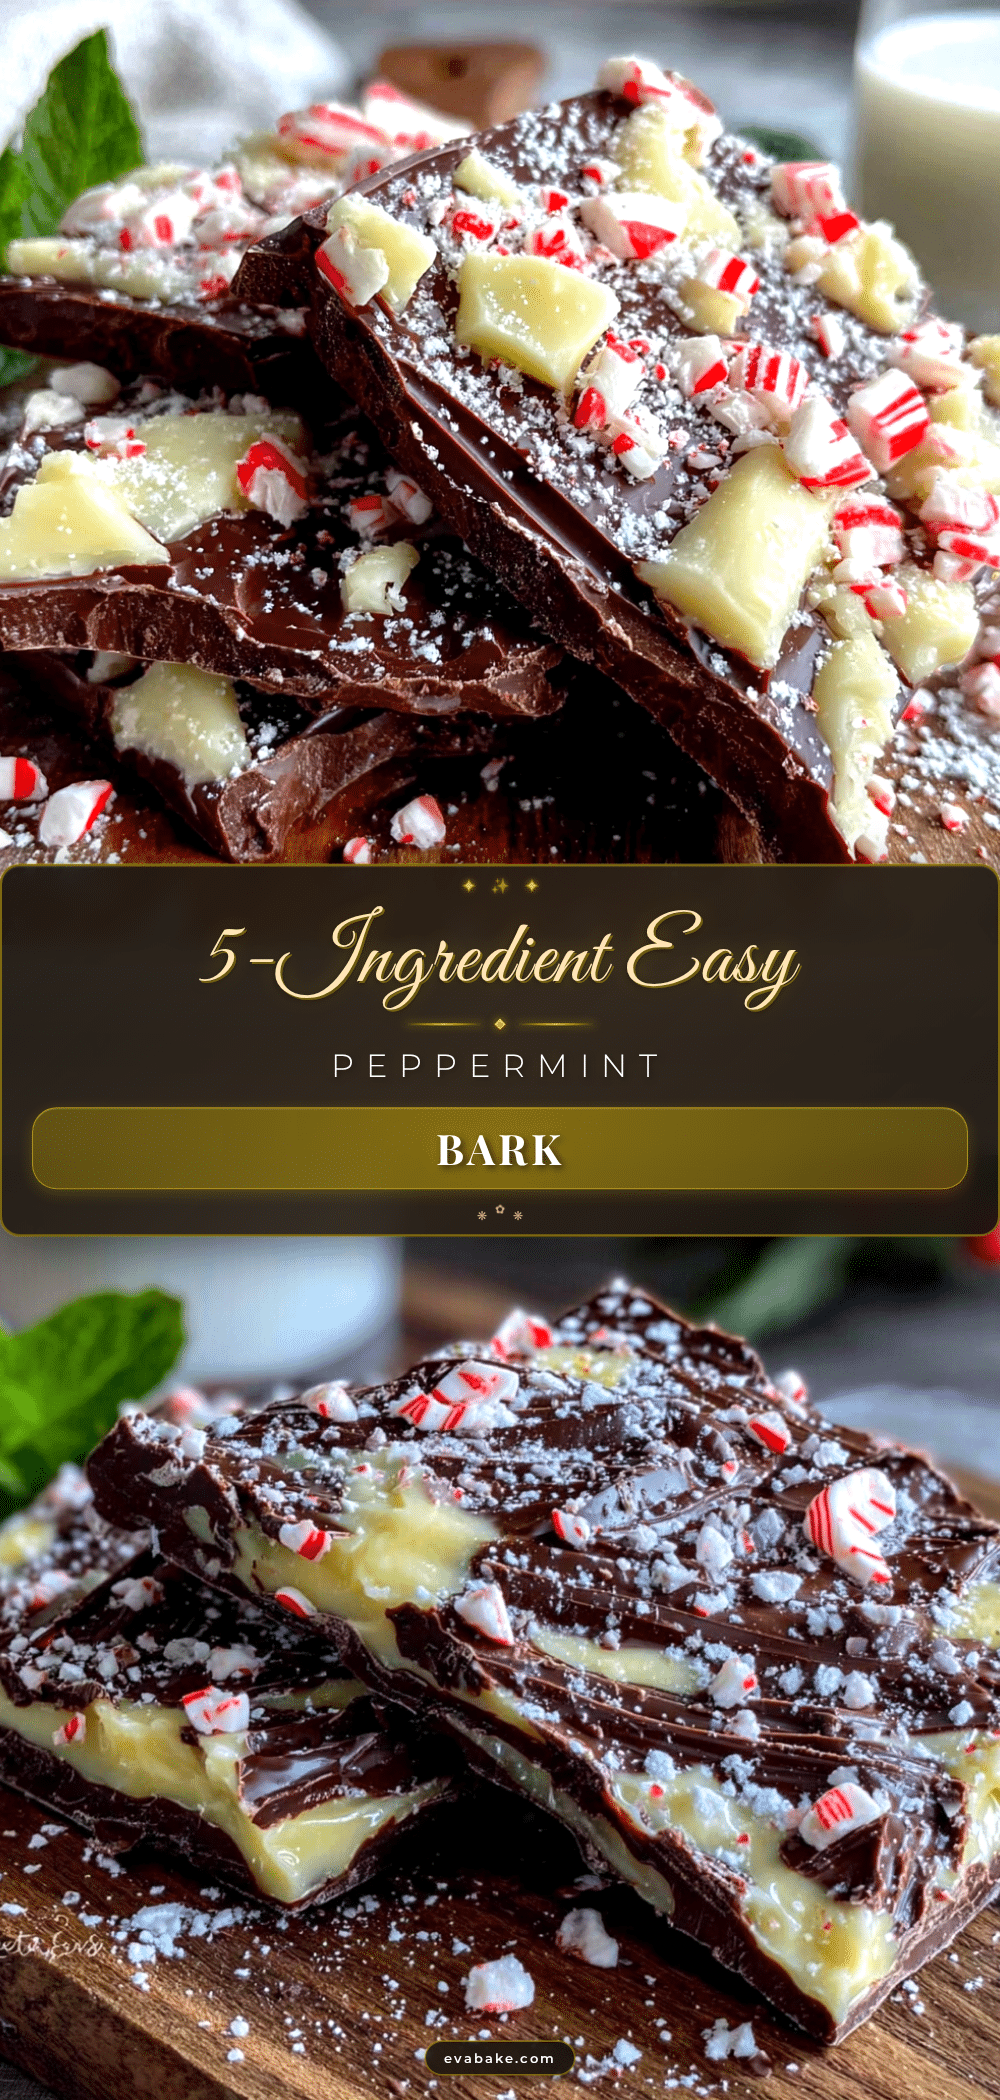
Easy Peppermint Bark: 5-Ingredient Holiday Treat

This easy peppermint bark is a simple, forgiving holiday candy made with just five ingredients. It’s crisp, festive, and perfect for gifting or enjoying as a quick treat.
- Prep Time: 15 minutes
- Cook Time: 0 minutes
- Total Time: 55 minutes (includes chilling time)
- Yield: 24 servings 1x
- Category: Dessert
- Cuisine: American
Ingredients
- 12 oz (340g) semi-sweet chocolate chips
- 12 oz (340g) white chocolate chips
- 1 teaspoon (5ml) peppermint extract
- 1/2 cup (60g) crushed candy canes (about 6–8 standard candy canes)
- Optional: 1/2 teaspoon (2.5ml) coconut oil or vegetable shortening
Instructions
- Prepare your baking sheet. Line a baking sheet with parchment paper, making sure the paper hangs over the edges a bit. Set it aside.
- Crush the candy canes. Place the candy canes in a Ziploc bag and seal it. Use a rolling pin or a heavy skillet to crush them into small pieces. You want a mix of fine crumbs and slightly larger chunks. Set aside about 2 tablespoons for the top garnish.
- Melt the semi-sweet chocolate. Place the semi-sweet chocolate chips in a microwave-safe bowl. Microwave in 30-second intervals, stirring well after each, until the chocolate is completely smooth. If it looks thick, stir in 1/2 teaspoon of coconut oil to thin it out. Stir in 1/2 teaspoon of the peppermint extract.
- Spread the first layer. Pour the melted semi-sweet chocolate onto the prepared baking sheet. Use a spatula to spread it into an even, thin layer—about 1/8-inch thick. Place the baking sheet in the refrigerator for about 10 minutes, or until the chocolate is firm but not rock-hard.
- Melt the white chocolate. While the first layer sets, melt the white chocolate chips in a separate microwave-safe bowl using the same 30-second interval method. Stir in the remaining 1/2 teaspoon of peppermint extract. Add a small amount of coconut oil if needed to thin it.
- Add the second layer. Remove the baking sheet from the fridge. Pour the melted white chocolate over the set semi-sweet layer. Use the spatula to spread it evenly, making sure it reaches the edges. Work quickly.
- Add the candy cane topping. Immediately sprinkle the crushed candy canes (including the reserved 2 tablespoons) evenly over the white chocolate layer. Gently press the pieces into the chocolate with your fingers or the back of a spoon so they stick.
- Set the bark. Place the baking sheet back in the refrigerator for at least 30 minutes, or until the bark is completely firm. You’ll know it’s ready when it lifts easily from the parchment paper and has a clean snap when you break it.
- Break into pieces. Once the bark is fully set, lift it from the baking sheet using the parchment paper edges. Place it on a cutting board. Use your hands to break it into rustic pieces, or use a sharp knife for cleaner edges.
Notes
Use high-quality chocolate for best results. Let the first layer set completely before adding the white chocolate to prevent streaking. Store in an airtight container in the refrigerator for up to two weeks, or freeze for up to three months. Let sit at room temperature for a few minutes before serving.
Nutrition
- Serving Size: 1 ounce (about 2-3 p
- Calories: 165
- Sugar: 17
- Sodium: 20
- Fat: 10
- Saturated Fat: 6
- Carbohydrates: 20
- Fiber: 1
- Protein: 1.5
Keywords: peppermint bark, holiday candy, easy dessert, 5-ingredient, chocolate bark, Christmas treat, gift idea


