The August heat had settled into the walls of my tiny apartment, and the last thing I wanted was to turn on the oven. I stood there, fridge door open, letting the cold air wash over my face while I stared at a carton of heavy cream and a pint of blueberries that were starting to look a little too soft for their own good. That’s when I remembered a trick my grandmother used to pull out during the sticky summers of my childhood—layering cookies and cream until something magical happened in the fridge. No heat, no fuss, just patience and a little bit of faith. That night, I didn’t want a project. I wanted something that felt like a reward without the work. And honestly? This easy no-bake berry icebox cake delivered exactly that.
There’s something about the way a no-bake dessert comes together that feels almost like a secret. You stack, you spread, you chill, and somehow the hours in the refrigerator transform simple ingredients into something that tastes like you spent all day in the kitchen. The berries soften just enough, the cream seeps into the cookies, and by the time you slice into it, the layers hold together like they’ve been practicing for years. It’s the kind of dessert that makes people close their eyes after the first bite, and that’s not something I say lightly.
This easy no-bake berry icebox cake became my go-to that summer, and it’s stuck around ever since. Not because it’s fancy, but because it’s honest. It doesn’t pretend to be anything other than what it is—a cool, creamy, berry-filled slice of relief on a hot day. And sometimes, that’s exactly what you need.
Why You’ll Love This Recipe
Let me tell you why this one’s different. I’ve tested this easy no-bake berry icebox cake more times than I can count, tweaking the cream-to-cookie ratio, swapping berries in and out, and even leaving it in the fridge an extra day just to see what happens. Here’s what I’ve learned:
- No Oven Required: When the temperature hits 90°F, the last thing you want is to stand over a hot stove. This cake comes together entirely in the fridge, which means your kitchen stays cool and you stay sane.
- Simple Ingredients: You probably already have most of these in your kitchen. Heavy cream, vanilla, a little sugar, and fresh or frozen berries. No fancy extracts or obscure pantry items here.
- Perfect for Summer Gatherings: Whether it’s a backyard barbecue, a picnic, or just a Tuesday night that needs a little something special, this cake shows up and delivers without any stress.
- Crowd-Pleaser: I’ve served this to kids, adults, and even picky eaters who “don’t like dessert.” Every single time, someone asks for the recipe. It’s that good.
- Unbelievably Delicious: The texture is what gets you. The cookies soften into a cake-like layer, the cream stays light and airy, and the berries burst with every bite. It’s comfort food disguised as something elegant.
What makes this recipe stand out from the dozens of other icebox cakes out there? It’s the balance. I’ve found that using a mix of fresh and frozen berries gives you both structure and juiciness. The cream is sweetened just enough to complement the tartness of the berries without overpowering them. And the cookies? They’re the unsung heroes, holding everything together while quietly soaking up all that creamy goodness. This isn’t just another version—it’s the version I keep coming back to, and I think you will too.
What Ingredients You Will Need
This easy no-bake berry icebox cake relies on a handful of simple, wholesome ingredients that work together to create something truly special. Here’s what you’ll need and why each one matters:
- Heavy Cream (2 cups / 480 ml): This is the backbone of your filling. You want heavy cream with at least 36% milk fat for the best volume and stability. I’ve tried using half-and-half in a pinch, and trust me—it’s not the same. The cream whips up into soft, billowy clouds that hold the layers together beautifully. If you can find it, I recommend a local dairy brand for the freshest taste.
- Powdered Sugar (1/3 cup / 40 g): Unlike granulated sugar, powdered sugar dissolves instantly into the cream, giving you a silky-smooth texture without any graininess. It also helps stabilize the whipped cream so your layers stay firm.
- Vanilla Extract (1 teaspoon): Pure vanilla extract adds warmth and depth that you just can’t get from imitation. It rounds out the sweetness and makes the cream taste almost like a custard, even though there’s no cooking involved.
- Mascarpone Cheese (8 oz / 225 g): This is my secret weapon. Mascarpone adds a subtle tang and a luxurious thickness to the cream layer. If you’ve never used it before, think of it as cream cheese’s sophisticated Italian cousin—less tangy, more buttery. It makes the filling stable enough to slice cleanly after chilling.
- Graham Crackers (about 24 full sheets): These are the classic choice for icebox cakes, and for good reason. They soften just enough overnight to create a cake-like texture while still offering a little bit of structure. I’ve tested this with vanilla wafers and shortbread cookies too, but graham crackers give the most reliable results. Look for the full-size sheets, not the pre-crushed crumbs.
- Fresh Strawberries (1 cup / 150 g, sliced): Strawberries bring sweetness and a pop of color. When they’re in season, they’re unbeatable. Look for berries that are bright red all the way through with no white shoulders—that’s a sign they were picked ripe.
- Fresh Blueberries (1 cup / 150 g): Blueberries add little bursts of tartness that cut through the richness of the cream. They also hold their shape better than softer berries, which helps with the structure of the cake.
- Frozen Mixed Berries (1 cup / 150 g, thawed and drained): This is where the magic happens. Frozen berries release more juice as they thaw, which seeps into the graham crackers and creates that signature icebox cake texture. Just make sure to drain them well so your cream doesn’t get watery. I like using a mix of blackberries, raspberries, and more blueberries.
- Lemon Zest (1 teaspoon): A tiny amount of lemon zest brightens the entire dessert. It’s not something you’ll taste directly, but you’ll notice its absence if you skip it. It lifts the berries and keeps the cake from feeling too heavy.
Equipment Needed
You don’t need a professional kitchen to pull off this easy no-bake berry icebox cake. Here’s what I use and what you can substitute if needed:
- 9×5-inch Loaf Pan or 8×8-inch Square Dish: A loaf pan gives you tall, dramatic slices, while a square dish makes for easier layering. I prefer the loaf pan because it creates that classic icebox cake look, but either works perfectly.
- Electric Hand Mixer or Stand Mixer: Whipping cream by hand is a workout I don’t recommend on a hot day. A hand mixer does the job in minutes. If you only have a stand mixer, use the whisk attachment and keep an eye on it—cream can go from soft peaks to butter in seconds.
- Large Mixing Bowl: Make sure your bowl is spotless and completely dry. Any trace of grease or moisture will prevent your cream from whipping properly. I like to chill my bowl and beaters for 10 minutes before starting—it makes a noticeable difference.
- Rubber Spatula: For folding the mascarpone into the whipped cream and spreading the layers evenly. A good spatula is worth its weight in gold here.
- Plastic Wrap or Parchment Paper: You’ll need this to cover the cake while it chills. Plastic wrap works fine, but I’ve started using parchment paper cut to fit the top of the pan—it’s more eco-friendly and doesn’t stick to the cream.
- Sharp Knife and Cutting Board: For slicing strawberries and zesting the lemon. A dull knife will bruise the berries, so keep it sharp.
- Fine-Mesh Strainer: If you’re using frozen berries, you’ll need this to drain off the excess liquid. Trust me on this one—soggy cake is not what we’re after.
If you don’t have a loaf pan, you can use a 9-inch springform pan or even a deep pie dish. The layering will be a little different, but the results will still be delicious. I once made this in a disposable aluminum pan for a camping trip, and it worked like a charm.
Preparation Method
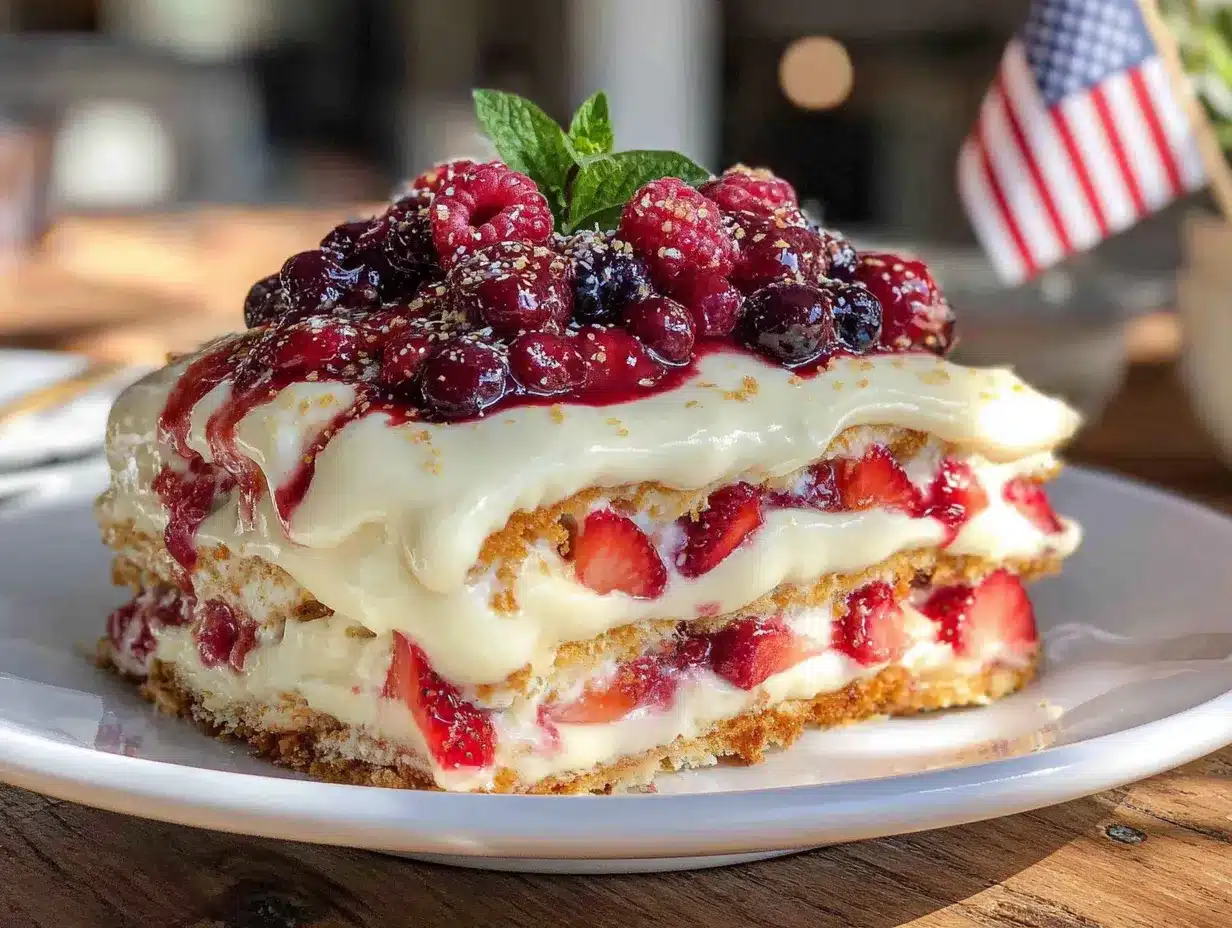
Let’s get to the good part. Follow these steps carefully, and you’ll have a dessert that looks like you spent hours on it—even though you didn’t.
- Prepare Your Pan and Berries: Line your loaf pan or dish with plastic wrap or parchment paper, leaving some overhang on the sides. This makes lifting the finished cake out much easier. If you’re using frozen berries, thaw them in a fine-mesh strainer set over a bowl. Let them sit for about 15 minutes while you prep everything else. You want them thawed but not swimming in juice.
- Whip the Cream: In a large mixing bowl, combine 2 cups of cold heavy cream, 1/3 cup of powdered sugar, and 1 teaspoon of vanilla extract. Beat on medium speed until soft peaks form—that’s when the cream holds its shape but flops over slightly when you lift the beaters. This usually takes about 3-4 minutes with a hand mixer. Be careful not to over-whip, or you’ll end up with butter.
- Add the Mascarpone: Add the 8 oz of mascarpone cheese to the whipped cream. Beat on low speed just until combined. You want it smooth and uniform, but don’t over-mix. Over-mixing at this stage can make the cream grainy. If you’re feeling fancy, you can fold in the mascarpone by hand with a spatula—it gives you more control.
- Prep the Graham Crackers: While the cream rests, break your graham cracker sheets into pieces that fit your pan. For a loaf pan, I usually break each sheet into 4 rectangles. For a square dish, you might need to get creative with the fit. It doesn’t have to be perfect—just close enough to cover the surface without huge gaps.
- Layer One: Graham Crackers: Spread a thin layer of the cream mixture on the bottom of your lined pan. This helps the first layer of graham crackers stick. Then arrange a single layer of graham crackers over the cream, breaking pieces as needed to fill gaps.
- Layer Two: Cream and Berries: Spread about 1/3 of the remaining cream mixture over the graham crackers. Scatter a handful of fresh strawberries, blueberries, and drained frozen berries over the cream. Press them in gently so they’re partially submerged.
- Repeat the Layers: Add another layer of graham crackers, followed by another 1/3 of the cream and more berries. Repeat one more time, ending with a final layer of graham crackers on top. Spread the last of the cream over the top layer of crackers, making sure it’s completely covered. This prevents the crackers from drying out.
- Finishing Touches: Sprinkle the lemon zest over the top layer of cream. Cover the pan tightly with plastic wrap or parchment paper. Refrigerate for at least 8 hours, but overnight is better. The longer it sits, the more the graham crackers soften and meld with the cream.
- Unmold and Serve: When you’re ready to serve, lift the cake out of the pan using the plastic wrap overhang. Place it on a serving plate and peel away the wrap. Slice with a sharp knife, wiping the blade clean between cuts for neat slices. Garnish with extra fresh berries and a sprig of mint if you’re feeling fancy.
Troubleshooting Tip: If your cream seems too soft after whipping, pop the bowl in the fridge for 10 minutes before layering. Cold cream is easier to work with and holds its shape better. Also, if your frozen berries released a lot of juice, pat them dry with a paper towel before adding them to the layers. Too much liquid can make the cake slide apart.
Cooking Tips & Techniques
I’ve made this easy no-bake berry icebox cake more times than I care to admit, and I’ve learned a few things along the way. Here are the tips that make the biggest difference:
- Chill Your Bowl and Beaters: This is the single best tip I can give you for perfect whipped cream. A cold bowl and cold beaters help the cream whip faster and hold its shape longer. I pop my mixing bowl and beaters in the freezer for 10 minutes before I start. It’s a small step that pays off big.
- Don’t Skip the Mascarpone: I know it’s an extra ingredient, but it’s what makes this cake feel special. Without it, the cream layer is too light and doesn’t hold up well. The mascarpone adds structure and a subtle richness that makes every bite better. If you really can’t find it, you can substitute an equal amount of cream cheese softened to room temperature, but the flavor will be tangier.
- Drain Your Frozen Berries Thoroughly: This is non-negotiable. Frozen berries release a lot of liquid as they thaw, and if you don’t drain them, that liquid will turn your cream into a soupy mess. I let mine sit in a strainer for at least 15 minutes, then gently press them with a paper towel to remove any remaining moisture.
- Patience Is Key: I know it’s tempting to dig in after a few hours, but trust me—wait the full 8 hours. Overnight is even better. The graham crackers need time to soften completely, and the flavors need time to meld. If you cut into it too early, you’ll get crunchy crackers and separate layers. Give it the time it deserves.
- Slice with a Wet Knife: This is a trick I learned from making cheesecakes. Run your knife under hot water, dry it off, and make your cut. The heat helps the knife glide through the cream without dragging. Wipe the blade clean between each slice for picture-perfect pieces.
One time, I was in a hurry and only let the cake chill for 4 hours. The result was a mess—the layers slid apart, the crackers were still crunchy, and the cream hadn’t set. It still tasted good, but it wasn’t the beautiful, sliceable cake I was hoping for. Learn from my mistake: give it the full chilling time.
Variations & Adaptations
This easy no-bake berry icebox cake is incredibly versatile. Here are some ways I’ve adapted it over the years:
- Vegan Version: Swap the heavy cream for full-fat coconut cream (chilled overnight and whipped), and use a dairy-free mascarpone alternative. For the graham crackers, look for vegan brands—some contain honey, so check the label. The coconut cream adds a subtle tropical flavor that pairs beautifully with the berries.
- Gluten-Free Option: Use gluten-free graham crackers or gluten-free vanilla wafers. I’ve tested this with several brands, and they all work well. Just be aware that gluten-free cookies tend to soften faster, so check the texture after 6 hours instead of 8.
- Seasonal Berry Swap: In the summer, I use a mix of fresh strawberries, blueberries, and raspberries. In the fall, I’ve swapped in sliced figs and blackberries with amazing results. In winter, frozen cherries and a sprinkle of cinnamon make for a cozy twist. The recipe is forgiving—use whatever berries look best at the market.
- Chocolate Lover’s Version: Add a layer of chocolate ganache between the cream and berries. To make the ganache, heat 1/2 cup of heavy cream and pour it over 4 oz of dark chocolate chips. Let it sit for 5 minutes, then stir until smooth. Let it cool slightly before spreading it over a graham cracker layer. It’s decadent and completely irresistible.
- Lemon-Berry Variation: Add the zest of one whole lemon to the cream mixture and use lemon-flavored graham crackers if you can find them. The lemon brightens the berries and makes the whole dessert taste like sunshine. I made this version for a friend’s baby shower, and it was gone in 20 minutes.
- Individual Servings: Instead of making one large cake, layer the ingredients in small mason jars or dessert cups. This is perfect for picnics or parties where you want individual portions. Just layer graham cracker pieces, cream, and berries in each jar, then chill as directed.
Serving & Storage Suggestions
This easy no-bake berry icebox cake is best served cold, straight from the refrigerator. Here’s how to make it shine:
Serving Temperature: Pull the cake out of the fridge about 10 minutes before you plan to serve it. This takes the edge off the chill without letting it get too soft. Slice it with a sharp, wet knife for clean edges. I like to serve it on a white platter to make the berry colors pop.
Garnishes: A handful of fresh berries on top, a drizzle of honey, and a few mint leaves make this cake look like it came from a bakery. If you’re feeling extra, you can dust it with powdered sugar just before serving. The contrast of the white sugar against the dark berries is stunning.
Complementary Dishes: This cake pairs beautifully with a cup of hot coffee or iced tea. For a summer party, serve it alongside a fresh watermelon feta mint skewers with zesty chili lime dressing for a sweet-and-savory combo that guests will love. If you’re building a dessert table, it also goes well with a perfect summer grazing board with prosciutto, brie, and figs for a complete spread.
Storage: Cover the cake tightly with plastic wrap or transfer it to an airtight container. It will keep in the refrigerator for up to 3 days. The texture actually improves after the first day as the flavors continue to meld. After 3 days, the graham crackers can become too soft and the cream may start to separate.
Freezing: You can freeze this cake for up to 1 month. Wrap it tightly in plastic wrap, then in a layer of aluminum foil. To serve, thaw it in the refrigerator overnight. The texture will be slightly different—a bit more icy—but it’s still delicious. I don’t recommend freezing it with fresh berries on top, as they’ll become mushy when thawed.
Reheating: This is a no-bake dessert, so there’s no reheating involved. But if you’ve frozen it, let it thaw slowly in the fridge for the best texture. Don’t rush it with the microwave—you’ll end up with a puddle of cream and soggy crackers.
Nutritional Information & Benefits
Here’s a rough estimate of the nutritional content per serving (based on 8 servings):
| Nutrient | Amount per Serving |
|---|---|
| Calories | 385 |
| Total Fat | 28g |
| Saturated Fat | 17g |
| Cholesterol | 95mg |
| Sodium | 210mg |
| Total Carbohydrates | 32g |
| Dietary Fiber | 3g |
| Sugars | 18g |
| Protein | 5g |
| Vitamin C | 15% DV |
| Calcium | 8% DV |
This easy no-bake berry icebox cake isn’t exactly health food, but it does have some redeeming qualities. The berries are packed with antioxidants, vitamin C, and fiber. Blueberries, in particular, are known for their anti-inflammatory properties and brain health benefits. The heavy cream and mascarpone provide calcium and healthy fats that help keep you full and satisfied.
If you’re watching your sugar intake, you can reduce the powdered sugar to 1/4 cup and rely on the natural sweetness of the berries. For a lower-calorie version, swap half the heavy cream for Greek yogurt—it adds protein and tang while cutting the fat. Just keep in mind that the texture will be less rich and creamy.
This dessert is not suitable for vegans, those with dairy allergies, or those on a strict low-carb diet (unless you make the adaptations mentioned above). As always, check your ingredients for hidden allergens if you’re serving a crowd.
Conclusion
This easy no-bake berry icebox cake is the kind of dessert that makes you look like a hero without breaking a sweat. It’s cool, creamy, bursting with berries, and perfect for those hot days when you want something special without turning on the oven. I’ve made it for family gatherings, summer parties, and quiet nights when I needed a little sweetness in my life, and it’s never let me down.
What I love most about this recipe is how forgiving it is. You can swap berries, change the cookies, adjust the sweetness—it all works. It’s a canvas, not a rigid formula. So take this recipe and make it your own. Add extra lemon zest if that’s your thing. Throw in some chocolate chips if you’re feeling indulgent. The beauty of a no-bake cake is that it adapts to you, not the other way around.
I’d love to hear how yours turns out. Drop a comment below and let me know what variations you tried, or tag me in your photos if you share them online. And if you’re looking for more no-fuss desserts, check out this easy no-bake peanut butter energy balls recipe for another quick and healthy treat. Happy baking—or should I say, happy chilling!
Frequently Asked Questions
Can I use a different type of cookie instead of graham crackers?
Absolutely. Vanilla wafers, shortbread cookies, or even chocolate wafer cookies work beautifully. Just keep in mind that different cookies soften at different rates. Vanilla wafers will soften faster than graham crackers, so check the texture after 6 hours. Chocolate wafers add a nice cocoa flavor that pairs well with the berries.
How long does this cake need to chill?
At least 8 hours, but overnight is best. The graham crackers need time to absorb moisture from the cream and berries, which creates that cake-like texture. If you’re in a rush, 6 hours is the absolute minimum, but don’t expect perfect slices. The longer it chills, the better it gets.
Can I use only fresh berries instead of frozen?
Yes, you can use all fresh berries. However, frozen berries add extra moisture that helps soften the graham crackers. If you use only fresh berries, the cake will be a bit firmer and the crackers won’t soften as much. I recommend using at least some frozen berries for the best texture. If you go all fresh, consider adding a tablespoon of berry jam between the layers for extra moisture.
Can I make this cake ahead of time for a party?
Yes, and I actually recommend it. This cake is at its best after 24 hours in the fridge. The flavors meld together beautifully, and the texture is perfectly set. You can make it up to 2 days in advance. Just keep it covered tightly in the refrigerator and add any fresh berry garnishes right before serving.
How do I get clean slices?
Use a sharp knife and run it under hot water before each cut. Wipe the blade clean between slices. This prevents the cream from sticking and dragging. For the first slice, you might get a little mess on the edges—that’s normal. Just wipe it off and keep going. Chilling the cake for the full 8 hours also makes slicing much easier.
Pin This Recipe!
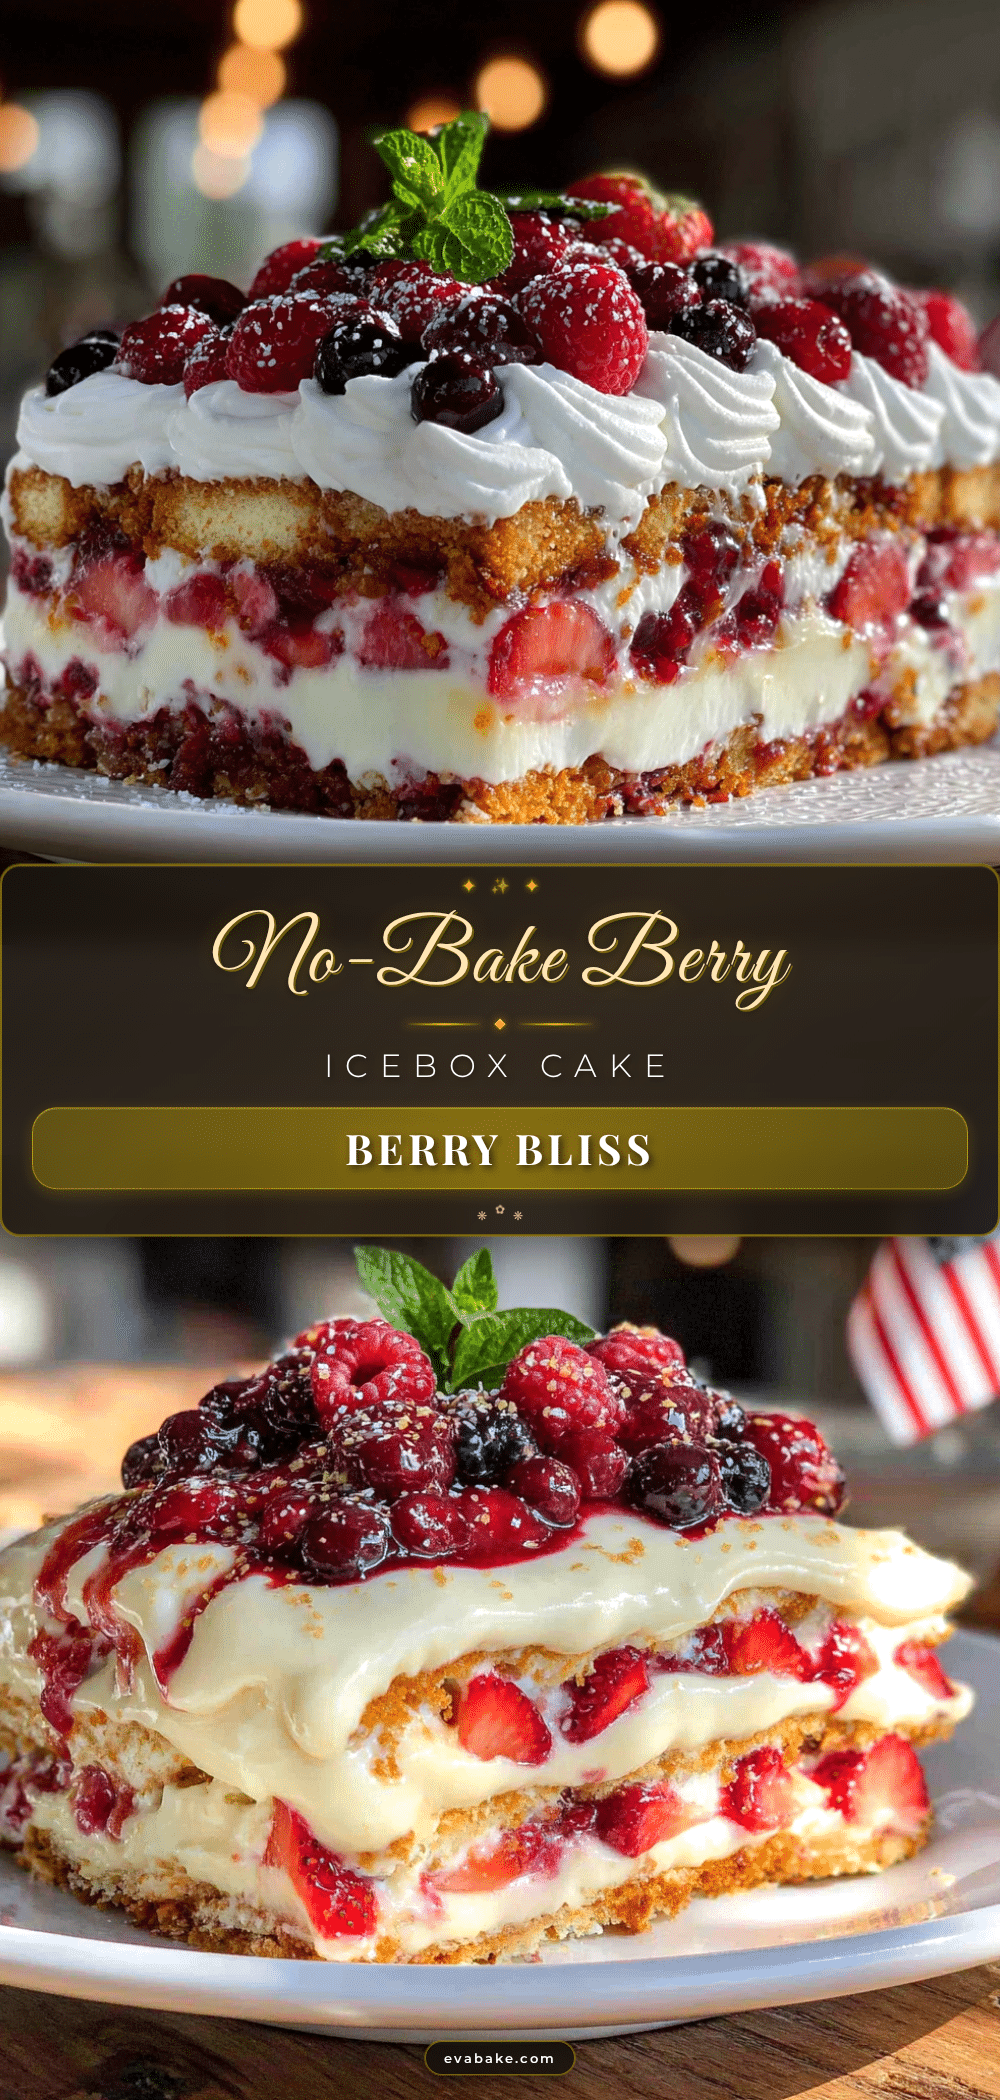
Easy No-Bake Berry Icebox Cake: Best Summer Dessert
A cool, creamy, berry-filled no-bake dessert perfect for hot summer days. Layers of graham crackers, mascarpone whipped cream, and fresh and frozen berries come together in the fridge for a stress-free, crowd-pleasing treat.
- Prep Time: 20 minutes
- Cook Time: 0 minutes
- Total Time: 8 hours 20 minutes (includes chilling)
- Yield: 8 servings 1x
- Category: Dessert
- Cuisine: American
Ingredients
- 2 cups (480 ml) heavy cream
- 1/3 cup (40 g) powdered sugar
- 1 teaspoon vanilla extract
- 8 oz (225 g) mascarpone cheese
- 24 full sheets graham crackers
- 1 cup (150 g) fresh strawberries, sliced
- 1 cup (150 g) fresh blueberries
- 1 cup (150 g) frozen mixed berries, thawed and drained
- 1 teaspoon lemon zest
Instructions
- Line a 9×5-inch loaf pan or 8×8-inch dish with plastic wrap or parchment paper, leaving overhang. Thaw frozen berries in a fine-mesh strainer for 15 minutes.
- In a large bowl, beat heavy cream, powdered sugar, and vanilla extract on medium speed until soft peaks form (3-4 minutes).
- Add mascarpone cheese and beat on low speed just until combined. Alternatively, fold in by hand with a spatula.
- Break graham cracker sheets into pieces that fit your pan (e.g., 4 rectangles per sheet for a loaf pan).
- Spread a thin layer of cream mixture on the bottom of the lined pan. Arrange a single layer of graham crackers over the cream.
- Spread about 1/3 of the remaining cream over the crackers. Scatter some fresh strawberries, blueberries, and drained frozen berries over the cream, pressing them in gently.
- Repeat layers: graham crackers, 1/3 cream, more berries. Repeat one more time, ending with a final layer of graham crackers. Spread the last of the cream over the top, covering completely.
- Sprinkle lemon zest over the top. Cover tightly with plastic wrap or parchment paper. Refrigerate for at least 8 hours, preferably overnight.
- To serve, lift cake out using the overhang, place on a serving plate, and peel away wrap. Slice with a sharp knife, wiping blade clean between cuts. Garnish with extra fresh berries and mint if desired.
Notes
Chill your bowl and beaters for 10 minutes before whipping cream for best results. Drain frozen berries thoroughly to prevent a watery cream. For clean slices, run your knife under hot water and wipe between cuts. The cake improves after 24 hours in the fridge.
Nutrition
- Serving Size: 1 slice (1/8 of cake
- Calories: 385
- Sugar: 18
- Sodium: 210
- Fat: 28
- Saturated Fat: 17
- Carbohydrates: 32
- Fiber: 3
- Protein: 5
Keywords: no-bake dessert, icebox cake, berry dessert, summer dessert, easy dessert, graham cracker cake, no-bake berry cake