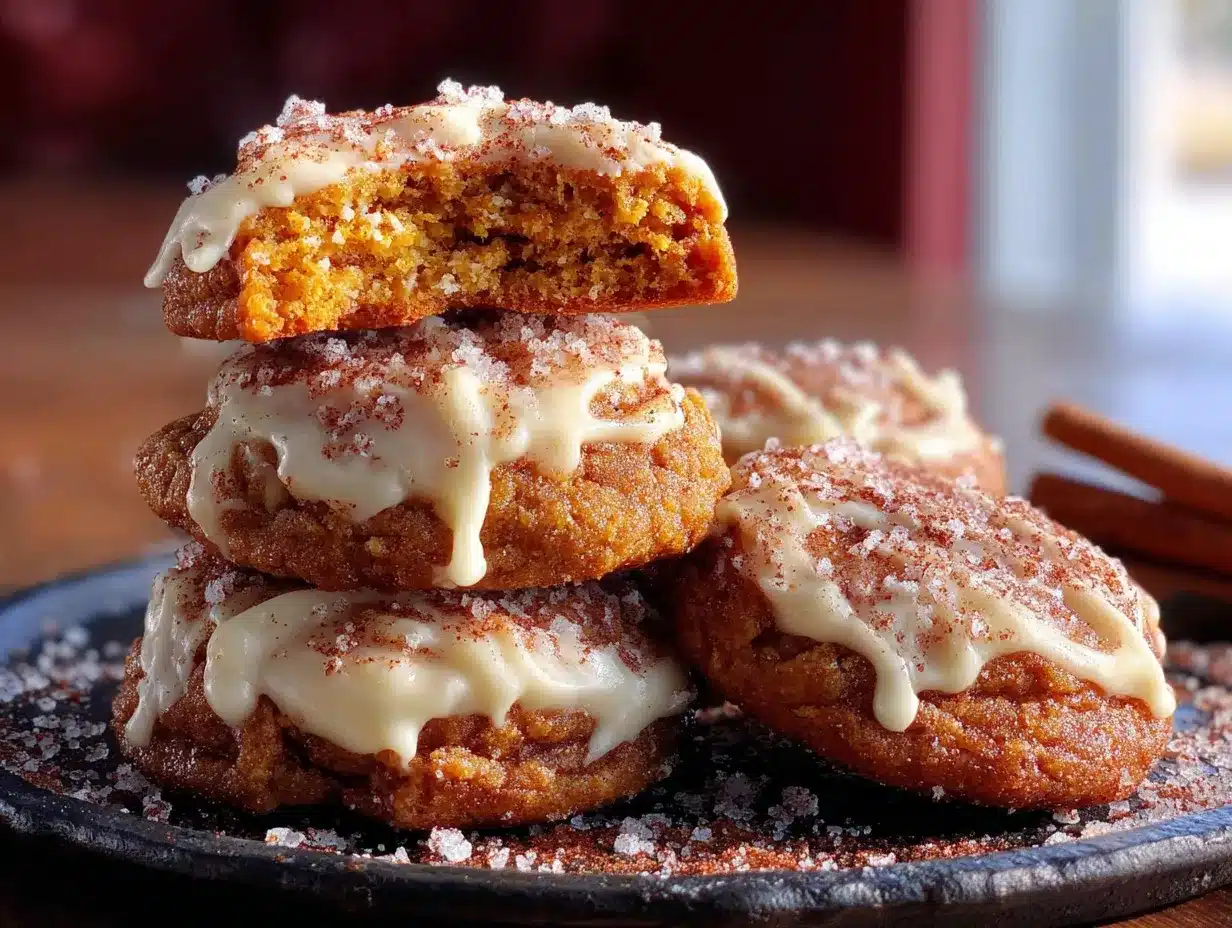
The crackle on top. That’s what I was chasing. Not the pumpkin spice aroma filling the kitchen, not the soft, pillowy center that gives way under your teeth, not even the creamy, tangy icing that pools into every crevice. No, it was that specific, sugar-crusted top that shatters just a little when you bite into it, and then dissolves into sweetness on your tongue. Everything else about these Best Iced Pumpkin Snickerdoodle Cookies is just a bonus. I’ve spent more autumns than I care to count trying to capture that exact texture in a pumpkin cookie, and honestly, most recipes fail. They turn out cakey, or they spread into sad, flat discs. But this one? The crackle is perfect. And the iced part? That came later, born from a late-night craving for something that tasted like a pumpkin pie and a snickerdoodle had a beautiful, frosted baby.
It started with a simple frustration. I wanted a cookie that tasted like fall but had the classic snickerdoodle chew. The first batch was a disaster—too soft, no crackle, and it tasted more like a muffin top than a cookie. I almost gave up. But then I remembered a trick from my grandma’s old sugar cookie recipe: chilling the dough. It felt like a gamble, adding an extra hour to the process, but it was the only thing that would keep the pumpkin from turning the dough into a puddle. And it worked. The crackle appeared, the centers stayed thick, and the flavor was finally there. Adding the icing was a last-minute decision, but it turned these cookies into something I actually crave. They’re not just good for a pumpkin cookie; they’re the cookie I want, period.
Why You’ll Love These Cookies
Let’s be honest for a second. Pumpkin cookies have a bad reputation for being dry, bland, or just plain sad. I’ve eaten my fair share of hockey pucks disguised as “healthy” pumpkin snacks. These are not those cookies. These are the ones that make you close your eyes after the first bite. Here’s why they are different:
- Perfectly Chewy Centers: Thanks to the pumpkin and a little trick with the butter, these stay soft for days. Not cakey. Chewy.
- That Signature Crackle Top: We’re getting a real, audible crackle from the cinnamon-sugar coating. It’s not just for show; it adds the best texture.
- Real Pumpkin Flavor: We’re not hiding the pumpkin. It’s the star, balanced with warm spices that don’t overwhelm it.
- The Icing Makes Them Next Level: The simple cream cheese icing adds a tangy, creamy finish that cuts through the sweetness. It turns a great cookie into an unforgettable one.
- No Weird Ingredients: You probably have everything in your pantry right now. No specialty flours or hard-to-find extracts.
- They Get Better After a Day: I know that sounds crazy, but the flavors meld together overnight. If you can wait that long, you’ll be rewarded.
I’ve tested this recipe six times to get the ratios right. The first version was too flat. The second was too dense. The third was just right but needed more spice. This version is the one I’d serve at a Thanksgiving potluck without any shame. It’s the one that makes people ask for the recipe before they even finish their first cookie. They’re that good.
What Ingredients You Will Need
This recipe uses simple, wholesome ingredients to deliver big flavor and that perfect texture. There’s nothing fancy here, just smart choices that work together. The quality of your pumpkin and spices really matters here, so don’t skimp. Here is what you need to grab:
- Unsalted Butter (1 cup, 2 sticks, softened): We use unsalted so we can control the salt level. Make sure it’s truly softened to room temp—not melted, not hard. This is crucial for creaming.
- Granulated Sugar (1 cup, plus more for rolling): This adds sweetness and helps create that crackly top. We’ll use a separate bowl of sugar mixed with cinnamon for rolling.
- Pumpkin Purée (½ cup): Not pumpkin pie filling! Just 100% pure pumpkin purée. Libby’s is my go-to brand because it’s consistently thick and not watery. Pat it dry with a paper towel if it looks too wet.
- Large Egg (1, room temperature): The egg binds everything together. A room-temperature egg incorporates into the butter mixture much better than a cold one.
- Vanilla Extract (1 teaspoon): Pure vanilla extract adds depth. Imitation vanilla works in a pinch, but pure is better.
- All-Purpose Flour (2 cups): Spoon and level your flour. Scooping directly from the bag packs in too much flour and makes the cookies dry. It’s the most common mistake.
- Cream of Tartar (2 teaspoons): This is the secret ingredient for snickerdoodles. It gives the cookies their signature tangy flavor and helps with that chewy texture. Don’t skip it.
- Baking Soda (1 teaspoon): Helps the cookies rise and spread just the right amount.
- Salt (½ teaspoon): Balances the sweetness and enhances all the other flavors.
- Pumpkin Pie Spice (1 ½ teaspoons): You can use store-bought or make your own. I prefer a blend with a little extra ginger and nutmeg.
- Ground Cinnamon (½ teaspoon, plus 2 tablespoons for rolling): We use a little in the dough and a lot in the coating. It’s the heart of the snickerdoodle flavor.
- For the Cream Cheese Icing:
- Cream Cheese (4 ounces, softened): Full-fat blocks are best. Low-fat can be too runny.
- Powdered Sugar (1 cup): Sift it if it’s lumpy. Nobody wants lumpy icing.
- Milk (1-2 tablespoons): To thin the icing to a drizzle-able consistency. Start with one and add more as needed.
- Vanilla Extract (½ teaspoon): For that extra layer of flavor.
Equipment Needed
You don’t need a fancy bakery setup for these. I made my best batch in a tiny apartment kitchen with a hand mixer that was older than me. Here is the gear that makes it easy:
- Electric Hand Mixer or Stand Mixer: A hand mixer works perfectly for creaming the butter and sugar. A stand mixer is great if you have one, but not necessary. You can even do it by hand with a wooden spoon if you have strong arms.
- Large Mixing Bowls: One for the wet ingredients and one for the dry. Glass or stainless steel works best.
- Baking Sheets (2): Light-colored, aluminum baking sheets are ideal. Dark sheets can cause the bottoms to burn before the centers are done.
- Parchment Paper or Silicone Baking Mat: This is non-negotiable. It prevents sticking and helps the cookies bake evenly. No greasing needed.
- Cookie Scoop (1.5 tablespoon size): This ensures uniform cookies that bake evenly. A spoon works, but a scoop is more consistent.
- Cooling Rack: Essential for letting the cookies cool completely before icing. Icing on a warm cookie is a puddle.
- Small Bowls: For the cinnamon-sugar coating mixture.
- Wire Whisk: For mixing the dry ingredients and the icing.
Preparation Method
Alright, let’s get to it. This process is simple, but there are a few moments where patience pays off. Trust the process, especially the chilling step. Here is the step-by-step breakdown:
- Cream the Butter and Sugar: In a large mixing bowl, beat the softened butter and 1 cup of granulated sugar together with an electric mixer on medium speed for about 2-3 minutes. You want it to look light, fluffy, and pale yellow. Scrape down the sides of the bowl with a spatula. This step is where we add air to the dough.
- Add the Wet Ingredients: Add the pumpkin purée, the room-temperature egg, and the vanilla extract. Beat on low speed until just combined. Don’t overmix here. The batter might look a little curdled or separated—that’s totally normal. It’s the pumpkin and butter not quite getting along yet, but they will once the flour goes in.
- Whisk the Dry Ingredients: In a separate medium bowl, whisk together the all-purpose flour, cream of tartar, baking soda, salt, pumpkin pie spice, and the ½ teaspoon of cinnamon. Whisking ensures the baking soda and spices are evenly distributed so you don’t get a pocket of baking soda in one cookie.
- Combine Wet and Dry: Gradually add the dry ingredients to the wet ingredients. Mix on low speed until just a few streaks of flour remain. Stop the mixer. Fold the dough together with a spatula until it is completely combined. Do not overmix, or the cookies will be tough.
- Chill the Dough (Crucial Step!): This is the most important part. Cover the bowl with plastic wrap and refrigerate the dough for at least 1 hour, or up to 3 days. Chilling solidifies the fat, which prevents the cookies from spreading into flat pancakes in the oven. It also allows the flavors to meld together. If you skip this, you will get flat cookies. I learned this the hard way.
- Preheat and Prepare: When you’re ready to bake, preheat your oven to 350°F (175°C). Line two baking sheets with parchment paper. In a small shallow bowl, mix together 2 tablespoons of granulated sugar and 2 tablespoons of ground cinnamon. This is your coating mixture.
- Roll the Dough: Using a 1.5 tablespoon cookie scoop, scoop out a ball of chilled dough. Roll it between your palms to form a smooth ball. Roll the ball generously in the cinnamon-sugar mixture until it’s completely coated. Place the coated dough balls on the prepared baking sheets, leaving about 2 inches of space between each one. They will spread.
- Bake: Bake for 10-12 minutes. The cookies should look puffy, set around the edges, and have a crackled top. The centers will look slightly soft and underdone—that’s perfect. They will continue to set on the hot baking sheet. Do not overbake them, or they will be dry!
- Cool: Let the cookies cool on the baking sheet for 5 minutes. This is critical for them to set up properly. Then, carefully transfer them to a wire cooling rack to cool completely. Do not even think about icing them until they are 100% cool to the touch.
- Make the Icing: While the cookies cool, make the icing. In a small bowl, beat the softened cream cheese with a hand mixer until smooth. Add the powdered sugar and ½ teaspoon of vanilla extract. Beat on low speed until combined. Add milk, one tablespoon at a time, until the icing reaches a thick but drizzle-able consistency. You want it to hold its shape for a moment before settling.
- Ice the Cookies: Once the cookies are completely cool, drizzle the icing over the tops using a spoon or a piping bag with a small tip. I prefer a spoon because I like the rustic look. Let the icing set for about 15-20 minutes before serving.
Cooking Tips & Techniques
I’ve made every mistake in the book with these cookies so you don’t have to. Here are the lessons I’ve learned in the trenches of my own kitchen:
- The Dough Will Be Sticky: Don’t panic. Pumpkin adds a lot of moisture. That’s why chilling is non-negotiable. If the dough is too sticky to roll after chilling, lightly dampen your hands with water. It helps prevent the dough from sticking to your skin.
- Don’t Overcrowd the Pan: These cookies spread. If you put too many on one sheet, they will merge into one giant cookie. Two inches of space is the minimum. If you only have one baking sheet, bake in batches and let the sheet cool completely between batches.
- Rotate the Pan Halfway Through: Halfway through the baking time (around the 5-minute mark), rotate the baking sheet 180 degrees. This ensures even browning, especially if your oven has hot spots.
- Check for Doneness by Touch: The edges should be lightly golden and the top should look set and cracked. The center should feel soft but not wet. If you press it gently, it should spring back slightly. Overbaked cookies are crumbly, so err on the side of slightly underdone.
- Cooling Rack is Your Friend: Never leave the cookies on the hot baking sheet for more than 5 minutes. They continue to cook from the residual heat. Transferring them to a wire rack stops the cooking process immediately.
- Icing Consistency is Key: If your icing is too thick, it won’t drizzle. If it’s too thin, it will run off the cookie and make a mess. Aim for a consistency that is slightly thicker than honey. You can always add more milk to thin it out.
Variations & Adaptations
One of the best things about this recipe is how easy it is to twist. I love playing around with different flavors. Here are some of my favorite ways to change it up:
- Chocolate Chip Pumpkin Snickerdoodles: Fold 1 cup of semi-sweet chocolate chips into the dough after mixing in the dry ingredients. The chocolate and pumpkin are a classic combo. I did this once when I was out of cinnamon for the topping, and it was a happy accident.
- Gluten-Free Version: Swap the all-purpose flour for a 1:1 gluten-free baking flour blend (like Bob’s Red Mill or King Arthur). The texture will be slightly more tender, but the flavor is spot on. Let the gluten-free dough chill for an extra 30 minutes.
- Spice It Up: Add a pinch of ground cloves or cardamom to the cinnamon-sugar coating. It adds a warm, almost floral note that’s incredible. I tried this last Thanksgiving and it was a huge hit.
- Maple Icing: Replace the vanilla extract in the cream cheese icing with 1 tablespoon of pure maple syrup. It adds a deep, autumnal sweetness that pairs perfectly with the pumpkin. Just reduce the milk by a tablespoon to keep the consistency right.
- Vegan Option: Use vegan butter (like Earth Balance) and a flax egg (1 tablespoon ground flaxseed + 3 tablespoons water, let sit for 5 minutes). The texture will be a bit more cakey, but it’s still delicious.
Serving & Storage Suggestions
These cookies are best served at room temperature, with a tall glass of cold milk or a hot cup of coffee. The contrast between the cold milk and the warm spices is pure comfort. They also make a fantastic addition to any fall dessert table. I love serving them alongside a slice of maple brown butter apple cinnamon tart for a stunning fall spread.
Storing: Store the iced cookies in an airtight container at room temperature for up to 3 days. If you stack them, place a sheet of parchment paper between the layers to prevent the icing from sticking. They actually taste better on day two, as the flavors have time to meld.
Freezing: You can freeze the un-iced cookie dough balls for up to 3 months. Scoop them, roll them in the cinnamon-sugar, and place them on a baking sheet in the freezer for an hour. Then, transfer the frozen dough balls to a freezer-safe bag. When you’re ready to bake, place them on a baking sheet and add 2-3 minutes to the baking time. No need to thaw. You can also freeze the baked, un-iced cookies for up to 2 months. Thaw them at room temperature and then add the icing.
Nutritional Information & Benefits
Let’s be real: these are a treat. But they do have some redeeming qualities! The pumpkin purée is packed with Vitamin A and fiber, which is more than most cookies can say. The cream cheese adds a little bit of protein and calcium. The cinnamon is a powerful antioxidant. Here are the approximate nutritional values per cookie (based on 24 cookies):
| Nutrient | Amount per Cookie |
|---|---|
| Calories | 185 |
| Total Fat | 9g |
| Saturated Fat | 5g |
| Cholesterol | 30mg |
| Sodium | 135mg |
| Total Carbohydrates | 26g |
| Dietary Fiber | 1g |
| Sugars | 16g |
| Protein | 2g |
Dietary Considerations: This recipe contains dairy (butter, cream cheese) and gluten (all-purpose flour). It can be made vegan and gluten-free with the substitutions listed above. It is not low-carb or keto-friendly.
Conclusion
These Best Iced Pumpkin Snickerdoodle Cookies are more than just a seasonal treat. They’re the cookie that finally cracked the code on making a pumpkin cookie that’s actually chewy, crackly, and full of flavor. They’re the ones that disappear first at the bake sale and get texted to friends with the caption “You need to make these right now.” I hope you give them a try and make them your own. Maybe you’ll add extra cinnamon, or skip the icing, or turn them into ice cream sandwiches. Whatever you do, let me know how they turn out. Drop a comment below, share a photo, or tag me on social media. I love seeing your bakes. Happy fall, and happy baking!
Frequently Asked Questions
Can I use pumpkin pie filling instead of pumpkin purée?
No, absolutely not. Pumpkin pie filling is pre-sweetened and has added spices. It will throw off the sugar and spice balance of the recipe completely. Stick to 100% pure pumpkin purée.
Why are my cookies flat?
The most common reason is that the dough wasn’t chilled long enough. The butter needs to be cold to prevent the cookies from spreading too much. Another culprit is overmixing the dough, which develops the gluten and makes the cookies spread. Make sure you chill the dough for at least 1 hour.
Can I freeze the cream cheese icing?
I don’t recommend it. Cream cheese icing can become grainy and watery after freezing and thawing. It’s best to make the icing fresh when you’re ready to serve the cookies.
How do I make the crackle more pronounced?
Make sure you roll the dough balls generously in the cinnamon-sugar mixture. The sugar coating needs to be thick. Also, don’t overbake the cookies. Taking them out when the centers are still slightly soft helps the crackle form perfectly as they cool.
Can I make these cookies without cream of tartar?
Cream of tartar is what gives snickerdoodles their signature tangy flavor and chewy texture. You can substitute it with 1 teaspoon of lemon juice or white vinegar mixed into the wet ingredients, but the texture won’t be exactly the same. It’s worth finding cream of tartar for the best results.
Pin This Recipe!
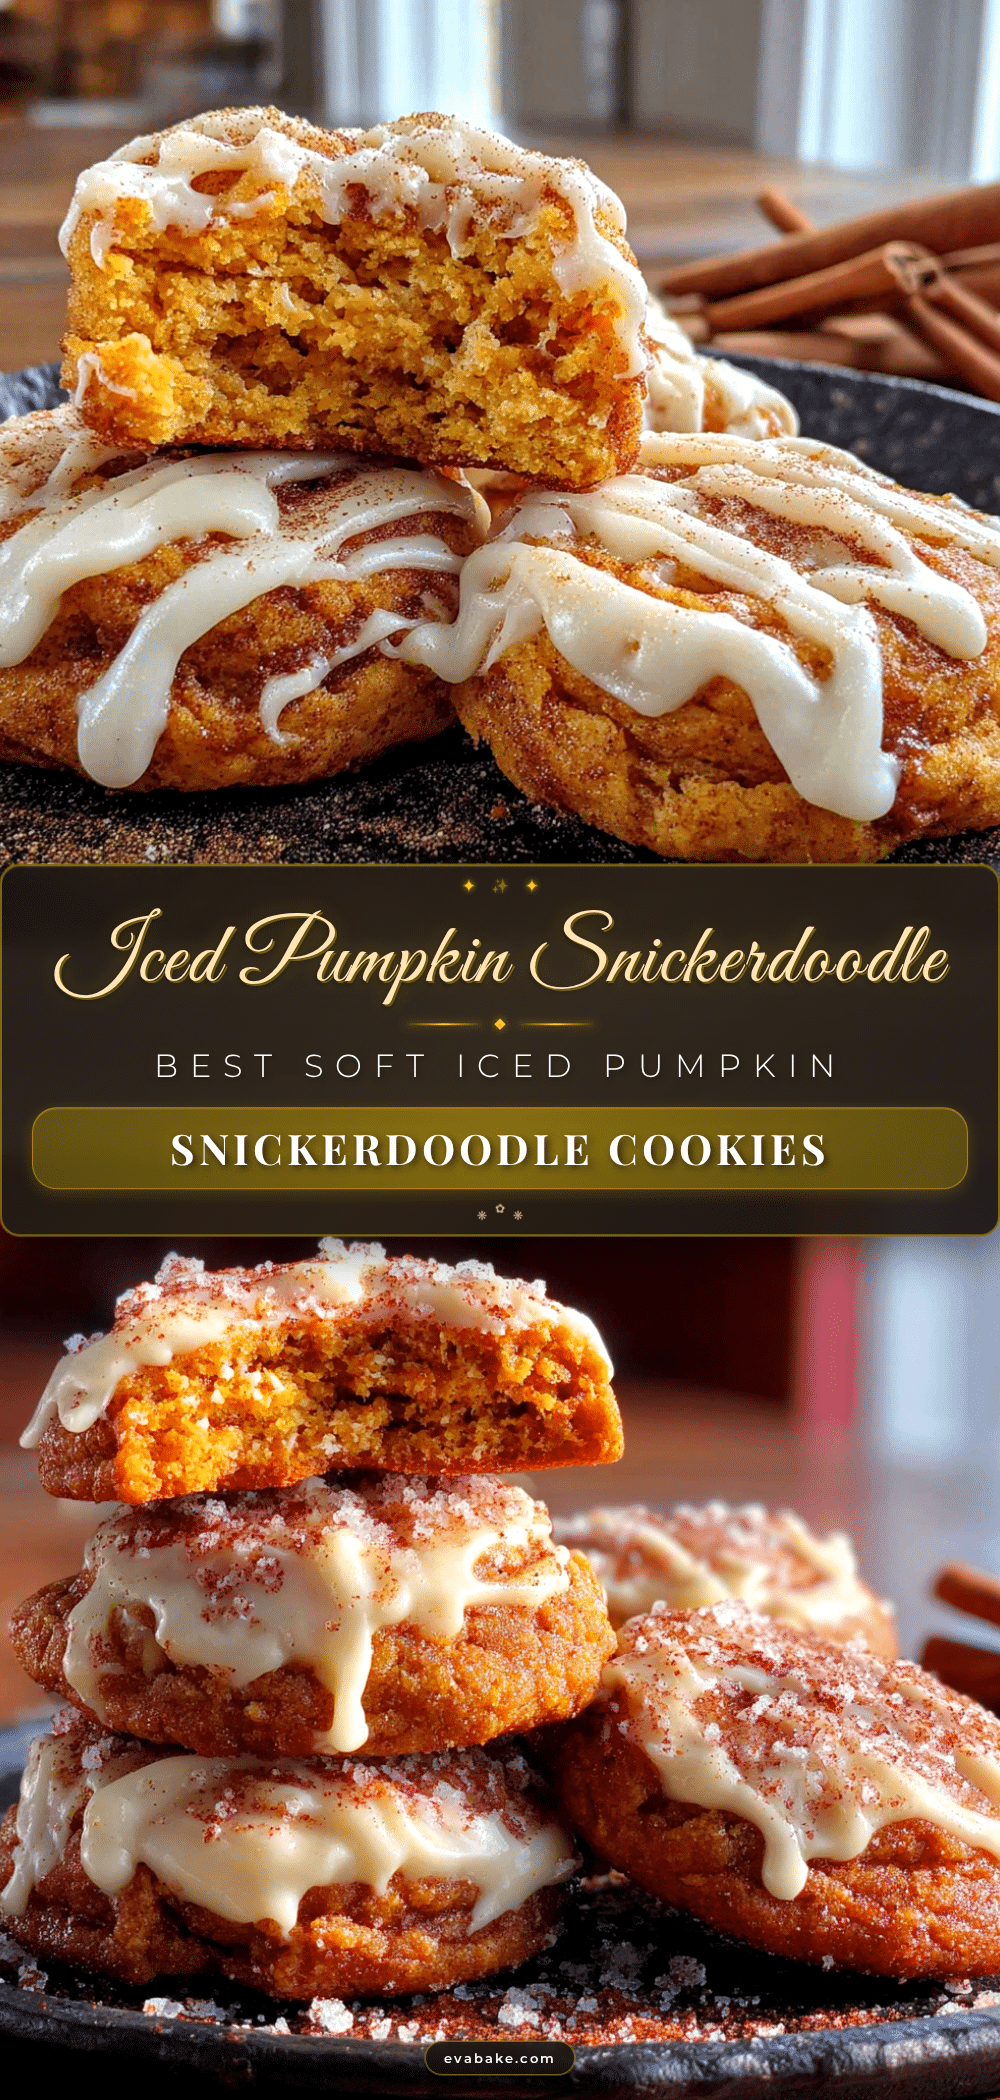
Best Iced Pumpkin Snickerdoodle Cookies: Easy Fall Recipe

These iced pumpkin snickerdoodle cookies are perfectly chewy with a signature crackle top and a creamy cream cheese icing. They are the ultimate fall treat that combines the best of pumpkin pie and snickerdoodle flavors.
- Prep Time: 15 minutes
- Cook Time: 12 minutes
- Total Time: 1 hour 27 minutes (includes 1 hour chilling)
- Yield: 24 cookies 1x
- Category: Dessert
- Cuisine: American
Ingredients
- 1 cup (2 sticks) unsalted butter, softened
- 1 cup granulated sugar, plus more for rolling
- ½ cup pumpkin purée (not pumpkin pie filling)
- 1 large egg, room temperature
- 1 teaspoon vanilla extract
- 2 cups all-purpose flour, spooned and leveled
- 2 teaspoons cream of tartar
- 1 teaspoon baking soda
- ½ teaspoon salt
- 1½ teaspoons pumpkin pie spice
- ½ teaspoon ground cinnamon, plus 2 tablespoons for rolling
- For the Cream Cheese Icing:
- 4 ounces cream cheese, softened
- 1 cup powdered sugar, sifted if lumpy
- 1–2 tablespoons milk
- ½ teaspoon vanilla extract
Instructions
- Cream the butter and sugar: In a large mixing bowl, beat the softened butter and 1 cup of granulated sugar together with an electric mixer on medium speed for about 2-3 minutes until light, fluffy, and pale yellow. Scrape down the sides of the bowl.
- Add the wet ingredients: Add the pumpkin purée, room-temperature egg, and vanilla extract. Beat on low speed until just combined. The batter may look slightly curdled—this is normal.
- Whisk the dry ingredients: In a separate medium bowl, whisk together the all-purpose flour, cream of tartar, baking soda, salt, pumpkin pie spice, and ½ teaspoon of cinnamon.
- Combine wet and dry: Gradually add the dry ingredients to the wet ingredients. Mix on low speed until just a few streaks of flour remain. Fold the dough together with a spatula until completely combined. Do not overmix.
- Chill the dough: Cover the bowl with plastic wrap and refrigerate the dough for at least 1 hour, or up to 3 days.
- Preheat and prepare: When ready to bake, preheat oven to 350°F (175°C). Line two baking sheets with parchment paper. In a small shallow bowl, mix together 2 tablespoons of granulated sugar and 2 tablespoons of ground cinnamon.
- Roll the dough: Using a 1.5 tablespoon cookie scoop, scoop out a ball of chilled dough. Roll it between your palms to form a smooth ball. Roll the ball generously in the cinnamon-sugar mixture until completely coated. Place the coated dough balls on the prepared baking sheets, leaving about 2 inches of space between each.
- Bake: Bake for 10-12 minutes. The cookies should look puffy, set around the edges, and have a crackled top. The centers will look slightly soft and underdone.
- Cool: Let the cookies cool on the baking sheet for 5 minutes. Then, carefully transfer them to a wire cooling rack to cool completely.
- Make the icing: In a small bowl, beat the softened cream cheese with a hand mixer until smooth. Add the powdered sugar and ½ teaspoon of vanilla extract. Beat on low speed until combined. Add milk, one tablespoon at a time, until the icing reaches a thick but drizzle-able consistency.
- Ice the cookies: Once the cookies are completely cool, drizzle the icing over the tops using a spoon or a piping bag. Let the icing set for about 15-20 minutes before serving.
Notes
Chilling the dough is crucial to prevent flat cookies. The dough will be sticky; lightly dampen your hands if needed. Do not overbake; cookies continue to set on the hot baking sheet. Icing should be thick but drizzle-able; adjust milk as needed. Cookies taste even better the next day.
Nutrition
- Serving Size: 1 cookie
- Calories: 185
- Sugar: 16
- Sodium: 135
- Fat: 9
- Saturated Fat: 5
- Carbohydrates: 26
- Fiber: 1
- Protein: 2
Keywords: pumpkin snickerdoodle cookies, iced pumpkin cookies, fall cookies, pumpkin dessert, snickerdoodle recipe, cream cheese icing