The whole tray was gone before I even got back from the carpool line. My son’s friend had texted his mom asking if I could make “those Halloween bars again” before the school party. Honestly, I wasn’t even trying to be impressive that day. I was just staring at a bag of candy corn I’d bought on impulse (you know, the one you grab at the checkout lane and immediately regret) and a box of Rice Krispies that was about to expire.
I almost tossed the candy corn into the pantry graveyard. But then I thought — what if I just melted it down with the marshmallows? The worst that could happen was a sticky mess, and let’s face it, I’ve made plenty of those. What I got instead was a pan of Easy Candy Corn Rice Krispie Treats that disappeared faster than I could cut them. The color was this gorgeous, sunset-orange marbled with white and yellow, and the flavor was way more subtle than I expected. Not overly sweet, not artificial-tasting — just buttery, marshmallowy, with that tiny hint of vanilla and honey that candy corn brings to the party.
That first batch taught me something. Sometimes the best recipes come from not trying so hard. You just let the ingredients do what they want to do. And these candy corn rice krispie treats wanted to be the hit of every Halloween gathering. I’ve made them four times since that day, and each time, someone asks for the recipe. It’s the kind of no-fuss dessert that makes you look like you planned something clever, when really you just got lucky with a pantry experiment. Trust me — you want this in your back pocket for fall.
Why You’ll Love This Recipe
I’ve tested this recipe more times than I care to admit, and here’s the honest truth — it works every single time. No complicated steps, no fancy equipment, no hunting down obscure ingredients. Just pure, nostalgic comfort with a seasonal twist that actually tastes good (not just looks cute).
- Ready in 15 Minutes: From start to finish, you’re looking at about 15 minutes of active time. Perfect for those “I need a treat for the bake sale tomorrow” panics.
- 3 Main Ingredients: Butter, marshmallows, and Rice Krispies cereal. Plus candy corn. That’s it. No weird stuff.
- No-Bake Magic: No oven required. If you can stir, you can make these. Great for hot days or when you don’t want to heat up the kitchen.
- Kid-Approved & Adult-Friendly: My kids inhale these, but I’ve also brought them to a grown-up potluck and watched them vanish. Something about the candy corn-marshmallow combo hits that nostalgic sweet spot.
- Customizable for Any Fall Event: Halloween party? Check. Thanksgiving dessert table? Check. Cozy movie night? Absolutely. These work for everything.
What makes these different from every other rice krispie treat recipe out there? It’s the way the candy corn melts into the marshmallow mixture. Most recipes just stir in whole candy corn at the end, which gives you these hard, chewy bits that stick to your teeth. My method melts half the candy corn with the marshmallows, creating a creamy, subtly flavored base that infuses every bite. The remaining candy corn gets stirred in at the end for texture and those iconic little pops of color. It’s a small tweak, but it changes everything.
And honestly? There’s something about biting into one of these that just makes you feel like a kid again. The crunch, the gooeyness, that faint honey-vanilla note from the candy corn — it’s comfort food at its simplest. No stress, no fuss, just pure deliciousness. If you love easy fall desserts that deliver big on flavor without a ton of effort, these are for you.
What Ingredients You Will Need
This recipe keeps things simple. You probably have most of these in your pantry already, which is exactly how I like my desserts to start. Here’s what you’ll need and why each ingredient matters.
- 3 tablespoons unsalted butter: Don’t substitute salted butter here — the salt content varies by brand and can throw off the sweetness balance. I use Land O’Lakes unsalted, but any good-quality butter works. The butter adds richness and helps the marshmallows melt smoothly without burning.
- 1 (10-ounce) bag mini marshmallows: Standard mini marshmallows melt faster and more evenly than the jumbo ones. Jet-Puffed is my go-to brand because they’re consistently fluffy. If you’re using store-brand, just watch them closely — some brands have more starch coating, which can make the mixture grainy.
- 6 cups Rice Krispies cereal (or any crispy rice cereal): The classic brand holds up best. Generic versions tend to get soggy faster, especially if you’re storing these for more than a day. Stick with the name brand for that signature snap, crackle, and pop texture.
- 1 cup candy corn (plus extra for topping): Brach’s is the most reliable for melting. Seasonal store brands can be waxier and don’t incorporate as smoothly. You’ll use about ¾ cup melted into the marshmallow mixture and ¼ cup stirred in at the end for texture. Save a few extra pieces to press on top for that classic candy corn look.
- ¼ teaspoon vanilla extract (optional but recommended): A tiny splash rounds out the candy corn’s honey-vanilla flavor. Pure vanilla extract adds warmth; imitation vanilla is fine but has a sharper, more artificial taste. I use Nielsen-Massey pure vanilla bean paste when I’m feeling fancy, but plain extract works great.
- Pinch of flaky sea salt (optional): This is my secret weapon. A light sprinkle on top right after pressing cuts the sweetness and makes the flavors pop. Maldon sea salt flakes are perfect, but any flaky salt works. Don’t use table salt — it dissolves too quickly and can make the treats taste salty instead of balanced.
Ingredient Substitution Notes: Need a dairy-free version? Use vegan butter (Miyoko’s is my favorite) and vegan marshmallows (Dandies brand melts beautifully). The texture will be slightly denser, but still delicious. For a gluten-free option, confirm your crispy rice cereal is certified gluten-free — Rice Krispies brand contains malt flavoring from barley, so look for a gluten-free alternative like Nature’s Path Organic Crispy Rice Cereal. And if you’re not a candy corn fan (I know, controversial), try swapping in chopped peanut butter cups or crushed pretzels for a salty-sweet twist.
Equipment Needed
You don’t need a professional kitchen for these. Here’s what I use every time:
- Large pot or Dutch oven (at least 5-quart): You need room to stir everything together without spilling. A heavy-bottomed pot distributes heat evenly and prevents the marshmallows from scorching. I use my Le Creuset Dutch oven, but any sturdy pot works.
- Rubber spatula (silicone is best): Metal spoons scratch your pot and don’t scrape the sides as well. A silicone spatula lets you fold the cereal in gently without crushing it. Get one with a heat-resistant handle — trust me on this.
- 9×13-inch baking pan: This gives you thick, satisfying bars. If you want thinner, crunchier treats, use an 11×17-inch sheet pan instead. Line it with parchment paper for easy removal — I leave overhang on two sides like handles.
- Parchment paper or wax paper: Essential for lining the pan and for pressing the mixture down without sticking to your hands. Parchment is more heat-resistant if you’re pressing while the mixture is still warm.
- Butter knife or offset spatula: For spreading the mixture evenly and cutting clean squares. Run it under hot water between cuts for the neatest edges.
- Measuring cups and spoons: Accurate measurements matter here. Too much cereal and your treats are dry; too little and they’re a sticky mess.
- Small bowl (for topping candy corn): Keeps your extra candy corn handy and prevents you from grabbing sticky handfuls from the bag.
Budget-Friendly Tip: Don’t have a 9×13 pan? Use a 9×9 square pan for extra-thick treats (just reduce the cereal to 5 cups). No parchment paper? Grease the pan generously with butter and press the mixture down with a buttered spatula. I’ve done it both ways, and honestly, the butter method works fine — just expect a slightly stickier cleanup.
Preparation Method
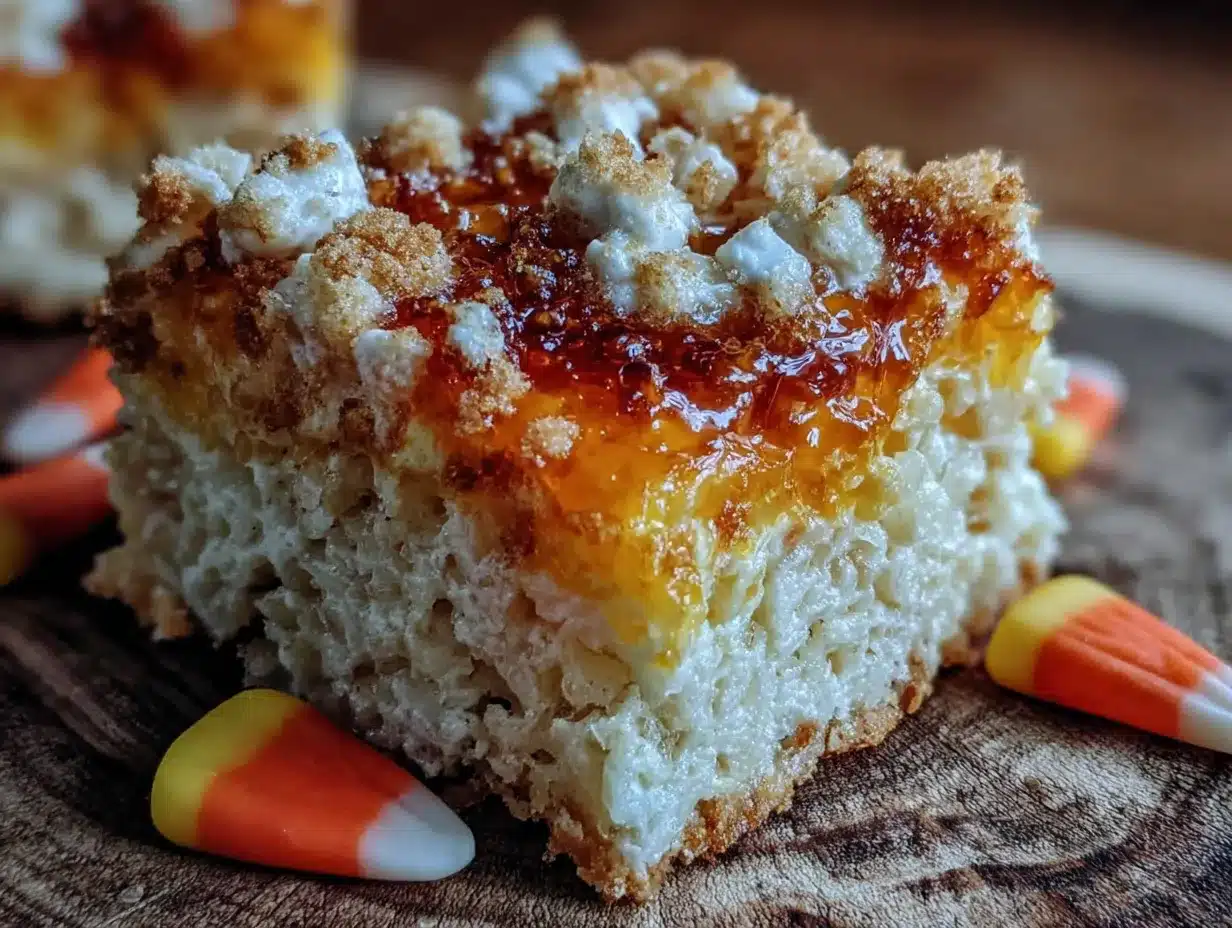
Let’s make these Easy Candy Corn Rice Krispie Treats. Follow these steps closely, especially the timing on the marshmallow melt — that’s where most people go wrong.
- Prep your pan: Line a 9×13-inch baking pan with parchment paper, leaving about 2 inches of overhang on the long sides. Lightly grease the parchment with butter or nonstick spray. This step is non-negotiable — without it, you’ll be chiseling treats out of the pan like a archeologist.
- Melt the butter: Place your large pot over medium-low heat. Add the 3 tablespoons of butter and let it melt slowly, swirling the pan occasionally. Don’t rush this — high heat will burn the butter and give you a scorched flavor. You want it fully melted and just starting to bubble, about 2 minutes.
- Add marshmallows and candy corn: Dump the entire bag of mini marshmallows into the pot, then add ¾ cup of candy corn. Stir constantly with your silicone spatula. The candy corn will start to melt and blend into the marshmallows, creating a beautiful orange-tinted mixture. Keep stirring until everything is completely smooth and uniform — about 5-7 minutes. The mixture should be glossy and stretchy, like thick caramel.
- Remove from heat and add vanilla: Take the pot off the burner immediately. Stir in the ¼ teaspoon of vanilla extract (if using). The residual heat will incorporate it without cooking it off. Give it a quick taste — it should be sweet, buttery, and faintly honeyed from the candy corn.
- Fold in the cereal: Add the 6 cups of Rice Krispies cereal all at once. Fold gently, using a cutting-and-folding motion — don’t stir vigorously or you’ll crush the cereal into dust. Fold until every piece of cereal is coated in the marshmallow mixture. You should see streaks of orange from the candy corn throughout. This takes about 1-2 minutes. Work quickly — the mixture sets as it cools.
- Add remaining candy corn: Sprinkle the remaining ¼ cup of candy corn over the top of the cereal mixture. Fold it in gently, just 2-3 strokes, so the candy corn pieces stay mostly whole. You want those visible pops of yellow, orange, and white throughout the finished treats.
- Transfer to pan: Scrape the mixture into your prepared pan. Don’t dump it all in one spot — spread it evenly across the pan as you go. This prevents one side from being thicker than the other.
- Press evenly: Here’s the trick: lightly butter your hands or the back of a spatula, then press the mixture down firmly and evenly. Don’t smash it flat — you want gentle, even pressure. If you press too hard, the treats become dense and hard. Press just enough to compact them into an even layer. Aim for about ¾-inch thickness.
- Add topping (optional): While the mixture is still warm, press a few extra candy corn pieces into the top in a pattern or scattered randomly. This makes them look intentional and pretty. Sprinkle a pinch of flaky sea salt over the top if you’re using it.
- Cool completely: Let the treats cool at room temperature for at least 30 minutes. Don’t rush this — warm treats fall apart when you cut them. If you’re in a hurry, pop the pan in the fridge for 15 minutes. The marshmallow mixture needs to set fully to hold its shape.
- Cut and serve: Lift the treats out of the pan using the parchment overhang. Place on a cutting board. Use a sharp knife (not a serrated one — it tears the marshmallow) to cut into squares. I cut 6 rows by 4 rows for 24 even bars. Run the knife under hot water and wipe it clean between cuts for the cleanest edges.
Sensory Cue: When you press the mixture, it should feel warm and pliable but not sticky. If it’s sticking to your hands like glue, it’s too hot — let it cool for 2-3 minutes before pressing again. The finished treats should look glossy, with visible candy corn pieces scattered throughout like little stained glass windows.
Cooking Tips & Techniques
I’ve made these candy corn rice krispie treats at least a dozen times, and I’ve learned a few things the hard way. Here’s what I wish someone had told me:
The Low and Slow Rule: Keep your heat on medium-low the entire time. The first time I made these, I cranked the heat thinking it would speed things up. Instead, I got burnt marshmallow bits that tasted bitter and smoky. Not the vibe. Low heat gives you a smooth, creamy melt without scorching. Patience pays off here.
Don’t Over-Stir the Cereal: I know it’s tempting to keep mixing until everything looks perfect, but over-stirring crushes the cereal into tiny pieces. You end up with dense, hard treats instead of light, airy ones. Fold just until the cereal is coated — about 10-12 folds. A few dry spots are fine; they’ll get coated as you press the mixture into the pan.
The Butter Your Hands Trick: If you’re pressing the mixture down with your hands (which is honestly the easiest method), butter them first. Rub a little softened butter between your palms before pressing. The mixture won’t stick, and you’ll get a much more even press than using a spatula. I learned this from my grandmother, and it’s never failed me.
Cutting Without the Crunch: Rice Krispie treats can be tricky to cut cleanly. The marshmallow stretches and pulls, leaving ragged edges. Use a long, sharp chef’s knife and cut in one smooth motion — don’t saw back and forth. For the absolute cleanest cuts, chill the treats in the fridge for 20 minutes before cutting. The marshmallow firms up, and the knife glides through like butter.
Timing Your Batch: These treats set up fast, so have everything ready before you start. Measure your cereal, line your pan, and have your candy corn portioned out. Once the marshmallow mixture is ready, you have about 3-4 minutes to work before it becomes too stiff to press. Move quickly but deliberately.
My Biggest Failure: I once tried to double the recipe in the same pot. Bad idea. The mixture overflowed, stuck to the burner, and I spent 45 minutes scrubbing burnt marshmallow off my stovetop. If you’re making a double batch, use two pots or a very large stockpot. Learn from my mistake.
Variations & Adaptations
One of the best things about this recipe is how easy it is to tweak. Here are some variations I’ve tried and loved:
Chocolate Drizzle: After pressing the treats into the pan, melt ½ cup of semi-sweet chocolate chips with 1 teaspoon of coconut oil. Drizzle over the top in zigzag patterns. Let set for 15 minutes before cutting. The chocolate adds a bittersweet contrast that cuts through the sweetness beautifully. I did this for a Halloween party, and people went nuts.
Peanut Butter Swirl: Warm ¼ cup of creamy peanut butter in the microwave for 20 seconds, then drizzle it over the marshmallow mixture before adding the cereal. Fold twice to create swirls — don’t overmix or you’ll lose the marbled effect. The peanut butter adds a savory richness that pairs perfectly with the candy corn’s sweetness. If you love no-bake peanut butter treats, you’ll adore this twist.
Spiced Autumn Version: Add ½ teaspoon of pumpkin pie spice and ¼ teaspoon of cinnamon to the marshmallow mixture as it melts. The warm spices complement the candy corn’s honey notes and make these taste like fall in a bite. I made this version for Thanksgiving, and it was the first thing to disappear from the dessert table.
Gluten-Free Option: Use a certified gluten-free crispy rice cereal (like Nature’s Path or One Degree Organics). The texture is slightly different — a bit more delicate — but the flavor is identical. I’ve served these to gluten-sensitive friends with zero complaints.
Vegan Adaptation: Swap the butter for vegan butter, use Dandies vegan marshmallows, and confirm your cereal is vegan (Rice Krispies contain vitamin D3 from lanolin, so opt for a vegan brand). The treats will be slightly less chewy but still delicious. I tested this for a friend’s vegan Halloween party, and they held up beautifully.
Halloween Mix-In: Stir in ¼ cup of mini chocolate chips and ¼ cup of chopped pretzels along with the remaining candy corn. The salty, crunchy, chocolatey additions make these feel extra festive. I call these my “trick-or-treat” bars, and kids absolutely demolish them.
Serving & Storage Suggestions
These Easy Candy Corn Rice Krispie Treats are best served at room temperature. The texture is perfect — chewy but not sticky, with a satisfying crunch from the cereal. If you’ve chilled them in the fridge, let them sit out for 10-15 minutes before serving to soften slightly.
Presentation Ideas: For Halloween parties, cut the treats into small squares and arrange them on a platter lined with orange or black napkins. I like to stack them in a pyramid shape for visual impact. For a more polished look, cut them into triangles (like candy corn shapes) using a sharp knife. Dust with a little powdered sugar for a “spider web” effect.
Pairing Suggestions: These treats pair beautifully with a cold glass of milk, a warm cup of apple cider, or a pumpkin spice latte. For a dessert board, arrange them alongside brown butter pumpkin chocolate chip blondies and pumpkin cream cheese swirl muffins for a full fall spread. They’re also great crumbled over vanilla ice cream for a quick sundae.
Storage Instructions: Store in an airtight container at room temperature for up to 5 days. Layer them between sheets of parchment paper to prevent sticking. Don’t refrigerate them — the cold dries out the marshmallow and makes the treats hard and crumbly. If your kitchen is warm, they’ll keep fine for 2-3 days without any issues.
Freezing: These freeze beautifully! Wrap individual treats tightly in plastic wrap, then place them in a freezer-safe bag. They’ll keep for up to 3 months. To thaw, let them sit at room temperature for about 30 minutes. The texture will be slightly softer than fresh, but still delicious. I always keep a stash in my freezer for last-minute Halloween parties or school events.
Flavor Development: Honestly, these taste even better on day two. The marshmallow-candy corn mixture settles and becomes more cohesive, and the flavors meld together beautifully. If you can resist eating them all on day one, you’re in for a treat.
Nutritional Information & Benefits
Let’s be real — these are a treat, not a health food. But here’s what you’re looking at per serving (based on 24 servings):
| Nutrient | Amount per Serving |
|---|---|
| Calories | 175 |
| Total Fat | 4g |
| Saturated Fat | 2.5g |
| Carbohydrates | 35g |
| Sugar | 20g |
| Protein | 1g |
| Sodium | 135mg |
Health Considerations: These treats are not gluten-free unless you use a certified gluten-free cereal. They contain dairy from the butter, but you can easily substitute vegan alternatives. Candy corn is typically free of common allergens (no nuts, soy, or eggs), but always check the label for cross-contamination warnings if you’re serving someone with severe allergies.
The Bright Side: On the plus side, rice cereal is fortified with iron and B vitamins. The butter provides a small amount of vitamin A. And honestly? Sometimes you just need a little joy in your day. I’d rather have one of these homemade treats than a bag of processed candy any day. You know exactly what’s in them, there’s no weird preservatives, and you can control the sweetness by adjusting the candy corn amount.
If you’re watching your sugar intake, try reducing the candy corn to ½ cup total (melted into the marshmallows) and skip the topping. The treats will be less sweet but still satisfying. Or make a smaller batch — this recipe halves beautifully for a 9×9 pan.
Conclusion
These Easy Candy Corn Rice Krispie Treats are proof that the simplest recipes often become the most beloved. They’re quick enough for a weeknight craving, festive enough for a Halloween party, and nostalgic enough to make you feel like a kid again. The combination of buttery marshmallow, crunchy cereal, and sweet candy corn is just — right. No fuss, no stress, just pure, uncomplicated deliciousness.
I love that this recipe lets you be creative. Add chocolate, swirl in peanut butter, or keep it classic — there’s no wrong way to make these. And honestly? That’s the kind of recipe I want in my life. One that gives you room to play, but always delivers.
So go ahead — grab that bag of candy corn you’ve been eyeing and give these a try. I promise you’ll be glad you did. And when you make them (because I know you will), I’d love to hear how they turned out. Did you add a twist? Did your kids love them? Drop a comment below and let me know. Share this recipe with a friend who needs a little fall sweetness in their life. Happy snacking, friends!
Frequently Asked Questions
Can I use stale candy corn for this recipe?
Yes, but stale candy corn won’t melt as smoothly. If your candy corn is hard and dry, try microwaving it for 10-15 seconds before adding it to the marshmallows. Fresh candy corn gives you the creamiest melt, so check the expiration date if you’ve had the bag sitting around since last Halloween.
Why did my treats turn out hard and dense?
You probably pressed them too firmly into the pan. Rice Krispie treats need a gentle touch — press just enough to compact them into an even layer. Over-pressing crushes the cereal and eliminates the air pockets that make them light and chewy. Next time, use a light hand and aim for a ¾-inch thickness.
Can I make these ahead of time for a party?
Absolutely! These treats actually taste better on day two. Make them up to 2 days in advance, store them in an airtight container at room temperature, and they’ll be perfect. Don’t refrigerate them — the cold makes them hard. If you need to make them further ahead, freeze them for up to 3 months.
Can I use jumbo marshmallows instead of mini?
You can, but mini marshmallows melt faster and more evenly. Jumbo marshmallows take longer to melt and can leave un-melted pockets if you’re not careful. If you only have jumbo, cut them into quarters before melting. And reduce the heat to low — jumbo marshmallows scorch more easily.
How do I keep the candy corn from sinking to the bottom?
This happens when the marshmallow mixture is too warm when you add the candy corn. Let the mixture cool for 1-2 minutes after removing it from the heat before folding in the remaining candy corn. The slightly cooler mixture will hold the candy corn in place. Also, fold gently — aggressive stirring pushes the candy corn to the bottom.
Pin This Recipe!

Easy Candy Corn Rice Krispie Treats: Best Fall Dessert

These Easy Candy Corn Rice Krispie Treats are a quick, no-bake fall dessert that combines buttery marshmallows, crispy rice cereal, and sweet candy corn for a nostalgic treat that’s ready in 15 minutes.
- Prep Time: 15 minutes
- Cook Time: 5 minutes
- Total Time: 20 minutes
- Yield: 24 servings 1x
- Category: Dessert
- Cuisine: American
Ingredients
- 3 tablespoons unsalted butter
- 1 (10-ounce) bag mini marshmallows
- 6 cups Rice Krispies cereal (or any crispy rice cereal)
- 1 cup candy corn (plus extra for topping)
- ¼ teaspoon vanilla extract (optional but recommended)
- Pinch of flaky sea salt (optional)
Instructions
- Prep your pan: Line a 9×13-inch baking pan with parchment paper, leaving about 2 inches of overhang on the long sides. Lightly grease the parchment with butter or nonstick spray.
- Melt the butter: Place your large pot over medium-low heat. Add the 3 tablespoons of butter and let it melt slowly, swirling the pan occasionally. You want it fully melted and just starting to bubble, about 2 minutes.
- Add marshmallows and candy corn: Dump the entire bag of mini marshmallows into the pot, then add ¾ cup of candy corn. Stir constantly with your silicone spatula until everything is completely smooth and uniform — about 5-7 minutes. The mixture should be glossy and stretchy, like thick caramel.
- Remove from heat and add vanilla: Take the pot off the burner immediately. Stir in the ¼ teaspoon of vanilla extract (if using).
- Fold in the cereal: Add the 6 cups of Rice Krispies cereal all at once. Fold gently, using a cutting-and-folding motion, until every piece of cereal is coated in the marshmallow mixture. This takes about 1-2 minutes.
- Add remaining candy corn: Sprinkle the remaining ¼ cup of candy corn over the top of the cereal mixture. Fold it in gently, just 2-3 strokes, so the candy corn pieces stay mostly whole.
- Transfer to pan: Scrape the mixture into your prepared pan, spreading it evenly across the pan as you go.
- Press evenly: Lightly butter your hands or the back of a spatula, then press the mixture down firmly and evenly. Aim for about ¾-inch thickness.
- Add topping (optional): While the mixture is still warm, press a few extra candy corn pieces into the top in a pattern or scattered randomly. Sprinkle a pinch of flaky sea salt over the top if you’re using it.
- Cool completely: Let the treats cool at room temperature for at least 30 minutes. If you’re in a hurry, pop the pan in the fridge for 15 minutes.
- Cut and serve: Lift the treats out of the pan using the parchment overhang. Place on a cutting board. Use a sharp knife to cut into squares. I cut 6 rows by 4 rows for 24 even bars.
Notes
For best results, melt half the candy corn with the marshmallows for a creamy base, and stir in the rest at the end for texture. Keep heat on medium-low to avoid scorching. Butter your hands before pressing the mixture to prevent sticking. These treats taste even better on day two.
Nutrition
- Serving Size: 1 bar
- Calories: 175
- Sugar: 20
- Sodium: 135
- Fat: 4
- Saturated Fat: 2.5
- Carbohydrates: 35
- Protein: 1
Keywords: candy corn rice krispie treats, easy fall dessert, no-bake Halloween treats, rice krispie treats with candy corn, quick dessert recipe


