Hand me that bag of flour, would you? My sister-in-law, Jen, wasn’t trying to impress anyone. I’d stopped by to borrow a car seat on a drizzly Tuesday afternoon, and the smell of cinnamon and something warm—almost like a bakery but better—hit me before I even got my rain boots off. She was standing in her kitchen, flour dusted across her favorite worn-out sweatshirt, while her toddler “helped” by dumping sprinkles onto the floor. She shrugged when I asked what she was making. “Oh, just some cookies. Trying to use up that can of pumpkin.”
She handed me one, still warm, and I honestly forgot why I was even there for a second. It had that classic snickerdoodle chew, but with this soft, almost cake-like center and a whisper of pumpkin that didn’t scream “fall spice latte.” It was just… perfect. And the best part? She made it look like it was nothing. Like she hadn’t just created the cookie that would haunt my dreams for the next two weeks. I stood there, eating three more while she calmly told me about her grocery budget. That’s when I knew I needed this recipe in my life—not just for the flavor, but for the sheer practicality of it.
Maybe you’ve been there, standing in someone’s kitchen, watching them throw together something extraordinary without a recipe card in sight. That moment stuck with me, so I went home and recreated it. After a few test batches (and one that came out a little too flat, let me tell you), I landed on this version. These are the cookies you make when you want a taste of fall without committing to a whole pie. They’re small batch, so you’re not stuck with dozens, and they’re kid-approved because, honestly, they taste like a hug.
Why You’ll Love This Recipe
Let me be real with you—I’ve tested a lot of pumpkin cookies over the years. Some come out too gummy, some taste more like spice than pumpkin, and others just fall apart. This one is different. It’s the result of a few happy accidents and one very determined afternoon of baking. Here’s why this recipe has earned a permanent spot in my rotation:
- Quick & Easy: From start to finish, you’re looking at about 25 minutes. No chilling the dough, no complicated steps. Perfect for those after-school cravings or a last-minute dessert.
- Simple Ingredients: You probably have most of this in your pantry right now. Canned pumpkin, butter, sugar, flour, and cinnamon. No fancy extracts or hard-to-find spices.
- Perfect for Small Families: This recipe makes just 12 cookies. No more, no less. It’s ideal for when you want a treat without a mountain of leftovers staring at you from the counter.
- Crowd-Pleaser: My kids devour these, and so do the adults at playdates. The pumpkin flavor is there, but it’s subtle enough that even picky eaters won’t complain.
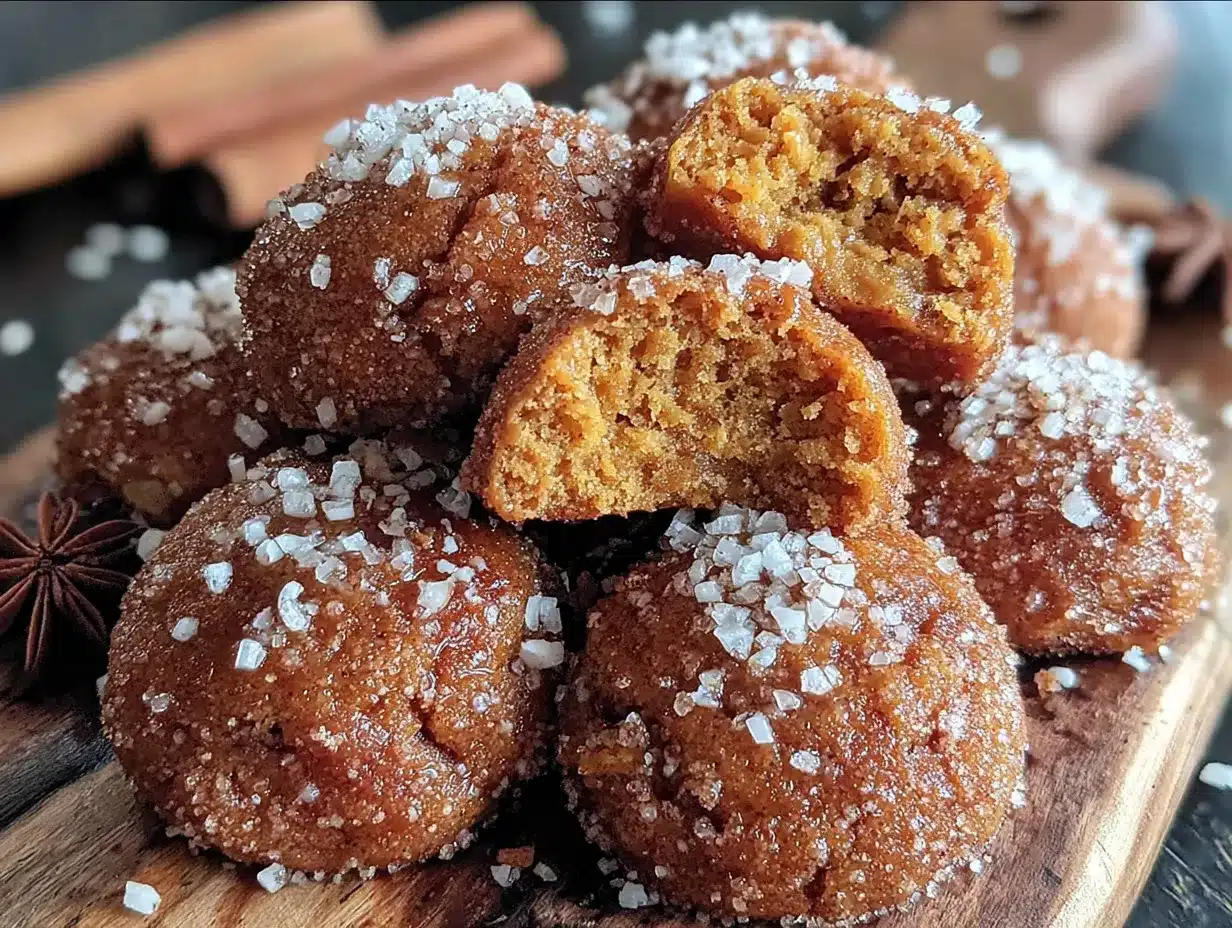
- Unbelievably Delicious: The texture is what gets me every time. Soft centers with a slightly crisp edge, rolled in a cinnamon-sugar coating that gives you that classic snickerdoodle crunch.
What makes this recipe different from the dozens of others out there? It’s the ratio. I played around with the pumpkin-to-butter balance until I got that perfect, tender crumb that doesn’t feel heavy or wet. Plus, using a small batch means you can whip these up on a whim without feeling like you’re committing to a full-on baking project. It’s comfort food, simplified.
Honestly, this recipe is the kind that makes you close your eyes after the first bite. It’s fall in cookie form—cozy, warm, and just sweet enough. Perfect for a rainy afternoon or a quiet evening when you need a little something special without the stress.
What Ingredients You Will Need
This recipe uses simple, wholesome ingredients to deliver that cozy pumpkin flavor and soft, chewy texture without any fuss. Most of these are pantry staples, which is exactly what I love about it. Here’s what you’ll need to gather:
For the Cookie Dough
- 1/2 cup unsalted butter, softened (I like using Land O’Lakes for consistent results—it makes a difference in the texture)
- 1/2 cup granulated sugar (adds sweetness and helps with that slightly crisp edge)
- 1/4 cup packed light brown sugar (for moisture and a deeper flavor)
- 1/3 cup canned pumpkin puree (not pumpkin pie filling—make sure it’s 100% pure pumpkin. Libby’s is my go-to)
- 1 large egg yolk (the yolk adds richness without making the dough too wet)
- 1 teaspoon vanilla extract (pure vanilla, not imitation, if you can swing it)
- 1 1/4 cups all-purpose flour (spoon and level it—don’t scoop straight from the bag)
- 1/2 teaspoon baking soda (helps them puff up just right)
- 1/2 teaspoon cream of tartar (this is the secret to that classic snickerdoodle tang)
- 1/4 teaspoon salt (balances the sweetness)
- 1 teaspoon ground cinnamon (for warmth)
- 1/4 teaspoon ground nutmeg (optional, but I love the extra layer)
- 1/4 teaspoon ground ginger (adds a little bite—skip if the kids are extra picky)
For the Cinnamon-Sugar Coating
- 2 tablespoons granulated sugar
- 1 teaspoon ground cinnamon
A quick note on the cream of tartar—don’t skip it. I know it’s one of those ingredients that sits in the back of your spice cabinet, but it’s what gives snickerdoodles their signature texture and slight tang. If you don’t have it, you can try substituting with 1 teaspoon of lemon juice or white vinegar, but honestly, it’s worth picking up a jar. It lasts forever.
For the pumpkin, I always recommend Libby’s for its consistent thickness. Some store brands can be a bit watery, which will throw off the dough. If your pumpkin looks loose, pat it dry with a paper towel before measuring.
Equipment Needed
You don’t need a fancy kitchen to pull these off. Here’s what I used, and some budget-friendly alternatives if you’re working with less:
- Mixing bowls: One large and one medium. I use my grandmother’s old Pyrex set, but any bowl will do.
- Electric hand mixer or stand mixer: A hand mixer works perfectly here. I’ve made these with a wooden spoon before, and it’s doable, but your arm will get a workout. If you’re mixing by hand, just make sure the butter is really soft.
- Baking sheet: A standard half-sheet pan works great. No need for non-stick—parchment paper is your friend.
- Parchment paper or silicone baking mat: This prevents sticking and makes cleanup a breeze. I prefer parchment for these because it helps the bottoms brown evenly.
- Cookie scoop or tablespoon: A 1.5-tablespoon scoop gives you uniform cookies. If you don’t have one, just use a regular spoon and try to keep them the same size.
- Cooling rack: Not strictly necessary, but it helps the cookies cool without getting soggy on the bottom.
- Small bowl for coating: Something shallow works best for rolling the dough balls in the cinnamon sugar.
One tip I learned the hard way: make sure your baking sheet is completely cool before putting the next batch on it. If you put dough on a hot sheet, the cookies will spread too fast and come out flat. I keep a second sheet on hand just for this reason.
Preparation Method
Alright, let’s get to it. This is straightforward, but I’ll walk you through each step with the little details that make a difference. Trust me, I’ve made every mistake in the book so you don’t have to.
- Preheat your oven to 350°F (175°C). Line a baking sheet with parchment paper or a silicone mat. Do this first so the oven is ready to go when you are.
- Cream the butter and sugars together. In a large mixing bowl, beat the softened butter, granulated sugar, and brown sugar together on medium speed until light and fluffy. This takes about 2-3 minutes with a hand mixer. You’re looking for a pale, airy mixture. Scrape down the sides of the bowl once or twice. If you skip this step, your cookies won’t have that nice tender texture.
- Add the wet ingredients. Beat in the pumpkin puree, egg yolk, and vanilla extract until just combined. Don’t overmix here—stop as soon as it looks uniform. The mixture might look a little curdled at this point, but that’s totally normal. It’ll come together once you add the flour.
- Whisk the dry ingredients together. In a separate medium bowl, whisk the flour, baking soda, cream of tartar, salt, cinnamon, nutmeg, and ginger. This ensures the spices and leavening agents are evenly distributed. I learned this the hard way after biting into a cookie that had a pocket of baking soda—not pleasant.
- Combine wet and dry ingredients. Gradually add the dry mixture to the wet mixture, mixing on low speed or folding with a spatula. Mix until just combined—a few streaks of flour are okay. Overmixing will make the cookies tough. The dough will be soft and slightly sticky, but it should hold together. If it feels too wet, add a tablespoon more flour.
- Prepare the coating. In a small, shallow bowl, stir together the 2 tablespoons of sugar and 1 teaspoon of cinnamon.
- Scoop and roll. Using a 1.5-tablespoon cookie scoop or a regular spoon, scoop out rounded balls of dough. Roll each ball between your palms to form a smooth sphere, then roll it in the cinnamon-sugar mixture until fully coated. Place the coated dough balls on the prepared baking sheet, spacing them about 2 inches apart. The dough will be a bit tacky, so lightly wet your hands if it sticks too much.
- Bake. Bake for 10-12 minutes, or until the edges are set and the tops look slightly cracked. The centers will still look soft and puffy—that’s exactly what you want. Don’t wait for them to brown all over, or they’ll be overbaked. I usually check at the 10-minute mark and add a minute if needed.
- Cool on the baking sheet. Let the cookies rest on the hot baking sheet for 5 minutes. This is crucial—they need this time to set up. If you try to move them right away, they’ll fall apart. After 5 minutes, transfer them to a wire rack to cool completely. They’ll continue to firm up as they cool.
- Repeat. If you’re baking in batches, let the baking sheet cool completely before scooping the next round of dough onto it.
A quick sensory cue: your kitchen should smell like a cozy autumn day by the time these come out of the oven. The tops will have that classic crackled look, and the bottoms will be a light golden brown. If you press one gently, it should spring back slightly. That’s how you know they’re perfect.
Cooking Tips & Techniques
I’ve made these cookies more times than I can count, and I’ve picked up a few tricks along the way. Here are the things I wish someone had told me when I first started:
Don’t overbake. This is the number one mistake I see. Pumpkin cookies are naturally softer than regular sugar cookies, so they’ll look underdone when you pull them out. Trust the process. The residual heat from the baking sheet finishes the job. If you wait until they look fully set in the oven, they’ll be dry and crumbly once they cool.
Use room temperature ingredients. Cold butter won’t cream properly, and cold egg yolk can cause the dough to seize. Leave your butter and egg out on the counter for about 30 minutes before you start. I’ve definitely tried to rush this step and ended up with lumpy dough. Not worth it.
Measure your flour correctly. This is a pet peeve of mine, but it matters. Spoon the flour into your measuring cup and level it off with a knife. Scooping directly from the bag packs the flour down, and you’ll end up with too much. That leads to dry, dense cookies. If you have a kitchen scale, 1 1/4 cups of all-purpose flour is about 156 grams.
Chill the dough if needed. If your kitchen is warm or the dough feels too sticky to handle, pop it in the fridge for 15-20 minutes. It’ll firm up and be much easier to roll. I’ve done this on humid summer days, and it works like a charm.
Make a test cookie. I know it sounds silly, but bake one cookie first to check your oven temperature and dough consistency. If it spreads too much, you might need a little more flour. If it’s too puffy, your baking soda might be old. Better to waste one cookie than a whole batch.
Rotate the pan halfway through. Ovens have hot spots. Halfway through baking, turn the baking sheet around to ensure even browning. I forgot to do this once, and half the batch came out darker than the other half. Lesson learned.
Variations & Adaptations
One of the best things about this recipe is how flexible it is. Here are a few ways I’ve adapted it for different needs and cravings:
- Gluten-Free Version: Swap the all-purpose flour with a 1:1 gluten-free baking flour blend. I’ve used Bob’s Red Mill with great results. The texture will be slightly more delicate, but they still taste amazing. Just don’t overmix the dough.
- Dairy-Free Option: Use a plant-based butter stick (like Earth Balance) in place of regular butter. Make sure it’s the stick form, not the spread, for the right fat content. The cookies will be a tad less rich, but still delicious.
- Extra Pumpkin Spice: If you’re a pumpkin spice fanatic, add 1/4 teaspoon of ground cloves and a pinch of allspice to the dough. It gives them that full-on pumpkin pie flavor. My husband loves this version.
- Chocolate Chip Twist: Fold in 1/3 cup of mini chocolate chips after combining the wet and dry ingredients. The chocolate pairs beautifully with the pumpkin and cinnamon. My kids go crazy for this version.
- Lower Sugar: Reduce the granulated sugar to 1/3 cup and the brown sugar to 3 tablespoons. The cookies will be less sweet but still have that warm, spiced flavor. You can also use a sugar substitute like monk fruit sweetener, but the texture might change slightly.
- Maple Glaze: For a special treat, whisk together 1/2 cup powdered sugar, 1 tablespoon maple syrup, and 1-2 teaspoons milk. Drizzle over the cooled cookies. It’s over-the-top in the best way.
I’ve personally tried the gluten-free version for a friend’s birthday, and honestly, no one could tell the difference. The key is letting the dough rest for 5 minutes after mixing to let the gluten-free flour absorb the moisture.
Serving & Storage Suggestions
These cookies are best served slightly warm, when the edges are still a little soft and the cinnamon-sugar coating is at its crunchiest. I like to pop them in the microwave for about 10 seconds if they’ve cooled down completely. It brings back that fresh-from-the-oven feeling.
For a cozy presentation, arrange them on a rustic wooden board or a simple white plate. They pair beautifully with a glass of cold milk for the kids or a hot cup of chai tea for the adults. If you’re feeling fancy, serve them alongside a scoop of vanilla ice cream for an easy dessert that looks impressive.
Storage: Keep the cookies in an airtight container at room temperature for up to 4 days. Place a slice of bread in the container to help maintain moisture—the bread will absorb excess air and keep the cookies soft. Just don’t forget to change the bread after a day or two.
Freezing: These freeze beautifully. Place the baked and cooled cookies in a single layer in a freezer-safe bag or container, with parchment paper between layers to prevent sticking. They’ll keep for up to 3 months. To thaw, leave them at room temperature for about 30 minutes. You can also freeze the unbaked dough balls—just roll them in the cinnamon sugar, place them on a baking sheet, freeze until solid, then transfer to a bag. Bake from frozen, adding 2-3 minutes to the baking time.
One thing I’ve noticed: the flavors actually deepen after a day or two. The pumpkin and spices meld together, and the texture becomes even softer. So if you can resist eating them all on day one, you’re in for a treat on day two.
Nutritional Information & Benefits
Here’s a rough estimate per cookie (based on 12 cookies):
- Calories: 175
- Fat: 8g
- Carbohydrates: 24g
- Sugar: 14g
- Protein: 2g
- Fiber: 1g
These numbers will vary based on the exact brands you use, but it gives you a general idea. The good news is that pumpkin is packed with vitamin A and fiber, so you’re getting a little nutritional boost with each cookie. The cream of tartar also adds a small amount of potassium.
For those watching their sugar intake, the lower sugar variation I mentioned earlier cuts the sugar by about 30%. And if you’re gluten-sensitive, the gluten-free version works wonderfully. Just be aware that these cookies contain dairy and eggs, so they’re not suitable for vegans as written. For a vegan option, you can try using a flax egg (1 tablespoon ground flaxseed mixed with 3 tablespoons water) and plant-based butter, but the texture will be slightly different.
Honestly, I don’t believe in labeling these as “healthy” cookies. They’re a treat, and that’s okay. But knowing there’s real pumpkin in there makes me feel a little better about having a second one.
Conclusion
These pumpkin snickerdoodle cookies have become a staple in my kitchen, and I hope they’ll become one in yours too. They’re the kind of recipe you turn to when you want something special but don’t have the energy for a big production. Small batch means no waste, and the flavor is big enough to satisfy even the most devoted pumpkin fan.
I love that these cookies capture the essence of fall without being complicated. They’re forgiving, adaptable, and always a hit with kids and adults alike. Whether you’re baking for a playdate, a cozy night in, or just because you have a can of pumpkin to use up, this recipe delivers every time.
Now I’d love to hear from you. Have you tried making these? Did you add your own twist? Drop a comment below and let me know how they turned out. And if you share a photo on Pinterest, tag me—I love seeing your creations. Happy baking, friends. You’ve got this.
Frequently Asked Questions
Can I use fresh pumpkin instead of canned?
Yes, you can. Just make sure to roast or steam the pumpkin, then puree it until smooth. The key is to drain off any excess liquid—fresh pumpkin tends to be more watery than canned. Pat it with a paper towel or let it sit in a fine-mesh strainer for 10 minutes before measuring.
Why do my cookies come out flat?
Flat cookies usually mean the butter was too soft or the dough was overmixed. Make sure your butter is softened but not melted, and stop mixing as soon as the flour is incorporated. Also, check that your baking soda is fresh—old baking soda loses its leavening power.
Can I double this recipe?
Absolutely. Just double all the ingredients and bake in batches. The baking time should stay the same, but keep an eye on them since your oven might behave differently with a full batch. You’ll get about 24 cookies from a double batch.
How do I keep the cookies soft?
Store them in an airtight container with a slice of bread. The bread releases moisture, which keeps the cookies from drying out. Change the bread every other day. Also, make sure you don’t overbake them—pulling them out when the centers are still soft is the best way to ensure a tender texture.
Can I make the dough ahead of time?
Yes! You can prepare the dough, roll it into balls, coat them in the cinnamon sugar, and refrigerate for up to 24 hours. When you’re ready to bake, just place them on the baking sheet and add 1-2 minutes to the baking time. You can also freeze the dough balls for up to 3 months.
Pin This Recipe!
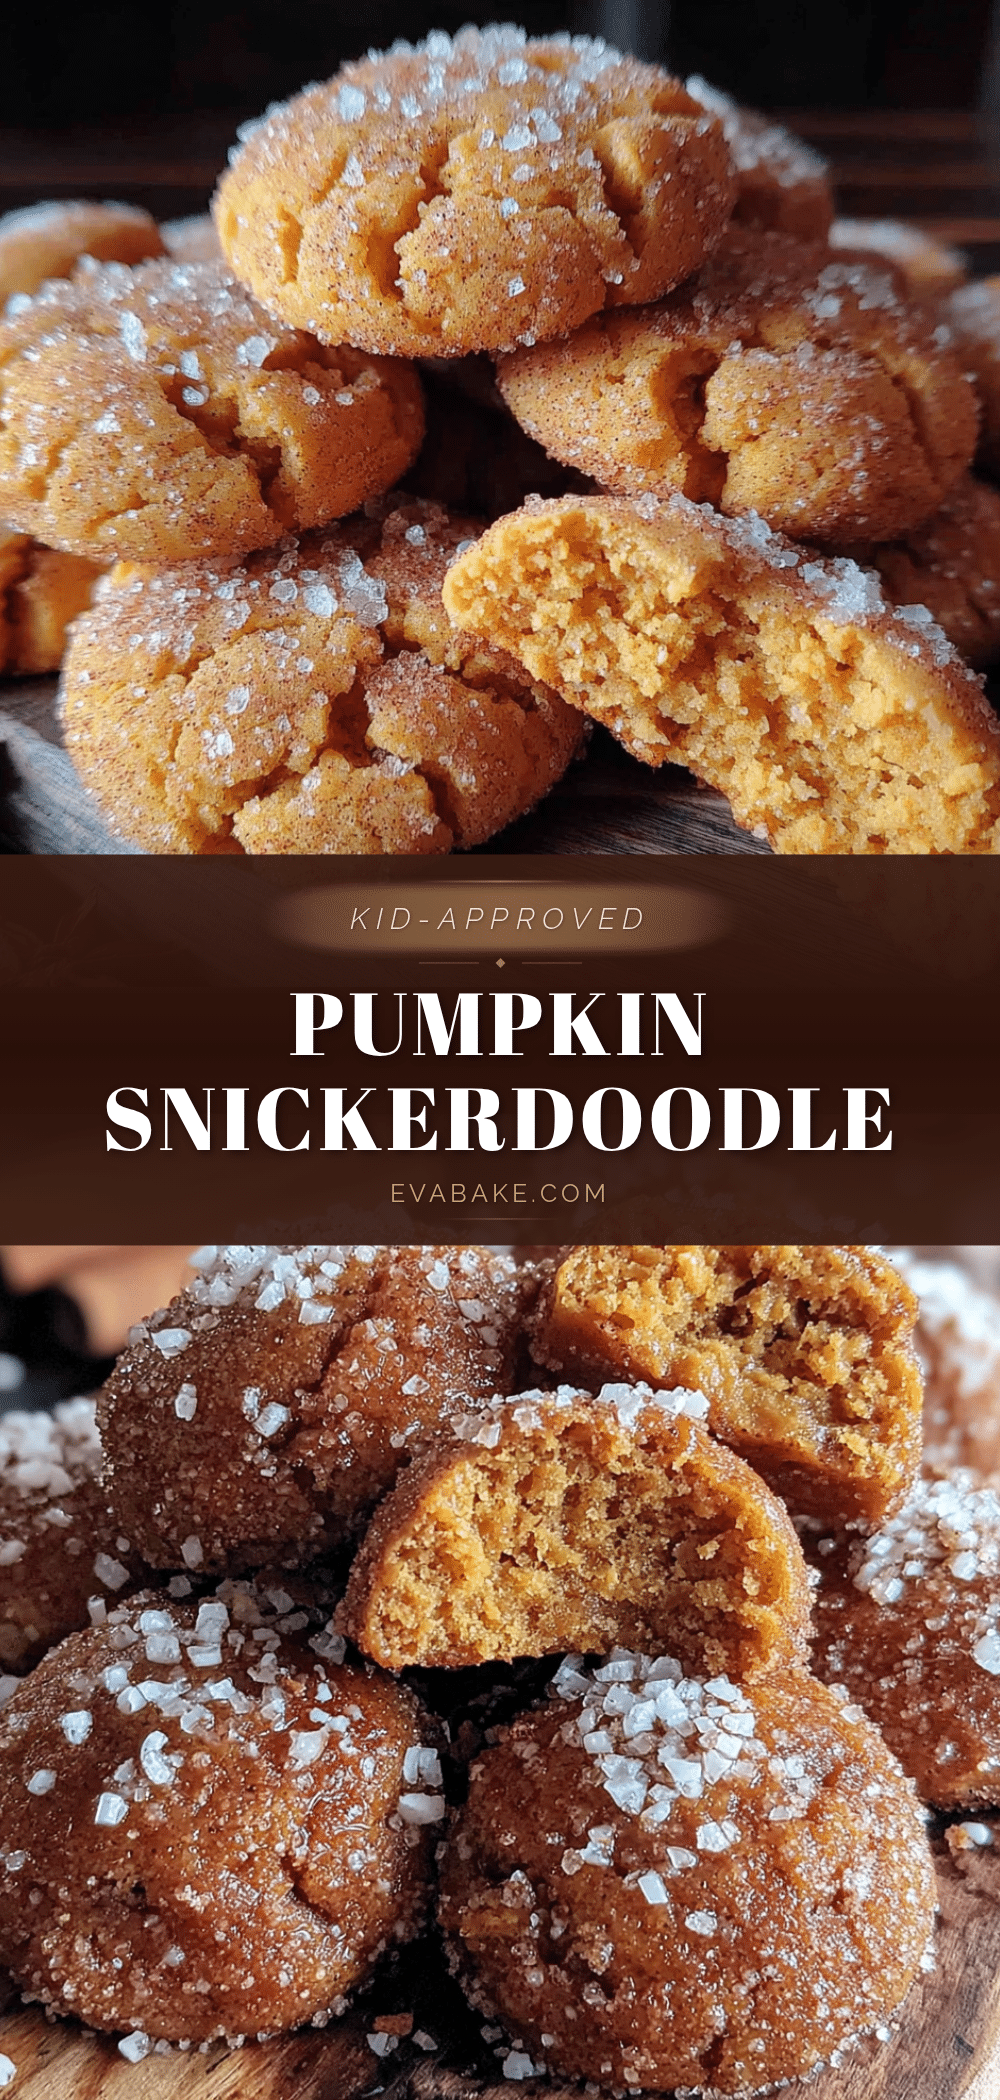
Easy Small Batch Pumpkin Snickerdoodle Cookies
Soft, chewy pumpkin snickerdoodle cookies with a classic cinnamon-sugar coating. This small batch recipe makes just 12 cookies and is perfect for fall baking without the fuss.
- Prep Time: 15 minutes
- Cook Time: 12 minutes
- Total Time: 27 minutes
- Yield: 12 cookies 1x
- Category: Dessert
- Cuisine: American
Ingredients
- 1/2 cup unsalted butter, softened
- 1/2 cup granulated sugar
- 1/4 cup packed light brown sugar
- 1/3 cup canned pumpkin puree (100% pure pumpkin, not pumpkin pie filling)
- 1 large egg yolk
- 1 teaspoon vanilla extract
- 1 1/4 cups all-purpose flour
- 1/2 teaspoon baking soda
- 1/2 teaspoon cream of tartar
- 1/4 teaspoon salt
- 1 teaspoon ground cinnamon
- 1/4 teaspoon ground nutmeg (optional)
- 1/4 teaspoon ground ginger (optional)
- 2 tablespoons granulated sugar (for coating)
- 1 teaspoon ground cinnamon (for coating)
Instructions
- Preheat your oven to 350°F (175°C). Line a baking sheet with parchment paper or a silicone mat.
- In a large mixing bowl, beat the softened butter, granulated sugar, and brown sugar together on medium speed until light and fluffy, about 2-3 minutes. Scrape down the sides of the bowl once or twice.
- Beat in the pumpkin puree, egg yolk, and vanilla extract until just combined. The mixture may look slightly curdled; this is normal.
- In a separate medium bowl, whisk together the flour, baking soda, cream of tartar, salt, cinnamon, nutmeg, and ginger.
- Gradually add the dry mixture to the wet mixture, mixing on low speed or folding with a spatula until just combined. A few streaks of flour are okay. The dough will be soft and slightly sticky.
- In a small, shallow bowl, stir together the 2 tablespoons of sugar and 1 teaspoon of cinnamon for the coating.
- Using a 1.5-tablespoon cookie scoop or a regular spoon, scoop out rounded balls of dough. Roll each ball between your palms to form a smooth sphere, then roll it in the cinnamon-sugar mixture until fully coated. Place the coated dough balls on the prepared baking sheet, spacing them about 2 inches apart.
- Bake for 10-12 minutes, or until the edges are set and the tops look slightly cracked. The centers will still look soft and puffy.
- Let the cookies rest on the hot baking sheet for 5 minutes, then transfer them to a wire rack to cool completely.
- If baking in batches, let the baking sheet cool completely before scooping the next round of dough onto it.
Notes
Don’t overbake—cookies will look underdone when you pull them out, but they set as they cool. Use room temperature ingredients for best results. Measure flour by spooning and leveling. If dough is too sticky, chill for 15-20 minutes. For gluten-free, use a 1:1 gluten-free flour blend. For dairy-free, use plant-based butter sticks. Store in an airtight container at room temperature for up to 4 days, or freeze for up to 3 months.
Nutrition
- Serving Size: 1 cookie
- Calories: 175
- Sugar: 14
- Sodium: 120
- Fat: 8
- Saturated Fat: 5
- Carbohydrates: 24
- Fiber: 1
- Protein: 2
Keywords: pumpkin snickerdoodle cookies, small batch cookies, pumpkin cookies, snickerdoodle recipe, fall cookies, easy pumpkin cookies


