It was 10:47 PM on a random Wednesday, and I had this sudden, ridiculous craving for something that tasted like fall but didn’t require a trip to the store. You know that feeling when your sweet tooth kicks in, but the pantry is looking pretty sad? I didn’t have the usual butter and sugar for a standard batch of muffins, but I spotted a half-used can of pumpkin puree from last week’s soup experiment and a bottle of maple syrup that was almost empty. The idea just clicked—maple pumpkin chocolate chip muffins, but made with whatever I had on hand. Honestly, I wasn’t sure if it would work, but at that hour, I was willing to try anything.
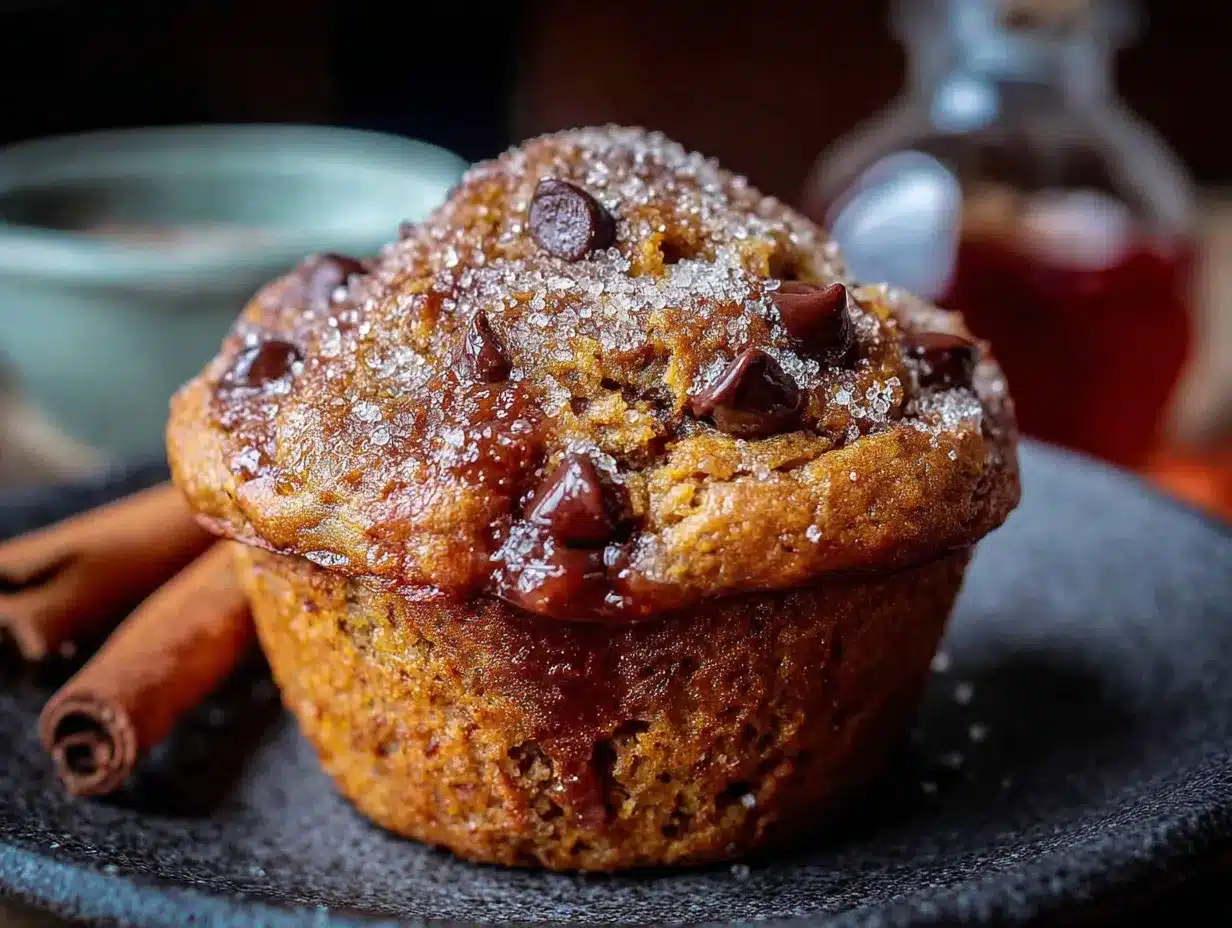
I started pulling things out of the cupboard, and my kitchen looked like a small hurricane had hit it. There was flour dust on the counter, a sticky maple syrup ring on the cutting board, and I may have dropped a chocolate chip or two on the floor—our dog, Charlie, was thrilled. The batter came together in about ten minutes, and while the muffins were baking, the whole house filled with this warm, spicy-sweet smell that made me forget it was almost midnight. When I finally pulled them out of the oven, they were golden on top, with little pockets of melted chocolate peeking through. That first bite was pure magic—soft, tender, with just the right amount of maple sweetness and a hint of pumpkin spice.
These are the kind of muffins that make you close your eyes after the first bite. They’re not overly sweet, not too dense, and the chocolate chips add just enough indulgence to keep everyone happy. I’ve made them for school bake sales, weekend brunches, and even as a quick breakfast on hectic mornings. Maybe you’ve been there—standing in your kitchen late at night, wondering if you can pull off something delicious with minimal effort. Trust me, this recipe is for those moments. It’s why I keep coming back to it, and why I think you will too.
Why You’ll Love This Recipe
These Kid-Approved Maple Pumpkin Chocolate Chip Muffins are the kind of recipe that makes you look like a hero without spending hours in the kitchen. I’ve tested this batch more times than I can count, and every single time, it delivers. Here’s why this recipe stands out from the crowd:
- Quick & Easy: From start to finish, these muffins come together in about 30 minutes. No complicated steps, no fancy equipment—just simple mixing and baking. Perfect for those mornings when you’re running late but still want something homemade.
- Simple Ingredients: You probably already have most of these in your pantry. Canned pumpkin, maple syrup, flour, eggs, and chocolate chips. No need for a special trip to the store or expensive specialty items.
- Perfect for Fall and Beyond: While these scream “autumn,” they’re honestly great any time of year. The pumpkin keeps them incredibly moist, and the maple adds a subtle warmth that works in any season.
- Crowd-Pleaser: I’ve served these to kids, picky eaters, and adults who claim they don’t like pumpkin. They disappear fast. The chocolate chips are the secret weapon—they make the muffins feel like a treat, not a health food.
- Unbelievably Delicious: The texture is what gets me every time. They’re soft and tender, almost like a cross between a muffin and a cake. The maple flavor isn’t overpowering, and the pumpkin keeps them from being dry. It’s comfort food at its finest.
What makes these different from every other pumpkin muffin recipe out there? It’s the balance. Most pumpkin muffins are either too dense or too sweet. This version uses maple syrup as the main sweetener, which adds a depth of flavor that granulated sugar just can’t match. Plus, the chocolate chips aren’t an afterthought—they’re generously scattered throughout, so every bite has that little burst of melted chocolate. This isn’t just another recipe; it’s the one you’ll come back to again and again.
I remember the first time I made these for my neighbor’s kids. They were skeptical about anything with pumpkin, but after one bite, they were asking for seconds. That’s the magic of this recipe—it turns pumpkin skeptics into fans. It’s the kind of muffin that makes you feel good about what you’re feeding your family, without any of the guilt or fuss.
What Ingredients You Will Need
This recipe uses simple, wholesome ingredients that come together to create something truly special. Each component plays a role in delivering that perfect texture and flavor. Here’s what you’ll need:
For the Muffins
- 1 ¾ cups all-purpose flour (spooned and leveled) – This gives the muffins structure without making them heavy. I’ve tried whole wheat pastry flour for a healthier twist, and it works, but all-purpose is best for that classic soft texture.
- 1 teaspoon baking soda – Helps the muffins rise and stay fluffy. Make sure it’s fresh—old baking soda can leave a metallic taste.
- ½ teaspoon baking powder – Adds extra lift for a lighter crumb.
- 1 teaspoon ground cinnamon – The backbone of that warm pumpkin spice flavor. I prefer Saigon cinnamon for its bold, sweet taste.
- ½ teaspoon ground nutmeg – Freshly grated if you have it, but pre-ground works perfectly fine.
- ½ teaspoon ground ginger – Adds a subtle warmth that complements the maple syrup beautifully.
- ¼ teaspoon ground cloves – Just a pinch for depth. Too much can overpower the other flavors.
- ½ teaspoon salt – Enhances all the flavors and balances the sweetness.
- 1 cup canned pumpkin puree – Not pumpkin pie filling! Look for 100% pure pumpkin. I recommend Libby’s for consistent results, but store brands work too.
- ½ cup maple syrup – Pure maple syrup, not pancake syrup. The real stuff makes a huge difference in flavor. Grade A dark amber is my go-to for its robust taste.
- ⅓ cup vegetable oil – Keeps the muffins moist without making them greasy. You can substitute melted coconut oil or applesauce for a lower-fat option.
- 2 large eggs, room temperature – Room temperature eggs incorporate more easily into the batter, resulting in a smoother texture.
- 1 teaspoon vanilla extract – Pure vanilla adds warmth and rounds out the flavors. Imitation vanilla works in a pinch.
- ¾ cup semi-sweet chocolate chips – I prefer Ghirardelli for their rich flavor and even melting. You can also use dark chocolate or milk chocolate chips depending on your preference.
Optional Add-Ins
- ¼ cup chopped walnuts or pecans – Adds a nice crunch if you’re feeling fancy. Toast them lightly first for extra flavor.
- 2 tablespoons brown sugar – Sprinkle on top before baking for a crunchy, caramelized crust.
- 1 tablespoon pumpkin seeds – For a decorative touch and a little extra texture.
When selecting your pumpkin, look for cans that are smooth and free of dents. I’ve learned the hard way that older cans can affect the taste. And if you’re using maple syrup, don’t skimp—the cheap stuff is mostly corn syrup and won’t give you that authentic maple flavor. Trust me on this one.
For substitutions, you can easily make these dairy-free by using a plant-based oil and dairy-free chocolate chips. If you’re gluten-sensitive, a good 1:1 gluten-free flour blend works well, though the texture will be slightly denser. I’ve also swapped the eggs for flax eggs (1 tablespoon ground flaxseed mixed with 3 tablespoons water per egg) with decent results, though the muffins won’t be quite as fluffy.
Equipment Needed
You don’t need a professional bakery setup for these muffins. Here’s what I use:
- 12-cup standard muffin tin – Non-stick is ideal, but a regular one works if you grease it well. I’ve had my trusty Wilton pan for years, and it’s never let me down.
- Paper or silicone muffin liners – Liners make cleanup a breeze and prevent sticking. Silicone ones are reusable and eco-friendly.
- Two large mixing bowls – One for dry ingredients, one for wet. Nothing fancy needed—I use the same glass bowls I’ve had since college.
- Whisk – For combining dry ingredients and smoothing out the wet mixture.
- Wooden spoon or rubber spatula – For folding everything together. A spatula is gentler and helps avoid overmixing.
- Measuring cups and spoons – Accurate measurements are key, especially for the flour and baking soda.
- Cooling rack – Lets air circulate around the muffins so they cool evenly without getting soggy on the bottom.
- Cookie scoop or ice cream scoop – Not essential, but it makes filling the muffin cups so much easier and more consistent.
If you don’t have a muffin tin, you can bake the batter as mini loaves or even in a greased 8×8 inch pan for pumpkin bars. Just adjust the baking time accordingly. And if you’re short on liners, greasing the tin generously with butter or non-stick spray works perfectly—just run a knife around the edges after baking to release the muffins.
One tip I learned the hard way: invest in a good cooling rack. I used to let muffins cool in the pan, and the bottoms would get soggy and steamed. A few dollars for a wire rack makes a world of difference.
Preparation Method
Making these muffins is straightforward, but a few details make all the difference. Follow these steps, and you’ll have perfect muffins every time.
- Preheat your oven to 350°F (175°C). Line your muffin tin with paper liners or grease it well. Getting the oven hot before you start mixing ensures even baking from the moment the batter goes in.
- In a large bowl, whisk together the dry ingredients: 1 ¾ cups all-purpose flour, 1 teaspoon baking soda, ½ teaspoon baking powder, 1 teaspoon cinnamon, ½ teaspoon nutmeg, ½ teaspoon ginger, ¼ teaspoon cloves, and ½ teaspoon salt. Whisk for about 15 seconds to make sure everything is evenly distributed. This step prevents pockets of baking soda or spices in your finished muffins.
- In another large bowl, combine the wet ingredients: 1 cup pumpkin puree, ½ cup maple syrup, ⅓ cup vegetable oil, 2 eggs, and 1 teaspoon vanilla extract. Whisk until smooth and well combined. The mixture should be a uniform orange color with no streaks of egg white visible.
- Pour the wet ingredients into the dry ingredients. Use a rubber spatula to fold them together gently. Stir just until you no longer see dry flour—about 10 to 12 strokes. A few lumps are perfectly fine. Overmixing at this stage will develop the gluten and make your muffins tough and dense. Trust me, I’ve made that mistake before, and you end up with hockey pucks instead of fluffy muffins.
- Fold in ¾ cup chocolate chips with a few gentle strokes. Reserve a handful to sprinkle on top before baking for a prettier presentation. If you’re adding nuts or other mix-ins, fold them in now.
- Divide the batter evenly among the 12 muffin cups. A cookie scoop makes this effortless—each scoop should be about 3 tablespoons. The cups will be nearly full, which is perfect for domed tops. Sprinkle the reserved chocolate chips on top, pressing them in slightly so they stay put.
- Bake for 18 to 22 minutes, or until a toothpick inserted into the center of a muffin comes out clean or with a few moist crumbs. The tops should be golden brown and spring back when lightly touched. Every oven is different, so start checking at 18 minutes. My old oven used to take a full 22 minutes, but my new one gets it done in 19.
- Let the muffins cool in the pan for 5 minutes, then transfer them to a wire rack to cool completely. This short rest in the pan allows them to set without sticking, but leaving them too long will make the bottoms soggy. If you’re impatient like me, you can eat one after about 10 minutes—just be careful, the chocolate chips are molten hot!
A few sensory cues to watch for: The batter should be thick but scoopable, like a loose cookie dough. When the muffins are done, your kitchen will smell like a cozy fall day, and the tops will be a beautiful golden brown with tiny cracks. If you tap the top gently, it should feel firm and spring back. Underbaked muffins will feel soft and leave an indent.
One more thing—don’t open the oven door for the first 15 minutes of baking. The rush of cold air can cause the muffins to sink in the middle. I learned this the hard way when I was checking on them every 5 minutes like a nervous parent.
Cooking Tips & Techniques
After making these muffins more times than I can count, I’ve picked up a few tricks that make the process smoother and the results more consistent. Here are my best tips:
Don’t overmix the batter. This is the number one mistake I see home cooks make. When you stir the wet and dry ingredients together, gluten starts to develop. The more you stir, the more gluten forms, and the tougher your muffins become. Mix just until the flour disappears, and accept a few lumps. Your muffins will be tender and light, not dense and chewy.
Use room temperature ingredients. Cold eggs and cold pumpkin can cause the batter to seize up, making it harder to mix evenly. Take your eggs out of the fridge about 30 minutes before you start, or place them in a bowl of warm water for 5 minutes. The pumpkin can sit on the counter while you gather your other ingredients. Room temperature ingredients emulsify better, resulting in a smoother, more cohesive batter.
Measure flour correctly. Scooping your measuring cup directly into the flour bag packs it down, and you can end up with 20% more flour than the recipe calls for. Instead, spoon the flour into your measuring cup, then level it off with a knife. This simple technique prevents dry, crumbly muffins. I used to skip this step, and my muffins were always hit or miss.
Let the batter rest for 5 minutes. After you’ve mixed everything together, let the batter sit in the bowl for about 5 minutes before scooping. This allows the flour to fully hydrate and the baking soda to start activating. The result is a slightly taller, more domed muffin. I stumbled on this trick by accident when I got distracted by a phone call, and I’ve done it ever since.
Use an ice cream scoop for even portions. This isn’t just about aesthetics—evenly sized muffins bake at the same rate, so you won’t have some overdone and others underdone. A standard scoop holds about 3 tablespoons, which is perfect for a 12-cup muffin tin. If you don’t have one, use two spoons to portion the batter.
Rotate the pan halfway through. Most ovens have hot spots, and rotating the pan ensures even browning. At the 10-minute mark, quickly turn the pan 180 degrees. Don’t linger with the oven door open—every second of heat loss affects the bake.
I once forgot to add the chocolate chips until after I’d scooped the batter into the cups. I had to stir them in individually, which was a mess. Now I always add them right before scooping. We all have those moments, right?
Variations & Adaptations
One of the best things about this recipe is how adaptable it is. Here are some variations I’ve tried and loved:
Dietary Variations
- Gluten-Free: Substitute the all-purpose flour with a 1:1 gluten-free baking blend. I’ve had good results with Bob’s Red Mill. The texture will be slightly more crumbly, but the flavor is still spot-on. Add an extra tablespoon of oil to help with moisture.
- Dairy-Free: Use dairy-free chocolate chips (Enjoy Life is a great brand) and a neutral oil like avocado or coconut. The rest of the ingredients are naturally dairy-free.
- Lower Sugar: Reduce the maple syrup to ⅓ cup and add ¼ cup unsweetened applesauce to maintain moisture. The muffins will be less sweet but still delicious, especially with the chocolate chips providing bursts of sweetness.
Flavor Twists
- Spiced Pumpkin: Add ¼ teaspoon cardamom and a pinch of allspice for a more complex spice profile. This version tastes like a chai latte in muffin form.
- White Chocolate Cranberry: Swap the semi-sweet chips for white chocolate chips and add ½ cup dried cranberries. The tartness of the cranberries balances the sweetness beautifully.
- Pumpkin Streusel: Mix ¼ cup flour, ¼ cup brown sugar, 2 tablespoons cold butter, and ½ teaspoon cinnamon until crumbly. Sprinkle on top before baking for a crunchy, buttery crust.
Different Cooking Methods
- Mini Muffins: Bake in a mini muffin tin for 10 to 12 minutes. Perfect for lunchboxes or snack portions. This yields about 36 mini muffins.
- Muffin Tops: Use a muffin top pan and bake for 12 to 14 minutes. More crispy edges per bite!
- Loaf Pan: Pour the batter into a greased 9×5 inch loaf pan and bake for 45 to 55 minutes. Check doneness with a toothpick. Slice and serve warm with butter.
My personal favorite variation is the streusel-topped version. I made it for a fall potluck, and people kept asking for the recipe. There’s something about that crunchy, buttery topping that takes these muffins to the next level. Just be warned—it adds a few minutes to the prep time, but it’s totally worth it.
Serving & Storage Suggestions
These muffins are incredibly versatile when it comes to serving. Here’s how I like to enjoy them:
Serving: These muffins are best served slightly warm, when the chocolate chips are still a little gooey. Pop one in the microwave for 10 to 15 seconds if it’s been sitting out for a while. For a special treat, split a muffin in half, toast it lightly, and spread with a pat of butter or a drizzle of honey. The warmth brings out the maple and spice flavors beautifully.
Pairings: These muffins pair wonderfully with a hot cup of coffee or a tall glass of cold milk. For breakfast, serve them alongside scrambled eggs and fresh fruit for a balanced meal. For dessert, a scoop of vanilla ice cream on top of a warm muffin is pure heaven. I’ve also crumbled them over yogurt for a quick parfait.
Storage: Store leftover muffins in an airtight container at room temperature for up to 3 days. Place a paper towel at the bottom of the container to absorb excess moisture, and another on top to keep the tops from getting sticky. If you live in a humid climate, the fridge is a better option, but let the muffins come to room temperature before eating for the best texture.
Freezing: These muffins freeze beautifully. Let them cool completely, then place them in a single layer in a freezer-safe bag or container. They’ll keep for up to 3 months. To thaw, leave them on the counter for about an hour, or microwave on low power for 30 seconds. You can also thaw them overnight in the fridge for grab-and-go breakfasts.
Reheating: The best way to reheat a frozen muffin is in a 300°F oven for 5 to 7 minutes. This restores the crispy top and soft interior. The microwave works in a pinch, but it can make the muffin a bit rubbery. If you’re in a hurry, slice the muffin in half and toast it—crisis averted!
One thing I’ve noticed is that these muffins taste even better the next day. The flavors have time to meld together, and the maple-pumpkin combination becomes more pronounced. So if you can resist eating them all on day one, you’re in for a treat on day two.
Nutritional Information & Benefits
Here’s the estimated nutritional breakdown for one muffin (based on 12 servings):
| Nutrient | Amount per Muffin |
|---|---|
| Calories | 220 |
| Total Fat | 9g |
| Saturated Fat | 3g |
| Cholesterol | 31mg |
| Sodium | 210mg |
| Total Carbohydrates | 33g |
| Dietary Fiber | 2g |
| Sugars | 18g |
| Protein | 4g |
These muffins offer more than just great taste. Pumpkin is packed with vitamin A, which supports eye health and immune function. It’s also a good source of fiber, which aids digestion and helps keep you full. Maple syrup contains antioxidants and minerals like zinc and manganese, though it’s still a sugar, so moderation is key.
From a dietary perspective, this recipe is naturally nut-free (unless you add nuts), making it safe for school lunchboxes. It’s also vegetarian and can be made dairy-free with simple swaps. The chocolate chips add a touch of indulgence, but the overall sugar content is reasonable compared to store-bought muffins, which often contain double the sugar.
I love that these muffins feel like a treat but aren’t loaded with refined sugar or artificial ingredients. They’re the kind of snack I feel good about giving my family—delicious enough to satisfy a sweet craving, but wholesome enough to serve for breakfast.
Conclusion
These Kid-Approved Maple Pumpkin Chocolate Chip Muffins are everything I want in a fall recipe—simple, delicious, and guaranteed to bring smiles to the table. They come together in under 30 minutes with ingredients you probably already have, and the result is a batch of tender, flavorful muffins that disappear almost as fast as you can bake them.
I love that this recipe is forgiving enough for beginner bakers but satisfying enough for experienced cooks. You can customize it with different mix-ins, adjust the sweetness, or turn it into a loaf. It’s the kind of recipe that adapts to your kitchen, your schedule, and your family’s tastes. That’s what makes it special—not just the flavors, but the flexibility.
So go ahead, give these muffins a try. Make them on a lazy Sunday morning, pack them in lunchboxes, or bring them to your next gathering. I promise they’ll be a hit. And when you make them, I’d love to hear how they turned out. Did you add any fun variations? Did your kids gobble them up? Drop a comment below and share your experience. Happy baking, friends!
Frequently Asked Questions
Can I use fresh pumpkin instead of canned?
Yes, you can use fresh pumpkin puree. Roast a small sugar pumpkin at 400°F until tender, then scoop out the flesh and blend until smooth. Keep in mind that fresh pumpkin has more water content than canned, so you may need to drain it slightly or reduce the oil by a tablespoon.
Why did my muffins turn out dense?
Dense muffins are usually the result of overmixing the batter. Stir just until the flour disappears, even if there are a few lumps. Overmixing develops gluten, which makes muffins tough. Another possible cause is expired baking soda or baking powder—check the dates before you start.
Can I make these muffins ahead of time?
Absolutely. You can make the batter the night before and store it in the fridge, then bake fresh in the morning. Alternatively, bake the muffins, let them cool completely, and store them in an airtight container for up to 3 days. They also freeze beautifully for up to 3 months.
How can I make these muffins vegan?
To make vegan muffins, replace the eggs with flax eggs (1 tablespoon ground flaxseed mixed with 3 tablespoons water per egg). Use a plant-based oil and dairy-free chocolate chips. The texture will be slightly denser, but the flavor will still be fantastic.
Can I reduce the sugar in this recipe?
Yes, you can reduce the maple syrup to ⅓ cup and add ¼ cup unsweetened applesauce to maintain moisture. Keep in mind that the muffins will be less sweet, but the chocolate chips will still provide pockets of sweetness. You can also use sugar-free chocolate chips for an even lower sugar option.
Pin This Recipe!
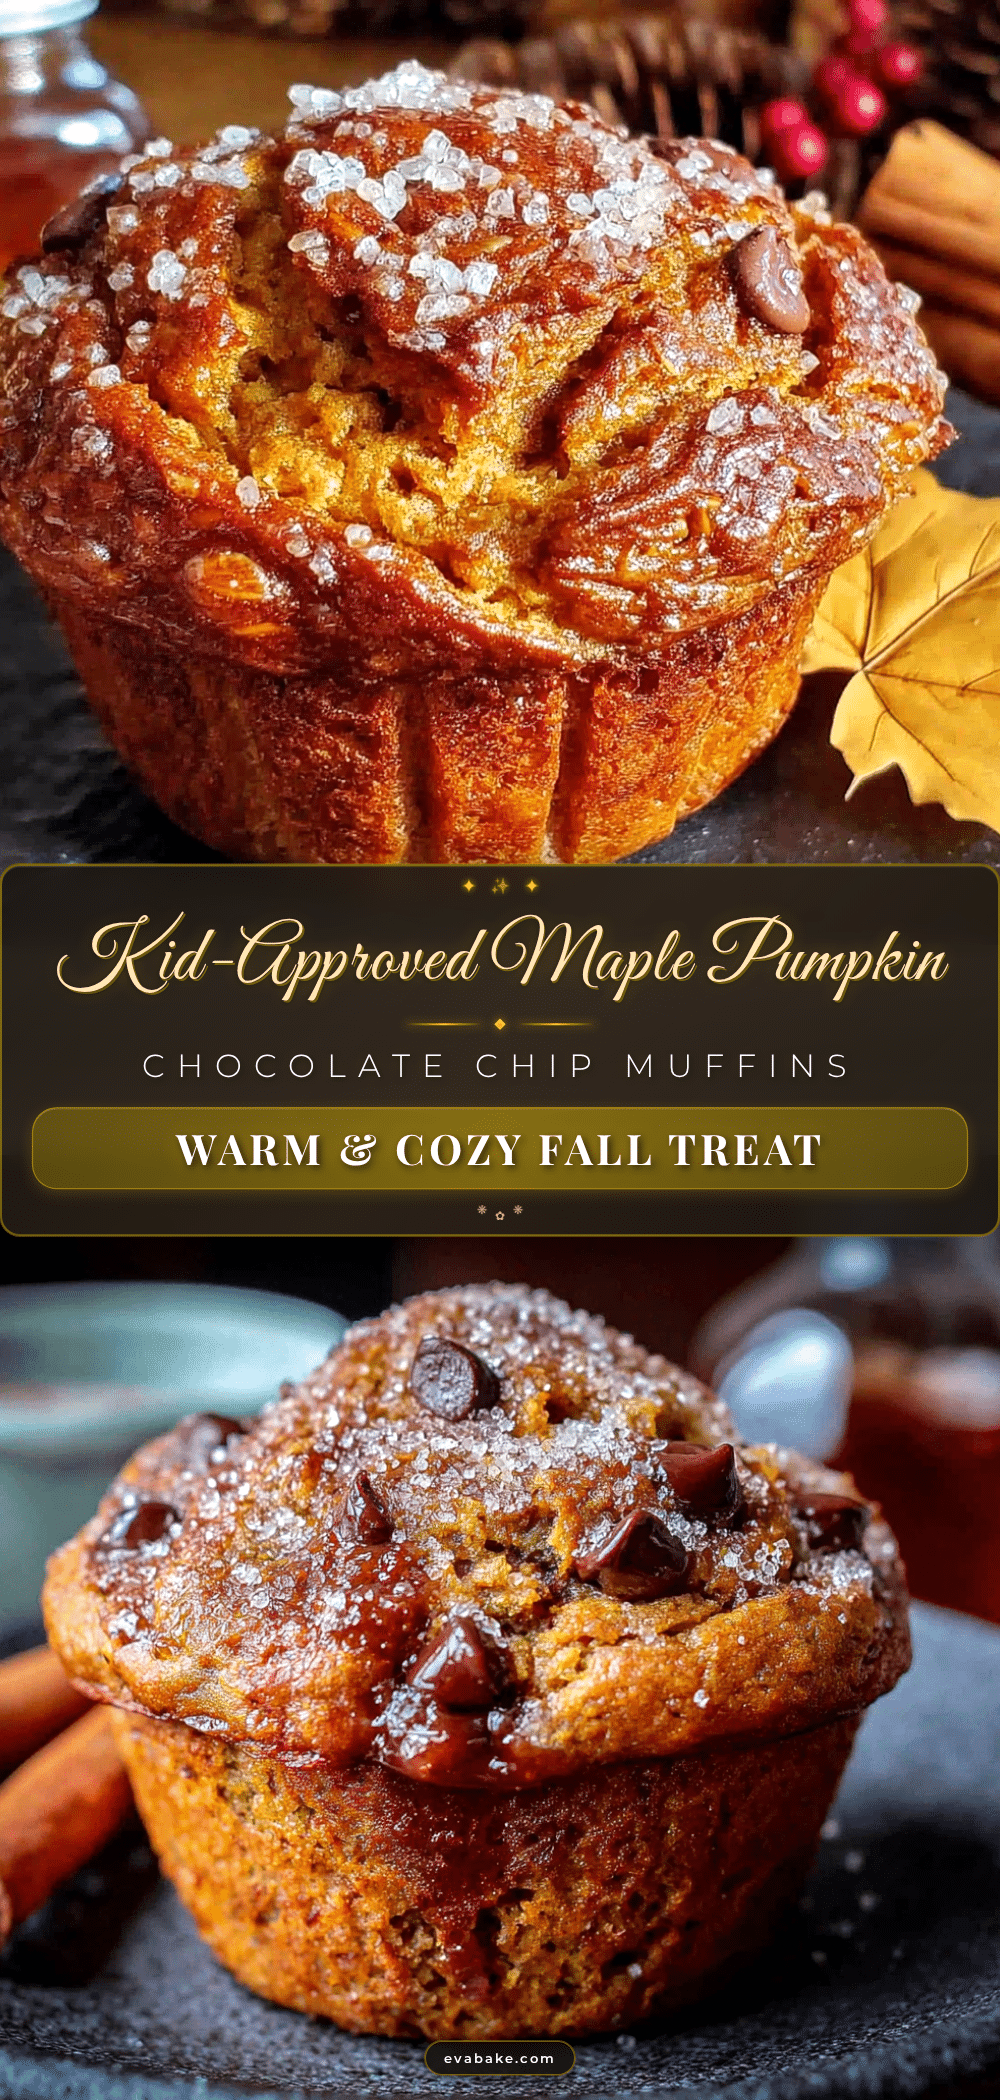
Kid-Approved Maple Pumpkin Chocolate Chip Muffins: Easy Fall Recipe
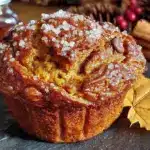
These tender, maple-sweetened pumpkin muffins are packed with chocolate chips and come together in under 30 minutes. Perfect for busy mornings, bake sales, or a cozy fall treat.
- Prep Time: 10 minutes
- Cook Time: 20 minutes
- Total Time: 30 minutes
- Yield: 12 muffins 1x
- Category: Dessert
- Cuisine: American
Ingredients
- 1 ¾ cups all-purpose flour (spooned and leveled)
- 1 teaspoon baking soda
- ½ teaspoon baking powder
- 1 teaspoon ground cinnamon
- ½ teaspoon ground nutmeg
- ½ teaspoon ground ginger
- ¼ teaspoon ground cloves
- ½ teaspoon salt
- 1 cup canned pumpkin puree (not pumpkin pie filling)
- ½ cup pure maple syrup
- ⅓ cup vegetable oil
- 2 large eggs, room temperature
- 1 teaspoon vanilla extract
- ¾ cup semi-sweet chocolate chips
- Optional: ¼ cup chopped walnuts or pecans
- Optional: 2 tablespoons brown sugar (for topping)
- Optional: 1 tablespoon pumpkin seeds
Instructions
- Preheat your oven to 350°F (175°C). Line a 12-cup muffin tin with paper liners or grease well.
- In a large bowl, whisk together the dry ingredients: flour, baking soda, baking powder, cinnamon, nutmeg, ginger, cloves, and salt.
- In another large bowl, whisk together the wet ingredients: pumpkin puree, maple syrup, vegetable oil, eggs, and vanilla extract until smooth.
- Pour the wet ingredients into the dry ingredients. Fold gently with a rubber spatula until just combined (about 10-12 strokes). Do not overmix.
- Fold in ¾ cup chocolate chips. Reserve a handful to sprinkle on top.
- Divide the batter evenly among the 12 muffin cups (about 3 tablespoons each). Sprinkle reserved chocolate chips on top.
- Bake for 18 to 22 minutes, or until a toothpick inserted into the center comes out clean or with a few moist crumbs. The tops should be golden and spring back when touched.
- Let the muffins cool in the pan for 5 minutes, then transfer to a wire rack to cool completely.
Notes
Do not overmix the batter to avoid dense muffins. Use room temperature ingredients for best results. Measure flour by spooning and leveling. Let batter rest for 5 minutes before scooping for taller muffins. Rotate the pan halfway through baking for even browning. Muffins taste even better the next day.
Nutrition
- Serving Size: 1 muffin
- Calories: 220
- Sugar: 18
- Sodium: 210
- Fat: 9
- Saturated Fat: 3
- Carbohydrates: 33
- Fiber: 2
- Protein: 4
Keywords: pumpkin muffins, maple muffins, chocolate chip muffins, fall recipe, kid-friendly, easy muffins