My neighbor’s Halloween bash was in three hours and I’d completely forgotten. Everyone else would be bringing elaborate, Pinterest-perfect treats—skeleton cookies with royal icing, cake pops shaped like eyeballs, a graveyard dirt cake that probably took three days. I had a box of black cocoa powder I’d bought on a whim, a stick of butter, and no plan. Honestly, I stood in my kitchen staring at the cabinets like they might offer a solution. The panic was real. I mean, I couldn’t show up with store-bought candy. Not to this party.
So I did what any reasonable person would do under pressure: I grabbed the darkest cocoa I could find, crossed my fingers, and started throwing things together. I wasn’t trying to win anything. I just wanted something that looked festive enough to pass as intentional. The batter was this gorgeous, inky black—almost unsettling, honestly—and the smell of rich chocolate filled the kitchen so fast my dog came wandering in to investigate. I baked them, let them cool on the counter while I frantically dug through my pantry for sprinkles, and threw together a quick cream cheese frosting. No piping bags, no fancy techniques. Just a butter knife and a prayer.
I showed up twenty minutes late, cupcakes stacked on a paper plate, looking like a hot mess. And you know what happened? People devoured them. Not just the kids—the adults kept sneaking back for seconds. Someone asked if I’d used squid ink (I hadn’t). Someone else demanded the recipe before I even sat down. The skeleton cookies sat untouched. The eyeball cake pops barely got a glance. My panic-baked, last-minute, barely-planned black velvet cupcakes stole the whole show. Maybe you’ve been there—that moment when something thrown together in a rush ends up being the thing everyone remembers. That’s this recipe. It’s the cozy, dark, slightly dramatic cupcake that saves you every time.
Why You’ll Love This Recipe
I’ve made these cupcakes more times than I can count since that Halloween night, and every single time, they deliver. Here’s why they’ve become my go-to for any spooky gathering—or honestly, any Tuesday that needs a little dark magic.
- Quick & Easy: From start to finish, these come together in about 45 minutes. No complicated techniques, no chilling dough overnight. Just mix, bake, frost, and go.
- Simple Ingredients: You probably already have most of this in your pantry. The only “special” thing is black cocoa powder, and you can find it at most grocery stores or online without a fuss.
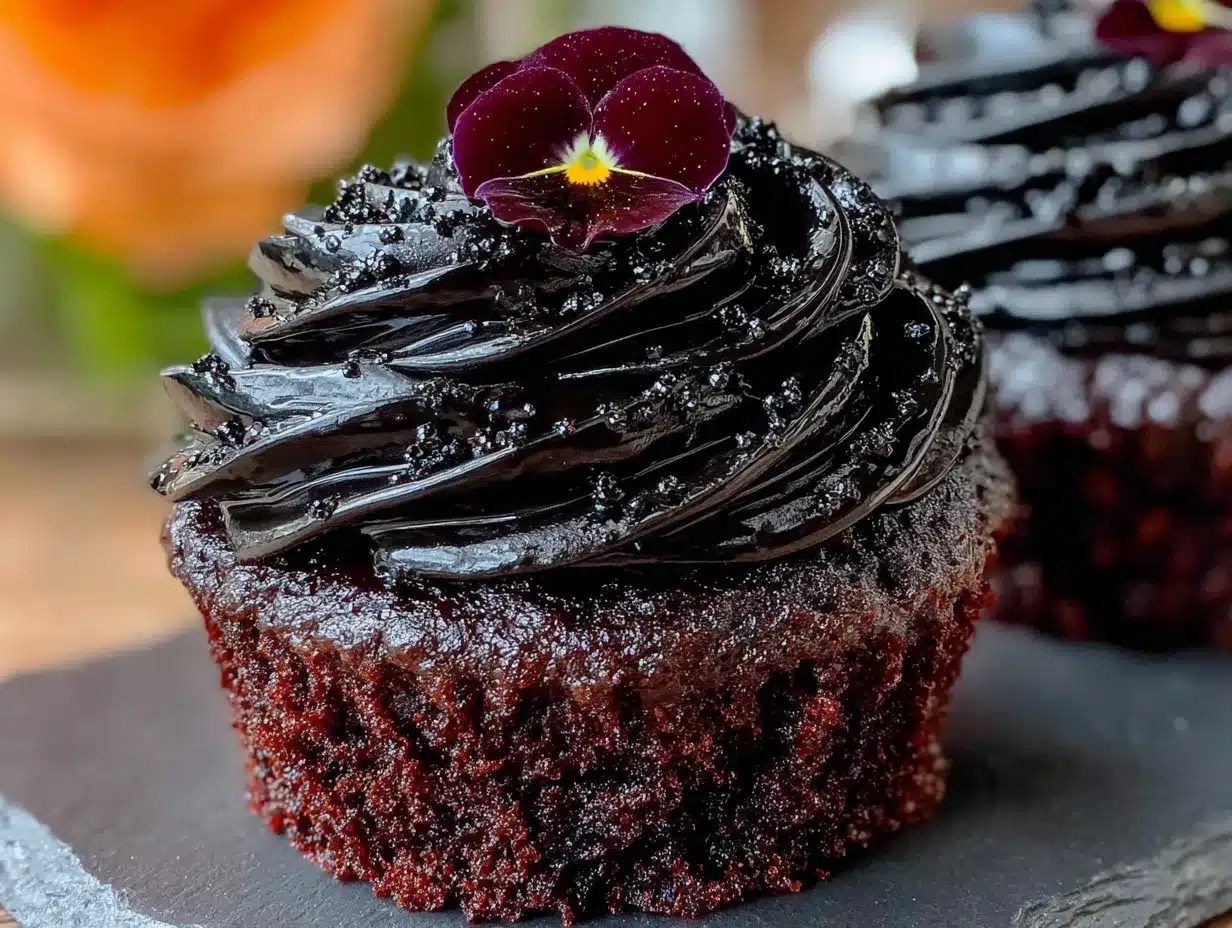
- Perfect for Halloween: The dramatic black color makes them an instant centerpiece for any spooky spread. They look like something from a witch’s bakery, but they taste like pure comfort.
- Crowd-Pleaser: I’ve served these to kids, adults, picky eaters, and serious foodies. Everyone loves them. The flavor is rich but not overwhelming—like a cross between an Oreo and a classic chocolate cupcake.
- Unbelievably Delicious: The texture is what gets people. They’re moist, tender, and almost velvety (hence the name). The black cocoa gives them a deep, slightly malty chocolate flavor that’s totally addictive.
What makes this recipe different from all the other Halloween cupcake recipes out there? It’s the balance. Most black velvet recipes are either too dry or too sweet, or they rely on food coloring that tastes weird. This one uses black cocoa powder for color and flavor, so you get that dramatic look without any artificial aftertaste. It’s comfort food reimagined—cozy, dark, and totally satisfying. Perfect for impressing guests without stress, or turning a simple evening into something memorable.
What Ingredients You Will Need
This recipe uses simple, wholesome ingredients to deliver that signature black velvet flavor and tender crumb. Nothing fancy here—just pantry staples that work together like magic.
For the Cupcakes
- All-purpose flour, 1 ½ cups (190g) – gives structure without making them dense
- Black cocoa powder, ½ cup (50g) – this is the star. I recommend King Arthur Flour black cocoa for the deepest color and richest flavor
- Granulated sugar, 1 cup (200g) – just enough sweetness to balance the dark cocoa
- Baking soda, 1 teaspoon – helps them rise nice and tall
- Salt, ½ teaspoon – enhances all the chocolate flavors
- Buttermilk, ¾ cup (180ml) – at room temperature. This is key for moisture and tenderness. If you don’t have buttermilk, add 1 tablespoon of lemon juice to regular milk and let it sit for 5 minutes
- Vegetable oil, ½ cup (120ml) – keeps them moist for days. I’ve used melted coconut oil too, and it works great
- Eggs, 2 large – at room temperature. Cold eggs can seize the batter
- Vanilla extract, 2 teaspoons – use pure vanilla if you have it
- White vinegar, 1 teaspoon – sounds weird, but it reacts with the baking soda for extra lift and tenderness
For the Cream Cheese Frosting
- Cream cheese, 8 oz (226g) – softened. Full-fat is best for stability, but low-fat works in a pinch
- Unsalted butter, ½ cup (113g) – softened. I use Kerrygold for the richest flavor
- Powdered sugar, 3 cups (360g) – sifted to avoid lumps
- Vanilla extract, 1 teaspoon
- Pinch of salt – just a tiny bit to balance the sweetness
For Decoration (Optional but Fun)
- Orange and purple sprinkles – for that Halloween vibe
- Candy eyeballs – always a hit with kids
- Black sanding sugar – for a little sparkle
Equipment Needed
You don’t need a professional bakery setup for these. Just the basics will do, though a few extras make life easier.
- Muffin tin – standard 12-cup. I love my Wilton non-stick pan because the cupcakes release perfectly every time
- Paper cupcake liners – black or orange ones add to the Halloween theme. I’ve used plain white in a pinch, and they work fine
- Mixing bowls – one large, one medium
- Whisk – for dry ingredients
- Electric hand mixer or stand mixer – for the frosting. You can whisk by hand, but your arm will get a workout
- Rubber spatula – for scraping the bowl
- Cooling rack – essential for even cooling
- Piping bag or zip-top bag – for frosting. If you don’t have piping tips, just snip the corner of a zip-top bag
Preparation Method
Let’s get baking. I’ll walk you through every step so you don’t miss a thing. Trust me, even if you’re a beginner, you’ve got this.
- Preheat your oven to 350°F (175°C). Line your muffin tin with 12 paper liners. I like to spray them lightly with non-stick spray—just in case.
- Mix the dry ingredients. In a large bowl, whisk together the flour, black cocoa powder, sugar, baking soda, and salt. Make sure there are no lumps. Black cocoa can be clumpy, so really break it up with your whisk.
- Combine the wet ingredients. In a medium bowl, whisk together the buttermilk, vegetable oil, eggs, vanilla extract, and white vinegar. Whisk until smooth and well combined.
- Make the batter. Pour the wet ingredients into the dry ingredients. Stir gently with a rubber spatula or wooden spoon until just combined. Do not overmix—a few lumps are fine. Overmixing will make the cupcakes tough.
- Fill the liners. Divide the batter evenly among the 12 liners. I use a cookie scoop for this—it’s cleaner and more consistent. Each liner should be about ⅔ full.
- Bake. Place the tin in the preheated oven and bake for 18-20 minutes. The tops should spring back when lightly touched, and a toothpick inserted in the center should come out clean or with a few moist crumbs. My oven runs hot, so I check at 16 minutes.
- Cool completely. Let the cupcakes cool in the tin for 5 minutes, then transfer them to a wire rack. They must be completely cool before frosting—otherwise, your frosting will melt into a sad puddle.
- Make the frosting. While the cupcakes cool, beat the softened cream cheese and butter together in a large bowl with an electric mixer until smooth and creamy—about 2 minutes. Gradually add the powdered sugar, one cup at a time, beating on low speed. Add the vanilla and salt, then beat on medium-high for another minute until fluffy.
- Frost the cupcakes. Spoon the frosting into a piping bag or zip-top bag with the corner snipped. Pipe swirls onto each cupcake. Or just spread it with a knife—no judgment here. Add sprinkles or candy eyeballs immediately before the frosting sets.
Cooking Tips & Techniques
I’ve made these cupcakes enough times to know where things can go wrong. Here’s what I’ve learned the hard way so you don’t have to.
- Don’t overmix the batter. I did this once when I was distracted, and the cupcakes came out dense and tough. Mix until the flour just disappears—a few lumps are your friends.
- Use room temperature ingredients. Cold eggs and cold buttermilk can make the batter seize up, giving you a lumpy mess. Take them out of the fridge 30 minutes before you start.
- Check your cocoa powder. Black cocoa powder is different from regular cocoa. It’s less acidic and more alkaline, which gives it that dark color and Oreo-like flavor. Don’t substitute regular cocoa—you’ll get brown cupcakes, not black ones.
- Let them cool completely. I know it’s tempting to frost warm cupcakes, but I promise you’ll regret it. The frosting will slide right off and turn into a sugary soup. Trust me, I’ve been there.
- Toast the sprinkles. Okay, this is weird but hear me out. If you’re using candy eyeballs or sanding sugar, toast them lightly in a dry pan for 30 seconds. It makes them stick better to the frosting. I learned this from a pastry chef friend, and it actually works.
Variations & Adaptations
One of the best things about this recipe is how flexible it is. Here are a few ways I’ve customized it over the years.
- Gluten-Free Version: Swap the all-purpose flour for a 1:1 gluten-free baking blend. I’ve used Bob’s Red Mill with great results. The texture is slightly more tender, but still delicious.
- Vegan Adaptation: Use flax eggs (1 tablespoon ground flaxseed + 3 tablespoons water per egg), plant-based buttermilk (almond milk + lemon juice), and coconut oil instead of butter. For the frosting, use vegan cream cheese and butter. I tested this for a friend’s dairy-free party, and no one could tell the difference.
- Spooky Spiderweb Design: After frosting, pipe a spiral of black gel icing on top, then drag a toothpick from the center outward to create a web pattern. It’s easier than it sounds and looks amazing.
- Peppermint Twist: Add ½ teaspoon of peppermint extract to the batter. It gives the cupcakes a subtle, cool finish that pairs perfectly with the dark chocolate. I made these for a Christmas party, and they were a hit.
- Mini Cupcakes: Use a mini muffin tin and bake for 10-12 minutes instead of 18-20. Perfect for parties where people want to try a little of everything.
Serving & Storage Suggestions
These cupcakes are best enjoyed fresh, but they store surprisingly well too. Here’s how to handle them.
- Serving Temperature: Serve at room temperature for the best texture and flavor. If you’ve refrigerated them, let them sit out for 20-30 minutes before serving.
- Presentation Ideas: Arrange on a black cake stand or a wooden board for a dramatic Halloween display. Add some fake spiderwebs and plastic spiders for extra spookiness. I once served them on a slate tile, and it looked incredible.
- Storage: Keep frosted cupcakes in an airtight container in the refrigerator for up to 5 days. Unfrosted cupcakes can be stored at room temperature for up to 3 days.
- Freezing: Freeze unfrosted cupcakes in a single layer in a freezer-safe bag for up to 3 months. Thaw at room temperature before frosting. I’ve done this for holiday prep, and they taste just as good.
- Reheating: Pop a frosted cupcake in the microwave for 10 seconds to soften the frosting and warm the cake. It’s like a fresh-baked treat all over again.
Nutritional Information & Benefits
Let’s be honest—these are cupcakes, not health food. But they’re made with real ingredients, and that counts for something. Here’s the breakdown per cupcake (with frosting):
- Calories: Approximately 380
- Fat: 18g
- Carbohydrates: 52g
- Protein: 5g
- Sugar: 38g
The black cocoa powder is actually rich in antioxidants—more so than regular cocoa. And the cream cheese frosting provides a small amount of calcium and protein. Are they a health food? No. But they’re made with love and real ingredients, which is more than you can say for most store-bought treats. If you’re watching your sugar intake, you can reduce the sugar in the frosting by using a sugar substitute like Swerve, but I’ll be honest—it’s not quite the same.
Conclusion
These black velvet Halloween cupcakes are more than just a recipe—they’re a lifesaver for anyone who’s ever panicked before a party. They’re quick, easy, and guaranteed to impress. The dark color and rich flavor make them perfect for Halloween, but honestly, I’ve made them for birthdays, movie nights, and random Tuesdays when I needed a little comfort.
I love this recipe because it reminds me that you don’t need fancy equipment or hours of prep to create something memorable. Sometimes the best things come from a moment of panic and a leap of faith. So go ahead—make these cupcakes your own. Add your favorite sprinkles, experiment with different frostings, or just enjoy them as-is. And when someone asks for the recipe (because they will), send them my way.
Have you tried these? Let me know in the comments—I’d love to hear about your Halloween baking adventures. And if you’ve got a variation that blew your mind, share it! We’re all in this together, one dark, delicious cupcake at a time.
Frequently Asked Questions
Can I use regular cocoa powder instead of black cocoa?
You can, but the cupcakes won’t be black—they’ll be a deep brown. The flavor will also be different, more like a traditional chocolate cupcake. If you want that dramatic black color, stick with black cocoa powder. It’s worth the extra effort to find it.
Why did my cupcakes turn out dry?
Dry cupcakes usually mean they were overbaked or overmixed. Check your oven temperature with an oven thermometer—they can run hot. Also, make sure you’re measuring your flour correctly. Spoon it into the measuring cup and level it off, don’t scoop directly from the bag.
Can I make these cupcakes ahead of time?
Absolutely. Bake the cupcakes up to 3 days in advance and store them unfrosted in an airtight container at room temperature. Frost them the day you plan to serve them for the best presentation. You can also freeze them for up to 3 months.
How do I get the frosting to be super smooth?
Make sure your cream cheese and butter are fully softened before you start. Beat them together for a full 2 minutes before adding the sugar. And sift your powdered sugar—lumps in the frosting are no fun. If it’s too thick, add a tablespoon of milk. Too thin, add more powdered sugar.
Can I make these into a cake instead of cupcakes?
Yes! Pour the batter into two greased and floured 9-inch round cake pans. Bake at 350°F (175°C) for 25-30 minutes, or until a toothpick comes out clean. Layer with cream cheese frosting, and you’ve got a stunning black velvet cake. Perfect for a Halloween birthday!
Pin This Recipe!
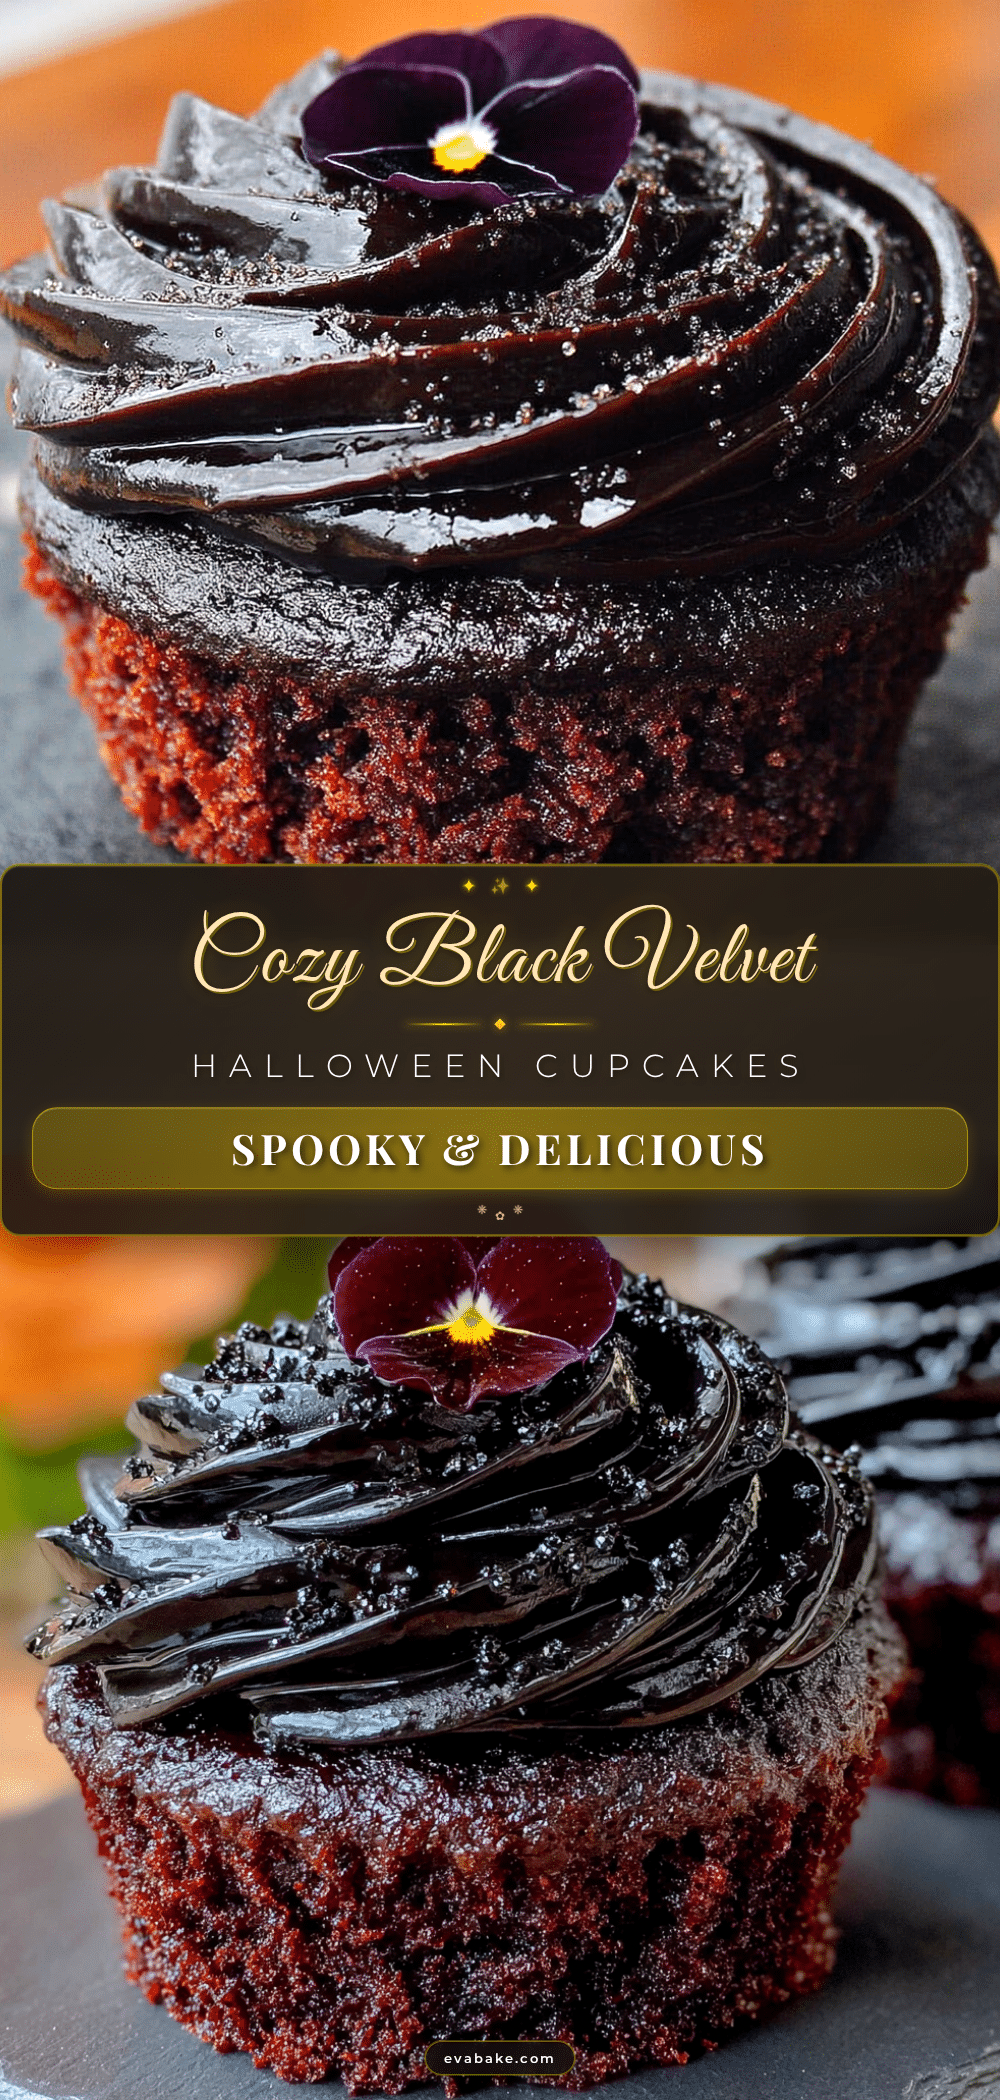
Easy Black Velvet Halloween Cupcakes Recipe
These black velvet Halloween cupcakes are quick, easy, and guaranteed to impress. Made with black cocoa powder for a dramatic color and rich flavor, they’re perfect for any spooky gathering.
- Prep Time: 15 minutes
- Cook Time: 20 minutes
- Total Time: 45 minutes
- Yield: 12 cupcakes 1x
- Category: Dessert
- Cuisine: American
Ingredients
- 1 ½ cups (190g) all-purpose flour
- ½ cup (50g) black cocoa powder
- 1 cup (200g) granulated sugar
- 1 teaspoon baking soda
- ½ teaspoon salt
- ¾ cup (180ml) buttermilk, room temperature
- ½ cup (120ml) vegetable oil
- 2 large eggs, room temperature
- 2 teaspoons vanilla extract
- 1 teaspoon white vinegar
- 8 oz (226g) cream cheese, softened
- ½ cup (113g) unsalted butter, softened
- 3 cups (360g) powdered sugar, sifted
- 1 teaspoon vanilla extract
- Pinch of salt
- Orange and purple sprinkles (optional)
- Candy eyeballs (optional)
- Black sanding sugar (optional)
Instructions
- Preheat your oven to 350°F (175°C). Line your muffin tin with 12 paper liners. Spray them lightly with non-stick spray.
- In a large bowl, whisk together the flour, black cocoa powder, sugar, baking soda, and salt until no lumps remain.
- In a medium bowl, whisk together the buttermilk, vegetable oil, eggs, vanilla extract, and white vinegar until smooth.
- Pour the wet ingredients into the dry ingredients. Stir gently with a rubber spatula or wooden spoon until just combined. Do not overmix.
- Divide the batter evenly among the 12 liners, filling each about ⅔ full.
- Bake for 18-20 minutes, until the tops spring back when lightly touched and a toothpick inserted in the center comes out clean or with a few moist crumbs.
- Let the cupcakes cool in the tin for 5 minutes, then transfer to a wire rack to cool completely.
- While the cupcakes cool, beat the softened cream cheese and butter together in a large bowl with an electric mixer until smooth and creamy, about 2 minutes.
- Gradually add the powdered sugar, one cup at a time, beating on low speed. Add the vanilla and salt, then beat on medium-high for another minute until fluffy.
- Spoon the frosting into a piping bag or zip-top bag with the corner snipped. Pipe swirls onto each cupcake, or spread with a knife. Add sprinkles or candy eyeballs immediately before the frosting sets.
Notes
Don’t overmix the batter to avoid dense cupcakes. Use room temperature ingredients for best results. Black cocoa powder is essential for the dark color; regular cocoa will yield brown cupcakes. Let cupcakes cool completely before frosting to prevent melting.
Nutrition
- Serving Size: 1 cupcake
- Calories: 380
- Sugar: 38
- Sodium: 280
- Fat: 18
- Saturated Fat: 8
- Carbohydrates: 52
- Fiber: 2
- Protein: 5
Keywords: black velvet cupcakes, Halloween cupcakes, black cocoa cupcakes, easy Halloween dessert, cream cheese frosting cupcakes


