My neighbor Carol watched me trying to wrangle three grocery bags, a pumpkin, and my youngest daughter’s backpack all at once. She didn’t say anything at first. Then she just reached over, took the pumpkin out of my arms, and said, “You look like you’re trying to do too much. Come inside for a minute.”
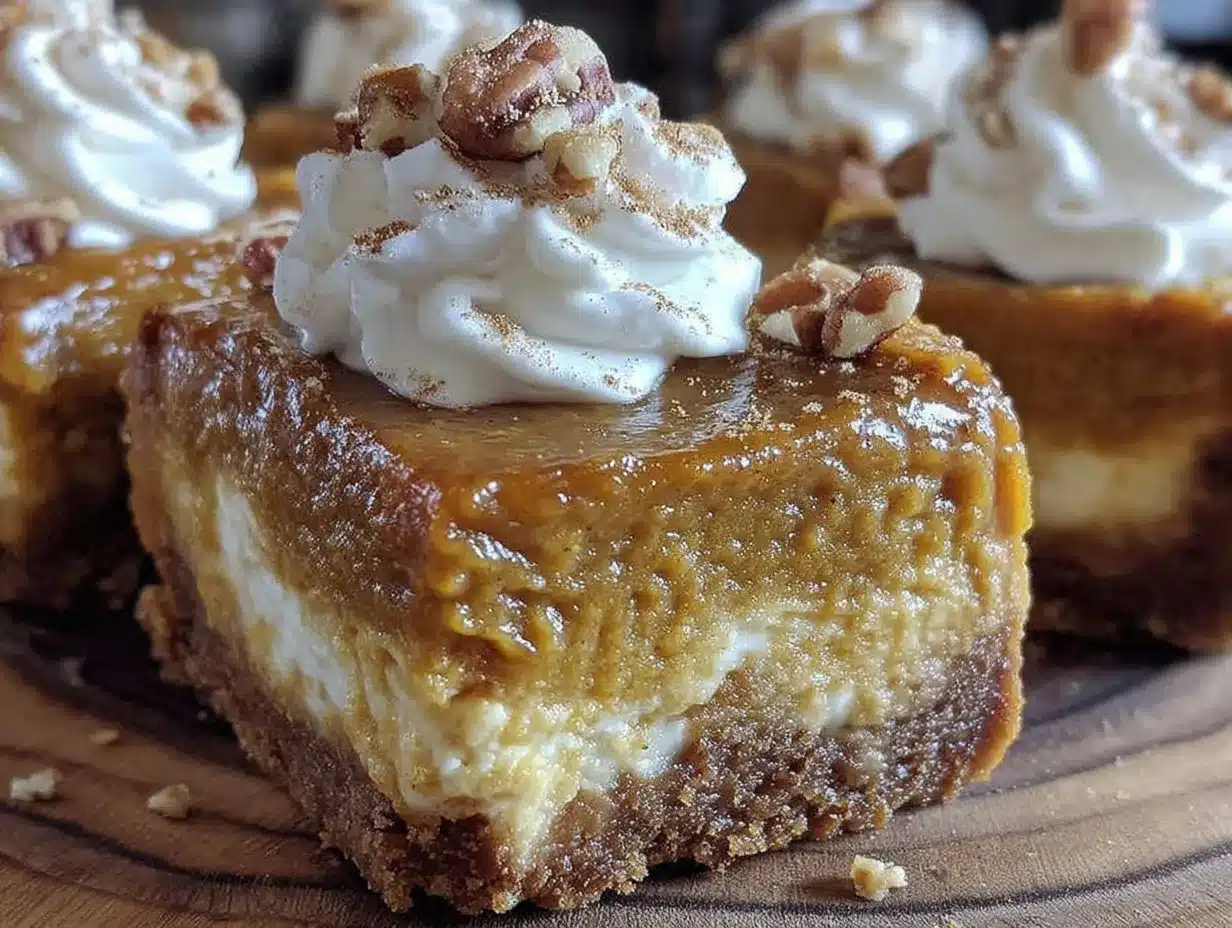
I followed her into her kitchen, which smelled like cinnamon and something sweet baking. She had a pan of these beautiful swirled bars cooling on the counter. “I made these for my grandkids last weekend,” she said, cutting me a piece without asking. “They’re pumpkin pie and cheesecake in one. The kids went crazy for them.”
Honestly, I was skeptical at first. Combining two desserts felt like it could go wrong pretty easily. But that first bite? The creamy cheesecake layer, the spiced pumpkin on top, the buttery crust underneath—it worked. It really worked. Carol laughed at the look on my face and told me she’d been making this recipe for over twenty years.
I tweaked it a bit when I got home. Added a little more cinnamon, swapped in graham crackers for the original crust, and figured out a way to make it simpler for busy weeknights. Maybe you’ve been there—standing in your kitchen, wondering how to make something special without spending all day on it. That’s exactly what this recipe is for.
These pumpkin pie cheesecake bars have become a staple in my house every fall. They’re the dessert that makes everyone happy, from the picky eater who “doesn’t like pumpkin” to the grown-ups who want something a little more sophisticated than plain pumpkin pie. And honestly? They’re easier to make than either dessert on its own. Let me show you how.
Why You’ll Love This Recipe
Let me tell you why these bars have earned a permanent spot in my fall baking rotation. I’ve tested this recipe more times than I can count, and it never disappoints.
- Kid-Approved: My own kids fought over the last bar last week. The creamy texture and sweet flavor win over even the pickiest eaters.
- Simple Ingredients: You probably already have most of these in your pantry. No weird specialty items or expensive extracts needed.
- Perfect for Fall Gatherings: Whether it’s a school bake sale, Thanksgiving dinner, or just a cozy Sunday afternoon, these bars fit right in.
- Easy to Make Ahead: They actually taste better the next day. Make them a day ahead and save yourself some stress.
- Budget-Friendly: One batch makes 16 generous servings. That’s a lot of happy faces for not a lot of money.
- Foolproof Texture: The cheesecake layer stays creamy, the pumpkin layer sets perfectly, and the crust holds together without getting soggy.
What makes these bars different from other pumpkin cheesecake recipes? It’s the ratio. I spent three batches getting the pumpkin-to-cheesecake balance just right. Too much pumpkin and the cheesecake gets lost. Too much cheesecake and you might as well skip the pumpkin entirely. This version gives you both flavors in every single bite.
This is the kind of dessert that makes you close your eyes after the first forkful. It’s comfort food at its best—familiar enough to feel like home, but special enough to feel like a treat.
What Ingredients You Will Need
This recipe uses simple, wholesome ingredients that work together to create something truly special. Most of these are pantry staples, especially if you do any fall baking.
For the Crust
- 2 cups graham cracker crumbs (about 16 full sheets, crushed fine)
- 1/2 cup unsalted butter, melted
- 1/4 cup granulated sugar
- 1/2 teaspoon ground cinnamon
For the Cheesecake Layer
- 16 ounces cream cheese, softened to room temperature (I prefer Philadelphia brand for the smoothest texture)
- 1/2 cup granulated sugar
- 2 large eggs, room temperature
- 1 teaspoon vanilla extract
- 2 tablespoons all-purpose flour
For the Pumpkin Layer
- 1 can (15 ounces) pumpkin puree (not pumpkin pie filling—look for 100% pure pumpkin)
- 1/2 cup granulated sugar
- 1/4 cup brown sugar, packed
- 2 large eggs, room temperature
- 1/2 cup heavy cream (or evaporated milk works great too)
- 1 teaspoon vanilla extract
- 2 teaspoons pumpkin pie spice (or make your own with cinnamon, nutmeg, ginger, and cloves)
- 1/2 teaspoon ground cinnamon
- 1/4 teaspoon salt
- 2 tablespoons all-purpose flour
Ingredient Tips: Make sure your cream cheese is truly at room temperature. Cold cream cheese creates lumps that won’t bake out. I take mine out of the fridge about an hour before I start. For the graham cracker crumbs, you can buy them pre-crushed or crush your own in a food processor or zip-top bag with a rolling pin. I actually prefer crushing my own—the texture is better and they’re less dusty.
Substitution Options: If you need a gluten-free version, use gluten-free graham crackers or crushed gluten-free cookies. For a dairy-free option, use dairy-free cream cheese and a plant-based butter alternative. The texture will be slightly different, but still delicious. You can also swap the heavy cream for full-fat coconut milk if needed.
Equipment Needed
You don’t need a professional bakery setup for these bars. Here’s what you’ll need:
- 9×13-inch baking pan (a metal pan works best for even baking)
- Parchment paper (for easy removal—don’t skip this!)
- Large mixing bowls (at least two)
- Electric hand mixer or stand mixer (you can mix by hand, but a mixer gives you smoother results)
- Measuring cups and spoons
- Rubber spatula
- Rolling pin or food processor (for crushing graham crackers)
- Medium saucepan (if you need to melt butter)
- Cooling rack
If you don’t have a food processor, don’t worry. I’ve crushed graham crackers with a rolling pin and a zip-top bag more times than I can count. It takes a few extra minutes, but it works perfectly. Just make sure you get them crushed evenly—no huge chunks or you’ll have uneven spots in your crust.
For the baking pan, glass or ceramic works fine, but metal gives you the crispiest crust. I’ve used all three and metal is my preference. Just make sure whatever you use has straight sides for clean cuts later.
Preparation Method
Let’s walk through this step by step. I’ve made these bars so many times that I’ve got the process down to a science. Follow along and you’ll have perfect bars every time.
Step 1: Prepare Your Pan and Preheat
Preheat your oven to 350°F (175°C). Line your 9×13-inch baking pan with parchment paper. Leave enough overhang on the two long sides so you can lift the whole thing out later. This little trick makes cutting so much easier.
Step 2: Make the Crust
In a medium bowl, combine the graham cracker crumbs, melted butter, sugar, and cinnamon. Stir until everything is evenly moistened. The mixture should look like wet sand and hold together when you squeeze it. Press this mixture firmly into the bottom of your prepared pan. Use the bottom of a measuring cup or a flat glass to really pack it down tight. Bake for 10 minutes, then set aside to cool slightly while you make the fillings.
Step 3: Make the Cheesecake Layer
In a large bowl, beat the softened cream cheese and 1/2 cup sugar together until smooth and creamy. This takes about 2-3 minutes with a hand mixer. Scrape down the sides of the bowl halfway through. Add the eggs one at a time, beating well after each addition. Mix in the vanilla extract. Finally, add the 2 tablespoons of flour and mix just until combined. Don’t overmix here—you don’t want to incorporate too much air. Set this bowl aside.
Step 4: Make the Pumpkin Layer
In another large bowl, combine the pumpkin puree, 1/2 cup granulated sugar, and 1/4 cup brown sugar. Whisk until smooth. Add the eggs, heavy cream, and vanilla extract. Whisk again until everything is well combined. Sprinkle in the pumpkin pie spice, cinnamon, salt, and 2 tablespoons of flour. Whisk until the mixture is smooth and glossy. Taste it—I always do. The spices should be warm and fragrant without being overpowering.
Step 5: Layer the Fillings
Pour the cheesecake mixture over the pre-baked crust. Spread it evenly with a spatula. Now gently spoon the pumpkin mixture over the cheesecake layer. Don’t pour it all in one spot—distribute it in dollops across the surface. Then use a butter knife or offset spatula to gently swirl the two layers together. You want a marbled effect, not fully combined. A few figure-eight motions across the pan are all you need.
Step 6: Bake
Place the pan in the preheated oven and bake for 35-40 minutes. The edges should be set and slightly puffed, but the center should still have a slight jiggle when you gently shake the pan. That jiggle is what gives you that creamy texture. If the center looks completely firm, you’ve overbaked it. Start checking at 30 minutes just to be safe.
Step 7: Cool and Chill
Let the bars cool completely on a wire rack at room temperature. This takes about an hour. Then cover the pan with plastic wrap and refrigerate for at least 4 hours, but overnight is better. I cannot stress this enough—do not skip the chilling step. The bars need this time to set properly. Cutting them while they’re still warm will give you a mess.
Step 8: Cut and Serve
Once the bars are fully chilled, use the parchment overhang to lift the whole slab out of the pan. Place it on a cutting board. Use a sharp knife to cut into 16 squares. Wipe the knife clean between cuts for the neatest edges. I like to cut them into 4 rows by 4 rows, but you can make them bigger or smaller depending on your crowd.
Cooking Tips & Techniques
After making these bars more times than I can count, I’ve learned a few things the hard way. Let me save you some trouble.
Room temperature ingredients matter. I know it’s tempting to use cold cream cheese straight from the fridge, but don’t. Cold cream cheese creates lumps that don’t smooth out, even with extended mixing. Trust me, I’ve tried. Set everything out about an hour before you start.
Don’t overmix the cheesecake batter. Overmixing incorporates too much air, which causes the cheesecake to puff up in the oven and then crack as it cools. Mix just until everything is combined. A few small lumps are fine—they’ll bake out.
The jiggle test is your friend. When you think the bars might be done, gently shake the pan. The edges should be set, but the center should wobble like Jell-O. If the center is completely firm, you’ve gone too far. I pulled my first batch out too late and ended up with dry, crumbly bars. Learn from my mistake.
Chill overnight for best results. I know you’ll want to dig in right away. But these bars truly taste better after a full night in the fridge. The flavors meld together, the texture firms up perfectly, and the slices come out clean. Make them the day before you need them.
Use a hot knife for clean cuts. Run your knife under hot water, dry it off, then make your cut. Wipe the blade clean between each cut. This gives you those gorgeous, bakery-style edges that look so professional.
Variations & Adaptations
One of the best things about this recipe is how adaptable it is. Here are some variations I’ve tried and loved.
Gluten-Free Version
Swap the graham crackers for gluten-free graham crackers or crushed gluten-free vanilla cookies. Use a gluten-free all-purpose flour blend in the fillings. I’ve tested this with several brands and it works beautifully. The texture is slightly different but just as delicious.
Dairy-Free Version
Use dairy-free cream cheese and a plant-based butter alternative. Replace the heavy cream with full-fat coconut cream. The flavor will be a little different, but the creamy texture stays intact. I made this version for a friend with dairy allergies and she asked for the recipe.
Extra Spiced Version
If you love warm fall spices, add an extra teaspoon of pumpkin pie spice to the pumpkin layer. You can also add a pinch of cardamom or allspice for a more complex flavor profile. My husband requests this version every year.
Chocolate Swirl Version
Melt 1/2 cup of semi-sweet chocolate chips and drizzle it over the top before swirling. The chocolate and pumpkin combination is surprisingly good. I stumbled onto this variation when I had leftover chocolate from another recipe, and now it’s my secret weapon for holiday parties.
Mini Bar Version
Make these in a mini muffin tin for bite-sized treats. Reduce the baking time to about 15-18 minutes. These are perfect for school parties or holiday cookie exchanges. Just make sure to line the mini muffin cups with parchment paper strips for easy removal.
Serving & Storage Suggestions
These bars are versatile enough for almost any occasion. Here’s how to serve and store them for the best experience.
Serving Temperature: Serve these bars cold or at room temperature. I prefer them straight from the fridge—the texture is firmer and the flavors are more pronounced. If you like a softer texture, let them sit at room temperature for about 15 minutes before serving.
Presentation Ideas: A dollop of whipped cream on top is the classic choice. For extra flair, add a sprinkle of cinnamon or a drizzle of caramel sauce. My kids love when I add a few mini chocolate chips on top. For a more grown-up presentation, dust the tops with powdered sugar just before serving.
What to Serve With Them: These bars pair beautifully with a cup of hot coffee or a warm mug of apple cider. For a full fall dessert spread, serve them alongside classic apple crisp or a slice of easy pumpkin bread. They also work great on a dessert board with fresh fruit and nuts.
Refrigerator Storage: Store the bars in an airtight container in the refrigerator for up to 5 days. Place a sheet of parchment paper between layers to prevent sticking. The flavors actually develop and improve over the first couple of days.
Freezer Storage: These bars freeze beautifully. Cut them into individual squares, wrap each one tightly in plastic wrap, then place them in a freezer-safe bag or container. They’ll keep for up to 3 months. To thaw, transfer them to the refrigerator overnight. Don’t thaw at room temperature—they’ll get too soft.
Reheating: I actually prefer these bars cold, but if you want them warm, microwave individual squares for about 15-20 seconds. Just be careful not to overheat them or the cheesecake layer will become runny.
Nutritional Information & Benefits
Let’s be real—these are a treat. But they do have some redeeming qualities. Here’s the nutritional breakdown for one bar (based on 16 servings):
| Nutrient | Amount Per Serving |
|---|---|
| Calories | 285 |
| Total Fat | 17g |
| Saturated Fat | 10g |
| Cholesterol | 85mg |
| Sodium | 220mg |
| Total Carbohydrates | 30g |
| Dietary Fiber | 1g |
| Sugars | 22g |
| Protein | 5g |
Health Benefits: Pumpkin is packed with vitamin A, which supports eye health and immune function. It’s also a good source of fiber and antioxidants. The cream cheese provides calcium and protein. Of course, these bars also contain sugar and butter, so they’re best enjoyed as an occasional treat rather than a daily snack.
Dietary Considerations: This recipe contains gluten, dairy, and eggs. For gluten-free and dairy-free options, check the variations section above. These bars are not suitable for vegan diets, but you can find vegan pumpkin cheesecake recipes elsewhere.
My Take: I believe in balance. These bars are a special occasion dessert, not an everyday snack. When you do indulge, make it count. One perfectly made bar is more satisfying than three mediocre ones. So take your time, enjoy the process, and savor every bite.
Conclusion
These kid-approved pumpkin pie cheesecake bars have become a fall tradition in my house for good reason. They combine two beloved desserts into one easy-to-make treat that pleases everyone. The creamy cheesecake, the spiced pumpkin, the buttery crust—it all comes together in a way that feels special without being complicated.
I love that this recipe is forgiving enough for beginners but impressive enough for experienced bakers. It’s the kind of dessert you can make for a school bake sale or a holiday dinner and get compliments either way. And honestly? It’s the kind of recipe that makes you feel like a rockstar in the kitchen.
I hope you give these bars a try. Make them your own—add extra spice, swap in different crusts, or experiment with toppings. That’s the beauty of baking. And when you do make them, I’d love to hear about it. Drop a comment below and let me know how they turned out. Did your kids love them? Did you try a fun variation? Share your photos and tag me on social media. Happy baking, friends!
Frequently Asked Questions
Can I use canned pumpkin pie filling instead of pure pumpkin?
No, I don’t recommend it. Pumpkin pie filling already has sugar and spices added, which will throw off the balance of this recipe. Stick with 100% pure pumpkin puree for the best results. The texture and sweetness will be exactly right.
Why did my cheesecake layer crack?
Cracks usually happen from overmixing or overbaking. Mix the cheesecake batter just until combined—no more. And pull the bars out of the oven while the center still has a slight jiggle. If cracks do appear, don’t worry. A dollop of whipped cream covers them perfectly.
Can I make these bars ahead of time?
Absolutely. In fact, I recommend it. These bars taste even better after a day in the fridge. Make them up to two days ahead and keep them covered in the refrigerator. They also freeze beautifully for up to three months.
How do I get clean, neat slices?
Chill the bars thoroughly first. Use a sharp knife and run it under hot water before each cut. Wipe the blade clean between cuts. Lifting the whole slab out with parchment paper also makes cutting much easier than trying to cut in the pan.
Can I use a different crust?
Yes! Graham crackers are classic, but you can use crushed vanilla wafers, shortbread cookies, or even ginger snaps for a spicier flavor. If you’re feeling adventurous, try a pecan crust by combining crushed pecans with butter and a little sugar. Each crust gives the bars a slightly different personality.
Pin This Recipe!
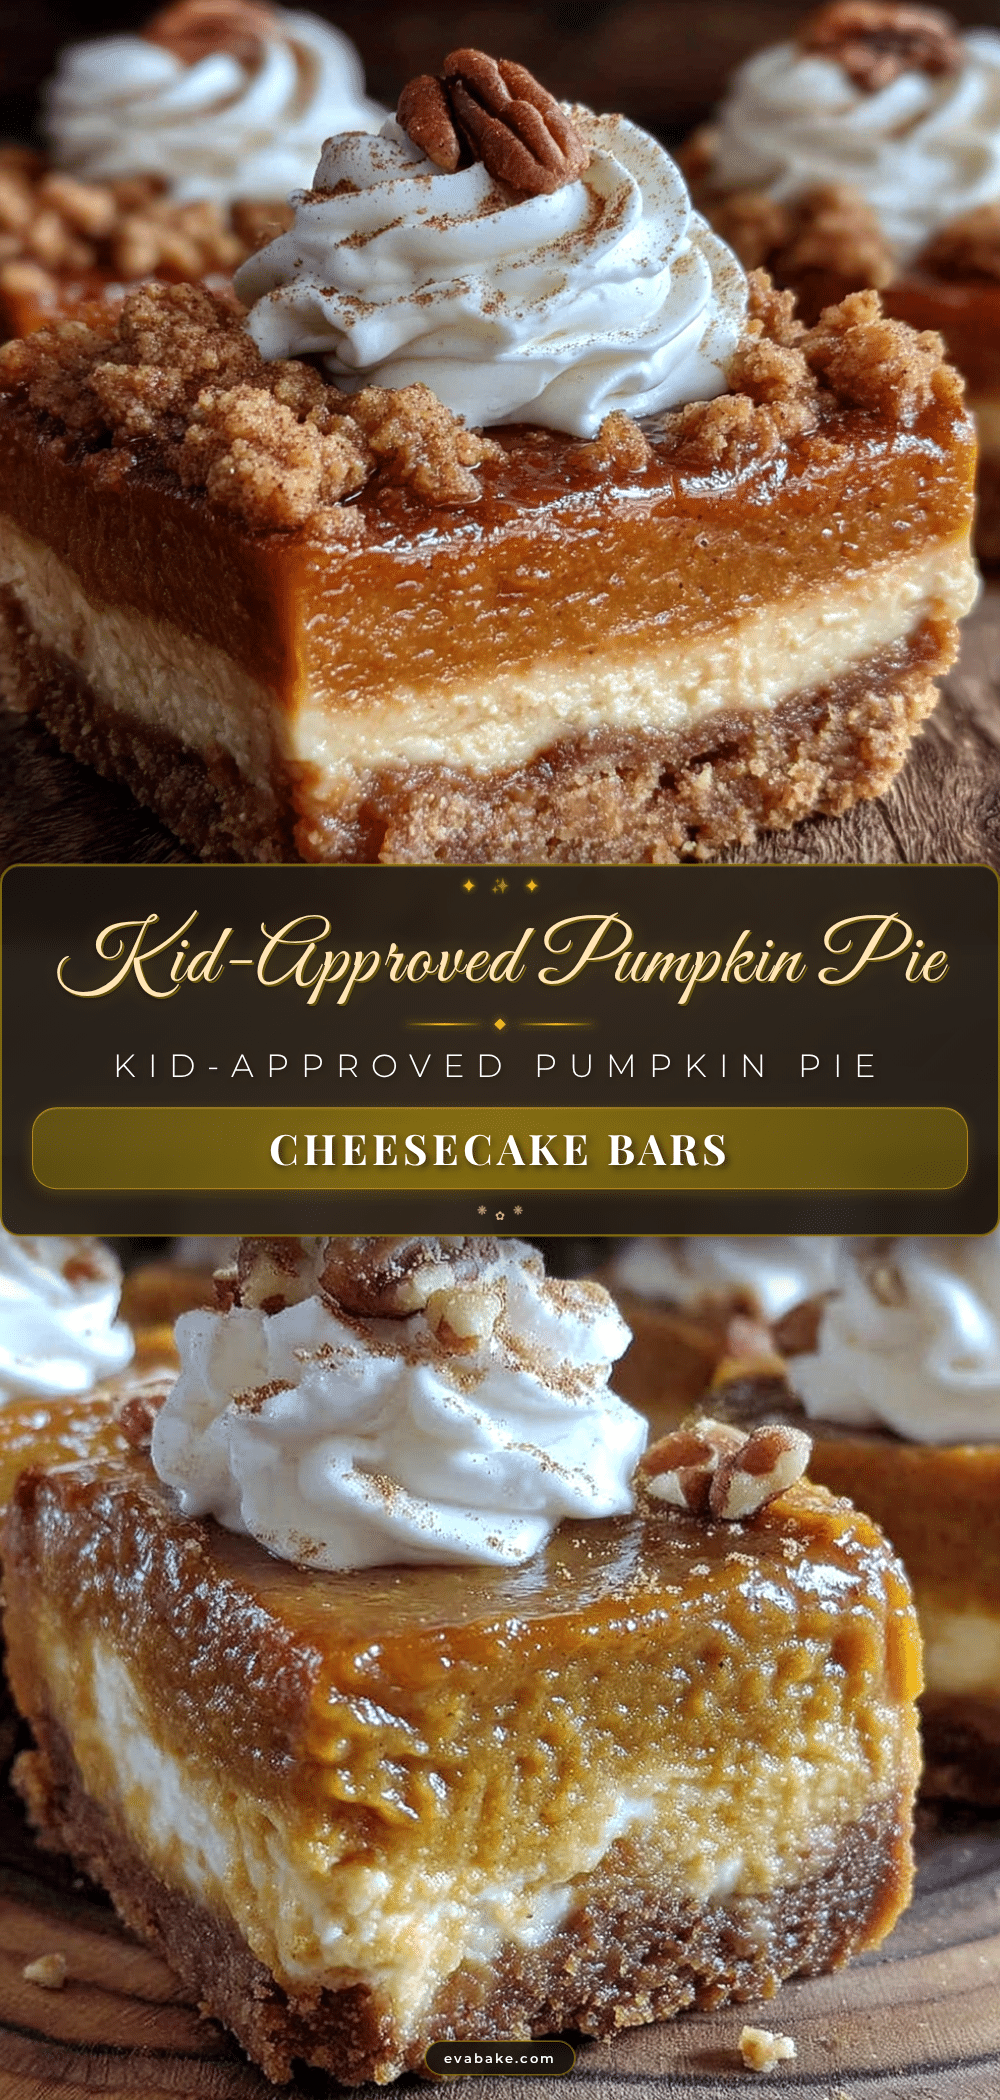
Kid-Approved Pumpkin Pie Cheesecake Bars Recipe: Easy Fall Dessert
These pumpkin pie cheesecake bars combine two beloved desserts into one easy-to-make treat that pleases everyone. The creamy cheesecake, spiced pumpkin, and buttery crust come together in a way that feels special without being complicated.
- Prep Time: 20 minutes
- Cook Time: 35-40 minutes
- Total Time: 5 hours (including chilling)
- Yield: 16 servings 1x
- Category: Dessert
- Cuisine: American
Ingredients
- 2 cups graham cracker crumbs (about 16 full sheets, crushed fine)
- 1/2 cup unsalted butter, melted
- 1/4 cup granulated sugar
- 1/2 teaspoon ground cinnamon
- 16 ounces cream cheese, softened to room temperature
- 1/2 cup granulated sugar
- 2 large eggs, room temperature
- 1 teaspoon vanilla extract
- 2 tablespoons all-purpose flour
- 1 can (15 ounces) pumpkin puree (not pumpkin pie filling)
- 1/2 cup granulated sugar
- 1/4 cup brown sugar, packed
- 2 large eggs, room temperature
- 1/2 cup heavy cream (or evaporated milk)
- 1 teaspoon vanilla extract
- 2 teaspoons pumpkin pie spice
- 1/2 teaspoon ground cinnamon
- 1/4 teaspoon salt
- 2 tablespoons all-purpose flour
Instructions
- Preheat your oven to 350°F (175°C). Line your 9×13-inch baking pan with parchment paper, leaving overhang on the two long sides.
- In a medium bowl, combine graham cracker crumbs, melted butter, sugar, and cinnamon. Stir until evenly moistened. Press firmly into the bottom of the prepared pan. Bake for 10 minutes, then set aside to cool slightly.
- In a large bowl, beat softened cream cheese and 1/2 cup sugar until smooth and creamy (2-3 minutes). Add eggs one at a time, beating well after each. Mix in vanilla extract and 2 tablespoons flour until just combined.
- In another large bowl, combine pumpkin puree, 1/2 cup granulated sugar, and 1/4 cup brown sugar. Whisk until smooth. Add eggs, heavy cream, and vanilla extract. Whisk again. Sprinkle in pumpkin pie spice, cinnamon, salt, and 2 tablespoons flour. Whisk until smooth and glossy.
- Pour the cheesecake mixture over the pre-baked crust and spread evenly. Gently spoon the pumpkin mixture in dollops over the cheesecake layer. Use a butter knife or offset spatula to gently swirl the two layers together for a marbled effect.
- Bake for 35-40 minutes. The edges should be set and slightly puffed, but the center should still have a slight jiggle when shaken.
- Let the bars cool completely on a wire rack at room temperature (about 1 hour). Then cover with plastic wrap and refrigerate for at least 4 hours, preferably overnight.
- Once fully chilled, use the parchment overhang to lift the slab out of the pan. Place on a cutting board. Use a sharp knife to cut into 16 squares. Wipe the knife clean between cuts for neat edges.
Notes
Make sure cream cheese is at room temperature to avoid lumps. Don’t overmix the cheesecake batter to prevent cracking. The jiggle test is key: edges set, center wobbly. Chill overnight for best flavor and texture. Use a hot knife for clean cuts.
Nutrition
- Serving Size: 1 bar
- Calories: 285
- Sugar: 22
- Sodium: 220
- Fat: 17
- Saturated Fat: 10
- Carbohydrates: 30
- Fiber: 1
- Protein: 5
Keywords: pumpkin pie cheesecake bars, fall dessert, kid-approved, easy recipe, Thanksgiving dessert, pumpkin dessert, cheesecake bars


