This was supposed to be a fancy layered peppermint mousse cake for a holiday party. I had the whole thing planned out in my head—three distinct layers, a complicated ganache drip, the kind of dessert that makes people gasp when you bring it to the table. But somewhere between the grocery store and my kitchen, the plan fell apart. I grabbed the wrong chocolate (dark instead of semi-sweet), my double boiler was buried under a mountain of other baking gear I’d impulsively bought, and I was already running late because I’d spent twenty minutes staring at peppermint extracts trying to remember which brand I usually buy. Honestly, I almost just gave up and brought a store-bought pie.
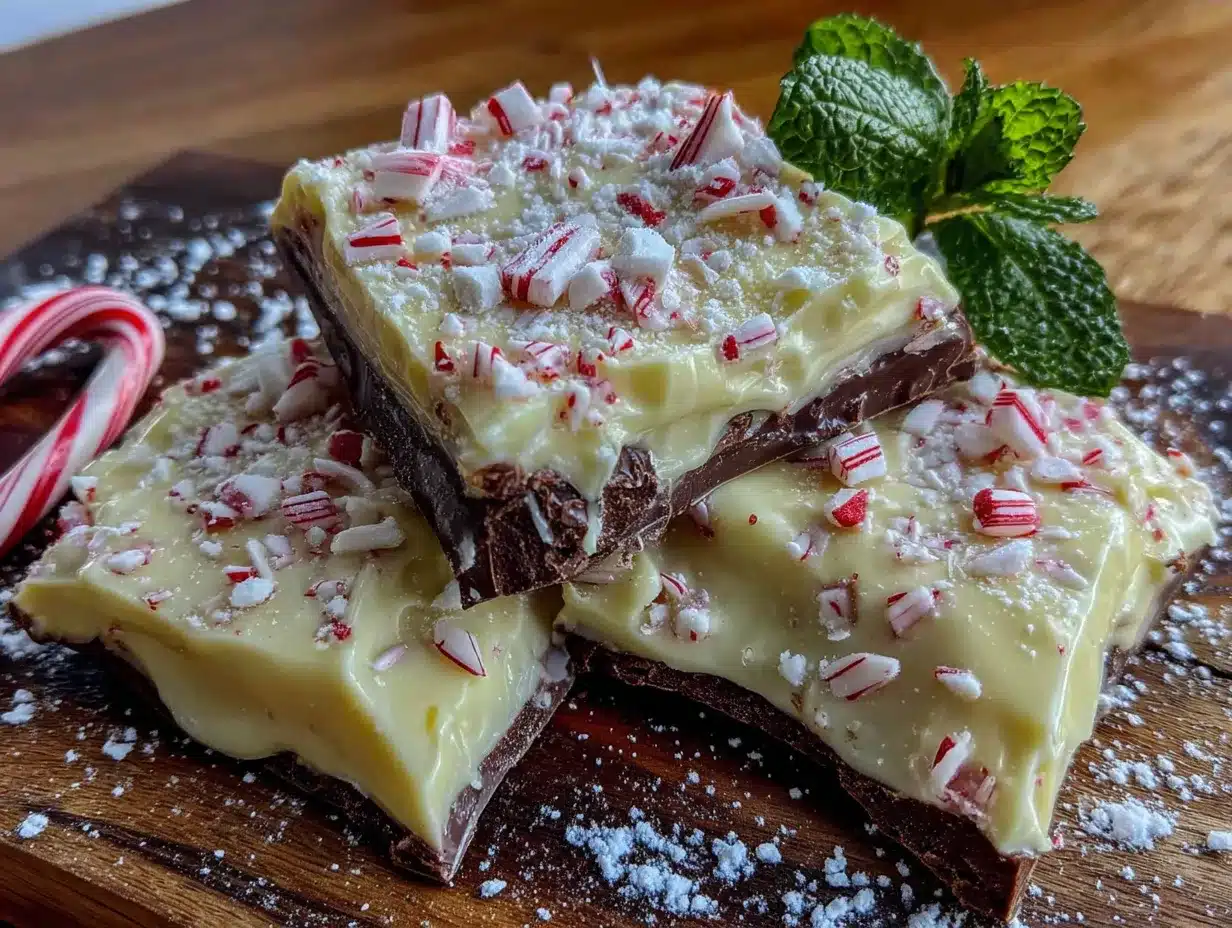
But I had all this chocolate sitting on my counter, and the peppermint was already in my hand, and I thought—well, maybe I could just… melt it and spread it on a pan? I mean, how hard could it be? So I melted the dark chocolate first, then the white, and I kinda just poured one over the other and swirled it around with a toothpick. I crushed some candy canes with a rolling pin (loudly, in a way that made my neighbor knock on the wall), sprinkled them on top, and stuck the whole thing in the fridge. When I pulled it out an hour later, I just stared at it. It was gorgeous. That crackly sound when I broke it into pieces? Pure satisfaction.
I brought it to the party anyway, and people actually liked it more than they would have liked the mousse cake. There’s something about peppermint bark that feels both nostalgic and impressive, you know? It’s the kind of thing that makes you look like you tried really hard when really, you just melted some chocolate and got lucky. Maybe you’ve been there—staring at a recipe that’s way too complicated for a Tuesday night, wondering if there’s a simpler way. There is. This is it.
Why You’ll Love This Recipe
This peppermint bark isn’t just another holiday treat. It’s the one that saves you when you need something homemade but have zero time or energy left. After testing this recipe about six times (yes, six—my coworkers were very happy volunteers), I landed on a method that’s practically foolproof. Here’s what makes it stand out:
- Quick & Easy: From start to finish, this takes about 15 minutes of active work. The rest is just waiting for the chocolate to set in the fridge. Perfect for those nights when you remember at 9 PM that you need a gift for tomorrow’s cookie exchange.
- Simple Ingredients: You need exactly four things—dark chocolate, white chocolate, peppermint extract, and candy canes. That’s it. No fancy equipment, no obscure baking supplies.
- Perfect for Gifting: This bark breaks into beautiful, irregular shards that look gorgeous in a little cellophane bag tied with a ribbon. It’s the kind of homemade gift that actually feels special.
- Crowd-Pleaser: I’ve brought this to work parties, family gatherings, and casual get-togethers. Every single time, someone asks for the recipe. Kids love it, adults love it, even people who claim they don’t like sweets usually grab a second piece.
- Unbelievably Delicious: The combination of rich, slightly bitter dark chocolate with sweet, creamy white chocolate and that cool, crisp peppermint crunch is just perfect. It’s the kind of treat that makes you close your eyes after the first bite.
What makes this version different from the rest? It’s the ratio. Most recipes use too much white chocolate or too little peppermint. I spent hours (and a few stomachaches) finding the sweet spot where the dark chocolate shines but the white chocolate still gets its moment. And I figured out that you don’t need to temper chocolate or use any special techniques. This is peppermint bark for real people who just want something delicious without the stress.
What Ingredients You Will Need
This recipe uses simple, honest ingredients to create something that tastes much more complex than it is. Most of these are pantry staples during the holiday season, but they’re easy to find year-round if you get a craving in July (no judgment here).
- Dark Chocolate (12 oz / 340g): Use good-quality dark chocolate bars or chips. I prefer chocolate with 60-70% cocoa content—it’s bitter enough to balance the sweetness of the white chocolate and candy canes. Ghirardelli or Lindt are my go-to brands for consistent melting. Avoid chocolate chips with stabilizers if you can; they don’t melt as smoothly.
- White Chocolate (12 oz / 340g): This is where quality really matters. Cheap white chocolate can seize up or taste waxy. Look for one that lists cocoa butter as an ingredient. I like Guittard or Baker’s brand. You can use white chocolate chips or chopped bars—just make sure they’re real white chocolate, not white confectionery coating.
- Peppermint Extract (1/2 teaspoon): This is different from peppermint oil, which is much more concentrated. Use a pure peppermint extract for the best flavor. I accidentally used mint extract once instead of peppermint—it tasted like toothpaste. Learn from my mistake. Nielsen-Massey makes a lovely pure peppermint extract that’s worth the splurge.
- Candy Canes (about 6-8, or 1/2 cup crushed): You want classic peppermint candy canes, not the fancy flavored ones. Crush them yourself for the best texture and freshness. I’ve tried pre-crushed peppermint pieces, and they’re just not as crunchy. Plus, crushing candy canes is weirdly satisfying.
- Optional: Coconut Oil or Vegetable Shortening (1 teaspoon): If your chocolate tends to seize or you want an extra-smooth finish, stir a tiny bit of coconut oil into each melted chocolate. I don’t always need it, but it’s a good trick to have in your back pocket.
For the dark chocolate, I’ve found that chopping bars into small, even pieces gives the smoothest melt. Chocolate chips are convenient but sometimes have a coating that prevents them from melting as evenly. If you’re using chips, add them slowly and stir constantly. For the white chocolate, be extra careful—it’s more delicate and can burn easily. I’ve ruined more than one batch by walking away for thirty seconds.
If you’re making this for someone with dietary restrictions: dark chocolate is often dairy-free (check the label), but white chocolate almost always contains dairy. There are vegan white chocolate options, but they behave differently when melted. I’d recommend testing a small batch first.
Equipment Needed
You don’t need a fancy kitchen for this recipe. In fact, you probably already have everything you need. Here’s what I use:
- Baking Sheet (13×18 inches or similar): A standard half-sheet pan works perfectly. Line it with parchment paper or aluminum foil for easy removal. I’ve used both, and parchment is easier to peel off the back of the bark.
- Double Boiler or Heatproof Bowl + Saucepan: A double boiler is ideal for gentle, even melting. But honestly, I usually just use a glass bowl set over a pot of simmering water. Make sure the bowl doesn’t touch the water, or your chocolate might seize.
- Rubber Spatula: For stirring and spreading the chocolate. A silicone spatula is best because it won’t scratch your bowls and it scrapes every last bit of chocolate.
- Rolling Pin or Meat Mallet: For crushing the candy canes. Put them in a zip-top bag, wrap it in a kitchen towel (so you don’t poke holes in the bag), and go to town. It’s loud and messy and wonderful.
- Offset Spatula (optional but helpful): For spreading the chocolate into an even layer. A regular spatula works too, but an offset one gives you more control.
- Sharp Knife: For cutting the bark into pieces once it’s set. Or you can just break it with your hands, which is what I usually do because it looks more rustic.
If you don’t have a double boiler, you can melt chocolate in the microwave. Use a microwave-safe bowl and heat in 30-second bursts, stirring between each. Just be careful—chocolate can go from melted to burnt in seconds. I learned this the hard way when I melted a beautiful bar of dark chocolate into a grainy, sad mess.
Preparation Method
- Prepare your pan. Line a baking sheet with parchment paper or aluminum foil. Make sure the paper comes up the sides a bit so the chocolate doesn’t leak out. I like to use binder clips to hold the parchment in place, but that’s optional. Set the pan aside.
- Crush the candy canes. Place the candy canes in a sturdy zip-top bag. Wrap the bag in a kitchen towel (trust me on this—it prevents tiny holes from forming). Use a rolling pin or even a heavy skillet to crush them into small pieces. You want a mix of fine dust and small chunks for texture. Don’t pulverize them completely; those little crunchy bits are the best part. Set aside about 2 tablespoons for the final garnish.
- Melt the dark chocolate. Fill a saucepan with about an inch of water and bring it to a gentle simmer. Place your dark chocolate in a heatproof bowl and set it over the saucepan, making sure the bottom of the bowl doesn’t touch the water. Stir occasionally with a rubber spatula until the chocolate is completely smooth and glossy. This should take about 3-5 minutes. If you’re using the microwave, heat in 30-second bursts, stirring between each.
- Add the peppermint extract. Once the dark chocolate is melted, remove the bowl from the heat. Stir in 1/4 teaspoon of peppermint extract. Taste a tiny bit (careful, it’s hot!) and add more if you want a stronger mint flavor. I usually stick with 1/4 teaspoon for the dark layer because the white chocolate layer will also have extract.
- Spread the dark chocolate. Pour the melted dark chocolate onto the prepared baking sheet. Use an offset spatula or the back of a spoon to spread it into an even layer, about 1/4 inch thick. Don’t worry if it’s not perfect—the white chocolate layer will cover any imperfections. Place the pan in the refrigerator for 10-15 minutes, or until the chocolate is firm to the touch but not completely hard.
- Melt the white chocolate. While the dark chocolate is setting, melt the white chocolate using the same double boiler method. White chocolate is more delicate, so keep the heat low and stir frequently. Remove it from the heat as soon as it’s smooth—overheating will make it seize and turn grainy. Stir in the remaining 1/4 teaspoon of peppermint extract.
- Add the white chocolate layer. Remove the pan from the refrigerator. Pour the melted white chocolate over the set dark chocolate layer. Gently spread it into an even layer, being careful not to press too hard and mix the two layers. You want them to stay distinct.
- Create the swirl (optional but pretty). If you want that classic marbled look, take a toothpick or a skewer and gently swirl it through the white chocolate, barely touching the dark layer underneath. Don’t over-swirl, or you’ll end up with a muddy brown mess. Two or three passes is plenty.
- Sprinkle the candy canes. Immediately sprinkle the crushed candy canes over the top. Press them in very gently so they stick. Use the reserved 2 tablespoons for a final, even sprinkle. This is the moment where it starts to look like real peppermint bark!
- Set the bark. Place the pan back in the refrigerator for at least 1 hour, or until the bark is completely firm. If you’re in a hurry, you can pop it in the freezer for 30 minutes. I usually let it set overnight because I’m impatient and I like knowing it’s fully hardened.
- Break into pieces. Once the bark is set, lift it out of the pan using the parchment paper. Peel off the paper from the back. Then, break the bark into irregular pieces with your hands, or use a sharp knife to cut it into neat squares. I prefer breaking it because the jagged edges look more rustic and homemade.
A quick note: If your chocolate seizes (turns grainy and lumpy), don’t panic. Stir in a teaspoon of coconut oil or vegetable shortening and whisk vigorously. It should smooth out. This happens to everyone at least once—it’s a rite of passage in chocolate-making.
Cooking Tips & Techniques
I’ve made this recipe more times than I care to admit, and I’ve learned a few things the hard way. Here are my best tips for perfect peppermint bark every time:
Don’t skip the parchment paper. I know it’s tempting to just spray the pan with cooking spray, but the chocolate will stick and you’ll end up with a crumbled mess. Parchment paper lifts right off, and the bark stays intact. Aluminum foil works in a pinch, but parchment is better.
Watch your temperatures. Chocolate is finicky. Dark chocolate melts best between 115-120°F, while white chocolate is happy around 100-110°F. If you overheat either one, they’ll seize. I use an instant-read thermometer when I’m being careful, but honestly, I usually just go by feel—when it’s mostly melted and I can stir it smooth, it’s done.
Let the dark layer set properly. This is the most common mistake I see. If the dark chocolate isn’t fully set before you add the white layer, the two will blend together and you’ll lose that beautiful contrast. Give it the full 10-15 minutes in the fridge, and if it’s still soft, wait longer. Better to be patient than to rush and ruin it.
Crush candy canes the right way. Put them in a bag, wrap it in a towel, and go to town with a rolling pin. But don’t crush them too finely—you want some bigger pieces for crunch. I like to leave a few chunks that are about the size of a pea. Also, crush them right before you use them; they lose their crunch if they sit out too long.
Work in a cool, dry kitchen. Humidity is chocolate’s enemy. If your kitchen is warm or steamy, the chocolate might bloom (develop white streaks) or refuse to set properly. I’ve made this on humid summer days and it worked fine, but it took longer to set. If you’re in a rush, use the freezer instead of the fridge.
Use a sharp knife for clean cuts. If you’re cutting the bark into squares (instead of breaking it), use a large, sharp chef’s knife. Run it under hot water, dry it off, and make one clean cut. Wipe the knife between cuts for the cleanest edges. This is how you get those beautiful, gift-worthy pieces.
I once forgot to add the peppermint extract entirely. The bark was just… chocolate. Tasty chocolate, sure, but not peppermint bark. I learned to set out all my ingredients before I start, and I double-check the extract before I pour. It’s a small step that saves a lot of disappointment.
Variations & Adaptations
One of the best things about this recipe is how easy it is to customize. Here are some variations I’ve tried and loved:
Dark Chocolate Only: If you’re not a fan of white chocolate (I get it—it’s divisive), just use all dark chocolate. Double the dark chocolate to 24 ounces, add the full 1/2 teaspoon of peppermint extract, and proceed as usual. The result is a more intense, less sweet bark that’s absolutely delicious.
Milk Chocolate Version: Swap the dark chocolate for milk chocolate if you prefer a milder flavor. Keep the white chocolate layer for contrast. This version is sweeter and more kid-friendly. I’ve made it for classroom parties and it disappears fast.
Vegan Adaptation: Use dairy-free dark chocolate (most are naturally vegan) and a vegan white chocolate alternative. I’ve tried the brand “Enjoy Life” for the white layer, and while it doesn’t melt quite as smoothly, it still tastes great. Add a teaspoon of coconut oil to help it spread.
Extra Peppermint Kick: For peppermint lovers, add a few drops of peppermint oil (not extract) to the dark chocolate layer. Peppermint oil is much stronger, so start with just 2-3 drops. You can also mix crushed candy canes into the white chocolate before spreading it for peppermint in every bite.
Topping Variations: Beyond candy canes, try crushed toffee bits, chopped nuts (almonds or pecans work well), or a sprinkle of flaky sea salt. The salt is especially good with the dark chocolate—it brings out the richness and balances the sweetness. I’ve also added dried cranberries for a tart pop of color.
Holiday Colors: Use red and green sprinkles instead of candy canes for a festive look that’s less minty. This is great if you’re making it for people who don’t love peppermint. I’ve done this for a “Christmas in July” party and it was a hit.
My personal favorite variation? I add a thin layer of crushed pretzels between the dark and white chocolate layers. The salty crunch is incredible with the sweet chocolate. It’s a little extra work, but so worth it.
Serving & Storage Suggestions
This peppermint bark is best served at room temperature. The chocolate is snappy, the candy canes are crunchy, and the flavors are most pronounced. If you’ve stored it in the fridge, let it sit out for about 10 minutes before serving.
For a beautiful presentation, arrange the pieces on a festive plate or in a decorative tin. I like to stack them in a small mason jar or a cellophane bag tied with a ribbon for gifting. Add a little tag with the ingredients and a personal note—it makes the gift feel so much more thoughtful.
Peppermint bark pairs wonderfully with a cup of hot cocoa, coffee, or a peppermint mocha. It’s also lovely alongside a cheese board—the sweetness contrasts beautifully with sharp cheddar or creamy brie. I’ve even crumbled it over vanilla ice cream for an impromptu sundae.
Storage Instructions: Store the bark in an airtight container at room temperature for up to 2 weeks. If your kitchen is warm, keep it in the refrigerator for up to 3 weeks. The bark also freezes beautifully—wrap it tightly in plastic wrap and then foil, and freeze for up to 3 months. Thaw at room temperature for about 30 minutes before serving.
A word of caution: Don’t store peppermint bark near other foods, especially ones with strong odors. Chocolate absorbs smells like a sponge. I once stored it next to some onions and ended up with onion-flavored chocolate. Not my finest moment.
The flavors actually develop and mellow over time. I think the bark tastes even better on day two or three, once the peppermint has had a chance to meld with the chocolate. If you can resist eating it all at once, you’re in for a treat.
Nutritional Information & Benefits
Let’s be real—this is a treat, not a health food. But that doesn’t mean it’s without its merits. Here’s a rough estimate per serving (about 1 ounce, or 1/12 of the recipe):
| Nutrient | Amount |
|---|---|
| Calories | 180-200 |
| Total Fat | 12g |
| Saturated Fat | 7g |
| Carbohydrates | 20g |
| Sugar | 17g |
| Protein | 2g |
| Fiber | 1g |
Dark chocolate is actually a decent source of antioxidants, specifically flavonoids, which can support heart health. It also contains iron, magnesium, and zinc. The peppermint can aid digestion and provide a refreshing, calming effect. So while this isn’t a superfood, it’s not empty calories either.
For those with dietary concerns: this recipe contains dairy (from the white chocolate) and may contain traces of nuts depending on the chocolate brand you choose. It’s gluten-free as written, but double-check your candy canes—some brands use wheat-based stabilizers. If you’re vegan, use the adaptations I mentioned earlier.
I like to think of this bark as a “sometimes food.” It’s perfect for holidays, celebrations, and those moments when you just need something sweet and special. A small piece goes a long way, and it’s so rich that you’re satisfied with just a little.
Conclusion
This peppermint bark has become my go-to holiday treat, and I think it’ll become yours too. It’s simple enough for a weeknight, impressive enough for a party, and delicious enough to make you forget about all those complicated recipes you’ve been eyeing. The best part? It started as a mistake. That happy accident taught me that sometimes the simplest things are the best.
I hope you give this recipe a try, and I hope you love it as much as I do. Feel free to customize it—add your favorite toppings, switch up the chocolate, make it your own. That’s the beauty of a recipe this forgiving. And if you do make it, I’d love to hear about it. Drop a comment below and tell me how it turned out, or share your own twist on this classic treat.
Happy holidays, happy baking, and remember: the best recipes are the ones that come together when you least expect it. Here’s to happy accidents and delicious chocolate!
Frequently Asked Questions
Can I use chocolate chips instead of chocolate bars?
Yes, you can use chocolate chips. Just be aware that some chips have stabilizers that prevent them from melting as smoothly. Stir them slowly and add a teaspoon of coconut oil if they seem thick. Ghirardelli chips work well for this recipe.
Why did my white chocolate seize up?
White chocolate is more delicate than dark chocolate and seizes easily if it gets too hot or if any water gets into the bowl. Make sure your bowl and spatula are completely dry, and melt the white chocolate over low heat, stirring constantly. If it seizes, try stirring in a teaspoon of vegetable shortening.
Can I make this without a double boiler?
Absolutely! You can melt the chocolate in a microwave-safe bowl in 30-second bursts, stirring between each. Or you can use a heatproof bowl set over a pot of simmering water. Just make sure the bowl doesn’t touch the water.
How long does peppermint bark last?
Stored in an airtight container at room temperature, it stays fresh for up to 2 weeks. In the refrigerator, it lasts up to 3 weeks. You can also freeze it for up to 3 months—just wrap it tightly in plastic wrap and foil.
Can I use peppermint oil instead of extract?
Yes, but be careful—peppermint oil is much more concentrated. Start with just 2-3 drops and taste as you go. Too much can make the bark taste like toothpaste. Stick with extract for a milder, more balanced flavor.
Pin This Recipe!
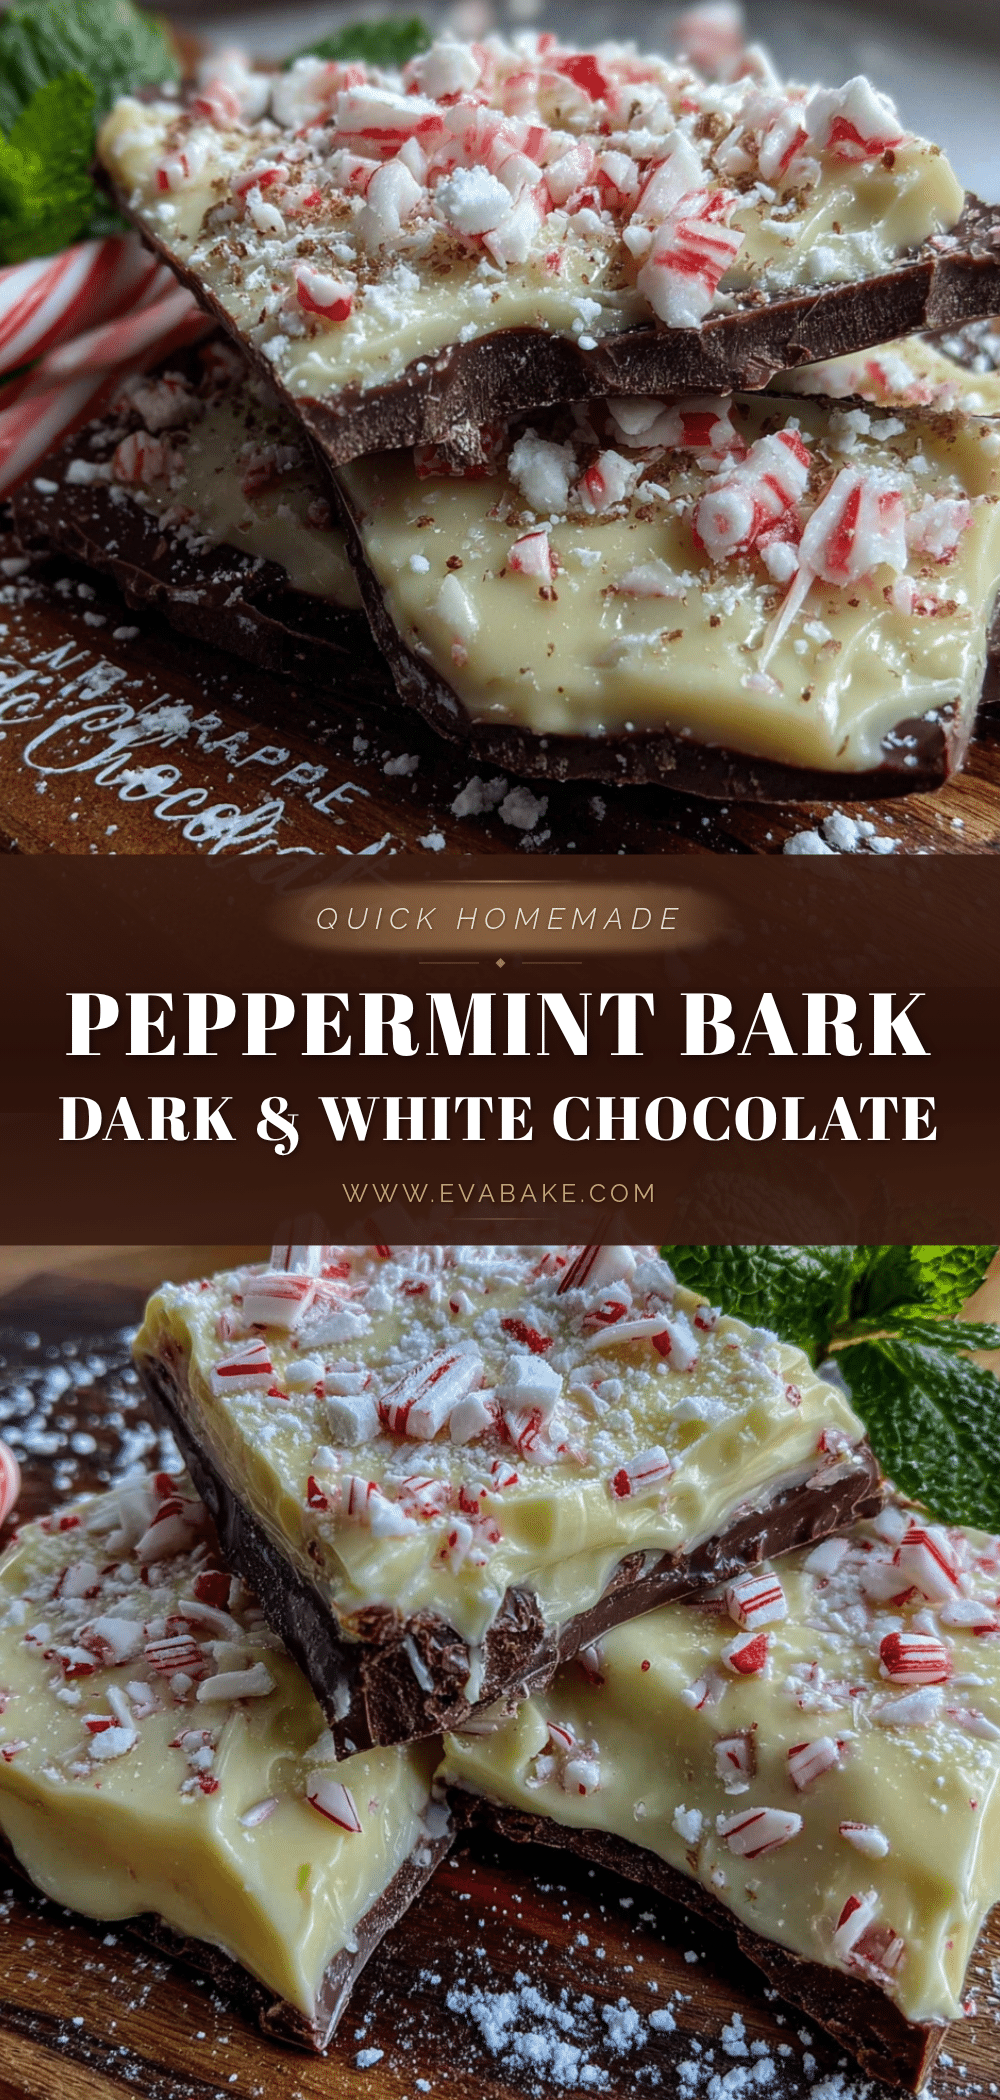
Easy Homemade Peppermint Bark with Dark & White Chocolate

This quick and easy peppermint bark is made with just four ingredients and 15 minutes of active work. It’s the perfect holiday treat for gifting or enjoying at home, with a beautiful contrast of dark and white chocolate and a crunchy peppermint topping.
- Prep Time: 15 minutes
- Cook Time: 5 minutes
- Total Time: 1 hour 20 minutes (including chilling)
- Yield: 12 servings 1x
- Category: Dessert
- Cuisine: American
Ingredients
- 12 oz (340g) dark chocolate (60-70% cocoa), chopped
- 12 oz (340g) white chocolate, chopped
- 1/2 teaspoon peppermint extract
- 6–8 candy canes (about 1/2 cup crushed)
- 1 teaspoon coconut oil or vegetable shortening (optional, for smoother melting)
Instructions
- Line a baking sheet with parchment paper or aluminum foil, letting it come up the sides. Set aside.
- Place candy canes in a sturdy zip-top bag, wrap in a kitchen towel, and crush with a rolling pin or heavy skillet into small pieces (mix of fine dust and small chunks). Reserve 2 tablespoons for garnish.
- Fill a saucepan with about 1 inch of water and bring to a gentle simmer. Place dark chocolate in a heatproof bowl and set over the saucepan (bowl should not touch water). Stir occasionally until completely smooth and glossy, about 3-5 minutes. Alternatively, microwave in 30-second bursts, stirring between each.
- Remove bowl from heat and stir in 1/4 teaspoon peppermint extract. Taste and adjust if desired.
- Pour melted dark chocolate onto prepared baking sheet and spread into an even layer about 1/4 inch thick. Refrigerate for 10-15 minutes until firm to the touch but not completely hard.
- While dark chocolate sets, melt white chocolate using the same double boiler method (or microwave). Keep heat low and stir frequently until smooth. Remove from heat and stir in remaining 1/4 teaspoon peppermint extract.
- Remove pan from refrigerator. Pour melted white chocolate over set dark chocolate and gently spread into an even layer, being careful not to mix the layers.
- Optional: Use a toothpick or skewer to gently swirl through the white chocolate, barely touching the dark layer, for a marbled effect. Do not over-swirl.
- Immediately sprinkle crushed candy canes over the top, pressing in gently. Use reserved 2 tablespoons for final sprinkle.
- Refrigerate for at least 1 hour (or freeze for 30 minutes) until completely firm.
- Lift bark out of pan using parchment paper. Peel off paper and break into irregular pieces with hands or cut into squares with a sharp knife.
Notes
For best results, use good-quality chocolate. Dark chocolate with 60-70% cocoa balances sweetness. White chocolate should contain cocoa butter. Crush candy canes just before using for maximum crunch. Work in a cool, dry kitchen to prevent chocolate from blooming. If chocolate seizes, stir in a teaspoon of coconut oil or vegetable shortening. Store in an airtight container at room temperature for up to 2 weeks, refrigerate for up to 3 weeks, or freeze for up to 3 months.
Nutrition
- Serving Size: 1 ounce (about 1/12
- Calories: 190
- Sugar: 17
- Sodium: 20
- Fat: 12
- Saturated Fat: 7
- Carbohydrates: 20
- Fiber: 1
- Protein: 2
Keywords: peppermint bark, holiday treat, chocolate bark, easy dessert, homemade gift, dark chocolate, white chocolate, candy cane


