This was supposed to be a batch of cinnamon rolls. I had the butter softening on the counter, the yeast proofing in a warm bowl, and my favorite rolling pin ready to go. But somewhere between answering a text from my sister and realizing I was out of bread flour, the whole plan unraveled. I stood there staring at the overripe bananas on my counter—three of them, practically begging to be used—and felt that familiar kitchen panic creeping in. You know that feeling when you have a vision for something elaborate and the universe just laughs at you? Yeah, that was my Tuesday afternoon.
I grabbed the wrong mixing bowl—my big ceramic one instead of the smaller stainless steel—and honestly, I was too annoyed to swap it out. The butter was already too soft from sitting out, the bananas were practically liquid, and I didn’t have the energy to drag out my stand mixer from the back of the cabinet. So I grabbed a wooden spoon, mashed those bananas with more force than necessary, and just started mixing. No plan. No recipe pulled up on my phone. Just butter, sugar, eggs, bananas, flour, and a prayer that something edible would come out of it.
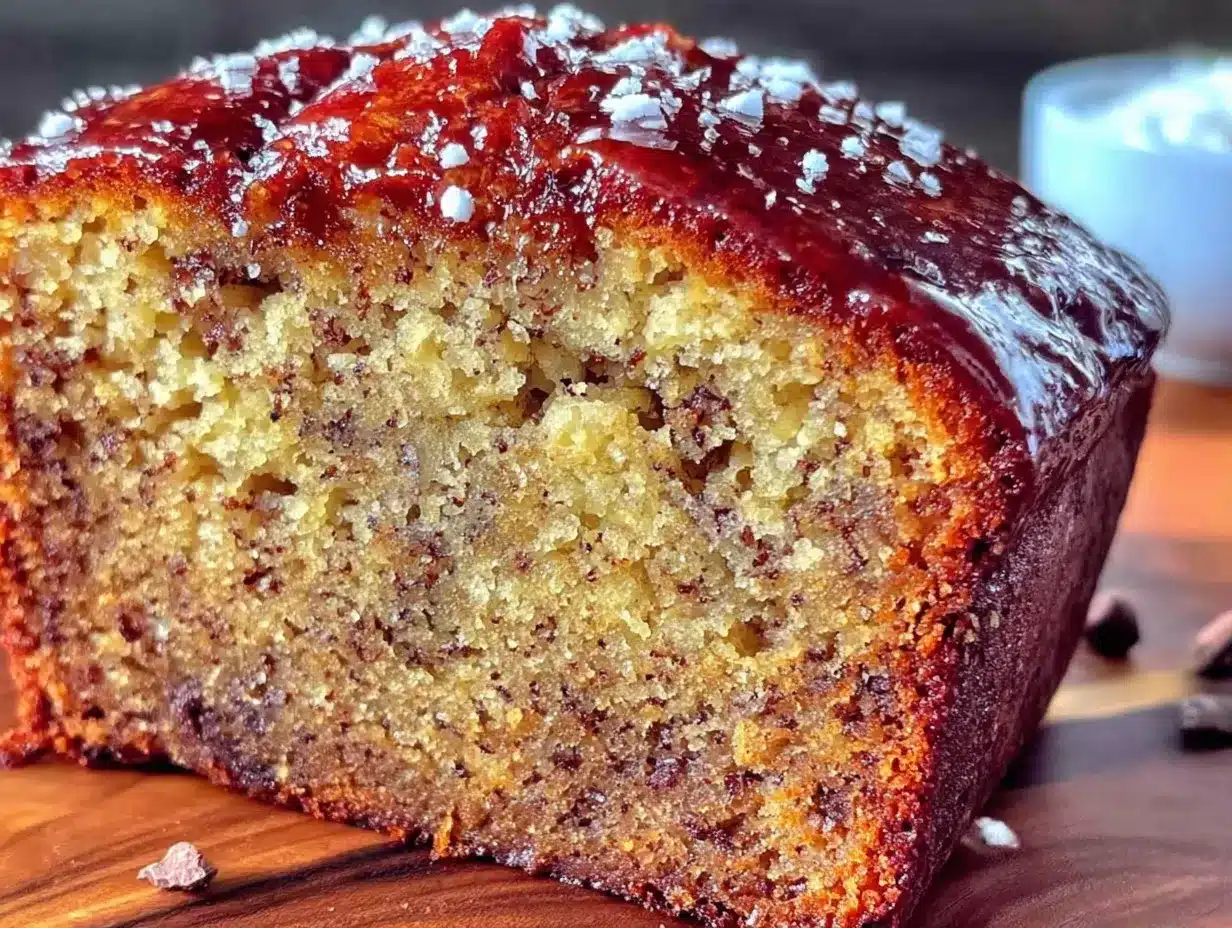
What came out of the oven was nothing like the cinnamon rolls I’d planned. It was better. This cozy classic banana bread—made without a mixer, born from a moment of frustration—turned out so tender and moist that I actually laughed when I pulled it from the pan. The top had that perfect crackly dome, the edges were caramelized just right, and the whole kitchen smelled like comfort. I’ve made it every week since then. Maybe you’ve been there too—staring down a kitchen fail that somehow becomes your favorite thing. This banana bread is that story, baked into something you can actually eat.
Why You’ll Love This Recipe
Let me tell you why this banana bread has earned a permanent spot in my weekly rotation. I’ve tested it at least a dozen times now, tweaking the ratios and timing until it felt just right. Here’s what makes it stand out:
- No Mixer Required: You only need a bowl and a wooden spoon or spatula. Less cleanup, less fuss, more banana bread in your life.
- Simple Pantry Ingredients: Butter, sugar, eggs, flour, baking soda, salt, and bananas. That’s it. No buttermilk, no sour cream, no specialty flours.
- Perfect for Cozy Mornings: This bread pairs beautifully with coffee or tea, making it ideal for slow weekend breakfasts or afternoon pick-me-ups.
- Crowd-Pleasing Texture: The inside is incredibly moist and tender, while the outside has that satisfying golden crust. Everyone who tries it asks for the recipe.
- Forgiving and Foolproof: Even if your bananas are super ripe or your butter gets a little too soft, this recipe works. I’ve messed up every step at least once, and it still came out delicious.
What makes this different from other banana bread recipes is the technique. Most recipes call for creaming butter and sugar with a mixer, but I found that mashing the bananas first and then stirring everything together by hand creates a denser, more tender crumb. It’s almost like a cross between banana bread and banana cake—moist without being gummy, sweet without being cloying. This isn’t just another version of banana bread. It’s the one you’ll actually make on a Tuesday night when you have ripe bananas and zero energy. And that’s the kind of recipe worth keeping.
What Ingredients You Will Need
This recipe uses simple, wholesome ingredients that you probably already have in your kitchen. The bananas do the heavy lifting here, providing both sweetness and moisture, so the rest of the ingredients just support them. Here’s what you’ll need:
For the Banana Bread
- 3 large ripe bananas, mashed (about 1 ½ cups or 340g) — The riper the better. Look for bananas with lots of brown spots; they’re sweeter and easier to mash.
- ½ cup (113g) unsalted butter, melted and slightly cooled — I use Kerrygold or Land O’Lakes for the best flavor. Let it cool for a few minutes after melting so it doesn’t cook the eggs.
- ¾ cup (150g) granulated sugar — Regular white sugar works perfectly. You can reduce it to ½ cup if your bananas are very sweet.
- 1 large egg, room temperature — Cold eggs can seize the melted butter. Let yours sit out for 30 minutes, or place it in warm water for 5 minutes.
- 1 teaspoon vanilla extract — Pure vanilla extract adds depth. Imitation works in a pinch, but the real stuff makes a difference here.
- 1 ½ cups (190g) all-purpose flour — Spoon and level your flour for accuracy. Scooping directly can pack in too much and make the bread dry.
- 1 teaspoon baking soda — This is the only leavening agent. Make sure it’s fresh—test it by dropping a bit into vinegar; it should fizz.
- ½ teaspoon salt — Fine sea salt or table salt. Don’t skip it—it balances the sweetness and enhances the banana flavor.
Optional Add-Ins
- ½ cup (60g) chopped walnuts or pecans — Toast them first for extra crunch and flavor.
- ½ cup (90g) chocolate chips — Semi-sweet or dark chocolate chips are my go-to. Milk chocolate makes it sweeter.
- 1 teaspoon cinnamon — Adds warmth and pairs beautifully with banana.
For substitutions, you can use coconut oil instead of butter for a dairy-free version, though the texture will be slightly less rich. Swap all-purpose flour with a 1:1 gluten-free baking blend if needed. If you’re out of granulated sugar, brown sugar works wonderfully and adds a deeper flavor—just reduce the amount slightly since brown sugar is more moist.
Equipment Needed
The beauty of this recipe is that you don’t need fancy equipment. Here’s what you’ll need:
- Large mixing bowl — Any size works, but a 4-quart bowl gives you room to mix without splattering.
- Wooden spoon or silicone spatula — I prefer a wooden spoon for the satisfying feel of mixing, but a spatula works great too.
- 9×5-inch loaf pan — A standard loaf pan is perfect. If you use an 8×4-inch pan, the bread will be taller and可能需要增加5-10分钟烘烤时间。
- Measuring cups and spoons — Dry measuring cups for flour and sugar, liquid measuring cup for melted butter.
- Fork or potato masher — For mashing the bananas. A fork works fine; a potato masher is faster.
- Parchment paper — Lining the pan makes removal effortless. You can also grease the pan with butter or non-stick spray.
- Cooling rack — Allows air to circulate so the bread cools evenly and doesn’t get soggy on the bottom.
If you don’t have a loaf pan, you can bake this in an 8×8-inch square pan—just reduce the baking time to 35-40 minutes. I’ve also used a muffin tin for banana bread muffins, baking for 18-22 minutes. The recipe is forgiving that way.
Preparation Method
Let’s get baking! This recipe comes together in about 15 minutes of active time. Follow these steps carefully, and you’ll have perfect banana bread every time.
- Preheat your oven to 350°F (175°C). Position the rack in the center of the oven. Line your 9×5-inch loaf pan with parchment paper, leaving some overhang on the long sides for easy lifting. If you don’t have parchment, grease the pan generously with butter or non-stick spray.
- Mash the bananas. In your large mixing bowl, mash the ripe bananas with a fork or potato masher until mostly smooth. A few small lumps are fine—they add texture. You should have about 1 ½ cups of mashed banana. If your bananas are smaller, use four instead of three.
- Add the melted butter. Pour the slightly cooled melted butter over the mashed bananas. Stir until combined. The mixture will look a bit separated at first, but keep stirring—it will come together. This step is important because the butter coats the banana fibers and helps create that tender crumb.
- Mix in the sugar, egg, and vanilla. Add the granulated sugar and stir vigorously for about 30 seconds until the sugar starts to dissolve. Crack the egg into a small bowl first (just in case you get shell pieces), then add it to the banana mixture along with the vanilla extract. Stir until everything is well combined and smooth. The batter will look glossy and slightly thick.
- Combine the dry ingredients separately. In a medium bowl, whisk together the all-purpose flour, baking soda, and salt. Whisking aerates the flour and distributes the baking soda evenly, which helps the bread rise uniformly. If you’re using cinnamon or other spices, add them here.
- Fold the dry ingredients into the wet ingredients. Add the flour mixture to the banana mixture in three additions, folding gently after each addition with your spatula or wooden spoon. Fold just until you can’t see any more streaks of flour—overmixing will develop gluten and make the bread tough. A few lumps are perfectly fine. If you’re adding nuts or chocolate chips, fold them in at the end with the last addition of flour.
- Pour the batter into the prepared pan. Scrape the batter into your lined loaf pan and spread it evenly with your spatula. The batter will be thick and slightly lumpy—that’s normal. Tap the pan on the counter a few times to release any air bubbles.
- Bake for 55-65 minutes. Place the pan in the preheated oven and bake until a toothpick inserted into the center comes out clean or with just a few moist crumbs. The top should be deep golden brown and cracked beautifully. If the top is browning too quickly after 40 minutes, tent the pan loosely with aluminum foil.
- Cool in the pan for 10 minutes. Remove the pan from the oven and place it on a cooling rack. Let the bread cool in the pan for exactly 10 minutes—this allows it to set without sticking. Then lift the bread out using the parchment overhang and transfer it to the cooling rack to cool completely.
- Slice and serve. Wait until the bread is completely cool before slicing, about 1 hour. Slicing too early can cause the bread to crumble. Use a serrated knife for clean slices.
Sensory Cue: When the bread is done, the kitchen will smell like caramelized bananas and warm butter. The top should look deeply golden and cracked, and the edges will have pulled away slightly from the pan. If you tap the top gently, it should feel firm and spring back slightly.
Cooking Tips & Techniques
After making this banana bread more times than I can count, I’ve learned a few things the hard way. Here are my best tips for getting perfect results every time:
Don’t overmix the batter. This is the most common mistake. When you add the flour, stir just until it disappears. Overmixing develops gluten, which makes the bread dense and tough instead of tender and moist. I learned this after making a batch that came out like a brick—I was so focused on getting the batter smooth that I stirred for a full two minutes. Never again.
Use overripe bananas. The best bananas for this recipe are almost entirely brown with a few black spots. They should be soft and smell intensely sweet. If your bananas aren’t ripe enough, you can speed things up by placing them on a baking sheet in a 300°F oven for 15-20 minutes until the skins turn black. Let them cool before using.
Measure flour correctly. Spoon the flour into your measuring cup and level it off with a knife. Scooping directly from the bag can pack in 20-30% more flour, leading to dry banana bread. If you have a kitchen scale, 190 grams is the sweet spot.
Room temperature ingredients matter. The egg should be at room temperature so it emulsifies properly with the melted butter. Cold egg can cause the butter to seize and create a lumpy batter. Place your egg in a bowl of warm water for 5 minutes if you forgot to take it out ahead of time.
Check for doneness early. Ovens vary wildly. Start checking your bread at 50 minutes by inserting a toothpick into the center. If it comes out with wet batter, bake for another 5 minutes and check again. My oven runs hot, so I usually start checking at 45 minutes.
Variations & Adaptations
This banana bread is incredibly versatile. Here are some of my favorite variations:
Chocolate Chip Banana Bread
Fold in ½ cup of semi-sweet chocolate chips along with the flour. The chocolate melts into pockets of gooey goodness throughout the bread. I’ve also used dark chocolate chunks for a more intense flavor.
Vegan Banana Bread
Replace the butter with ½ cup melted coconut oil and use a flax egg (1 tablespoon ground flaxseed mixed with 3 tablespoons water, left to sit for 5 minutes). The texture will be slightly denser but still delicious. I tested this version for a friend with dairy allergies and it was a hit.
Gluten-Free Banana Bread
Substitute the all-purpose flour with a 1:1 gluten-free baking blend that contains xanthan gum. I recommend King Arthur Measure for Measure or Bob’s Red Mill. Add an extra tablespoon of flour since gluten-free blends can be heavier.
Spiced Banana Bread
Add 1 teaspoon cinnamon, ½ teaspoon nutmeg, and ¼ teaspoon ground ginger to the dry ingredients. This version feels extra cozy for fall and winter mornings. I made this for Thanksgiving brunch once and it disappeared in minutes.
Banana Nut Bread
Fold in ½ cup of toasted walnuts or pecans. Toast them in a dry skillet over medium heat for 3-4 minutes until fragrant—this brings out their natural oils and adds incredible crunch.
Serving & Storage Suggestions
This banana bread is best served slightly warm or at room temperature. For an extra treat, spread a slice with salted butter, cream cheese, or a drizzle of honey. It pairs beautifully with a hot cup of coffee, chai tea, or a cold glass of milk.
Storage: Store leftover banana bread in an airtight container at room temperature for up to 4 days. The moisture actually improves over the first 24 hours, so day-old banana bread is often even better than fresh. If your kitchen is warm, you can store it in the refrigerator, but let slices come to room temperature before serving for the best texture.
Freezing: This banana bread freezes beautifully. Wrap the completely cooled loaf tightly in plastic wrap, then in aluminum foil, and freeze for up to 3 months. You can also freeze individual slices for quick grab-and-go breakfasts. To thaw, leave at room temperature for about 2 hours, or pop a slice in the microwave for 20-30 seconds.
Reheating: For that just-baked experience, warm slices in a 300°F oven for 5-7 minutes, or in a toaster oven. The edges get slightly crisp while the center stays soft. I’ve been known to eat it cold straight from the fridge too—it’s that good.
Nutritional Information & Benefits
Here’s the approximate nutritional breakdown for one slice (based on 10 slices per loaf, without add-ins):
| Nutrient | Amount per Slice |
|---|---|
| Calories | 245 |
| Total Fat | 11g |
| Saturated Fat | 7g |
| Cholesterol | 45mg |
| Sodium | 220mg |
| Total Carbohydrates | 35g |
| Dietary Fiber | 2g |
| Sugars | 18g |
| Protein | 3g |
Bananas are a great source of potassium, vitamin B6, and vitamin C. They also provide natural sweetness, which allows us to use less refined sugar. This recipe is relatively low in added sugar compared to many banana bread recipes, and the butter provides healthy fats that help you feel satisfied. If you’re watching your sugar intake, you can reduce the sugar to ½ cup without compromising the texture too much. This recipe is vegetarian and can easily be made dairy-free or vegan with the substitutions mentioned above. It contains gluten, eggs, and dairy in its standard form.
Conclusion
This cozy classic banana bread is proof that the best recipes often come from the most unexpected places. What started as a failed attempt at cinnamon rolls turned into a weekly staple that my family actually requests by name. It’s the kind of recipe that doesn’t demand perfection—it just asks for ripe bananas, a wooden spoon, and a little bit of trust.
I love this banana bread because it reminds me that not everything has to go according to plan. Some of the best things in life—and in the kitchen—come from those moments when we let go of control and just make something with what we have. Whether you’re baking for a cozy weekend breakfast, a thoughtful homemade gift, or just because you have bananas that need using, this recipe will never let you down.
I’d love to hear how yours turns out! Did you add chocolate chips or nuts? Did you make it vegan or gluten-free? Drop a comment below and share your version. And if you loved this recipe, please share it with a friend who needs a little cozy baking in their life. Happy baking!
Frequently Asked Questions
Can I use frozen bananas for this recipe?
Absolutely! Frozen bananas work great. Thaw them completely at room temperature, then drain off any excess liquid before mashing. The texture will be slightly softer, but the flavor is even more concentrated.
Why did my banana bread sink in the middle?
A sunken middle usually means the bread was underbaked or the oven temperature was too low. Make sure your oven is fully preheated to 350°F and check doneness with a toothpick. Also, avoid opening the oven door during the first 40 minutes of baking.
Can I make this recipe into muffins?
Yes! Divide the batter among a greased or lined 12-cup muffin tin. Bake at 350°F for 18-22 minutes, or until a toothpick inserted into the center comes out clean. This makes about 12 standard muffins.
How do I know when my bananas are ripe enough?
Look for bananas that are mostly yellow with lots of brown spots or even fully brown. They should be soft to the touch and smell sweet. If they’re still green or mostly yellow, they won’t be sweet or soft enough for good banana bread.
Can I reduce the sugar in this recipe?
Yes, you can reduce the sugar to ½ cup without affecting the texture too much. If your bananas are very ripe and sweet, you might even get away with ⅓ cup. Just keep in mind that sugar also contributes to the moistness and browning of the bread.
Pin This Recipe!
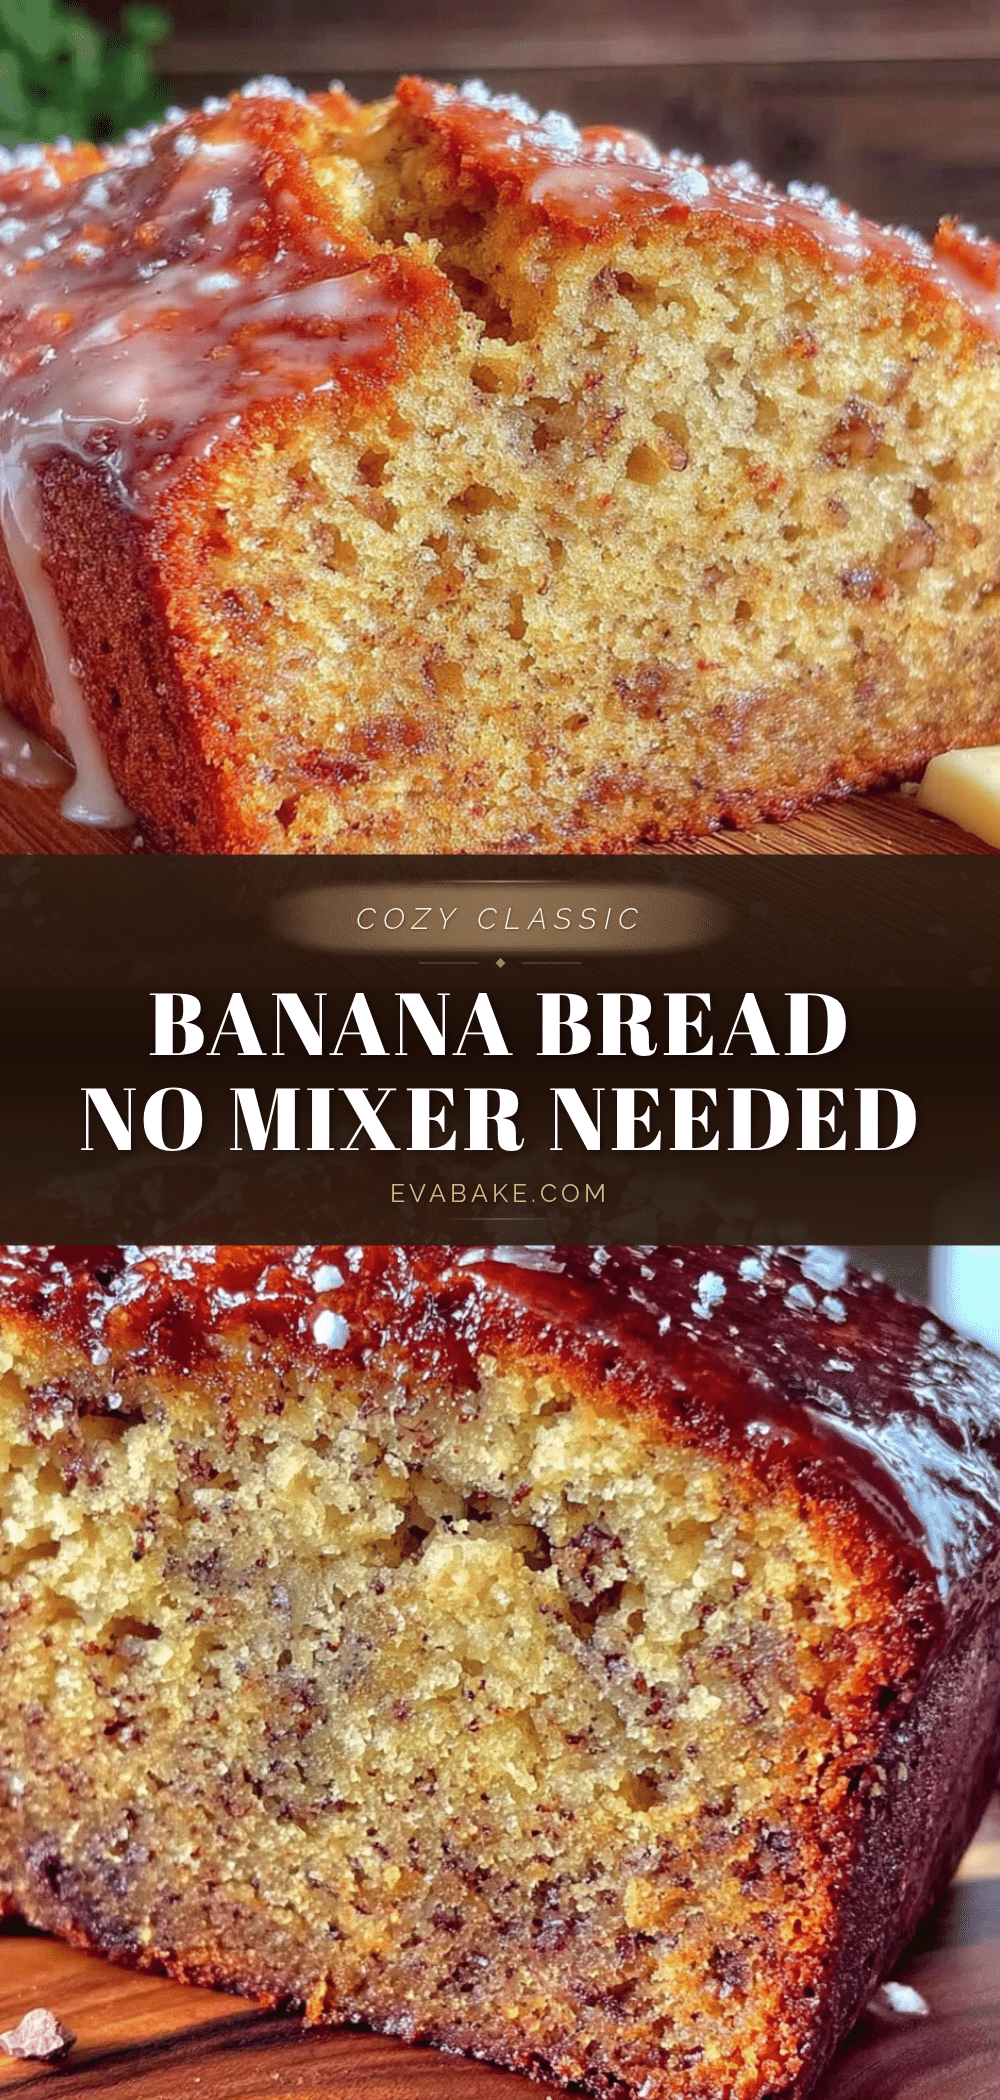
Cozy Classic Banana Bread Made Easy Without a Mixer
This tender, moist banana bread requires no mixer and uses simple pantry ingredients. Born from a kitchen mishap, it’s become a weekly staple with a perfect crackly dome and caramelized edges.
- Prep Time: 15 minutes
- Cook Time: 55-65 minutes
- Total Time: 1 hour 10 minutes to 1 hour 20 minutes
- Yield: 10 servings 1x
- Category: Dessert
- Cuisine: American
Ingredients
- 3 large ripe bananas, mashed (about 1 ½ cups or 340g)
- ½ cup (113g) unsalted butter, melted and slightly cooled
- ¾ cup (150g) granulated sugar
- 1 large egg, room temperature
- 1 teaspoon vanilla extract
- 1 ½ cups (190g) all-purpose flour
- 1 teaspoon baking soda
- ½ teaspoon salt
- ½ cup (60g) chopped walnuts or pecans (optional)
- ½ cup (90g) chocolate chips (optional)
- 1 teaspoon cinnamon (optional)
Instructions
- Preheat your oven to 350°F (175°C). Position the rack in the center of the oven. Line your 9×5-inch loaf pan with parchment paper, leaving some overhang on the long sides for easy lifting. If you don’t have parchment, grease the pan generously with butter or non-stick spray.
- In your large mixing bowl, mash the ripe bananas with a fork or potato masher until mostly smooth. A few small lumps are fine—they add texture. You should have about 1 ½ cups of mashed banana. If your bananas are smaller, use four instead of three.
- Pour the slightly cooled melted butter over the mashed bananas. Stir until combined. The mixture will look a bit separated at first, but keep stirring—it will come together.
- Add the granulated sugar and stir vigorously for about 30 seconds until the sugar starts to dissolve. Crack the egg into a small bowl first, then add it to the banana mixture along with the vanilla extract. Stir until everything is well combined and smooth.
- In a medium bowl, whisk together the all-purpose flour, baking soda, and salt. If you’re using cinnamon or other spices, add them here.
- Add the flour mixture to the banana mixture in three additions, folding gently after each addition with your spatula or wooden spoon. Fold just until you can’t see any more streaks of flour. If you’re adding nuts or chocolate chips, fold them in at the end with the last addition of flour.
- Scrape the batter into your lined loaf pan and spread it evenly with your spatula. Tap the pan on the counter a few times to release any air bubbles.
- Bake for 55-65 minutes until a toothpick inserted into the center comes out clean or with just a few moist crumbs. The top should be deep golden brown and cracked. If the top is browning too quickly after 40 minutes, tent the pan loosely with aluminum foil.
- Remove the pan from the oven and place it on a cooling rack. Let the bread cool in the pan for exactly 10 minutes. Then lift the bread out using the parchment overhang and transfer it to the cooling rack to cool completely.
- Wait until the bread is completely cool before slicing, about 1 hour. Use a serrated knife for clean slices.
Notes
Don’t overmix the batter to avoid a dense texture. Use overripe bananas (mostly brown with black spots) for best sweetness. Measure flour by spooning and leveling. Room temperature egg is important. Start checking for doneness at 50 minutes. Store in an airtight container at room temperature for up to 4 days. Freezes well for up to 3 months.
Nutrition
- Serving Size: 1 slice
- Calories: 245
- Sugar: 18
- Sodium: 220
- Fat: 11
- Saturated Fat: 7
- Carbohydrates: 35
- Fiber: 2
- Protein: 3
Keywords: banana bread, easy banana bread, no mixer banana bread, classic banana bread, moist banana bread, homemade banana bread


