My neighbor, Mrs. Gable, watched me wrestling with a bag of store-bought Halloween cookies that had crumbled into a sad pile of sugary dust. She didn’t say anything at first. Then she just pointed at her kitchen window, where I could see these little white shapes cooling on her counter, looking like tiny ghosts that had decided to take a nap. She waved me over, and I walked into her house expecting some complicated family heirloom recipe. Instead, she handed me a bowl of egg whites and said, “It’s just meringue. Kids love it. Costs almost nothing.”
Honestly, I was a little embarrassed. Here I was, spending way too much money on pre-packaged treats that my kids barely touched, and Mrs. Gable had been making these adorable ghost meringue cookies for years with ingredients she already had in her pantry. She showed me how to pipe them into little ghost shapes, and I’ll admit my first batch looked more like sad, lumpy clouds than actual ghosts. But my kids didn’t care. They thought they were hilarious. Maybe you’ve been there—spending a small fortune on Halloween treats that end up forgotten in the bottom of a plastic pumpkin bucket?
These ghost meringue cookies changed everything for our family Halloween celebrations. They are crunchy, sweet, and light as air, with the perfect amount of whimsy. The recipe is so simple that my six-year-old can help with most of the steps, and the best part is that a single batch makes dozens of cookies for just a few cents each. I keep making them because they remind me of that afternoon with Mrs. Gable, standing in her sunny kitchen, learning that the best treats don’t need fancy ingredients or complicated techniques. They just need a little patience and a lot of love.
Why You’ll Love This Recipe
Let me tell you why these ghost meringue cookies have become our go-to Halloween treat, year after year. First off, they are genuinely budget-friendly. A dozen eggs and some sugar cost a fraction of what you would spend on a bag of fancy Halloween cookies from the store. When you are feeding a family on a sensible budget, every penny counts, and this recipe delivers big on fun without breaking the bank.
- Quick & Easy: The active prep time is only about 15 minutes. Most of the time is just waiting for them to bake low and slow in the oven. You can whip these up while the kids are doing homework or watching a Halloween movie.
- Simple Ingredients: You probably already have eggs and sugar in your kitchen. No special trips to the store for exotic flavorings or expensive decorations. Just basic pantry staples that turn into something magical.
- Perfect for Halloween Parties: These are great for school parties, neighborhood gatherings, or just a fun afternoon activity. They travel well and don’t get messy like frosted cupcakes or sticky candy.
- Crowd-Pleaser: I have yet to meet a kid who doesn’t love these. They are sweet, crunchy, and just the right size for little hands. Even the picky eaters in my family gobble them up.
- Unbelievably Delicious: There is something special about homemade meringue. It melts in your mouth with a delicate sweetness that store-bought cookies just can’t match. The texture is light and airy, almost like a sweet cloud.
What makes this recipe different from all the other meringue recipes out there? It is the technique. I learned from Mrs. Gable that the secret is getting the egg whites to stiff peaks with a little cream of tartar for stability. And the low-and-slow baking method ensures they stay white and ghost-like, not brown and sad. This isn’t just another version of meringue cookies—it is my best version, tested through many batches of trial and error. Trust me, I have made plenty of mistakes along the way so you don’t have to.
These cookies are the kind that make you smile after the first bite. They are comfort food reimagined—healthier than most Halloween candy, faster to make than a complicated cake, but with the same soul-soothing satisfaction. Perfect for impressing your kids without any stress, or turning a simple Tuesday afternoon into something memorable.
What Ingredients You Will Need
This recipe uses simple, wholesome ingredients to deliver a light, sweet treat without any fuss. Most of these items are probably already in your pantry, which makes this a perfect last-minute Halloween activity.
- Egg whites: 4 large egg whites, at room temperature (this is important for maximum volume). I recommend using fresh eggs rather than carton egg whites for the best structure. Save the yolks for making homemade pudding or custard.
- Granulated sugar: 1 cup (200 grams). Regular white sugar works best. Do not use powdered sugar or brown sugar, as they will change the texture and color of the meringue.
- Cream of tartar: 1/2 teaspoon. This helps stabilize the egg whites and gives them a better structure. If you don’t have it, you can use 1 teaspoon of lemon juice or white vinegar instead.
- Vanilla extract: 1 teaspoon. Pure vanilla extract gives the best flavor, but imitation vanilla works fine too. You could also use almond extract for a different twist.
- Mini chocolate chips: 1/4 cup (optional). These are for making the ghost faces. I like using mini chocolate chips because they are the perfect size for little eyes and mouths. You could also use regular chocolate chips cut in half, or even draw faces with melted chocolate after baking.
- Pinch of salt: Just a tiny pinch helps balance the sweetness and enhances the flavor.
I always use large eggs from the store brand and they work perfectly. For the sugar, I prefer Domino or C&H because they dissolve evenly, but any brand works. The cream of tartar is something I always keep on hand for baking, but if you don’t have it, the lemon juice substitute works well in a pinch.
One important tip: make sure your bowl and beaters are completely clean and free of any grease. Even a tiny bit of oil can prevent the egg whites from whipping up properly. I like to wipe my mixing bowl with a little lemon juice on a paper towel before starting, just to be safe.
For the chocolate chips, I use Nestle Toll House mini chips because they are widely available and the perfect size. But any brand of mini chocolate chips will work. If you want to get creative, you could use candy eyes from the baking aisle, but chocolate chips are cheaper and taste better.
Equipment Needed
You don’t need any fancy equipment to make these ghost meringue cookies, which is part of their charm. Here is what you will need:
- Electric mixer: A stand mixer is ideal, but a hand mixer works just as well. You could technically whisk by hand, but your arm will get very tired. Trust me, I tried it once and regretted it.
- Large mixing bowl: Glass or metal is best. Avoid plastic bowls because they can retain grease even after washing.
- Piping bag: A disposable piping bag works great. If you don’t have one, you can use a sturdy zip-top bag with the corner snipped off. I have done this many times in a pinch.
- Large round piping tip: A Wilton 1A or similar size works perfectly. If you are using a zip-top bag, you can just snip a 1/2-inch opening.
- Baking sheets: Two large baking sheets lined with parchment paper. The parchment is essential because meringue can stick to unlined pans.
- Measuring cups and spoons: For accurate ingredient measurements.
- Spatula: A rubber spatula for scraping down the bowl.
If you don’t have a piping bag, don’t worry. You can also drop spoonfuls of meringue onto the baking sheet and use the back of a spoon to shape them into ghost-like blobs. They won’t be as perfectly shaped, but they will still taste delicious and look cute. Kids actually prefer the imperfect ones because they look more like friendly ghosts.
I bought my piping tips at a craft store for a few dollars, and they have lasted for years. Just make sure to wash them by hand and dry them completely to prevent rust.
Preparation Method
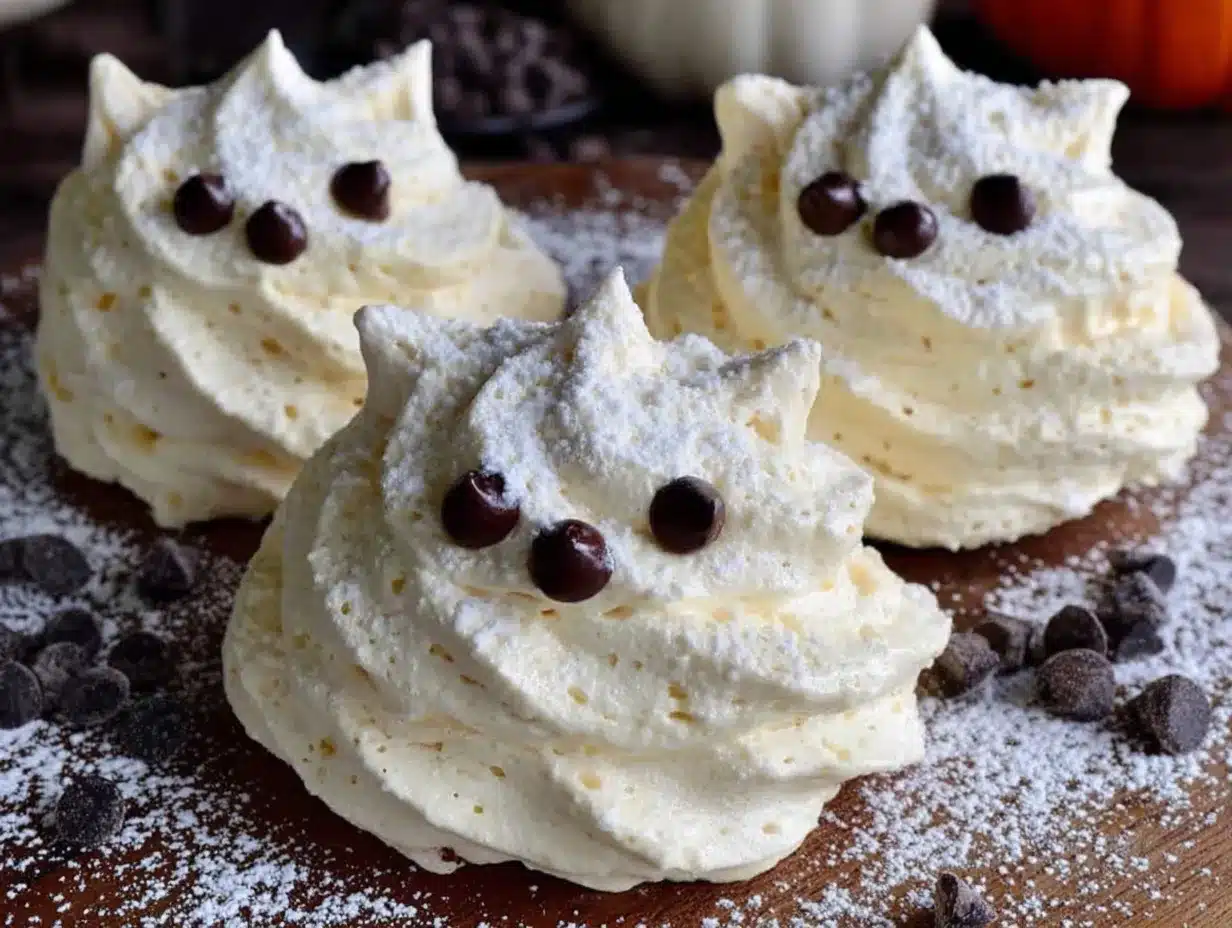
Making these ghost meringue cookies is easier than you think. Just follow these steps, and you will have a batch of adorable Halloween treats in no time.
- Preheat your oven to 200°F (95°C). This is very important. Meringue needs to bake low and slow to dry out without browning. Line two baking sheets with parchment paper and set them aside.
- Prepare your egg whites. Separate 4 large eggs while they are cold, then let the egg whites come to room temperature in your mixing bowl. This takes about 30 minutes. Room temperature egg whites whip up to a much higher volume than cold ones. I learned this the hard way after making flat, sad meringues.
- Start whipping. Add the cream of tartar and a pinch of salt to the egg whites. Begin mixing on medium speed until the mixture becomes frothy and bubbly. This takes about 1-2 minutes. The bubbles should be small and uniform.
- Add the sugar slowly. With the mixer running on medium-high speed, add the granulated sugar one tablespoon at a time. This gradual addition helps the sugar dissolve completely into the egg whites. If you dump it all in at once, your meringue might turn out grainy. I speak from experience here—my first batch was a crunchy disaster.
- Whip to stiff peaks. Continue beating on high speed for about 8-10 minutes. The mixture should become thick, glossy, and smooth. You know it is ready when you lift the beater and the meringue forms a stiff peak that stands up straight. If the peak droops over, keep beating. Also, rub a little meringue between your fingers—if it feels smooth and not grainy, the sugar has dissolved properly.
- Add vanilla. Beat in the vanilla extract on low speed just until combined. Do not overmix at this stage or you might deflate the meringue.
- Prepare your piping bag. Fit your piping bag with the large round tip. If you are using a zip-top bag, snip about 1/2 inch off one corner. Fold the top of the bag over your hand to create a cuff, then fill it with the meringue. Twist the top of the bag to seal it.
- Pipe the ghosts. Hold the piping bag straight up and down, about 1/2 inch above the parchment paper. Squeeze gently to create a round base, then pull straight up while releasing pressure to create a tall, ghost-like shape. The meringue should form a little peak on top. Make them about 2 inches tall and leave about 1 inch between each ghost. They won’t spread much during baking.
- Add the faces. Before the meringue dries, gently press two mini chocolate chips into each ghost for eyes, and one or two for a mouth. You can make them look happy, surprised, or silly. My kids always insist on making a few with crooked smiles.
- Bake. Place the baking sheets in the preheated oven and bake for 60-75 minutes. The meringues are done when they are dry to the touch and easily lift off the parchment paper. They should be white and crisp, not sticky or chewy. If they start to brown, your oven is too hot.
- Cool completely. Turn off the oven and leave the meringues inside with the door slightly open for about 30 minutes. This helps them dry out completely and prevents cracking. Then transfer them to a wire rack to cool completely.
One thing I always do is make a test ghost first. If it spreads too much, the meringue might be a little thin, and I can add a minute or two more of beating. It is a small step that saves a whole batch from being flat and sad.
Cooking Tips & Techniques
After making these ghost meringue cookies more times than I can count, I have picked up a few tricks that make the process smoother and the results more consistent. Let me share them with you.
Humidity is the enemy of meringue. If it is a rainy or humid day, your meringue might turn out sticky or chewy instead of crisp and dry. Try to make these on a dry day if possible. If you have to make them in humid weather, bake them a little longer and store them in an airtight container immediately after cooling.
Don’t overmix after adding the sugar. Once the sugar is fully incorporated and you have stiff peaks, stop beating. Overmixing can actually break down the structure of the meringue and cause it to deflate or weep during baking. I learned this after making a batch that had tiny beads of sugar syrup on the surface—not a good look for ghost cookies.
Use a thermometer if you are unsure. The ideal temperature for your oven is 200°F (95°C). Many ovens run hot or cold, so it is worth checking with an oven thermometer. If your oven runs hot, the meringues will brown instead of staying ghostly white. If it runs cold, they might not dry out properly.
Pipe with confidence. When you are piping the ghosts, try to do it in one smooth motion. Stopping and starting can create ridges or uneven shapes. If you mess up, just scrape the meringue back into the bag and try again. The meringue is very forgiving before it goes in the oven.
Make ahead and store properly. These cookies can be made a few days in advance, but they must be stored in an airtight container at room temperature. Do not refrigerate them, as the moisture in the fridge will make them sticky. If you live in a humid area, add a food-safe silica gel packet to the container to keep them crisp.
Variations & Adaptations
One of the best things about this recipe is how easy it is to customize. Here are some variations I have tried and loved.
Flavor variations: Instead of vanilla, try using peppermint extract for a minty ghost, or almond extract for a nutty flavor. You could also add a tablespoon of cocoa powder for chocolate ghosts, though they won’t be white anymore. My kids love the peppermint version during the holiday season.
Colorful ghosts: Add a few drops of gel food coloring to the meringue before piping. Gel coloring works better than liquid because it doesn’t add extra moisture. You could make orange ghosts for Halloween, green for St. Patrick’s Day, or pink for Valentine’s Day. Just be careful not to overmix when adding the color.
Dietary adaptations: These cookies are naturally gluten-free and dairy-free, which makes them perfect for kids with food allergies. Just make sure your chocolate chips are dairy-free if needed. Enjoy Life brand makes great dairy-free mini chocolate chips. The recipe is also egg-free? No, it is not, but you can try using aquafaba (the liquid from a can of chickpeas) as a replacement. I have tried it, and it works surprisingly well, though the texture is slightly different.
Different shapes: You don’t have to make ghosts. Pipe the meringue into small kisses, pumpkins (add orange coloring and a green chocolate chip stem), or even tiny witches hats. A friend of mine makes meringue bones for Halloween parties, and they are always a hit.
Size variations: Make mini ghosts by piping smaller mounds, or giant ghosts for a dramatic centerpiece. Just adjust the baking time accordingly—smaller cookies need less time, larger ones need more. I made giant ghosts once for a school party, and they were the talk of the classroom.
Serving & Storage Suggestions
These ghost meringue cookies are best served at room temperature. They are light and airy, with a satisfying crunch that melts in your mouth. I like to arrange them on a platter with some Halloween-themed napkins and maybe a few candy corn for color.
They pair beautifully with a warm cup of hot chocolate or apple cider for a cozy Halloween treat. For a party, you could set up a meringue decorating station where kids can add their own chocolate chip faces or even drizzle melted white chocolate over the top. It is a fun activity that keeps little hands busy.
For storage, place the cooled meringues in an airtight container at room temperature. They will stay fresh for up to two weeks, though they rarely last that long in my house. Do not store them in the refrigerator, as the moisture will make them sticky and soft. If you need to keep them longer, you can freeze them in a freezer-safe container for up to three months. Just thaw them at room temperature with the container lid slightly open to prevent condensation.
One thing I have noticed is that these cookies actually taste better the next day. The flavors meld together and the texture becomes even more crisp. So don’t be afraid to make them a day or two before your Halloween celebration.
Nutritional Information & Benefits
Each ghost meringue cookie (without chocolate chips) contains approximately 15-20 calories, 0 grams of fat, 4 grams of carbohydrates, and 1 gram of protein. With the mini chocolate chips, add about 5-10 calories per cookie. These are a relatively low-calorie treat compared to most Halloween candies, which can have 50-100 calories per piece.
The main ingredient, egg whites, are a good source of protein and contain no fat or cholesterol. They also provide small amounts of selenium, riboflavin, and magnesium. Of course, these cookies are still a treat and should be enjoyed in moderation, but they are a lighter option than many store-bought alternatives.
This recipe is naturally gluten-free and dairy-free (if you use dairy-free chocolate chips), making it suitable for many dietary restrictions. However, it does contain eggs, so it is not suitable for those with egg allergies. Always check your chocolate chips for potential cross-contamination if you are serving someone with severe allergies.
From a wellness perspective, I love that these cookies let my kids enjoy a Halloween treat without a massive sugar crash later. The meringue is sweet, but a little goes a long way. Plus, the act of making them together is a fun family activity that creates memories, not just empty calories.
Conclusion
These ghost meringue cookies have become a beloved tradition in our house, and I hope they become one in yours too. They are proof that you don’t need to spend a lot of money or have fancy skills to create something magical for your family. With just a few simple ingredients and a little patience, you can make Halloween treats that are budget-friendly, delicious, and absolutely adorable.
I encourage you to make this recipe your own. Let your kids help with piping the ghosts, experiment with different face designs, and don’t worry if they don’t look perfect. The imperfect ones always have the most personality. Honestly, some of my favorite batches have been the ones where the ghosts looked a little lopsided or had chocolate chip eyes that were slightly crooked. Those are the ones that make us laugh the most.
I would love to hear how your ghost meringue cookies turn out. Did your kids help? Did you try any fun variations? Leave a comment below and share your experience. And if you have a friend who is stressing about Halloween treats, send them this recipe. Everyone deserves a little bit of kitchen magic without breaking the bank. Happy Halloween, and happy baking!
Frequently Asked Questions
Can I make these ghost meringue cookies without a piping bag?
Absolutely! If you don’t have a piping bag, you can use a sturdy zip-top bag with the corner snipped off. Alternatively, you can drop spoonfuls of meringue onto the baking sheet and use the back of a spoon to shape them into ghost-like forms. They won’t be as perfectly shaped, but they will still taste delicious and look cute.
Why did my meringue cookies turn brown?
Your oven is likely too hot. Meringue needs to bake at a low temperature, around 200°F (95°C), to dry out without browning. Check your oven temperature with an oven thermometer, as many ovens run hotter than the dial indicates. Also, make sure you are baking on the middle rack.
Can I use liquid egg whites from a carton?
Fresh egg whites work much better for this recipe. Carton egg whites often have stabilizers added that can prevent them from whipping up to stiff peaks. If you must use carton egg whites, look for a brand that specifically says it is suitable for meringues.
How do I know when the meringue cookies are done?
The cookies are done when they are dry to the touch and easily lift off the parchment paper. They should be white and crisp, not sticky or chewy. If they feel soft or tacky, they need more time in the oven. You can also break one open to check the inside—it should be dry all the way through.
Can I freeze these ghost meringue cookies?
Yes, you can freeze them for up to three months. Place the cooled meringues in a freezer-safe container with layers of parchment paper between them to prevent sticking. Thaw them at room temperature with the container lid slightly open to prevent condensation from making them sticky.
Pin This Recipe!
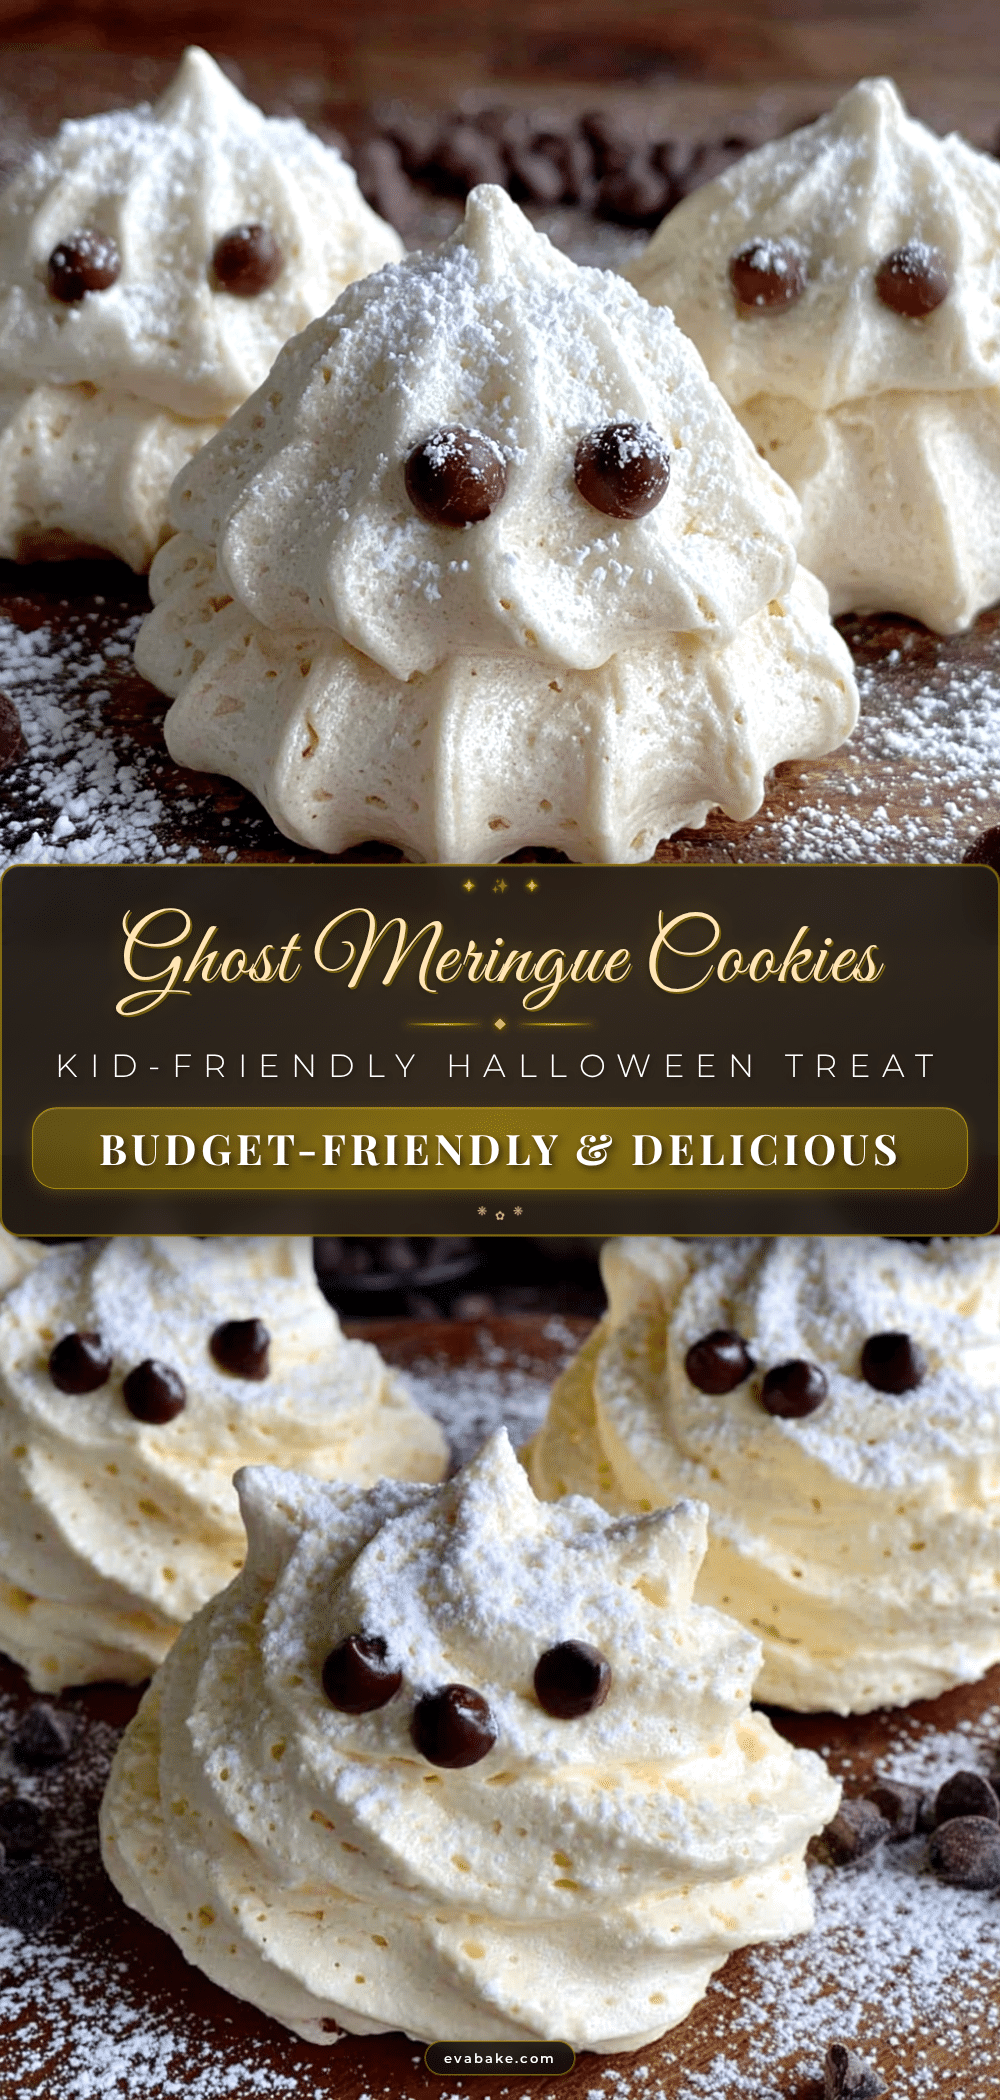
Best Easy Ghost Meringue Cookies for Halloween
These ghost meringue cookies are crunchy, sweet, and light as air, with the perfect amount of whimsy. Made with simple pantry staples, they are budget-friendly, easy to make, and perfect for Halloween parties or a fun family activity.
- Prep Time: 15 minutes
- Cook Time: 60-75 minutes
- Total Time: 1 hour 45 minutes (including cooling)
- Yield: 36 cookies 1x
- Category: Dessert
- Cuisine: American
Ingredients
- 4 large egg whites, at room temperature
- 1 cup (200 grams) granulated sugar
- 1/2 teaspoon cream of tartar
- 1 teaspoon vanilla extract
- 1/4 cup mini chocolate chips (optional, for faces)
- Pinch of salt
Instructions
- Preheat your oven to 200°F (95°C). Line two baking sheets with parchment paper.
- Separate 4 large eggs while cold, then let the egg whites come to room temperature in your mixing bowl (about 30 minutes).
- Add the cream of tartar and a pinch of salt to the egg whites. Begin mixing on medium speed until frothy and bubbly, about 1-2 minutes.
- With the mixer running on medium-high speed, add the granulated sugar one tablespoon at a time.
- Continue beating on high speed for about 8-10 minutes until thick, glossy, and stiff peaks form. The meringue should feel smooth when rubbed between your fingers.
- Beat in the vanilla extract on low speed just until combined.
- Fit a piping bag with a large round tip (Wilton 1A or similar). Fill the bag with meringue.
- Pipe ghost shapes onto the prepared baking sheets: squeeze gently to create a round base, then pull straight up while releasing pressure to create a tall shape with a peak on top. Leave about 1 inch between each ghost.
- Before the meringue dries, gently press mini chocolate chips into each ghost for eyes and a mouth.
- Bake for 60-75 minutes, until dry to the touch and easily lift off the parchment paper. They should be white and crisp.
- Turn off the oven and leave the meringues inside with the door slightly open for about 30 minutes to cool and dry completely. Then transfer to a wire rack to cool completely.
Notes
Humidity is the enemy of meringue; make on a dry day if possible. Ensure bowl and beaters are completely clean and grease-free. Use an oven thermometer to verify temperature. Store in an airtight container at room temperature for up to 2 weeks. Do not refrigerate. Can be frozen for up to 3 months.
Nutrition
- Serving Size: 1 cookie
- Calories: 2030
- Sugar: 4
- Sodium: 10
- Carbohydrates: 4
- Protein: 1
Keywords: ghost meringue cookies, Halloween cookies, meringue cookies, easy Halloween treats, budget-friendly Halloween, gluten-free Halloween cookies, dairy-free cookies


