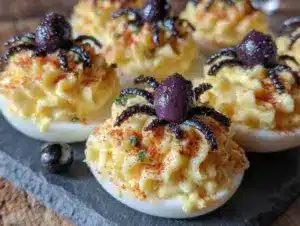
It was 11:47 PM on a random Wednesday in early October, and I had a very specific craving for something spooky but cozy. I didn’t have any fancy Halloween cookie cutters or creepy cake molds, but I had a dozen hard-boiled eggs in the fridge and a jar of black olives that was staring at me from the pantry. The idea arrived like a little whisper: what if I made deviled eggs look like tiny spiders? Honestly, I was half-asleep, standing there in my pajamas, and I just started peeling eggs like it was the most natural thing to do at nearly midnight.
The kitchen was quiet except for the hum of the fridge, and I remember thinking, “This is either going to be brilliant or a total disaster.” I mean, there’s something about the late night that loosens the usual rules, you know? You stop second-guessing yourself and just go with the flow. I mashed up the yolks with mayo and mustard, tasted it, added a pinch of paprika, and then I stared at those olives like they owed me money. How was I supposed to make them look like spiders?
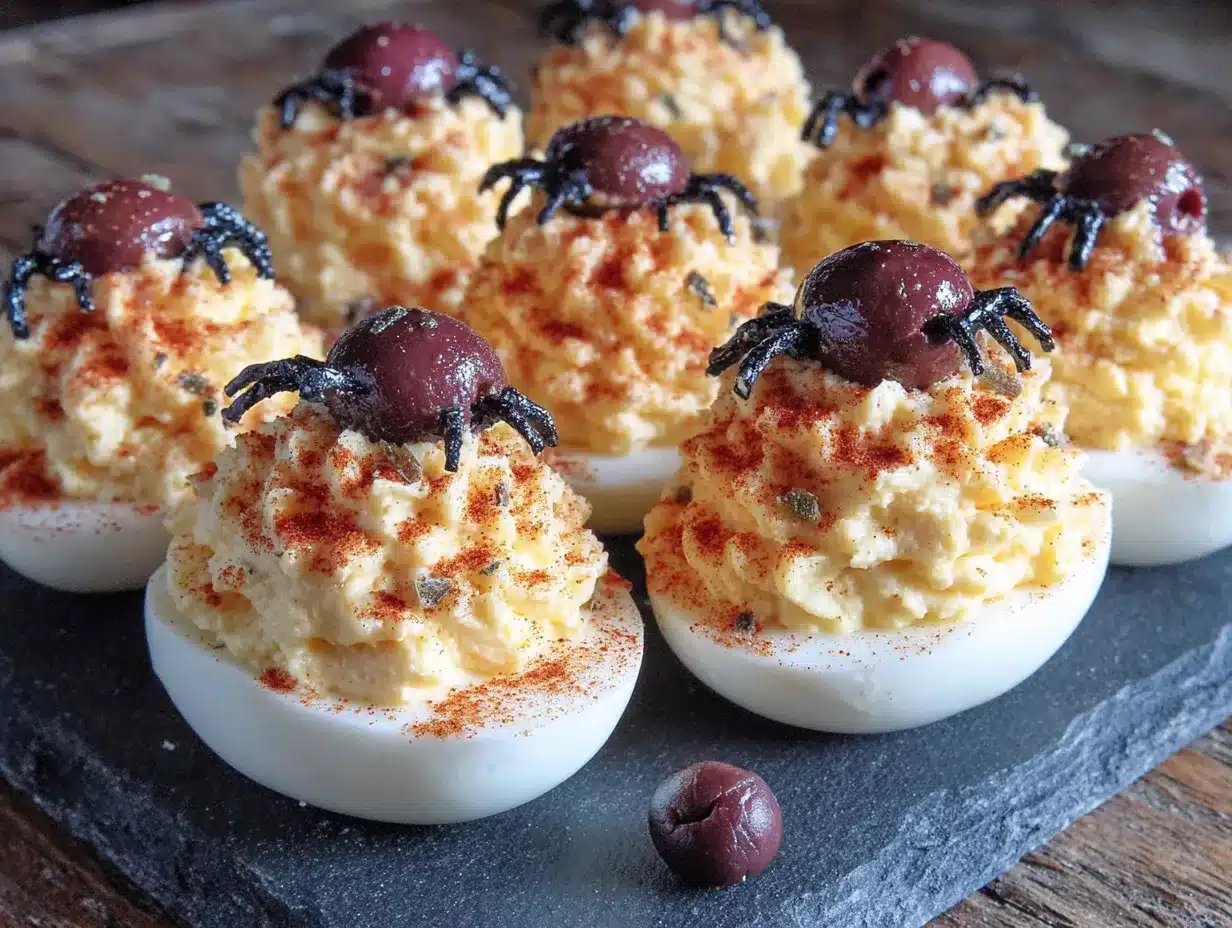
I sliced them in half, carved little legs, and placed them on top of the deviled eggs. And let me tell you, when I stepped back and saw those little olive spiders sitting on their creamy yellow beds, I actually laughed out loud. It was 12:15 AM, and I was unreasonably proud of myself. Maybe you’ve been there—that weird, wonderful moment when a silly idea turns into something genuinely delightful. These Cozy Halloween Deviled Eggs with Spider Olive Toppers are now my go-to for any fall gathering, and they started with a tired, impulsive craving on a quiet Wednesday night.
Why You’ll Love This Recipe
Let’s face it—Halloween food can be a little over the top sometimes. You’ve got your creepy cupcakes and your gory punch bowls, but sometimes you just want something that feels cozy and familiar with just a touch of spooky fun. That’s exactly what these deviled eggs deliver. They’re the perfect balance of nostalgic comfort food and playful Halloween creativity, and they come together so fast you’ll wonder why you ever bought those plastic spider rings.
Here’s what makes these little guys stand out:
- Quick & Easy: You can whip up a batch in under 30 minutes, especially if you already have hard-boiled eggs on hand. Perfect for last-minute Halloween parties or a cozy night in.
- Simple Ingredients: No fancy grocery trips needed. Eggs, mayo, mustard, paprika, and olives—that’s it. You probably have everything in your kitchen right now.
- Perfect for Halloween Gatherings: Whether it’s a spooky movie night, a potluck, or a kids’ Halloween party, these eggs are always the first thing to disappear from the table.
- Crowd-Pleaser: Even people who claim they don’t like olives end up grabbing seconds. The creamy filling and the briny olive topper are a match made in heaven.
- Unbelievably Delicious: The texture is silky and smooth, and the flavor is that classic deviled egg goodness with a fun twist. It’s comfort food that makes you smile.
I’ve tested this recipe more times than I’d like to admit, and I can tell you with confidence—this is the best version. The trick is in the filling: blending the yolks until they’re ultra-smooth and adding just the right amount of mustard for a little tang. It’s not just another deviled egg recipe. It’s the one that makes people close their eyes after the first bite and say, “Okay, that’s really good.”
And honestly, there’s something so satisfying about serving food that looks like it took hours when it really only took minutes. You get to be the cool host who made spider eggs without breaking a sweat. Plus, it’s a great conversation starter. I’ve lost count of how many times someone has picked one up, laughed, and said, “Wait, how did you do that?”
What Ingredients You Will Need
This recipe uses simple, everyday ingredients to create something that feels special. The beauty is in the details—each component plays a role in delivering that creamy, tangy, slightly briny flavor that makes deviled eggs so addictive.
For the Deviled Eggs
- 6 large eggs (room temperature works best for even cooking)
- 3 tablespoons mayonnaise (I prefer Hellmann’s or Duke’s for that rich, creamy texture)
- 1 teaspoon yellow mustard (adds a subtle tang and that classic deviled egg color)
- 1 teaspoon white vinegar (helps balance the richness and keeps the filling from being too heavy)
- ¼ teaspoon salt (adjust to taste)
- ⅛ teaspoon black pepper (freshly ground if you have it)
- ¼ teaspoon paprika (plus extra for garnish—smoked paprika adds a lovely depth)
For the Spider Toppers
- 12 large black olives (pitted, please—you don’t want to deal with pits mid-bite)
- 1 small carrot (for the spider eyes—you’ll cut tiny little circles)
A few notes on ingredient selection: When it comes to eggs, fresher isn’t always better for hard-boiling. Eggs that are about a week old actually peel more easily than super fresh ones. I learned this the hard way after destroying a dozen farm-fresh eggs. If you can, buy your eggs a few days ahead of time.
For the olives, look for large, firm black olives. The jumbo ones work best because they give you more surface area to carve those little spider legs. I’ve tried using kalamata olives before, and while the flavor is nice, they’re a bit too soft and tend to fall apart. Stick with canned or jarred black olives for the best results.
If you’re not a fan of mustard, you can swap it out for a tiny pinch of garlic powder or onion powder instead. And if you want to cut down on calories, Greek yogurt works surprisingly well as a substitute for half the mayonnaise. Just make sure it’s plain, full-fat yogurt so the texture stays creamy.
Equipment Needed
You don’t need anything fancy to make these spider deviled eggs, which is part of the charm. Here’s what you’ll need:
- A medium saucepan for boiling the eggs. Any pot will do, but one with a tight-fitting lid helps with even cooking.
- A sharp paring knife for slicing the olives and carving the spider legs. A dull knife will just squish the olives.
- A small mixing bowl for the filling. I use a glass bowl because it doesn’t hold onto odors.
- A fork or potato masher for mashing the yolks. A fork works great, but a potato masher makes it even faster.
- A piping bag or zip-top bag for filling the eggs. If you want that fancy piped look, a piping bag with a star tip is lovely. But honestly, a zip-top bag with the corner snipped off works just as well.
- A small knife or vegetable peeler for cutting the carrot eyes. I use a tiny paring knife, but a vegetable peeler can create thin strips that you can then cut into circles.
- A serving platter that’s Halloween-themed or just plain white. The contrast really makes the spiders pop.
I’ve made these eggs with nothing more than a fork and a butter knife before, and they turned out just fine. Don’t let the lack of fancy equipment stop you. That said, if you’re planning to make these for a party, investing in a good egg slicer will save you a ton of time. I picked one up at a thrift store for two dollars, and it’s been a game-changer.
Preparation Method
Alright, let’s get to the fun part. Here’s how to make these little guys come to life:
Step 1: Hard-Boil the Eggs
Place the eggs in a single layer in your saucepan and cover them with cold water by about an inch. Bring the water to a rolling boil over high heat. Once it’s boiling, cover the pot, turn off the heat, and let the eggs sit for exactly 12 minutes. This gives you perfectly cooked yolks—firm but not chalky. While they’re sitting, fill a bowl with ice water. After 12 minutes, transfer the eggs to the ice bath and let them cool for at least 5 minutes. This stops the cooking process and makes peeling so much easier.
Step 2: Peel the Eggs
Gently tap each egg on the counter to crack the shell, then roll it between your palms to loosen the shell. Start peeling from the wider end where the air pocket is—it’s usually easier. If you’re struggling, try peeling under running water. The water helps slide the shell right off. I’ve had eggs that refused to cooperate, and running water saved the day more than once.
Step 3: Slice the Eggs in Half
Using a sharp knife, slice each egg lengthwise. Wipe the knife clean between cuts to keep the edges neat. Gently pop out the yolks into your mixing bowl. Arrange the egg white halves on your serving platter, cut side up.
Step 4: Make the Filling
Mash the yolks with a fork until they’re crumbly with no large chunks. Add the mayonnaise, mustard, vinegar, salt, pepper, and paprika. Mix until the filling is smooth and creamy. Taste it and adjust the seasoning if needed. I always add a tiny pinch more paprika at this point because I love that smoky warmth.
Step 5: Fill the Eggs
Spoon the filling into your piping bag or zip-top bag. If using a zip-top bag, snip off about ½ inch from one corner. Pipe the filling into each egg white half, mounding it slightly. You want it to look generous and inviting, not skimpy. If you don’t have a piping bag, just use a small spoon—it’ll still taste amazing.
Step 6: Prepare the Spider Toppers
Drain the olives and pat them dry with a paper towel. Cut each olive in half crosswise (not lengthwise). You’ll use one half for the spider body and the other half for another spider. To make the legs, use your paring knife to make 4 small slits on each side of the olive half, creating little “legs.” Don’t cut all the way through—just enough to create the illusion of spider legs. Gently spread the legs apart with your fingers.
Step 7: Make the Spider Eyes
Using your vegetable peeler or paring knife, cut thin slices of carrot. Then use a small knife or a straw to cut tiny circles from the carrot slices. These will be the spider eyes. Place two tiny carrot circles on top of each olive spider body. You can use a tiny dab of mayonnaise as “glue” to keep them in place.
Step 8: Assemble the Spiders
Gently place one olive spider on top of each filled deviled egg. Press down just enough so it stays in place. Sprinkle a little extra paprika over the eggs for color and contrast. Stand back and admire your work—you just made edible spiders!
Cooking Tips & Techniques
Over the years, I’ve made these eggs more times than I can count, and I’ve learned a few things the hard way. Let me save you some trouble.
Perfect hard-boiled eggs every time: The 12-minute method I shared above is foolproof. But here’s the thing—altitude matters. If you live at a high altitude, you might need to add an extra minute or two. I learned this when I visited my sister in Denver and ended up with runny yolks. Also, older eggs peel better than fresh ones, so plan ahead if you can.
Don’t overmix the filling: I know it’s tempting to keep stirring, but overmixing can make the filling greasy. Mix just until everything is combined and smooth. If your filling seems too thick, add a tiny splash of pickle juice or vinegar. Too thin? Add another yolk or a bit more mayo.
Carving the olives: This takes a little practice. Use a sharp knife and make confident cuts. If the olive starts to fall apart, you’re probably pressing too hard. I ruined my first few olives and had to eat them as a snack (tough life, I know). Once you get the hang of it, you’ll be able to carve a dozen spiders in under five minutes.
Timing and multitasking: While the eggs are boiling, you can prepare the olives and carrot eyes. This saves a ton of time. I usually boil the eggs, then while they’re cooling in the ice bath, I carve the olives. By the time the eggs are ready to peel, the spiders are already waiting.
Consistency is key: If you’re making these for a party, try to keep the spiders uniform in size. It sounds silly, but having all the spiders look similar makes the platter look more polished. I use a ruler sometimes—okay, that’s a lie, but I do eyeball it carefully.
Variations & Adaptations
One of the best things about this recipe is how easy it is to customize. Here are some of my favorite variations:
Spicy Southwest Version
Add ½ teaspoon of smoked paprika and a pinch of cayenne pepper to the filling. Top with a tiny slice of jalapeño under the olive spider. The heat pairs beautifully with the creamy filling and briny olive. I made this version for a Halloween party last year, and it was a huge hit with the adults.
Herb & Garden Version
Mix in 1 tablespoon of finely chopped fresh chives or dill into the filling. The fresh herbs add a bright, garden-fresh flavor that’s perfect for a fall brunch. You can also use microgreens as a garnish around the eggs for a spooky “forest floor” look.
Avocado Twist
Replace half the mayonnaise with mashed avocado. This makes the filling greener and adds a creamy, buttery texture. It’s also a great option if you’re trying to cut down on dairy or eggs (ironic, I know). Just be aware that the filling will brown faster, so make these closer to serving time.
Gluten-Free & Low-Carb
This recipe is naturally gluten-free and low-carb, so no adjustments needed. If you’re serving guests with dietary restrictions, these are a safe bet. Just double-check your mustard and mayonnaise labels to make sure they’re gluten-free.
Vegan Option
I haven’t tried this myself, but a friend of mine made a vegan version using silken tofu for the filling. She blended the tofu with black salt (kala namak) for that eggy flavor, plus the usual seasonings. She said it was surprisingly good, though the texture is a bit softer. Worth experimenting with if you have vegan guests.
Serving & Storage Suggestions
These deviled eggs are best served chilled or at room temperature. I like to arrange them on a black or dark-colored platter to make the spiders stand out. A little sprinkle of paprika or smoked paprika on top adds a pop of color. If you’re feeling extra festive, you can add a few fake spider webs or plastic spiders around the platter for decoration.
What to serve with them: These eggs pair beautifully with other Halloween appetizers like spooky stuffed mushrooms or a warm bowl of creamy pumpkin soup. For drinks, a crisp apple cider or a dark stout beer complements the flavors nicely. If you’re hosting a kids’ party, serve them with Halloween punch and some ghost-shaped cookies for dessert.
Storage: Deviled eggs are best eaten within 24 hours, but they’ll keep in the refrigerator for up to 2 days. Store them in an airtight container, and place a damp paper towel over the top to keep them from drying out. The spider toppers might soften a bit over time, so if you’re making them ahead, I’d recommend adding the olives just before serving.
Reheating: Don’t. Seriously, deviled eggs are meant to be served cold. If you’ve stored them in the fridge, just let them sit at room temperature for about 10 minutes before serving. This takes the chill off without compromising the texture.
Flavor development: Honestly, these eggs taste even better the next day. The flavors meld together overnight, and the filling becomes even creamier. Just be careful with the olive spiders—they might get a little soggy, so I always add fresh ones on day two.
Nutritional Information & Benefits
Here’s the approximate nutritional breakdown for one deviled egg (with spider topper):
| Nutrient | Amount per serving |
|---|---|
| Calories | 85 |
| Protein | 6g |
| Fat | 6g |
| Saturated Fat | 1.5g |
| Carbohydrates | 1g |
| Fiber | 0g |
| Sugar | 0.5g |
| Sodium | 180mg |
Eggs are a fantastic source of high-quality protein and contain important nutrients like choline, which supports brain health. The olives provide healthy monounsaturated fats and antioxidants. Carrots add a tiny boost of vitamin A. This recipe is naturally low-carb and gluten-free, making it suitable for a variety of dietary preferences.
If you’re watching your sodium intake, you can use low-sodium olives or reduce the added salt in the filling. The mustard and vinegar already provide plenty of flavor, so you might not miss the extra salt at all.
From a wellness perspective, I love that these deviled eggs are a satisfying, protein-rich snack that doesn’t leave you feeling heavy. They’re perfect for a Halloween party where you want to enjoy yourself without overdoing it on sugary treats. Plus, the portion control is built-in—one or two eggs is usually enough to satisfy a craving.
Conclusion
So there you have it—Cozy Halloween Deviled Eggs with Spider Olive Toppers that are equal parts spooky and delicious. What started as a late-night whim turned into one of my most-requested recipes, and I honestly can’t imagine a Halloween gathering without them now. They’re simple enough for a casual weeknight but impressive enough to steal the show at any party.
I hope you give these a try and make them your own. Maybe you’ll add a little extra spice, or maybe you’ll swap the olives for something else entirely. That’s the beauty of cooking—you get to play and experiment. And if your spiders end up looking a little wonky, don’t worry. Mine did too, the first time. That’s part of the fun.
If you make these, I’d love to hear about it. Drop a comment below and let me know how they turned out, or share a photo on social media and tag me. Did you add your own twist? Did your kids help carve the olives? I want to hear all about it. And if you have questions, just ask—I’m always here to help.
Until next time, happy cooking—and happy Halloween!
Frequently Asked Questions
Can I make these deviled eggs a day ahead?
Absolutely! You can prepare the deviled eggs up to 24 hours in advance. Just store them in an airtight container in the refrigerator. However, I recommend adding the olive spider toppers right before serving to keep them looking their best. The olives can soften and lose their shape if they sit on the filling too long.
How do I keep the olive spiders from falling apart?
The key is using firm, pitted black olives and a sharp knife. When carving the legs, don’t cut all the way through the olive—just make shallow slits. If your olives are too soft, try a different brand. I’ve found that store-brand olives can be hit or miss, so I stick with a trusted brand like Lindsay or Pearls.
Can I use a different type of olive?
You can, but black olives work best because of their color and firm texture. Green olives are too briny and soft, and kalamata olives tend to fall apart. If you want to experiment, try using stuffed olives (like pimento-stuffed) for a different look, but be aware that the filling might show through.
How do I get perfectly smooth deviled egg filling?
The secret is to mash the yolks thoroughly before adding the wet ingredients. I like to press them through a fine-mesh sieve for the smoothest texture, but a fork works fine if you’re patient. Also, make sure your mayonnaise is at room temperature—cold mayo can make the filling lumpy.
Can I freeze deviled eggs?
I wouldn’t recommend it. Deviled eggs don’t freeze well because the texture of the filling becomes watery and grainy after thawing. These are best enjoyed fresh, which is easy since they come together so quickly. If you’re short on time, you can hard-boil the eggs up to a week in advance and assemble them the day of your event.
Pin This Recipe!
Cozy Halloween Deviled Eggs with Spider Olive Toppers
These spooky yet cozy deviled eggs feature creamy filling topped with olive spiders, perfect for Halloween gatherings. Quick to make with simple ingredients, they’re a crowd-pleasing appetizer that’s both fun and delicious.
- Prep Time: 15 minutes
- Cook Time: 12 minutes
- Total Time: 27 minutes
- Yield: 12 deviled eggs (6 servings of 2 eggs each) 1x
- Category: Appetizer
- Cuisine: American
Ingredients
- 6 large eggs (room temperature)
- 3 tablespoons mayonnaise (Hellmann’s or Duke’s recommended)
- 1 teaspoon yellow mustard
- 1 teaspoon white vinegar
- ¼ teaspoon salt
- ⅛ teaspoon black pepper (freshly ground preferred)
- ¼ teaspoon paprika (plus extra for garnish; smoked paprika adds depth)
- 12 large black olives (pitted)
- 1 small carrot (for spider eyes)
Instructions
- Place eggs in a single layer in a saucepan and cover with cold water by about an inch. Bring to a rolling boil over high heat. Cover, turn off heat, and let sit for exactly 12 minutes.
- While eggs cook, prepare an ice bath. After 12 minutes, transfer eggs to ice bath and cool for at least 5 minutes.
- Peel eggs: gently tap each egg on counter to crack shell, roll between palms, and peel starting from the wider end. Rinse under running water if needed.
- Slice each egg lengthwise with a sharp knife. Remove yolks to a mixing bowl. Arrange egg white halves on a serving platter, cut side up.
- Mash yolks with a fork until crumbly. Add mayonnaise, mustard, vinegar, salt, pepper, and paprika. Mix until smooth and creamy. Adjust seasoning to taste.
- Spoon filling into a piping bag or zip-top bag. Snip off ½ inch from corner if using zip-top bag. Pipe filling into each egg white half, mounding slightly.
- Drain olives and pat dry. Cut each olive in half crosswise. Using a paring knife, make 4 small slits on each side of each olive half to create spider legs. Gently spread legs apart.
- Using a vegetable peeler or paring knife, cut thin slices of carrot. Cut tiny circles from carrot slices for spider eyes.
- Place two carrot circles on top of each olive spider body, using a tiny dab of mayonnaise as glue if needed.
- Gently place one olive spider on each filled deviled egg. Press down lightly to secure. Sprinkle extra paprika over eggs for color.
Notes
For best results, use eggs that are about a week old for easier peeling. If you live at high altitude, add 1-2 minutes to the boiling time. The olive spiders can be prepared while eggs are cooling. Deviled eggs are best eaten within 24 hours; store in an airtight container with a damp paper towel on top. Add olive toppers just before serving to keep them firm.
Nutrition
- Serving Size: 2 deviled eggs
- Calories: 170
- Sugar: 1
- Sodium: 360
- Fat: 12
- Saturated Fat: 3
- Carbohydrates: 2
- Protein: 12
Keywords: Halloween deviled eggs, spider deviled eggs, spooky appetizer, Halloween party food, olive spiders, easy Halloween recipe