My brother-in-law Mark had claimed to hate banana bread for a solid decade. “It’s for grandmas and people with too many brown bananas,” he’d say, waving a dismissive hand at any loaf I brought to family gatherings. I stopped trying to convert him, honestly. Life’s too short to argue about quick breads. Then last Thanksgiving, I made this version specifically for the brunch spread the next morning, thinking I’d have a quiet slice with my coffee while everyone else fought over leftover pie. I found Mark at 6:47 AM, standing in front of the microwave in his pajamas, eating the last third of the loaf with his bare hands. He froze mid-bite, crumbs all over his chin, and just said, “This is different.” That’s the thing about this banana bread—it sneaks up on people. It’s not trying to be fancy or complicated. It just happens to be the one that makes people forget they ever claimed to hate it.
Maybe you’ve been there, trying to figure out a dessert that feels special enough for guests but doesn’t have you sweating in the kitchen while everyone else is having fun. That’s exactly where this recipe comes in. It’s the dessert you make when you want to impress without the stress, when you need something that looks like you tried really hard but actually came together in one bowl with zero fuss. Let me tell you, there’s something deeply satisfying about pulling a gorgeous, golden loaf out of the oven while your guests are still sipping their first glass of wine.
Why You’ll Love This Recipe
This isn’t just another banana bread recipe floating around the internet. I’ve tested this version more times than I care to admit, tweaking the ratios, playing with temperatures, and serving it to everyone from my picky neighbor to a professional pastry chef who asked for the recipe before finishing his first slice. Here’s what makes it stand out:
- One Bowl, Zero Drama: No stand mixer required. No sifting. No separating wet and dry ingredients like some complicated science experiment. Everything goes into one bowl, you stir it with a wooden spoon, and you’re done. Perfect for when you’re already juggling appetizers and drinks.
- Prep Ahead Like a Pro: You can mix the batter the morning of your dinner party, cover the bowl, and pop it in the fridge. When your guests arrive, just pour it into the pan and bake. The aroma fills your house right as people are settling in with their cocktails.
- Impossibly Moist: The secret is using really ripe bananas and a specific fat-to-flour ratio that keeps this bread tender for days. It’s the kind of moist that makes people close their eyes on the first bite.
- Crowd-Pleasing Texture: The edges get this beautiful, slightly caramelized crust while the center stays soft and almost pudding-like. Every slice has that perfect contrast.
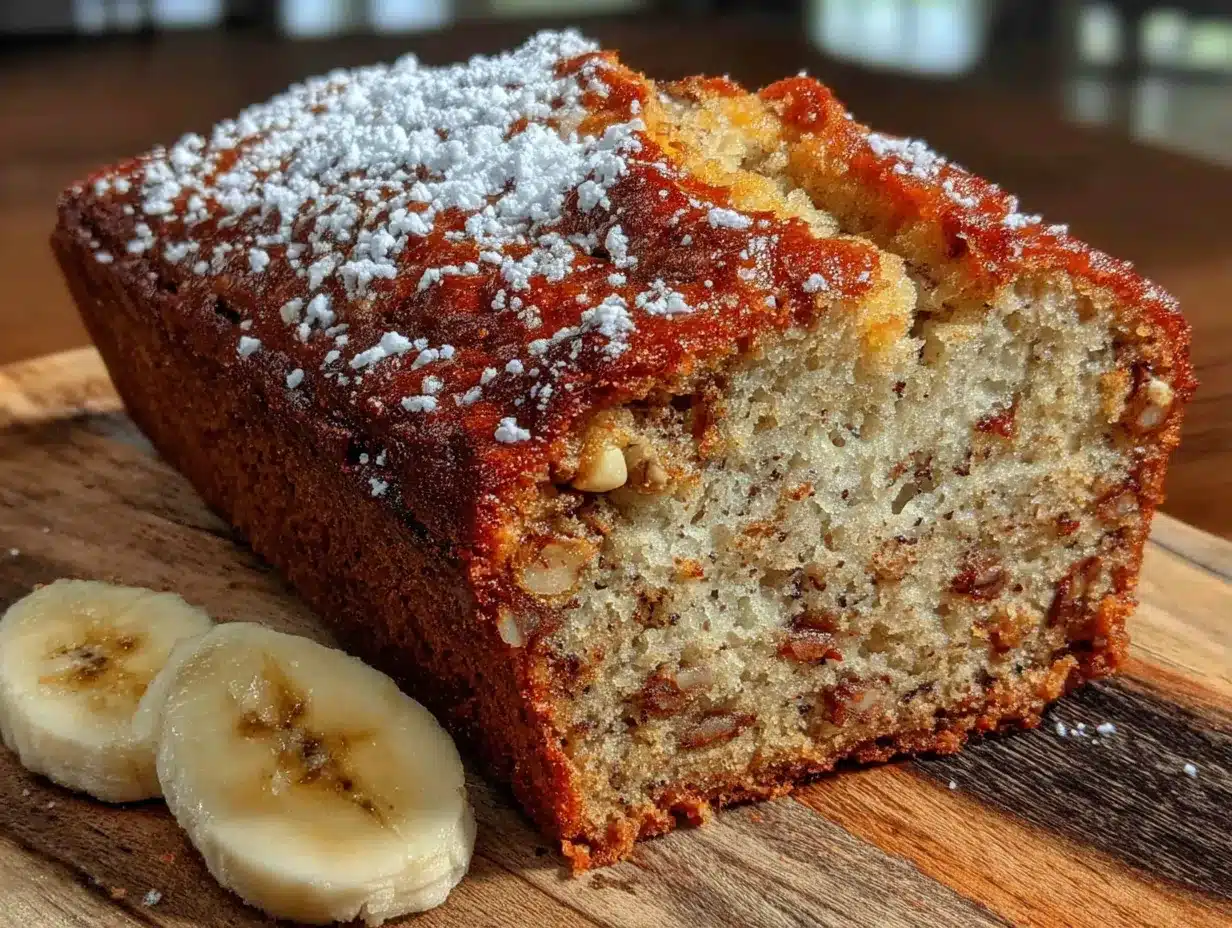
- Dinner Party Ready: It looks stunning on a cake stand with a dusting of powdered sugar, and it pairs beautifully with coffee, dessert wine, or a scoop of vanilla ice cream. Your guests will think you spent hours on it.
This recipe is comfort food reimagined for the host who wants to actually enjoy their own party. It’s the kind of dessert that makes you look like a rockstar without the rockstar effort.
What Ingredients You Will Need
The beauty of this banana bread is that it relies on simple, everyday ingredients that most of you probably already have in your kitchen. No fancy grocery store runs or obscure specialty items here. Let’s break down exactly what you need and why each ingredient matters.
- 3 large very ripe bananas (about 1½ cups mashed): This is non-negotiable for flavor and moisture. You want bananas that are heavily speckled with brown spots, almost looking past their prime. The riper they are, the sweeter and more banana-forward your bread will be. If your bananas aren’t quite there yet, you can roast them in a 300°F oven for 15-20 minutes until they soften and darken.
- ½ cup unsalted butter, melted and slightly cooled: Butter gives that rich, undeniable flavor that oil just can’t replicate. I use unsalted so I can control the salt level. Let it cool for a couple minutes after melting so it doesn’t cook the eggs when you mix everything together.
- ¾ cup granulated sugar: Just regular white sugar works perfectly here. It dissolves easily into the wet ingredients and helps create that crackly top crust everyone fights over. You could reduce this to ½ cup if your bananas are extremely sweet, but I wouldn’t go lower.
- 2 large eggs, room temperature: Room temperature eggs incorporate more evenly into the batter, creating a smoother texture. If you forgot to take them out ahead of time, place them in a bowl of warm water for 5 minutes.
- 1 teaspoon vanilla extract: Pure vanilla extract adds depth and rounds out the banana flavor. Skip the imitation stuff if you can—it makes a noticeable difference.
- 1½ cups all-purpose flour: Standard all-purpose flour gives this bread its structure. Spoon it into your measuring cup and level it off with a knife rather than scooping directly, which packs the flour and can make the bread dense.
- 1 teaspoon baking soda: This is the only leavening agent you need. Baking soda reacts with the acidity in the bananas to help the bread rise. Make sure yours isn’t expired—test it by dropping a bit into vinegar; it should fizz vigorously.
- ½ teaspoon salt: Salt enhances all the flavors and balances the sweetness. Don’t skip it, even if you’re using salted butter.
- Optional mix-ins: ½ cup chopped walnuts or pecans, ½ cup chocolate chips, or ¼ cup shredded coconut. These are completely optional but add wonderful texture and flavor. If you’re hosting, I recommend offering one loaf plain and one with chocolate chips—people go nuts for the chocolate version.
For the best results, I recommend using King Arthur Flour for consistent texture and Land O’Lakes butter for that rich flavor. But honestly, any brand will work beautifully. The real star here is those overripe bananas.
Equipment Needed
One of the best things about this recipe is how little equipment it requires. You don’t need a fancy stand mixer or a cupboard full of specialty tools. Here’s what you’ll need:
- One large mixing bowl: Any medium-to-large bowl will work. I use a ceramic one because it feels sturdy and doesn’t slide around.
- A 9×5-inch loaf pan: This is the standard size for banana bread. If you use an 8×4-inch pan, you’ll need to increase the baking time by about 10 minutes. Glass or metal both work, but metal gives you a nicer golden crust.
- A wooden spoon or rubber spatula: For mixing everything together. A spatula is great for scraping down the sides of the bowl.
- A fork or potato masher: For mashing those bananas. A fork works perfectly fine, but a potato masher makes it even faster.
- Parchment paper: Lining your loaf pan with parchment paper makes lifting the bread out effortless and makes cleanup a breeze. You can also use butter and flour to grease the pan, but parchment is foolproof.
- Cooling rack: Essential for letting the bread cool evenly so the bottom doesn’t get soggy. If you don’t have one, you can use the inverted loaf pan to create airflow.
That’s honestly it. No sifter, no whisk attachments, no complicated gadgets. I’ve made this recipe in a friend’s vacation rental kitchen with a plastic bowl and a fork, and it came out beautifully. The simplicity is the whole point.
Preparation Method
Alright, let’s get to the good part. This recipe comes together in about 10 minutes of active time, and then the oven does the rest. Follow these steps carefully, and you’ll have a loaf that looks and tastes like you spent way more effort than you actually did.
- Preheat your oven to 350°F (175°C). Position the rack in the center of the oven. Getting the temperature right from the start is crucial for that perfect rise and golden crust.
- Prepare your loaf pan. Cut a piece of parchment paper that’s about 8 inches wide and 16 inches long. Press it into the pan so the excess hangs over the long sides—these become handles for lifting the bread out later. If you don’t have parchment, generously butter the inside of the pan and dust it with flour, tapping out the excess.
- Mash those bananas. Peel the bananas and place them in your large mixing bowl. Mash them with a fork or potato masher until they’re mostly smooth with a few small lumps remaining. You want some texture here—don’t turn them into baby food. It should look like chunky applesauce.
- Add the melted butter. Pour the slightly cooled melted butter over the mashed bananas and stir until combined. The butter should be warm but not hot—you don’t want to scramble the eggs in the next step.
- Add the sugar, eggs, and vanilla. Crack the eggs directly into the bowl, add the sugar and vanilla, and stir everything together until smooth and well combined. The mixture will look glossy and slightly thick. Make sure you scrape the bottom of the bowl with your spatula to incorporate everything evenly.
- Add the dry ingredients. Sprinkle the flour, baking soda, and salt over the wet mixture. Stir gently with your spatula or wooden spoon until just combined. Here’s the most important tip: stop mixing as soon as you no longer see streaks of flour. Overmixing develops the gluten and makes your banana bread tough and rubbery. A few small lumps are totally fine—they’ll disappear during baking.
- Fold in any mix-ins. If you’re using nuts, chocolate chips, or coconut, gently fold them in with a few strokes of your spatula. Don’t overmix here either.
- Pour the batter into the prepared pan. Use your spatula to scrape every last bit of batter into the pan. Smooth the top gently—it will naturally settle and create a beautiful domed top as it bakes.
- Bake for 55-65 minutes. Place the pan in the preheated oven and bake until the top is deep golden brown and a toothpick inserted into the center comes out clean or with just a few moist crumbs. If the top is browning too quickly after 40 minutes, tent the pan loosely with aluminum foil.
- Cool in the pan for 10 minutes. Set the pan on a cooling rack and let it rest. This allows the bread to set up so it doesn’t fall apart when you remove it.
- Remove from the pan and cool completely. Use the parchment handles to lift the bread out of the pan and transfer it to the cooling rack. Let it cool completely before slicing—about 1 hour. I know it’s tempting to cut into it warm, but it will be gummy and fall apart if you do. Trust me, I’ve learned this the hard way more than once.
Your kitchen should smell absolutely incredible at this point. That combination of caramelized bananas and butter is pure magic.
Cooking Tips & Techniques
After making this banana bread probably fifty times over the past few years, I’ve collected some hard-won wisdom that will help you nail it every single time. Let me share what I’ve learned through trial and error.
The banana ripeness trap. I cannot stress this enough—use bananas that are practically black. I know it feels wrong to use fruit that looks like it belongs in the compost bin, but that’s exactly when they’re at their sweetest and most flavorful. If you only have yellow bananas, you’ll end up with bread that’s bland and dense. Pop them in a 300°F oven for 15 minutes to speed-ripen them if you’re in a pinch.
The overmixing mistake. This is probably the most common error I see in comments on other banana bread recipes. When you mix the flour into the wet ingredients, you’re developing gluten. More mixing equals more gluten equals tough, dense bread. Stir just until you don’t see dry flour anymore. A few streaks are fine. Your bread will be tender and soft instead of chewy and bread-like.
The doneness test. Toothpick tests can be misleading with banana bread because the moisture from the bananas can make it look underdone even when it’s perfectly baked. Instead, look for the edges pulling away slightly from the pan and a deep golden brown color. If the toothpick comes out with wet batter, it needs more time. If it comes out with moist crumbs, it’s done. Give it the full 55 minutes before even checking.
The cooling patience game. I ruined my first three loaves by cutting into them too early. The bread needs time to set its structure. If you slice it warm, it will crumble and seem underbaked even though it’s perfectly cooked. Let it cool completely on the rack. If you absolutely must have warm banana bread, pop individual slices in the microwave for 15 seconds after it’s fully cooled.
Multitasking for hosts. Here’s my favorite strategy: mix the batter in the morning while your coffee is brewing. Cover the bowl with plastic wrap and refrigerate it. When your guests arrive and you’re pouring drinks, pour the batter into the pan and pop it in the oven. By the time everyone has finished their appetizers and main course, the bread will be cool enough to slice and serve. The timing works out perfectly.
Variations & Adaptations
One of my favorite things about this banana bread is how endlessly adaptable it is. You can change it up based on the season, your guests’ preferences, or whatever you happen to have in your pantry. Here are some variations I’ve tried and loved.
Chocolate Chip Banana Bread: Fold in ¾ cup of semi-sweet or dark chocolate chips along with the dry ingredients. This is the version that Mark actually caught me eating that morning, and it’s the one that finally converted him. The chocolate melts into little pockets of richness throughout the bread. For a dinner party, this version feels more like a dessert and less like breakfast.
Nutty Banana Bread: Toast ½ cup of walnuts or pecans in a dry skillet over medium heat for 3-4 minutes until fragrant, then fold them into the batter. Toasting brings out their oils and adds a wonderful crunch. This version pairs beautifully with a cheese board if you’re serving it as part of a dessert spread.
Vegan Banana Bread: Substitute the melted butter with ½ cup of coconut oil (melted) or vegetable oil, and replace the eggs with two flax eggs (2 tablespoons ground flaxseed mixed with 6 tablespoons water, let sit for 5 minutes). The texture will be slightly denser but still incredibly moist and delicious. I’ve served this to vegan friends who couldn’t tell the difference.
Gluten-Free Banana Bread: Swap the all-purpose flour with a 1:1 gluten-free baking flour blend that contains xanthan gum. Cup4Cup and King Arthur both make excellent blends. Don’t use almond flour or coconut flour as a straight substitute—they’ll change the texture completely.
Spiced Banana Bread: Add 1 teaspoon of cinnamon, ½ teaspoon of nutmeg, and ¼ teaspoon of ground ginger to the flour mixture. This version is perfect for fall dinner parties and fills your house with the coziest aroma. Top it with a simple cream cheese frosting for an extra special touch.
My personal favorite variation is the chocolate chip version with a handful of toasted walnuts thrown in. The combination of sweet chocolate, crunchy nuts, and tender banana bread is absolutely irresistible. I’ve started making two loaves for every dinner party because one disappears before anyone even gets to dessert.
Serving & Storage Suggestions
How you serve this banana bread can transform it from a simple loaf into a showstopping dessert. Here’s how I like to present it for dinner parties.
Serving temperature: Banana bread is best served at room temperature. If you’ve refrigerated it, let it sit out for about 30 minutes before serving. For a warm treat, microwave individual slices for 10-15 seconds.
Presentation ideas: Place the whole loaf on a beautiful wooden cutting board or cake stand. Dust the top with powdered sugar right before serving for an elegant finish. You can also slice it and arrange the pieces on a platter with fresh berries and a dollop of whipped cream or a scoop of vanilla bean ice cream. Drizzle a little caramel sauce over each slice for extra decadence.
What to serve alongside: This bread pairs wonderfully with coffee, espresso, or a dessert wine like Moscato or a late-harvest Riesling. For a full dessert spread, serve it alongside fresh fruit, a cheese board, and maybe some dark chocolate truffles. It also makes a fantastic breakfast the next morning with a cup of strong coffee.
Storage instructions: Wrap the cooled loaf tightly in plastic wrap or store it in an airtight container at room temperature for up to 4 days. Do not refrigerate it—the cold temperature actually dries out the bread faster. If you need to keep it longer, slice the loaf and freeze the individual pieces. Wrap each slice in plastic wrap and place them in a freezer bag. They’ll keep for up to 3 months.
Reheating frozen slices: Pop a frozen slice directly into the toaster or microwave for 15-20 seconds. It comes out tasting almost as fresh as the day you baked it. This is perfect for when you want a quick treat or unexpected guests stop by.
Flavor development: Here’s something interesting—this banana bread actually tastes better on the second day. The flavors meld together and the moisture distributes more evenly throughout the loaf. If you can, make it a day ahead of your dinner party and wrap it tightly overnight. Your guests will never know you planned it that way.
Nutritional Information & Benefits
While banana bread is definitely a treat, it does have some redeeming nutritional qualities worth noting. Here’s a rough breakdown per slice (assuming 10 slices per loaf):
| Nutrient | Amount Per Slice |
|---|---|
| Calories | 285 |
| Total Fat | 12g |
| Saturated Fat | 7g |
| Carbohydrates | 41g |
| Fiber | 2g |
| Sugar | 22g |
| Protein | 4g |
Bananas are a great source of potassium, vitamin B6, and vitamin C. They also contain resistant starch, which acts as a prebiotic and supports gut health—though this decreases as bananas ripen. The eggs provide high-quality protein and choline, which is important for brain health. If you use whole wheat pastry flour instead of all-purpose, you’ll add more fiber and nutrients.
For those watching their sugar intake, you can reduce the sugar to ½ cup without significantly affecting the texture. The natural sweetness from very ripe bananas carries a lot of the flavor. This recipe is naturally nut-free if you skip the walnuts, and it can easily be made dairy-free by substituting the butter with coconut oil.
I personally love that this dessert feels indulgent without being overly heavy. It satisfies that craving for something sweet and comforting while still feeling like real food, not a science experiment.
Conclusion
This one-bowl banana bread has become my secret weapon for dinner parties, and I think it’s time it became yours too. It’s the dessert that lets you actually enjoy your own gathering instead of stressing in the kitchen. The ingredients are simple, the method is forgiving, and the results are consistently impressive. Your guests will rave about it, ask for the recipe, and probably sneak seconds when they think no one is looking.
What I love most about this recipe is how it brings people together. There’s something about the smell of banana bread baking that makes everyone feel at home. It’s nostalgic without being dated, comforting without being boring. And honestly, watching someone take that first bite and close their eyes in appreciation never gets old.
I’d love to hear how this recipe works out for you. Did you add chocolate chips or go with nuts? Did you serve it with ice cream or keep it simple? Drop a comment below and let me know your favorite variation. And if you have a dinner party coming up, make this bread—I promise you won’t regret it. Your future self, the one who gets to sit down with a glass of wine and actually talk to your guests, will thank you.
Frequently Asked Questions
Can I use frozen bananas for this recipe?
Absolutely! Frozen bananas actually work great. Thaw them completely, then drain off any excess liquid before mashing. The freezing process breaks down the cell walls and makes them even sweeter and easier to mash. Just don’t skip draining the liquid, or your batter will be too wet.
Why did my banana bread sink in the middle?
This usually happens for one of three reasons: the oven temperature was too low, you opened the oven door too often during baking, or the bread was underbaked. Make sure your oven is properly preheated to 350°F and resist the urge to peek until at least 50 minutes have passed. If the center still sinks after cooling, it likely needed another 5-10 minutes in the oven.
Can I make this recipe into muffins instead?
Yes, and it works beautifully! Grease a 12-cup muffin tin or line it with paper liners. Fill each cup about ¾ full and bake at 350°F for 18-22 minutes, until a toothpick comes out clean. You’ll get about 12-14 muffins. They’re perfect for brunch parties or as grab-and-go breakfasts the next morning.
How do I know when my bananas are ripe enough?
Look for bananas that are heavily speckled with brown spots or even mostly brown. They should feel soft when you squeeze them gently. If they still have any green on the peel or feel firm, they’re not ready. The perfect banana for baking is one that you’d normally think is too ripe to eat out of hand.
Can I double this recipe?
Absolutely. This recipe doubles perfectly. Just use a larger bowl and make sure you have two 9×5-inch loaf pans. You can bake both loaves at the same time on the same oven rack, but rotate them halfway through baking for even browning. Give one loaf as a hostess gift or freeze it for later.
Pin This Recipe!
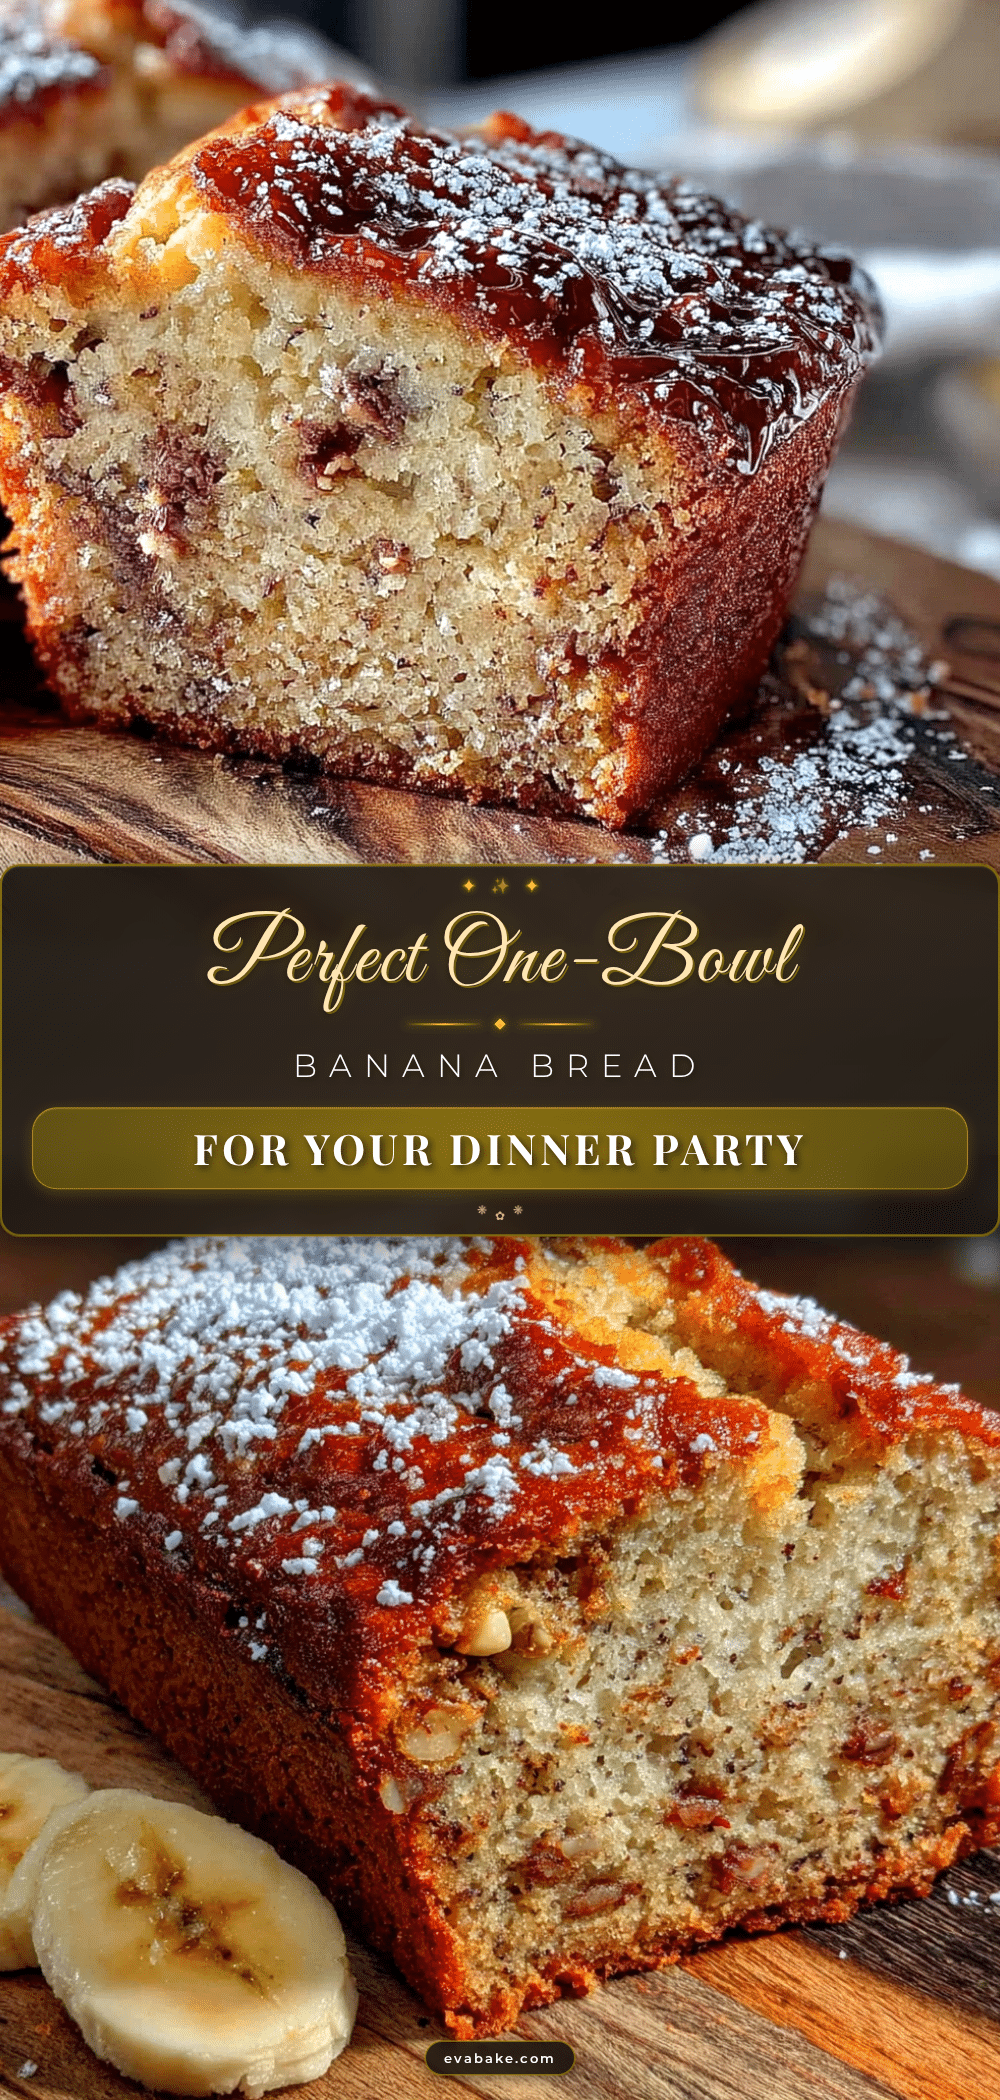
Perfect One-Bowl Banana Bread: Easy Dinner Party Dessert
This one-bowl banana bread is the ultimate easy dessert for dinner parties. It’s impossibly moist, has a caramelized crust, and comes together with minimal effort, making you look like a rockstar host.
- Prep Time: 10 minutes
- Cook Time: 55-65 minutes
- Total Time: 1 hour 15 minutes
- Yield: 10 servings 1x
- Category: Dessert
- Cuisine: American
Ingredients
- 3 large very ripe bananas (about 1½ cups mashed)
- ½ cup unsalted butter, melted and slightly cooled
- ¾ cup granulated sugar
- 2 large eggs, room temperature
- 1 teaspoon vanilla extract
- 1½ cups all-purpose flour
- 1 teaspoon baking soda
- ½ teaspoon salt
- Optional mix-ins: ½ cup chopped walnuts or pecans, ½ cup chocolate chips, or ¼ cup shredded coconut
Instructions
- Preheat your oven to 350°F (175°C). Position the rack in the center of the oven.
- Prepare your loaf pan. Cut a piece of parchment paper about 8 inches wide and 16 inches long. Press it into the pan so the excess hangs over the long sides. If you don’t have parchment, generously butter the inside of the pan and dust it with flour, tapping out the excess.
- Mash the bananas. Peel the bananas and place them in your large mixing bowl. Mash them with a fork or potato masher until mostly smooth with a few small lumps remaining.
- Add the melted butter. Pour the slightly cooled melted butter over the mashed bananas and stir until combined.
- Add the sugar, eggs, and vanilla. Crack the eggs directly into the bowl, add the sugar and vanilla, and stir everything together until smooth and well combined.
- Add the dry ingredients. Sprinkle the flour, baking soda, and salt over the wet mixture. Stir gently with your spatula or wooden spoon until just combined. Stop mixing as soon as you no longer see streaks of flour.
- Fold in any mix-ins. If using nuts, chocolate chips, or coconut, gently fold them in with a few strokes of your spatula.
- Pour the batter into the prepared pan. Use your spatula to scrape every last bit of batter into the pan. Smooth the top gently.
- Bake for 55-65 minutes. Place the pan in the preheated oven and bake until the top is deep golden brown and a toothpick inserted into the center comes out clean or with just a few moist crumbs. If the top is browning too quickly after 40 minutes, tent the pan loosely with aluminum foil.
- Cool in the pan for 10 minutes. Set the pan on a cooling rack and let it rest.
- Remove from the pan and cool completely. Use the parchment handles to lift the bread out of the pan and transfer it to the cooling rack. Let it cool completely before slicing—about 1 hour.
Notes
Use very ripe bananas (heavily speckled or mostly brown) for best flavor and moisture. Do not overmix the batter to avoid tough bread. Let the bread cool completely before slicing to prevent crumbling. The bread tastes even better on the second day. For a dinner party, mix the batter in the morning and refrigerate; bake when guests arrive.
Nutrition
- Serving Size: 1 slice
- Calories: 285
- Sugar: 22
- Fat: 12
- Saturated Fat: 7
- Carbohydrates: 41
- Fiber: 2
- Protein: 4
Keywords: banana bread, one-bowl banana bread, easy banana bread, dinner party dessert, moist banana bread, chocolate chip banana bread, nutty banana bread