My niece Maya asked why I couldn’t just use the gluten-free flour blend I always keep in the pantry to thicken the sauce. I started to explain why that wouldn’t work — something about cornstarch being the only reliable option for a creamy casserole. Then I stopped. Honestly, I had no good reason. I’d just never tried it.
It was a Tuesday night, and I was testing a green bean casserole recipe for a family gathering the next week. Maya was helping me trim the beans — she was eight and took her job very seriously. She pointed at the bag of gluten-free all-purpose flour sitting on the counter and said, “Why don’t you just use that?” I opened my mouth to explain all the reasons it wouldn’t work, but nothing came out that sounded convincing. So I shrugged and said, “Alright, let’s find out.”
The sauce came together beautifully — no lumps, no weird texture, just the same creamy, savory goodness I’d been chasing for years. Maya looked at me like she’d won the lottery. Maybe you’ve been there — that moment when the person you’re supposed to be teaching ends up teaching you something instead. This gluten-free green bean casserole became our new family standard. I’ve made it for Thanksgiving, potlucks, and random weeknights when we need something warm and comforting. Every time, I think about how I almost said no to a simple idea that turned out to be exactly right.
Why You’ll Love This Recipe
This isn’t just another green bean casserole recipe. It’s the one that finally works for gluten-free eaters without making anyone feel like they’re missing out. I’ve tested this version more times than I can count, and it passes the pickiest taste testers — kids, in-laws, and that one friend who always brings store-bought everything.
- Quick & Easy: From start to table in about 45 minutes. Most of that time is just the oven doing its thing.
- Simple Ingredients: No fancy gluten-free specialty items. You probably have most of this already.
- Perfect for Holidays: Thanksgiving, Christmas, Easter — it holds up beautifully on a buffet table.
- Crowd-Pleaser: My own kids ask for this year-round. Even my brother-in-law, who swears he hates green beans, goes back for seconds.
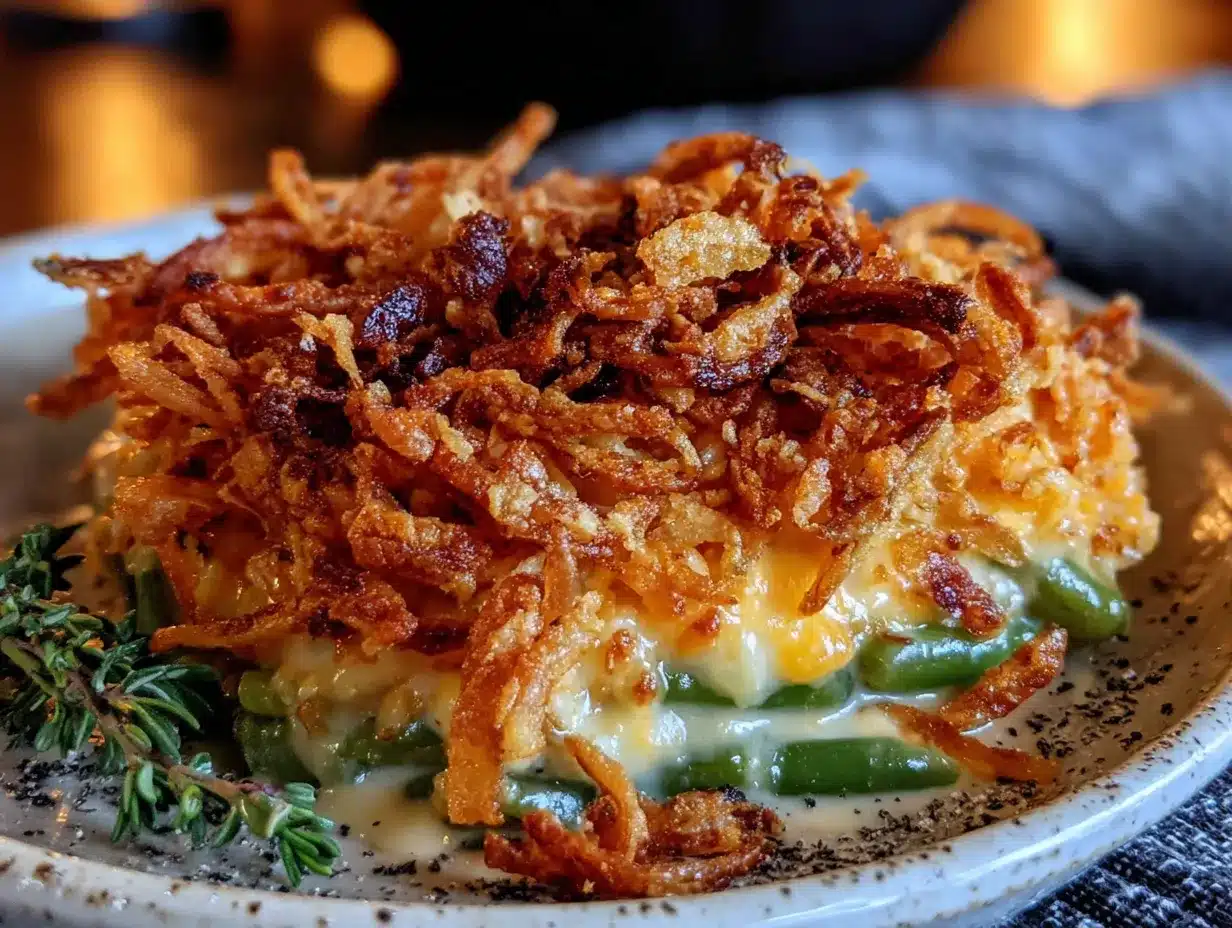
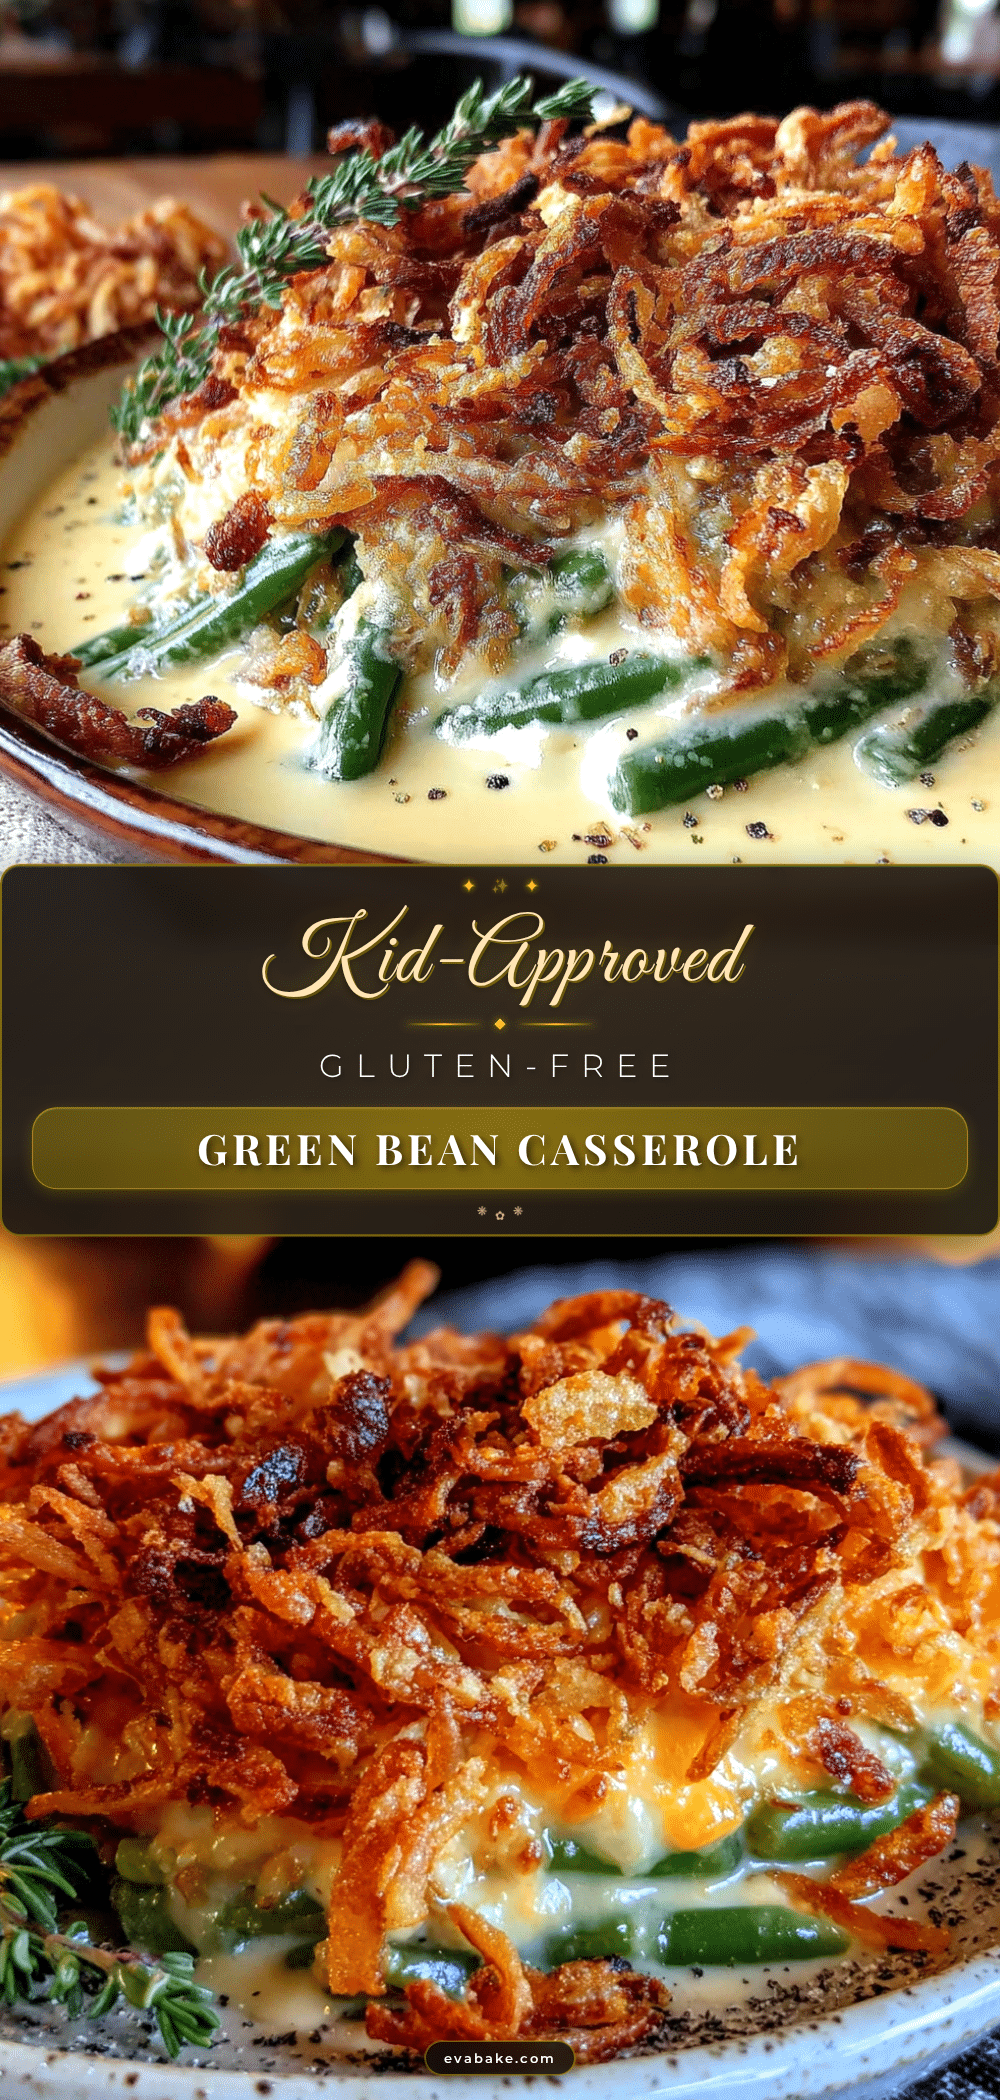
- Unbelievably Delicious: The creamy mushroom sauce, the crispy onion topping — it tastes like the classic you remember, just made without gluten.
What makes this recipe different is the technique. Most gluten-free versions use canned soup, which has its own gluten issues and a flavor that’s just okay. This one builds the sauce from scratch with a simple roux made from gluten-free flour. It’s richer, fresher, and you control exactly what goes in. Plus, the homemade crispy onions are a game-changer — they stay crunchy even the next day, which is something I could never say about the canned ones.
This recipe is the kind that makes you close your eyes after the first bite. It’s comfort food reimagined — healthier, faster, but with the same soul-soothing satisfaction. Perfect for impressing guests without stress, or turning a simple meal into something memorable. And honestly, it’s the only green bean casserole I make anymore.
What Ingredients You Will Need
This recipe uses simple, wholesome ingredients that come together to create a creamy, savory dish with a satisfying crunch. Most of these are pantry staples, which makes it easy to whip up on a weeknight or for a holiday gathering.
For the Casserole Base
- 1 ½ pounds fresh green beans, trimmed and cut into 2-inch pieces (frozen works too, just thaw and pat dry)
- 2 tablespoons unsalted butter (I use Kerrygold for the flavor, but any unsalted butter works)
- 8 ounces cremini mushrooms, sliced (white button mushrooms are fine too, but cremini have more flavor)
- 1 small yellow onion, diced
- 3 cloves garlic, minced
- 3 tablespoons gluten-free all-purpose flour blend (I recommend Bob’s Red Mill 1-to-1 Baking Flour)
- 1 ½ cups whole milk (2% works, but whole milk gives the creamiest texture)
- 1 cup low-sodium chicken or vegetable broth (use vegetable broth for vegetarian version)
- ½ cup heavy cream (adds richness — you can skip it and use more milk, but it won’t be as luxurious)
- 1 teaspoon salt
- ½ teaspoon black pepper
- ¼ teaspoon garlic powder
- ¼ teaspoon onion powder
- Pinch of nutmeg (trust me on this — it makes the sauce taste more complex)
For the Crispy Onion Topping
- 2 large yellow onions, thinly sliced into rings
- 1 cup gluten-free all-purpose flour blend
- ½ cup buttermilk (or ½ cup milk mixed with 1 tablespoon lemon juice, let sit 5 minutes)
- 1 teaspoon salt
- ½ teaspoon black pepper
- ½ teaspoon smoked paprika (optional, but adds a lovely depth)
- Vegetable oil for frying (about 2 cups, or enough for shallow frying)
If you’re short on time, you can use store-bought gluten-free fried onions — just check the label to make sure they’re certified gluten-free. But honestly, the homemade version is so much better and stays crunchier. I learned that the hard way after a soggy Thanksgiving disaster a few years ago.
For dairy-free option, use plant-based butter, unsweetened oat milk, and full-fat coconut cream instead of heavy cream. The flavor will be slightly different, but still delicious.
Equipment Needed
- Large pot for blanching green beans
- Colander for draining
- Large skillet or sauté pan (I prefer a 12-inch cast iron skillet for even heating)
- Medium saucepan for the sauce
- Whisk (a flat whisk works best for roux)
- 9×13-inch baking dish (or similar 3-quart casserole dish)
- Cutting board and sharp knife
- Measuring cups and spoons
- Paper towels for draining fried onions
- Slotted spoon for removing onions from oil
If you don’t have a deep-fry thermometer, don’t worry — you can test the oil by dropping a small piece of onion in. If it sizzles immediately, the oil is ready. I’ve been frying without a thermometer for years, and it works fine as long as you keep the heat at medium. A heavy-bottomed pot is worth investing in if you fry often, but a regular skillet works for this recipe since we’re only shallow frying.
Preparation Method
Step 1: Blanch the Green Beans
Bring a large pot of salted water to a boil. Add the green beans and cook for 3 minutes — they should be bright green and still slightly crisp. Drain immediately and transfer to a bowl of ice water to stop the cooking. Let them sit for 2 minutes, then drain well. Pat dry with a clean kitchen towel. This step keeps the beans from getting mushy in the oven. I learned this the hard way after making a soggy casserole that nobody touched.
Step 2: Make the Crispy Onions
While the beans are cooling, start the onions. In a shallow bowl, mix the gluten-free flour, salt, pepper, and smoked paprika. Pour the buttermilk into another shallow bowl. Dip the onion rings in the buttermilk, letting the excess drip off, then coat them in the flour mixture. Shake off any extra flour.
Heat about ½ inch of vegetable oil in a large skillet over medium heat. The oil is ready when a small piece of onion sizzles immediately. Fry the onions in batches — don’t crowd the pan — for 2-3 minutes per side until golden brown and crispy. Transfer to a paper towel-lined plate and sprinkle with a little salt while still hot. Set aside. You’ll have more than enough, which is the whole point — you want extras for snacking.
Step 3: Build the Creamy Mushroom Sauce
In the same skillet (wipe out the excess oil but don’t wash it), melt the butter over medium heat. Add the sliced mushrooms and diced onion. Cook for 5-7 minutes, stirring occasionally, until the mushrooms have released their liquid and started to brown. Add the minced garlic and cook for 30 seconds until fragrant.
Sprinkle the gluten-free flour over the mushroom mixture and stir constantly for 1 minute — this cooks out the raw flour taste. Slowly pour in the milk while whisking continuously to prevent lumps. Then add the broth and heavy cream, continuing to whisk. Bring to a gentle simmer and cook for 3-4 minutes until the sauce thickens enough to coat the back of a spoon. Season with salt, pepper, garlic powder, onion powder, and nutmeg. Taste and adjust seasoning — this is your chance to fix it before it goes in the oven.
Step 4: Assemble the Casserole
Preheat your oven to 375°F (190°C). Grease your 9×13-inch baking dish with butter or non-stick spray. Spread the blanched green beans evenly in the dish. Pour the creamy mushroom sauce over the top and gently stir to coat all the beans. Spread everything into an even layer.
Bake uncovered for 20 minutes. The sauce will be bubbly and slightly thickened. Remove from the oven and top with the crispy fried onions — use as many or as few as you like. Return to the oven and bake for another 10 minutes until the onions are deep golden brown and the casserole is hot all the way through.
Step 5: Rest and Serve
Let the casserole rest for 5 minutes before serving. This helps the sauce set up a bit so it doesn’t run all over the plate. Trust me, I’ve served it immediately before, and it was more like green bean soup. The wait is worth it.
Cooking Tips & Techniques
Making a gluten-free roux is trickier than a regular one — gluten-free flours don’t absorb liquid the same way. The key is to cook the flour in the butter for a full minute before adding any liquid. This step, called “cooking out the raw flour taste,” is non-negotiable. I’ve skipped it before and ended up with a sauce that tasted like paste. Not my finest moment.
If your sauce seems too thin after baking, don’t panic. Let it sit for 5-10 minutes, and it will thicken as it cools. If it’s still thin, you can mix 1 tablespoon of cornstarch with 2 tablespoons of cold water and stir it in. Pop it back in the oven for 5 minutes. I’ve had to do this more times than I’d like to admit.
For the crispiest onions, make sure they’re completely dry before frying. Any moisture on the onions will make the flour coating clump and the oil splatter. I pat them dry with paper towels after the buttermilk dip. Also, don’t skip the buttermilk step — it helps the flour stick better than plain milk. The acidity also adds a subtle tang that balances the rich sauce.
Timing is everything with this recipe. I like to blanch the beans and make the sauce the day before. Then on serving day, I just assemble and bake. The fried onions are best made fresh, but they’ll keep in an airtight container for up to 3 days. Just re-crisp them in a 350°F oven for 5 minutes before topping the casserole.
Variations & Adaptations
Dairy-Free Version
Swap the butter for plant-based butter, the milk for unsweetened oat milk, and the heavy cream for full-fat coconut cream. The sauce will have a slightly different flavor, but it’s still creamy and delicious. I’ve made this for a friend with dairy allergies, and she said it was the best green bean casserole she’d had in years. The coconut cream adds a subtle sweetness that works surprisingly well with the mushrooms.
Protein-Packed Version
Add 1 cup of cooked, shredded rotisserie chicken or 8 ounces of sautéed ground turkey to the sauce before baking. This turns the casserole into a complete meal. My kids love this version — they call it “green bean chicken casserole” and ask for it on busy school nights. It’s a great way to use up leftover chicken from a Sunday roast.
Seasonal Twist
In the fall, add 1 cup of roasted butternut squash cubes to the casserole. The sweetness of the squash pairs beautifully with the savory mushroom sauce. In spring, swap half the green beans for asparagus spears cut into 2-inch pieces. Both variations are gorgeous on a holiday table. I discovered the squash version by accident when I had leftover roasted squash and threw it in. Now it’s my go-to for Thanksgiving.
Spicy Kick
Add ½ teaspoon of red pepper flakes to the sauce along with the seasonings. Or stir in 1 tablespoon of sriracha for a different kind of heat. This version is not for the kids — but my husband loves it. He says it wakes up the whole dish.
Serving & Storage Suggestions
This casserole is best served hot, straight from the oven. Let it rest for 5 minutes before digging in — the sauce will be perfectly thick and creamy. I like to serve it in a warm dish to keep it hot longer. It’s a classic side dish for Thanksgiving, Christmas, Easter, or any family dinner where you want something comforting and familiar.
For a complete meal, pair it with roasted chicken, grilled steak, or baked salmon. It also works beautifully alongside mashed potatoes and a simple green salad. The creamy sauce complements almost any main dish. My family loves it with a simple roast chicken and some crusty gluten-free bread to soak up the extra sauce.
Leftovers keep well in the refrigerator for up to 4 days. Store in an airtight container. To reheat, place in a 350°F oven for 15-20 minutes until hot and bubbly. The microwave works in a pinch, but the onions will lose their crunch. I actually prefer the leftovers the next day — the flavors meld together and get even better. The sauce thickens up nicely overnight.
To freeze, assemble the casserole without the fried onions. Cover tightly with foil and freeze for up to 3 months. Thaw overnight in the refrigerator, then bake at 375°F for 25 minutes. Add the fried onions and bake another 10 minutes. I always make a double batch for the freezer — it’s a lifesaver during the busy holiday season.
Nutritional Information & Benefits
Per serving (about 1 cup, assuming 8 servings):
- Calories: 285
- Total Fat: 18g
- Saturated Fat: 8g
- Cholesterol: 35mg
- Sodium: 480mg
- Total Carbohydrates: 28g
- Dietary Fiber: 4g
- Sugars: 8g
- Protein: 7g
Green beans are an excellent source of vitamins A, C, and K, as well as fiber and folate. They’re low in calories and high in antioxidants. Mushrooms provide B vitamins and selenium, which supports immune function. This recipe is naturally gluten-free and can be made dairy-free with simple substitutions.
I love that this casserole feels indulgent but still packs in vegetables. It’s a great way to get kids to eat their greens without complaint. My own kids have been eating this since they were toddlers, and they genuinely love the creamy sauce and crispy topping. It’s comfort food that actually does your body some good.
Conclusion
This gluten-free green bean casserole is proof that simple ideas often turn out to be the best ones. My niece Maya taught me that day in the kitchen, and I’ve never looked back. It’s creamy, crunchy, savory, and completely satisfying — everything a holiday side dish should be. And honestly, it’s become a year-round staple in my house.
I hope you give this recipe a try and make it your own. Add extra mushrooms, swap the herbs, or load it up with cheese — it’s flexible enough to handle whatever you throw at it. The only rule is to use fresh ingredients and cook with love. That’s what makes it taste so good.
If you make this casserole, I’d love to hear about it. Leave a comment below and tell me how it turned out. Did your kids love it? Did you add your own twist? Share your stories — I read every single one. And don’t forget to pin this recipe for later. Happy cooking, friends!
Frequently Asked Questions
Can I use frozen green beans instead of fresh?
Yes, you can use frozen green beans. Thaw them first and pat them dry with paper towels to remove excess moisture. If you skip this step, the casserole will be watery. Frozen beans also don’t need to be blanched — just add them directly to the sauce.
Can I make this casserole ahead of time?
Absolutely. Assemble the casserole without the fried onions up to 24 hours in advance. Cover and refrigerate. When ready to bake, add 10 minutes to the initial baking time since you’re starting from cold. Add the fried onions for the last 10 minutes of baking.
What’s the best gluten-free flour to use for the roux?
I recommend Bob’s Red Mill 1-to-1 Baking Flour or King Arthur Measure for Measure. Both contain xanthan gum, which helps the sauce thicken properly. If you use a single-ingredient flour like rice flour or almond flour, the sauce won’t thicken the same way. Stick with a blend for best results.
Can I skip the homemade fried onions and use store-bought?
Yes, you can use store-bought gluten-free fried onions. Just check the label to make sure they’re certified gluten-free. The homemade version is crunchier and more flavorful, but the store-bought option saves time. I’ve used both, and the casserole is delicious either way.
How do I keep the fried onions from getting soggy?
The key is to add them during the last 10 minutes of baking, not at the beginning. Also, make sure the onions are completely cool before storing them. If you’re making them ahead, store them in an airtight container at room temperature for up to 3 days. Re-crisp in a 350°F oven for 5 minutes before using.
Pin This Recipe!
Best Gluten-Free Green Bean Casserole: Easy Kid-Approved Recipe
This gluten-free green bean casserole is creamy, crunchy, and completely satisfying. Made from scratch with a simple roux and homemade crispy onions, it’s a crowd-pleaser that even picky eaters love.
- Prep Time: 20 minutes
- Cook Time: 30 minutes
- Total Time: 50 minutes
- Yield: 8 servings 1x
- Category: Side Dish
- Cuisine: American
Ingredients
- 1 ½ pounds fresh green beans, trimmed and cut into 2-inch pieces
- 2 tablespoons unsalted butter
- 8 ounces cremini mushrooms, sliced
- 1 small yellow onion, diced
- 3 cloves garlic, minced
- 3 tablespoons gluten-free all-purpose flour blend
- 1 ½ cups whole milk
- 1 cup low-sodium chicken or vegetable broth
- ½ cup heavy cream
- 1 teaspoon salt
- ½ teaspoon black pepper
- ¼ teaspoon garlic powder
- ¼ teaspoon onion powder
- Pinch of nutmeg
- 2 large yellow onions, thinly sliced into rings
- 1 cup gluten-free all-purpose flour blend
- ½ cup buttermilk
- 1 teaspoon salt
- ½ teaspoon black pepper
- ½ teaspoon smoked paprika (optional)
- Vegetable oil for frying
Instructions
- Bring a large pot of salted water to a boil. Add the green beans and cook for 3 minutes until bright green and still slightly crisp. Drain and transfer to a bowl of ice water for 2 minutes, then drain well and pat dry.
- In a shallow bowl, mix 1 cup gluten-free flour, 1 teaspoon salt, ½ teaspoon black pepper, and ½ teaspoon smoked paprika. In another shallow bowl, pour ½ cup buttermilk. Dip onion rings in buttermilk, then coat in flour mixture. Shake off excess.
- Heat about ½ inch of vegetable oil in a large skillet over medium heat. Fry onion rings in batches for 2-3 minutes per side until golden brown. Transfer to paper towels and sprinkle with salt. Set aside.
- In the same skillet, melt 2 tablespoons butter over medium heat. Add sliced mushrooms and diced onion; cook 5-7 minutes until mushrooms release liquid and start to brown. Add minced garlic and cook 30 seconds.
- Sprinkle 3 tablespoons gluten-free flour over mushroom mixture and stir constantly for 1 minute. Slowly whisk in 1 ½ cups milk, then 1 cup broth and ½ cup heavy cream. Bring to a gentle simmer and cook 3-4 minutes until thickened. Season with 1 teaspoon salt, ½ teaspoon pepper, ¼ teaspoon garlic powder, ¼ teaspoon onion powder, and a pinch of nutmeg.
- Preheat oven to 375°F (190°C). Grease a 9×13-inch baking dish. Spread blanched green beans in dish, pour sauce over, and stir to coat. Bake uncovered for 20 minutes.
- Remove from oven, top with fried onions, and bake another 10 minutes until onions are deep golden brown and casserole is hot.
- Let rest for 5 minutes before serving.
Notes
For dairy-free, use plant-based butter, unsweetened oat milk, and full-fat coconut cream. For the crispiest onions, ensure they are completely dry before frying. The sauce can be made a day ahead; assemble and bake when ready. Store leftovers in the refrigerator for up to 4 days.
Nutrition
- Serving Size: 1 cup
- Calories: 285
- Sugar: 8
- Sodium: 480
- Fat: 18
- Saturated Fat: 8
- Carbohydrates: 28
- Fiber: 4
- Protein: 7
Keywords: gluten-free green bean casserole, easy green bean casserole, kid-approved, Thanksgiving side dish, gluten-free side dish