The church potluck was in four hours and I’d completely forgotten. Not just forgotten—I’d blocked it out, the way you do with dental appointments and annual performance reviews. Everyone else would be bringing their A-game: layered casseroles with caramelized onions, homemade bread that had been rising since dawn, those little gelatin salads that require actual molds. I had a fridge full of Thanksgiving leftovers and a vague sense of panic.
I mean, let’s be honest—there’s only so much turkey sandwich you can eat before your soul starts asking for something more. The bird was sitting there, all carved up and sad in its Tupperware, next to a half-bag of frozen peas I’d bought for a recipe I never made. And in the back of the freezer, like a gift from my past self, was a sheet of puff pastry. I remember staring at those three ingredients—turkey, peas, puff pastry—and thinking, “This is either going to be embarrassing or brilliant.”
Spoiler alert: it was the kind of brilliant that makes people ask for the recipe before they’ve finished chewing. I threw it together in a cast-iron skillet, not even bothering to transfer it to a proper dish, and rushed out the door with the whole thing wrapped in foil. The potluck table was a battlefield of culinary ambition, and my humble leftover turkey pot pie sat there looking, honestly, a little plain. But then people started opening the foil, and the steam hit them—that buttery, herby, comfort-you-from-the-inside smell—and suddenly my skillet was empty while fancier dishes still had full serving spoons in them. That’s when I knew this one was special. Maybe you’ve been there, staring down a fridge full of leftovers and wondering how to make them feel like a meal you’d actually look forward to. This is that meal.
Why You’ll Love This Recipe
This isn’t just another way to use up leftovers—it’s the way you’ll actually want to use them. I’ve tested this recipe through three different holiday seasons, two different ovens, and one very questionable store-brand puff pastry, and it holds up every single time. Here’s why this one’s different:
- Quick & Easy: From fridge to oven in under 15 minutes. Seriously. The puff pastry does all the heavy lifting, and you don’t even have to make a from-scratch pie crust.
- Simple Ingredients: You probably have most of this in your kitchen right now. Leftover turkey, frozen veggies, a can of cream of something soup—it’s pantry-friendly comfort at its finest.
- Perfect for Cozy Nights: This is the definition of cold-weather comfort food. Rainy Tuesday, snowy Sunday, or just one of those days—this pot pie fixes it.
- Crowd-Pleaser: I’ve served this to picky kids, foodie relatives, and neighbors who “don’t really do casseroles.” Every single one of them went back for seconds.
- Unbelievably Delicious: The contrast between the flaky, golden puff pastry lid and the creamy, savory filling underneath? It’s the kind of texture combo that makes you close your eyes after the first bite.
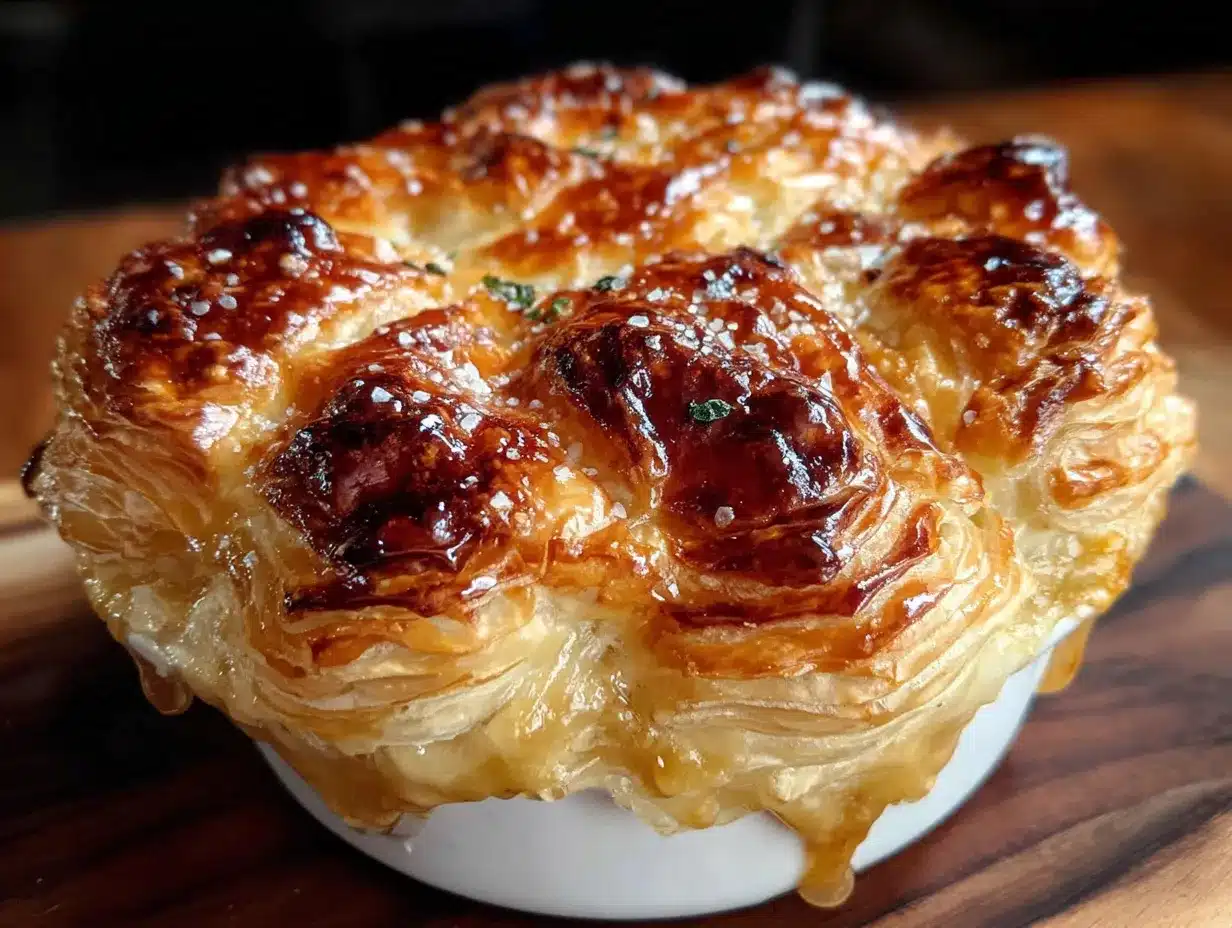
What makes this recipe different from every other leftover turkey pot pie out there is the puff pastry lid. Instead of a heavy, time-consuming double crust, you get this light, buttery, shatteringly flaky top that feels fancy without the fuss. The filling stays creamy and rich, but the pastry keeps everything from feeling heavy. It’s comfort food reimagined—faster, easier, but with the same soul-soothing satisfaction that makes pot pie the ultimate hug in a bowl.
What Ingredients You Will Need
This recipe uses simple, wholesome ingredients to deliver bold flavor and satisfying texture without the fuss. Most of these are pantry staples or leftover heroes, so you can throw this together without a special trip to the store.
For the Filling
- 3 cups cooked turkey, shredded or diced (leftover white and dark meat both work great; I actually prefer a mix for more flavor)
- 2 tablespoons unsalted butter (adds richness; I recommend Kerrygold for best flavor)
- 1 medium yellow onion, diced (about 1 cup; sweet onions work too if that’s what you have)
- 2 cloves garlic, minced (fresh is best, but jarred minced garlic works in a pinch)
- 1/3 cup all-purpose flour (this thickens the filling; use a gluten-free all-purpose blend if needed)
- 2 cups low-sodium chicken or turkey broth (homemade turkey stock from the carcass is incredible here)
- 1 cup whole milk or half-and-half (adds creaminess; use 2% milk for a lighter version)
- 1 cup frozen peas and carrots mix (no need to thaw—just toss them in frozen)
- 1/2 cup frozen corn kernels (optional, but I love the little bursts of sweetness)
- 1 teaspoon dried thyme (or 1 tablespoon fresh thyme leaves)
- 1/2 teaspoon dried rosemary (crush it between your fingers to release the oils)
- 1/2 teaspoon salt (plus more to taste)
- 1/4 teaspoon black pepper (freshly ground is always better)
- 1/4 cup frozen peas (for extra color and sweetness—add at the very end)
For the Puff Pastry Lid
- 1 sheet frozen puff pastry, thawed (I use Pepperidge Farm; it’s reliable and widely available)
- 1 large egg (for the egg wash)
- 1 tablespoon water (to thin the egg wash)
- Flaky sea salt, for sprinkling (optional but highly recommended)
Substitution Guidance
If you’re out of turkey, shredded rotisserie chicken works perfectly. For a dairy-free version, use olive oil instead of butter, and swap the milk for unsweetened oat or almond milk (though the filling will be slightly less creamy). You can also skip the egg wash and brush the pastry with melted butter or milk for a similar golden finish.
Equipment Needed
You don’t need a fancy kitchen to pull this off—just a few basics that most home cooks already have. Here’s what you’ll need:
- 10-inch oven-safe skillet or shallow baking dish (cast iron is ideal—it goes from stovetop to oven beautifully; a 9×9-inch baking dish works too)
- Sharp chef’s knife and cutting board (for dicing the onion and turkey)
- Wooden spoon or silicone spatula (for stirring the filling without scratching your pan)
- Measuring cups and spoons (accuracy matters for the flour and broth)
- Small bowl (for whisking the egg wash)
- Pastry brush (or just use a paper towel if you don’t have one—I’ve done it)
- Paring knife or pizza cutter (for trimming the puff pastry)
I’ve made this in a $15 baking dish from the grocery store and it turned out just as good as in my fancy cast-iron skillet. The only non-negotiable is that your pan is oven-safe to 400°F. If you’re not sure, wrap the handle in a double layer of foil as a safety measure. Oh, and if you don’t have a pastry brush, don’t run out and buy one—just dip a folded paper towel in the egg wash and dab it on. Works every time.
Preparation Method
Alright, let’s get cooking. This comes together fast, so have everything prepped and ready before you start. Trust me on this one—I learned the hard way when I was scrambling to find the flour while my onions were burning.
- Preheat your oven to 400°F (200°C). Position a rack in the center of the oven. This is important—too high and the pastry will burn before the filling bubbles; too low and you’ll end up with a soggy lid.
- Start the filling base. Place your 10-inch oven-safe skillet over medium heat and add the 2 tablespoons of butter. Let it melt completely—it should sizzle gently when you add the onion. Toss in the diced onion and cook for 4-5 minutes, stirring occasionally, until it turns translucent and starts to soften. You’re looking for that golden, fragrant stage where your kitchen starts smelling like comfort.
- Add the garlic. Stir in the minced garlic and cook for exactly 30 seconds—any longer and it’ll burn and turn bitter. You should smell it immediately. If you’re using jarred garlic, drain off the liquid first to avoid making the filling watery.
- Make the roux. Sprinkle the 1/3 cup of all-purpose flour over the onion mixture. Stir constantly with your wooden spoon for about 2 minutes. The mixture will look pasty and clumpy—that’s exactly what you want. This step cooks out the raw flour taste and ensures your filling thickens properly. I once skipped this step in a hurry and ended up with soup instead of pot pie filling. Learn from my mistakes.
- Add the liquids slowly. Pour in the 2 cups of broth in a steady stream while whisking continuously. Then add the 1 cup of milk or half-and-half. Keep stirring until the mixture is smooth and starts to thicken—this takes about 3-4 minutes. You’ll know it’s ready when it coats the back of your spoon and leaves a clear trail when you run your finger through it.
- Season the filling. Stir in the dried thyme, crushed rosemary, salt, and black pepper. Taste it here—I mean it. This is your chance to adjust the seasoning before the turkey and veggies go in. The filling should taste slightly overseasoned at this point because the turkey and vegetables will absorb some of the salt.
- Add the turkey and vegetables. Fold in the shredded turkey, frozen peas and carrots, and frozen corn (if using). Stir until everything is evenly coated in that creamy sauce. Let it simmer gently for 3-4 minutes, just until the vegetables are heated through and the turkey is warmed. Then stir in the extra 1/4 cup of frozen peas—adding them at the end keeps them bright green and slightly pop-in-your-mouth tender.
- Prepare the puff pastry lid. While the filling simmers, lightly flour your counter and unfold the thawed puff pastry sheet. Roll it out just slightly—about 1/8 inch thick—to fit your skillet or baking dish with about 1 inch of overhang. Don’t overwork the pastry; you want those butter layers intact for maximum flakiness.
- Top the filling. Remove the skillet from the heat. Carefully lay the puff pastry sheet over the filling, letting the edges hang over the sides of the pan. Don’t stretch the pastry—just let it settle naturally. Use a paring knife to trim any excess, leaving about 1/2 inch of overhang all around.
- Create the egg wash. In a small bowl, whisk together the egg and 1 tablespoon of water until smooth and lightly frothy. Brush this mixture evenly over the entire surface of the puff pastry—don’t skip the edges. This is what gives you that gorgeous, golden-brown, bakery-style finish.
- Add the finishing touch. Sprinkle a pinch of flaky sea salt over the egg-washed pastry. It sounds weird, but trust me—that little bit of salt on top makes the buttery pastry sing. If you don’t have flaky salt, a tiny pinch of regular salt works too.
- Bake to perfection. Place the skillet in the preheated oven and bake for 25-30 minutes, until the puff pastry is puffed up, deeply golden, and the filling is bubbling up around the edges. If the pastry is browning too quickly after 20 minutes, tent it loosely with foil for the remaining time.
- Rest before serving. This is the hardest part—let the pot pie rest for 10 minutes after it comes out of the oven. The filling needs this time to set up so you don’t end up with a runny mess on your plate. I know it smells incredible, but patience pays off here.
Cooking Tips & Techniques
After making this recipe more times than I care to count, I’ve collected a few hard-won lessons. Here are the ones that’ll save you from my mistakes.
Don’t skip the roux step. I know it’s tempting to just dump everything in and hope for the best, but that 2-minute flour-cooking window is what separates a creamy pot pie from a watery one. I once tried to shortcut this by using cornstarch slurry instead, and the filling turned out gluey and weird. Stick with the roux—it’s worth it.
Keep your puff pastry cold. Puff pastry is basically butter wrapped in dough, and butter needs to stay cold to create those flaky layers. If your kitchen is warm, pop the pastry back in the fridge for 10 minutes after you roll it out. I learned this the hard way when my pastry melted into a sad, greasy puddle on top of a hot filling.
Use low-sodium broth. This gives you control over the salt level. Turkey and puff pastry both have natural sodium, and you can always add more salt at the end. You can’t take it out once it’s in there. Trust me, I’ve ruined a batch by using regular broth and then adding the full salt measurement.
Let the filling cool slightly before adding the pastry. If the filling is piping hot when you lay the pastry on top, it’ll start melting the butter before the pastry even hits the oven. Give it 5 minutes off the heat—just enough so it’s warm but not steaming. This one tip alone improved my puff pastry results dramatically.
Multitask like a pro. While the filling simmers, roll out your pastry and make the egg wash. While the pot pie bakes, clean up your kitchen and set the table. This dish comes together fast, so having everything ready to go makes the process feel effortless instead of chaotic.
Variations & Adaptations
One of the best things about this recipe is how flexible it is. Here are some ways to make it your own:
Vegetarian Version: Swap the turkey for 3 cups of roasted mushrooms and chickpeas. The mushrooms add that savory, meaty depth, and chickpeas give you the protein and texture. Use vegetable broth instead of chicken broth, and you’ve got a hearty vegetarian pot pie that even meat-eaters will love.
Gluten-Free Adaptation: Use a gluten-free all-purpose flour blend (I like Bob’s Red Mill 1-to-1) for the roux. For the lid, you can use gluten-free puff pastry—it’s available at most grocery stores now, though it tends to be a bit less flaky. Alternatively, top the filling with gluten-free biscuit dough for a similar effect.
Dairy-Free Twist: Substitute the butter with olive oil or vegan butter, and use unsweetened oat milk or canned coconut milk (the unsweetened kind, not the creamy one for curries). The filling will be slightly less rich, but still delicious. I’ve made this for dairy-free friends and they went back for thirds.
Seasonal Vegetable Swap: In spring, use fresh asparagus, peas, and leeks instead of the frozen mix. In summer, add fresh corn cut off the cob and diced zucchini. In fall, roasted butternut squash cubes are incredible in here. The creamy sauce works with almost any vegetable combination.
Spicy Kick: Add 1/2 teaspoon of smoked paprika and a pinch of cayenne pepper to the filling along with the other seasonings. The smokiness complements the turkey beautifully, and the heat cuts through the richness of the cream sauce. I tried this on a whim one night and now it’s my go-to version.
Serving & Storage Suggestions
This pot pie is at its absolute best served warm, straight from the skillet, with the puff pastry lid still puffed and golden. I like to scoop it into shallow bowls, making sure each serving gets a generous piece of that flaky top. The contrast between the crispy pastry and the creamy filling is the whole point.
What to serve with it: A simple green salad with a bright vinaigrette is the perfect side—the acidity cuts through the richness of the pot pie. I also love serving it with roasted green beans or steamed broccoli. If you’re feeling extra cozy, a side of crusty bread for sopping up every last bit of sauce is never a bad idea. For drinks, a crisp white wine like Sauvignon Blanc or a light lager pairs beautifully.
Storing leftovers: If you have any left (which is rare in my house), let the pot pie cool completely, then cover the skillet tightly with foil or transfer leftovers to an airtight container. It will keep in the refrigerator for up to 4 days. The puff pastry will soften overnight, but it’s still delicious—think of it as a pot pie casserole the next day.
Reheating instructions: The best way to reheat is in a 350°F oven for 15-20 minutes, covered with foil. This warms the filling through without burning the pastry. In a pinch, the microwave works too—just know the pastry won’t be crispy. Heat individual portions for 2-3 minutes, checking halfway through.
Freezer-friendly: You can freeze the unbaked pot pie (without the egg wash) for up to 3 months. Assemble everything in a freezer-safe dish, wrap tightly in plastic wrap and foil, and freeze. When you’re ready to bake, thaw overnight in the fridge, add the egg wash, and bake as directed, adding 10-15 minutes to the baking time since the filling will be cold.
Flavor development: Here’s a secret—this pot pie actually tastes even better the next day. The flavors meld together overnight, and the filling becomes even more rich and complex. If you can resist eating it all in one sitting, you’re in for a treat.
Nutritional Information & Benefits
Here’s an approximate nutritional breakdown per serving (based on 6 servings):
| Nutrient | Amount per Serving |
|---|---|
| Calories | 485 |
| Total Fat | 28g |
| Saturated Fat | 12g |
| Cholesterol | 115mg |
| Sodium | 720mg |
| Total Carbohydrates | 35g |
| Dietary Fiber | 4g |
| Sugars | 6g |
| Protein | 32g |
This pot pie is surprisingly balanced for comfort food. The turkey provides lean protein that keeps you full and satisfied, while the vegetables add fiber, vitamins A and C, and antioxidants. The puff pastry is an indulgence, sure, but it’s a reasonable one—you’re getting a real meal here, not just empty calories. If you’re watching your sodium, use low-sodium broth and skip the added salt in the filling. For a lighter version, swap the half-and-half for whole milk and use only 1 tablespoon of butter. The pot pie will still be creamy and delicious, just a little less decadent.
Conclusion
This leftover turkey pot pie with puff pastry lid has become my favorite post-holiday tradition, and I honestly think it’s better than the Thanksgiving dinner itself. There’s something magical about taking odds and ends from the fridge and turning them into a meal that feels like a warm hug on a cold day. The flaky, golden pastry cracking open to reveal that creamy, savory filling underneath—it’s the kind of food that makes you slow down and actually taste every bite.
I hope you give this recipe a try, whether you’re staring down a fridge full of holiday leftovers or just craving some serious comfort food. Don’t be afraid to make it your own—swap in whatever vegetables you have, play with the seasonings, or try the vegetarian version I mentioned. Cooking should feel flexible and forgiving, not rigid and stressful.
If you make this pot pie, I’d love to hear about it. Drop a comment below and tell me how it turned out, or share a photo on Pinterest and tag me. Did you add something unexpected? Did your family fight over the last piece? Let me know—I read every single comment, and your stories honestly make my day. Now go preheat that oven and give those leftovers the glorious second life they deserve!
Frequently Asked Questions
Can I use rotisserie chicken instead of leftover turkey?
Absolutely! Rotisserie chicken is a perfect substitute. Use about 3 cups of shredded chicken, and follow the recipe exactly as written. The flavors work beautifully with chicken, and it’s a great way to use up rotisserie chicken from the grocery store.
Do I have to use puff pastry, or can I use pie crust?
You can definitely use a pie crust if that’s what you have on hand. The texture will be different—more dense and flaky rather than light and puffy—but it’s still delicious. If using pie crust, you may need to adjust the baking time slightly, so keep an eye on it after 20 minutes.
Can I make this ahead of time?
Yes! You can assemble the entire pot pie (without the egg wash) up to 24 hours in advance. Cover and refrigerate, then add the egg wash just before baking. You may need to add 5-10 minutes to the baking time since the filling will be cold from the fridge.
What if I don’t have an oven-safe skillet?
No problem at all! Make the filling in a regular skillet or saucepan, then transfer it to a 9×9-inch baking dish or a 2-quart casserole dish. Top with the puff pastry and bake as directed. Just make sure your baking dish is oven-safe to 400°F.
My puff pastry always ends up soggy. What am I doing wrong?
The most common culprit is a filling that’s too thin or too hot when the pastry goes on. Make sure your filling is thick enough to coat the back of a spoon before adding the pastry. Also, let the filling cool for 5 minutes off the heat before topping it with pastry. And don’t skip the egg wash—it creates a barrier that helps keep the pastry crisp.
Pin This Recipe!
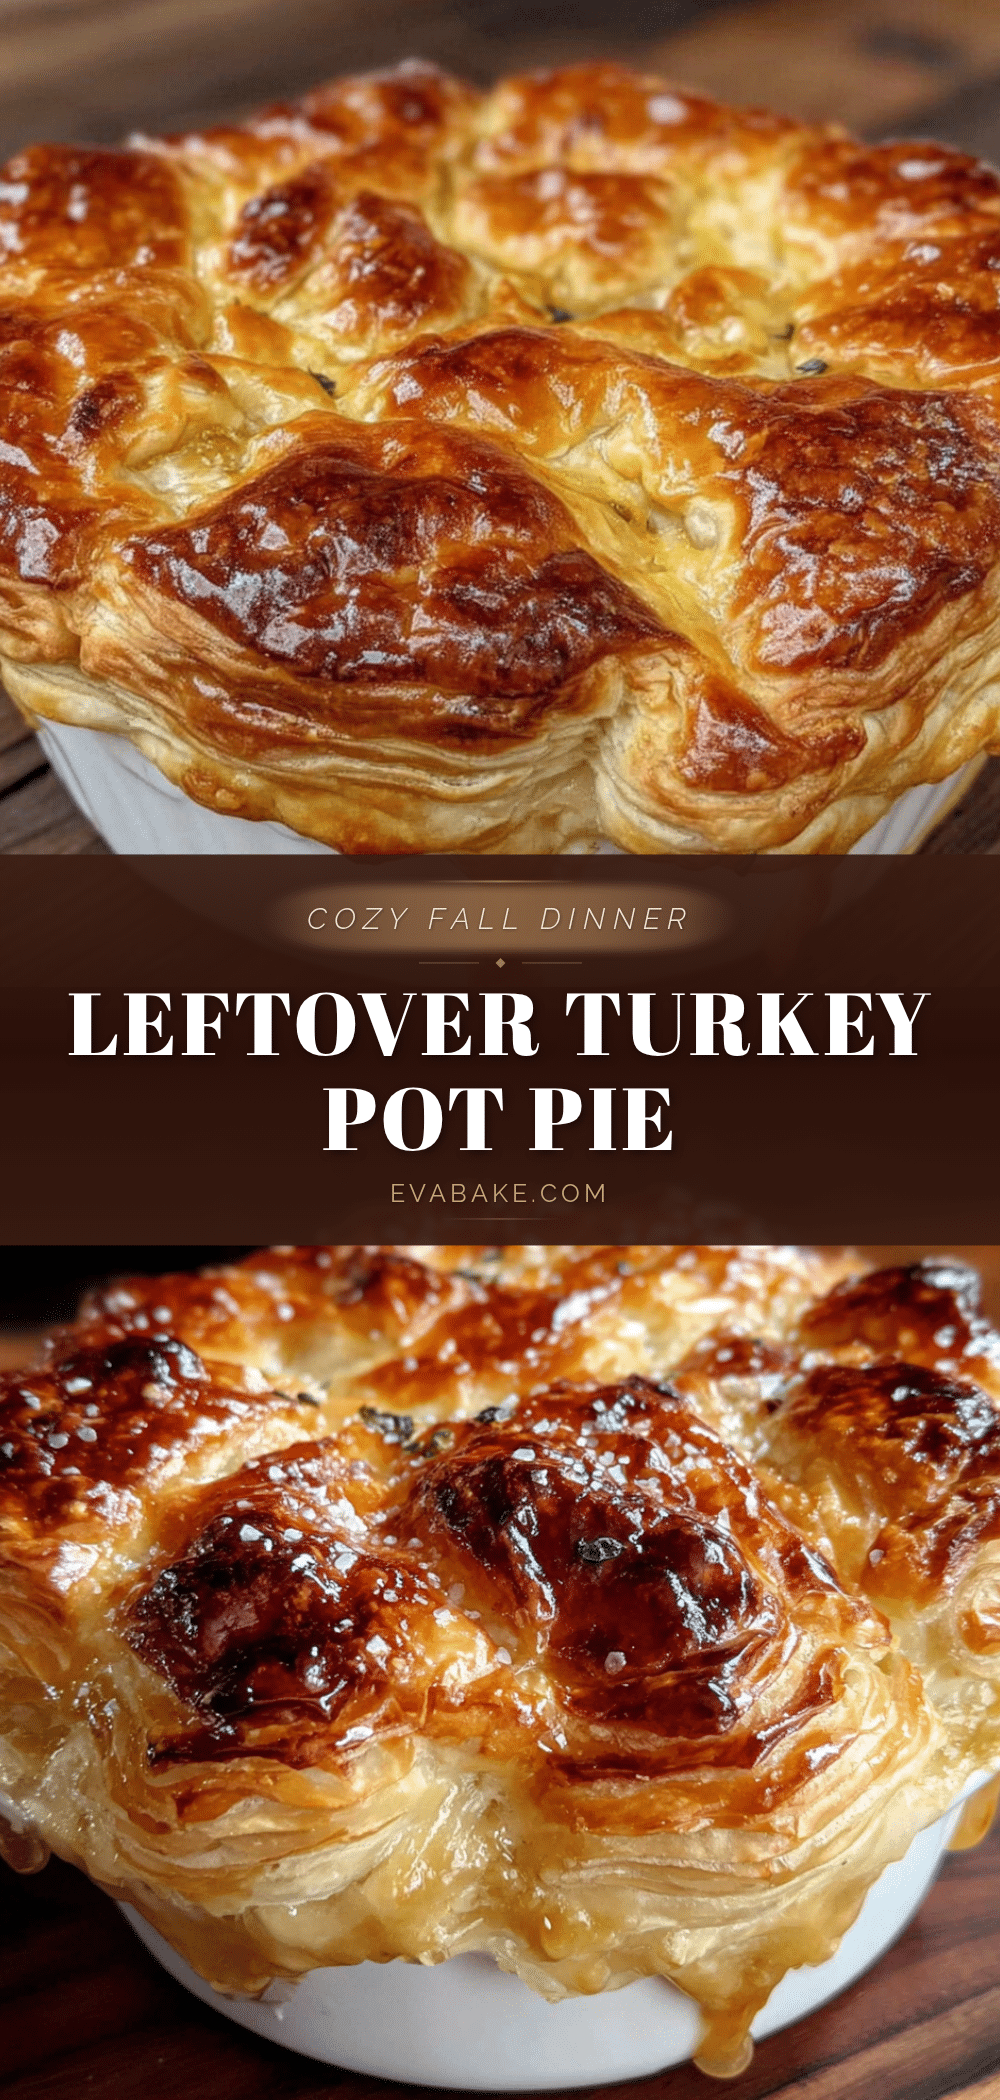
Easy Leftover Turkey Pot Pie with Puff Pastry

A quick and easy leftover turkey pot pie with a flaky puff pastry lid, creamy filling, and simple ingredients. Perfect for using up holiday leftovers or any night you crave comfort food.
- Prep Time: 15 minutes
- Cook Time: 30 minutes
- Total Time: 45 minutes
- Yield: 6 servings 1x
- Category: Main Course
- Cuisine: American
Ingredients
- 3 cups cooked turkey, shredded or diced
- 2 tablespoons unsalted butter
- 1 medium yellow onion, diced (about 1 cup)
- 2 cloves garlic, minced
- 1/3 cup all-purpose flour
- 2 cups low-sodium chicken or turkey broth
- 1 cup whole milk or half-and-half
- 1 cup frozen peas and carrots mix
- 1/2 cup frozen corn kernels (optional)
- 1 teaspoon dried thyme
- 1/2 teaspoon dried rosemary
- 1/2 teaspoon salt
- 1/4 teaspoon black pepper
- 1/4 cup frozen peas (for extra color and sweetness)
- 1 sheet frozen puff pastry, thawed
- 1 large egg
- 1 tablespoon water
- Flaky sea salt, for sprinkling (optional)
Instructions
- Preheat your oven to 400°F (200°C). Position a rack in the center of the oven.
- Place a 10-inch oven-safe skillet over medium heat and add 2 tablespoons of butter. Let it melt completely.
- Add the diced onion and cook for 4-5 minutes, stirring occasionally, until translucent and softened.
- Stir in the minced garlic and cook for exactly 30 seconds.
- Sprinkle 1/3 cup of all-purpose flour over the onion mixture. Stir constantly for about 2 minutes until pasty and clumpy.
- Pour in 2 cups of broth in a steady stream while whisking continuously. Then add 1 cup of milk or half-and-half. Keep stirring until smooth and thickened, about 3-4 minutes.
- Stir in dried thyme, crushed rosemary, salt, and black pepper. Taste and adjust seasoning.
- Fold in the shredded turkey, frozen peas and carrots, and frozen corn (if using). Simmer gently for 3-4 minutes. Then stir in the extra 1/4 cup of frozen peas.
- Lightly flour your counter and unfold the thawed puff pastry sheet. Roll it out to about 1/8 inch thick, large enough to fit your skillet with about 1 inch of overhang.
- Remove the skillet from the heat. Lay the puff pastry over the filling, letting the edges hang over. Trim excess, leaving about 1/2 inch overhang.
- In a small bowl, whisk together the egg and 1 tablespoon of water. Brush evenly over the entire puff pastry surface.
- Sprinkle a pinch of flaky sea salt over the egg-washed pastry.
- Bake for 25-30 minutes, until the puff pastry is puffed and golden and the filling is bubbling. If browning too quickly after 20 minutes, tent loosely with foil.
- Let the pot pie rest for 10 minutes before serving.
Notes
For best results, keep puff pastry cold until ready to use. Let filling cool slightly before adding pastry to prevent melting. Use low-sodium broth to control salt level. Pot pie tastes even better the next day.
Nutrition
- Serving Size: 1 serving (1/6 of re
- Calories: 485
- Sugar: 6
- Sodium: 720
- Fat: 28
- Saturated Fat: 12
- Carbohydrates: 35
- Fiber: 4
- Protein: 32
Keywords: leftover turkey, pot pie, puff pastry, comfort food, easy dinner, Thanksgiving leftovers