“I’m not eating anything that looks like a bird,” my nephew announced, arms crossed, at the Thanksgiving kids’ table three years ago. He was eight and had apparently decided that poultry-shaped food was his line in the sand. Fair enough, I thought. I’d made turkey-shaped cookies the year before and watched him eat around the head. So I just nodded, slid a plate of these cupcake turkeys his way, and focused on helping his little sister with her napkin. You know how it goes—sometimes the best strategy is to pretend you don’t care. Twenty minutes later, I looked over and he was on his second one, chocolate feathers smeared across his cheek. He caught me looking and mumbled, “These are just cupcakes. They don’t count.” And that, honestly, was the moment I knew I had something special.
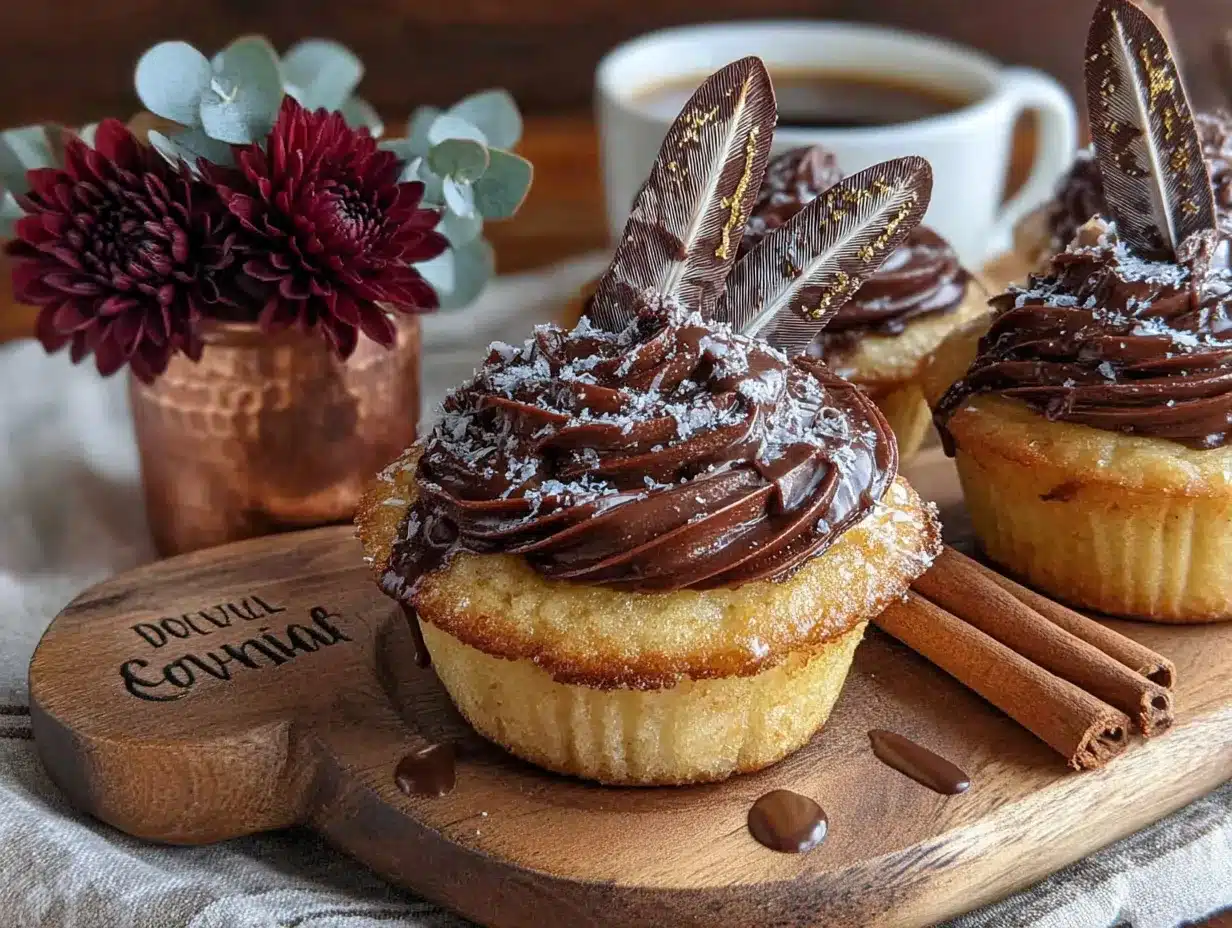
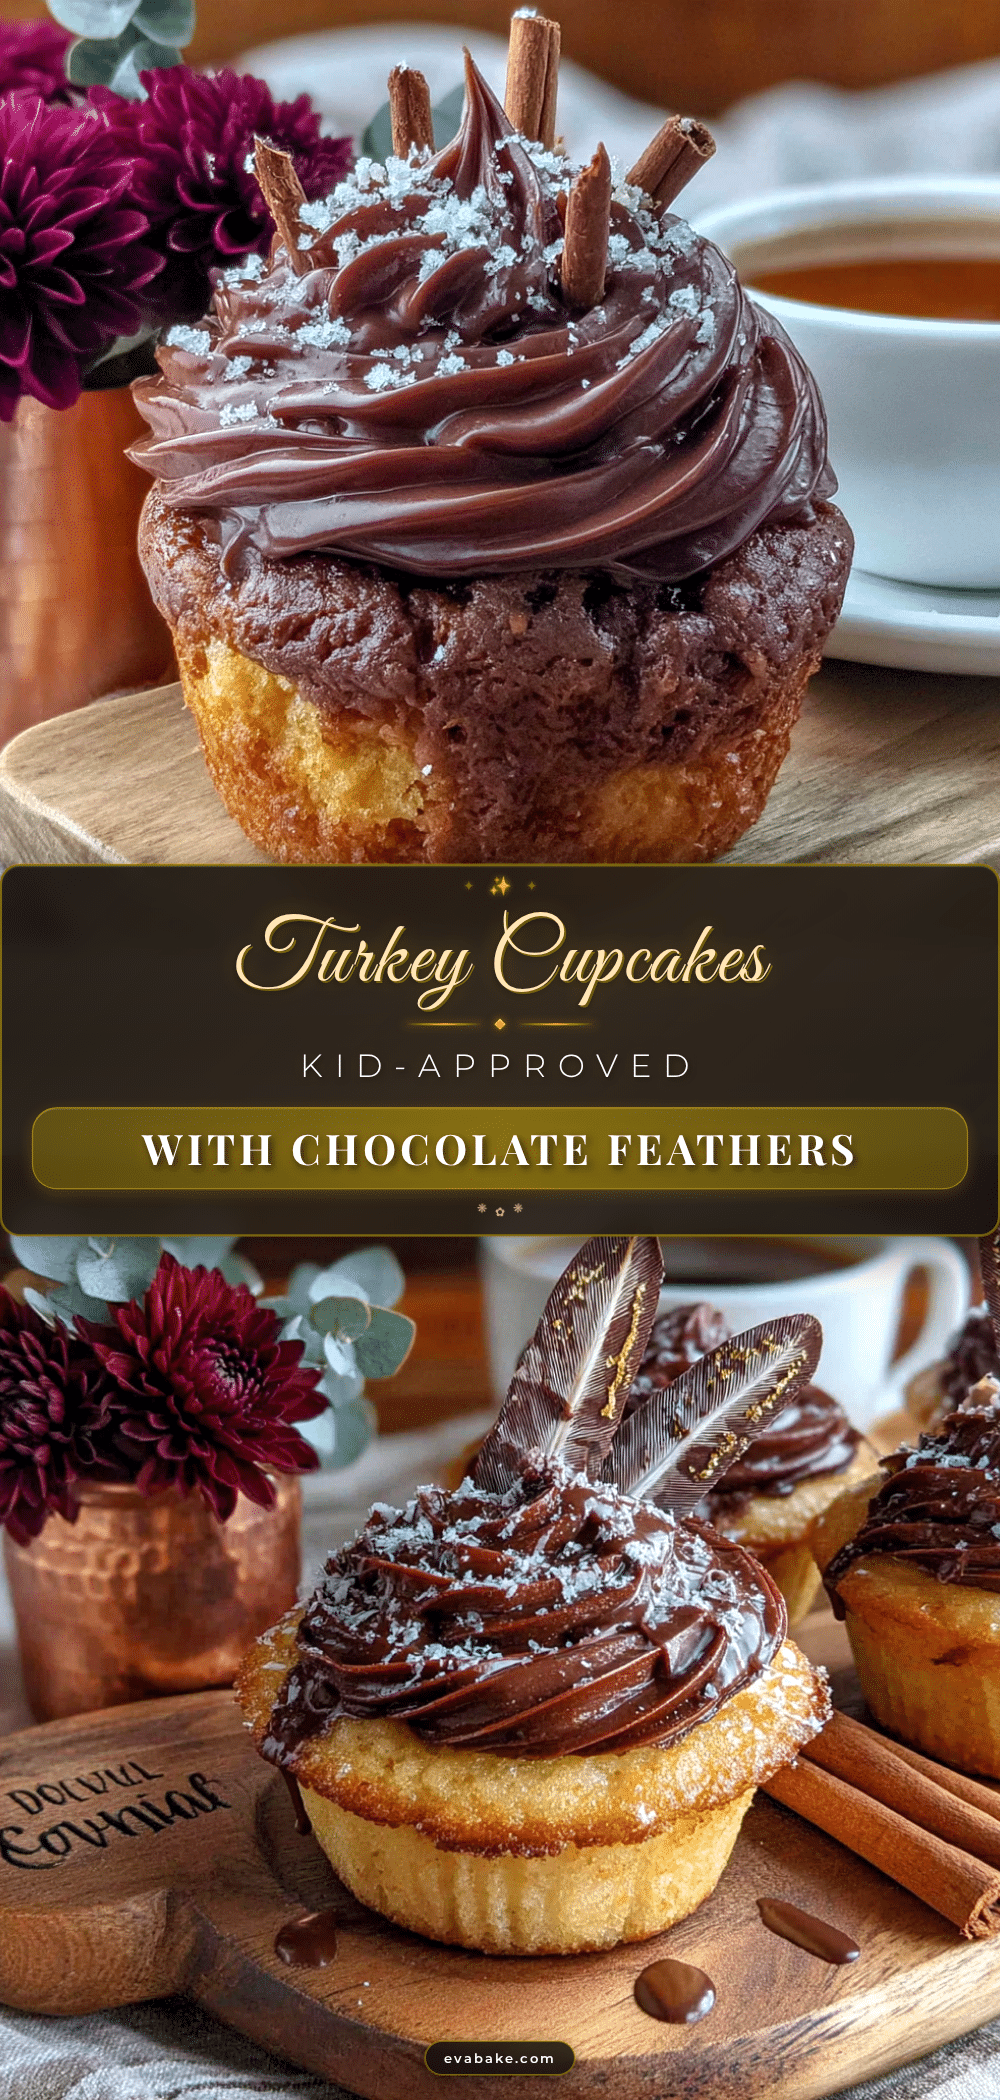
These Kid-Approved Turkey Cupcakes with Chocolate Feathers are my secret weapon for any fall gathering where kids are involved. They look impressive enough to make the adults smile, but they’re actually dead simple to put together. The chocolate feathers are the real star here—they’re made from melted chocolate piped into feather shapes, and let me tell you, watching a kid’s face light up when they realize they can eat the “feathers” is pure gold. I’ve made these for school bake sales, Friendsgiving parties, and even a classroom Thanksgiving celebration where the teacher specifically asked for something that wouldn’t cause a sugar meltdown before nap time. Spoiler: they still had a sugar meltdown, but at least they were happy about it.
Maybe you’ve been there—standing in the baking aisle, staring at those pre-made turkey cupcake kits that cost way too much and taste like cardboard. I’ve been there too. That’s exactly why I started making these from scratch. The chocolate feathers are easier than you’d think, the cupcakes are actually moist and delicious (not just a vehicle for frosting), and the whole thing comes together in under an hour. Plus, you get to say you made chocolate feathers, which sounds way more impressive than it actually is. I keep coming back to this recipe because it’s the one that makes people—kids especially—feel like they’re part of something special. And honestly, isn’t that what Thanksgiving is really about?
Why You’ll Love This Recipe
- Quick & Easy : These come together in about 45 minutes from start to finish, including cooling time. Perfect for busy weeknights when you need a classroom treat or a last-minute dessert for a potluck.
- Simple Ingredients : No weird specialty items here. You probably already have flour, sugar, cocoa powder, and eggs in your pantry. The chocolate feathers use basic chocolate chips or melting wafers.
- Perfect for Fall Gatherings : Whether it’s a Thanksgiving feast, a harvest party, or just a fun weekend baking project, these little turkeys fit right in. They’re especially great for kids’ events where presentation matters.
- Crowd-Pleaser : I’ve watched kids who swore they didn’t like chocolate cake go back for seconds. The novelty factor is real, and the taste delivers. Adults love them too—they’re not overly sweet, which is a win for the grown-up palate.
- Unbelievably Delicious : The chocolate cake is moist and tender, the frosting is creamy without being cloying, and the chocolate feathers add a satisfying crunch. It’s the kind of dessert that makes you close your eyes after the first bite.
What makes this recipe different from the dozens of other turkey cupcake tutorials out there? It’s the chocolate feathers technique. Most versions use candy corn or pretzels for the feathers, which is fine, but the chocolate version is way more elegant and actually tastes better. I tested this method at least six times before I got it right—the right chocolate temperature, the perfect piping consistency, the trick for getting them to release cleanly from the parchment. This isn’t just another version of turkey cupcakes. It’s the version that works every single time, even if you’ve never piped chocolate in your life.
This recipe is the kind that makes you feel like a baking hero without actually having to be one. It’s comfort food with a sense of humor—the kind of dessert that makes people smile before they even take a bite. And for the record, my nephew now requests these every year. He’s eleven and still won’t admit he was wrong, but I see him sneaking extra feathers when he thinks no one’s looking.
What Ingredients You Will Need
This recipe uses simple, everyday ingredients to create something that looks way more complicated than it actually is. The magic happens in the chocolate feathers and the assembly, not in fancy baking tricks.
For the Chocolate Cupcakes
- 1 ¾ cups all-purpose flour (I use King Arthur for consistent results)
- 1 ½ cups granulated sugar
- ¾ cup unsweetened cocoa powder (natural or Dutch-process both work; I prefer Ghirardelli for deeper flavor)
- 1 ½ teaspoons baking powder
- 1 ½ teaspoons baking soda
- 1 teaspoon salt
- 2 large eggs (room temperature for best texture)
- 1 cup whole milk (2% works fine too, but avoid skim—the cupcakes need the fat for moisture)
- ½ cup vegetable oil (canola or avocado oil also work)
- 2 teaspoons vanilla extract
- 1 cup boiling water (this is the secret to a tender, bakery-style crumb)
For the Chocolate Feathers
- 1 cup semi-sweet chocolate chips (or melting wafers for easier handling)
- 1 teaspoon coconut oil or vegetable shortening (optional, for smoother melting)
For the Frosting & Assembly
- 1 cup unsalted butter (softened to room temperature)
- 3 ½ cups powdered sugar
- ¼ cup heavy cream (or milk in a pinch)
- 2 teaspoons vanilla extract
- Pinch of salt
- Candy eyes (the kind you find at baking supply stores or online)
- Orange candy melts or orange frosting (for the beak and wattle)
- Red candy melts or red frosting (for the wattle, optional but cute)
Ingredient Notes & Substitutions
The boiling water in the cupcake batter might seem weird, but trust me on this one. It helps the cocoa powder bloom and creates a super moist crumb that stays tender for days. If you’re dairy-free, you can swap the milk for almond milk and use a dairy-free butter substitute for the frosting—just make sure it’s softened properly. For the chocolate feathers, I’ve used both chocolate chips and melting wafers. Melting wafers are easier because they don’t need tempering, but chocolate chips work fine if you’re careful not to overheat them. I recommend Ghirardelli melting wafers for the most reliable results, but any brand will do in a pinch.
Equipment Needed
- Standard 12-cup muffin tin (or two 6-cup tins if that’s what you have)
- Paper cupcake liners (brown or orange ones look especially cute for fall)
- Large mixing bowls (at least two—one for dry ingredients, one for wet)
- Whisk and rubber spatula
- Electric hand mixer or stand mixer (for the frosting; you can do it by hand, but your arm will hate you)
- Piping bags or small zip-top bags (for the chocolate feathers and frosting)
- Parchment paper (for piping the chocolate feathers)
- Baking sheet (to hold the parchment while the chocolate sets)
- Small microwave-safe bowl (for melting chocolate)
- Cooling rack (essential for even cooling)
If you don’t have piping bags, don’t worry. I’ve used zip-top bags with a tiny corner snipped off more times than I can count. They work just as well for the chocolate feathers and the frosting. Just make sure the bag doesn’t have any holes—learned that one the hard way when chocolate started leaking all over my counter. For the muffin tin, a non-stick one is nice but not necessary if you use paper liners. I actually prefer a standard aluminum tin because it conducts heat more evenly.
Preparation Method
Step 1: Make the Chocolate Feathers (Do This First)
Line a baking sheet with parchment paper. In a small microwave-safe bowl, melt the chocolate chips in 30-second intervals, stirring between each, until smooth. If using coconut oil, stir it in after the chocolate is melted—it helps the chocolate flow more smoothly and prevents streaks. Transfer the melted chocolate to a small piping bag or zip-top bag and snip off a tiny corner. Pipe feather shapes onto the parchment paper—think elongated teardrops with little lines coming off the sides. You want about 5-6 feathers per cupcake, so aim for 60-72 feathers total. Don’t stress about making them perfect; the imperfect ones actually look more like real feathers. Pop the baking sheet in the refrigerator for at least 20 minutes to set.
Step 2: Prepare the Cupcake Batter
Preheat your oven to 350°F (175°C). Line your muffin tin with paper liners. In a large bowl, whisk together the flour, sugar, cocoa powder, baking powder, baking soda, and salt until well combined. In a separate bowl, whisk the eggs, milk, oil, and vanilla extract until smooth. Pour the wet ingredients into the dry ingredients and stir until just combined—a few lumps are okay. Slowly pour in the boiling water while stirring continuously. The batter will be very thin, which is exactly what you want. Don’t panic if it looks more like soup than cake batter; that’s how it’s supposed to look.
Step 3: Bake the Cupcakes
Divide the batter evenly among the 12 cupcake liners, filling each about ⅔ full. Bake for 18-22 minutes, or until a toothpick inserted in the center comes out clean or with a few moist crumbs. The tops should spring back when lightly touched. Let the cupcakes cool in the pan for 5 minutes, then transfer them to a cooling rack to cool completely. Do not frost them while they’re warm, or the frosting will slide right off. I learned this the hard way when I was rushing for a school event and ended up with a tray of sad, half-melted turkeys.
Step 4: Make the Frosting
While the cupcakes are cooling, make the frosting. Beat the softened butter with an electric mixer until creamy, about 2 minutes. Gradually add the powdered sugar, one cup at a time, beating on low speed after each addition. Add the heavy cream, vanilla extract, and salt, then beat on medium-high speed for 3-4 minutes until light and fluffy. If the frosting is too stiff, add another tablespoon of cream. If it’s too thin, add more powdered sugar a tablespoon at a time. Transfer the frosting to a piping bag fitted with a star tip, or use a zip-top bag with a corner snipped off.
Step 5: Assemble the Turkeys
Once the cupcakes are completely cool, pipe a generous swirl of frosting on each one. This will be the turkey’s body, so don’t be shy with it. Now, carefully peel the chocolate feathers off the parchment paper. Insert 5-6 feathers into the back of each cupcake, fanning them out like a turkey tail. The frosting will hold them in place. For the turkey’s face, attach two candy eyes to the front of the cupcake. Use a tiny dot of frosting or melted orange candy to pipe a small triangle beak. Add a little red wattle (that’s the dangly bit under the beak) using red frosting or melted red candy. If you’re feeling extra, you can pipe little feet at the bottom using orange frosting.
Step 6: The Finishing Touch
Let the assembled turkeys sit at room temperature for about 10 minutes so the chocolate feathers adhere properly. If you’re transporting them, place them in a single layer in a container with a lid—don’t stack them, or the feathers will break. I speak from experience: stacked turkey cupcakes look less like turkeys and more like chocolate crime scenes.
Cooking Tips & Techniques
The chocolate feathers are the trickiest part, but once you get the hang of it, they’re actually pretty forgiving. Here’s what I’ve learned from my many, many attempts: the chocolate needs to be warm enough to pipe smoothly but not so hot that it spreads into a puddle on the parchment. If your chocolate is too thick, add a tiny bit more coconut oil. If it’s too thin, let it cool for a minute or two before piping. I once tried to rush this step and ended up with chocolate blobs instead of feathers. They still tasted fine, but they looked more like chocolate slugs than turkey feathers.
For the cupcakes themselves, the biggest mistake people make is overmixing the batter. Once you add the wet ingredients to the dry, mix just until you don’t see any more flour streaks. Overmixing develops the gluten and makes the cupcakes tough. Also, don’t skip the boiling water step—I know it seems weird, but it’s what makes these cupcakes so moist. I tried making them without it once when I was in a hurry, and the result was dry and crumbly. Never again.
Timing-wise, I like to make the chocolate feathers the night before and store them in the fridge. That way, on the day of the event, all I have to do is bake the cupcakes and assemble. It makes the whole process feel much less stressful. If you’re multitasking, you can bake the cupcakes while the chocolate feathers are setting in the fridge. Just don’t forget about them like I did once—I left them in there for three days and they were perfectly fine, actually. Chocolate is pretty forgiving that way.
Variations & Adaptations
Dietary Adaptations
For a gluten-free version, substitute the all-purpose flour with a good 1:1 gluten-free baking flour. I’ve used Bob’s Red Mill and King Arthur brands with success. For a dairy-free version, use almond milk in the cupcakes and a dairy-free butter substitute for the frosting. The chocolate feathers are naturally dairy-free if you use dairy-free chocolate chips. I made a dairy-free batch for a friend’s kid with allergies, and honestly, no one could tell the difference.
Flavor Variations
Swap the chocolate cupcakes for vanilla or pumpkin spice if you want a different flavor profile. Vanilla works especially well because it lets the chocolate feathers stand out. For a fun twist, add a teaspoon of cinnamon or pumpkin pie spice to the cupcake batter for a fall-flavored version. I tried a pumpkin spice version last year, and it was a huge hit at the school bake sale. Just reduce the boiling water by ¼ cup if you’re using pumpkin puree to keep the batter consistency right.
Seasonal Adaptations
These turkeys aren’t just for Thanksgiving. For Christmas, swap the feathers for green and red chocolate and call them “Christmas Turkeys” (or just reindeer). For Easter, use pastel-colored chocolate and call them “Spring Chicks.” The basic technique is the same—just change the colors and the face decorations. I’ve even made them for a birthday party with rainbow feathers, and the kids went absolutely nuts.
Serving & Storage Suggestions
These turkey cupcakes are best served at room temperature. If you’ve refrigerated them, let them sit out for about 30 minutes before serving so the frosting softens up. They look amazing on a platter arranged in a circle, with the turkey faces facing outward. For a Thanksgiving table, I like to arrange them around a small pumpkin or a pile of fall leaves for a centerpiece effect.
For storage, keep them in an airtight container at room temperature for up to 2 days. If you need to store them longer, refrigerate them for up to 5 days, but let them come to room temperature before serving. The chocolate feathers can be made up to a week in advance and stored in an airtight container in the refrigerator. I do not recommend freezing these fully assembled because the chocolate feathers get brittle and the frosting can separate. However, you can freeze the unfrosted cupcakes for up to 3 months—just wrap them individually in plastic wrap and pop them in a freezer bag.
The flavors actually develop nicely overnight. The chocolate cake gets even more moist, and the frosting settles into a perfect creamy texture. I’ve found that these taste even better the next day, which makes them perfect for make-ahead holiday prep.
Nutritional Information & Benefits
Here’s the honest truth: these are cupcakes with buttercream frosting and chocolate feathers. They’re a treat, not a health food. But here’s what I tell myself: the cocoa powder in the cupcakes is rich in antioxidants, the eggs provide protein, and the butter in the frosting has vitamin A. Is that reaching? Maybe. But it makes me feel better about eating two of them.
Per cupcake (based on 12 servings), the estimated nutritional values are: approximately 420 calories, 22g fat, 55g carbohydrates, 4g protein, and 35g sugar. These numbers will vary based on your specific ingredients and portion sizes. If you’re looking to lighten things up, you can reduce the sugar in the cupcakes by ¼ cup without affecting the texture too much, or use a lighter frosting option like a whipped cream cheese frosting.
For allergen considerations: these contain wheat, dairy, and eggs. The chocolate may contain soy lecithin. If you’re serving these at a school event, check for any classroom allergies before bringing them in. I always include a little card listing the ingredients so parents can make informed decisions.
Conclusion
These Kid-Approved Turkey Cupcakes with Chocolate Feathers are the kind of recipe that makes you look like a hero without requiring you to actually be one. They’re fun, they’re delicious, and they’re surprisingly easy to pull off. The chocolate feathers are the secret weapon—they look impressive, they taste great, and they’re way simpler than they look. Whether you’re making them for a classroom party, a Friendsgiving gathering, or just a fun weekend baking project with your kids, these little turkeys deliver every time.
I love this recipe because it’s the one that makes people smile. It’s not fancy or complicated, but it has heart. And honestly, that’s what holiday baking should be about—making something that brings people together and puts a smile on their faces. So go ahead, give these a try. Customize them however you want—different colors, different flavors, different face designs. Make them your own. And when you do, come back and tell me how they turned out. I’d love to hear about your chocolate feather adventures.
Happy baking, and may your feathers always be perfectly piped!
Frequently Asked Questions
Can I use a boxed cake mix instead of making the cupcakes from scratch?
Absolutely. If you’re short on time, a boxed chocolate cake mix works perfectly fine. Just follow the package directions and bake according to the mix instructions. The chocolate feathers and assembly are what make these special, not necessarily the from-scratch cake. I’ve done it both ways, and honestly, the boxed version is still a crowd-pleaser.
How do I prevent the chocolate feathers from breaking?
Let them set completely in the refrigerator—at least 20 minutes, but 30 is better. When peeling them off the parchment, do it gently and slowly. If the chocolate is too thin, it will be fragile. If it’s too thick, it will be brittle. The sweet spot is when the chocolate is smooth but not runny. If you’re having trouble, add a tiny bit more coconut oil to make the chocolate more flexible.
Can I make these ahead of time for a party?
Yes, but with some planning. The chocolate feathers can be made up to a week ahead and stored in the fridge. The cupcakes can be baked a day ahead and stored at room temperature. Assemble them the day of the event for best results. If you assemble them too far in advance, the chocolate feathers can absorb moisture from the frosting and lose their crunch.
What can I use instead of candy eyes?
You can pipe small dots of white frosting and add a tiny dot of melted chocolate in the center for the pupil. Or use mini chocolate chips turned upside down. I’ve also used black frosting in a piping bag to make little eyes. The candy eyes are the easiest option, but they’re not the only option. Get creative with what you have on hand.
Can I freeze the assembled turkey cupcakes?
I don’t recommend it. The chocolate feathers become very brittle when frozen and thawed, and the frosting can get grainy. If you need to freeze something, freeze the unfrosted cupcakes and make the chocolate feathers fresh when you’re ready to assemble. It takes a little more time on the day of, but the results are much better.
Pin This Recipe!
Kid-Approved Turkey Cupcakes with Easy Chocolate Feathers
These adorable turkey cupcakes feature moist chocolate cake, creamy frosting, and homemade chocolate feathers that kids love. Perfect for Thanksgiving, fall gatherings, and classroom parties, they come together in under an hour with simple ingredients.
- Prep Time: 25 minutes
- Cook Time: 20 minutes
- Total Time: 45 minutes
- Yield: 12 servings 1x
- Category: Dessert
- Cuisine: American
Ingredients
- 1 ¾ cups all-purpose flour
- 1 ½ cups granulated sugar
- ¾ cup unsweetened cocoa powder
- 1 ½ teaspoons baking powder
- 1 ½ teaspoons baking soda
- 1 teaspoon salt
- 2 large eggs (room temperature)
- 1 cup whole milk (2% works, avoid skim)
- ½ cup vegetable oil (canola or avocado oil)
- 2 teaspoons vanilla extract
- 1 cup boiling water
- 1 cup semi-sweet chocolate chips (or melting wafers)
- 1 teaspoon coconut oil or vegetable shortening (optional)
- 1 cup unsalted butter (softened)
- 3 ½ cups powdered sugar
- ¼ cup heavy cream (or milk)
- 2 teaspoons vanilla extract
- Pinch of salt
- Candy eyes
- Orange candy melts or orange frosting
- Red candy melts or red frosting (optional)
Instructions
- Line a baking sheet with parchment paper. Melt chocolate chips in 30-second intervals in the microwave, stirring between each, until smooth. Stir in coconut oil if using. Transfer to a piping bag or zip-top bag, snip a tiny corner, and pipe feather shapes (elongated teardrops with lines) onto the parchment. Make 60-72 feathers. Refrigerate for at least 20 minutes to set.
- Preheat oven to 350°F (175°C). Line a 12-cup muffin tin with paper liners.
- In a large bowl, whisk together flour, sugar, cocoa powder, baking powder, baking soda, and salt.
- In a separate bowl, whisk eggs, milk, oil, and vanilla extract until smooth. Pour wet ingredients into dry ingredients and stir until just combined (a few lumps are okay). Slowly pour in boiling water while stirring continuously. Batter will be thin.
- Divide batter evenly among liners, filling each about ⅔ full. Bake for 18-22 minutes, until a toothpick inserted in the center comes out clean or with a few moist crumbs. Cool in pan for 5 minutes, then transfer to a cooling rack to cool completely.
- While cupcakes cool, make frosting: Beat softened butter with an electric mixer until creamy, about 2 minutes. Gradually add powdered sugar, one cup at a time, beating on low. Add heavy cream, vanilla extract, and salt, then beat on medium-high for 3-4 minutes until light and fluffy. Transfer to a piping bag fitted with a star tip or a zip-top bag with a corner snipped off.
- Once cupcakes are completely cool, pipe a generous swirl of frosting on each. Carefully peel chocolate feathers off parchment and insert 5-6 feathers into the back of each cupcake, fanning them out like a turkey tail.
- Attach two candy eyes to the front of each cupcake. Pipe a small triangle beak using orange candy melts or frosting. Add a red wattle using red frosting or melted red candy. Optionally pipe small feet at the bottom with orange frosting.
- Let assembled turkeys sit at room temperature for about 10 minutes before serving or transporting.
Notes
The chocolate feathers can be made up to a week ahead and stored in an airtight container in the refrigerator. Cupcakes can be baked a day ahead and stored at room temperature. Assemble the day of serving for best results. For dairy-free version, use almond milk and dairy-free butter substitute. For gluten-free, use a 1:1 gluten-free baking flour. The boiling water is essential for a moist crumb—do not skip it. Do not overmix the batter to avoid tough cupcakes.
Nutrition
- Serving Size: 1 cupcake
- Calories: 420
- Sugar: 35
- Sodium: 380
- Fat: 22
- Saturated Fat: 12
- Carbohydrates: 55
- Fiber: 3
- Protein: 4
Keywords: turkey cupcakes, Thanksgiving cupcakes, chocolate feathers, kid-friendly dessert, fall baking, chocolate cupcakes, turkey dessert