There used to be a little diner on Route 9, right past the old water tower, that made a corn casserole so good it made you forget about your main dish entirely. When they closed up shop back in 2018—the owner retired, moved to Florida with his wife—I felt a real, honest-to-goodness loss. I mean, where else was I supposed to get that perfect, creamy, slightly sweet side dish that paired with everything from meatloaf to a simple rotisserie chicken?
After probably a dozen tries—some were too runny, a couple were dry enough to use as building material—I finally got it. The secret, it turns out, was simpler than I ever imagined. It wasn’t some fancy imported cheese or a complicated roux. It was a box of Jiffy corn muffin mix, a can of creamed corn, a tub of sour cream, and a stick of butter. That’s it. Honestly, I felt a little foolish for overthinking it for so long.
I remember the night it all came together. I had a pan of it in the oven, the smell filling the kitchen, and my youngest wandered in, asking, “What’s that?” I pulled it out, golden and bubbling at the edges, and let it cool for a few minutes. The first bite was that memory—warm, comforting, with that tender crumb and a slight tang from the sour cream. My kids, who can be picky about anything with a slightly mushy texture, ate two helpings. That was the moment I knew the search was over. This is the one I keep making, not just because it’s easy, but because it brings that feeling back to the table.
Why You’ll Love This Recipe
Let’s face it, finding a side dish that everyone at the table actually agrees on feels like a small miracle. This Jiffy corn casserole with sour cream is that miracle. It’s the kind of recipe you’ll come back to again and again, and here’s why:
- Only 4 Ingredients: No complicated shopping lists or hard-to-find items. You probably have most of this in your pantry right now.
- Incredibly Easy: If you can stir, you can make this. It comes together in about 5 minutes of active prep time. Perfect for those evenings when you’re already juggling homework and after-school activities.
- Kid-Approved and Budget-Friendly: This is the ultimate family win. It’s affordable, uses pantry staples, and even the pickiest eaters tend to go back for seconds. It’s a smart choice for feeding a hungry family without blowing the grocery budget.
- Perfect for Any Occasion: It’s fancy enough for a holiday potluck or Thanksgiving table, but simple enough for a Tuesday night meatloaf. It’s a true workhorse recipe.
- Leftovers That Reheat Like a Dream: This is a big one for busy families. The casserole gets even better the next day, and it reheats beautifully in the microwave or oven. No sad, dry leftovers here.
What makes this version different from the rest? It’s all about the texture. The sour cream and butter create an incredibly moist, almost custard-like interior that’s a world away from dry, crumbly cornbread. It’s not just another side dish; it’s the one that gets scraped clean from the pan. It’s comfort food at its simplest and most satisfying.
What Ingredients You Will Need
This recipe uses simple, wholesome ingredients to deliver bold flavor and satisfying texture without the fuss. You likely have most of these on hand, which makes it a perfect last-minute side dish.
- 1 (8.5 oz) box Jiffy Corn Muffin Mix: This is the star of the show. The mix has a slightly sweet, tender crumb that’s perfect for this casserole. I’ve tried other brands, but Jiffy gives the best texture and flavor for this specific recipe. Don’t be tempted to use a larger box; the proportions are key.
- 1 (14.75 oz) can cream-style corn: This is what gives the casserole its creamy, almost pudding-like interior. Do not drain it! The liquid is essential for the right consistency. I usually go with the store brand here, but any brand of cream-style corn works perfectly.
- 1 (14.75 oz) can whole kernel corn, drained: This adds a little bit of texture and a pop of sweetness. Make sure to drain it well, or the casserole can become too watery. If you only have frozen corn, you can use 1 ½ cups of thawed and drained frozen corn instead.
- 1 cup (8 oz) sour cream: This is the secret ingredient that makes this casserole so moist and tangy. It adds a richness that balances the sweetness of the corn and the corn muffin mix. I recommend using full-fat sour cream for the best flavor and texture, but a low-fat version will work in a pinch. Greek yogurt can also be substituted, though the flavor will be a little more tangy.
- ½ cup (1 stick) unsalted butter, melted: Butter adds richness and helps create that beautiful golden-brown crust. I prefer unsalted so I can control the salt level, but salted butter works fine—just reduce any extra salt you might add. Melt it gently in the microwave or on the stovetop.
Optional Add-ins: While the base recipe is perfect as is, you can add a ½ cup of shredded cheddar cheese for a cheesier version, or a 4-ounce can of diced green chiles for a little heat. These are great ways to customize the casserole to your family’s taste.
Equipment Needed
You don’t need any fancy gadgets for this one. It’s a true testament to simple cooking. Here’s what you’ll need:
- An 8×8 or 9×9 inch baking dish: A square baking dish is perfect for this recipe. An 8×8 will give you a slightly thicker casserole, while a 9×9 will cook a little faster. Both work great. I’ve used a glass Pyrex dish for years, and it works perfectly.
- A large mixing bowl: Any large bowl will do. You just need enough room to stir everything together without making a mess.
- A whisk or a wooden spoon: A whisk is great for making sure there are no lumps in the muffin mix, but a good old-fashioned wooden spoon works just as well.
- A measuring cup: For measuring the sour cream and butter.
- A can opener: A simple necessity.
- Cooking spray or butter: For greasing the baking dish so nothing sticks.
That’s it! If you have a kitchen, you have everything you need. No stand mixer, no food processor, no special pans. This is the kind of recipe that makes you feel like a genius with almost zero effort.
Preparation Method

This is where the magic happens. The process is almost laughably simple, but the results are anything but. Follow these steps, and you’ll have a perfect casserole every single time.
- Preheat and Prep: First things first, preheat your oven to 350°F (175°C). While it’s heating up, spray your 8×8 or 9×9 inch baking dish with cooking spray, or grease it with a little butter. This step is important—it ensures your casserole slides out easily and you get those beautiful, clean edges.
- Melt the Butter: Place your stick of unsalted butter in a microwave-safe bowl and melt it in 30-second intervals until it’s completely liquid. Set it aside to cool slightly while you mix the other ingredients. You don’t want it to be boiling hot when you add it to the eggs or sour cream.
- Combine the Wet Ingredients: In your large mixing bowl, add the entire container of sour cream. It should be at room temperature for easiest mixing. I usually take it out of the fridge when I start preheating the oven. Add the melted butter, the undrained can of cream-style corn, and the drained can of whole kernel corn. Stir everything together with your whisk or wooden spoon until it’s well combined. The mixture will look a little lumpy from the corn, and that’s perfectly fine.
- Add the Jiffy Mix: Now, pour the entire box of Jiffy Corn Muffin Mix into the bowl. Stir gently but thoroughly until the dry mix is just incorporated. You want to make sure there are no hidden pockets of dry mix at the bottom of the bowl. The batter will be thick, almost like a loose cake batter. Don’t overmix it—a few small lumps are okay. Overmixing can make the final casserole a little tough.
- Pour and Spread: Pour the batter into your prepared baking dish. Use a spatula to scrape every last bit out of the bowl—you don’t want to waste any of that goodness! Then, gently spread the batter into an even layer with the back of your spatula. It will be thick, so just coax it into the corners.
- Bake to Perfection: Place the dish on the middle rack of your preheated oven. Bake for 45 to 55 minutes. The casserole is done when the top is a deep golden brown and the edges are pulling away from the sides of the dish. The center should be set and not jiggly. A toothpick inserted into the center should come out clean or with just a few moist crumbs. My oven runs a little hot, so I always start checking at the 45-minute mark.
- Cool and Serve: Once it’s done, remove the dish from the oven and place it on a wire rack to cool for at least 10-15 minutes. This is an important step! The casserole needs this time to set up properly. If you cut into it right away, it will be a little loose and messy. After it’s cooled, slice it into squares and serve it warm. The aroma will have everyone gathering in the kitchen.
Cooking Tips & Techniques
Over the years, I’ve made this casserole more times than I can count, and I’ve learned a few things the hard way. Here are my best tips to make sure yours turns out perfect every time.
Don’t Overmix the Batter. This is probably the most common mistake. It’s tempting to keep stirring until the batter is perfectly smooth, but that activates the gluten in the corn muffin mix and can make your casserole dense and tough. Stir just until the dry ingredients are moistened. A few small lumps are your friend here.
Room Temperature Ingredients Matter. This is a tip I learned from years of baking. When your sour cream and eggs (if you use them) are at room temperature, they blend into the batter much more smoothly. It creates a more uniform texture. Just take them out of the fridge about 20 minutes before you start mixing.
Check for Doneness with a Toothpick. Ovens can be finicky. The baking time of 45-55 minutes is a guideline, not a rule. The best way to know if it’s done is to insert a toothpick into the center. If it comes out clean or with just a few moist crumbs, it’s ready. If it’s wet with batter, give it another 5 minutes and check again.
Let It Rest. I know it’s hard to wait when the kitchen smells this good, but letting the casserole rest for at least 10-15 minutes after it comes out of the oven is crucial. This allows the custard-like interior to set up, so you get clean, beautiful slices instead of a messy spoonful. Trust me on this one—I’ve learned from my impatience.
One Time I Forgot the Corn. I was rushing one night, trying to get dinner on the table, and I completely forgot to add the can of whole kernel corn. The casserole still tasted good, but it was much softer and more like a pudding. It was a good reminder that every ingredient has a job to do. The whole kernel corn adds that essential texture that makes this dish so special.
Variations & Adaptations
This recipe is a fantastic base, and it’s so easy to adapt to your family’s tastes or what you have on hand. Here are a few of my favorite variations.
- Cheesy Corn Casserole: This is probably the most popular variation in my house. After you’ve poured the batter into the dish, stir in ½ cup of shredded cheddar cheese. You can also sprinkle another ¼ cup on top during the last 10 minutes of baking for a cheesy, golden crust. It’s fantastic.
- Mexican Street Corn Casserole: For a little kick, add a 4-ounce can of diced green chiles (drained) and ¼ cup of crumbled cotija cheese to the batter. After baking, drizzle the top with a little crema or sour cream and sprinkle with fresh cilantro and a pinch of chili powder. It’s a fun, flavorful twist.
- Gluten-Free Version: While Jiffy mix contains wheat flour, you can easily make this gluten-free by using a gluten-free corn muffin mix. Look for a brand like Bob’s Red Mill. The rest of the ingredients are naturally gluten-free, so just follow the recipe as written. The texture might be slightly different, but it’s still delicious.
- Add Some Heat: If your family likes a little spice, stir in a finely chopped jalapeño (seeds removed for less heat) or a teaspoon of adobo sauce from a can of chipotle peppers. It adds a wonderful smoky warmth without being overwhelming.
- Make It a Meal: You can easily turn this into a main dish. Stir in 1 cup of shredded cooked chicken or a can of drained, flaked tuna, along with ½ cup of frozen peas. Bake as directed. It’s a great way to use up leftovers.
Serving & Storage Suggestions
This corn casserole is incredibly versatile when it comes to serving. It’s a true side dish star.
Serving: Serve it warm, straight from the oven. It’s the perfect companion to so many meals. I love it alongside a simple roasted chicken, a juicy meatloaf, or even a plate of crispy fried fish. It’s also a staple on our holiday table, right next to the turkey and mashed potatoes. A dollop of extra sour cream or a sprinkle of fresh chives on top makes it look extra special for company.
Storage: Leftovers, if you have any, store beautifully. Let the casserole cool completely, then cover the dish tightly with plastic wrap or aluminum foil, or transfer the leftovers to an airtight container. It will keep in the refrigerator for up to 4 days.
Reheating: This is where this recipe really shines. The casserole reheats wonderfully. For individual servings, the microwave is your best friend. Heat on high for 30-60 seconds, or until warmed through. For a larger portion or to re-crisp the edges, place the casserole in a 350°F (175°C) oven for 10-15 minutes. The flavors actually meld together even more overnight, making the leftovers taste just as good, if not better, than the first time around.
Freezing: This casserole freezes well, which is great for busy families. Bake it completely, let it cool, then wrap it tightly in a layer of plastic wrap and a layer of aluminum foil. It will keep in the freezer for up to 3 months. To serve, thaw it in the refrigerator overnight and reheat it in the oven until warmed through.
Nutritional Information & Benefits
While this is a comfort food dish, it does offer some nutritional benefits, especially when you look at the ingredients. Here’s an estimated breakdown per serving (based on 9 servings):
| Nutrient | Approximate Amount |
|---|---|
| Calories | 280 |
| Fat | 16g |
| Carbohydrates | 32g |
| Protein | 5g |
| Fiber | 2g |
| Sugar | 10g |
Health Highlights: Corn is a good source of fiber and antioxidants like lutein and zeaxanthin, which are great for eye health. The sour cream provides a small amount of calcium and protein. While this isn’t a low-calorie dish, it’s a satisfying one that can be part of a balanced diet. For a slightly healthier twist, you can use a low-fat sour cream and reduce the butter to ¼ cup, though the texture will be a little less rich.
Dietary Considerations: This recipe is vegetarian-friendly. It can be made gluten-free with a simple swap of the corn muffin mix. It is not suitable for a dairy-free or vegan diet due to the sour cream and butter.
Conclusion
So there you have it—a simple, honest, and utterly delicious corn casserole that brings people to the table. It’s the kind of recipe that feels like a hug in a dish, and it’s one I’m so happy to share with you.
I love this recipe because it’s proof that you don’t need a million ingredients or hours of time to create something truly special. It’s a dish that works for a busy weeknight, a holiday feast, or a weekend potluck. It’s forgiving, adaptable, and always, always a hit. It’s the recipe that makes you look like a star with almost no effort at all.
Now I’d love to hear from you! Have you tried this casserole? Did you add your own twist? Drop a comment below and let me know how it turned out. And if you loved it as much as we do, please share this recipe with a friend who needs a little comfort food in their life. Happy cooking!
Frequently Asked Questions
Can I use a different brand of corn muffin mix?
You can, but the texture and sweetness might be different. Jiffy is the standard for this recipe because it’s slightly sweet and has a very fine, tender crumb. Other brands may produce a denser or less sweet casserole.
Can I make this casserole ahead of time?
Absolutely! You can assemble the casserole a day in advance, cover it, and keep it in the refrigerator. Just add about 10-15 minutes to the baking time since you’re starting from a cold dish. It’s a great time-saver for holidays.
Why is my corn casserole watery?
This usually happens if you didn’t drain the whole kernel corn well enough, or if the casserole wasn’t baked long enough. Make sure to drain the whole kernel corn thoroughly in a colander before adding it to the bowl. Also, be sure to bake it until the center is set and a toothpick comes out clean.
Can I add eggs to this recipe?
You can, but it’s not necessary. The original recipe I recreated doesn’t use eggs, and the texture is perfect. Adding an egg will make the casserole a little more firm and cake-like. If you want to try it, add one beaten egg along with the other wet ingredients.
How do I make this in a 9×13 inch pan?
To double the recipe for a 9×13 inch pan, simply use two boxes of Jiffy mix, two cans of cream-style corn, two cans of drained whole kernel corn, two cups of sour cream, and one cup (two sticks) of melted butter. The baking time will be about the same, possibly 5-10 minutes longer.
Pin This Recipe!
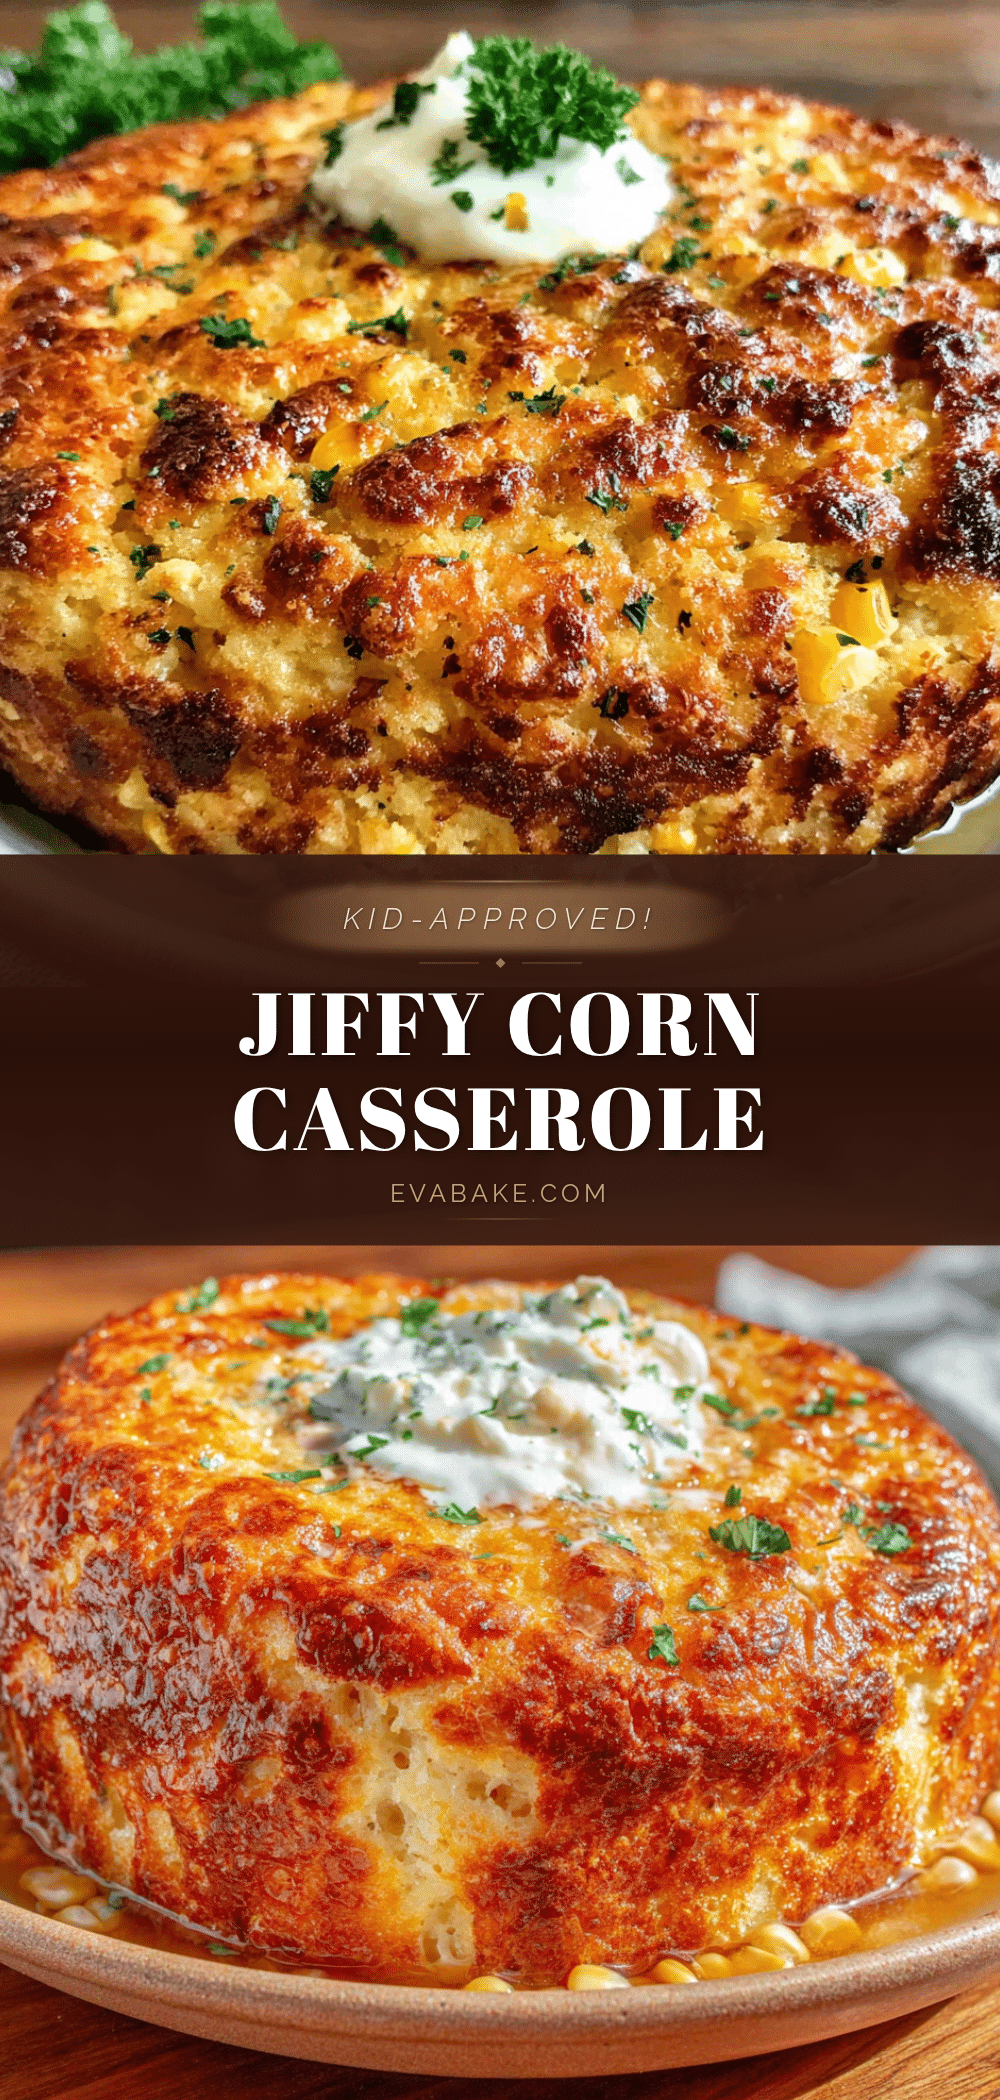
Kid-Approved Jiffy Corn Casserole with Sour Cream: Easy 4-Ingredient Recipe

This easy 4-ingredient corn casserole is incredibly moist, slightly sweet, and kid-approved. It’s the perfect side dish for any occasion, from weeknight dinners to holiday feasts.
- Prep Time: 5 minutes
- Cook Time: 50 minutes
- Total Time: 55 minutes
- Yield: 9 servings 1x
- Category: Side Dish
- Cuisine: American
Ingredients
- 1 (8.5 oz) box Jiffy Corn Muffin Mix
- 1 (14.75 oz) can cream-style corn
- 1 (14.75 oz) can whole kernel corn, drained
- 1 cup (8 oz) sour cream
- ½ cup (1 stick) unsalted butter, melted
Instructions
- Preheat oven to 350°F (175°C). Grease an 8×8 or 9×9 inch baking dish with cooking spray or butter.
- Melt the butter in a microwave-safe bowl in 30-second intervals until liquid. Set aside to cool slightly.
- In a large mixing bowl, combine the sour cream, melted butter, undrained cream-style corn, and drained whole kernel corn. Stir until well combined.
- Add the Jiffy Corn Muffin Mix and stir gently until just incorporated. Do not overmix; a few small lumps are fine.
- Pour the batter into the prepared baking dish and spread into an even layer.
- Bake for 45 to 55 minutes, until the top is deep golden brown, edges pull away from the dish, and a toothpick inserted in the center comes out clean or with a few moist crumbs.
- Remove from oven and let cool in the dish for 10-15 minutes before slicing and serving warm.
Notes
For a cheesier version, stir in ½ cup shredded cheddar cheese before baking. For a Mexican twist, add a 4-oz can of diced green chiles and ¼ cup crumbled cotija cheese. To make gluten-free, use a gluten-free corn muffin mix. Leftovers can be stored in the refrigerator for up to 4 days and reheat well in the microwave or oven.
Nutrition
- Serving Size: 1 square (1/9 of cas
- Calories: 280
- Sugar: 10
- Sodium: 480
- Fat: 16
- Saturated Fat: 9
- Carbohydrates: 32
- Fiber: 2
- Protein: 5
Keywords: corn casserole, Jiffy corn casserole, sour cream corn casserole, easy side dish, kid-friendly, 4-ingredient recipe