I was standing in the middle of the spice aisle at my local grocery store last Tuesday, staring at a jar of dried rosemary like it held the secrets to the universe. The fluorescent lights were buzzing, someone’s cart had a squeaky wheel, and I was supposed to be grabbing milk. But then this scent hit me — or maybe it was just a memory pretending to be a scent — and suddenly I was nine years old in my Aunt Rosa’s tiny kitchen in Portland.
The air in her house was always thick and warm, like the oven had been on since breakfast. She’d pull the roasting pan out of the oven, and that herby, garlicky, beefy smell would wrap around you like a blanket you didn’t know you needed. I remember standing on my tiptoes, chin barely clearing the counter, watching her slice into this gorgeous hunk of meat. The juices would pool on the cutting board, and she’d wink at me and slip me a piece of the crispy, seasoned edge before anyone else even sat down. Honestly, I haven’t thought about that kitchen in years.
But there I was, in the spice aisle, holding rosemary and trying not to get all emotional about a Tuesday afternoon. I grabbed the garlic, the thyme, the butter — I mean, I practically ran to the checkout. That night, I was determined to bring back that feeling. Not just the flavor, but the whole moment. The warmth. The quiet pride of pulling something spectacular out of your own oven. And let me tell you, it took a few tries to get it right. The first attempt? Way too dry. The second? Under-seasoned and sad.
But this version — this Easy Garlic Herb Butter Prime Rib Roast with the reverse sear method — this is the one that finally made me close my eyes on that first bite. Maybe you’ve been there, chasing a taste from your past that you can almost but not quite remember. This is that recipe. The one that brings it all back.
Why You’ll Love This Recipe
Look, I get it. Prime rib feels like a splurge, maybe even a little intimidating. You picture it as something reserved for fancy restaurants or holiday dinners where your mom takes over the kitchen for three days. But here’s the thing — this recipe flips all of that on its head. It’s actually one of the easiest, most forgiving roasts you can make, especially when you use the reverse sear method. And I’ve tested this method more times than I care to admit, tweaking temperatures and timing until it was absolutely foolproof.
- Perfectly Cooked Every Time : The reverse sear method means no more dry, overcooked edges. You get a beautiful, even pink from edge to center — medium-rare perfection, every single time. No guesswork, no anxiety.
- Minimal Active Time : Honestly, this roast does most of the work itself. You spend about 15 minutes prepping the garlic herb butter, slather it on, and then the oven does the heavy lifting. Perfect for a weeknight dinner that feels like a celebration.
- Simple, Familiar Ingredients : Butter, garlic, rosemary, thyme, salt, pepper — you probably have most of this in your kitchen right now. No fancy shopping lists or specialty stores required.
- Budget-Friendly Elegance : Prime rib is often more affordable than you think, especially if you catch a sale. And it feeds a crowd with zero stress. This is the kind of meal that makes people think you slaved all day, when really, you just let the oven do its thing.
- Leftovers That Steal the Show : I’m not kidding — the leftovers from this roast might be even better than the first dinner. Thinly sliced for sandwiches the next day, or chopped into a hearty hash for breakfast. It’s the gift that keeps on giving.
This recipe isn’t just good — it’s the kind that makes you look forward to the leftovers. It’s comfort food that feels luxurious, but without the stress. And honestly, after a long week, isn’t that exactly what we need?
What Ingredients You Will Need
This recipe uses a short list of ingredients, but each one pulls its weight. The magic is in the garlic herb butter — it does double duty, adding flavor and helping the roast develop that gorgeous, crispy crust. Here’s what you’ll need:
For the Garlic Herb Butter
- Unsalted butter (1/2 cup, or 1 stick, softened) — I prefer unsalted so I can control the salt level. Let it sit out for about 30 minutes before you start so it’s spreadable.
- Fresh garlic (6 cloves, minced) — Don’t skimp here. Garlic is the backbone of this roast. If you can, use a microplane to grate it into the butter — it melts right in.
- Fresh rosemary (2 tablespoons, finely chopped) — Fresh makes a huge difference here. Dried rosemary is okay in a pinch, but it won’t have that same aromatic punch.
- Fresh thyme (1 tablespoon, leaves stripped and chopped) — Adds that earthy, slightly floral note that pairs so well with beef.
- Kosher salt (2 teaspoons) — I’m a big fan of Diamond Crystal kosher salt. It’s less salty by volume than other brands, so you get better control.
- Freshly ground black pepper (1 1/2 teaspoons) — Freshly ground is non-negotiable here. Pre-ground pepper just doesn’t have the same punch.
For the Prime Rib Roast
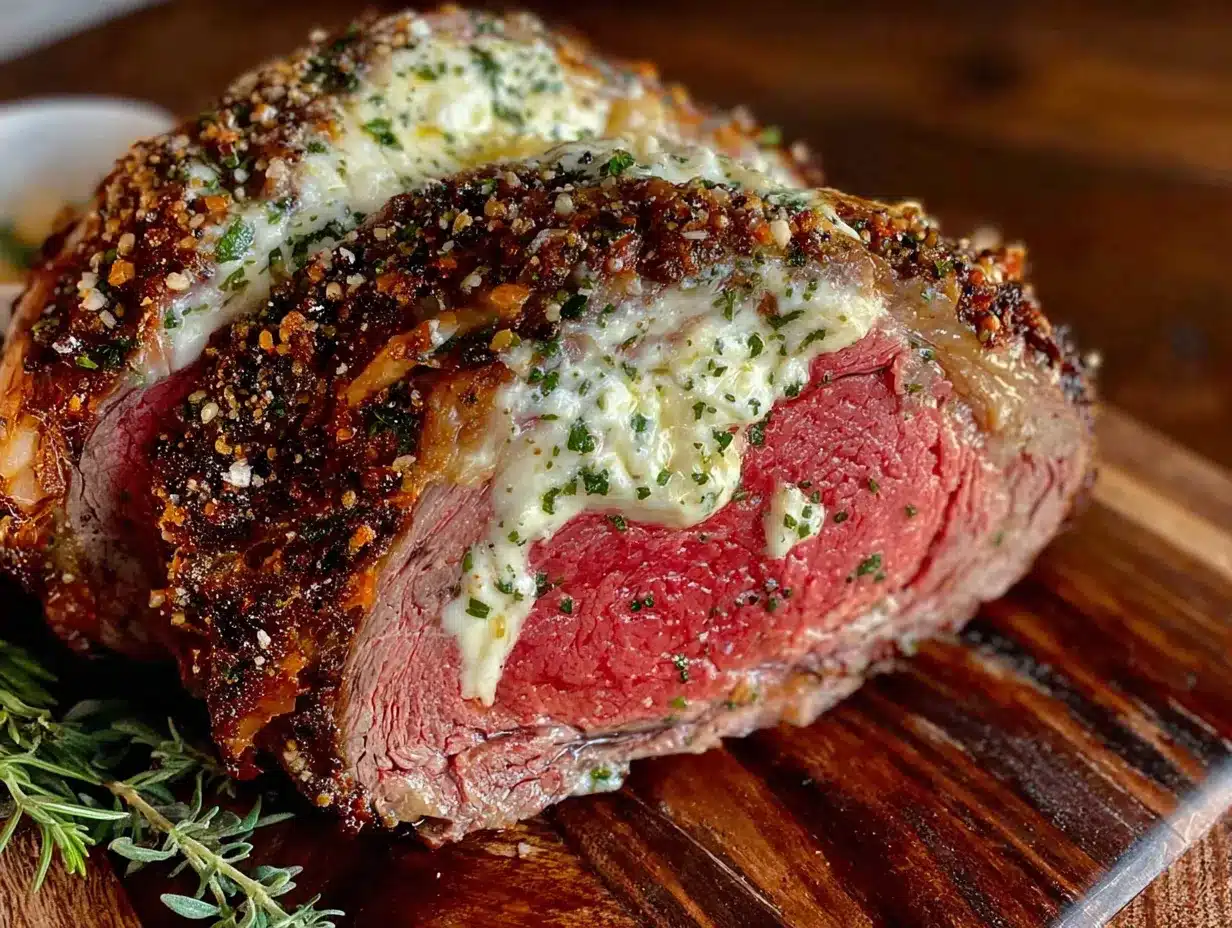
- Bone-in prime rib roast (4 to 5 pounds) — A 3-bone roast is perfect for 4 to 6 people. Bone-in adds flavor and helps the meat cook more evenly. I usually ask my butcher to trim the excess fat cap to about 1/4 inch.
- Additional kosher salt (1 tablespoon) — For seasoning the roast directly. Don’t skip this step — it’s what builds that flavorful crust.
- Freshly ground black pepper (1 teaspoon) — For the roast itself.
- Optional: Beef broth or red wine (1/2 cup) — For the pan drippings if you want to make a quick au jus. I usually grab a cup of beef broth from the carton — no need for homemade here.
Ingredient Selection Tips
When you’re picking out your prime rib at the store, look for one with good marbling — those little white streaks of fat running through the meat. That fat is what keeps the roast juicy and tender as it cooks. If you see a roast labeled “Choice” or “Prime,” grab it. The higher the grade, the more marbling you’ll get. Also, give the roast a sniff — it should smell fresh and clean, not sour or funky. And if you can, buy it a day or two ahead so you can salt it and let it rest in the fridge overnight. That extra step makes a noticeable difference.
Equipment Needed
You don’t need a ton of fancy gear for this recipe, which is part of why I love it so much. Here’s what you’ll need:
- Roasting pan with a rack — The rack lifts the roast up so air can circulate around it, helping it cook evenly. If you don’t have a roasting pan, a rimmed baking sheet with a wire cooling rack works perfectly.
- Instant-read thermometer — This is the most important tool for this recipe. The reverse sear method relies on precise temperatures, and guessing just won’t cut it. I use a Thermapen, but any reliable instant-read thermometer will work.
- Small bowl — For mixing the garlic herb butter.
- Chef’s knife and cutting board — For mincing the garlic and herbs.
- Aluminum foil — For tenting the roast while it rests.
- Cast iron skillet or heavy-bottomed pan — For the final sear. A cast iron skillet holds heat beautifully and gives you that gorgeous crust.
- Tongs — For flipping the roast during the sear. Silicone-tipped tongs are great so you don’t scratch your pan.
If you don’t have a cast iron skillet, don’t worry. You can use any heavy-bottomed pan, or even finish the roast under the broiler for a few minutes. I’ve done it both ways, and honestly, the broiler method works just fine. Just keep a close eye on it so it doesn’t burn.
Preparation Method
Alright, let’s get cooking. This method is all about low-and-slow cooking first, then a hot sear at the end. It sounds fancy, but I promise it’s straightforward. Here’s exactly how to do it.
- Take the roast out of the fridge 1 to 2 hours before cooking. This is a crucial step. You want the meat to come to room temperature so it cooks evenly. If you put a cold roast in the oven, the outside will overcook before the center is done. Pat the roast dry with paper towels — moisture is the enemy of a good crust.
- Season the roast generously with kosher salt and pepper. Use about 1 tablespoon of salt and 1 teaspoon of pepper. Rub it all over the roast, including the sides and the bones. If you have time, do this the night before and let the roast sit uncovered in the fridge overnight. This dry-brine step makes the meat even more flavorful and helps the crust develop.
- Make the garlic herb butter. In a small bowl, combine the softened butter, minced garlic, chopped rosemary, chopped thyme, 2 teaspoons of kosher salt, and 1 1/2 teaspoons of black pepper. Mix until everything is well combined. Taste a tiny bit — it should be punchy and flavorful. Set it aside at room temperature.
- Preheat your oven to 250°F (120°C). Yes, that’s low. Trust the process. Place the oven rack in the middle position.
- Place the roast on a rack in your roasting pan, bone-side down. The bones act as a natural rack, so if you have a rack, you can use it, but it’s not strictly necessary. Just make sure the roast isn’t sitting in its own juices.
- Cook the roast low and slow. Insert your instant-read thermometer into the thickest part of the meat, avoiding the bone. For medium-rare, you’re aiming for an internal temperature of 120°F to 125°F (49°C to 52°C). This usually takes about 2 1/2 to 3 hours for a 4- to 5-pound roast. Start checking the temperature after about 2 hours — every oven is a little different.
- When the roast hits 120°F, remove it from the oven. Tent it loosely with aluminum foil and let it rest for 20 to 30 minutes. During this rest, the internal temperature will rise another 5 to 10 degrees — that’s called carryover cooking. Don’t skip this rest! It’s essential for juicy meat.
- While the roast rests, slather on the garlic herb butter. Using a spatula or your hands, spread that beautiful butter all over the roast. Don’t be shy — really coat it. The butter will melt and start to drip, and that’s exactly what you want.
- Preheat your cast iron skillet over high heat. You want it screaming hot. If you’re using the broiler method, preheat your broiler to high and move an oven rack to the top position.
- Sear the roast. Carefully place the roast in the hot skillet. Sear for 1 to 2 minutes per side, using tongs to turn it. You want a deep, golden-brown crust on all sides, including the ends. If you’re using the broiler, place the roast on a baking sheet and broil for 3 to 5 minutes, watching closely and turning once.
- Let the roast rest again for 5 to 10 minutes. I know, more resting. But this final rest lets the juices redistribute after the sear. Slice against the grain into thick, beautiful slices. Serve immediately.
Cooking Tips & Techniques
I’ve made this recipe more times than I can count, and I’ve definitely learned a few things the hard way. Here are my best tips to make sure your roast turns out perfect.
Don’t skip the dry brine. The first time I made this, I was impatient and skipped the overnight salting. The roast was fine, but it wasn’t amazing. That extra time in the fridge with salt makes a huge difference in flavor and texture. If you can plan ahead, do it. If not, just season generously and let the roast sit at room temperature for at least an hour before cooking.
Use a thermometer, not a timer. I cannot stress this enough. Ovens vary wildly, and the size and shape of your roast will affect cooking time. The only reliable way to know when it’s done is with a good instant-read thermometer. I’ve ruined roasts by relying on “about 15 minutes per pound” — that’s just not accurate enough for something this special.
Let it rest. Twice. I know it’s tempting to slice into that beautiful roast right away, but patience pays off here. The first rest after the low-and-slow cooking allows the juices to redistribute. The second rest after the sear keeps those juices from running out all over your cutting board. Trust me, I’ve made the mistake of slicing too soon, and the result is dry meat and a puddle of flavor on the board.
Watch your sear carefully. The butter and garlic can burn quickly over high heat. If you see the butter starting to turn dark brown or smell acrid, pull the roast off the heat immediately. You want a deep golden brown, not black. If you’re nervous, the broiler method is more forgiving.
Slice against the grain. Look at the roast before you slice — you’ll see lines running through the meat. That’s the grain. Slice perpendicular to those lines for the most tender bites. And slice thick, about 1/2 to 3/4 inch. Thin slices can dry out faster.
Variations & Adaptations
One of the best things about this recipe is how flexible it is. Here are some ways to make it your own.
Herb Swap : Not a fan of rosemary? Swap it out for equal amounts of fresh oregano or sage. Both work beautifully with beef. I once made this with a mix of rosemary and tarragon, and it was surprisingly good — that slight anise flavor from the tarragon paired well with the rich meat.
Spicy Kick : Add 1/2 teaspoon of red pepper flakes or a tablespoon of harissa paste to the garlic herb butter. The heat cuts through the richness of the roast beautifully. I tried this on a whim one winter and now it’s my go-to when I want something a little different.
Garlic Lovers : If you’re like me and believe there’s no such thing as too much garlic, roast a whole head of garlic alongside the prime rib. Squeeze the soft, caramelized cloves into the butter instead of raw garlic. It’s mellower and sweeter, and absolutely incredible.
Dairy-Free Option : Substitute the butter with a high-quality vegan butter or good olive oil. I’ve used a cultured vegan butter from Miyoko’s and it worked beautifully — still got that rich, herby crust.
Smaller Roast : Cooking for two? Use a 2- to 3-pound roast and reduce the cooking time. The same method applies, just start checking the temperature earlier, around 1 1/2 hours.
Make It a Meal : While the roast rests, toss some halved Brussels sprouts or baby potatoes in the pan drippings and roast them at 400°F for 20 minutes. They soak up all that beefy, buttery goodness and make the perfect side dish.
Serving & Storage Suggestions
This roast is a showstopper, and how you serve it matters. Here’s what I’ve learned from years of trial and error.
Serving Temperature : Serve the prime rib hot, right after that final rest. The crust should be crisp and the interior warm and pink. I like to arrange the slices on a warm platter and spoon a little of the pan juices over the top.
What to Serve With It : This roast is rich, so you want sides that cut through that richness. A bright, acidic salad with vinaigrette works perfectly. Creamy horseradish sauce is a classic for a reason — it adds heat and tang. And mashed potatoes are always a good idea. I’m partial to garlic mashed potatoes with this roast.
Storage : Leftover prime rib should be cooled completely, then wrapped tightly in plastic wrap or aluminum foil and stored in the refrigerator. It will keep for 3 to 4 days. I like to slice it before storing so it’s ready to grab for sandwiches.
Freezing : You can freeze cooked prime rib for up to 3 months. Wrap it tightly in plastic wrap, then a layer of foil, and place it in a freezer bag. Thaw overnight in the refrigerator before reheating.
Reheating : The best way to reheat prime rib without drying it out is in a low oven. Place the slices in a baking dish, add a splash of beef broth or au jus, cover with foil, and warm at 300°F for 10 to 15 minutes. You can also reheat slices quickly in a hot skillet with a little butter — just 30 seconds per side. Avoid the microwave; it will turn your beautiful roast into shoe leather.
Flavor Development : Honestly, the leftovers are often better the next day. The flavors have time to meld, and the meat is even more tender. I’ve been known to make this roast just for the sandwiches I know I’ll have the next day.
Nutritional Information & Benefits
Let’s be real — prime rib isn’t a health food, but it does have some nutritional perks. Here’s a rough breakdown for a 6-ounce serving (about the size of two thick slices).
- Calories : Approximately 550-650
- Protein : 45-50 grams
- Fat : 40-45 grams
- Saturated Fat : 18-20 grams
- Carbohydrates : 0 grams
- Sodium : 600-800 mg (varies based on salting)
Health Benefits : Beef is an excellent source of high-quality protein, which is essential for muscle repair and growth. It’s also rich in iron, zinc, and B vitamins, particularly B12, which supports nerve function and energy production. The garlic in this recipe has anti-inflammatory properties and may support immune health. And the herbs — rosemary and thyme — are packed with antioxidants.
Dietary Considerations : This recipe is naturally gluten-free, low-carb, and keto-friendly. If you’re watching your sodium, use a lighter hand with the salt and skip the dry brine. For a lower-fat option, trim the fat cap more aggressively before cooking.
Personal Perspective : I don’t eat prime rib every week, but when I do, I savor it. It’s a treat, and treats are part of a balanced life. Pair it with a big green salad or roasted vegetables, and you’ve got a meal that feels both indulgent and nourishing.
Conclusion
This Easy Garlic Herb Butter Prime Rib Roast is more than just a recipe — it’s a way to bring a little magic to your dinner table. It’s the kind of meal that makes people stop talking and just eat. The kind that makes you feel like a rockstar in your own kitchen, even if you’re just wearing sweatpants and listening to a podcast.
I love this recipe because it respects your time. It doesn’t demand constant attention or complicated techniques. It just asks for a little patience and a good thermometer. And in return, it gives you the most tender, flavorful, impressive roast you’ve ever made at home.
So go ahead — give it a try. Make it for a holiday, a birthday, or just a random Tuesday that needs a little something special. And when you do, come back and tell me how it turned out. I’d love to hear about your own kitchen memory in the making.
Happy cooking, friend. You’ve got this.
Frequently Asked Questions
Can I use a boneless prime rib roast for this recipe?
Absolutely. Boneless roasts work just as well with this method. The cooking time may be slightly shorter since there’s no bone to slow down heat transfer. Start checking the temperature about 30 minutes earlier than you would for a bone-in roast. The flavor is still fantastic, though I personally prefer bone-in for that extra richness.
What if I don’t have an instant-read thermometer?
Honestly, I’d recommend getting one — they’re inexpensive and make a huge difference. But if you’re in a pinch, you can use the “hand test” method. Touch the fleshy part of your palm under your thumb, then compare that feel to the meat. For medium-rare, the roast should feel like the fleshy part of your palm when your thumb and ring finger touch. It’s not as precise, but it works in a bind.
Can I prepare the garlic herb butter ahead of time?
Yes, and I actually recommend it. You can make the butter up to 3 days in advance. Just shape it into a log using plastic wrap, twist the ends, and store it in the fridge. Let it come to room temperature for about 30 minutes before spreading it on the roast. You can also freeze the butter log for up to 3 months — just thaw it in the fridge overnight before using.
How do I prevent the garlic from burning during the sear?
This is a common concern, and it’s valid. The key is to use a very hot pan but keep the sear short — 1 to 2 minutes per side max. If you see the butter starting to smoke or the garlic turning dark brown, pull the roast off immediately. You can also pat the garlic herb butter off the surface of the roast before searing, then reapply it after the sear. I’ve done both methods, and honestly, a quick sear with the butter on works fine as long as you’re watching closely.
What’s the best way to slice prime rib for sandwiches?
For sandwiches, you want thin, even slices. Let the roast cool completely, then use a sharp slicing knife to cut it as thin as you can — about 1/8 to 1/4 inch thick. If you have a deli slicer, this is the time to use it. If not, a sharp chef’s knife works well. The key is to slice against the grain for the most tender bites. Layer the slices on a good crusty roll with some horseradish sauce and provolone, and you’ve got a sandwich that’ll ruin you for all others.
Pin This Recipe!
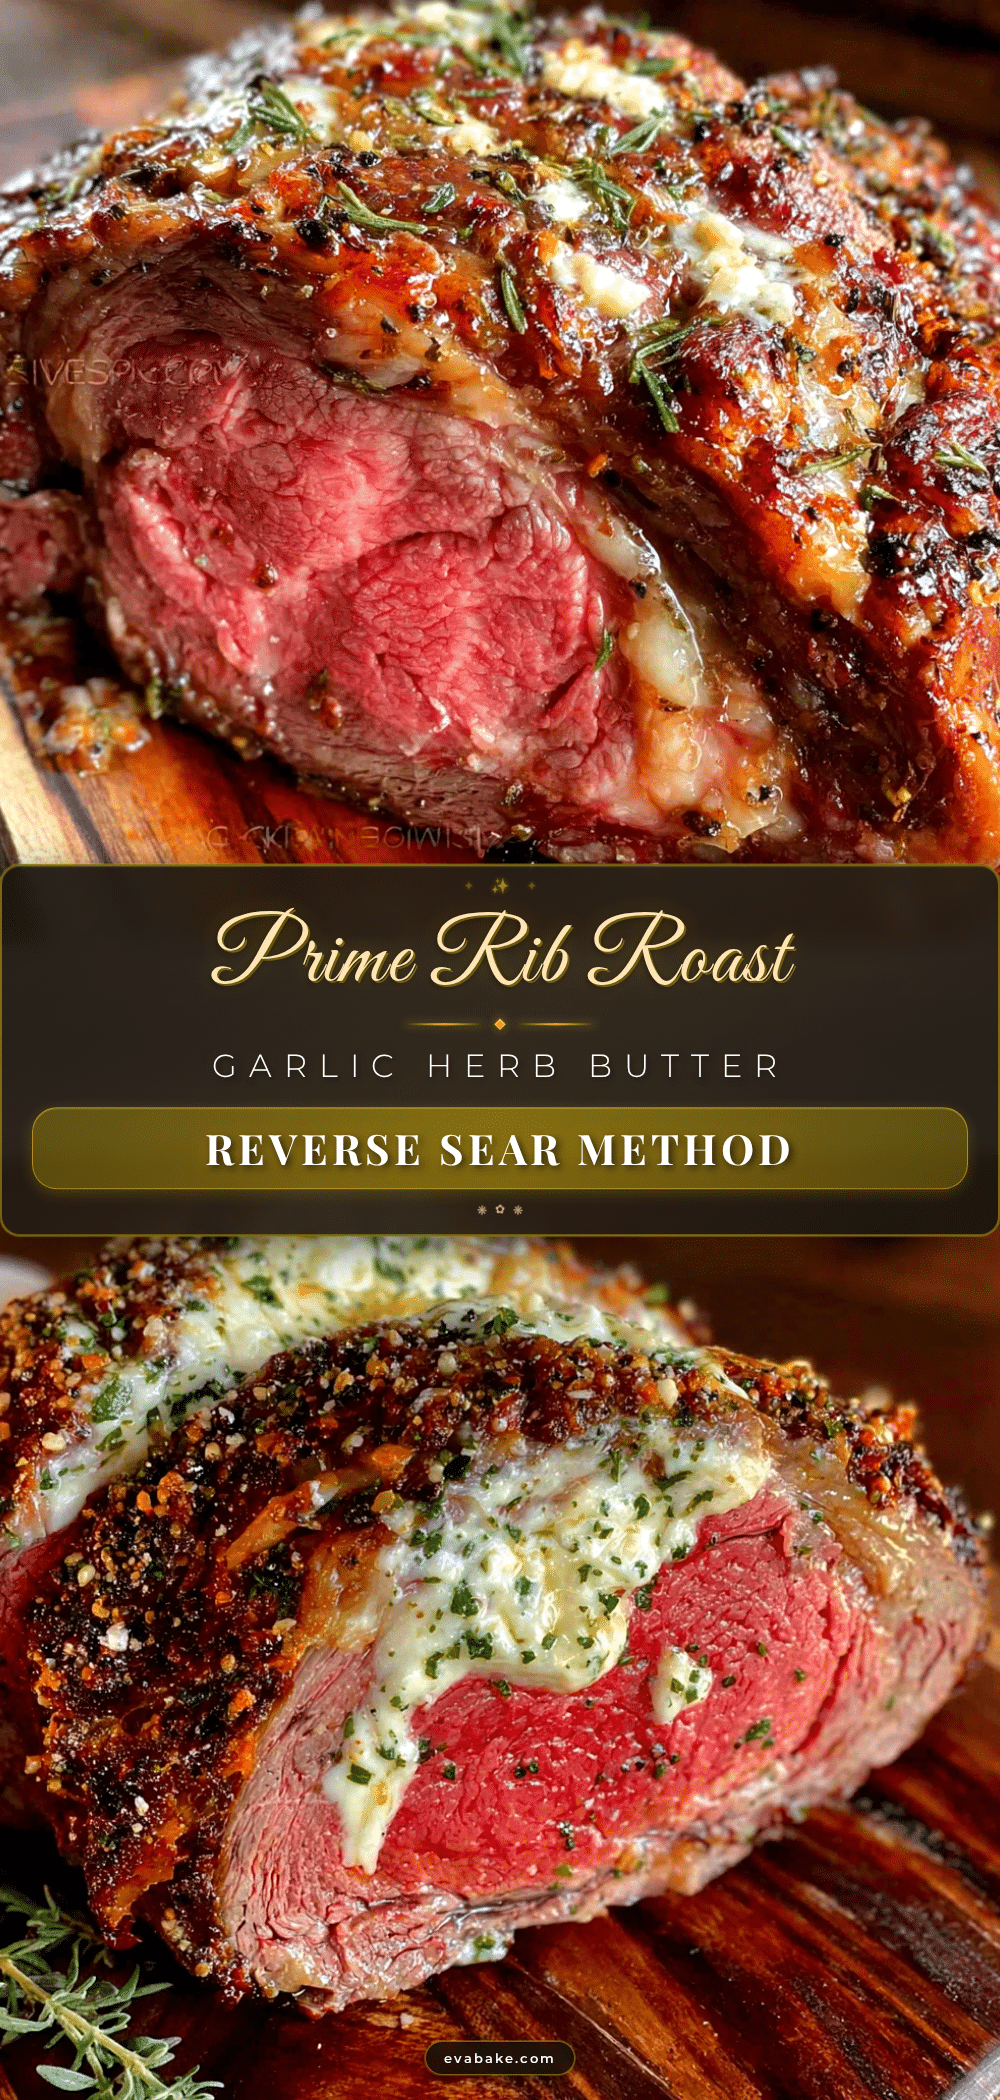
Easy Garlic Herb Butter Prime Rib Roast (Reverse Sear)
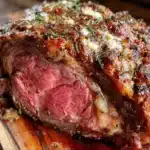
This Easy Garlic Herb Butter Prime Rib Roast uses the reverse sear method for perfectly cooked, tender, and juicy meat every time. With a flavorful garlic herb butter crust, it’s a showstopper that’s surprisingly simple to make.
- Prep Time: 15 minutes
- Cook Time: 2 hours 30 minutes
- Total Time: 3 hours 15 minutes
- Yield: 4 to 6 servings 1x
- Category: Main Course
- Cuisine: American
Ingredients
- 1/2 cup (1 stick) unsalted butter, softened
- 6 cloves fresh garlic, minced
- 2 tablespoons fresh rosemary, finely chopped
- 1 tablespoon fresh thyme, leaves stripped and chopped
- 2 teaspoons kosher salt
- 1 1/2 teaspoons freshly ground black pepper
- 4 to 5 pounds bone-in prime rib roast
- 1 tablespoon additional kosher salt (for seasoning the roast)
- 1 teaspoon additional freshly ground black pepper (for the roast)
- 1/2 cup beef broth or red wine (optional, for au jus)
Instructions
- Take the roast out of the fridge 1 to 2 hours before cooking to bring it to room temperature. Pat dry with paper towels.
- Season the roast generously with 1 tablespoon kosher salt and 1 teaspoon black pepper. Rub all over, including sides and bones. For best results, do this the night before and refrigerate uncovered overnight.
- Make the garlic herb butter: In a small bowl, combine softened butter, minced garlic, chopped rosemary, chopped thyme, 2 teaspoons kosher salt, and 1 1/2 teaspoons black pepper. Mix well and set aside at room temperature.
- Preheat oven to 250°F (120°C) with rack in middle position.
- Place the roast on a rack in a roasting pan, bone-side down.
- Cook low and slow until internal temperature reaches 120°F to 125°F (49°C to 52°C) for medium-rare, about 2 1/2 to 3 hours. Start checking after 2 hours.
- Remove roast from oven, tent loosely with aluminum foil, and let rest for 20 to 30 minutes.
- While resting, slather the garlic herb butter all over the roast.
- Preheat a cast iron skillet over high heat until screaming hot.
- Sear the roast for 1 to 2 minutes per side, including ends, until deep golden brown. Alternatively, broil on high for 3 to 5 minutes, turning once.
- Let the roast rest again for 5 to 10 minutes before slicing against the grain into 1/2 to 3/4 inch thick slices. Serve immediately.
Notes
Don’t skip the dry brine for best flavor. Use a thermometer, not a timer. Let the roast rest twice for juicy meat. Watch the sear carefully to prevent burning. Slice against the grain for tender bites.
Nutrition
- Serving Size: 6 ounces (about 2 th
- Calories: 600
- Sodium: 700
- Fat: 42
- Saturated Fat: 19
- Protein: 48
Keywords: prime rib, reverse sear, garlic herb butter, roast beef, holiday dinner, easy prime rib, bone-in prime rib