“I don’t usually do desserts, but these parfait cups? Yeah, they snuck their way into my weekly dinner rotation.” That’s what I found myself telling a friend after the third time in a week I whipped up these creamy banana pudding parfait cups with crunchy Nilla wafer crumble. Honestly, it started as a last-minute fix—a few overripe bananas staring at me from the counter, some pudding mix I’d forgotten about, and a box of Nilla wafers I’d grabbed on a whim at the store.
At first, I was skeptical. Banana pudding is classic comfort food, sure, but layering it into parfait cups with that buttery, crunchy crumble was something I hadn’t quite imagined. The first bite surprised me—the smooth, luscious pudding, the fresh banana slices, and the little pockets of crisp wafer bits created a perfect little harmony. It’s like the cozy nostalgia of grandma’s kitchen, but with a fresh, playful twist that makes it feel new again.
What really hooked me was how easy it was to make. No long baking times, no complicated steps. Just mixing, layering, and a bit of patience while it chills. It quickly became my go-to when I wanted something sweet but didn’t want to mess up the kitchen or pull out my mixer. Plus, serving these in individual cups makes them perfect for casual get-togethers or just treating yourself without leftovers staring back at you.
Every time I make these, I think about the simple pleasures: the smell of ripe bananas, the snap of the wafer crumble, the creamy chill of the pudding. It’s not flashy, but it’s just right. I guess that’s why these banana pudding parfait cups have quietly become a staple in my dessert lineup. They’re comfort food that feels like a hug in a cup—easy, satisfying, and honestly, a little addictive.
Why You’ll Love This Creamy Banana Pudding Parfait Cups Recipe
When you’re craving something sweet but don’t want to fuss over complicated desserts, these creamy banana pudding parfait cups with crunchy Nilla wafer crumble hit a sweet spot. I’ve tested and tweaked this recipe multiple times to get the texture just right and the flavors balanced perfectly. Here’s why this recipe stands out:
- Quick & Easy: Ready in under 20 minutes (plus chilling time), so it’s ideal for busy weeknights or last-minute dessert emergencies.
- Simple Ingredients: Uses pantry staples and fresh bananas, so no need for a special grocery run.
- Perfect for Any Occasion: Whether you’re hosting a casual brunch or just want a cozy solo treat, these parfaits fit right in.
- Crowd-Pleaser: The mix of creamy pudding and crunchy wafer crumble always gets nods of approval from both kids and grown-ups.
- Unbelievably Delicious: The combination of silky pudding and crisp wafers creates a texture contrast that’s impossible not to enjoy.
What really sets this recipe apart is the layering technique and the use of Nilla wafer crumble instead of whole wafers. Crushing the wafers just right adds that perfect crunch without overwhelming the delicate pudding. Plus, I like to make my pudding from scratch using a blend of vanilla custard and whipped cream—no instant mixes here—which gives the parfaits a rich, fresh flavor that beats boxed versions every time.
And if you’ve ever tried other banana puddings that felt too heavy or too sweet, you’ll appreciate how this recipe balances creaminess and freshness. It’s comfort food reimagined, simple but with a little extra flair that makes it feel special. Honestly, after making these parfaits, you’ll find yourself wanting to bring this dessert to every gathering—no pressure, but it’s kind of a showstopper.
What Ingredients You Will Need
This recipe uses simple, wholesome ingredients to deliver bold flavor and satisfying texture without the fuss. Most of these are pantry staples, with fresh bananas lending the perfect natural sweetness and softness.
- For the Pudding:
- Whole milk – 2 cups (480 ml), for that creamy base
- Granulated sugar – ⅔ cup (135 g), to sweeten just right
- Egg yolks – 3 large (room temperature), for richness and silky texture
- Cornstarch – ¼ cup (30 g), thickens the pudding without lumps
- Unsalted butter – 2 tablespoons (28 g), softened (adds a smooth finish)
- Pure vanilla extract – 2 teaspoons, for that classic banana pudding flavor
- For the Whipped Cream Layer:
- Heavy cream – 1 cup (240 ml), chilled for best whipping results
- Powdered sugar – 2 tablespoons (15 g), lightly sweetens the cream
- Vanilla extract – 1 teaspoon, complements the pudding
- For the Parfait Assembly:
- Ripe bananas – 3 medium, sliced thinly (look for bananas with a few brown spots for optimal sweetness)
- Nilla wafers – 1 ½ cups (about 150 g), crushed into coarse crumbs (I like to pulse them briefly in a food processor for a nice crunch without powder)
Ingredient Tips: I usually pick organic bananas when I can—something about the flavor just feels brighter. For the butter, I recommend Kerrygold for that creamy texture. If you need a dairy-free option, swapping heavy cream for coconut cream works surprisingly well, though the flavor will shift a bit. And if you want to save time, you can use a good-quality vanilla pudding mix, but honestly, the scratch-made pudding is worth it.
Equipment Needed
- Medium saucepan – for cooking the pudding evenly without scorching
- Whisk – essential for smoothing out the pudding and stirring constantly
- Mixing bowls – at least two, one for pudding and one for whipping cream
- Electric hand mixer or stand mixer – to whip the cream to perfect peaks (a whisk works but takes more effort)
- Measuring cups and spoons – accuracy matters for pudding consistency
- Spatula – for gentle folding of whipped cream and scraping the pudding
- Food processor or plastic bag and rolling pin – for crushing Nilla wafers
- Serving cups or parfait glasses – small clear cups work great for layering and presentation
If you don’t have a food processor, no worries: placing Nilla wafers in a sealed plastic bag and gently tapping with a rolling pin or even the bottom of a heavy pan works just fine. I’ve done this many times when I was in a pinch. For whipping cream, I find an electric hand mixer makes the job faster, but if you’re up for a bit of an arm workout, a sturdy whisk will do the trick.
Preparation Method
- Make the pudding: In a medium saucepan, whisk together the sugar, cornstarch, and egg yolks until smooth. Slowly pour in the milk while whisking to combine everything evenly. Place the pan over medium heat, stirring constantly with a whisk to prevent lumps and scorching. Cook for about 7-10 minutes until the mixture thickens and coats the back of a spoon. You’ll notice it starts bubbling gently—that’s your cue.
- Finish the pudding: Remove from heat and stir in the softened butter and vanilla extract. Mix until the butter melts and the pudding is smooth. Transfer the pudding to a bowl, cover with plastic wrap pressed directly onto the surface (to avoid a skin), and let it cool to room temperature, about 30 minutes.
- Whip the cream: While the pudding cools, pour the chilled heavy cream into a mixing bowl. Add powdered sugar and vanilla extract. Using a hand or stand mixer, whip on medium-high speed until soft to medium peaks form. Be careful not to overwhip, or it’ll turn grainy.
- Fold whipped cream into pudding: Once the pudding has cooled but is still soft, gently fold about two-thirds of the whipped cream into the pudding. This lightens the texture and adds a luscious creaminess. Keep the remaining whipped cream for layering.
- Prepare the bananas and wafer crumble: Slice the bananas thinly, aiming for even rounds about ¼ inch thick. Crush the Nilla wafers into coarse crumbs—some bigger bits, some fine crumbs—for texture contrast.
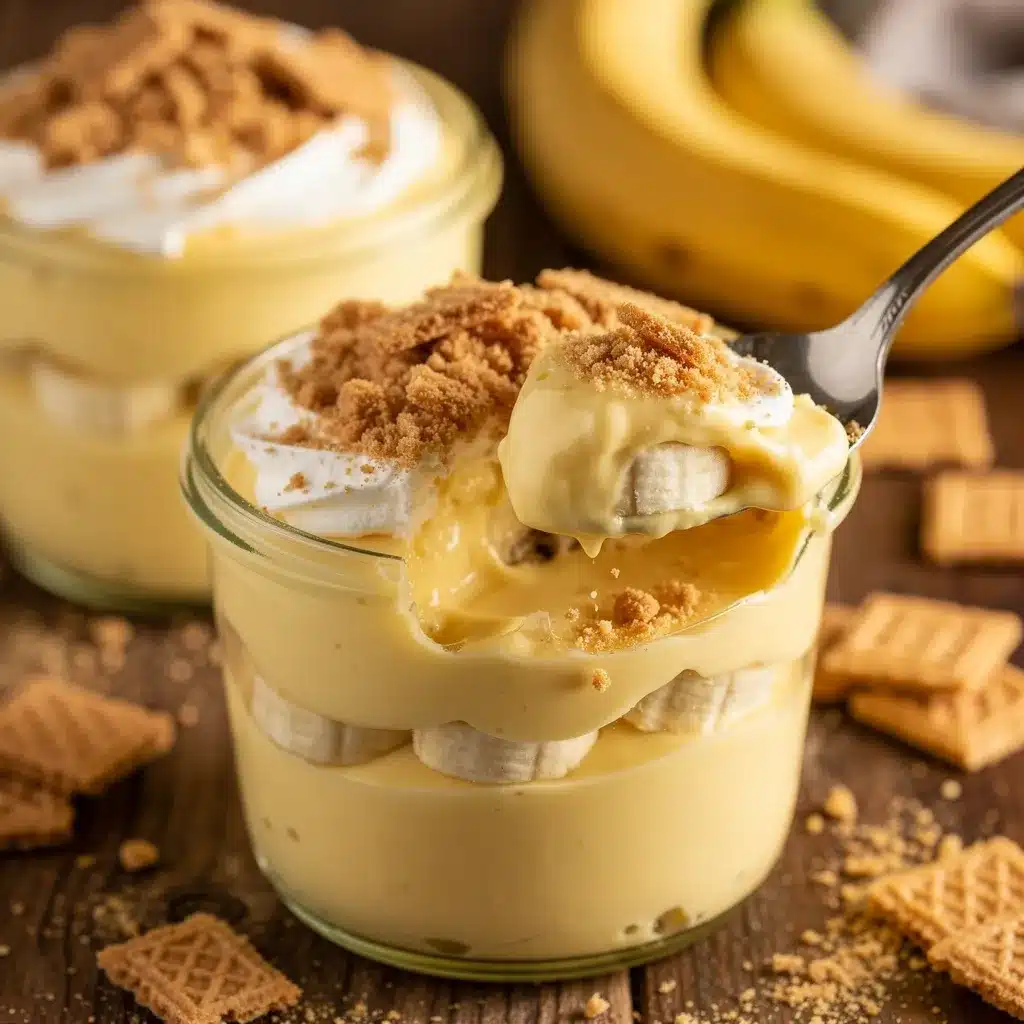
- Assemble the parfait cups: Start by adding a spoonful of the pudding mixture at the bottom of each cup. Top with banana slices, then a sprinkle of wafer crumble. Repeat layers until the cup is nearly full, finishing with a dollop of whipped cream and a final dusting of wafer crumbs on top.
- Chill and serve: Refrigerate the parfait cups for at least 2 hours, preferably longer, so flavors meld and the pudding firms up nicely. Serve chilled for the best experience.
Pro tip: If you want to speed up chilling, place the cups in the coldest part of your fridge and cover loosely with plastic wrap. Also, be gentle when folding the whipped cream into pudding to keep that airy texture intact. I’ve found rushing this step leads to a denser pudding and, honestly, less fun to eat.
Cooking Tips & Techniques
Making creamy banana pudding parfait cups might seem straightforward, but a few little tricks can make a big difference. First, stirring the pudding constantly while cooking is key to avoid lumps or burnt spots on the bottom. I once skipped this step and ended up with scrambled eggs in my pudding—trust me, it’s not a vibe.
When whipping cream, cold equipment helps. I usually chill my mixing bowl and beaters in the fridge for 15 minutes before whipping. This helps the cream thicken faster and hold structure better. Also, knowing when to stop whipping is a bit of an art: soft peaks mean the cream holds shape but still looks silky, perfect for folding into pudding.
For the wafer crumble, crushing too finely can make it soggy quickly, so aim for a mix of small and medium pieces. Crushing wafers right before assembling helps keep that satisfying crunch. If you’re prepping ahead, store the crumble separately in an airtight container to maintain texture.
A common mistake is slicing bananas too early and letting them brown. To prevent this, slice bananas just before layering or toss them lightly in lemon juice to slow oxidation if prepping ahead. That little tartness actually complements the sweetness nicely.
One last tip: layering is about balance. Don’t overload with pudding or wafers in one layer. Thin, even layers keep each bite interesting and avoid mushiness. It’s the same layering principle I use when making eggplant parmigiana, where texture contrast is everything.
Variations & Adaptations
This recipe is super flexible, so feel free to make it your own! Here are some ways I’ve played around with it:
- Dietary swaps: Use coconut milk and coconut cream to make a dairy-free version. Swap Nilla wafers for gluten-free vanilla cookies or crushed graham crackers if you need gluten-free.
- Flavor twists: Add a layer of caramel sauce or dulce de leche for extra indulgence. A sprinkle of cinnamon or nutmeg over the bananas adds warmth and depth.
- Seasonal fruit swaps: In warmer months, I sometimes swap bananas for fresh peaches or mango slices for a tropical vibe. Works beautifully and feels fresh.
- Cooking method adaptation: If you’re short on time, make the pudding using a high-quality instant vanilla pudding mix and fold in whipped cream. It won’t have the same depth but still makes a lovely parfait.
- Personal favorite: I once layered in crushed toasted pecans or walnuts for extra crunch and a nutty edge. It adds a great texture contrast and a little surprise in each bite.
Serving & Storage Suggestions
These banana pudding parfait cups are best served chilled, straight from the fridge. The cold temperature enhances the creamy texture and keeps the wafers crisp. I like to present them in clear glass parfait cups or small mason jars to show off the beautiful layers—makes a simple dessert feel special.
They pair nicely with a light coffee or iced tea, especially if you’re serving them at brunch or a casual gathering. If you want to turn the dessert into a snack or light finish to dinner, a shot of espresso alongside balances the sweetness.
Store leftovers covered in the refrigerator for up to 3 days. The wafer crumble will soften over time, so if you want to keep the crunch, store the crumble separately and sprinkle just before serving. Reheat? Nope, this dessert is best cold and fresh.
Flavors meld beautifully after a few hours, so if you can make these a day ahead, you’ll get a more harmonious taste. Just be sure to add the final crunchy topping just before serving to keep that satisfying texture snap.
Nutritional Information & Benefits
Each serving of these creamy banana pudding parfait cups offers a comforting treat with a moderate calorie count (around 250-300 calories per cup, depending on portion size). Bananas provide natural sweetness plus potassium and vitamin B6, supporting heart health and energy metabolism.
The homemade pudding uses whole milk and egg yolks, delivering protein and calcium, essential for bone health. While this is an indulgent dessert, you can lighten it by using low-fat milk or a sugar substitute if preferred.
Keep in mind the wafers contain gluten and some added sugars, so this dessert isn’t suitable for gluten-free or low-sugar diets unless adjusted. For dairy-free options, coconut milk and cream work well and add healthy fats.
From my experience, this dessert feels like a balanced treat—you get creamy richness and a sweet fruit boost without going overboard on heaviness. It’s a nice middle ground between homemade comfort and mindful eating.
Conclusion
Creamy banana pudding parfait cups with crunchy Nilla wafer crumble are a perfect blend of creamy, crunchy, and naturally sweet that’s hard to resist. I love how straightforward the recipe is, letting simple ingredients shine with just a little extra care in layering and texture balance. Whether you’re feeding a crowd or treating yourself after a long day, these parfaits feel like a little moment of joy in a cup.
Feel free to tweak the layers, swap fruits, or add your favorite toppings to make it truly yours. I’ve found that this recipe not only satisfies sweet cravings but also brings a sense of calm to the kitchen—easy, reliable, and delicious every time.
Don’t hesitate to share how you make it your own or ask any questions below. I’m always curious how others enjoy these parfait cups, and maybe you’ll discover your new favorite way to serve banana pudding!
Frequently Asked Questions about Creamy Banana Pudding Parfait Cups
Can I make these parfait cups ahead of time?
Yes! Prepare the pudding and whipped cream layers and assemble the parfaits a few hours ahead. Keep them covered and refrigerated. Add the crunchy wafer crumble right before serving to maintain texture.
How do I prevent bananas from browning in the parfait?
Slice bananas just before assembling the parfaits. If prepping early, toss banana slices lightly in lemon juice to slow browning without affecting flavor much.
Can I use instant pudding mix instead of homemade pudding?
You can, especially if short on time. Use good-quality vanilla instant pudding and fold in whipped cream for a lighter texture. The flavor will be less fresh but still tasty.
What are good substitutions for Nilla wafers?
Gluten-free vanilla cookies or crushed graham crackers work well. For a nutty crunch, try crushed toasted nuts as a topping instead.
Is it possible to make this dessert dairy-free?
Yes, substitute whole milk with coconut or almond milk and use coconut cream instead of heavy cream. The texture and flavor will change slightly but remain delicious.
Pin This Recipe!
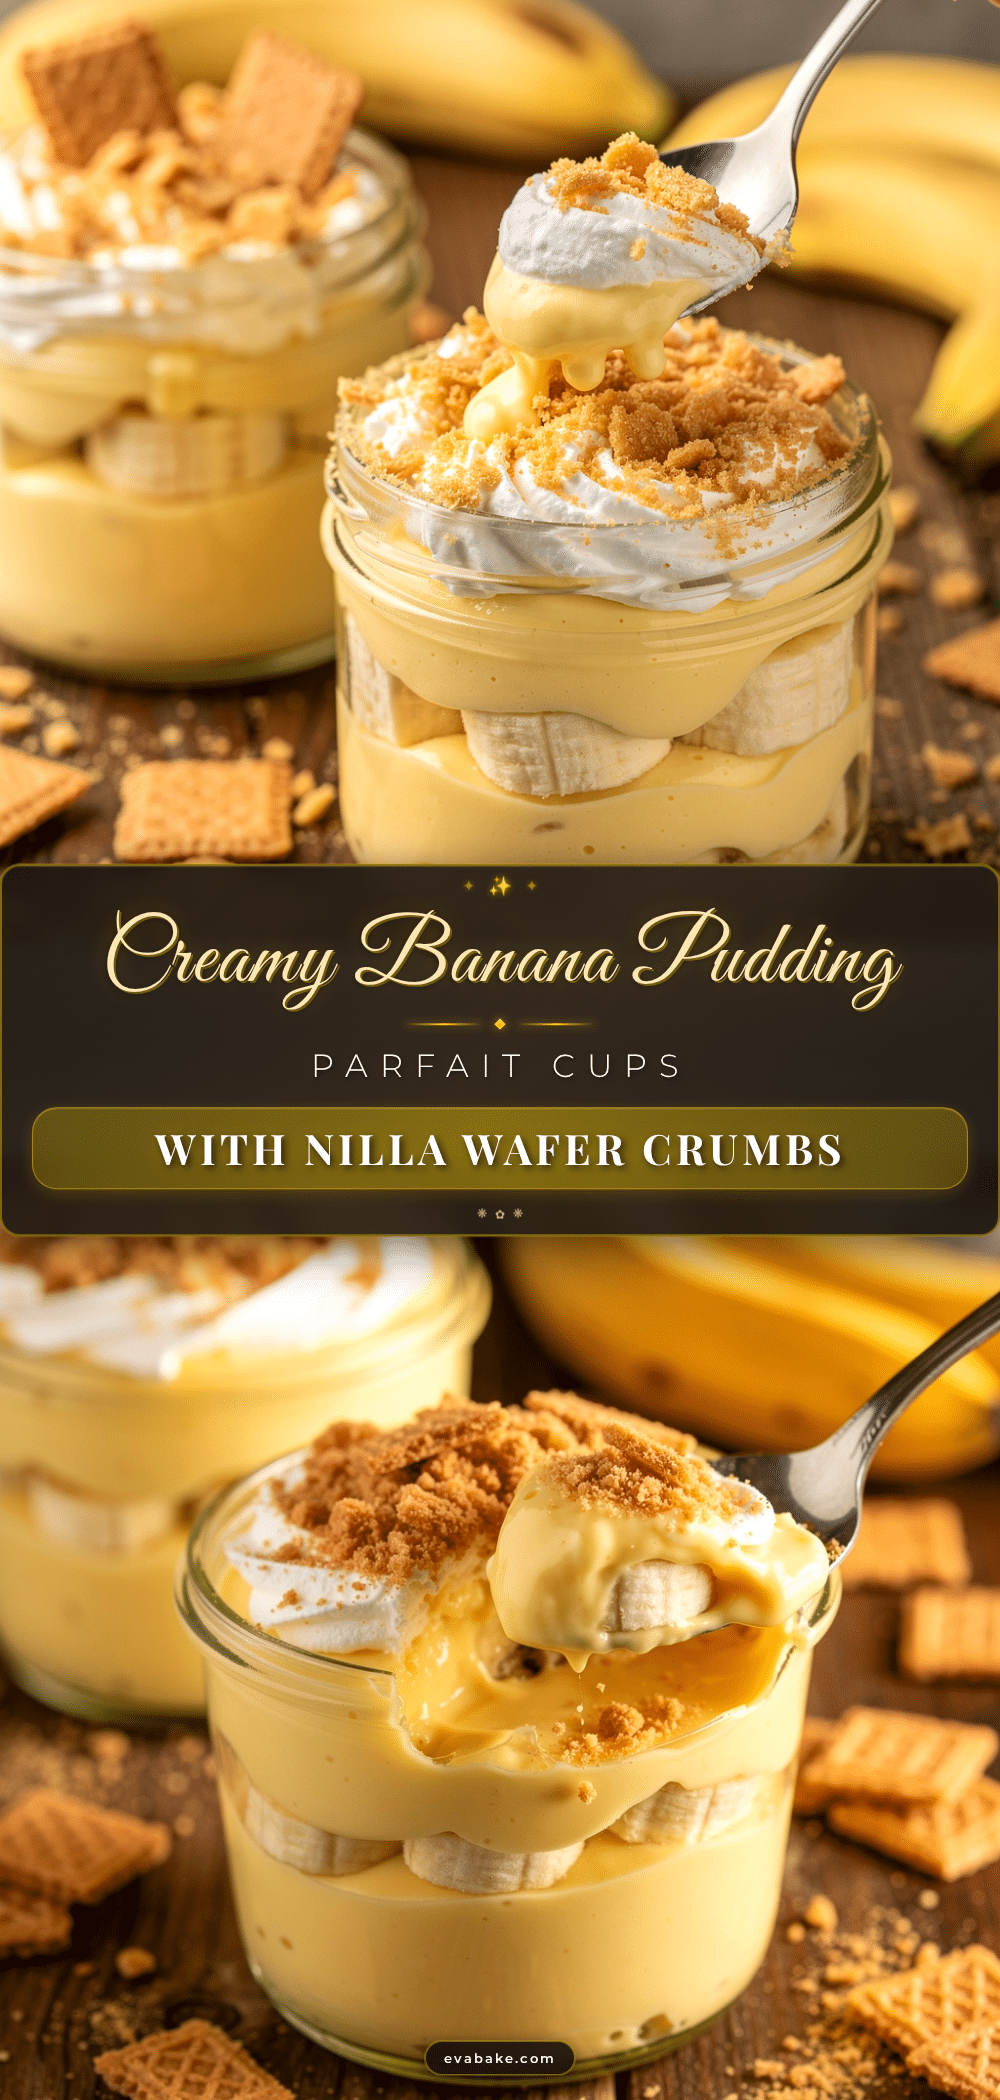
Creamy Banana Pudding Parfait Cups

A quick and easy homemade dessert featuring creamy vanilla pudding layered with fresh bananas and crunchy Nilla wafer crumble, perfect for any occasion.
- Prep Time: 15 minutes
- Cook Time: 10 minutes
- Total Time: 2 hours 25 minutes
- Yield: 6 servings 1x
- Category: Dessert
- Cuisine: American
Ingredients
- 2 cups whole milk (480 ml)
- ⅔ cup granulated sugar (135 g)
- 3 large egg yolks (room temperature)
- ¼ cup cornstarch (30 g)
- 2 tablespoons unsalted butter (28 g), softened
- 2 teaspoons pure vanilla extract
- 1 cup heavy cream (240 ml), chilled
- 2 tablespoons powdered sugar (15 g)
- 1 teaspoon vanilla extract
- 3 medium ripe bananas, sliced thinly
- 1 ½ cups Nilla wafers (about 150 g), crushed into coarse crumbs
Instructions
- In a medium saucepan, whisk together sugar, cornstarch, and egg yolks until smooth.
- Slowly pour in the milk while whisking to combine evenly.
- Place the pan over medium heat, stirring constantly with a whisk to prevent lumps and scorching.
- Cook for about 7-10 minutes until the mixture thickens and coats the back of a spoon.
- Remove from heat and stir in softened butter and vanilla extract until smooth.
- Transfer pudding to a bowl, cover with plastic wrap pressed onto the surface, and let cool to room temperature, about 30 minutes.
- Pour chilled heavy cream into a mixing bowl, add powdered sugar and vanilla extract, and whip on medium-high speed until soft to medium peaks form.
- Gently fold about two-thirds of the whipped cream into the cooled pudding to lighten the texture.
- Slice bananas thinly (about ¼ inch thick) and crush Nilla wafers into coarse crumbs.
- Assemble parfait cups by layering pudding mixture, banana slices, and wafer crumble, repeating layers until nearly full.
- Finish with a dollop of whipped cream and a final dusting of wafer crumbs on top.
- Refrigerate parfait cups for at least 2 hours before serving chilled.
Notes
Stir pudding constantly while cooking to avoid lumps or burning. Chill mixing bowl and beaters before whipping cream for better results. Crush wafers just before assembling to keep crunch. Slice bananas just before layering or toss in lemon juice to prevent browning. Fold whipped cream gently into pudding to maintain airy texture. Store wafer crumble separately if making ahead to keep crispness.
Nutrition
- Serving Size: 1 parfait cup
- Calories: 275
- Sugar: 22
- Sodium: 150
- Fat: 15
- Saturated Fat: 9
- Carbohydrates: 30
- Fiber: 2
- Protein: 5
Keywords: banana pudding, parfait cups, creamy dessert, Nilla wafers, easy dessert, homemade pudding, layered dessert