Dropped a whole bag of frozen chicken tenders on the kitchen floor at 5:47 PM. The dog looked thrilled, my youngest was crying because the honey mustard I’d just mixed got knocked over too, and somewhere in the back of my brain, I heard that little voice that says, “Just order pizza.” But I didn’t. I stood there, staring at the mess, and something clicked. I didn’t want greasy takeout. I wanted something that *felt* like a treat but didn’t make me feel like I’d just run a marathon in a deep fryer. So I picked up the chicken, tossed it in the sink for a quick rinse (don’t judge, we were in survival mode), and decided to wing it.
That night, I threw together a coating from stuff in the pantry—panko, some random spices, a little olive oil—and baked those tenders until they were golden and shatteringly crisp. The honey mustard? I made that from scratch too, because the store-bought stuff was gone. And honestly? It was the best batch of crispy baked chicken tenders with honey mustard I’d ever eaten. The kids devoured them. The dog got a tiny piece. I stood at the counter eating one straight off the tray, and I felt like I’d won dinner.
That’s the thing about this recipe. It’s not fancy. It’s not complicated. But it’s the kind of meal that saves a chaotic night and makes everyone at the table happy. I’ve made these crispy baked chicken tenders with honey mustard at least a dozen times since that floor-mop moment, and they’ve never let me down. They’re the dinner I turn to when I need a sure thing.
Why You’ll Love This Recipe
Let me be real with you—I’ve tested a lot of baked chicken tender recipes over the years. Some come out soggy. Some taste like cardboard coated in sadness. These are not those. This version is the result of trial, error, and a few burnt fingers, and I stand by every crispy bite.
- Quick & Easy : These come together in about 30 minutes from start to finish. No marinating, no complicated steps. Perfect for a weeknight when you’re short on time and patience.
- Simple Ingredients : You probably have everything in your kitchen right now. Panko breadcrumbs, eggs, flour, a few spices. No weird specialty items that cost a fortune.
- Perfect for Picky Eaters : My kids inhale these. So do my nieces and nephews. Even my friend who “doesn’t like chicken” ate three. They’re a guaranteed crowd-pleaser.
- Healthier Than Fried : You get all the crunch without the grease. Baked, not fried, but you honestly won’t miss the oil. The texture is that good.
- Unbelievably Crispy : The secret is in the panko and a little trick with the oven rack position. No sogginess. No sad, limp chicken. Just pure, golden crunch.
What makes this recipe different from the rest is the method. I bake these on a wire rack set inside a baking sheet, which lets the hot air circulate all around the tenders. That’s what gives you that all-over crunch without having to flip them halfway through. And the honey mustard? It’s not just a dip. It’s a tangy, sweet, slightly spicy sauce that I’ve perfected over the years. It’s the kind of sauce you’ll want to put on everything—sandwiches, salads, even roasted vegetables. Trust me on this one.
This isn’t just another recipe. It’s the one you’ll bookmark, screenshot, and send to your mom. It’s the one that makes you feel like a kitchen hero even on your most exhausted days.
What Ingredients You Will Need
This recipe uses simple, everyday ingredients to create something that tastes anything but ordinary. The magic is in the balance of the coating and the freshness of the honey mustard. Let’s break it down.
For the Chicken Tenders
- Chicken tenders (1.5 lbs or about 680g) – You can use chicken breast strips if you can’t find pre-cut tenders. Just cut them into uniform pieces so they cook evenly.
- All-purpose flour (½ cup or 60g) – This helps the egg wash stick to the chicken. You can use gluten-free all-purpose flour if needed.
- Large eggs (2) – Beaten. These act as the glue for the breadcrumb coating. Make sure they’re at room temperature for easier mixing.
- Panko breadcrumbs (1 ½ cups or about 120g) – This is the key to the crunch. Regular breadcrumbs won’t give you the same texture. I prefer the Japanese-style panko from the brand Kikkoman or Ian’s.
- Grated Parmesan cheese (¼ cup or 25g) – Adds a savory, nutty flavor and helps with browning. Use the real stuff, not the green can.
- Garlic powder (1 teaspoon) – For that savory depth. Don’t use garlic salt unless you adjust the added salt.
- Paprika (1 teaspoon) – Adds a mild sweetness and a beautiful golden color. Smoked paprika works great too for a different vibe.
- Onion powder (½ teaspoon) – Rounds out the flavor without being overpowering.
- Salt (1 teaspoon) – I use fine sea salt. Adjust based on your preference and the saltiness of your Parmesan.
- Black pepper (½ teaspoon) – Freshly ground is always better.
- Olive oil spray or melted butter (2 tablespoons) – Spraying or brushing the tenders before baking helps the panko get golden and crispy. Don’t skip this.
For the Honey Mustard
- Dijon mustard (⅓ cup or 80ml) – I recommend Grey Poupon or Maille for the best flavor. It has that sharp, tangy kick that balances the honey.
- Honey (¼ cup or 85g) – Use a good-quality, runny honey. Local honey is amazing if you have it.
- Mayonnaise (2 tablespoons) – Adds creaminess and richness. Use full-fat for the best texture. If you’re dairy-free, vegan mayo works fine.
- Apple cider vinegar (1 tablespoon) – A tiny bit of acid brightens everything up. White wine vinegar works too.
- Garlic powder (¼ teaspoon) – Just a hint. Don’t go overboard.
- Salt (a pinch) – To balance the sweetness.
Equipment Needed
You don’t need a ton of fancy gear for this recipe, which is part of why I love it. Here’s what you’ll need:
- Baking sheet – A standard half-sheet pan (about 13×18 inches) works perfectly. I’ve used the same Nordic Ware one for years.
- Wire cooling rack – This is the secret weapon. It fits inside the baking sheet and lifts the chicken off the bottom, allowing air to circulate. Without it, the bottoms can get soggy. If you don’t have one, you can bake directly on the sheet, but flip the tenders halfway through.
- Three shallow bowls – For the flour, egg wash, and panko mixture. I use wide, shallow pasta bowls for easy dipping.
- Tongs – For transferring the chicken from bowl to bowl without making a huge mess. Silicone-tipped ones are great.
- Small whisk or fork – For mixing the honey mustard. A fork works if your whisk is hiding in the back of a drawer.
- Measuring cups and spoons – For accuracy. I’m usually a “by eye” cook, but for this recipe, the ratios matter, especially for the honey mustard.
If you don’t have a wire rack, you can use a lightly greased baking sheet. Just keep an eye on the tenders and flip them at the 10-minute mark. They’ll still be good, just not quite as uniformly crispy. I’ve done it that way in a pinch, and no one complained.
Preparation Method
Alright, let’s get cooking. This is straightforward, but I’ll walk you through every step so you get that perfect crunch.
- Preheat your oven to 425°F (220°C). Place a wire rack inside a baking sheet and spray it lightly with olive oil spray. This prevents sticking and helps the bottoms crisp up.
- Set up your breading station. In the first shallow bowl, add the ½ cup of all-purpose flour. In the second bowl, beat the 2 eggs until they’re uniform and slightly frothy. In the third bowl, combine the 1 ½ cups panko, ¼ cup Parmesan, 1 teaspoon garlic powder, 1 teaspoon paprika, ½ teaspoon onion powder, 1 teaspoon salt, and ½ teaspoon black pepper. Mix with a fork until everything is evenly distributed.
- Prep the chicken. Pat the chicken tenders dry with paper towels. This is important—if they’re wet, the flour won’t stick properly. Season them lightly with a pinch of salt and pepper on both sides.
- Coat the chicken. Working one piece at a time, dredge a tender in the flour, shaking off any excess. Then dip it into the egg wash, letting the excess drip off. Finally, press it into the panko mixture, making sure it’s fully coated on all sides. Place it on the prepared wire rack. Repeat with all the tenders. Your hands will get messy. Embrace it.
- Spray with oil. Once all the tenders are on the rack, give them a generous spray with olive oil spray. This is what makes the panko turn golden and crunchy instead of pale and sad. If you don’t have spray, brush each tender with a thin layer of melted butter.
- Bake. Place the baking sheet on the middle rack of the oven. Bake for 12-15 minutes, until the tenders are golden brown and cooked through. The internal temperature should reach 165°F (74°C). No need to flip them—the wire rack does the work for you.
- Make the honey mustard while the chicken bakes. In a small bowl, whisk together the ⅓ cup Dijon mustard, ¼ cup honey, 2 tablespoons mayonnaise, 1 tablespoon apple cider vinegar, ¼ teaspoon garlic powder, and a pinch of salt. Taste it. Adjust the honey or mustard to your preference. I like mine with a little extra kick, so I sometimes add a dash of cayenne.
- Rest and serve. Let the tenders rest on the rack for 2-3 minutes after baking. This helps the coating set. Then serve them hot with the honey mustard on the side for dipping.
A quick note: if your tenders are on the thicker side, they might need an extra minute or two. Check the thickest one with a meat thermometer to be safe. I’ve learned this the hard way—nothing ruins the vibe like cutting into a raw center.
Cooking Tips & Techniques
I’ve made this recipe more times than I can count, and I’ve definitely had my share of mishaps. Here’s what I’ve learned so you don’t have to repeat my mistakes.
Don’t skip the wire rack. This is the single most important tip for achieving crispy baked chicken tenders. When the chicken sits directly on the baking sheet, the heat can’t reach the bottom, and the coating steams instead of crisps. The rack changes everything. Trust me, I learned this after making a batch of soggy-bottomed tenders that my kids politely refused to eat.
Pat the chicken dry. I know it sounds fussy, but it makes a huge difference. Excess moisture dilutes the flour and egg wash, which means the coating won’t stick as well. You’ll end up with patchy, bare spots. Take the extra 30 seconds.
Use your hands for the panko step. Tongs don’t press the coating on firmly enough. Use one hand for wet ingredients (flour and egg) and one hand for dry (panko). This keeps the breading from clumping on your fingers. It’s a pro move that makes the process way less messy.
Don’t overcrowd the rack. Leave a little space between each tender. If they’re touching, they’ll steam each other and you’ll lose that precious crunch. If you’re making a big batch, use two racks and rotate them halfway through.
The honey mustard is better the next day. Seriously. The flavors meld together overnight in the fridge. I always make it ahead of time if I can. But even fresh, it’s leagues better than anything from a bottle.
One mistake I made early on: I used regular breadcrumbs instead of panko. The result was a dense, heavy coating that felt more like a breaded cutlet than a tender. Panko is lighter and crispier because of its flaky texture. It’s worth the extra trip to the store.
Variations & Adaptations
This recipe is a fantastic base, and I’ve played around with it quite a bit. Here are some of my favorite variations.
Spicy Buffalo Version: Add 1-2 teaspoons of cayenne pepper to the panko mixture and serve with a side of buffalo sauce mixed with a little melted butter. It’s a total game-changer if you like heat. I made this for a game day gathering, and it disappeared in minutes.
Gluten-Free Option: Swap the all-purpose flour for a 1:1 gluten-free flour blend and use gluten-free panko (I like the one from Ian’s). The texture is nearly identical. My sister-in-law has celiac, and she always requests these when she visits.
Lighter Honey Mustard: Replace the mayonnaise with plain Greek yogurt. It’s tangier and a little less rich, but still creamy. I do this when I’m trying to be a bit healthier, and honestly, I don’t miss the mayo.
Herb-Crusted Version: Add 1 tablespoon of dried herbs to the panko mixture. Rosemary, thyme, and oregano work beautifully. I tried this one summer when I had too much rosemary in the garden, and it was a happy accident.
Air Fryer Adaptation: Preheat your air fryer to 400°F (200°C). Cook the tenders in a single layer for 8-10 minutes, flipping halfway through. They come out even crispier, if you can believe it. This is my go-to method when I’m only cooking for myself.
Serving & Storage Suggestions
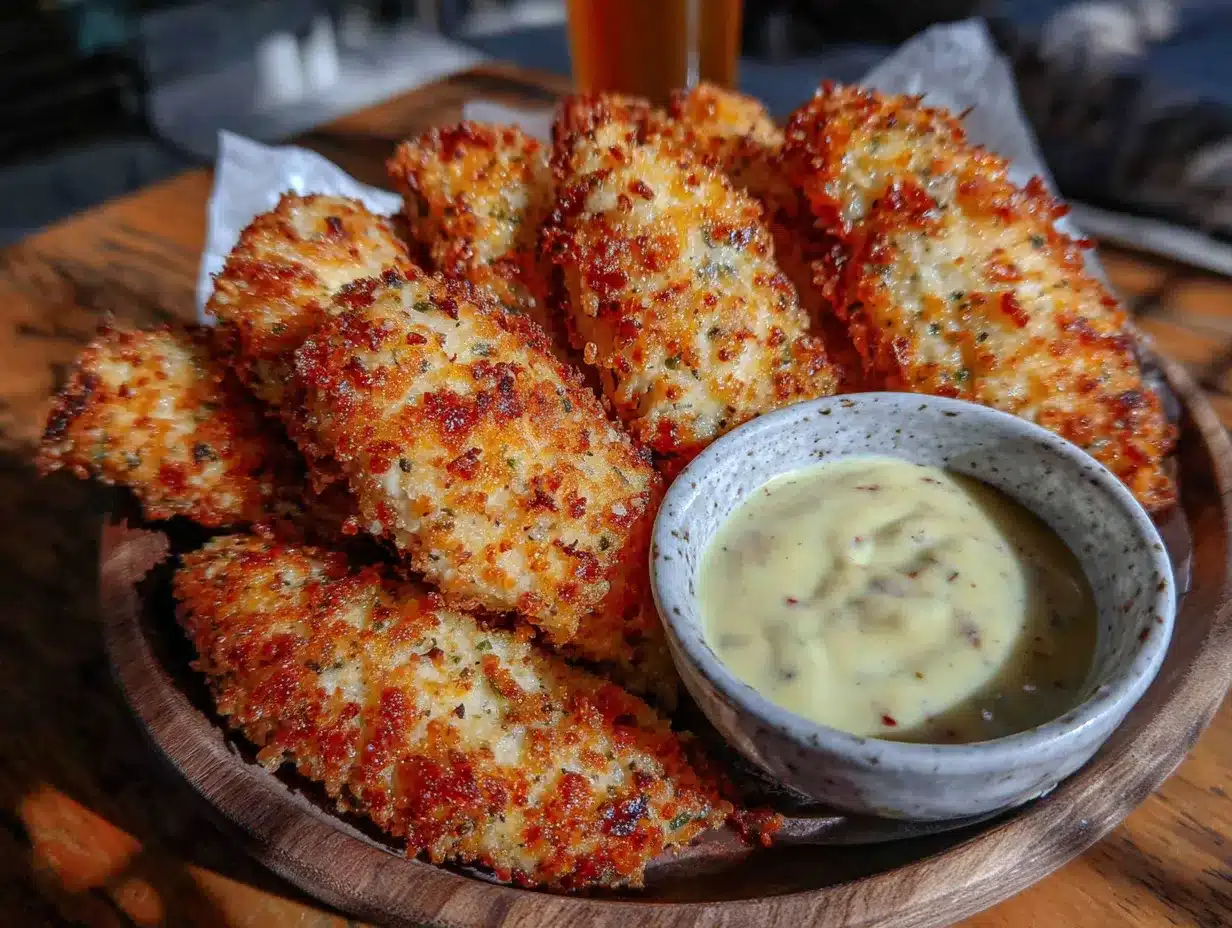
These tenders are best served hot, right out of the oven, when the coating is at its peak crunchiness. I like to arrange them on a platter with a small bowl of honey mustard in the center for dipping. A sprinkle of fresh parsley or chives on top adds a nice pop of color, but it’s totally optional.
For sides, you can’t go wrong with a simple green salad, some roasted vegetables, or a pile of fresh cold pasta salad with sun-dried tomatoes. The tangy pasta salad balances the savory crunch of the chicken perfectly. If you’re in the mood for something heartier, try serving them with flavorful sheet pan nachos with carnitas and street corn for a fun, shareable dinner. I’ve also wrapped leftovers in a tortilla with lettuce and tomato for an easy lunch the next day—it’s like a homemade chicken wrap that beats anything from a fast-food joint.
Storage: Let any leftover tenders cool completely before storing them in an airtight container in the refrigerator. They’ll keep for up to 3 days. The honey mustard can be stored in a separate jar in the fridge for up to a week.
Reheating: The microwave will make them soggy, so don’t do it. Instead, reheat them in a 375°F (190°C) oven for about 5-7 minutes, or until they’re hot and crispy again. An air fryer works even better—just 3-4 minutes at 350°F (175°C). The texture comes back remarkably well.
Freezing: You can freeze the baked and cooled tenders in a single layer on a baking sheet, then transfer them to a freezer bag. They’ll keep for up to 2 months. Reheat directly from frozen in the oven or air fryer. I do this all the time for busy weeks.
Nutritional Information & Benefits
Here’s a rough estimate per serving (about 4-5 tenders with 2 tablespoons of honey mustard):
- Calories: Around 420
- Protein: 38g
- Fat: 18g
- Carbohydrates: 28g
- Fiber: 1g
- Sugar: 12g (mostly from the honey)
These tenders are a solid source of lean protein, thanks to the chicken breast. The panko adds a bit of carbs for energy, but it’s not excessive. The honey mustard, while not exactly a health food, does provide a small amount of antioxidants from the honey and the anti-inflammatory properties of mustard seeds. If you’re watching your sugar intake, you can reduce the honey in the sauce to 2 tablespoons.
This recipe is naturally nut-free and can be made gluten-free with the substitutions I mentioned earlier. It’s also a great option for meal prep, since the protein keeps you full and satisfied. I often pack these for lunch with some raw veggies and a side of the honey mustard. It’s way better than a sad desk salad.
Conclusion
These crispy baked chicken tenders with honey mustard have become a staple in my kitchen for a reason. They’re reliable, delicious, and they make everyone happy. Whether you’re feeding a crowd of hungry kids, meal-prepping for the week, or just craving something comforting that doesn’t leave you feeling heavy, this recipe delivers.
I love that I can tweak it depending on my mood—spicy, herby, gluten-free—and it always works. The honey mustard is the perfect finishing touch, and once you make it from scratch, you’ll never go back to the store-bought stuff. It’s just better.
So go ahead and give these a try. I promise they’ll become a regular in your rotation too. When you make them, let me know how they turned out. Did you try a variation? Did your kids ask for seconds? Drop a comment below or tag me in your photos. I’d love to hear about your crispy chicken adventures. Until then, happy cooking, and remember—even if you drop the chicken on the floor, you can still make something amazing.
Frequently Asked Questions
Can I use chicken breast instead of tenders?
Absolutely. Just cut the chicken breast into strips about 1 inch wide and ½ inch thick. Try to make them uniform so they cook at the same rate. You might need to adjust the baking time by a minute or two if the strips are thicker.
Why did my coating fall off?
This usually happens if the chicken wasn’t dried properly before breading, or if you didn’t press the panko on firmly enough. Make sure to pat the chicken dry with paper towels and use your hands to really press the coating into the egg wash. Also, let the tenders rest on the rack for a few minutes after breading—this helps the coating set.
Can I make these ahead of time for a party?
Yes! You can bread the tenders up to 2 hours ahead and keep them on the wire rack in the refrigerator, uncovered. Bake them just before serving. You can also bake them fully, let them cool, and reheat them in the oven or air fryer. They won’t be quite as crispy as fresh, but they’re still very good.
Is there a dairy-free version of the honey mustard?
Yes. Just use a dairy-free mayonnaise (like Vegenaise) and skip the Parmesan in the panko mixture. The Parmesan adds flavor and helps with browning, but you can add an extra tablespoon of panko to compensate. The tenders will still be delicious.
Can I double this recipe?
Definitely. Just use two baking sheets with wire racks and rotate them in the oven halfway through. You might need to bake them for an extra minute or two since the oven will be more crowded. The honey mustard recipe doubles perfectly too.
Pin This Recipe!

Crispy Baked Chicken Tenders with Honey Mustard – Easy Homemade Recipe
These crispy baked chicken tenders are coated in a seasoned panko-Parmesan crust and baked to golden perfection on a wire rack for maximum crunch. Served with a tangy-sweet homemade honey mustard, they’re a quick, family-friendly dinner that’s healthier than fried and ready in about 30 minutes.
- Prep Time: 15 minutes
- Cook Time: 15 minutes
- Total Time: 30 minutes
- Yield: 4 servings 1x
- Category: Main Course
- Cuisine: American
Ingredients
- 1.5 lbs (about 680g) chicken tenders
- ½ cup (60g) all-purpose flour
- 2 large eggs, beaten
- 1 ½ cups (about 120g) panko breadcrumbs
- ¼ cup (25g) grated Parmesan cheese
- 1 teaspoon garlic powder
- 1 teaspoon paprika
- ½ teaspoon onion powder
- 1 teaspoon fine sea salt
- ½ teaspoon black pepper
- 2 tablespoons olive oil spray or melted butter
- ⅓ cup (80ml) Dijon mustard
- ¼ cup (85g) honey
- 2 tablespoons mayonnaise
- 1 tablespoon apple cider vinegar
- ¼ teaspoon garlic powder
- A pinch of salt
Instructions
- Preheat your oven to 425°F (220°C). Place a wire rack inside a baking sheet and spray it lightly with olive oil spray.
- Set up your breading station: In the first shallow bowl, add the ½ cup of all-purpose flour. In the second bowl, beat the 2 eggs until uniform and slightly frothy. In the third bowl, combine the 1 ½ cups panko, ¼ cup Parmesan, 1 teaspoon garlic powder, 1 teaspoon paprika, ½ teaspoon onion powder, 1 teaspoon salt, and ½ teaspoon black pepper. Mix with a fork until evenly distributed.
- Pat the chicken tenders dry with paper towels. Season them lightly with a pinch of salt and pepper on both sides.
- Working one piece at a time, dredge a tender in the flour, shaking off any excess. Then dip it into the egg wash, letting the excess drip off. Finally, press it into the panko mixture, making sure it’s fully coated on all sides. Place it on the prepared wire rack. Repeat with all the tenders.
- Once all the tenders are on the rack, give them a generous spray with olive oil spray (or brush each tender with a thin layer of melted butter).
- Place the baking sheet on the middle rack of the oven. Bake for 12-15 minutes, until the tenders are golden brown and cooked through. The internal temperature should reach 165°F (74°C). No need to flip them.
- While the chicken bakes, make the honey mustard: In a small bowl, whisk together the ⅓ cup Dijon mustard, ¼ cup honey, 2 tablespoons mayonnaise, 1 tablespoon apple cider vinegar, ¼ teaspoon garlic powder, and a pinch of salt. Taste and adjust honey or mustard to your preference.
- Let the tenders rest on the rack for 2-3 minutes after baking. Serve hot with the honey mustard on the side for dipping.
Notes
Don’t skip the wire rack—it’s the key to crispy bottoms. Pat the chicken dry for better coating adhesion. Use your hands for the panko step to press the coating on firmly. The honey mustard is even better the next day. For thicker tenders, add an extra minute or two of baking time and check with a meat thermometer.
Nutrition
- Serving Size: 4-5 tenders with 2 t
- Calories: 420
- Sugar: 12
- Sodium: 800
- Fat: 18
- Saturated Fat: 4
- Carbohydrates: 28
- Fiber: 1
- Protein: 38
Keywords: crispy baked chicken tenders, homemade chicken tenders, baked chicken tenders, honey mustard, easy chicken recipe, weeknight dinner, kid-friendly, panko chicken tenders


