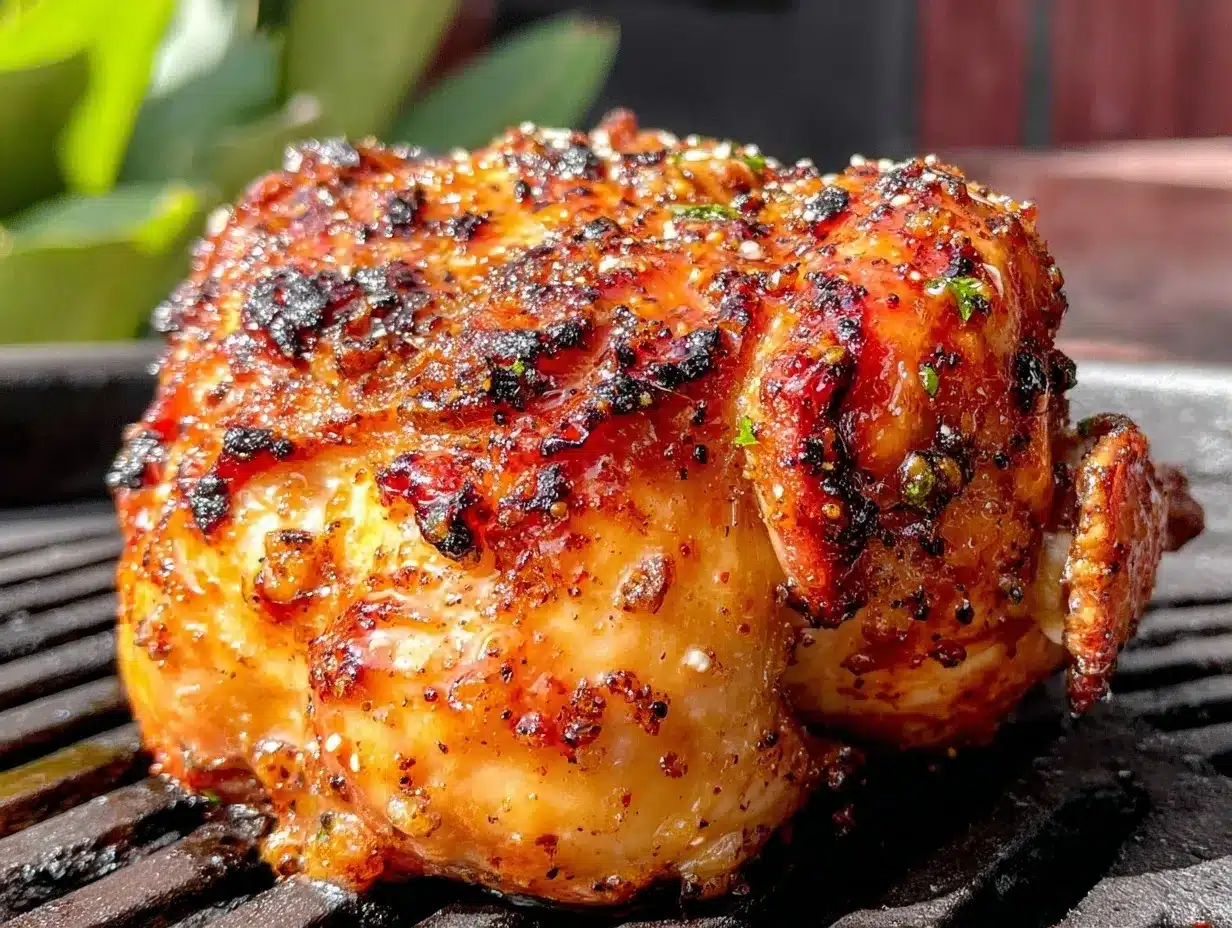
“Hey, grab the beer and the chicken!” That’s what my buddy shouted the instant he spotted my grill setup last summer. Honestly, I wasn’t sure about this whole beer can chicken thing at first. Using a can of beer as a roasting stand? Seemed a little quirky, maybe even messy. But that night, as the sun dipped and the grill hissed, something magical happened. The skin crisped up to golden perfection, crackling under the slightest touch, while the meat inside stayed so tender it practically melted off the bone.
See, I’d been fumbling with grilled chicken for years—either dry as desert sand or lacking that punch of flavor. This recipe? It felt like a happy accident, born from a long day of craving something easy but impressive for a cookout. There’s this satisfying sound of the chicken sizzling, mingled with the faint hoppy aroma from the beer, that instantly sets the mood. Plus, knowing the meat will come out juicy and tender makes you want to gather everyone around the table right away.
What really won me over was how simple the whole process is. No complicated marinades or tricky basting every few minutes. Just a few straightforward ingredients, a trusty grill, and a little patience. The crispy beer can chicken on the grill became my go-to for backyard gatherings and lazy weekend dinners alike. It’s one of those dishes that gets better with every try, and honestly, I can’t keep it off my grill for long.
There’s something comforting about the crackly skin that you just can’t fake. It’s a texture and flavor combo that pulls you back to summer nights, laughter-filled patios, and that first bite that makes you close your eyes in appreciation. That’s why this recipe stuck with me—it’s the kind of meal that turns a simple cookout into a memorable feast, no fancy tricks required.
Why You’ll Love This Recipe
After countless experiments with grilled chicken, this crispy beer can chicken recipe became a favorite for good reasons. It’s honest, satisfying, and packs flavors that make you want seconds (and thirds). Here’s why it stands out in the crowded world of grilled chicken recipes:
- Quick & Easy: Ready in about 1 hour and 15 minutes including prep, which is perfect when you want something delicious without fussing for hours.
- Simple Ingredients: Nothing exotic here—just a whole chicken, your favorite beer, basic spices, and a few pantry staples you probably already have.
- Perfect for Summer Cookouts: Whether it’s a weekend barbecue or a casual get-together, this recipe fits right in. It pairs especially well with grilled sides like bacon-wrapped grilled corn or grilled pineapple teriyaki chicken skewers.
- Crowd-Pleaser: Kids and adults alike rave about the crispy skin and juicy meat combo—it’s a dish that brings everyone to the table.
- Unbelievably Delicious: The beer steams the chicken from the inside out, keeping it moist, while the dry rub crisps the outside into irresistible crackling.
This recipe isn’t just another grilled chicken recipe. The secret lies in the steady indirect heat and the beer can technique, which creates a perfect cooking environment inside the bird. Plus, the seasoning blend balances savory and smoky notes just right, making it a reliable winner every time. It’s comfort food redefined—fast, flavorful, and downright satisfying.
What Ingredients You Will Need
This crispy beer can chicken recipe uses simple, wholesome ingredients that come together beautifully without any fuss. Most are pantry staples, and the beauty is in how they work as a team to create that perfect flavor and texture.
- Whole chicken (about 3.5 to 4 lbs / 1.6 to 1.8 kg) – fresh or thawed, ideally with skin on for that crispy finish.
- Beer (one 12 oz / 355 ml can) – a lager or pale ale works best; avoid heavy stouts as they can overpower the flavors.
- Olive oil (2 tablespoons) – helps the seasoning stick and promotes crisp skin.
- Garlic powder (1 teaspoon) – adds depth and a subtle savory note.
- Onion powder (1 teaspoon) – complements the garlic for a rounded flavor.
- Smoked paprika (1 tablespoon) – provides that classic smoky aroma and vibrant color.
- Salt (1 ½ teaspoons) – crucial for seasoning and drawing out moisture for crispy skin.
- Black pepper (1 teaspoon) – freshly ground for best taste.
- Brown sugar (1 tablespoon) – balances the savory with a touch of sweetness and helps caramelize the skin.
- Dried thyme (1 teaspoon) – optional, adds a subtle herbaceous note.
- Lemon (1, halved) – optional, for stuffing inside the cavity to add brightness.
For the beer, I usually reach for a crisp pale ale from a local brewery—it adds a subtle hoppy note without dominating the chicken. If you prefer, a lighter lager is also fantastic and widely available. If you want to skip alcohol, substitute with chicken broth or a non-alcoholic beer, but the flavor won’t be quite the same.
Feel free to swap smoked paprika with regular paprika if you don’t have it on hand, but the smokiness really adds a layer that’s hard to beat. For a gluten-free twist, make sure to use a gluten-free beer or broth.
Equipment Needed
- Grill: A gas or charcoal grill with a lid works perfectly. Indirect heat is key here.
- Beer can chicken holder (optional): While not necessary, a dedicated holder stabilizes the chicken upright and makes handling easier. If you don’t have one, a sturdy beer can and careful balancing will do.
- Meat thermometer: Essential for checking doneness without guessing. I recommend an instant-read thermometer for speed and accuracy.
- Mixing bowl: For combining your dry rub ingredients.
- Tongs and heat-resistant gloves: For safely placing and removing the chicken from the grill.
Personally, I started without a fancy holder—just a can and a steady hand—and it worked fine. But investing in a simple beer can chicken stand made the whole process less wobbly and more confidence-inspiring. Also, keeping your grill grates clean and oiled before cooking helps prevent sticking and promotes even crisping.
Preparation Method
- Preheat your grill: Set it up for indirect heat at about 375°F (190°C). If using charcoal, bank the coals to one side; for gas, turn off the middle burners and leave only the outer burners on.
- Prepare the chicken: Remove any giblets from the cavity and pat the bird dry with paper towels. Dry skin is your best friend for crispiness.
- Apply the dry rub: In a bowl, mix garlic powder, onion powder, smoked paprika, salt, black pepper, brown sugar, and thyme. Rub olive oil all over the chicken, then generously coat it with the spice mix, making sure to get under the skin where possible for extra flavor.
- Prepare the beer can: Open the beer and pour out (or drink!) about half the can so it doesn’t overflow. Optional: add a few garlic cloves or herbs into the beer for an extra aromatic lift.
- Mount the chicken: Carefully place the chicken cavity over the beer can so it sits upright. The legs should form a tripod with the can for stability.
- Grill the chicken: Place the chicken upright over indirect heat. Close the lid and cook for approximately 1 hour to 1 hour 15 minutes. Avoid opening the lid too often; you want to keep the heat steady.
- Monitor temperature: Check internal temperature after an hour using the meat thermometer. The thickest part of the thigh should reach 165°F (74°C). If not there yet, continue cooking and check every 5-10 minutes.
- Rest the chicken: Once done, carefully remove the chicken from the grill (use heat-resistant gloves!) and let it rest upright for about 10 minutes. This helps juices redistribute.
- Carve and serve: Remove the beer can (careful, it’ll be hot!) and carve the chicken. Enjoy the crispy skin and juicy tender meat!
If you notice the skin isn’t crispy enough by the end, you can move the chicken directly over the heat for a few minutes, rotating gently—but watch closely so it doesn’t burn. Also, avoid piercing the meat with a fork while checking doneness to keep juices locked in.
Cooking Tips & Techniques
Getting crispy beer can chicken just right takes some practice, but here are a few tips I picked up after many tries:
- Pat skin dry: Moisture is the enemy of crispiness. The drier the skin before seasoning, the better it crisps up.
- Indirect heat is key: Cooking the chicken directly over flames often burns the skin before the inside cooks through. Setting up for indirect heat ensures even cooking.
- Use a thermometer: Nothing beats an instant-read thermometer. It saves you from guesswork and keeps the meat tender by preventing overcooking.
- Don’t skip resting: Letting the chicken rest upright holds in the juices and helps the skin stay crispy rather than soggy.
- Choose your beer wisely: Avoid strong-flavored beers like stouts for this recipe. Light lagers or pale ales add subtle aroma without overpowering the chicken.
- Flavor boosters: For a little extra, I sometimes add a splash of apple cider vinegar or lemon juice to the beer can to brighten flavors while the chicken cooks.
One failure I learned from was trying to rush the process by cooking at too high heat. The skin charred before the inside was safe to eat. Patience really pays off here, and the aroma wafting from the grill while it cooks is a great excuse to grab a cold drink and relax.
Variations & Adaptations
This recipe is pretty flexible, so you can tailor it to your tastes or dietary needs with a few tweaks:
- Spicy kick: Add cayenne pepper or chili powder to the rub for a smoky heat that gets noticed.
- Herb-infused: Stuff the cavity with fresh rosemary, thyme, or sage along with lemon halves for a fragrant twist.
- Low-sodium: Reduce salt in the rub and opt for a low-sodium beer or broth substitute to keep sodium levels in check.
- Smoky flavor: Use wood chips like hickory or applewood on a charcoal grill to add a subtle smoky aroma.
- Oven method: If you don’t have a grill handy, roast the chicken upright in a 375°F (190°C) oven using a beer can or a vertical roaster for similar results.
One of my favorite tweaks was trying a honey-chipotle rub for a sweet and smoky combo that paired beautifully with grilled BBQ chicken drumsticks I made alongside. It brought a nice contrast to the classic version.
Serving & Storage Suggestions
This crispy beer can chicken is best served fresh off the grill, skin crackling and meat juicy. I like to carve it up on a wooden board with a sharp knife, letting the natural juices drip a little. Serve warm with grilled veggies or a light salad for balance.
For a complete summer feast, pairing it with something like a fresh watermelon feta mint salad adds a refreshing contrast. And don’t forget some crusty bread or grilled corn to soak up those juices.
Leftovers store well in an airtight container in the fridge for up to 3 days. Reheat gently in an oven at 325°F (160°C) to keep the skin from getting soggy. Microwaving tends to soften the crispness, so avoid if possible.
Flavors actually deepen after a day, so cold slices can be great for sandwiches or salads too. Just remember to remove the skin if you want to keep it crispy after reheating.
Nutritional Information & Benefits
One serving of this crispy beer can chicken (about 6 oz / 170 g cooked) contains roughly:
| Nutrient | Amount |
|---|---|
| Calories | 320 kcal |
| Protein | 38 g |
| Fat | 18 g |
| Carbohydrates | 1 g |
| Sodium | 600 mg |
Chicken is an excellent source of lean protein essential for muscle repair and energy. Using skin-on provides healthy fats that improve satiety and flavor, though you can remove skin for a leaner option. The spices add antioxidants and anti-inflammatory compounds, especially paprika and garlic.
If you’re watching carbs, this recipe fits a low-carb or keto lifestyle perfectly. Just be mindful of sodium if you’re limiting salt intake. For gluten-free diets, select gluten-free beer or broth substitutes.
Conclusion
This crispy beer can chicken recipe brings together the best of simple ingredients and easy grilling techniques for a dish that’s juicy, tender, and irresistibly crispy. It’s the kind of meal that feels special without the fuss, perfect for lazy weekends or impressing friends around the grill.
Whether you stick with the classic rub or try a spicy variation, you’ll find this recipe a reliable crowd-pleaser. I love it because it turns an ordinary chicken into something that feels celebratory—without any stress. Plus, it pairs wonderfully with so many summer sides and snacks, from buffalo chicken dip stuffed bread bowl to fresh salads.
Give it a go, tweak it to your liking, and don’t hesitate to share your own spin in the comments. Happy grilling!
FAQs about Crispy Beer Can Chicken
Can I use canned soda or other liquids instead of beer?
Yes, you can substitute beer with soda, apple cider, or chicken broth. Each adds a different flavor profile, but beer generally provides the best balance of moisture and subtle aroma.
How do I know when the chicken is fully cooked?
Use an instant-read thermometer inserted into the thickest part of the thigh without touching bone. The chicken is safe to eat at 165°F (74°C).
Is it safe to use the beer can on the grill?
Yes, as long as you use a standard, unopened can and avoid cans with plastic linings. The beer steams the chicken from inside, enhancing moisture and flavor.
Can I prepare this recipe in the oven instead of on a grill?
Absolutely. Roast the chicken upright on a beer can or vertical roaster in a 375°F (190°C) oven for about 1 hour to 1 hour 15 minutes, until cooked through.
How do I get extra crispy skin on my beer can chicken?
Make sure to pat the chicken skin dry before seasoning, cook over indirect heat, and finish with a few minutes of direct heat if needed. Avoid opening the grill too often to keep temperature steady.
Pin This Recipe!
Crispy Beer Can Chicken Recipe Easy Juicy Tender Grill Guide

This crispy beer can chicken recipe delivers juicy, tender meat with irresistibly crispy skin using a simple dry rub and indirect grilling method. Perfect for summer cookouts and easy to prepare.
- Prep Time: 15 minutes
- Cook Time: 1 hour 15 minutes
- Total Time: 1 hour 30 minutes
- Yield: 4 servings
- Category: Main Course
- Cuisine: American
Ingredients
- Whole chicken (about 3.5 to 4 lbs / 1.6 to 1.8 kg), fresh or thawed, skin on
- Beer (one 12 oz / 355 ml can), lager or pale ale preferred
- Olive oil (2 tablespoons)
- Garlic powder (1 teaspoon)
- Onion powder (1 teaspoon)
- Smoked paprika (1 tablespoon)
- Salt (1 ½ teaspoons)
- Black pepper (1 teaspoon), freshly ground
- Brown sugar (1 tablespoon)
- Dried thyme (1 teaspoon, optional)
- Lemon (1, halved, optional)
Instructions
- Preheat your grill for indirect heat at about 375°F (190°C). For charcoal, bank coals to one side; for gas, turn off middle burners and leave outer burners on.
- Remove giblets from the chicken cavity and pat the bird dry with paper towels.
- In a mixing bowl, combine garlic powder, onion powder, smoked paprika, salt, black pepper, brown sugar, and thyme.
- Rub olive oil all over the chicken, then generously coat it with the spice mix, including under the skin where possible.
- Open the beer can and pour out or drink about half to prevent overflow. Optionally add garlic cloves or herbs to the beer.
- Place the chicken cavity over the beer can so it sits upright, with legs forming a tripod for stability.
- Place the chicken upright on the grill over indirect heat. Close the lid and cook for about 1 hour to 1 hour 15 minutes.
- Check the internal temperature after 1 hour using a meat thermometer; the thickest part of the thigh should reach 165°F (74°C). Continue cooking if needed, checking every 5-10 minutes.
- Carefully remove the chicken from the grill using heat-resistant gloves and let it rest upright for about 10 minutes.
- Remove the beer can carefully and carve the chicken. Serve immediately.
Notes
Pat the chicken skin dry before seasoning for best crispiness. Use indirect heat to avoid burning the skin. Use a meat thermometer to ensure doneness. Let the chicken rest upright to keep juices locked in. For extra crispy skin, finish with a few minutes of direct heat but watch closely to prevent burning. Avoid piercing the meat to retain moisture. Substitute beer with chicken broth or non-alcoholic beer for alcohol-free version. Use gluten-free beer or broth for gluten-free diet.
Nutrition
- Serving Size: 6 oz (170 g) cooked
- Calories: 320
- Sodium: 600
- Fat: 18
- Carbohydrates: 1
- Protein: 38
Keywords: beer can chicken, grilled chicken, crispy chicken, summer cookout, easy chicken recipe, juicy chicken, backyard barbecue