“You sure you don’t want to knead it?” my friend asked skeptically as I pulled out the dough from the mixing bowl for the first time. Honestly, I was half-expecting this no-knead artisan bread recipe to flop—no kneading? No shaping? It sounded like some sort of bread wizardry that would leave me with a sad, dense loaf. But there I was, late one evening, kitchen light casting long shadows, flour dusting the counter, and a simple bowl of dough quietly bubbling away. I’d been craving freshly baked bread but didn’t want to wrestle with a stand mixer or get my hands sticky for hours.
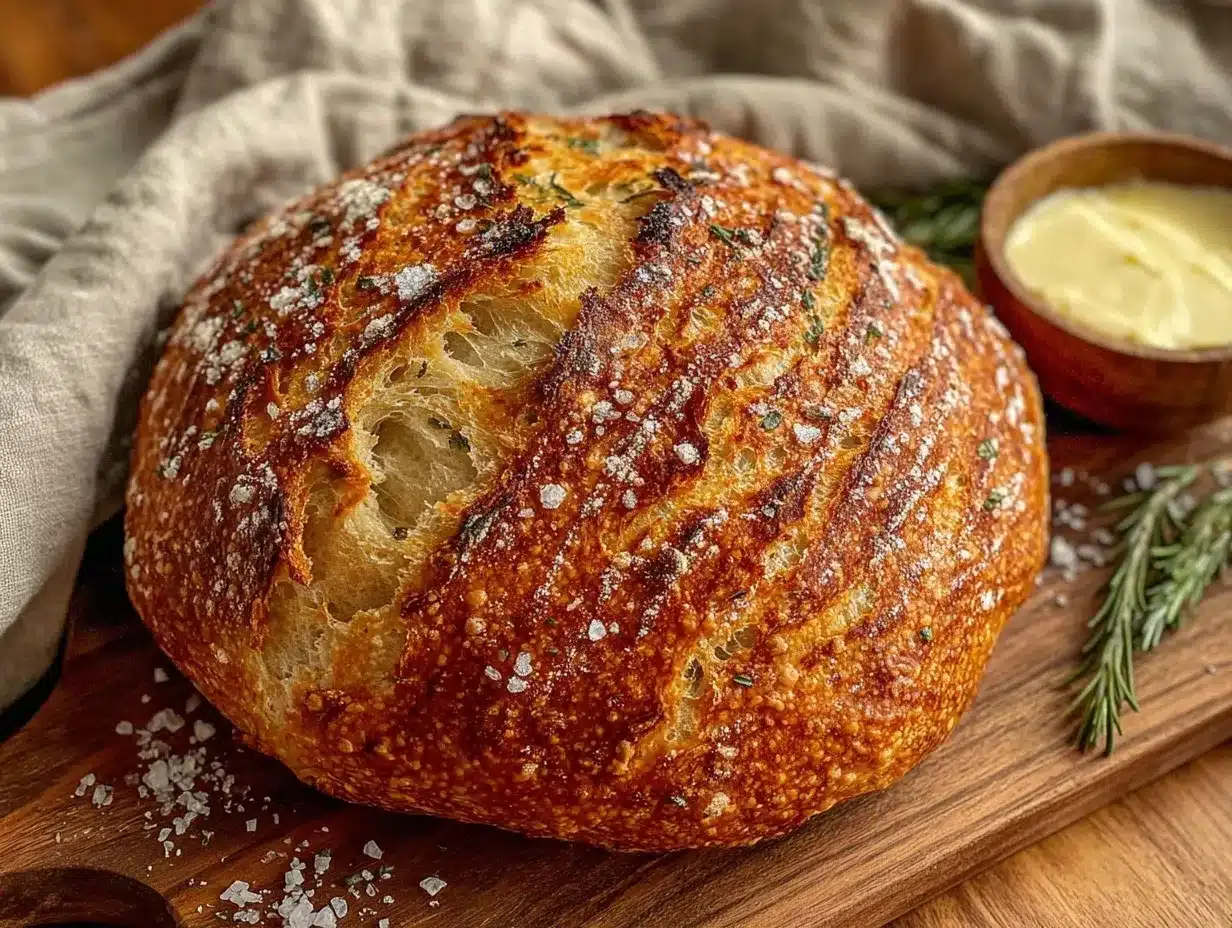
After the rising time, I slid the dough into a hot Dutch oven and waited, the aroma slowly unfolding like a comforting secret. When I finally pulled it out, the crust was crackling and golden, and the inside was soft, airy, almost chewy in that perfect way. The crispy no-knead artisan bread was a surprise win that night. Since then, it’s become my go-to when I want homemade bread without the fuss. It’s the kind of recipe that sticks with you—not just because it’s easy, but because it smells like home and tastes like a little celebration.
There’s something quietly satisfying about breaking off a chunk of this bread, warm and crackling, paired with a swipe of butter or a drizzle of olive oil. I often find myself making it ahead of weekend dinners, sometimes alongside a hearty Greek chicken bowl or a fresh summer salad. It’s easy to forget that this crispy no-knead artisan bread only demands a bit of patience, not effort, and that’s what makes it so special. A reminder that sometimes, the best things come from the simplest moments.
Why You’ll Love This Easy Crispy No-Knead Artisan Bread Recipe
Having tested several bread recipes over the years, I can say this one really stands out for how approachable it is. You don’t need fancy equipment or hours of prep, and the results honestly punch way above their weight. Here’s why this crispy no-knead artisan bread recipe has earned a permanent spot in my kitchen:
- Quick & Easy: While the dough needs time to rest and rise (about 12-18 hours), the hands-on work is under 15 minutes. Perfect for busy weeknights or those days when you want fresh bread with minimal effort.
- Simple Ingredients: Just four pantry staples—flour, water, salt, and yeast. No need for specialty flours or additives, so it’s budget-friendly and accessible.
- Perfect for Any Occasion: Whether you’re hosting a casual dinner, prepping for brunch, or craving a warm sandwich base, this bread fits the bill.
- Crowd-Pleaser: The crispy crust and soft, chewy interior get rave reviews every time I bring it out. It pairs beautifully with everything from soups to spreads.
- Unique Texture: The secret is the long fermentation and baking in a covered pot that traps steam, creating that signature artisan crust without any kneading.
Unlike many bread recipes that require hours of kneading and folding, this method rests on patience and a hot baking vessel to do the magic. It’s honestly the best way I’ve found to get bakery-quality bread right in my own kitchen, without breaking a sweat. Plus, if you’ve ever been intimidated by bread baking, this recipe is the perfect confidence builder. It’s comfort food, but with a bit of rustic charm and zero stress.
What Ingredients You Will Need
This recipe keeps things straightforward with a short list of ingredients that work in harmony to create that classic crusty loaf. These are mostly pantry staples, so chances are you have them on hand. Here’s the breakdown:
- All-Purpose Flour (3 cups / 360 grams): I prefer King Arthur Flour for its consistency, but any unbleached all-purpose flour will do. If you want a slightly heartier loaf, you can substitute half with bread flour.
- Instant Yeast (1/4 teaspoon): A tiny amount goes a long way. This recipe works best with instant yeast, but active dry yeast can be used if dissolved first in warm water.
- Salt (1 1/4 teaspoons): Use fine sea salt or kosher salt. Salt is crucial here—not just for flavor but for controlling fermentation.
- Lukewarm Water (1 1/2 cups / 360 ml): Temperature matters; around 75-80°F (24-27°C) helps the yeast do its work without rushing.
Optional but recommended:
- Cornmeal or Extra Flour: For dusting your work surface or the Dutch oven to prevent sticking.
Substitution tips:
- For gluten-free options, I recommend a blend designed for bread baking, but keep in mind the texture will differ.
- If you want a richer loaf, try swapping water for milk or adding a tablespoon of olive oil, though this will change the crust crispness slightly.
These ingredients’ simplicity is what makes this recipe approachable. I’ve experimented with herbs and cheese additions, but honestly, the classic crust and crumb are what keep me coming back. Plus, it pairs beautifully with hearty dishes like the buffalo chicken dip stuffed bread bowl I sometimes make for game nights.
Equipment Needed
One of the beauties of this recipe is its minimal equipment needs. Here’s what you’ll want to have on hand:
- Large Mixing Bowl: A glass or stainless steel bowl works well. I use a 4-quart bowl to allow enough space for the dough to rise.
- Measuring Cups and Spoons: Precision helps, especially with salt and yeast.
- Dutch Oven or Heavy Oven-Safe Pot with Lid (at least 5 quarts): This is key for baking the bread. The pot traps steam, creating that perfect crust. If you don’t have a Dutch oven, a heavy cast iron pot or any oven-safe pot with a tight lid will do.
- Wooden Spoon or Silicone Spatula: For mixing the dough.
- Kitchen Scale (optional but recommended): For accurate flour measurement, especially if you want consistent results.
- Cooling Rack: To let the bread cool properly without sogginess.
Pro tip: I’ve tried baking this bread in different pots, and the best crust comes from cast iron because it retains heat evenly. If you’re on a budget, a simple heavy pot with a lid works just fine. Also, lightly oiling or dusting the pot with cornmeal can help prevent sticking and make cleanup easier.
Preparation Method
- Mix Dry Ingredients: In your large mixing bowl, combine 3 cups (360 g) of all-purpose flour, 1/4 teaspoon instant yeast, and 1 1/4 teaspoons salt. Stir well to distribute everything evenly. This step takes about 2 minutes.
- Add Water and Stir: Pour in 1 1/2 cups (360 ml) lukewarm water. Use a wooden spoon or spatula to mix until a shaggy, sticky dough forms. Don’t worry about kneading; just stir until the flour is hydrated. This should take 2-3 minutes.
- Cover and Let Rise: Cover the bowl with plastic wrap or a clean kitchen towel. Leave it at room temperature (around 70°F or 21°C) for 12 to 18 hours. You’ll notice bubbles forming, and the dough will double in size. This slow fermentation develops flavor and texture.
- Prepare for Shaping: After the first rise, lightly flour a clean surface. Scrape the dough onto it. It will be sticky but resist the urge to add too much flour. Fold it over onto itself a couple of times to shape it loosely into a ball. This step takes about 2-3 minutes.
- Second Rise: Place the dough on a piece of parchment paper and cover it with a towel. Let it rest for 1 to 2 hours until it puffs up again.
- Preheat the Oven and Pot: About 30 minutes before baking, place your Dutch oven with the lid inside your oven and set the temperature to 450°F (230°C). Preheating the pot is crucial for the crispy crust.
- Bake the Bread: Carefully remove the hot pot from the oven (use oven mitts!). Lift the parchment with the dough and lower it gently into the pot. Cover with the lid and bake for 30 minutes.
- Finish Baking Uncovered: Remove the lid and bake for an additional 10-15 minutes. You want the crust deeply golden and crisp—listen for that crackling sound as it cools.
- Cool Before Slicing: Transfer the bread to a cooling rack. Let it rest for at least 1 hour before slicing to allow the crumb to set. I know it’s tempting, but patience here pays off.
Common troubleshooting: If your dough feels too wet or dry, adjust the water slightly next time. Humidity affects flour absorption. Also, make sure the oven and pot are fully preheated for best crust results. This method produces a rustic loaf with an open crumb and crackly crust every time.
Cooking Tips & Techniques for Perfect No-Knead Bread
From my experience, the success of this crispy no-knead artisan bread recipe lies in a few key details:
- Patience is Everything: The long fermentation builds flavor and texture. Don’t rush the rise times even if you’re eager. I’ve learned the hard way that cutting the rise short yields dense bread.
- Hydration Level Matters: The dough is wetter than typical bread dough. That’s okay! It’s what creates those lovely holes inside. Resist adding extra flour unless the dough is impossibly sticky to handle.
- Preheat the Pot: This step can’t be skipped. The hot pot traps steam which crisps the crust. I once tried baking without preheating and ended up with a pale, soft crust—such a bummer.
- Use Parchment Paper: It helps transfer the dough safely into the pot and keeps cleanup easier. Plus, it prevents sticking.
- Crust Variations: If you want an extra-crispy crust, leave the bread uncovered for the last 15 minutes or give it a quick blast under the broiler while watching closely.
Timing tip: While the bread bakes, it’s a great moment to prep a fresh herb spread or whip up a quick garlic pesto pasta to serve alongside. Multitasking in the kitchen makes the whole meal come together effortlessly.
Variations & Adaptations
This easy crispy no-knead artisan bread recipe is a fantastic base for experimentation. Here are a few ways I’ve adapted it to suit different tastes and needs:
- Herb-Infused Loaf: Add 1-2 tablespoons of fresh chopped rosemary, thyme, or oregano to the dough for an aromatic twist.
- Whole Wheat Version: Replace up to half the all-purpose flour with whole wheat flour for a nuttier flavor and denser crumb. You might need to add slightly more water.
- Cheese-Stuffed: Before the second rise, gently fold in cubes of sharp cheddar or mozzarella for a delicious melty surprise inside.
- Gluten-Free Adaptation: Use a gluten-free bread flour blend formulated for yeast breads, and be aware the texture won’t be quite the same but still tasty.
- Alternative Cooking Methods: If you don’t have a Dutch oven, bake on a preheated pizza stone and place a pan of water in the oven to create steam.
Personally, I once experimented with adding caramelized onions and black pepper, which paired perfectly with a hearty stew. Adjusting this recipe to your taste is part of the fun—feel free to get creative or keep it classic.
Serving & Storage Suggestions
Serving this crispy no-knead artisan bread fresh from the oven is a treat. I like to slice it warm, slather on some good-quality butter, and sprinkle a little flaky sea salt on top. It’s also fantastic alongside soups, stews, or homemade dips.
For storage:
- Room Temperature: Wrap the bread loosely in a clean kitchen towel or paper bag. It stays fresh for about 2 days.
- Freezer: Slice the loaf and freeze in airtight bags. Toast or reheat slices directly from frozen for a quick snack.
- Reheating: To revive the crust, pop the bread in a 350°F (175°C) oven for about 10 minutes wrapped in foil, or uncovered for a crispier crust.
Over time, the flavors deepen slightly, making leftover bread great for croutons or bread pudding. I often serve this bread alongside a fresh summer meal or a rich dish like grilled pineapple teriyaki chicken skewers to balance its rustic texture.
Nutritional Information & Benefits
This easy crispy no-knead artisan bread is simple, wholesome, and free from preservatives or additives. Each serving (~1/10 of loaf) contains approximately:
| Calories | Carbs | Protein | Fat | Fiber |
|---|---|---|---|---|
| 150 | 30g | 5g | 1g | 1g |
The main ingredients—flour, water, salt, yeast—offer basic nourishment without excess sugars or fats. Using unbleached flour ensures more natural nutrients and a better crumb texture. This bread fits well into balanced diets and can be paired with protein-rich or vegetable dishes for a complete meal.
For those mindful of gluten, this recipe is naturally gluten-containing, but as mentioned, substitutions are available. I find this bread a satisfying way to enjoy carbs without overcomplicating meals—comfort-food done simply and well.
Conclusion
There’s a reason this easy crispy no-knead artisan bread recipe keeps coming back to my kitchen. It’s the kind of bake that feels impressive without the stress, rewarding patience with a crust that snaps and a crumb that melts. Whether you’re new to bread baking or just want a reliable, no-fuss loaf, this recipe delivers.
Feel free to tweak it—add herbs, swap flours, or try different shapes. It’s your kitchen, your bread, your way. I love how this simple recipe turns everyday ingredients into something special, whether accompanying a casual meal or a slightly fancy spread.
If you give it a try, I’d love to hear how it went or what variations you dreamed up. Bread baking is a journey, and sharing those moments makes it all the more delicious.
Frequently Asked Questions
Can I use active dry yeast instead of instant yeast?
Yes, but dissolve the active dry yeast in warm water for 5-10 minutes before mixing with other ingredients. Instant yeast can be added directly.
What if I don’t have a Dutch oven?
You can bake the bread on a preheated pizza stone or baking sheet and place a pan of hot water in the oven to create steam and help develop the crust.
How long can I keep this bread fresh?
At room temperature, it’s best eaten within 2 days. For longer storage, slice and freeze it in airtight bags.
Can I add flavors like garlic or herbs to the dough?
Absolutely! Fresh herbs, roasted garlic, or even cheese can be folded into the dough during shaping for extra flavor.
Is this recipe suitable for beginners?
Definitely. The no-knead method means minimal hands-on time and less chance of mistakes, making it perfect for first-time bread bakers.
Pin This Recipe!
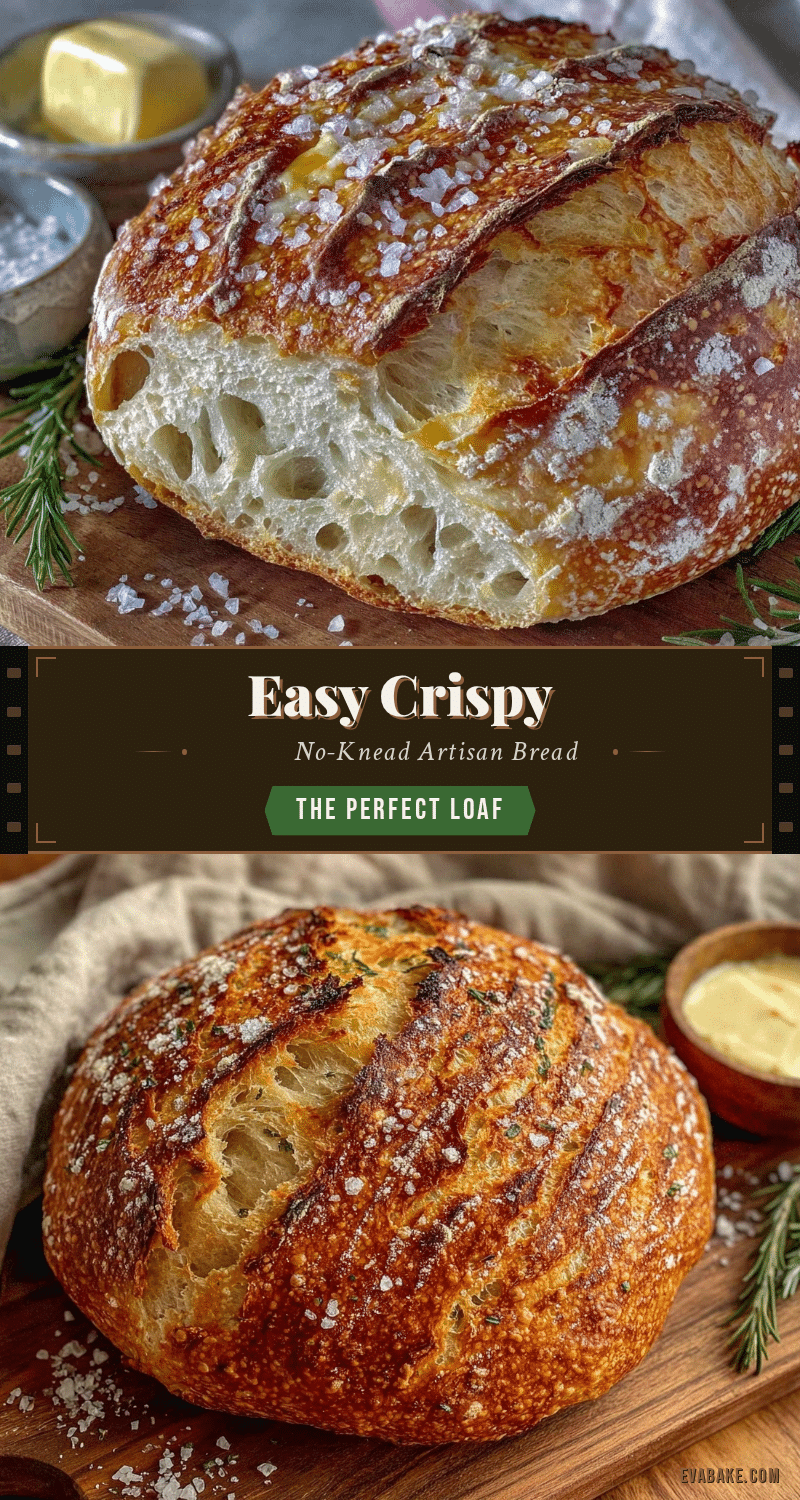
Easy Crispy No-Knead Artisan Bread Recipe Perfect for Beginners

This no-knead artisan bread recipe is simple, requires minimal hands-on time, and produces a crispy crust with a soft, airy interior. Perfect for beginners and those who want fresh homemade bread without the fuss.
- Prep Time: 15 minutes
- Cook Time: 45 minutes
- Total Time: 13 hours
- Yield: 10 servings 1x
- Category: Bread
- Cuisine: American
Ingredients
- 3 cups (360 grams) all-purpose flour
- 1/4 teaspoon instant yeast
- 1 1/4 teaspoons salt
- 1 1/2 cups (360 ml) lukewarm water (75-80°F / 24-27°C)
- Optional: cornmeal or extra flour for dusting
Instructions
- In a large mixing bowl, combine 3 cups (360 g) all-purpose flour, 1/4 teaspoon instant yeast, and 1 1/4 teaspoons salt. Stir well to distribute evenly (about 2 minutes).
- Pour in 1 1/2 cups (360 ml) lukewarm water. Mix with a wooden spoon or spatula until a shaggy, sticky dough forms (2-3 minutes).
- Cover the bowl with plastic wrap or a clean kitchen towel and let the dough rise at room temperature (around 70°F or 21°C) for 12 to 18 hours until doubled in size and bubbly.
- Lightly flour a clean surface and scrape the dough onto it. Fold the dough over onto itself a couple of times to loosely shape into a ball (2-3 minutes).
- Place the dough on a piece of parchment paper, cover with a towel, and let it rest for 1 to 2 hours until puffed up again.
- About 30 minutes before baking, preheat your oven to 450°F (230°C) and place a Dutch oven with the lid inside to heat.
- Carefully remove the hot Dutch oven from the oven using oven mitts. Lift the parchment paper with the dough and lower it gently into the pot. Cover with the lid and bake for 30 minutes.
- Remove the lid and bake uncovered for an additional 10-15 minutes until the crust is deeply golden and crisp.
- Transfer the bread to a cooling rack and let it cool for at least 1 hour before slicing.
Notes
Preheat the Dutch oven to trap steam for a crispy crust. Use parchment paper to transfer dough safely. Resist adding extra flour during shaping to maintain open crumb texture. For extra crispy crust, bake uncovered for last 15 minutes or briefly broil while watching closely. Adjust water slightly if dough feels too wet or dry due to humidity.
Nutrition
- Serving Size: Approximately 1/10 o
- Calories: 150
- Sodium: 300
- Fat: 1
- Carbohydrates: 30
- Fiber: 1
- Protein: 5
Keywords: no-knead bread, artisan bread, easy bread recipe, crispy crust bread, beginner bread recipe, homemade bread