There used to be a little bakery on the corner of Elm and 4th in my old neighborhood called “The Spooky Spoon.” It wasn’t a Halloween-themed place, not really—they just had this one dessert that showed up every October 1st like clockwork. A single-serve dirt pudding cup with a crushed Oreo “graveyard,” a gummy worm poking out, and a little tombstone cookie that said “R.I.P. Appetite.” When they closed three summers ago—just a handwritten sign in the window saying “Thanks for the memories”—I honestly felt a little pang of loss. That sounds dramatic, I know. But that little cup of chocolatey, creamy, crumbly goodness was the thing my kids looked forward to every fall. After 6 tries—and some truly sad, soupy disasters—I finally got it. And honestly? This version might be even better than the original.
Let me tell you, the first time I attempted it at home, I forgot to soften the cream cheese. I was standing there with a hand mixer, chunks of cold cream cheese flying everywhere, and my youngest said, “Mom, this looks like a monster threw up.” Not exactly the Halloween vibe I was going for. But that’s the thing about recipes—you learn from the mess. And now, after perfecting the ratios and the layering technique, I can make these graveyard dirt pudding cups in my sleep. Maybe you’ve been there, trying to recreate a favorite treat from a place that’s gone. It’s a specific kind of kitchen quest, isn’t it? But when you nail it, it’s so worth it. These cups are the reason my kids actually get excited about hosting the Halloween party every year.
Why You’ll Love This Recipe
Let’s be real—Halloween desserts can be a total pain. Between carving pumpkins and wrangling costumes, the last thing you need is a complicated recipe that requires a pastry bag and a culinary degree. These graveyard dirt pudding cups are the exact opposite. They’re the kind of dessert that makes you look like a Halloween hero without actually breaking a sweat.
- Quick & Easy: Comes together in under 20 minutes of active prep time. Seriously, you can make these while the kids are still arguing about which costume to wear.
- Simple Ingredients: No weird specialty items. Cream cheese, milk, pudding mix, Cool Whip, and Oreos. You probably have most of this in your kitchen right now.
- Perfect for Parties: These are made for Halloween gatherings, potlucks, and spooky movie nights. They’re individual servings, so no slicing or plating—just grab and go.
- Crowd-Pleaser: I’ve watched grown adults fight over the last one. The combination of creamy pudding and crunchy Oreo “dirt” is universally loved.
- Unbelievably Delicious: The texture is what gets me every time. The silky smooth pudding against the crumbly Oreo topping, with that little surprise gummy worm in the middle—it’s next-level comfort food.
What makes this recipe different from the hundreds of other dirt pudding recipes out there? It’s the technique. Most versions skip the cream cheese step, which means you end up with a runny, sad pudding that never sets properly. By incorporating softened cream cheese into the mix, you get a thick, luscious base that holds its shape and makes the “dirt” actually stay on top without sinking. It’s a small tweak that makes a huge difference.
These cups aren’t just good—they’re the kind of dessert that makes you close your eyes after the first bite. It’s Halloween comfort food at its finest, and it’s perfect for impressing guests without any stress. Your friends will think you spent hours on these, but you and I will know the truth. And that’s our little secret.
What Ingredients You Will Need
This recipe uses simple, mostly pantry-staple ingredients to deliver that rich, creamy, chocolatey flavor that makes Halloween feel special. Here’s what you’ll need to gather before you start.
- 1 package (8 oz) cream cheese, softened to room temperature (this is non-negotiable—cold cream cheese will give you lumps)
- 1/2 cup granulated sugar (adds just the right sweetness to balance the cocoa)
- 1 teaspoon vanilla extract (I prefer pure vanilla, but imitation works fine here)
- 2 cups cold whole milk (you can use 2% if that’s what you have, but whole milk gives the richest texture)
- 1 package (3.9 oz) instant chocolate pudding mix (Jell-O brand is my go-to, but any brand works—just make sure it’s instant, not cook-and-serve)
- 1 container (8 oz) frozen whipped topping (Cool Whip, thawed—or you can use homemade whipped cream if you’re feeling fancy)
- 1 package (14.3 oz) Oreo cookies (about 36 cookies—you’ll use the whole package)
- Gummy worms (about 12-15, for that creepy crawly effect)
- Small tombstone cookies or candy (I use Milano cookies with “R.I.P.” written in icing, or you can buy pre-made Halloween decorations)
- Optional: Green food coloring (for making “slime” or “grass” effects—completely optional but fun)
For the best texture, I recommend Philadelphia cream cheese—it’s consistently creamy and blends smoothly. If you’re dairy-free, you can use a plant-based cream cheese and coconut milk, but the texture will be slightly less rich. Also, make sure your Oreos are the original ones, not Double Stuf. The regular ones crush into that perfect dirt-like consistency, while Double Stuf leaves greasy streaks in the crumbs. Trust me on this one—I learned the hard way.
Equipment Needed
You don’t need any fancy equipment for these graveyard dirt pudding cups, which is part of their charm. Here’s what you’ll need:
- Large mixing bowl (for the cream cheese mixture)
- Medium mixing bowl (for the pudding)
- Hand mixer or stand mixer (a whisk works in a pinch, but your arm will get tired)
- Measuring cups and spoons
- Rubber spatula (for scraping every last bit of that creamy goodness)
- 12 small cups or glasses (clear plastic cups are perfect for Halloween—you can see the layers)
- Ziploc bag or food processor (for crushing Oreos—a rolling pin works too, if you want to release some aggression)
- Small offset spatula or butter knife (for smoothing the tops)
If you don’t have a hand mixer, you can absolutely do this by hand. Just make sure your cream cheese is super soft, and be prepared for a decent arm workout. I’ve also used a food processor to crush the Oreos, and it’s a game-changer—just pulse until you get fine crumbs. But honestly, the Ziploc bag and rolling pin method is more satisfying. There’s something therapeutic about smashing those cookies.
Preparation Method
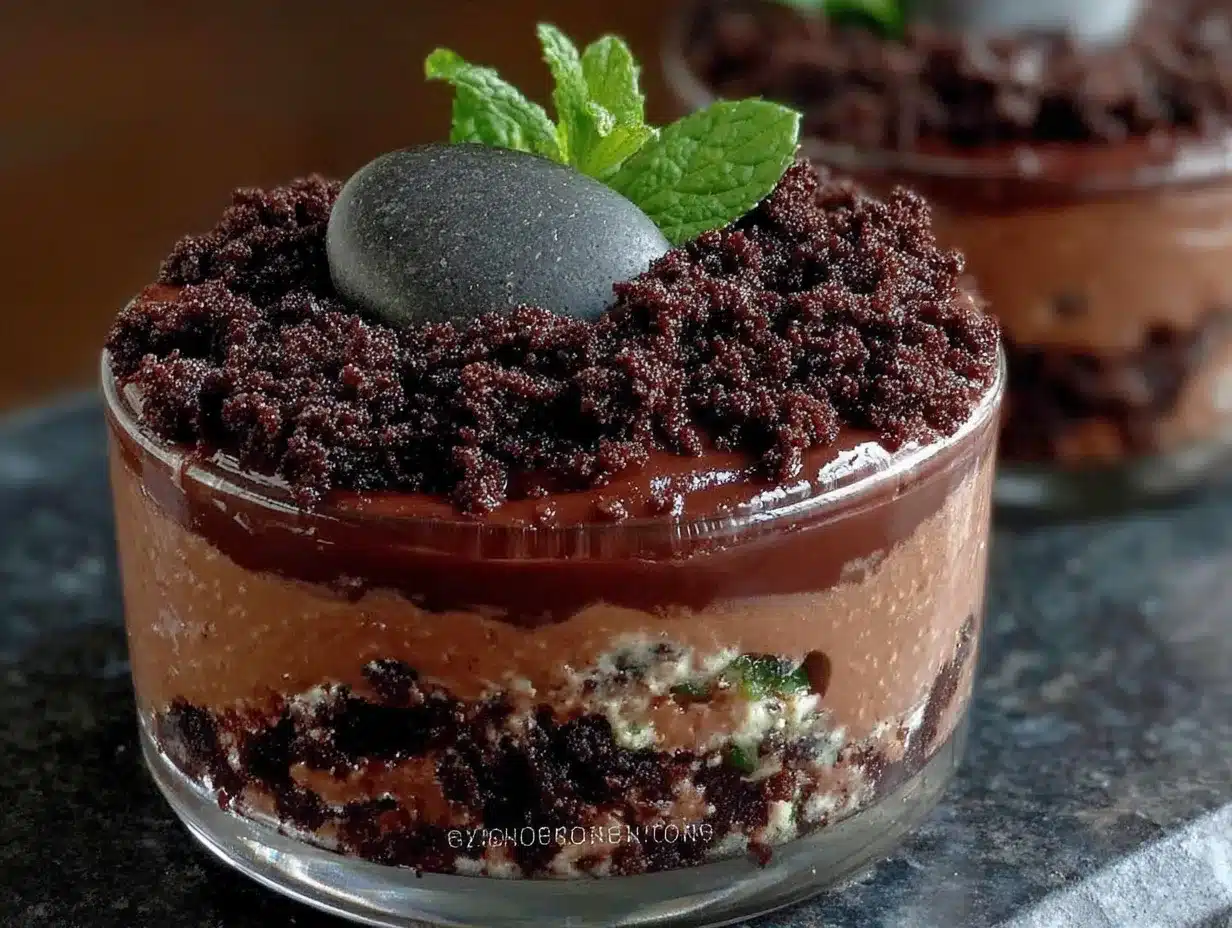
Alright, let’s get to the fun part. Here’s how to make these spooky treats step by step.
- Crush the Oreos: Place all the Oreo cookies (cream filling and all) in a large Ziploc bag. Seal it up, and use a rolling pin to crush them into fine crumbs. You want a mix of fine dirt-like crumbs and a few slightly larger pieces for texture. Alternatively, pulse them in a food processor until you get the same consistency. Set aside about 1/2 cup of the crumbs for topping later.
- Soften the cream cheese: Take your cream cheese out of the fridge about 30 minutes before you start. It should be soft enough that you can easily press your finger into it. If you forgot (like I often do), microwave it in 10-second intervals until soft but not melted.
- Make the cream cheese base: In a large mixing bowl, beat the softened cream cheese with an electric hand mixer until smooth and fluffy, about 2 minutes. Add the sugar and vanilla extract, and beat for another minute until well combined. You want it to be light and airy—this is what gives the pudding that thick, luxurious texture.
- Prepare the pudding: In a separate medium bowl, whisk together the cold milk and instant chocolate pudding mix. Whisk for about 2 minutes until the pudding starts to thicken. It will be fairly thin at first, then suddenly get thick—that’s when you know it’s ready.
- Combine everything: Add the prepared pudding to the cream cheese mixture. Beat on low speed until just combined—don’t overmix, or you’ll deflate all that air you worked into the cream cheese. Fold in the thawed whipped topping gently with a rubber spatula until no white streaks remain. The mixture should be smooth, creamy, and a beautiful chocolate color.
- Layer the cups: Now for the fun part. Grab your 12 cups or glasses. Start with a layer of crushed Oreo crumbs at the bottom—about 1 to 2 tablespoons per cup. Then spoon or pipe the pudding mixture on top, filling each cup about three-quarters full. You want to leave room for the top layer of “dirt.”
- Add the creepy crawlies: Before you add the top layer of Oreo crumbs, poke a gummy worm into the pudding of each cup. Let it stick out just a little, like it’s trying to escape from the grave. This is the part the kids go absolutely crazy for.
- Top with “dirt”: Sprinkle the reserved Oreo crumbs over the top of each cup, covering the pudding completely. You want a nice, thick layer that looks like freshly turned soil. Use the back of a spoon to gently press the crumbs down so they stick.
- Add the tombstones: Place a tombstone cookie or candy into each cup, pushing it down slightly so it stands upright. If you’re using Milano cookies, you can write “R.I.P.” on them with black icing for an extra spooky touch.
- Chill and set: Cover the cups with plastic wrap and refrigerate for at least 4 hours, but overnight is better. This allows the flavors to meld and the pudding to fully set. Trust me, they taste so much better the next day.
A quick note: The pudding mixture will seem quite thick when you’re layering it. That’s perfect. If it’s too thin, your “dirt” will sink into the pudding and you’ll lose that beautiful layered effect. Don’t panic if it feels stiff—that’s exactly what you want.
Cooking Tips & Techniques
I’ve made these graveyard dirt pudding cups more times than I can count, and I’ve picked up a few tricks along the way. Let me save you from my early mistakes.
The cream cheese must be soft. I cannot stress this enough. If your cream cheese is even slightly cold, you’ll end up with little white lumps in your pudding that look like cottage cheese. Not the vibe we’re going for. If you’re short on time, cut the cream cheese into small cubes and let it sit on the counter for 15 minutes. Or microwave it in 10-second bursts, checking after each one.
Don’t overmix the pudding. Once you add the pudding mix to the milk, whisk it just until it thickens. Overwhisking can make the pudding grainy. And when you combine it with the cream cheese mixture, use a low speed and stop as soon as it’s combined. You want it light and fluffy, not dense and gluey.
Layer strategically. I learned this one the hard way: if you put too many Oreo crumbs on the bottom, they’ll get soggy and turn into a paste. Stick to a thin layer—just enough to cover the bottom of the cup. The real “dirt” magic happens on top.
Make them ahead of time. These cups actually get better after 24 hours in the fridge. The Oreo crumbs soften slightly and meld with the pudding, creating that perfect dirt-like texture. I always make mine the day before a party. It’s one less thing to stress about on the day of.
Keep them cold until serving. If these sit out at room temperature for more than 30 minutes, the pudding will start to soften and lose its structure. If you’re serving them at a party, keep them in the fridge until the last minute. You can even set them on a bed of ice if it’s a warm day.
Variations & Adaptations
One of the best things about this recipe is how easy it is to customize. Here are some of my favorite variations.
Peanut Butter Monster Cups: Add 1/2 cup of creamy peanut butter to the cream cheese mixture before adding the pudding. It gives the whole thing a Reese’s-like flavor that’s absolutely addictive. My neighbor Sarah tried this version and now refuses to make them any other way.
Gluten-Free Graveyard: Use gluten-free chocolate sandwich cookies (like Glutino or Kinnikinnick brands) instead of Oreos. The rest of the ingredients are naturally gluten-free, so this is an easy swap. Just make sure your pudding mix is certified gluten-free—most are, but always check the label.
Vegan Dirt Cups: Use vegan cream cheese (like Tofutti or Kite Hill), plant-based milk (cashew milk works great), and a dairy-free whipped topping (CocoWhip is my go-to). For the cookies, there are vegan chocolate sandwich cookies available at most health food stores. The texture is slightly different, but honestly, it’s still delicious.
Pumpkin Spice Graveyard: For a fall twist, replace the chocolate pudding with vanilla or butterscotch pudding, and add 1 teaspoon of pumpkin pie spice to the cream cheese mixture. Top with crushed ginger snaps instead of Oreos. It tastes like autumn in a cup.
Spider Web Design: Instead of a full layer of Oreo crumbs on top, create a spider web effect by drizzling melted white chocolate over the dark “dirt.” Use a toothpick to drag the white chocolate into web patterns. It’s a showstopper for Halloween parties.
Serving & Storage Suggestions
These graveyard dirt pudding cups are best served cold, straight from the fridge. The contrast between the creamy pudding and the crunchy Oreo “dirt” is at its peak when they’re properly chilled.
Presentation tips: For a Halloween party, serve them in clear plastic cups so guests can see the layers. I like to set them on a tray with some fake spider webs and plastic spiders scattered around. It makes the whole display feel like a mini graveyard. You can also add a plastic skeleton finger or two for a creepy touch.
What to serve alongside: These pair beautifully with other Halloween treats like crispy spider web cookies or a warm apple cider bar. If you’re doing a full Halloween spread, try serving them alongside savory mummy pigs in a blanket for a sweet-and-savory balance.
Storage instructions: Cover the cups tightly with plastic wrap or transfer them to an airtight container. They’ll keep in the refrigerator for up to 5 days. The Oreo crumbs will soften over time, which some people actually prefer—it gives the whole thing a more “dirt-like” texture.
Freezing instructions: You can freeze these cups for up to 2 months, but the texture will change slightly. The pudding will become a bit icy when thawed, so I recommend adding the Oreo crumbs and gummy worms fresh after thawing. To freeze, prepare the pudding mixture and layer it in the cups without the toppings. Cover tightly and freeze. When you’re ready to serve, thaw in the refrigerator overnight, then add the Oreo crumbs and decorations.
Reheating note: Don’t even think about microwaving these. They’re meant to be eaten cold. If you want a warm dessert, these aren’t it. But honestly, the cold, creamy texture is what makes them so good.
Nutritional Information & Benefits
Let’s be honest—these graveyard dirt pudding cups are a treat, not a health food. But here’s the estimated nutritional breakdown per serving (based on 12 servings):
- Calories: Approximately 380-420 per cup
- Fat: 22g (mostly from cream cheese and whipped topping)
- Carbohydrates: 45g (from sugar, cookies, and pudding mix)
- Protein: 6g (thanks to the milk and cream cheese)
- Sugar: 32g (yes, it’s high—it’s Halloween, after all)
Health benefits: Okay, so there aren’t many, but here’s what I tell myself. The cream cheese provides some calcium and protein. The milk adds vitamin D and more calcium. And the Oreos… well, they provide happiness, which is important for mental health, right?
Dietary considerations: This recipe contains dairy, gluten (from the Oreos), and soy (from the Cool Whip). For a dairy-free version, see the variations section above. For a gluten-free version, use gluten-free sandwich cookies. The recipe is nut-free as written, making it safe for school Halloween parties.
Portion control tip: These are rich and satisfying, so one cup is usually enough. If you’re serving a crowd, you can make smaller portions in shot glasses or small mason jars. They’re perfect for portion control and look adorable.
Conclusion
These graveyard dirt pudding cups are the Halloween dessert you’ve been looking for. They’re fun, they’re easy, and they taste like childhood in the best possible way. Whether you’re hosting a spooky party, bringing a treat to a potluck, or just want to make a regular Tuesday feel a little more magical, these cups deliver every time.
I love this recipe because it brings people together. There’s something about digging into a cup of “dirt” and finding a gummy worm that makes everyone—kids and adults alike—grin like they’re six years old again. And honestly, isn’t that what Halloween is all about? A little bit of spooky, a whole lot of fun, and a dessert that makes you feel like a kid again.
I’d love to hear how yours turn out! Drop a comment below and let me know if you tried any variations, or tag me in your photos on social media. Did your kids love the gummy worms? Did you add any creepy decorations? Share your graveyard creations—I can’t wait to see them. Happy Halloween, and happy eating!
Frequently Asked Questions
Can I make these graveyard dirt pudding cups the night before?
Absolutely! In fact, they’re better when made a day ahead. The flavors meld together, and the Oreo crumbs soften slightly to create that perfect dirt-like texture. Just wait to add the gummy worms and tombstone decorations until right before serving so they stay fresh and perky.
Can I use sugar-free pudding mix?
Yes, you can substitute sugar-free instant chocolate pudding mix. The texture will be slightly different—a bit less creamy—but it works fine. Just follow the same instructions. You can also use sugar-free Cool Whip to cut down on sugar even more.
How do I prevent the Oreo crumbs from getting soggy?
The key is to let the pudding set completely in the fridge before adding the top layer of crumbs. If you add the “dirt” too soon, it will sink into the still-soft pudding. Wait at least 2 hours before adding the final layer of Oreo crumbs. And don’t press them down too hard—a gentle sprinkle is all you need.
Can I use a different type of cookie for the “dirt”?
Definitely! Chocolate wafer cookies, gluten-free chocolate sandwich cookies, or even crushed chocolate graham crackers work great. For a non-chocolate version, try crushed vanilla wafers or ginger snaps. The key is to get a fine, crumbly texture that looks like soil.
How many cups does this recipe make?
This recipe makes approximately 12 standard-sized cups (about 6-8 ounces each). If you’re using smaller cups or shot glasses, you can get up to 20 servings. For larger cups or mason jars, you’ll get about 8 servings. Adjust the layering accordingly based on your cup size.
Pin This Recipe!
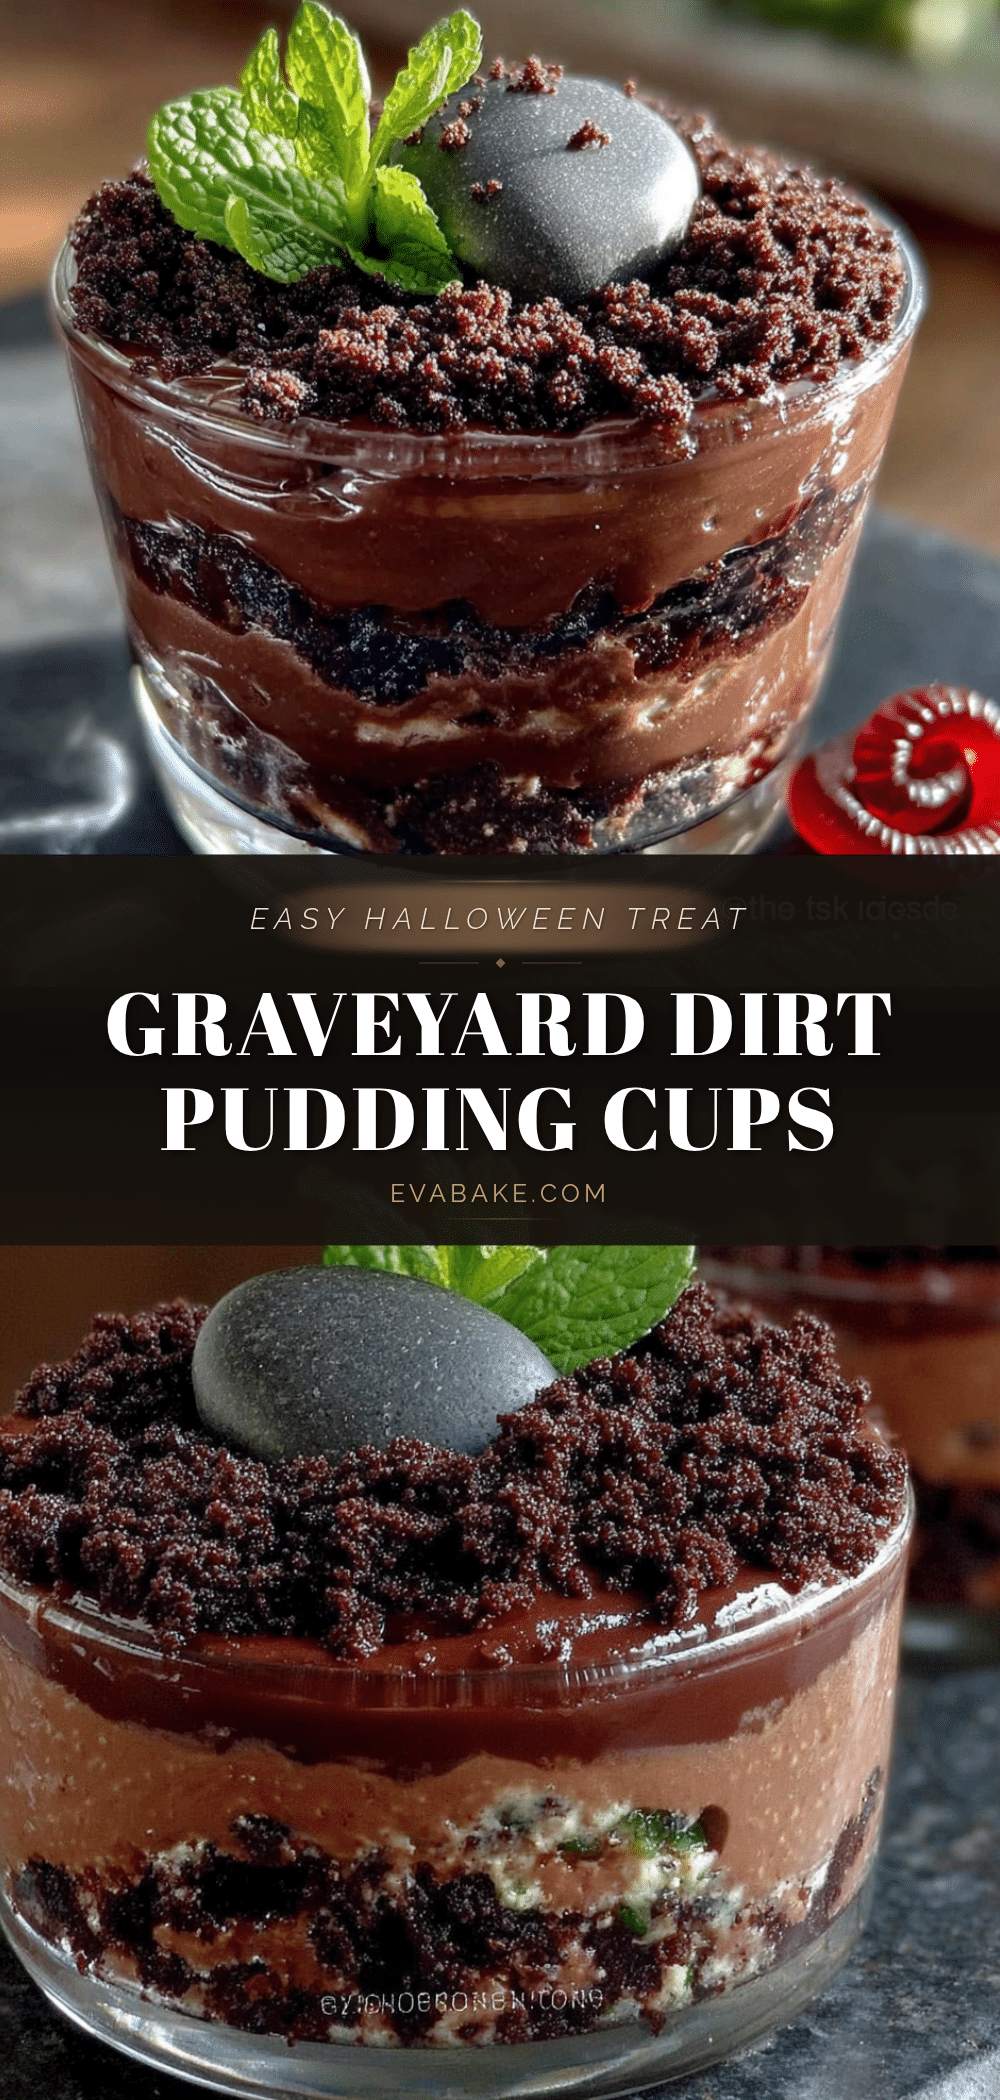
Easy Graveyard Dirt Pudding Cups: Best Halloween Dessert
These graveyard dirt pudding cups are a fun and easy Halloween dessert made with creamy chocolate pudding, crushed Oreo ‘dirt,’ and gummy worms. Perfect for parties, they come together in under 20 minutes of active prep time and are sure to be a crowd-pleaser.
- Prep Time: 20 minutes
- Cook Time: 0 minutes
- Total Time: 4 hours 20 minutes (includes chilling)
- Yield: 12 servings 1x
- Category: Dessert
- Cuisine: American
Ingredients
- 1 package (8 oz) cream cheese, softened
- 1/2 cup granulated sugar
- 1 teaspoon vanilla extract
- 2 cups cold whole milk
- 1 package (3.9 oz) instant chocolate pudding mix
- 1 container (8 oz) frozen whipped topping, thawed
- 1 package (14.3 oz) Oreo cookies (about 36 cookies)
- 12–15 gummy worms
- 12 small tombstone cookies or candy
- Optional: green food coloring
Instructions
- Crush the Oreos: Place all Oreo cookies in a large Ziploc bag and crush with a rolling pin into fine crumbs. Alternatively, pulse in a food processor. Set aside about 1/2 cup of crumbs for topping.
- Soften the cream cheese: Remove cream cheese from fridge 30 minutes before starting, or microwave in 10-second intervals until soft.
- Make the cream cheese base: In a large mixing bowl, beat softened cream cheese with an electric hand mixer until smooth and fluffy, about 2 minutes. Add sugar and vanilla extract, beat for another minute until well combined.
- Prepare the pudding: In a separate medium bowl, whisk together cold milk and instant chocolate pudding mix for about 2 minutes until thickened.
- Combine everything: Add prepared pudding to cream cheese mixture. Beat on low speed until just combined. Fold in thawed whipped topping gently with a rubber spatula until no white streaks remain.
- Layer the cups: In 12 small cups or glasses, start with a layer of crushed Oreo crumbs (about 1-2 tablespoons per cup). Spoon or pipe pudding mixture on top, filling each cup about three-quarters full.
- Add the creepy crawlies: Poke a gummy worm into the pudding of each cup, letting it stick out slightly.
- Top with ‘dirt’: Sprinkle reserved Oreo crumbs over the top of each cup, covering the pudding completely. Gently press crumbs down with the back of a spoon.
- Add the tombstones: Place a tombstone cookie or candy into each cup, pushing it down slightly so it stands upright.
- Chill and set: Cover cups with plastic wrap and refrigerate for at least 4 hours, preferably overnight.
Notes
The cream cheese must be soft to avoid lumps. Do not overmix the pudding. Layer strategically to prevent soggy crumbs. These cups taste even better after 24 hours in the fridge. Keep cold until serving.
Nutrition
- Serving Size: 1 cup
- Calories: 400
- Sugar: 32
- Sodium: 380
- Fat: 22
- Saturated Fat: 12
- Carbohydrates: 45
- Fiber: 1
- Protein: 6
Keywords: Halloween dessert, dirt pudding, graveyard pudding, Oreo pudding, easy Halloween treat, no-bake dessert