My neighbor, Mrs. Kowalski, watched me one Saturday morning as I was wrestling with a bag of frozen corn, trying to figure out a side dish for a last-minute dinner party. She didn’t say anything at first. Then she just shook her head, walked into her own kitchen, and came back ten minutes later with a warm dish covered in foil. “No boxes,” she said, handing it over. “Corn deserves better than that.” I’ll never forget the way that casserole looked—golden on top, with little pockets of melted cheese bubbling around the edges. I mean, honestly, I had been planning to just open a can of creamed corn and call it a day. But that moment changed everything for me.
The thing is, Mrs. Kowalski wasn’t trying to teach me a lesson. She was just being neighborly, sharing something she’d been making for her family for years. We stood there on my porch for a good twenty minutes, talking about everything from her garden tomatoes to the best way to get a crispy top on a casserole. Somewhere in that conversation, between the laughter and the coffee that went cold, this recipe found its way to me. And let me tell you—it has never let me down.
This creamy corn casserole from scratch is the kind of dish that makes people close their eyes after the first bite. No boxed mix, no shortcuts, just honest ingredients that come together in something truly special. Maybe you’ve been there—staring at a box of corn muffin mix, wondering if there’s a better way. There is. And it starts with fresh corn, a little patience, and a whole lot of love. Three winters ago, I made this for a holiday dinner, and my sister-in-law asked for the recipe before she even finished her plate. That’s the kind of power this casserole has.
Why You’ll Love This Recipe
Let’s be real for a second—there are a thousand corn casserole recipes out there. Most of them start with a box of Jiffy mix and call it a day. And listen, I have nothing against a shortcut now and then. But this creamy corn casserole from scratch? It’s different. It’s better. And once you taste it, you’ll understand why I don’t go back to the box anymore.
- No Box Mix Required: Everything comes from real, whole ingredients you can pronounce. No preservatives, no mystery powders—just corn, cream, cheese, and a few pantry staples.
- Perfect for Hosting: This dish was practically made for dinner parties. It scales beautifully, holds well in the oven while you finish other dishes, and always gets that “wow” reaction from guests.
- Crowd-Pleaser Guaranteed: I’ve served this to picky eaters, vegan friends (with a few swaps), and my uncle who “doesn’t do casseroles.” Everyone goes back for seconds.
- Simple Ingredients: You probably already have most of what you need in your kitchen right now. No special trips to fancy grocery stores required.
- Make-Ahead Friendly: This is a host’s dream. You can assemble it the night before, pop it in the fridge, and bake it when your guests arrive. Stress-free entertaining at its finest.
What really sets this recipe apart is the texture. The combination of sweet corn kernels, creamy custard-like filling, and that golden, slightly crispy top is pure magic. I’ve tested this recipe at least a dozen times—tweaking the ratios, trying different cheeses, playing with baking times. This version is the one that works every single time. It’s comfort food that feels special enough for a holiday table but easy enough for a Tuesday night. Honestly, it’s the kind of recipe that makes you look like a rockstar in the kitchen without breaking a sweat.
What Ingredients You Will Need
This recipe uses simple, wholesome ingredients to deliver bold flavor and satisfying texture without the fuss. Most of these are pantry staples, but I’ve included a few notes to help you pick the best options for the creamiest results.
For the Casserole Base
- 6 cups fresh or frozen corn kernels (about 6-7 ears fresh corn, or two 16-ounce bags frozen) – If using fresh, look for ears with bright green husks and plump kernels. Frozen works beautifully too—just thaw and drain well.
- 1 cup heavy cream – This is what makes it luxuriously creamy. You can substitute half-and-half for a lighter version, but the texture won’t be quite as rich.
- 1/2 cup whole milk – Adds just the right amount of liquid without making it soupy. I’ve tried this with 2% milk, and it works fine, but whole milk gives the best results.
- 3 large eggs, lightly beaten – These help bind everything together and give the casserole that custard-like texture. Room temperature eggs work best.
- 2 tablespoons unsalted butter, melted – Adds richness and helps with browning on top. I use salted butter in a pinch, but I reduce the added salt slightly.
- 1 tablespoon granulated sugar – Just a touch to enhance the natural sweetness of the corn. You can skip this if you prefer a savory version.
- 1 teaspoon salt – I recommend fine sea salt for even distribution.
- 1/2 teaspoon black pepper – Freshly ground is always better here.
- 1/4 teaspoon paprika – Adds a subtle warmth and helps with color. Smoked paprika works wonderfully for a deeper flavor.
For the Cheesy Goodness
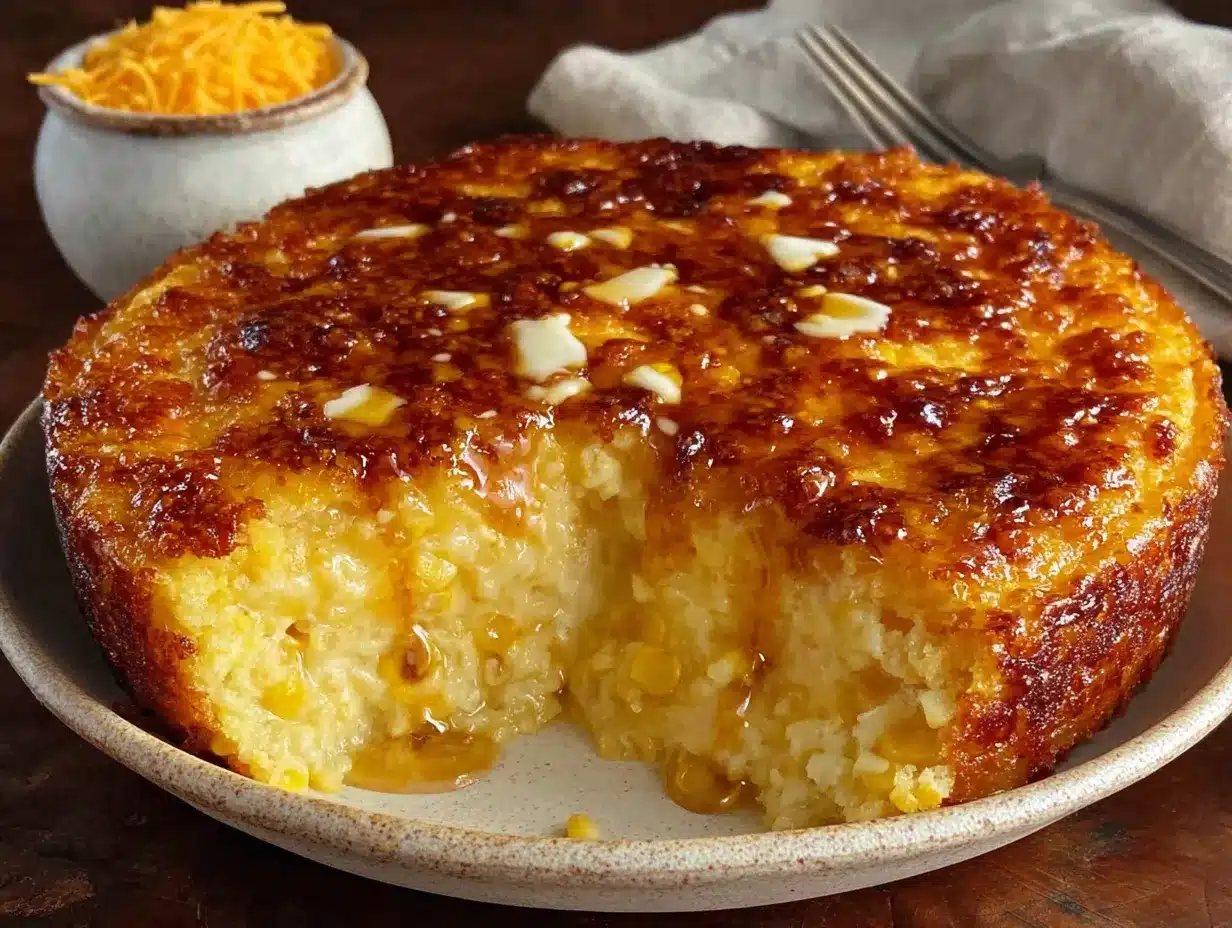
- 1 1/2 cups sharp cheddar cheese, shredded – I prefer block cheese that I shred myself—it melts so much better than pre-shredded bags. Sharp cheddar gives the most flavor, but mild works too.
- 1/2 cup parmesan cheese, grated – This adds a salty, nutty note that complements the corn beautifully. I recommend Parmigiano-Reggiano if you can swing it.
For the Topping
- 1/2 cup panko breadcrumbs – These create that irresistible crispy top. Regular breadcrumbs work, but panko gives a lighter, crunchier texture.
- 2 tablespoons unsalted butter, melted – For tossing with the breadcrumbs before baking.
- 2 tablespoons fresh parsley, chopped – Optional, but adds a nice pop of color and freshness.
Substitution Notes: For a gluten-free version, use gluten-free panko or crushed pork rinds for the topping. Dairy-free? Swap the heavy cream for full-fat coconut milk, use vegan butter, and try nutritional yeast in place of the parmesan. The texture will be slightly different, but still delicious. I’ve tested a dairy-free version for a friend’s potluck, and it held up beautifully.
Equipment Needed
You don’t need a fancy kitchen to pull off this creamy corn casserole. Here’s what you’ll need:
- 9×13-inch baking dish – This is the standard size for this recipe. A glass or ceramic dish works best for even heat distribution. If you’re using a metal pan, keep an eye on the baking time—it may cook a bit faster.
- Large mixing bowl – For combining all the ingredients. Any big bowl will do.
- Whisk – For beating the eggs and mixing the wet ingredients smoothly.
- Cheese grater – Please, for the love of all things cheesy, grate your own cheese. It melts so much better than the pre-shredded stuff, which has anti-caking agents that mess with the texture.
- Small skillet or saucepan – For melting butter and toasting the panko topping if you want extra crunch.
- Rubber spatula – For scraping every last bit of the mixture into the baking dish. Trust me, you don’t want to waste any of this.
- Sharp knife and cutting board – If you’re using fresh corn, you’ll need these to cut the kernels off the cob.
Budget-Friendly Tip: Don’t have a 9×13 dish? You can use a 10-inch cast iron skillet or even a 2-quart casserole dish. Just adjust the baking time slightly—a deeper dish will need a few extra minutes, while a wider, shallower dish will cook faster. I’ve used my grandmother’s old CorningWare dish for years, and it works perfectly.
Preparation Method
Alright, let’s get cooking! This creamy corn casserole from scratch comes together in about 15 minutes of active prep time, then the oven does the rest of the work.
- Preheat your oven to 350°F (175°C). Position a rack in the center of the oven. Grease your 9×13-inch baking dish with butter or non-stick spray.
- Prepare the corn. If using fresh corn, cut the kernels off the cob. The easiest way? Stand each ear on its end in a wide bowl and slice downward with a sharp knife. You’ll get about 1 cup of kernels per ear. If using frozen corn, thaw it completely and drain off any excess liquid. Pat it dry with paper towels if needed—you don’t want extra water in your casserole.
- Mix the wet ingredients. In your large mixing bowl, whisk together the heavy cream, whole milk, beaten eggs, and melted butter until everything is smooth and well combined. The mixture should look pale yellow and slightly thick. Take a moment to scrape the sides of the bowl with your spatula.
- Add the seasonings. Stir in the sugar, salt, black pepper, and paprika. Whisk again until fully incorporated. Taste the mixture if you want—it should be slightly sweet with a hint of warmth from the paprika.
- Fold in the corn and cheese. Add the corn kernels to the bowl, along with the shredded cheddar and grated parmesan. Use your rubber spatula to fold everything together gently but thoroughly. You want every kernel coated in that creamy, cheesy mixture. Don’t overmix—just fold until evenly distributed.
- Pour into the baking dish. Transfer the mixture to your prepared dish and spread it into an even layer. Give the dish a gentle tap on the counter to settle everything and release any air bubbles.
- Prepare the topping. In a small bowl, combine the panko breadcrumbs with the 2 tablespoons of melted butter. Stir until every crumb is coated. Sprinkle this mixture evenly over the top of the casserole. If you’re using parsley, you can mix it in with the breadcrumbs or save it for garnish after baking.
- Bake for 40-45 minutes. Place the dish on the center rack and bake until the edges are golden brown and bubbly, and the center is set but still slightly jiggly—like a cheesecake. The top should be beautifully golden and crispy. If the topping is browning too quickly, tent the dish loosely with foil for the last 10 minutes.
- Let it rest. Remove the casserole from the oven and let it sit for 10-15 minutes before serving. This is crucial—it allows the custard to set fully so you get clean slices instead of a soupy mess. I know it’s hard to wait, but trust me on this one.
- Garnish and serve. Sprinkle with fresh parsley if desired, and serve warm. Watch as your guests go back for seconds.
Pro Tip: For an extra golden top, switch the oven to broil for the last 2-3 minutes of baking. Keep a close eye on it—things can go from perfect to burnt very quickly under the broiler!
Cooking Tips & Techniques
Over the years, I’ve made this creamy corn casserole more times than I can count. And let me tell you—I’ve learned a few things the hard way. Here are my best tips to make sure yours turns out perfect every time.
Don’t skip draining the corn. This is probably the most common mistake I’ve made. If you’re using frozen corn, thaw it and drain it well. Extra water in the dish will make your casserole watery instead of creamy. I once forgot to drain, and the result was a sad, soupy mess that never set properly. Learn from my mistakes!
Grate your own cheese. I know, I know—it’s an extra step. But pre-shredded cheese is coated with cellulose and anti-caking agents that prevent it from melting smoothly. For the creamiest texture, buy a block of sharp cheddar and grate it yourself. It takes two minutes and makes a world of difference.
Let it rest before serving. I cannot stress this enough. The casserole needs time to set after coming out of the oven. If you dig in right away, you’ll end up with a runny, unstructured mess. Give it at least 10 minutes—15 is even better. The texture will be firm, creamy, and absolutely perfect.
Toast the panko first for extra crunch. If you want that topping to be next-level crispy, toast the panko in a dry skillet over medium heat for 2-3 minutes before mixing with butter. It adds an extra layer of texture that makes the casserole even more irresistible. I started doing this after a particularly soggy topping incident, and I’ve never looked back.
Multitasking tip for hosts. This casserole is perfect for dinner parties because it’s so forgiving. Assemble it the night before, cover it, and store it in the fridge. When your guests arrive, just pop it in the oven. It may need an extra 5-10 minutes of baking time since it’s starting cold, but it will still turn out beautifully. This frees you up to focus on other dishes—or, you know, actually enjoy your party.
Variations & Adaptations
One of the best things about this creamy corn casserole is how adaptable it is. I’ve tried several variations over the years, and they’ve all been hits in their own way.
Spicy Southwest Version: Add 1 diced jalapeño (seeds removed for less heat), 1/2 cup diced red bell pepper, and 1 teaspoon cumin to the mixture. Swap the cheddar for pepper jack cheese, and top with crushed tortilla chips instead of panko. This version is fantastic for summer barbecues or Tex-Mex themed dinners.
Bacon & Chive Delight: Cook 6 strips of bacon until crispy, crumble them, and fold half into the casserole mixture. Reserve the rest for topping. Add 3 tablespoons of fresh chopped chives to the mix. The smoky, salty bacon pairs beautifully with the sweet corn. I made this for a potluck last summer, and it disappeared in ten minutes flat.
Herb & Garlic Twist: Sauté 3 minced garlic cloves in the melted butter before adding to the mixture. Fold in 2 tablespoons each of fresh thyme and rosemary. This version is more savory and pairs wonderfully with roasted meats. It’s become my go-to for Thanksgiving dinner.
Dairy-Free Adaptation: Substitute the heavy cream with full-fat coconut milk, use vegan butter, and replace the cheeses with nutritional yeast (about 1/4 cup) and a dairy-free shredded cheese alternative. The texture will be slightly different—a bit lighter—but still creamy and satisfying. I tested this for a friend with lactose intolerance, and she asked for the recipe.
Gluten-Free Option: Use gluten-free panko or crushed pork rinds for the topping. Everything else in the recipe is naturally gluten-free, so it’s an easy swap. Just double-check your spice labels to make sure there’s no hidden gluten.
Serving & Storage Suggestions
This creamy corn casserole is incredibly versatile when it comes to serving. Here’s how to make the most of it.
Serving Temperature: Serve warm, straight from the oven after the resting period. It’s at its absolute best when the top is still crispy and the inside is warm and creamy. If you’re hosting, you can keep it in a warm oven (200°F) for up to 30 minutes before serving—just cover it loosely with foil to prevent the topping from burning.
What to Serve Alongside: This casserole is a natural side for so many main dishes. It’s phenomenal with roasted chicken, grilled steak, baked ham, or even a simple holiday turkey. For a vegetarian spread, pair it with a hearty lentil loaf or stuffed portobello mushrooms. It also works beautifully alongside other classic sides like green bean casserole or roasted asparagus.
Storage Instructions: Leftovers can be stored in an airtight container in the refrigerator for up to 4 days. The topping will lose some of its crunch, but the flavor will still be fantastic. To reheat, place individual portions in a 350°F oven for 10-15 minutes, or microwave for 1-2 minutes. The microwave is faster, but the oven does a better job of reviving that crispy top.
Freezing Tips: This casserole freezes surprisingly well. Assemble it completely but don’t bake it. Wrap the dish tightly in plastic wrap, then a layer of foil, and freeze for up to 3 months. When you’re ready to bake, thaw it overnight in the refrigerator, then bake as directed, adding 10-15 minutes to the cooking time. I’ve done this for holiday prep, and it’s a lifesaver.
Flavor Development: Here’s a little secret—this casserole actually tastes even better the next day. The flavors meld together overnight, creating a deeper, more cohesive dish. If you can resist eating it all on day one, the leftovers are absolutely worth it.
Nutritional Information & Benefits
While this creamy corn casserole is definitely a comfort food, it does offer some nutritional perks worth noting.
Estimated Nutrition Per Serving (based on 12 servings):
- Calories: 285
- Total Fat: 18g
- Saturated Fat: 11g
- Cholesterol: 95mg
- Sodium: 420mg
- Total Carbohydrates: 24g
- Dietary Fiber: 2g
- Sugars: 6g
- Protein: 10g
Health Highlights: Corn is a good source of fiber, which supports digestive health, and contains antioxidants like lutein and zeaxanthin that are beneficial for eye health. The eggs provide high-quality protein and essential vitamins like B12 and D. Calcium from the cheese and milk supports bone health. And while this isn’t a low-calorie dish, it’s made from whole, real ingredients—no preservatives, no artificial flavors, no processed box mixes.
Dietary Considerations: This recipe contains dairy and gluten (from the panko). For a gluten-free version, use gluten-free breadcrumbs. For a dairy-free version, see the variations section above. It’s naturally nut-free and can be made vegetarian. If you’re watching your sodium, reduce the added salt to 1/2 teaspoon and use low-sodium cheese.
I’m a firm believer that food should be enjoyed without guilt. This casserole is a celebration dish—something you make for special occasions or when you want to show people you care. It’s not an everyday meal, and that’s okay. The joy it brings to the table is worth every bite.
Conclusion
So there you have it—my creamy corn casserole from scratch, the one that started with a simple conversation on a Saturday morning and has become a staple at every gathering I host. No boxed mix, no shortcuts, just honest ingredients and a whole lot of love. Honestly, I think that’s what makes it so special. It’s not about being fancy or complicated. It’s about taking something simple and treating it with the respect it deserves.
I hope you give this recipe a try—whether it’s for a holiday dinner, a summer barbecue, or just a Tuesday night when you want something warm and comforting. And please, make it your own. Add bacon if that’s your thing. Throw in some jalapeños for heat. Skip the cheese if you’re feeling adventurous. The best recipes are the ones that evolve with the people who make them.
When you do make it, I’d love to hear how it turned out. Drop a comment below, share a photo, or tell me about your own variations. That’s the beauty of cooking—it’s a conversation that never really ends. And if you’re looking for more crowd-pleasing sides for your next gathering, check out our homemade macaroni and cheese or these garlic herb roasted potatoes. Happy cooking, friend!
Frequently Asked Questions
Can I make this creamy corn casserole ahead of time?
Absolutely! This is one of my favorite things about this recipe. You can assemble the entire casserole (minus the panko topping) up to 24 hours in advance. Cover it tightly and refrigerate. When you’re ready to bake, add the topping and bake as directed, adding about 10 extra minutes since it’s starting cold.
Can I use canned corn instead of fresh or frozen?
Yes, you can, but I recommend draining it really well and patting it dry. Canned corn tends to have more liquid than fresh or frozen, which can make the casserole watery. If you’re in a pinch, go for it—just be extra careful with the draining. I’ve done it before, and it works, but fresh or frozen gives the best texture.
Why is my corn casserole runny?
This usually happens for one of three reasons: too much liquid from the corn (not draining properly), not enough baking time, or cutting into it too soon after baking. Make sure to drain your corn well, bake until the center is just set, and let it rest for at least 10-15 minutes before serving. The resting time is crucial—it allows the custard to set properly.
Can I freeze this casserole?
Yes! Freeze it before baking for best results. Assemble the casserole completely, wrap it tightly in plastic wrap and then foil, and freeze for up to 3 months. Thaw overnight in the fridge, add the panko topping, and bake as directed. You can also freeze baked leftovers, but the texture won’t be quite as creamy upon reheating.
What can I use instead of heavy cream?
If you don’t have heavy cream, you can substitute half-and-half or a mixture of 3/4 cup whole milk and 1/4 cup melted butter. The texture will be slightly lighter and less rich, but still delicious. For a dairy-free option, full-fat coconut milk works beautifully and adds a subtle sweetness that complements the corn.
Pin This Recipe!
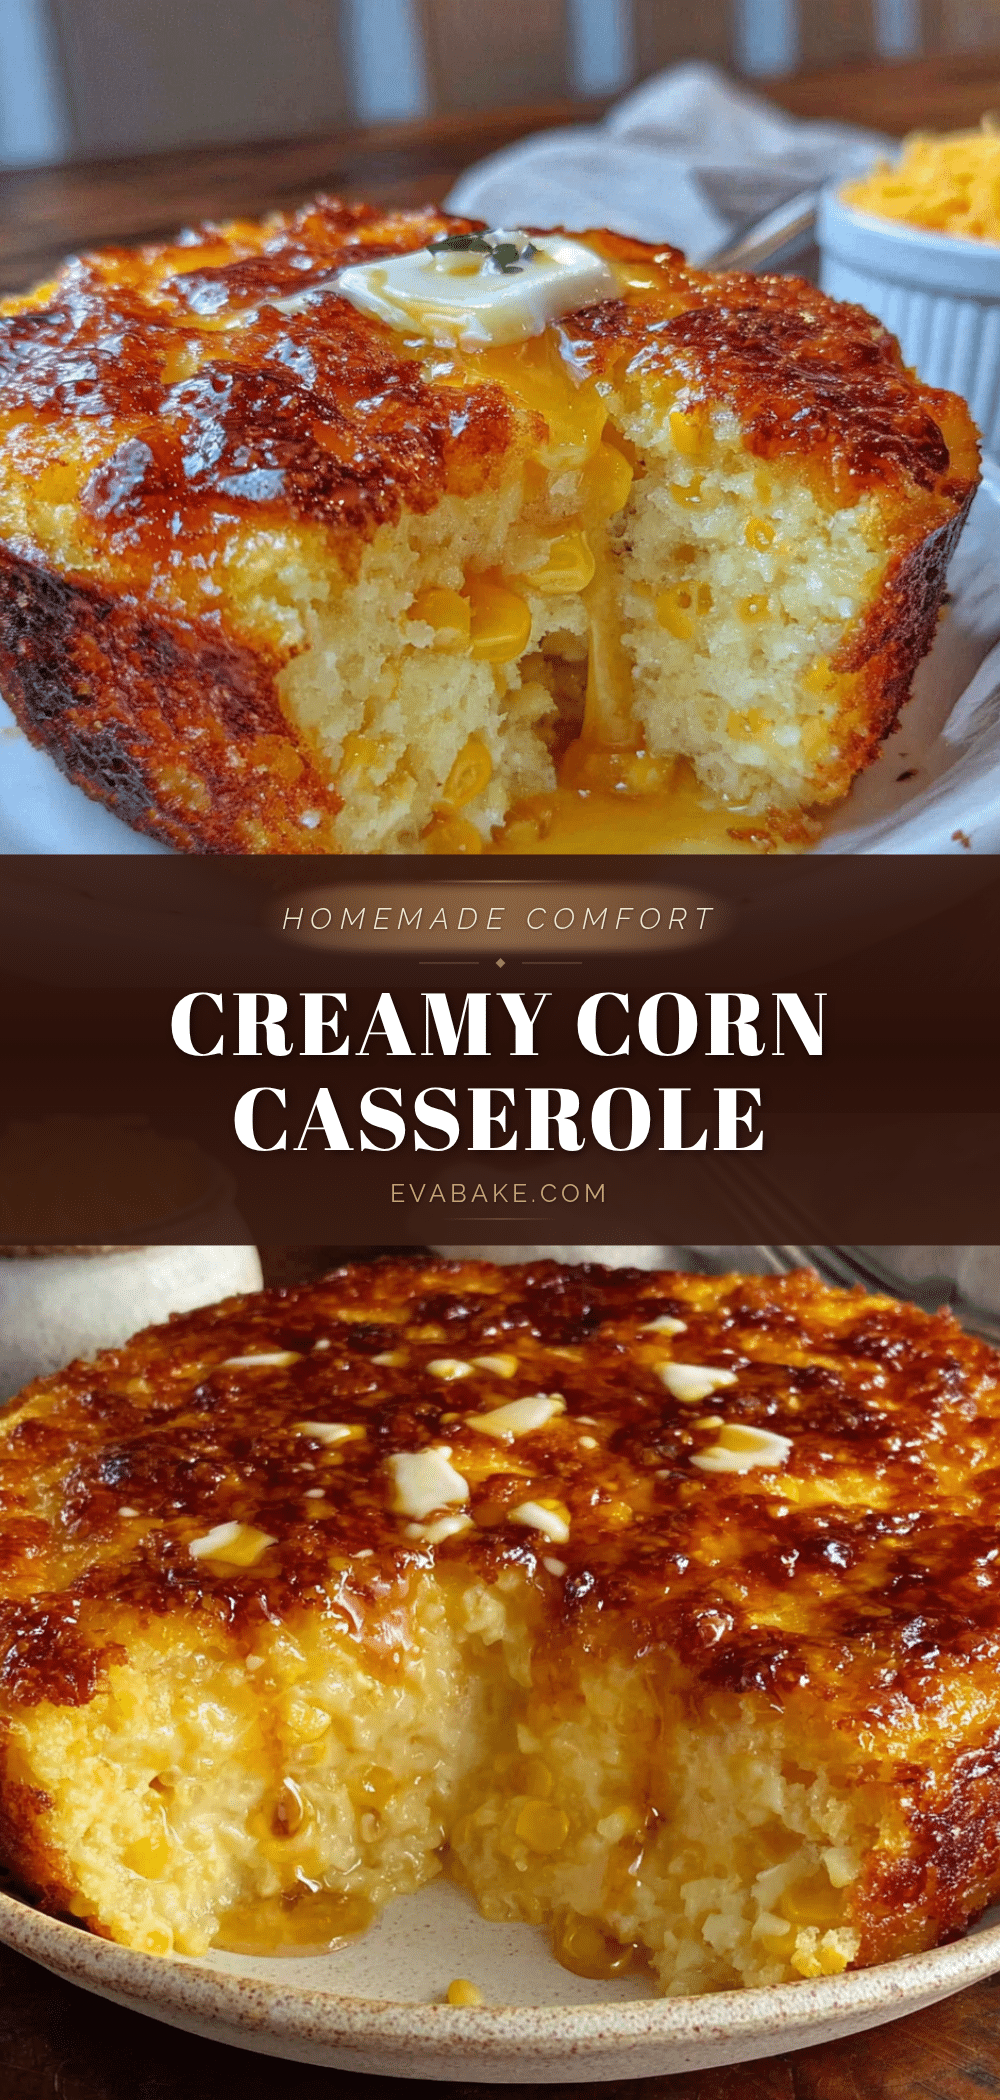
Easy Homemade Creamy Corn Casserole (No Box Mix)

This creamy corn casserole from scratch is the kind of dish that makes people close their eyes after the first bite. No boxed mix, no shortcuts, just honest ingredients that come together in something truly special.
- Prep Time: 15 minutes
- Cook Time: 40-45 minutes
- Total Time: 55-60 minutes
- Yield: 12 servings 1x
- Category: Side Dish
- Cuisine: American
Ingredients
- 6 cups fresh or frozen corn kernels (about 6–7 ears fresh corn, or two 16-ounce bags frozen)
- 1 cup heavy cream
- 1/2 cup whole milk
- 3 large eggs, lightly beaten
- 2 tablespoons unsalted butter, melted
- 1 tablespoon granulated sugar
- 1 teaspoon salt
- 1/2 teaspoon black pepper
- 1/4 teaspoon paprika
- 1 1/2 cups sharp cheddar cheese, shredded
- 1/2 cup parmesan cheese, grated
- 1/2 cup panko breadcrumbs
- 2 tablespoons unsalted butter, melted (for topping)
- 2 tablespoons fresh parsley, chopped (optional)
Instructions
- Preheat your oven to 350°F (175°C). Position a rack in the center of the oven. Grease your 9×13-inch baking dish with butter or non-stick spray.
- Prepare the corn. If using fresh corn, cut the kernels off the cob. If using frozen corn, thaw it completely and drain off any excess liquid. Pat it dry with paper towels if needed.
- Mix the wet ingredients. In your large mixing bowl, whisk together the heavy cream, whole milk, beaten eggs, and melted butter until everything is smooth and well combined.
- Add the seasonings. Stir in the sugar, salt, black pepper, and paprika. Whisk again until fully incorporated.
- Fold in the corn and cheese. Add the corn kernels to the bowl, along with the shredded cheddar and grated parmesan. Use your rubber spatula to fold everything together gently but thoroughly.
- Pour into the baking dish. Transfer the mixture to your prepared dish and spread it into an even layer. Give the dish a gentle tap on the counter to settle everything and release any air bubbles.
- Prepare the topping. In a small bowl, combine the panko breadcrumbs with the 2 tablespoons of melted butter. Stir until every crumb is coated. Sprinkle this mixture evenly over the top of the casserole.
- Bake for 40-45 minutes. Place the dish on the center rack and bake until the edges are golden brown and bubbly, and the center is set but still slightly jiggly. If the topping is browning too quickly, tent the dish loosely with foil for the last 10 minutes.
- Let it rest. Remove the casserole from the oven and let it sit for 10-15 minutes before serving.
- Garnish and serve. Sprinkle with fresh parsley if desired, and serve warm.
Notes
For an extra golden top, switch the oven to broil for the last 2-3 minutes of baking. Keep a close eye on it. This casserole can be assembled the night before and baked when ready. For a gluten-free version, use gluten-free panko or crushed pork rinds for the topping. For a dairy-free version, substitute heavy cream with full-fat coconut milk, use vegan butter, and replace cheeses with nutritional yeast and dairy-free shredded cheese.
Nutrition
- Serving Size: 1 serving
- Calories: 285
- Sugar: 6
- Sodium: 420
- Fat: 18
- Saturated Fat: 11
- Carbohydrates: 24
- Fiber: 2
- Protein: 10
Keywords: corn casserole, creamy corn casserole, no box mix, homemade corn casserole, side dish, holiday side dish, comfort food