I’m not supposed to admit this, but I used to think banana bread was a bit of a production. All that creaming of butter and sugar, the mixer, the multiple bowls—it felt like a whole thing for something that’s supposed to be simple comfort food. Then last Tuesday, I stopped by my neighbor, Carol’s, house to return her hedge clippers. The smell hit me before I even got to her screen door. It was warm, sweet, and deeply familiar, like the inside of a bakery, but better. She wasn’t trying to impress anyone. She was just making banana bread because she had three sad, brown bananas on her counter.
I walked in to find her casually tossing everything into one big bowl—no mixer, no fuss, just a wooden spoon and a look of pure nonchalance. “It’s the only way I make it,” she shrugged, wiping a smear of batter off her cheek. Honestly, I was a little jealous. Here I was, with my complicated recipe and stack of dirty dishes, and she was about to pull a perfect, golden loaf out of the oven with basically zero cleanup. That smell, that casualness—it stuck with me. I went home, vowed to simplify my life, and this easy one-bowl banana bread is the delicious result. Maybe you’ve been there, overcomplicating a simple pleasure. Let’s fix that.
Why You’ll Love This Recipe
This isn’t just another banana bread recipe. It’s the one you’ll come back to again and again because it works every single time without any special effort. I’ve tested it in my own kitchen more times than I can count, tweaking the moisture and sweetness until it was just right. It’s the kind of recipe that builds confidence, even if you’re a beginner.
- One Bowl, No Mixer: This is the star of the show. You mix everything in a single bowl with a spoon. Less cleanup means more time to actually enjoy the bread (and your coffee).
- Perfectly Moist: The secret is using really ripe bananas and a little bit of oil. It guarantees a tender crumb that stays soft for days, not dry and crumbly.
- Simple Pantry Ingredients: You probably have everything you need right now—flour, sugar, eggs, oil, and, of course, those spotty bananas. No fancy grocery trips required.
- Family-Approved: This is the definition of a crowd-pleaser. It’s sweet enough for the kids, but not too sweet for the adults. It disappears fast at my house.
- Budget-Friendly: Using oil instead of butter keeps the cost down, and it uses up bananas that would otherwise be thrown away. It’s smart cooking for a happy table.
What makes this version different from the rest? It’s the technique of mashing the bananas perfectly and using melted butter (or oil) for a foolproof emulsion. You get that signature domed top and a soft, almost velvety inside. It’s comfort food reimagined—faster, easier, but with the same soul-soothing satisfaction. Perfect for a busy weeknight dessert or a lazy Sunday morning treat.
What Ingredients You Will Need
This recipe relies on simple, wholesome ingredients that work together to deliver maximum flavor with minimum effort. Most of these are pantry staples, so you can whip this up whenever those bananas start looking a little sad.
- For the Bread:
- 3 large ripe bananas, mashed (about 1 ½ cups). The riper the better—they should be heavily speckled with brown spots. This is where all the natural sweetness comes from.
- ¾ cup (150g) granulated sugar. Regular white sugar works perfectly. You can use light brown sugar for a deeper, molasses-like flavor.
- ⅓ cup (75ml) vegetable oil (or melted butter). Oil makes the bread incredibly moist. I prefer a neutral oil like canola or avocado. If you use butter, let it cool slightly before adding.
- 1 large egg, at room temperature. This helps bind everything together. If you’re in a hurry, place the egg in a bowl of warm water for 5 minutes.
- 1 teaspoon vanilla extract. Pure vanilla adds a warm, aromatic note. Imitation is fine in a pinch.
- 1 ½ cups (190g) all-purpose flour. Spoon the flour into your measuring cup and level it off for accuracy. Too much flour makes the bread dry.
- 1 teaspoon baking soda. This is the only leavening agent you need. Make sure it’s fresh for a good rise.
- ½ teaspoon salt. A little salt balances the sweetness and enhances the banana flavor.
- Optional: ½ cup (60g) chopped walnuts or pecans, or ½ cup (85g) chocolate chips. A classic addition for texture and flavor.
For the best texture, I recommend using Gold Medal or King Arthur all-purpose flour. They have a consistent protein content that works well for quick breads. And please, don’t skip the salt—it’s not just for taste; it strengthens the gluten structure.
Equipment Needed
You don’t need a fancy kitchen to make this bread. In fact, you probably already have everything you need. That’s the beauty of it.
- Large Mixing Bowl: A standard 2-3 quart bowl is perfect. You’ll do all your mixing right in here.
- Fork or Potato Masher: For mashing the bananas. A fork works great, but a potato masher makes it even easier and faster.
- Wooden Spoon or Rubber Spatula: For stirring the batter. A spatula is great for scraping the sides of the bowl.
- 9×5-inch Loaf Pan: A standard metal or glass loaf pan works well. If you use a dark non-stick pan, keep an eye on the baking time—it may brown faster.
- Measuring Cups and Spoons: For accurate measuring. Dry and liquid measuring cups are best for their respective ingredients.
- Cooling Rack: A wire rack allows air to circulate around the bread, preventing a soggy bottom.
- Parchment Paper (Optional): Lining the pan with parchment makes removal a breeze. I do it every time now after one too many stuck loaves.
If you don’t have a cooling rack, you can use an overturned cutting board or even the grates of your oven (turned off, of course). Just make sure air can get underneath the pan.
Preparation Method
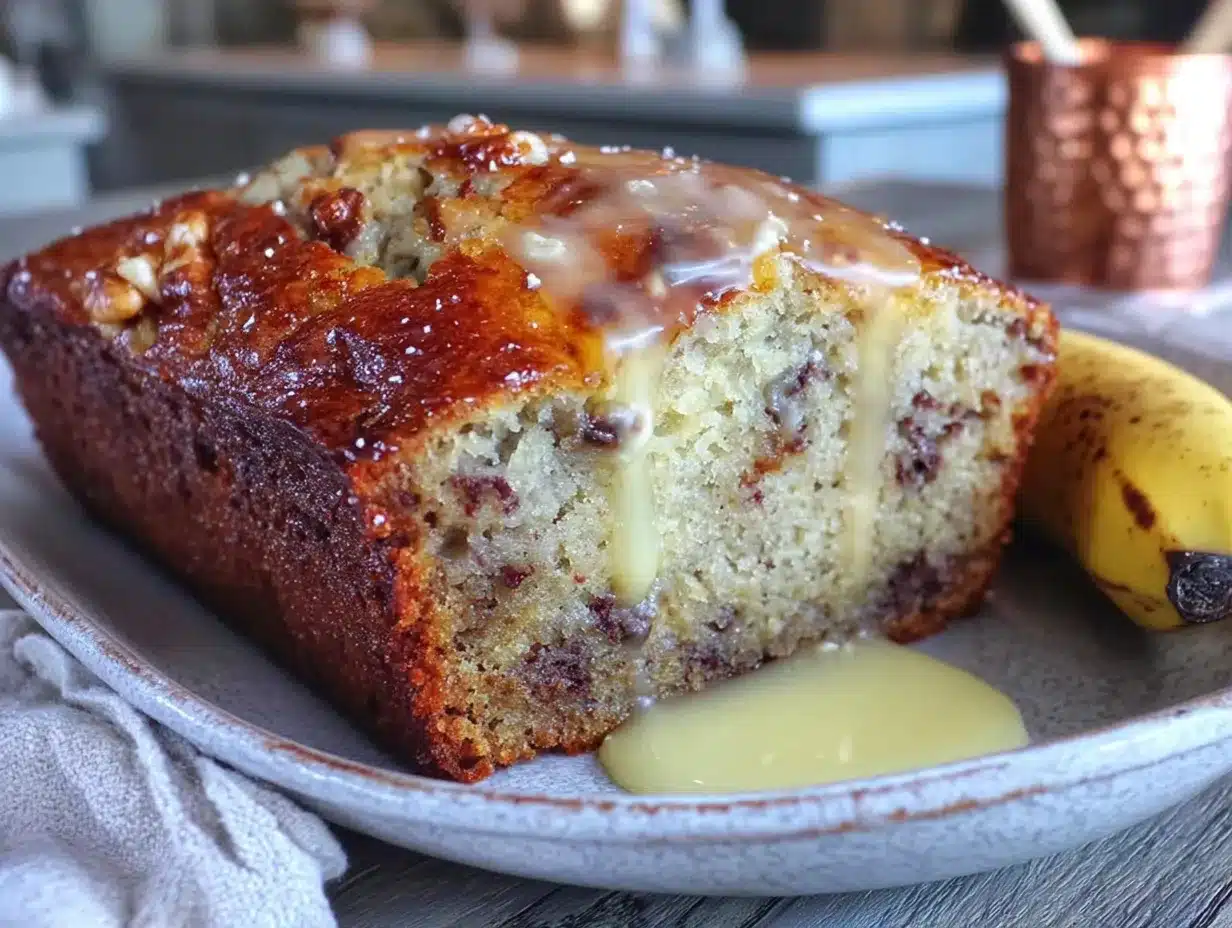
Let’s get to the fun part. This method is so simple, you’ll be tempted to make it every week. Follow these steps carefully, and you’ll be rewarded with a perfect loaf.
- Preheat and Prep: Preheat your oven to 350°F (175°C). Grease a 9×5-inch loaf pan with butter or non-stick spray. For extra insurance, cut a strip of parchment paper to fit the bottom and long sides of the pan, leaving a little overhang to use as handles.
- Mash the Bananas: In your large mixing bowl, mash the three ripe bananas with a fork or potato masher until they are smooth with only a few small lumps. You should have about 1 ½ cups of mashed banana. A few lumps are fine—they add nice pockets of flavor.
- Mix the Wet Ingredients: Add the sugar, oil (or melted butter), egg, and vanilla extract to the bowl with the mashed bananas. Stir with your wooden spoon or spatula until everything is well combined and smooth. The mixture might look a little separated at first, but keep stirring until it comes together. It should look like a thick, pale yellow liquid.
- Add the Dry Ingredients: Sprinkle the flour, baking soda, and salt evenly over the wet mixture. Stir gently until just combined. Do not overmix! A few streaks of flour are perfectly fine. Overworking the batter will develop the gluten and make your bread tough. This is the most important tip I can give you.
- Fold in the Extras: If you’re using nuts or chocolate chips, gently fold them into the batter with a few more stirs. Distribute them evenly, but don’t overmix.
- Bake: Pour the batter into your prepared loaf pan and spread it into an even layer. Bake for 55-65 minutes, or until a toothpick inserted into the center comes out clean or with a few moist crumbs. The top should be a deep golden brown and spring back lightly when touched. My oven runs a little hot, so I start checking at the 50-minute mark.
- Cool: Place the pan on a cooling rack and let the bread cool in the pan for about 10 minutes. Then, using the parchment paper handles, lift the bread out of the pan and transfer it to the rack to cool completely. If you slice it while it’s still warm, it will be a bit crumbly—but sometimes that’s the best way to eat it!
Cooking Tips & Techniques
After making this bread more times than I can count, I’ve learned a few things the hard way. Here are my best tips to ensure success every time.
- Banana Ripeness is Key: Don’t use yellow bananas. They won’t have enough sugar or moisture. You want them brown and spotty, almost looking past their prime. If yours aren’t ripe enough, you can bake them (unpeeled) at 300°F (150°C) for 15-20 minutes to soften and sweeten them.
- Don’t Overmix the Batter: This is the number one mistake people make. Stir just until the flour disappears. A few lumps are your friend. Overmixing develops gluten, which leads to a dense, rubbery loaf instead of a tender one.
- Check Your Oven Temperature: Ovens can be liars. An oven thermometer is a cheap investment that will save you from underbaked or burnt loaves. If your bread is browning too quickly on top but isn’t done in the middle, tent it loosely with aluminum foil for the last 15 minutes of baking.
- Use a Toothpick for Doneness: The toothpick test is your best friend. If it comes out with wet batter, it needs more time. If it comes out clean, it’s done. A few moist crumbs are perfect.
- Let It Cool: I know it’s hard to wait, but letting the bread cool completely (or at least for an hour) allows the structure to set. Slicing too early can result in a gummy, crumbly mess.
Variations & Adaptations
This one-bowl banana bread is a fantastic base for experimentation. Don’t be afraid to make it your own. Here are a few of my favorite twists.
- Chocolate Chip Banana Bread: Fold in ½ cup (85g) of semi-sweet or dark chocolate chips. It’s a classic for a reason. My kids insist on this version.
- Vegan Banana Bread: Replace the egg with a flax egg (1 tablespoon ground flaxseed mixed with 3 tablespoons water, left to sit for 5 minutes). Use a neutral oil instead of butter, and you’re good to go. It turns out just as moist and delicious.
- Gluten-Free Banana Bread: Substitute the all-purpose flour with a 1:1 gluten-free baking blend that contains xanthan gum. I’ve had great luck with Bob’s Red Mill. Don’t overmix, as gluten-free batters can get gummy.
- Spiced Banana Bread: Add 1 teaspoon of cinnamon, ½ teaspoon of nutmeg, and a pinch of cloves to the dry ingredients. It gives the bread a warm, cozy fall flavor.
- Nutty Banana Bread: Toasted walnuts or pecans add a wonderful crunch. Toast them in a dry skillet over medium heat for 3-4 minutes before folding them into the batter.
I once tried a version with shredded zucchini and a handful of coconut flakes. It was a little too wet, but the flavor was incredible. Sometimes the best experiments come from a happy accident.
Serving & Storage Suggestions
This bread is wonderful on its own, but a little extra effort can make it feel truly special. Here’s how I like to serve and store it.
- Serving: Serve the banana bread at room temperature or slightly warm. A thick slice with a pat of salted butter is my go-to. For a real treat, toast a slice and slather it with cream cheese or peanut butter. It’s also fantastic with a drizzle of honey or a dollop of Greek yogurt.
- Storage: Store leftover banana bread tightly wrapped in plastic wrap or in an airtight container at room temperature for up to 4 days. The moisture actually improves over the first day or two, making it even more tender.
- Freezing: This bread freezes beautifully. Wrap the cooled loaf (or individual slices) tightly in plastic wrap, then in a layer of aluminum foil. Freeze for up to 3 months. To thaw, leave it on the counter for a few hours or pop a slice in the toaster.
- Reheating: For a quick warm slice, microwave for 15-20 seconds. For a crispier edge, toast it in a toaster oven or under the broiler for a minute or two. The flavors deepen and the texture becomes even more delightful after a day or two in the fridge.
- Flavor Development: Honestly, this bread is even better on day two. The flavors meld together and the moisture distributes perfectly. So don’t feel bad if you can’t finish it all in one sitting—it’s actually designed to be enjoyed over time.
Nutritional Information & Benefits
While this is a treat, it does have some redeeming qualities. Here’s a quick look at what you’re getting in a standard slice (1/12th of the loaf, without nuts or chocolate chips).
- Estimated Nutrition (per slice): Calories: 210, Fat: 9g, Carbohydrates: 31g, Fiber: 1g, Sugar: 16g, Protein: 3g.
- Health Benefits: Bananas are a great source of potassium, which is important for heart health and muscle function. They also contain vitamin B6 and vitamin C. Using oil instead of butter reduces the saturated fat content.
- Dietary Considerations: This recipe can easily be made dairy-free by using oil. It’s also adaptable to be vegan and gluten-free, as noted in the variations section.
- Potential Allergens: This recipe contains wheat (gluten) and eggs. If you have nut allergies, simply omit the nuts. Always check your ingredient labels if you have specific concerns.
I love that I can feel a little better about giving this to my family for breakfast or a snack. It’s not health food, but it’s made with real ingredients and a lot of love.
Conclusion
This easy one-bowl banana bread is more than just a recipe—it’s a solution. It’s the answer to those spotty bananas on your counter, the craving for something warm and sweet, and the desire for a simple, stress-free baking project. It’s the kind of recipe that makes you feel like a rockstar in the kitchen with almost no effort.
I encourage you to make this your own. Throw in some chocolate chips, add a handful of walnuts, or keep it perfectly plain. It’s forgiving, foolproof, and always delicious. I honestly can’t keep a loaf in my house for more than two days, and I’m perfectly okay with that.
I’d love to hear how yours turns out! Leave a comment below and let me know what variations you tried, or share a photo of your beautiful loaf. Happy baking, friends—you’ve got this.
Frequently Asked Questions
Can I use frozen bananas for this banana bread?
Absolutely! Frozen bananas are actually perfect for baking. Thaw them completely, then drain off any excess liquid before mashing. They will be very soft and almost liquid, which is ideal.
Why is my banana bread dry?
The most common reason is overmixing the batter or using too much flour. Make sure you spoon the flour into your measuring cup and level it off. Also, check that your bananas are very ripe—they provide crucial moisture.
Can I make this into muffins instead of a loaf?
Yes, you can! Grease a 12-cup muffin tin and fill each cup about ¾ full. Bake at 350°F (175°C) for 18-22 minutes, or until a toothpick inserted into the center comes out clean.
How do I know when my banana bread is done baking?
Insert a toothpick or a thin knife into the center of the loaf. If it comes out clean or with just a few moist crumbs, it’s done. The top should be golden brown and spring back when lightly pressed.
Can I substitute the oil with applesauce?
Yes, you can substitute up to half of the oil with unsweetened applesauce to reduce the fat content. The bread will be slightly less tender, but it will still be moist and delicious. Don’t replace all of the oil, or the texture may become gummy.
Pin This Recipe!
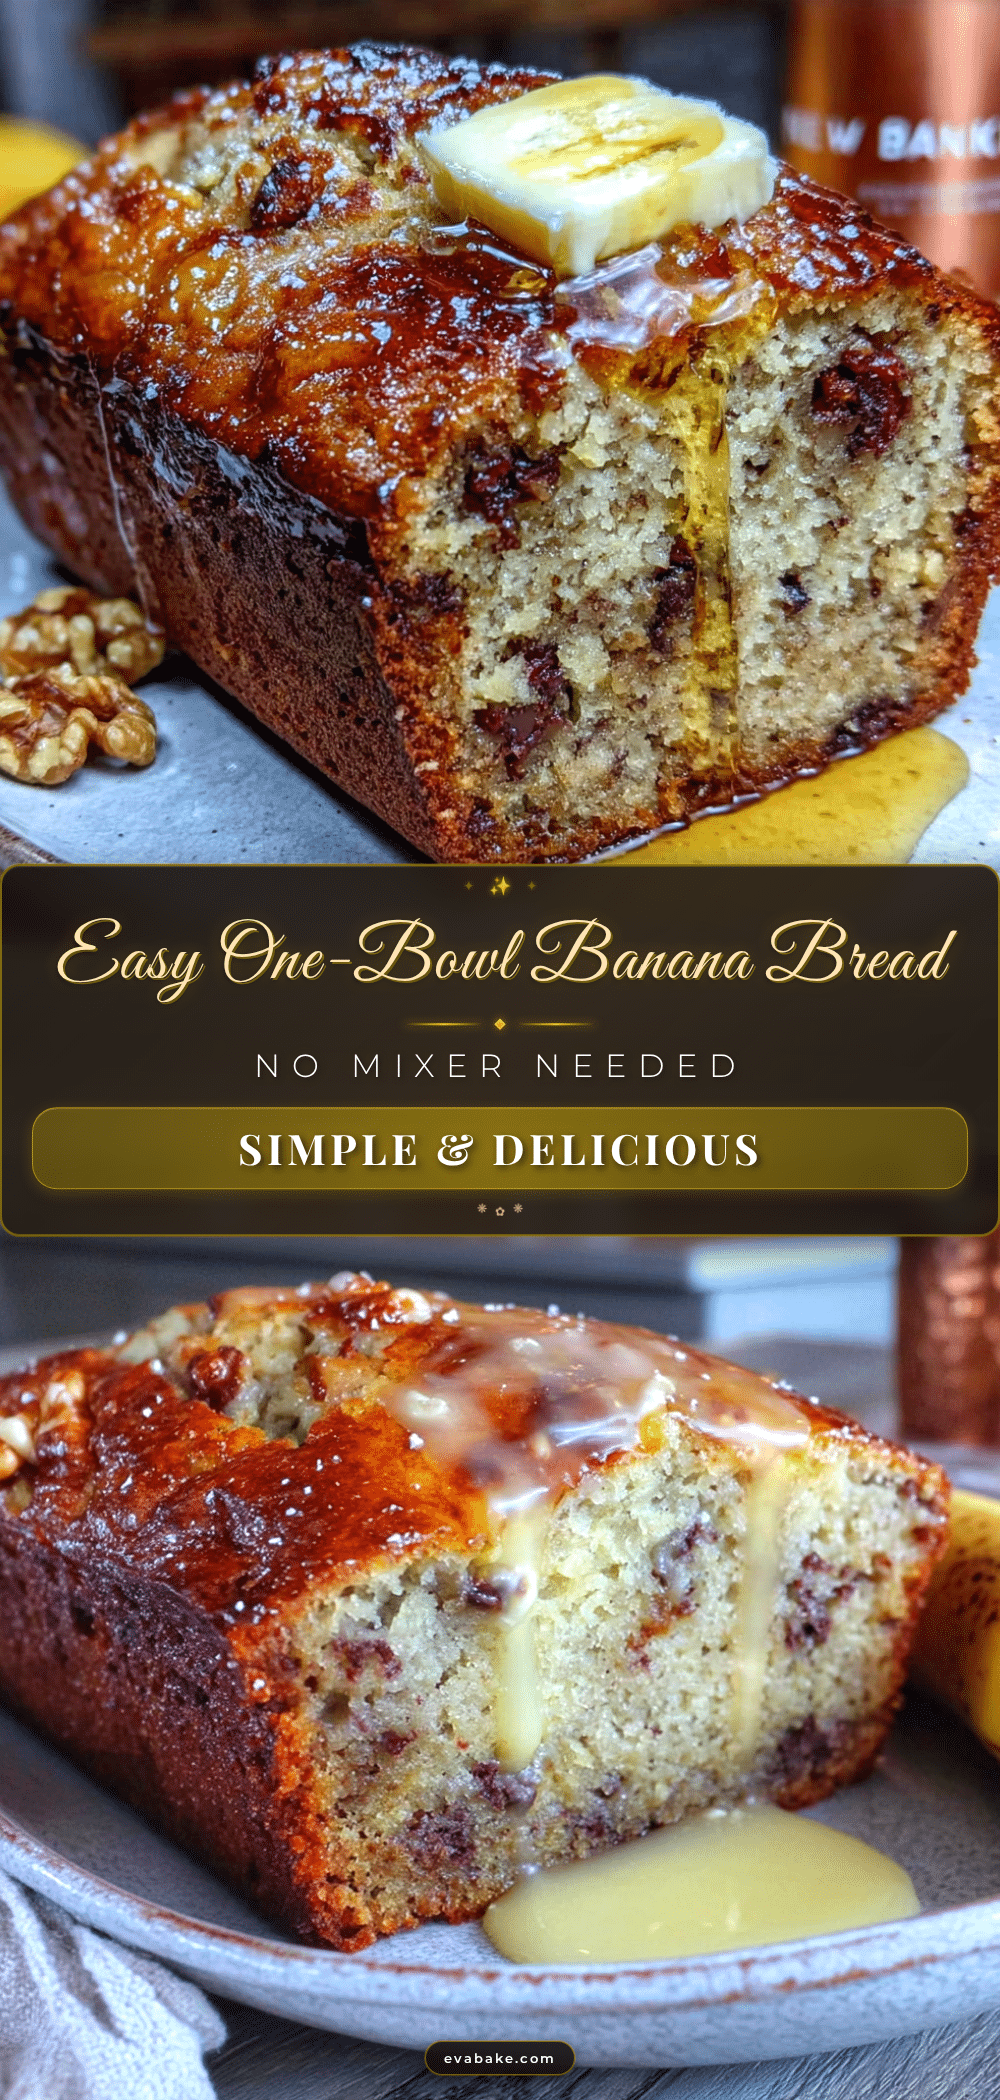
Easy One-Bowl Banana Bread (No Mixer Needed, Perfectly Moist)
This easy one-bowl banana bread is the answer to those spotty bananas on your counter. It’s perfectly moist, requires no mixer, and comes together with simple pantry ingredients for a stress-free baking project.
- Prep Time: 15 minutes
- Cook Time: 55-65 minutes
- Total Time: 1 hour 10 minutes - 1 hour 20 minutes
- Yield: 12 servings 1x
- Category: Dessert
- Cuisine: American
Ingredients
- 3 large ripe bananas, mashed (about 1 ½ cups)
- ¾ cup (150g) granulated sugar
- ⅓ cup (75ml) vegetable oil (or melted butter)
- 1 large egg, at room temperature
- 1 teaspoon vanilla extract
- 1 ½ cups (190g) all-purpose flour
- 1 teaspoon baking soda
- ½ teaspoon salt
- Optional: ½ cup (60g) chopped walnuts or pecans, or ½ cup (85g) chocolate chips
Instructions
- Preheat your oven to 350°F (175°C). Grease a 9×5-inch loaf pan with butter or non-stick spray. For extra insurance, cut a strip of parchment paper to fit the bottom and long sides of the pan, leaving a little overhang to use as handles.
- In your large mixing bowl, mash the three ripe bananas with a fork or potato masher until they are smooth with only a few small lumps. You should have about 1 ½ cups of mashed banana.
- Add the sugar, oil (or melted butter), egg, and vanilla extract to the bowl with the mashed bananas. Stir with your wooden spoon or spatula until everything is well combined and smooth.
- Sprinkle the flour, baking soda, and salt evenly over the wet mixture. Stir gently until just combined. Do not overmix! A few streaks of flour are perfectly fine.
- If you’re using nuts or chocolate chips, gently fold them into the batter with a few more stirs. Distribute them evenly, but don’t overmix.
- Pour the batter into your prepared loaf pan and spread it into an even layer. Bake for 55-65 minutes, or until a toothpick inserted into the center comes out clean or with a few moist crumbs. The top should be a deep golden brown and spring back lightly when touched.
- Place the pan on a cooling rack and let the bread cool in the pan for about 10 minutes. Then, using the parchment paper handles, lift the bread out of the pan and transfer it to the rack to cool completely.
Notes
For the best texture, use very ripe bananas with brown spots. Don’t overmix the batter—a few lumps are fine. If the bread is browning too quickly on top but isn’t done in the middle, tent it loosely with aluminum foil for the last 15 minutes of baking. The bread is even better on day two as the flavors meld together.
Nutrition
- Serving Size: 1 slice (1/12th of l
- Calories: 210
- Sugar: 16
- Sodium: 210
- Fat: 9
- Saturated Fat: 1.5
- Carbohydrates: 31
- Fiber: 1
- Protein: 3
Keywords: banana bread, easy banana bread, one bowl banana bread, moist banana bread, no mixer banana bread, quick bread, banana recipe