I want to make something fun for Halloween dinner, but I refuse to spend my evening scrubbing a dozen dirty pots. That’s the thought that hit me around 3 PM on a random Tuesday in late September, staring at a box of ziti and a bag of mozzarella. The kids would want something spooky, obviously. But I also needed it to be easy—the kind of easy where you dump everything in one pot and walk away for a bit. Enter the mummy. Not a real one, obviously. A pasta one. The idea came together faster than I expected: stretch some strips of mozzarella over the top like bandages, drop in a couple of olive eyes, and suddenly dinner looks like it crawled out of a tomb. It’s silly. It’s delicious. And honestly? It works.
This isn’t one of those Halloween recipes that looks cool but tastes like cardboard. This is real baked ziti—creamy, cheesy, saucy, with that perfect golden crust on top. The mummy thing is just the icing on the cake. Or the bandages on the ziti. Whatever. The point is, it’s a crowd-pleaser that happens to look like it belongs at a costume party. And since it all comes together in a single pot (yes, even the pasta cooks right in the sauce), cleanup is almost as satisfying as the first bite. Let me show you how to pull this off without breaking a sweat.
Why You’ll Love This Recipe
I’ve tested this recipe about five times now, and each time I tweaked something small. The first batch was too saucy. The second needed more cheese. By the third, I had it dialed in—and my family confirmed it was the best baked ziti I’d ever made. Here’s why this version stands out:
- One Pot Wonder : Everything cooks in a single Dutch oven or deep skillet. No boiling pasta separately. No draining. No extra colander to wash. You just throw it all in and let the magic happen.
- Simple Ingredients : Ground beef, canned tomatoes, dried herbs, pasta, cheese. That’s it. You probably have most of this in your pantry right now.
- Perfect for Halloween : The mummy design is ridiculously easy to pull off. Even if you’re not artsy, you can lay cheese strips over the top and call it a day. Kids absolutely lose their minds over this.
- Crowd-Pleaser : Adults love it because it’s comfort food. Kids love it because it looks like a monster. Everyone wins.
- Unbelievably Delicious : The pasta absorbs the sauce as it cooks, so every bite is packed with flavor. The cheese gets bubbly and browned in spots. It’s the kind of dinner that makes you go back for seconds even when you’re full.
What makes this different from other baked ziti recipes is the technique. Most versions require pre-boiling the pasta, which adds time and dishes. This one cooks the ziti directly in the sauce, so the starch from the pasta thickens everything naturally. Plus, the mummy presentation turns a weeknight staple into something memorable. It’s comfort food reimagined—faster, easier, but with the same soul-soothing satisfaction. Perfect for impressing guests without stress, or turning a simple meal into something that feels special.
What Ingredients You Will Need
This recipe uses simple, wholesome ingredients to deliver bold flavor and satisfying texture without the fuss. Most of these are pantry staples, which makes this perfect for last-minute Halloween plans.
For the Ziti Base
- 1 pound ground beef (80/20 works best for flavor; you can use ground turkey if preferred)
- 1 medium yellow onion, finely diced (adds sweetness and depth)
- 4 cloves garlic, minced (fresh is best, but jarred works in a pinch)
- 1 teaspoon salt
- 1/2 teaspoon black pepper
- 1 teaspoon dried oregano
- 1/2 teaspoon dried basil
- 1/4 teaspoon red pepper flakes (optional, for a little heat)
- 1 can (28 ounces) crushed tomatoes (I prefer San Marzano for sweetness)
- 2 cups water (helps cook the pasta)
- 12 ounces ziti or penne pasta (uncooked; no need to boil first)
- 1 cup ricotta cheese (full-fat gives the creamiest texture)
- 2 cups shredded mozzarella cheese, divided
- 1/2 cup grated Parmesan cheese
For the Mummy Decoration
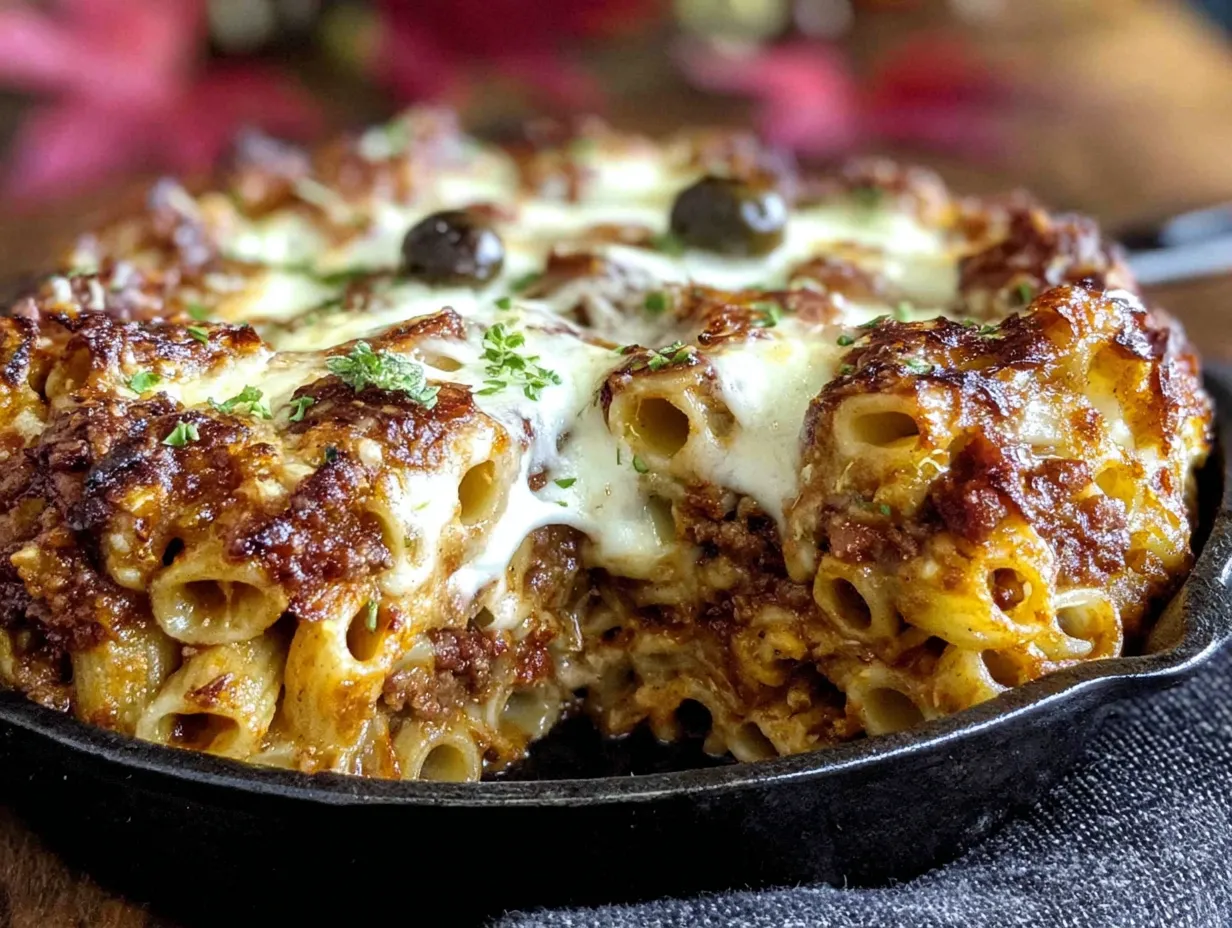
- 1 cup shredded mozzarella cheese (for the bandages)
- 2 pitted black olives (for the eyes)
- 1 tablespoon chopped fresh parsley (optional, for garnish)
I recommend using whole-milk ricotta for the creamiest result. If you only have part-skim, it’ll still work, but the texture won’t be quite as luxurious. For the mozzarella, low-moisture shredded works best—fresh mozzarella can get watery and make the bandages slide around. Also, look for crushed tomatoes that are labeled “pure” or “unseasoned” so you can control the salt and herbs yourself.
If you want to make this gluten-free, swap the ziti with a gluten-free pasta that holds up well to boiling in sauce—look for ones made from brown rice or chickpea flour. For a dairy-free version, use plant-based ricotta and mozzarella substitutes, though the texture will be slightly different. And if you’re out of ground beef, try Italian sausage (casings removed) for a more flavorful base. I’ve done it with spicy sausage before, and it was incredible.
Equipment Needed
You don’t need much for this one, which is honestly my favorite part. Here’s what you’ll want:
- Large Dutch oven or deep skillet (at least 5 quarts, with a tight-fitting lid) – This is your main vessel. I use my trusty enameled cast iron Dutch oven, and it works perfectly. If you don’t have one, any heavy-bottomed pot with a lid will do.
- Wooden spoon or spatula – For breaking up the meat and stirring everything together. A silicone spatula works too, but wood won’t scratch your pot.
- Cheese grater – If you’re shredding your own mozzarella (which I recommend for better melting), you’ll need a box grater or a microplane for the Parmesan.
- Cutting board and knife – For dicing the onion, mincing garlic, and slicing the olives for eyes.
- Measuring cups and spoons – Pretty standard, but you’ll need them for the water, tomatoes, and seasonings.
If you don’t have a Dutch oven, a large stainless steel pot with a lid works fine. Just make sure it’s deep enough to hold everything without bubbling over. I’ve also made this in a 12-inch cast iron skillet with a lid, and it turned out great—though the pasta cooks a little faster since the surface area is larger. Budget tip: A good enameled Dutch oven is an investment, but you can find decent ones at stores like Target or even thrift shops. For this recipe, any heavy pot with a lid will get the job done.
Preparation Method
Let’s walk through this step by step. I’ll include time estimates and visual cues so you know exactly what to look for. Trust me, it’s easier than it sounds.
- Brown the meat (5 minutes). Place your Dutch oven over medium-high heat and add the ground beef. Break it up with a wooden spoon as it cooks. You want it browned and crumbly, not grey and steamed. Let it sit for a minute before stirring to get those nice brown bits on the bottom. Once it’s fully cooked (no pink remaining), use a slotted spoon to transfer the meat to a plate. Leave about 1 tablespoon of fat in the pot—if there’s more, drain the excess.
- Sauté the aromatics (3 minutes). Reduce the heat to medium. Add the diced onion to the pot with the reserved fat. Cook for 2-3 minutes, stirring occasionally, until the onion turns translucent and starts to soften. Add the minced garlic and cook for another 30 seconds, stirring constantly. You should smell the garlic become fragrant—don’t let it burn, or it’ll turn bitter.
- Build the sauce (2 minutes). Pour in the crushed tomatoes, water, salt, pepper, oregano, basil, and red pepper flakes (if using). Stir everything together, scraping up any browned bits from the bottom of the pot. Those bits are pure flavor. Bring the sauce to a gentle simmer.
- Add the pasta (15-18 minutes). Stir in the uncooked ziti and the browned ground beef. Make sure the pasta is mostly submerged in the liquid. It might look like there’s not enough sauce, but trust the process—the pasta will absorb the liquid as it cooks. Cover the pot with the lid, reduce the heat to low, and let it simmer gently. Stir once halfway through to prevent sticking. The pasta should be al dente after about 15 minutes. Check by tasting a piece—it should be tender but still have a slight bite. If it’s still too firm, cover and cook for another 2-3 minutes.
- Incorporate the cheeses (2 minutes). Remove the pot from the heat. Drop in the ricotta cheese, 1 cup of the shredded mozzarella, and the Parmesan. Stir gently until the cheeses melt into the sauce. The mixture should look creamy and cohesive, not dry. If it seems too thick, add a splash of water or milk. If it’s too loose, let it sit uncovered for a minute to thicken.
- Create the mummy design (5 minutes). Now for the fun part. Sprinkle the remaining 1 cup of shredded mozzarella over the top of the ziti. Use your hands or a spoon to create long, uneven strips of cheese across the surface—these will look like mummy bandages. Leave a small gap near the top for the eyes. Place two black olives in that gap, pressing them gently into the cheese. You can also use sliced olives for a creepier look, but whole olives give the mummy more personality. If you want the bandages to look more realistic, drag a knife through the cheese strips to create slight ridges.
- Broil for the finish (2-3 minutes). If your Dutch oven is oven-safe (most are), transfer it to the oven and broil on high for 2-3 minutes. Watch it closely—you want the cheese to bubble and brown in spots, not burn. The bandages should look golden and slightly crispy around the edges. If your pot isn’t oven-safe, you can use a kitchen torch to brown the cheese, or simply serve it as-is—the residual heat will melt everything nicely.
- Rest and serve (5 minutes). Let the ziti sit for 5 minutes before serving. This allows the sauce to set slightly so it doesn’t turn into a soupy mess on the plate. Garnish with chopped fresh parsley if desired. Scoop out servings, making sure each plate gets a piece of the mummy face.
One thing I learned the hard way: don’t skip the resting step. The first time I made this, I served it immediately, and the cheese bandages slid right off into a puddle. Giving it those five minutes makes all the difference. Also, if you’re making this for a party, you can assemble the mummy design ahead of time and broil right before serving. Just keep the cheese refrigerated until you’re ready.
Cooking Tips & Techniques
I’ve made this recipe more times than I care to admit, and I’ve picked up a few tricks along the way. Here’s what I wish someone had told me before my first attempt:
Don’t over-stir the pasta. Once you add the uncooked ziti to the sauce, resist the urge to stir constantly. Stirring too much can break the pasta and make the sauce starchy. One gentle stir halfway through is plenty. The pasta will cook evenly as long as it’s mostly submerged.
Watch the heat. When simmering the pasta, keep the heat on low. If the sauce boils too vigorously, it can evaporate too quickly and leave you with dry, undercooked pasta. You want a gentle simmer—just a few bubbles breaking the surface. If you notice the liquid level dropping too fast, add a splash of water and lower the heat.
Use room-temperature ricotta. Cold ricotta straight from the fridge can clump up when you stir it into the hot sauce. Let it sit on the counter for 15-20 minutes before adding it. This ensures it melts smoothly and evenly. Same goes for the mozzarella—shredded cheese at room temperature melts faster and more uniformly.
My biggest failure? The first time I made this, I used way too much liquid because I didn’t trust the pasta to cook properly. The result was a soupy, watery mess that took forever to thicken. Learn from my mistake: stick to the measurements in the recipe. The pasta absorbs exactly what it needs, and the sauce concentrates beautifully. If you’re nervous, you can always add a little extra water at the end if needed.
For the mummy design, use low-moisture mozzarella. Fresh mozzarella releases too much water when it melts, which makes the bandages slide around and lose their shape. Also, don’t be afraid to get creative with the eyes—I’ve used sliced green olives, capers, and even small pieces of roasted red pepper. Each version has its own personality.
Multitasking tip: While the pasta simmers, use that time to shred your cheese, chop parsley, and set the table. This way, when the ziti is done, all you have to do is assemble the mummy and broil. It makes the whole process feel effortless.
Variations & Adaptations
One of the best things about this recipe is how flexible it is. I’ve tried several variations, and each one brought something new to the table. Here are a few ideas to get you started:
Vegetarian Mummy Ziti. Skip the ground beef and add 1 can (15 ounces) of drained and rinsed chickpeas or lentils instead. You can also sauté 8 ounces of cremini mushrooms with the onions for a meaty texture. The mushrooms add umami that mimics the richness of beef. If you want extra protein, stir in a handful of frozen spinach at the end.
Spicy Sausage Version. Replace the ground beef with 1 pound of hot Italian sausage (casings removed). Brown it the same way, breaking it up as it cooks. The fennel and red pepper flakes in the sausage add a whole new layer of flavor. I made this for a Halloween party last year, and it disappeared faster than the candy bowl.
Seasonal Twist. In the fall, stir in 1 cup of roasted butternut squash cubes along with the pasta. The sweetness of the squash pairs beautifully with the tomato sauce and cheese. In summer, swap the crushed tomatoes for fresh diced tomatoes and add a handful of fresh basil at the end. The flavor is brighter and more vibrant.
Dairy-Free Adaptation. Use dairy-free ricotta (made from almonds or cashews) and shredded vegan mozzarella. The texture will be slightly less creamy, but the flavor still holds up. I’ve tested this with a cashew-based ricotta, and it worked surprisingly well—just make sure to drain any excess liquid from the ricotta before adding it.
Gluten-Free Option. Use gluten-free ziti or penne. Look for a brand that recommends boiling in sauce rather than pre-boiling. I’ve had good luck with chickpea-based pasta—it holds its shape and doesn’t turn mushy. Just keep an eye on the cooking time, as gluten-free pasta often cooks faster than regular pasta.
Personal Variation I Love: I once added a layer of sautéed kale and caramelized onions between the ziti and the cheese bandages. The bitterness of the kale balanced the richness of the cheese, and the onions added sweetness. It felt like a grown-up version of the dish, perfect for when I wanted something a little more sophisticated. Try it if you’re feeling adventurous.
Serving & Storage Suggestions
This mummy baked ziti is best served hot, straight from the pot. The cheese should be bubbly and slightly browned, with the bandages holding their shape. Scoop out portions with a large spoon, making sure each serving gets a piece of the mummy face. If you’re serving it at a Halloween party, place the pot in the center of the table and let everyone help themselves—it makes for a great centerpiece.
What to serve alongside: A simple green salad with a tangy vinaigrette cuts through the richness of the cheese. Garlic bread or crusty bread is also a must for sopping up any leftover sauce. For drinks, a crisp red wine like Chianti or a cold beer pairs beautifully. If you’re serving kids, apple cider or sparkling water with a splash of pomegranate juice adds a festive touch.
Storage: Leftover ziti keeps well in the refrigerator for up to 4 days. Transfer it to an airtight container and let it cool completely before sealing. The flavors actually deepen overnight, so leftovers taste even better the next day. To reheat, scoop individual portions into a microwave-safe bowl and heat in 30-second bursts, stirring between each. For larger portions, reheat in a 350°F oven for 15-20 minutes, covered with foil to prevent the cheese from drying out.
Freezer instructions: This recipe freezes beautifully. Let the ziti cool completely, then transfer it to a freezer-safe container or zip-top bag. It will keep for up to 3 months. To thaw, place it in the refrigerator overnight. Reheat in a 350°F oven until warmed through, about 25-30 minutes. If the sauce seems dry after reheating, add a splash of water or milk and stir gently.
How flavors develop: The first day, the ziti is creamy and saucy. By day two, the pasta has absorbed more of the sauce, making each bite more concentrated. The cheese bandages soften slightly, but they still look cute. Honestly, I sometimes make this specifically for leftovers—it’s that good.
Nutritional Information & Benefits
Here’s an approximate nutritional breakdown per serving (based on 6 servings):
- Calories: 520
- Protein: 32g
- Fat: 22g
- Carbohydrates: 48g
- Fiber: 4g
- Sugar: 8g
- Sodium: 780mg
This dish provides a solid balance of protein, carbs, and fats, making it a satisfying meal on its own. The ground beef offers iron and B vitamins, while the tomatoes are rich in lycopene, an antioxidant linked to heart health. The dairy provides calcium and vitamin D for bone health. If you’re looking to reduce sodium, use low-sodium canned tomatoes and skip the added salt until the end—you can always adjust to taste.
Dietary considerations: This recipe contains dairy and gluten. For a gluten-free version, use gluten-free pasta. For a dairy-free version, substitute with plant-based cheeses. It’s also relatively low in added sugar, which is a nice bonus. If you’re watching your carb intake, you can swap the ziti for zucchini noodles, though the texture will be different—more of a saucy skillet dish than a baked pasta.
From a wellness perspective, I love that this recipe feels indulgent without being over-the-top. It’s the kind of meal that satisfies a craving for comfort food while still providing real nutrients. Plus, the one-pot method means you’re not spending hours in the kitchen, which is a win for anyone trying to balance a busy schedule.
Conclusion
This Easy One-Pot Mummy Baked Ziti is the kind of recipe that makes Halloween dinner feel special without making you crazy. It’s fun, it’s delicious, and it comes together in a single pot—which means more time enjoying the evening and less time scrubbing dishes. Whether you’re serving it to kids who want something spooky or adults who just want a killer bowl of pasta, this dish delivers on every level.
I love how customizable it is. You can make it vegetarian, spicy, gluten-free, or dairy-free, and it still works. The mummy design is simple enough that anyone can do it, but impressive enough that people will think you spent hours on it. And honestly? That’s the best kind of recipe—the one that makes you look like a rockstar with minimal effort.
So go ahead and give it a try. Make it your own. Add extra cheese, swap the meat, go wild with the decorations. And when you do, I’d love to hear about it. Drop a comment below, share your mummy creation on social media, or tag me in your photos. Let me know how it turned out, what variations you tried, and whether your kids thought it was the coolest dinner ever. Happy Halloween, and happy cooking!
Frequently Asked Questions
Can I make this ahead of time?
Absolutely. You can prepare the entire ziti base (steps 1-5) up to 24 hours in advance. Let it cool completely, then cover and refrigerate. When you’re ready to serve, reheat it on the stovetop over medium-low heat, stirring occasionally. Once it’s hot, add the cheese bandages and olives, then broil as directed. This is a great option for Halloween parties when you want to minimize last-minute stress.
What if I don’t have a Dutch oven?
No problem. Any large, heavy-bottomed pot with a lid will work. A 12-inch deep skillet with a lid is a great alternative. Just make sure it’s at least 5 quarts in capacity to hold everything without bubbling over. If your pot isn’t oven-safe, you can skip the broiling step and simply let the cheese melt under the lid for a few minutes—it won’t brown, but it will still be delicious.
Can I use a different type of pasta?
Yes. Ziti is traditional, but penne, rigatoni, or even fusilli work well. Just make sure the pasta is similar in size and shape so it cooks evenly. Avoid very small pasta like ditalini, which can get mushy. If you use a different shape, keep an eye on the cooking time—smaller shapes cook faster, larger shapes may need a minute or two more.
How do I keep the cheese bandages from sliding off?
The key is using low-moisture mozzarella and letting the dish rest for 5 minutes after broiling. Low-moisture cheese melts without releasing too much water, so the bandages stay in place. Also, don’t make the cheese strips too thick—thin, uneven strips adhere better to the surface. If you’re still having trouble, you can press the cheese gently into the ziti with your fingers before broiling.
Can I double this recipe?
Yes, but you’ll need a larger pot—at least 8 quarts. Double all the ingredients and follow the same steps. The cooking time for the pasta might increase by 2-3 minutes since there’s more liquid. If you don’t have a pot big enough, you can split the recipe between two Dutch ovens or make it in a large roasting pan with a lid. Just adjust the broiling time as needed.
Pin This Recipe!
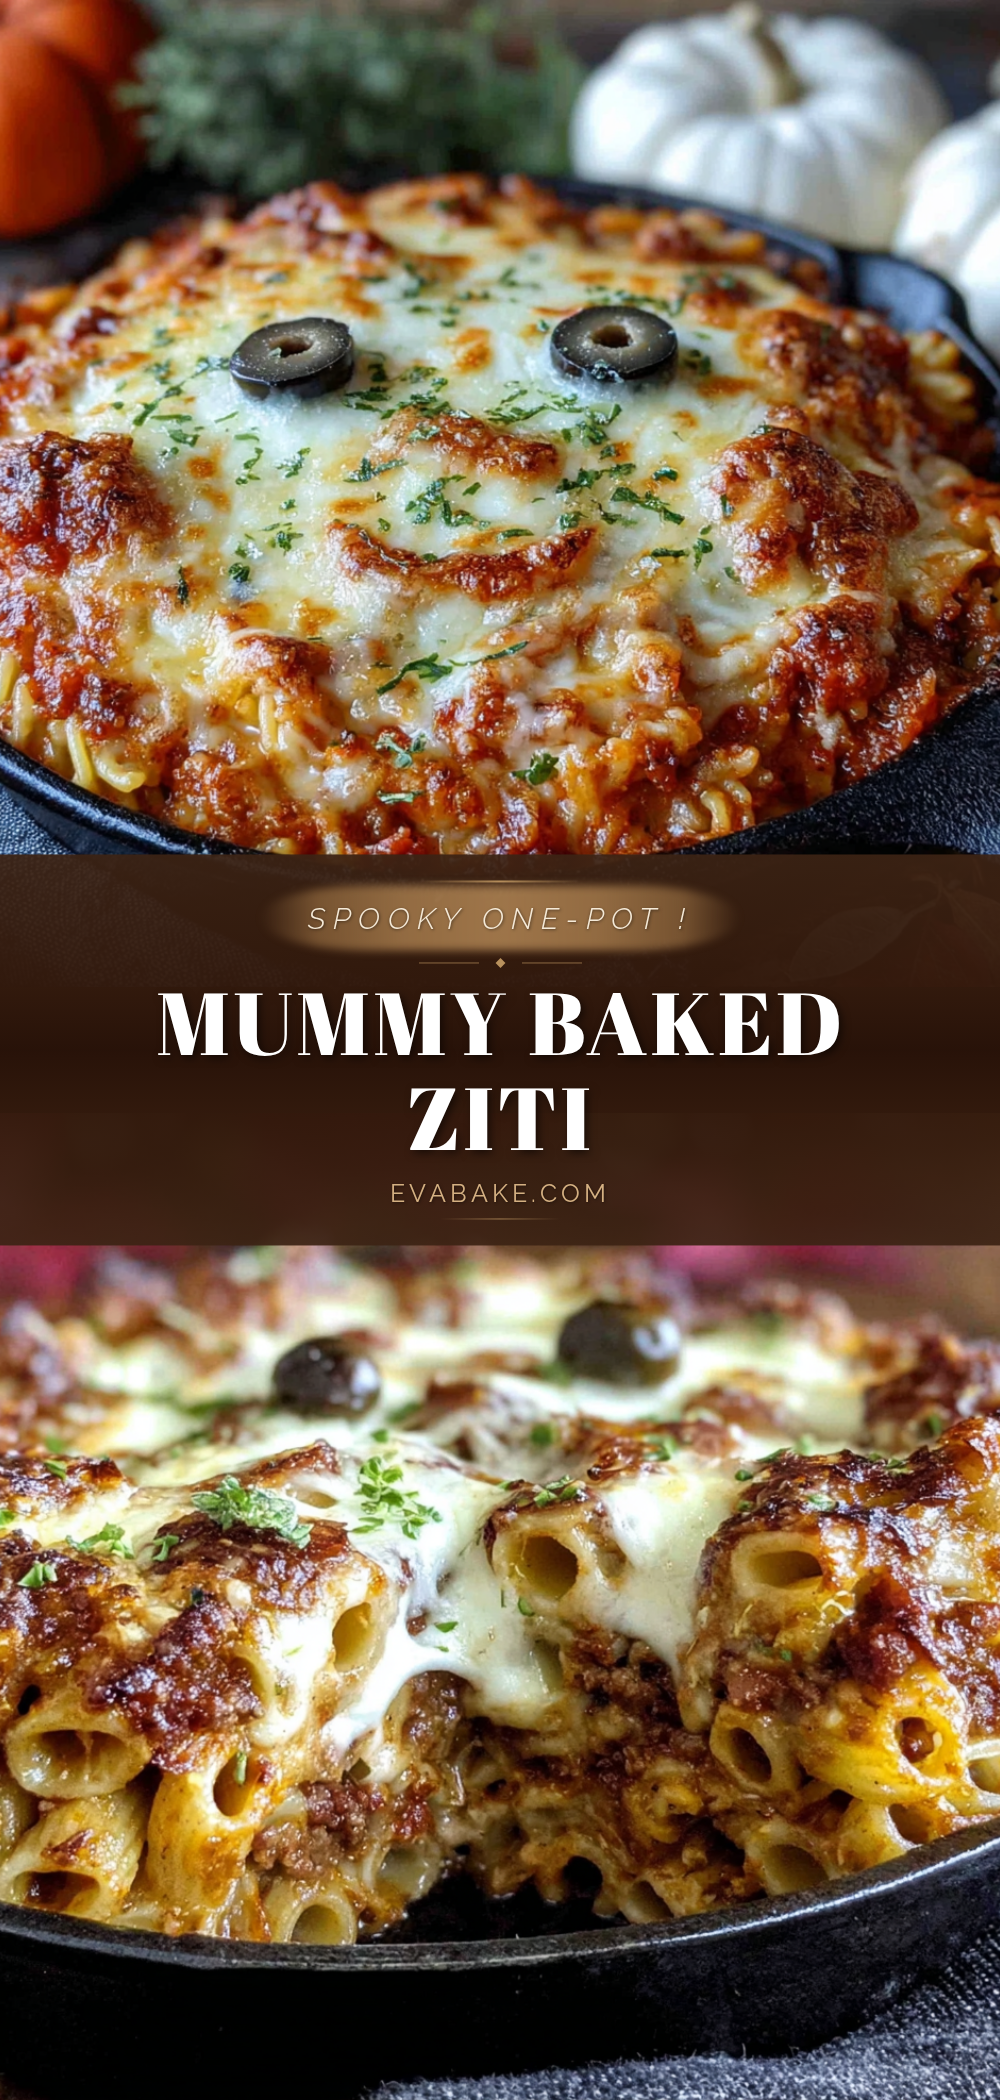
Easy One-Pot Mummy Baked Ziti: Best Halloween Dinner

A fun and delicious Halloween dinner that comes together in a single pot. Creamy, cheesy baked ziti with a mummy design made from mozzarella bandages and olive eyes.
- Prep Time: 15 minutes
- Cook Time: 30 minutes
- Total Time: 45 minutes
- Yield: 6 servings 1x
- Category: Main Course
- Cuisine: Italian-American
Ingredients
- 1 pound ground beef (80/20)
- 1 medium yellow onion, finely diced
- 4 cloves garlic, minced
- 1 teaspoon salt
- 1/2 teaspoon black pepper
- 1 teaspoon dried oregano
- 1/2 teaspoon dried basil
- 1/4 teaspoon red pepper flakes (optional)
- 1 can (28 ounces) crushed tomatoes
- 2 cups water
- 12 ounces ziti or penne pasta, uncooked
- 1 cup ricotta cheese (full-fat)
- 2 cups shredded mozzarella cheese, divided
- 1/2 cup grated Parmesan cheese
- 1 cup shredded mozzarella cheese (for bandages)
- 2 pitted black olives (for eyes)
- 1 tablespoon chopped fresh parsley (optional, for garnish)
Instructions
- Brown the meat (5 minutes): Place Dutch oven over medium-high heat, add ground beef, and cook until browned and crumbly. Transfer to a plate, leaving about 1 tablespoon of fat in the pot.
- Sauté the aromatics (3 minutes): Reduce heat to medium. Add diced onion and cook 2-3 minutes until translucent. Add minced garlic and cook 30 seconds until fragrant.
- Build the sauce (2 minutes): Pour in crushed tomatoes, water, salt, pepper, oregano, basil, and red pepper flakes. Stir, scraping up browned bits. Bring to a gentle simmer.
- Add the pasta (15-18 minutes): Stir in uncooked ziti and browned beef. Ensure pasta is mostly submerged. Cover, reduce heat to low, and simmer gently. Stir once halfway through. Cook until al dente.
- Incorporate the cheeses (2 minutes): Remove from heat. Stir in ricotta, 1 cup mozzarella, and Parmesan until creamy. Adjust consistency with water or milk if needed.
- Create the mummy design (5 minutes): Sprinkle remaining 1 cup mozzarella over the top in long, uneven strips to resemble bandages. Leave a gap near the top for eyes. Place two black olives in the gap, pressing gently.
- Broil for the finish (2-3 minutes): If oven-safe, transfer to oven and broil on high until cheese is bubbly and browned. Watch closely to avoid burning.
- Rest and serve (5 minutes): Let ziti rest for 5 minutes before serving. Garnish with parsley if desired.
Notes
Use low-moisture mozzarella for bandages to prevent sliding. Let dish rest 5 minutes after broiling. For gluten-free, use gluten-free pasta. For dairy-free, use plant-based cheeses. Can be assembled ahead and broiled before serving.
Nutrition
- Serving Size: 1 serving (about 1/6
- Calories: 520
- Sugar: 8
- Sodium: 780
- Fat: 22
- Saturated Fat: 10
- Carbohydrates: 48
- Fiber: 4
- Protein: 32
Keywords: Halloween dinner, baked ziti, one-pot pasta, mummy pasta, easy dinner, comfort food


