The pumpkin puree was already open on the counter, leftover from a batch of muffins I’d made two days before. I had every intention of using it up, but the week got busy, and there it sat, staring at me every time I walked past. I hate wasting food, especially pumpkin puree in the fall. It feels almost criminal. So I decided to throw together something quick, something that didn’t require pulling out the stand mixer or waiting for butter to soften. I wanted a bar. A thick, soft, chewy bar that tasted like everything good about autumn but didn’t demand a lot of effort. I grabbed a bowl, a wooden spoon, and started dumping things in. No plan, just instinct.
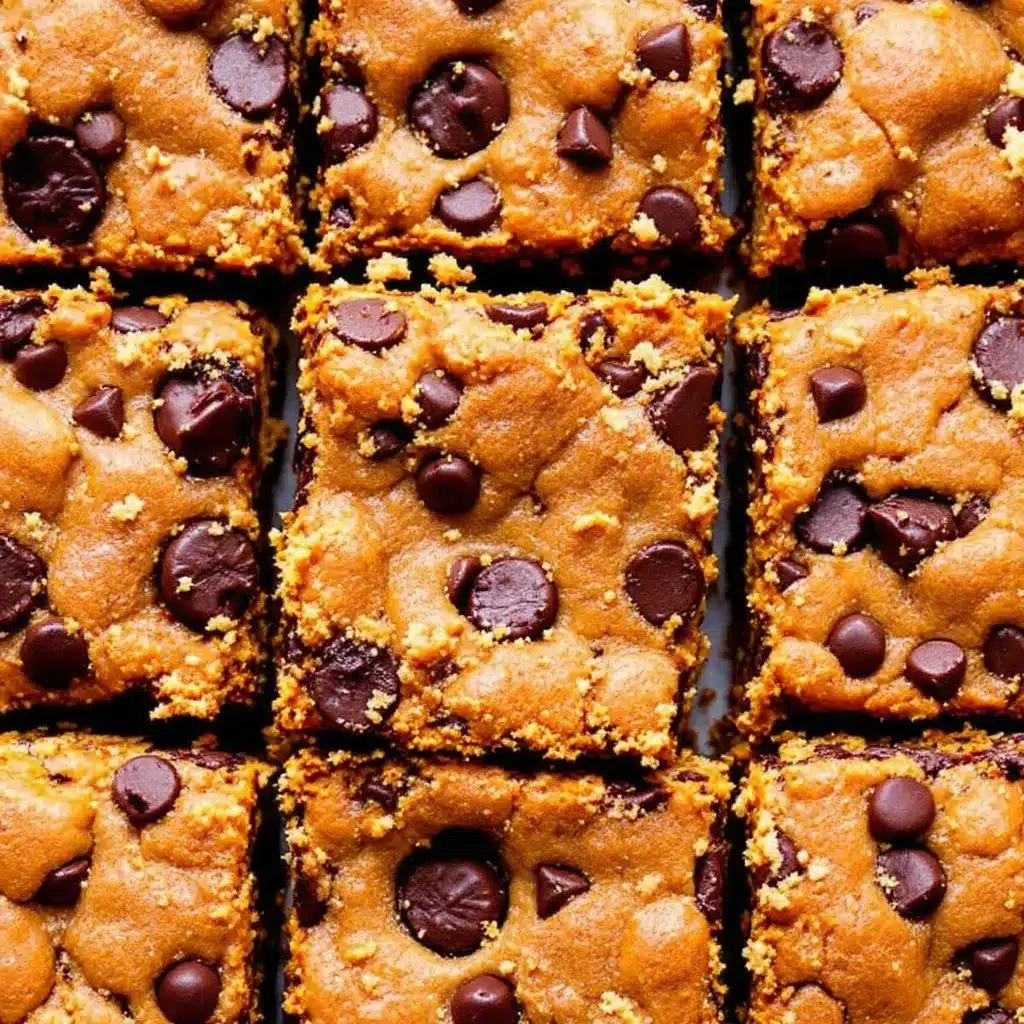
I added chocolate chips because, honestly, when is that a bad idea? I figured the pumpkin would keep things moist, the spices would do their cozy thing, and the chocolate would handle the rest. What came out of the oven surprised me. The edges were slightly crisp, the center was tender, and the whole kitchen smelled like a candle store had exploded in the best way. I let them cool for maybe ten minutes before cutting into one. It held together perfectly, no crumbling, no sinking middle, just a beautiful, golden-brown bar with melty chocolate pockets throughout.
I texted a photo to my sister with the caption “accidental win.” She called me within thirty seconds demanding the recipe. That’s when I knew these pumpkin chocolate chip cookie bars were something special. They weren’t fussy. They didn’t need a special occasion. They just worked. And honestly, that’s my favorite kind of recipe. The kind that comes together when you’re not trying too hard and ends up being the thing everyone asks for again and again.
Since that first batch, I’ve made them at least four times in the last three weeks. They’ve gone to a potluck, a coffee date, and straight into my face at 10 p.m. with a glass of cold milk. Every single time, someone asks for the recipe. So here it is. My no-stress, always-delicious, perfectly spiced pumpkin chocolate chip cookie bars.
Why You’ll Love This Recipe
- Quick & Easy : These bars come together in about 35 minutes total, with only 10 minutes of active prep. No chilling, no rolling, no fuss. Just mix, spread, and bake.
- Simple Ingredients : You probably already have everything in your pantry. Pumpkin puree, butter, sugar, flour, eggs, and chocolate chips. Nothing weird or hard to find.
- Perfect for Fall Gatherings : Whether it’s a Halloween party, Thanksgiving dessert table, or just a cozy weekend treat, these bars fit right in. They’re portable, sliceable, and everyone loves them.
- Crowd-Pleaser : Kids devour them. Adults go back for seconds. Even people who “don’t like pumpkin” have been converted. The chocolate does a lot of heavy lifting here.
- Unbelievably Delicious : The texture is what gets me every time. Soft and tender in the middle, slightly crisp around the edges, with gooey chocolate in every bite. It’s comfort food in bar form.
What makes these different from every other pumpkin bar recipe out there? It’s the ratio. I’ve tested this more times than I care to admit. Too much pumpkin and they get gummy. Too little and they’re dry. The balance here gives you that perfect pumpkin flavor without turning the texture into a cake. These are cookie bars, not pumpkin bread in a different shape. They’re denser, chewier, and way more satisfying.
I’m not a professional baker. I’m just someone who loves good food and hates complicated recipes. These bars reflect that. They’re forgiving, adaptable, and genuinely delicious. The first time I made them, I wasn’t sure they’d work. Now I can’t imagine fall without them.
What Ingredients You Will Need
This recipe uses simple, wholesome ingredients to deliver bold fall flavor and that perfect soft-baked texture. Most of these are pantry staples, so you might not even need a grocery run.
- 1 cup pumpkin puree (not pumpkin pie filling) – Make sure it’s 100% pure pumpkin. I prefer Libby’s for consistent texture and flavor. Pat it lightly with a paper towel if it seems watery.
- ½ cup unsalted butter, melted and slightly cooled – Butter gives these bars richness and helps create that tender crumb. Salted butter works too, just reduce the added salt slightly.
- ¾ cup granulated sugar – Adds sweetness and helps with structure. You can reduce this to ½ cup if you prefer less sweet bars.
- ¼ cup brown sugar, packed – Adds moisture and a hint of molasses flavor that pairs beautifully with pumpkin and spice.
- 1 large egg, at room temperature – Helps bind everything together. If your egg is cold, place it in warm water for 5 minutes.
- 1 teaspoon vanilla extract – Pure vanilla adds depth. Imitation works fine in a pinch.
- 1½ cups all-purpose flour – Spoon and level your flour for accurate measurement. Scooping directly can pack it down and make the bars dry.
- 1 teaspoon baking soda – Helps the bars rise just enough without puffing up too much.
- ½ teaspoon salt – Balances the sweetness and enhances the spices.
- 2 teaspoons pumpkin pie spice – You can use store-bought or make your own with cinnamon, nutmeg, ginger, and cloves. I like using a heavy hand here because pumpkin loves spice.
- 1 cup semi-sweet chocolate chips – I use Guittard or Ghirardelli for the best melt. You can also use dark chocolate, milk chocolate, or even white chocolate chips.
Optional add-ins: ½ cup chopped pecans or walnuts for crunch, or a sprinkle of flaky sea salt on top before baking.
Substitution notes: For a gluten-free version, use a 1:1 gluten-free flour blend. For dairy-free, swap the butter with vegan butter or coconut oil (use refined for neutral flavor). The egg can be replaced with a flax egg (1 tablespoon flaxseed meal + 3 tablespoons water, let sit for 5 minutes).
Equipment Needed
- 8×8-inch baking pan – A metal pan gives crisper edges, while glass or ceramic works fine too. Just keep an eye on baking time.
- Mixing bowls – One large, one medium. Nothing fancy needed.
- Whisk and wooden spoon or spatula – A whisk for the wet ingredients, a spoon for folding.
- Parchment paper – Lining the pan makes removal and slicing so much easier. I never skip this.
- Measuring cups and spoons – Accurate measurements matter here, especially for the flour.
- Cooling rack – Helps the bars cool evenly so they set properly before slicing.
If you don’t have an 8×8 pan, a 9×9 will work but the bars will be slightly thinner and may bake a few minutes faster. A 9×13 pan will make thinner bars too, just reduce baking time to around 18-20 minutes. I’ve used a disposable foil pan in a pinch and it worked fine.
Preparation Method
- Preheat your oven to 350°F (175°C). Line an 8×8-inch baking pan with parchment paper, leaving some overhang on two sides. This creates handles for lifting the bars out later. Lightly grease the parchment if you’re worried about sticking, though I usually don’t need to.
- In a large mixing bowl, whisk together the melted butter, granulated sugar, and brown sugar. Whisk until smooth and well combined, about 30 seconds. The mixture should look glossy and smell like caramelized butter. If your butter is too hot, let it cool a minute before adding the egg so it doesn’t scramble.
- Add the pumpkin puree, egg, and vanilla extract. Whisk vigorously until everything is fully incorporated and the batter looks smooth and uniform. It will be slightly thick and glossy. Scrape down the sides of the bowl with a spatula.
- In a separate medium bowl, whisk together the flour, baking soda, salt, and pumpkin pie spice. Make sure there are no clumps, especially with the baking soda. I like to give the spices a good stir because they tend to settle at the bottom of the jar.
- Gradually add the dry ingredients to the wet ingredients. Fold gently with a spatula or wooden spoon until just combined. Do not overmix. A few streaks of flour are okay. Overmixing will develop gluten and make the bars tough instead of tender.
- Fold in the chocolate chips. Reserve about 2 tablespoons to sprinkle on top for a prettier presentation. Fold just until the chips are evenly distributed. The batter will be thick and slightly sticky, similar to a soft cookie dough.
- Transfer the batter to the prepared pan. Spread it evenly using the spatula. It will be thick, so take your time to get it into the corners. The top doesn’t need to be perfectly smooth, rustic is fine.
- Sprinkle the reserved chocolate chips on top. Press them in very lightly so they stick. This step is optional but makes the bars look bakery-style.
- Bake for 22-26 minutes. The edges should be golden brown and set, while the center will still look slightly soft and puffed. A toothpick inserted into the center should come out with a few moist crumbs, not wet batter. If it comes out clean, you’ve overbaked them slightly.
- Let the bars cool in the pan on a wire rack for at least 20 minutes. This is important. The bars need time to set, or they’ll fall apart when you try to slice them. After 20 minutes, use the parchment overhang to lift them out and transfer to a cutting board. Let cool completely before slicing into 9 or 16 squares.
My personal tip: For cleaner slices, refrigerate the cooled bars for 15 minutes before cutting. Use a sharp knife and wipe it clean between cuts. You’ll get those perfect, Instagram-worthy edges.
Cooking Tips & Techniques
I’ve made this recipe enough times to know where things can go wrong. Here’s what I’ve learned the hard way so you don’t have to.
Don’t skip the parchment paper. I know it’s tempting to just grease the pan and hope for the best. But these bars are soft and delicate when warm, and trying to flip them out without parchment is a recipe for frustration. The overhang trick is a game-changer. Trust me.
Pat your pumpkin puree dry. Pumpkin puree contains a lot of water. If you dump it straight into the batter without blotting, your bars can turn out gummy or take forever to bake. Just spread the puree on a paper towel, lay another on top, and press gently. You’ll remove about a tablespoon of liquid, which makes a noticeable difference in texture.
Measure your flour correctly. This is the most common mistake in baking. Scooping flour with your measuring cup packs it down and adds extra flour, making your bars dry and dense. Instead, spoon the flour into the cup, then level it off with a knife. It takes five extra seconds and saves you from disappointing results.
Watch the bake time closely. Every oven runs differently. My old oven took exactly 24 minutes. My current one hits the sweet spot at 23 minutes. Start checking at 20 minutes. The edges should be golden and pulling away from the pan slightly. The center will look puffed and soft, but not jiggly. If you see cracks forming on top, they’re probably overdone.
Let them cool. I know it’s hard. The smell is intoxicating, and you want to dig in immediately. But cutting into warm bars is the fastest way to end up with a crumbly mess. The bars continue to set as they cool. Give them at least 20 minutes in the pan, then another 10 on the rack. Your patience will be rewarded with perfect, clean slices.
Room temperature ingredients matter. Cold egg can seize the melted butter and create a lumpy batter. Let your egg sit on the counter for 15 minutes, or place it in a bowl of warm water for 5 minutes. The batter comes together much more smoothly.
Variations & Adaptations
One of the best things about these bars is how adaptable they are. I’ve tried several variations, and they’ve all been winners.
- Gluten-Free Version : Swap the all-purpose flour with a 1:1 gluten-free baking blend. I’ve used Bob’s Red Mill and King Arthur with great results. The texture is slightly more tender, but still delicious. Add an extra tablespoon of flour if the batter seems too wet.
- Vegan Version : Use melted coconut oil or vegan butter instead of dairy butter. Replace the egg with a flax egg (1 tablespoon flaxseed meal + 3 tablespoons water, let sit for 5 minutes). Use dairy-free chocolate chips. The bars will be slightly denser but still incredibly good.
- Spice It Up : Add ½ teaspoon of ground ginger or cardamom for a more complex flavor profile. I once added a pinch of cayenne pepper, and the subtle heat with the chocolate was surprisingly addictive.
- Nutty Crunch : Fold in ½ cup of toasted pecans or walnuts along with the chocolate chips. Toast them first in a dry pan over medium heat for 3-4 minutes until fragrant. It adds a wonderful crunch and nutty depth.
- White Chocolate Cranberry : Swap the semi-sweet chips for white chocolate and add ½ cup dried cranberries. The tartness of the cranberries balances the sweetness perfectly. This version is especially festive for holiday gatherings.
- Brown Butter Upgrade : For an even richer flavor, brown the butter before using. Melt it in a saucepan over medium heat, swirling occasionally, until it turns golden brown and smells nutty. Let it cool slightly before using. It takes about 5 minutes and adds incredible depth.
My personal favorite variation? The brown butter version with dark chocolate chips and a sprinkle of flaky sea salt on top. It’s what I make when I want to impress people, but it’s still just as easy as the original.
Serving & Storage Suggestions
These pumpkin chocolate chip cookie bars are best served at room temperature or slightly warm. If you want that gooey chocolate experience, pop a bar in the microwave for 10-15 seconds before serving. It makes the chocolate melty and the bar extra soft.
They’re perfect on their own, but they also pair beautifully with a scoop of vanilla ice cream or a dollop of whipped cream. For a cozy fall dessert, serve them alongside a warm mug of spiced apple cider or a pumpkin spice latte. I’ve also crumbled them over vanilla yogurt for a decadent breakfast, no regrets.
Storage: Store leftover bars in an airtight container at room temperature for up to 4 days. They stay soft and delicious. If your kitchen is warm, you can refrigerate them, but let them come to room temperature before serving for the best texture.
Freezing: These bars freeze beautifully. Wrap individual bars tightly in plastic wrap, then place them in a freezer-safe bag or container. They’ll keep for up to 3 months. To thaw, just leave them on the counter for about 30 minutes, or microwave for 20-30 seconds. I always keep a stash in the freezer for unexpected guests or late-night cravings.
Flavor development: Honestly, these bars taste even better the next day. The spices have time to meld, and the texture becomes even more tender. So don’t be afraid to make them a day ahead. They’ll be a hit either way.
Nutritional Information & Benefits
Here’s an approximate nutritional breakdown per bar (based on 9 servings):
- Calories: 310
- Fat: 16g
- Carbohydrates: 41g
- Fiber: 2g
- Sugar: 26g
- Protein: 4g
Pumpkin puree is packed with vitamin A, fiber, and antioxidants. It’s also low in calories, so you get some nutritional benefit even in a dessert. The chocolate chips add a dose of antioxidants too, especially if you use dark chocolate. The butter and sugar are what they are, but this is a treat, not a health food. And that’s okay.
Dietary considerations: This recipe can be made gluten-free, dairy-free, and vegan with the substitutions mentioned above. It contains eggs and dairy in the original version. For a lower-sugar option, reduce the granulated sugar to ½ cup and use dark chocolate chips with no added sugar.
I believe in balance. These bars are meant to be enjoyed without guilt. They’re a celebration of fall flavors, and sometimes you just need a little sweetness in your life.
Conclusion
These pumpkin chocolate chip cookie bars have become my go-to fall recipe for a reason. They’re simple enough for a weekday baking session but impressive enough to bring to any gathering. The texture is spot on, soft and chewy with those irresistible crisp edges. The pumpkin and spice combo is cozy without being overwhelming. And the chocolate? It ties everything together in the most delicious way.
I love that this recipe is forgiving. You can tweak it, adapt it, make it your own. That’s the beauty of a good bar recipe. It doesn’t demand perfection. It just asks for a little love and a hot oven.
If you make these, I’d love to hear how they turn out. Leave a comment below and let me know if you tried any variations. Did you add nuts? Use white chocolate? Brown the butter? Tell me all about it. And if you’re looking for more easy fall treats, check out my moist pumpkin chocolate chip bread with cream cheese filling or these cozy pumpkin coffee cake with brown sugar streusel. They’re both perfect for the season.
Happy baking, friends. I hope these bars bring a little warmth and sweetness to your fall.
Frequently Asked Questions
Can I use pumpkin pie filling instead of pumpkin puree?
No, please don’t. Pumpkin pie filling is pre-sweetened and spiced, which will throw off the sugar and spice balance in this recipe. Stick with 100% pure pumpkin puree for the best results.
Why are my bars too soft or falling apart?
They likely need more time to cool and set. These bars are very tender when warm. Let them cool completely in the pan, then refrigerate for 15 minutes before slicing. If they’re still too soft, you may have added too much pumpkin puree or not enough flour.
Can I make these bars ahead of time?
Absolutely. In fact, they taste even better the next day. Bake them, cool completely, and store in an airtight container at room temperature. They’ll stay fresh for up to 4 days. You can also freeze them for up to 3 months.
Can I use a different size pan?
Yes, but the baking time will change. A 9×9 pan will give you thinner bars that bake in about 18-20 minutes. A 9×13 pan will make very thin bars that bake in about 15-18 minutes. Keep an eye on them and check for doneness early.
How do I make these bars more pumpkin-flavored?
Add an extra teaspoon of pumpkin pie spice and use dark brown sugar instead of light. You can also add ¼ teaspoon of ground ginger or cloves. Just don’t add more pumpkin puree, or the texture will become gummy.
Pin This Recipe!
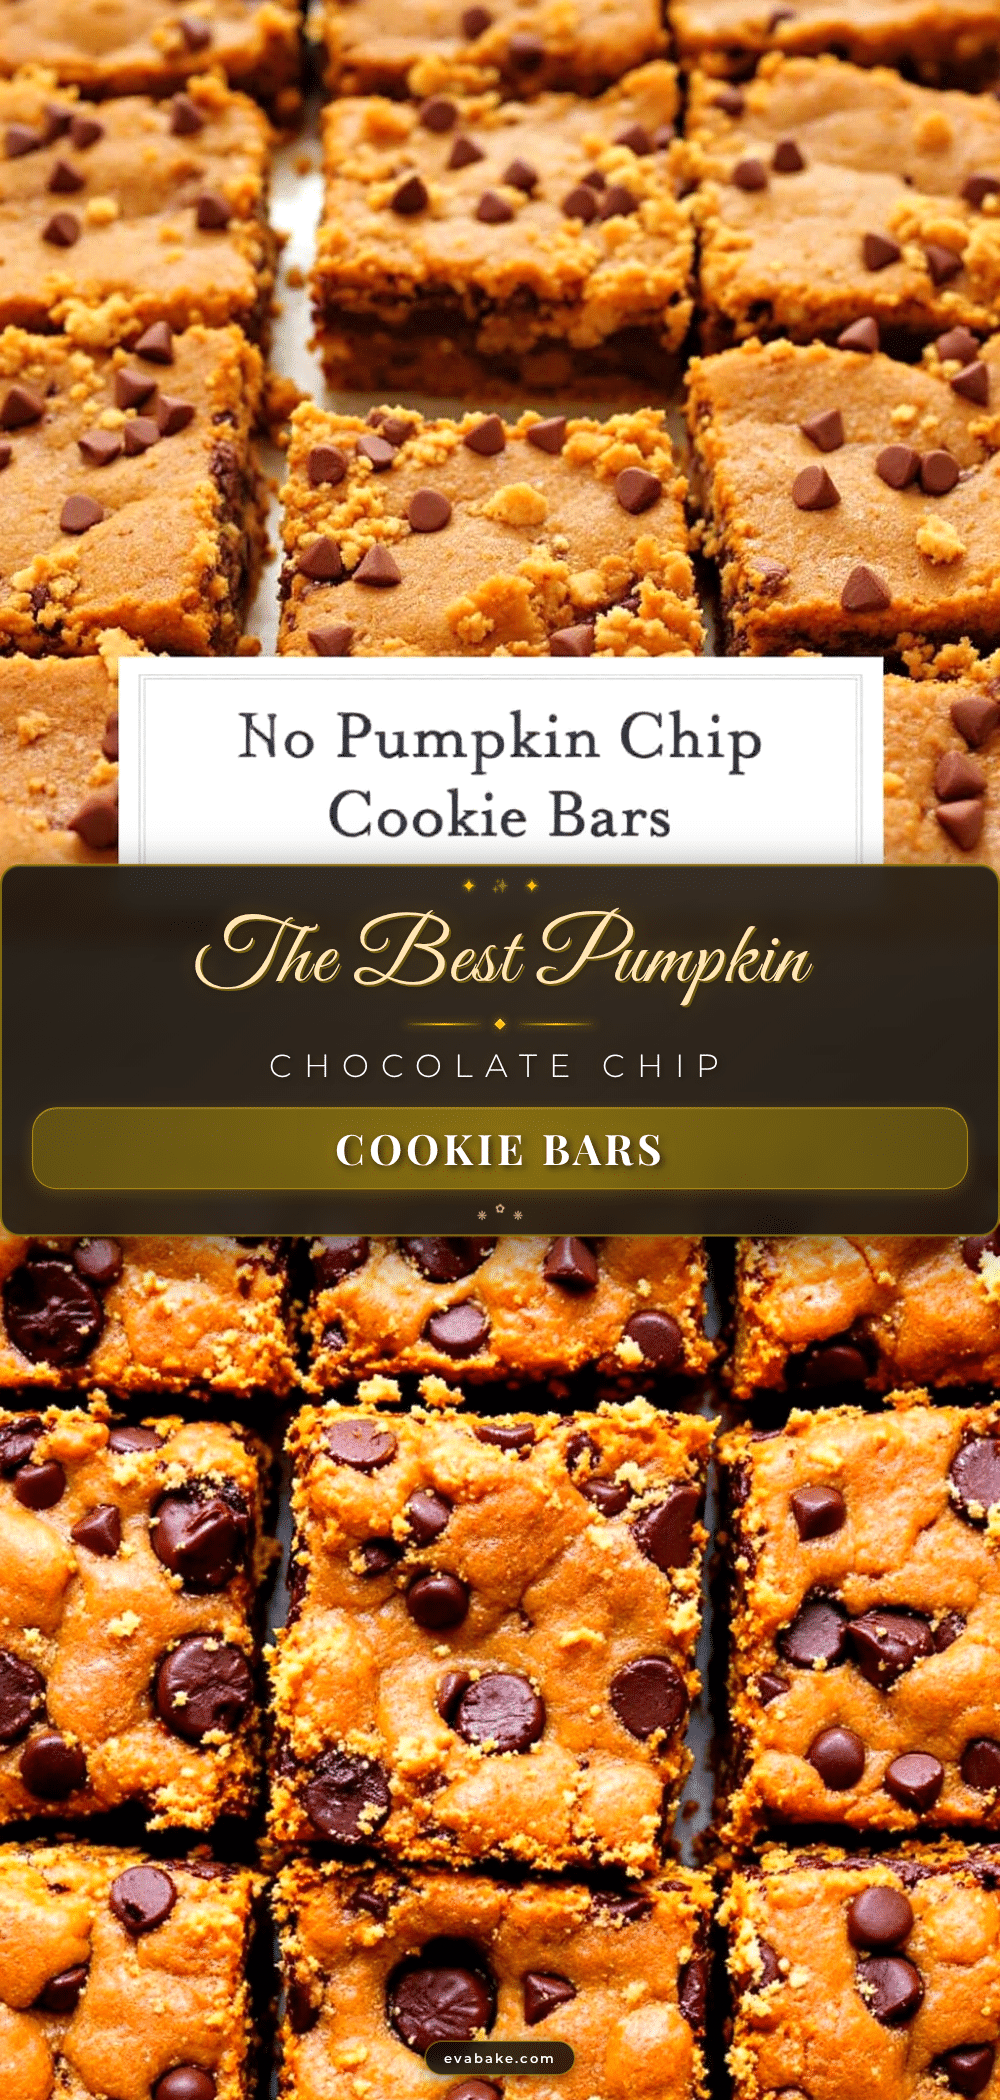
Easy Pumpkin Chocolate Chip Cookie Bars: Best Fall Dessert
These pumpkin chocolate chip cookie bars are thick, soft, and chewy with crisp edges and gooey chocolate in every bite. They come together in about 35 minutes with simple pantry ingredients, making them the perfect no-stress fall dessert.
- Prep Time: 10 minutes
- Cook Time: 25 minutes
- Total Time: 35 minutes
- Yield: 9 servings 1x
- Category: Dessert
- Cuisine: American
Ingredients
- 1 cup pumpkin puree (not pumpkin pie filling)
- ½ cup unsalted butter, melted and slightly cooled
- ¾ cup granulated sugar
- ¼ cup brown sugar, packed
- 1 large egg, at room temperature
- 1 teaspoon vanilla extract
- 1½ cups all-purpose flour
- 1 teaspoon baking soda
- ½ teaspoon salt
- 2 teaspoons pumpkin pie spice
- 1 cup semi-sweet chocolate chips
Instructions
- Preheat your oven to 350°F (175°C). Line an 8×8-inch baking pan with parchment paper, leaving some overhang on two sides. Lightly grease the parchment if desired.
- In a large mixing bowl, whisk together the melted butter, granulated sugar, and brown sugar until smooth and well combined, about 30 seconds.
- Add the pumpkin puree, egg, and vanilla extract. Whisk vigorously until fully incorporated and smooth. Scrape down the sides of the bowl.
- In a separate medium bowl, whisk together the flour, baking soda, salt, and pumpkin pie spice until no clumps remain.
- Gradually add the dry ingredients to the wet ingredients. Fold gently with a spatula or wooden spoon until just combined. Do not overmix.
- Fold in the chocolate chips, reserving about 2 tablespoons to sprinkle on top. Fold until evenly distributed. The batter will be thick and slightly sticky.
- Transfer the batter to the prepared pan and spread it evenly using the spatula. Sprinkle the reserved chocolate chips on top and press them in lightly.
- Bake for 22-26 minutes. The edges should be golden brown and set, while the center will still look slightly soft and puffed. A toothpick inserted into the center should come out with a few moist crumbs.
- Let the bars cool in the pan on a wire rack for at least 20 minutes. Then use the parchment overhang to lift them out and transfer to a cutting board. Let cool completely before slicing into 9 or 16 squares.
Notes
For cleaner slices, refrigerate the cooled bars for 15 minutes before cutting. Pat pumpkin puree dry with a paper towel to remove excess moisture. Measure flour by spooning and leveling. Let bars cool completely before slicing to prevent crumbling.
Nutrition
- Serving Size: 1 bar (based on 9 se
- Calories: 310
- Sugar: 26
- Sodium: 280
- Fat: 16
- Saturated Fat: 9
- Carbohydrates: 41
- Fiber: 2
- Protein: 4
Keywords: pumpkin chocolate chip cookie bars, easy fall dessert, pumpkin bars, chocolate chip cookie bars, pumpkin dessert


