I’d claimed to hate eggnog for about fifteen years. Fifteen years of wrinkling my nose at holiday parties, of politely declining cups thrust in my direction with a tight smile. Then last December, my friend Marcus caught me red-handed in his kitchen, standing over the stove with a whisk in one hand and a spoon in the other, scraping the bottom of a saucepan that had held his grandmother’s recipe. I didn’t even hear him come in. The look on his face was pure, unholy triumph.
Here’s the thing—I didn’t actually hate eggnog. I hated the store-bought stuff. You know the one I mean. That thick, syrupy, almost artificially yellow liquid that comes in a carton and tastes more like liquid custard than something you’d actually want to drink. It’s too sweet, too heavy, and honestly, it sits in your stomach like a brick. I tried it once at a office party and spent the rest of the night regretting every sip. After that, I just told people I wasn’t an eggnog person. It was easier.
But then Marcus mentioned his family’s recipe over coffee one morning, and something about the way he described it—light, creamy, with just a whisper of fresh nutmeg—made me pause. He said it was nothing like the carton stuff. Said it was almost a different drink entirely. I was skeptical, but I’m also nosy, so when he offered to show me how to make it, I showed up at his place on a Tuesday evening with a dozen eggs and a stubborn attitude. I fully expected to be proven right.
Instead, I spent the next hour watching him crack eggs, separate yolks, and whisk everything together with a patience I didn’t know I possessed. The kitchen smelled like vanilla and warm spice, and when he finally handed me a small glass, I took it more out of politeness than curiosity. That first sip caught me completely off guard. It was light—almost airy—with a creamy texture that coated my tongue without feeling heavy. The fresh nutmeg hit right at the end, warm and slightly peppery, cutting through the richness in a way I’d never experienced. I finished the glass before I realized what I’d done, and when I looked up, Marcus was grinning like he’d just won a bet.
I asked for the recipe that night. He wrote it down on a napkin, and I’ve been making it ever since. Honestly, I think about that moment every time I grate fresh nutmeg over a finished batch—the way one good recipe can completely rewrite what you thought you knew about a food. Maybe you’ve been there too. Maybe there’s something you swore you hated, until someone made it the right way. This eggnog is that recipe for me, and I keep making it because it reminds me that sometimes being wrong tastes really, really good.
Why You’ll Love This Recipe
This isn’t your average holiday eggnog. It’s lighter, creamier, and actually balanced enough that you can enjoy a glass without feeling like you need a nap afterward. I’ve tested this recipe at least a dozen times over the past year, tweaking the ratios, adjusting the sweetness, and even dragging a few skeptical friends through blind taste tests. Every single person—including my sister who also claimed to hate eggnog—ended up asking for seconds.
- Quick & Easy: You can have this ready in about 20 minutes of active time. The rest is just chilling, which means you can make it ahead and forget about it until you’re ready to serve.
- Simple Ingredients: Eggs, milk, cream, sugar, vanilla, and fresh nutmeg. That’s it. No weird stabilizers, no artificial flavors, nothing you can’t find at any grocery store.
- Perfect for Holiday Gatherings: Whether it’s Christmas morning, a cozy night in, or a festive party, this eggnog fits right in. It’s impressive enough to serve guests but simple enough to make on a random Tuesday.
- Crowd-Pleaser: I’ve served this to eggnog lovers and eggnog skeptics alike. The light texture and fresh nutmeg flavor win over just about everyone. Even my uncle, who only drinks black coffee, asked for a refill.
- Unbelievably Delicious: The combination of creamy texture, balanced sweetness, and that warm, aromatic fresh nutmeg is genuinely next-level. It’s comfort in a glass, but somehow lighter than you’d expect.
What makes this recipe different from the dozens of other eggnog recipes out there? It’s the technique. Most recipes call for heavy cream and whole milk, which makes the final drink thick and almost syrupy. This version uses a higher ratio of milk to cream, plus a gentle tempering method that gives you that silky texture without the weight. The fresh nutmeg isn’t just a garnish—it’s the star. Grating it yourself right before serving releases essential oils that pre-ground nutmeg simply can’t match. It’s the difference between a good eggnog and one that makes people close their eyes after the first sip.
This recipe isn’t just good. It’s the kind that makes you wonder why you ever settled for the carton stuff. It’s holiday tradition reimagined—lighter, fresher, but with the same soul-soothing satisfaction that makes eggnog a seasonal staple. Perfect for impressing guests without stress, or turning a quiet evening into something a little more special.
What Ingredients You Will Need
This recipe uses simple, wholesome ingredients to deliver that signature light and creamy texture without any of the heaviness you get from store-bought versions. Most of these are pantry staples, but a couple—like fresh nutmeg—are worth seeking out for the difference they make.
- 6 large egg yolks (room temperature works best for smooth tempering; save the whites for another use like meringues or omelets)
- 1/2 cup granulated sugar (adds just enough sweetness without overwhelming; I use organic cane sugar for a cleaner flavor)
- 2 cups whole milk (provides the creamy base; don’t substitute with skim or low-fat here—the texture won’t be the same)
- 1 cup heavy cream (adds richness without making it too thick; you can use light cream if you want it even lighter)
- 1 teaspoon vanilla extract (use pure vanilla extract, not imitation; it makes a noticeable difference in depth of flavor)
- 1/2 teaspoon ground cinnamon (adds warmth and complexity; I prefer Ceylon cinnamon for its milder, sweeter profile)
- 1/4 teaspoon ground cloves (just a pinch for that classic holiday spice note; it’s potent so don’t overdo it)
- 1/2 teaspoon fresh grated nutmeg (plus extra for garnish; this is non-negotiable for the best flavor—I recommend grating it directly over the finished eggnog)
- Pinch of sea salt (balances the sweetness and enhances all the other flavors; don’t skip it)
- Optional: 1/4 cup bourbon, rum, or brandy (for an adult version; I prefer bourbon for its warm, vanilla-like notes, but dark rum works beautifully too)
Ingredient Tips & Sourcing: For the best texture, use eggs that are as fresh as possible—farm-fresh if you can find them. The yolks are what give eggnog its rich, creamy body, so quality matters here. I personally prefer using organic, pasture-raised eggs for their brighter yolks and cleaner flavor. For the milk and cream, I’ve found that local dairy brands often produce the freshest taste. If you’re using a plant-based milk alternative, I’d recommend oat milk for its creaminess, but keep in mind the texture will be slightly thinner.
Substitution Guidance: If you need a dairy-free version, you can substitute the whole milk with full-fat oat milk and the heavy cream with canned coconut cream (the thick part from a can of full-fat coconut milk). The flavor will shift slightly, but it’s still delicious. For a lower-sugar option, reduce the sugar to 1/3 cup or use a monk fruit sweetener blend. Just note that the texture may be slightly less creamy. And if you’re avoiding alcohol, the non-alcoholic version is just as satisfying—the fresh nutmeg and vanilla provide plenty of complexity on their own.
Equipment Needed
You don’t need anything fancy to make this eggnog, which is part of what makes it so approachable. Here’s what you’ll need:
- Medium saucepan (for heating the milk mixture; a heavy-bottomed pan works best to prevent scorching)
- Large mixing bowl (for whisking the egg yolks and sugar; glass or stainless steel is ideal)
- Whisk (a balloon whisk works great for incorporating air and preventing lumps)
- Fine-mesh strainer (this is key for catching any cooked egg bits and ensuring a silky smooth texture)
- Nutmeg grater or Microplane (a Microplane is my go-to for fresh nutmeg—it gives you that fine, fluffy texture that dissolves beautifully into the eggnog)
- Measuring cups and spoons (accuracy matters for this recipe, especially with the spices)
- Glass pitcher or jar with lid (for storing the finished eggnog in the fridge)
- Small saucepan or heatproof bowl (if you’re using a double boiler method, though a regular saucepan works fine)
If you don’t have a fine-mesh strainer, you can use cheesecloth or even a clean kitchen towel, but the strainer is easier and gives you more control. For the nutmeg, whole nutmeg seeds and a grater are a small investment that pays off big in flavor. I’ve tried pre-ground nutmeg in a pinch, and honestly, it’s just not the same. The fresh stuff has this aromatic, almost floral quality that makes the whole recipe sing.
I’ve made this eggnog in a cramped apartment kitchen with a single burner and a cheap whisk, and it turned out just fine. Don’t let equipment hold you back. If you have a pot, a bowl, and something to stir with, you’re good to go.
Preparation Method
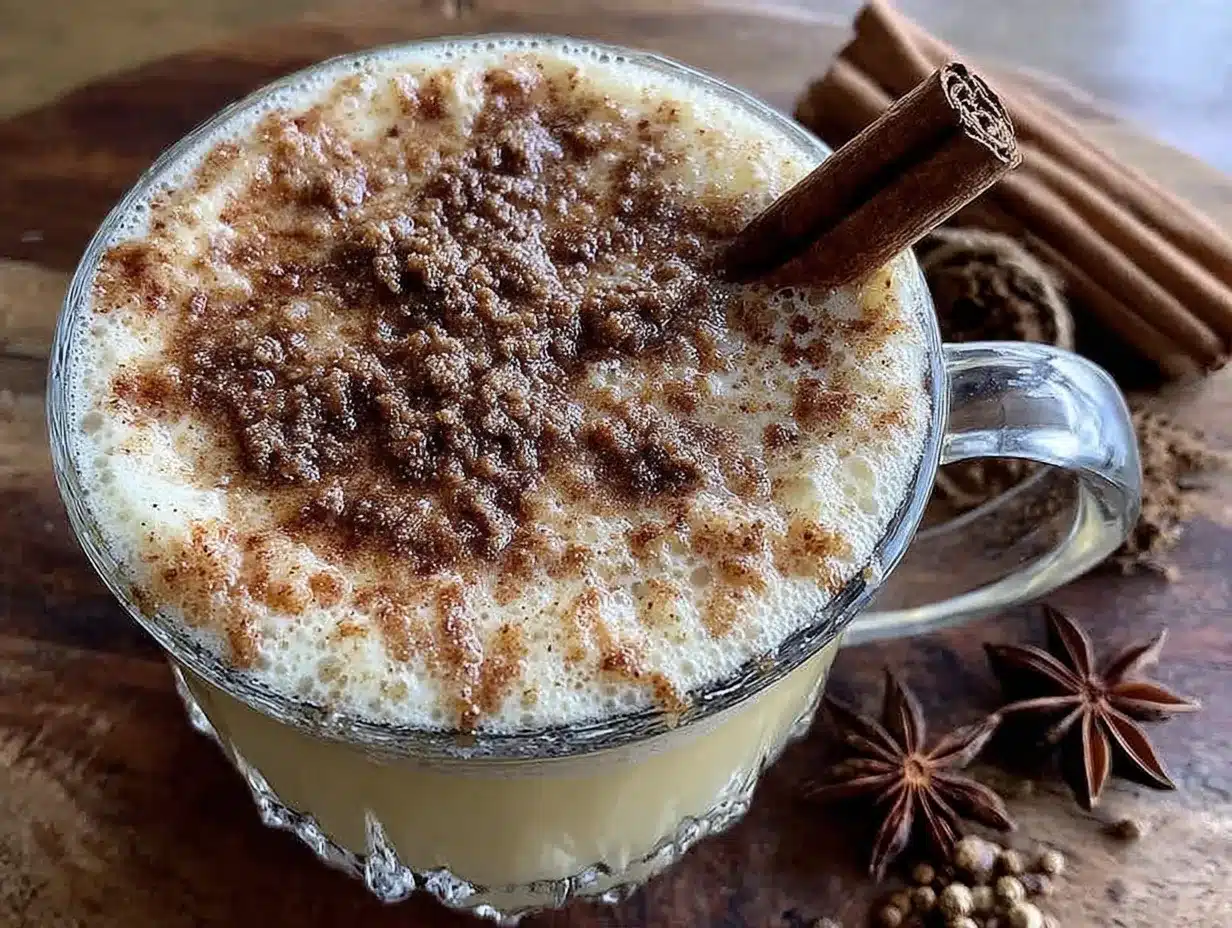
Making this eggnog is easier than you think, but there are a few key moments where patience pays off. Follow these steps, and you’ll end up with a drink that tastes like it came from a fancy holiday market—except you made it yourself.
- Prepare your ingredients. Separate the egg yolks from the whites while the eggs are still cold—it’s easier. Place the yolks in a large mixing bowl and save the whites for another use. Let the yolks come to room temperature for about 10 minutes while you gather the rest of your ingredients. This helps them whisk up smoother and incorporate the sugar more evenly.
- Whisk the yolks and sugar. Add the sugar to the bowl with the egg yolks. Whisk vigorously for 2-3 minutes until the mixture turns pale yellow and thickens slightly. You’re looking for a texture that ribbons off the whisk when you lift it up. This step is important because it dissolves the sugar and aerates the yolks, which gives the final eggnog a lighter texture. Don’t rush it—put on some music and enjoy the process.
- Heat the milk mixture. In a medium saucepan, combine the whole milk, heavy cream, cinnamon, cloves, and a pinch of sea salt. Place over medium heat and warm gently, stirring occasionally, until the mixture is hot but not boiling. You’ll see small bubbles forming around the edges of the pan—that’s your cue. Do not let it come to a full boil, or the milk proteins can scorch and give you a burnt flavor. This takes about 4-5 minutes.
- Temper the egg yolks. This is the trickiest step, but I promise you can handle it. Slowly pour about 1/2 cup of the hot milk mixture into the egg yolk mixture while whisking constantly. This raises the temperature of the yolks gradually so they don’t scramble when you add them to the pot. Keep whisking as you pour—don’t stop, even for a second. Once that’s incorporated, slowly pour the tempered yolk mixture back into the saucepan with the remaining milk, again whisking constantly.
- Cook until thickened. Place the saucepan back over medium-low heat and cook, stirring constantly with a wooden spoon or heatproof spatula, for 5-7 minutes. You’ll feel the mixture start to thicken—it should coat the back of your spoon. If you run a finger across the spoon, the line should hold. Do not let it boil. If you see any bubbles starting to form, reduce the heat immediately. The mixture should steam and gently thicken, not bubble aggressively.
- Strain the eggnog. Remove the saucepan from heat. Place a fine-mesh strainer over a clean bowl or directly over your storage pitcher. Pour the eggnog through the strainer to catch any small cooked egg bits or spice solids. This step is what gives you that silky, smooth texture. Don’t skip it—even if you think you whisked perfectly, there’s always a tiny bit that sneaks through.
- Add vanilla and fresh nutmeg. Stir in the vanilla extract and 1/2 teaspoon of freshly grated nutmeg. The heat will help the flavors meld together beautifully. Taste it at this point—it should be warm, creamy, and perfectly spiced. If you want it a little sweeter, you can add another tablespoon of sugar, but I find the balance is just right as written.
- Chill thoroughly. Let the eggnog cool to room temperature, then cover and refrigerate for at least 4 hours, preferably overnight. This is the hardest part because the kitchen smells amazing, but trust me—the flavors need time to meld and deepen. The eggnog will also thicken slightly as it chills, giving you that perfect creamy consistency.
- Serve with fresh nutmeg. When you’re ready to serve, pour the chilled eggnog into glasses. Grate a generous amount of fresh nutmeg over the top of each glass. If you’re adding alcohol, stir it in just before serving—about 1 tablespoon per serving is a good starting point. Garnish with a cinnamon stick if you’re feeling fancy.
Troubleshooting Tip: If your eggnog curdles or develops lumps, don’t panic. Pour it through a fine-mesh strainer and it should smooth out. If it’s still lumpy after straining, you can use an immersion blender to smooth it out in seconds. I’ve had this happen once when I got distracted and let the heat get too high, and the immersion blender saved the batch completely.
Cooking Tips & Techniques
After making this eggnog more times than I can count, I’ve picked up a few tricks that make the process smoother and the final result even better. Here are the ones I swear by:
Temperature control is everything. The most common mistake people make is rushing the heating process. Low and slow is your friend here. If you heat the milk too quickly, it can scorch, and once that happens, there’s no going back. I like to use a thermometer (around 160°F is perfect for tempering), but you can also go by feel—the milk should be steaming with small bubbles around the edges, not rolling or boiling.
Whisk like you mean it. When you’re tempering the eggs, don’t be gentle. Whisk vigorously and continuously as you pour the hot milk in. I’ve learned this the hard way—the first time I made eggnog, I got distracted halfway through and ended up with scrambled eggs floating in my milk. It was a sad, lumpy mess. Now I make sure I have a solid whisking rhythm before I even start pouring.
Fresh nutmeg is a game-changer. I cannot stress this enough. Whole nutmeg seeds last for months in your spice drawer, and a Microplane grater costs about the same as a latte. The flavor difference between fresh and pre-ground nutmeg is like comparing a garden tomato to a canned one. The fresh stuff has this warm, slightly piney, aromatic quality that elevates the entire drink. I grate it directly over the finished eggnog right before serving, and the oils release into the air—it’s honestly one of my favorite kitchen smells.
Make it ahead for best flavor. Eggnog is one of those rare recipes that actually gets better after a day or two in the fridge. The spices meld together, the texture smooths out, and the flavors become more rounded. I always make mine at least 24 hours before I plan to serve it. If you’re adding alcohol, it also helps mellow the harshness of the spirits. Just give it a good stir before serving, because the spices can settle at the bottom.
Don’t skip the straining step. I know it’s an extra dish to wash, but it makes a real difference. Even if you think you whisked perfectly, there are always tiny bits of cooked egg or spice that sneak through. Straining gives you that velvety, professional-quality texture that makes people think you spent hours on it. I use a fine-mesh strainer and press the mixture through with a spatula to get every last drop.
Variations & Adaptations
One of the best things about this eggnog recipe is how adaptable it is. Here are some variations I’ve tried and loved:
Dairy-Free Version: Substitute the whole milk with full-fat oat milk and the heavy cream with canned coconut cream. The texture will be slightly thinner, but the flavor is still rich and satisfying. I’ve made this for a friend who’s lactose intolerant, and she said it was the best eggnog she’d had in years. Just make sure to use the thick part of the coconut cream for best results.
Vegan Option: Use a combination of full-fat oat milk and cashew cream (soaked cashews blended with water until smooth). For the egg yolks, you can use a commercial vegan egg substitute or a mixture of cornstarch and silken tofu blended until smooth. The texture won’t be exactly the same, but it’s surprisingly close. I tested this version last Christmas for a vegan friend, and it disappeared faster than the regular batch.
Spiced Chai Eggnog: Add 2 chai tea bags to the milk while it heats, letting them steep for 5 minutes before removing. The chai spices—cardamom, ginger, and black pepper—complement the nutmeg beautifully. I stumbled onto this combination by accident when I ran out of cinnamon and used chai tea instead, and now I make it this way at least once every holiday season.
Lower-Sugar Version: Reduce the sugar to 1/3 cup and add 2 tablespoons of maple syrup or honey. The natural sweetness adds a different depth of flavor. I’ve also tried it with monk fruit sweetener, and while the texture is slightly less creamy, it still tastes great. Just keep in mind that sugar contributes to the body of the eggnog, so reducing it too much will make it thinner.
Boozy Variations: While bourbon is my personal favorite, dark rum adds a molasses-like richness, and brandy gives it a more sophisticated, fruity note. You can also try spiced rum for extra warmth. For a truly decadent version, add a splash of amaretto or Frangelico. I like to offer a small selection of spirits and let guests choose their own adventure.
Serving & Storage Suggestions
This eggnog is best served well-chilled, straight from the refrigerator. Pour it into small glasses or cups—a little goes a long way because it’s so rich and satisfying. I like to use clear glass mugs so you can see that beautiful creamy color. Top each serving with a generous grating of fresh nutmeg and a cinnamon stick for stirring.
Complementary Dishes: This eggnog pairs beautifully with gingerbread cookies, shortbread, or a slice of pound cake. For a more savory pairing, try it alongside a cheese board with sharp cheddar or aged gouda. The creamy sweetness of the eggnog contrasts nicely with salty, tangy flavors. I’ve also served it with spiced nuts and dried fruit for a simple but elegant holiday spread.
Storage: Store the eggnog in a sealed glass pitcher or jar in the refrigerator for up to 5 days. The flavors will continue to develop and deepen over the first 2-3 days. Give it a good stir before serving, as the spices and any added alcohol can settle at the bottom. I do not recommend freezing this eggnog—the texture becomes grainy and watery upon thawing due to the dairy content.
Reheating: If you prefer warm eggnog, you can gently reheat it on the stovetop over low heat, stirring constantly. Do not let it boil. You can also microwave individual servings in 15-second bursts, stirring between each. Just be careful not to overheat it, or the eggs can scramble. I personally prefer it cold, but my mom loves it warm with an extra grating of nutmeg on top.
Flavor Development: The eggnog will thicken slightly as it chills, which is normal. If it becomes too thick for your liking, you can thin it with a splash of milk when serving. The spices will also become more pronounced over time—the fresh nutmeg mellows and blends with the cinnamon and cloves, creating a more complex, rounded flavor. This is why I always recommend making it a day ahead if you can.
Nutritional Information & Benefits
This light and creamy eggnog is a more balanced version of the traditional recipe, but it’s still a treat. Here’s the estimated nutritional breakdown per serving (about 1/2 cup, without alcohol):
- Calories: 220
- Fat: 14g (8g saturated)
- Carbohydrates: 18g (16g sugar)
- Protein: 6g
- Calcium: 150mg (15% DV)
- Vitamin D: 2mcg (10% DV)
Health Benefits: Eggs are a fantastic source of high-quality protein and contain choline, which supports brain health. Milk and cream provide calcium and vitamin D for bone health. Fresh nutmeg contains compounds with anti-inflammatory properties and has been used in traditional medicine to aid digestion. The cinnamon in this recipe can help regulate blood sugar levels. While this is still a rich, indulgent drink, it’s made with real, whole ingredients—no artificial additives or preservatives. The lighter ratio of cream to milk means it’s less heavy than traditional eggnog, making it a more sensible choice for holiday gatherings.
Dietary Considerations: This recipe contains dairy and eggs. For a dairy-free version, see the variations section above. It is naturally gluten-free. If you’re watching your sugar intake, the lower-sugar variation works well. As always, if you have specific dietary concerns or allergies, please consult with a healthcare professional.
Conclusion
This light and creamy homemade eggnog with fresh nutmeg is proof that sometimes the things you think you hate just haven’t been made the right way yet. It’s the recipe that turned me from a dedicated eggnog skeptic into someone who actually looks forward to making it every December. The process is simple enough for a weeknight, but the result is impressive enough for holiday entertaining. And that fresh nutmeg? It honestly makes all the difference.
I hope you give this recipe a try, whether you’re a longtime eggnog lover or a curious skeptic like I was. Feel free to customize it to your taste—add more or less spice, try different spirits, or experiment with the variations I shared. That’s the beauty of homemade cooking. You get to make it your own.
If you do make it, I’d love to hear how it turned out. Drop a comment below and let me know if you converted any eggnog haters along the way. And if you have your own twist on this recipe, please share it—I’m always looking for new ideas. Until next time, happy cooking, and don’t forget the fresh nutmeg!
Frequently Asked Questions
Can I make this eggnog without alcohol?
Absolutely! The non-alcoholic version is just as delicious. The vanilla and fresh nutmeg provide plenty of flavor on their own. If you want a little extra complexity without the alcohol, try adding a teaspoon of vanilla bean paste or a pinch of cardamom.
How long does homemade eggnog last in the fridge?
Homemade eggnog will keep for up to 5 days in a sealed container in the refrigerator. The flavors actually improve after the first day or two. Just give it a good stir before serving, as the spices can settle at the bottom.
Can I use pre-ground nutmeg instead of fresh?
You can, but I really recommend using fresh nutmeg if possible. Pre-ground nutmeg loses its essential oils over time and has a much milder, less aromatic flavor. The fresh stuff is noticeably brighter and more complex. A whole nutmeg seed and a Microplane are a small investment that pays off big in flavor.
Why did my eggnog curdle?
Curdling usually happens when the heat is too high or the eggs are added too quickly. To prevent this, always temper the eggs slowly by adding hot milk in a thin stream while whisking constantly. Keep the heat at medium-low and never let the mixture boil. If it does curdle, pour it through a fine-mesh strainer—it should smooth out.
Can I make this eggnog ahead of time for a party?
Yes, and I actually recommend it! Making the eggnog 1-2 days ahead allows the flavors to meld and deepen. Just store it in a sealed container in the fridge, and give it a good stir before serving. Add any alcohol right before serving, and don’t forget the fresh nutmeg garnish.
Pin This Recipe!
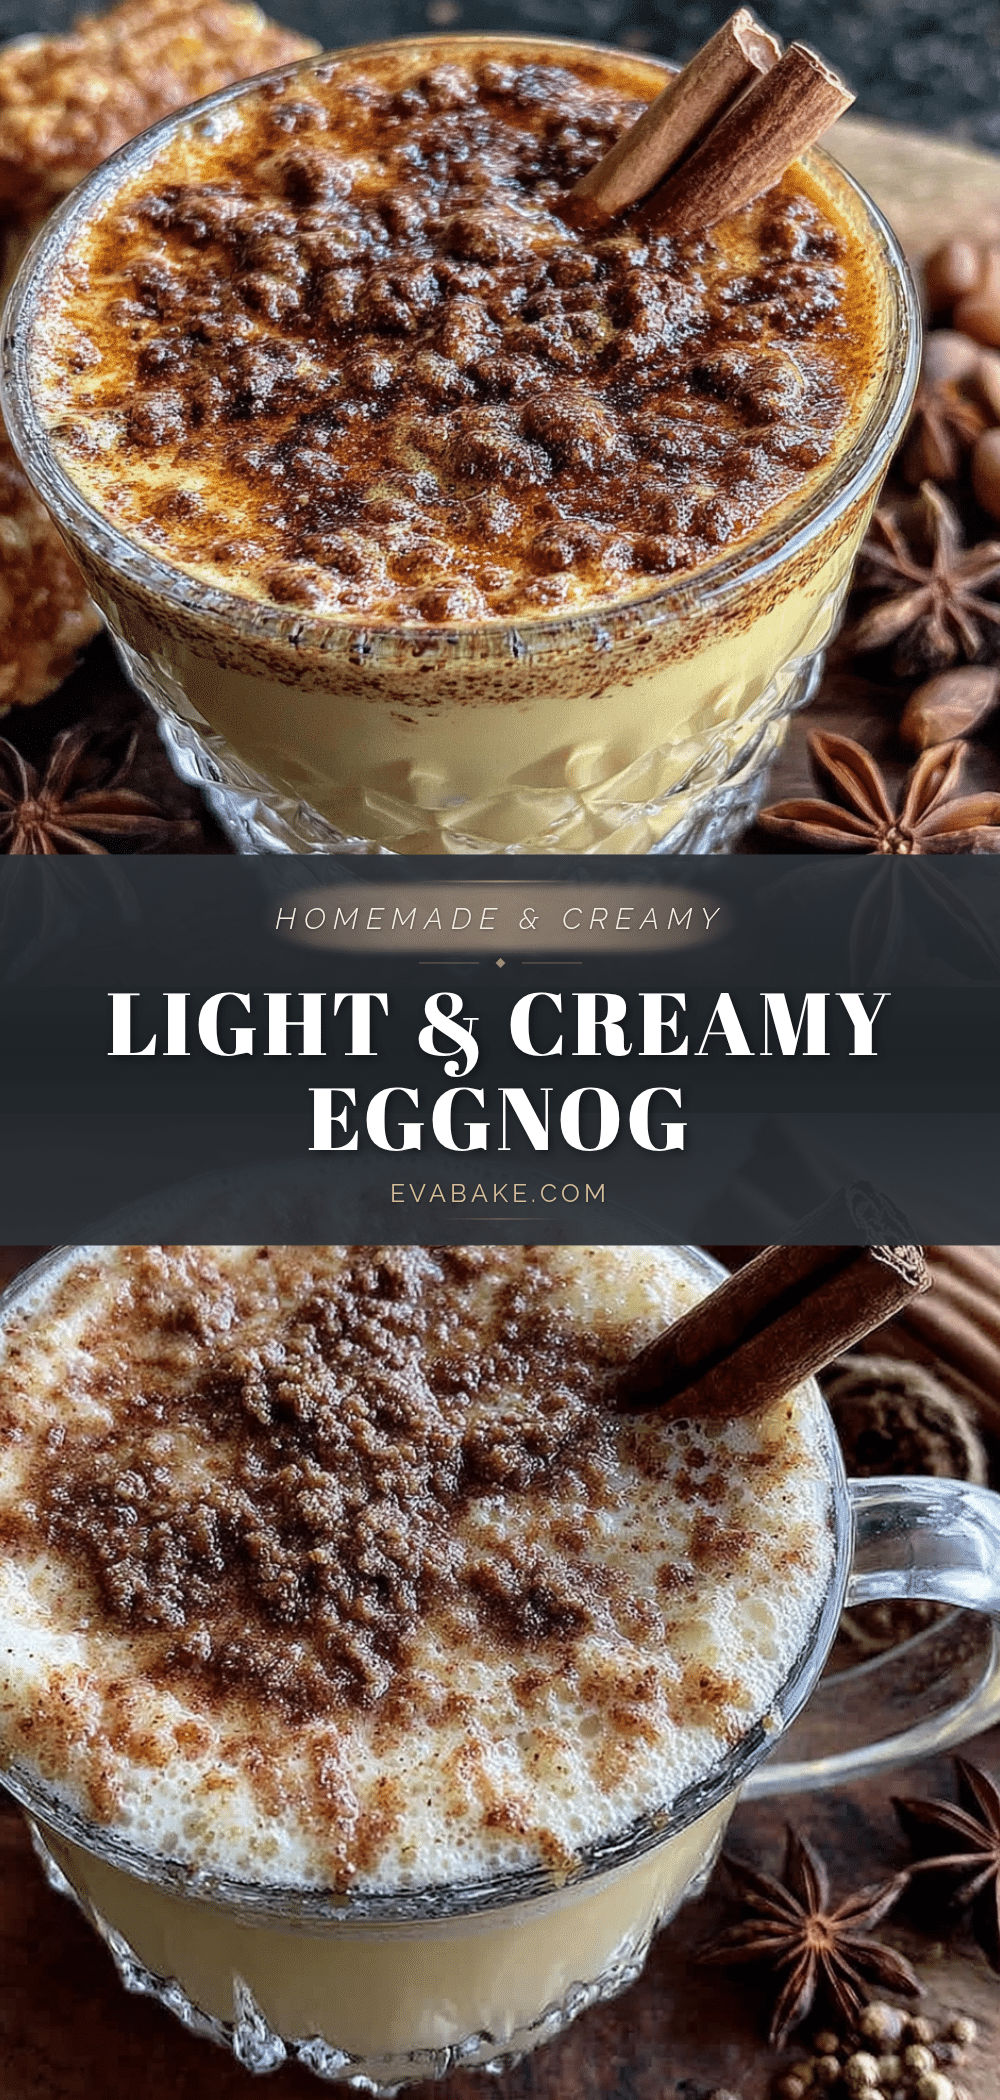
Light & Creamy Homemade Eggnog with Fresh Nutmeg

This light and creamy homemade eggnog with fresh nutmeg is proof that sometimes the things you think you hate just haven’t been made the right way yet. It’s the recipe that turned me from a dedicated eggnog skeptic into someone who actually looks forward to making it every December.
- Prep Time: 20 minutes
- Cook Time: 10 minutes
- Total Time: 4 hours 30 minutes (includes chilling)
- Yield: 4 servings 1x
- Category: Beverage
- Cuisine: American
Ingredients
- 6 large egg yolks (room temperature)
- 1/2 cup granulated sugar
- 2 cups whole milk
- 1 cup heavy cream
- 1 teaspoon vanilla extract
- 1/2 teaspoon ground cinnamon
- 1/4 teaspoon ground cloves
- 1/2 teaspoon fresh grated nutmeg (plus extra for garnish)
- Pinch of sea salt
- Optional: 1/4 cup bourbon, rum, or brandy
Instructions
- Prepare your ingredients. Separate the egg yolks from the whites while the eggs are still cold. Place the yolks in a large mixing bowl and save the whites for another use. Let the yolks come to room temperature for about 10 minutes.
- Whisk the yolks and sugar. Add the sugar to the bowl with the egg yolks. Whisk vigorously for 2-3 minutes until the mixture turns pale yellow and thickens slightly, forming a ribbon when the whisk is lifted.
- Heat the milk mixture. In a medium saucepan, combine the whole milk, heavy cream, cinnamon, cloves, and a pinch of sea salt. Place over medium heat and warm gently, stirring occasionally, until hot but not boiling (small bubbles around the edges). Do not let it boil.
- Temper the egg yolks. Slowly pour about 1/2 cup of the hot milk mixture into the egg yolk mixture while whisking constantly. Then slowly pour the tempered yolk mixture back into the saucepan with the remaining milk, whisking constantly.
- Cook until thickened. Place the saucepan back over medium-low heat and cook, stirring constantly, for 5-7 minutes until the mixture thickens and coats the back of a spoon. Do not let it boil.
- Strain the eggnog. Remove from heat and pour through a fine-mesh strainer into a clean bowl or storage pitcher to catch any cooked egg bits or spice solids.
- Add vanilla and fresh nutmeg. Stir in the vanilla extract and 1/2 teaspoon of freshly grated nutmeg.
- Chill thoroughly. Let the eggnog cool to room temperature, then cover and refrigerate for at least 4 hours, preferably overnight.
- Serve with fresh nutmeg. Pour the chilled eggnog into glasses and grate fresh nutmeg over the top. If adding alcohol, stir in just before serving (about 1 tablespoon per serving). Garnish with a cinnamon stick if desired.
Notes
Temperature control is key—do not let the milk boil. Whisk vigorously when tempering eggs to prevent scrambling. Fresh nutmeg is essential for best flavor. Make ahead for best flavor (1-2 days). Strain even if you think you whisked perfectly. If curdling occurs, strain or use an immersion blender.
Nutrition
- Serving Size: 1/2 cup
- Calories: 220
- Sugar: 16
- Sodium: 80
- Fat: 14
- Saturated Fat: 8
- Carbohydrates: 18
- Protein: 6
Keywords: eggnog, homemade eggnog, light eggnog, creamy eggnog, fresh nutmeg, holiday drink, Christmas drink, eggnog recipe