Scrambling through the pantry when I realized I was missing a key ingredient for the 4th of July dessert showdown. The usual box mixes were nowhere to be found, and honestly, the idea of store-bought just wasn’t going to cut it this time. Flour dust in the air, kids tugging at my sleeves, and the clock ticking loud—it was one of those moments where you think, “Alright, let’s see what happens.” That’s how this Perfect Red White Blue Layer Cake with Cream Cheese Frosting was born. Between dodging flying paper plates and a last-minute call from the neighbor asking if we had enough desserts, I found myself mixing batter with one hand and wiping spills with the other.
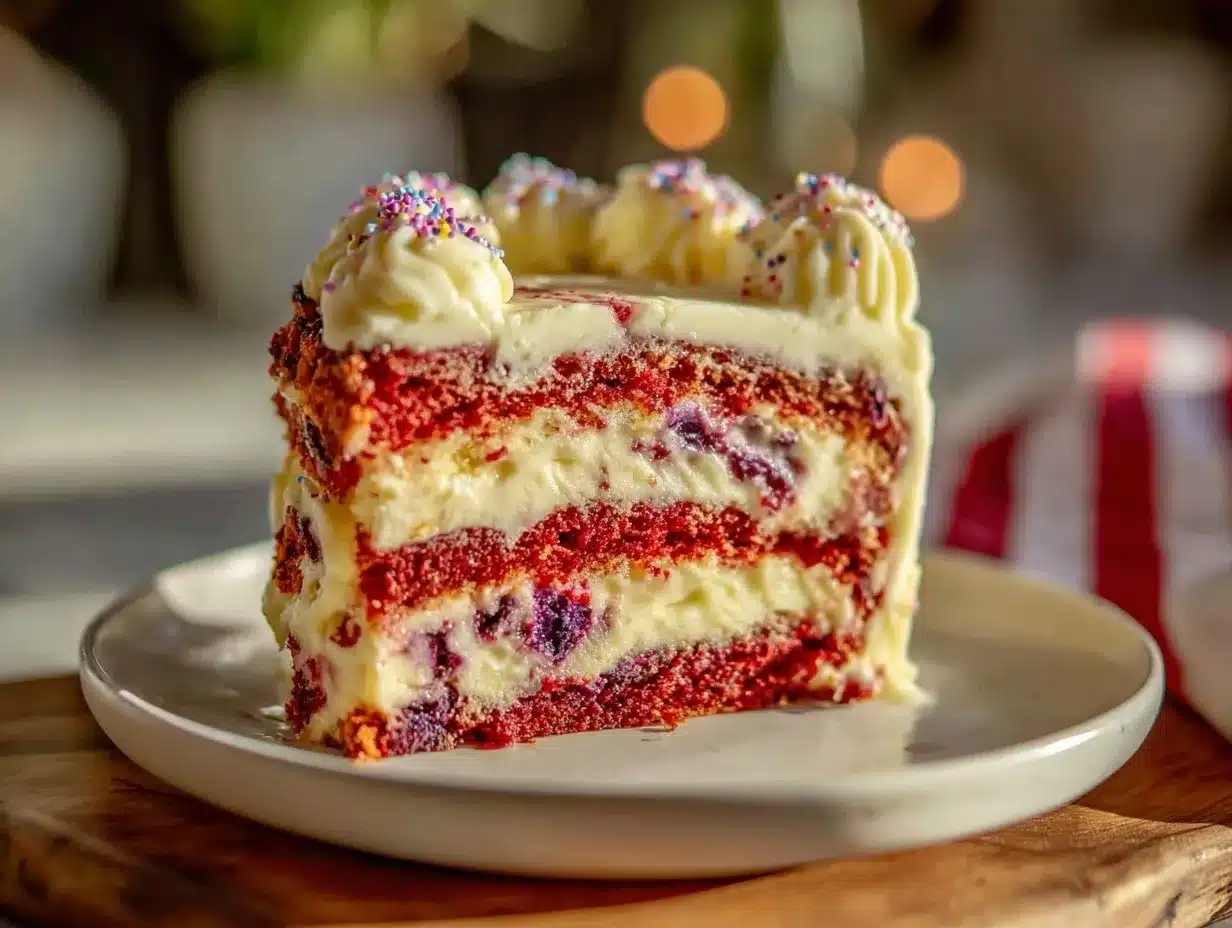
The vibrant layers of red, white, and blue weren’t just festive eye candy—they were a little beacon of calm amid the chaos. The cream cheese frosting, tangy and smooth, pulled everything together with a creamy hug. And when I finally sliced into that cake, the kids stopped their mess-making just long enough to savor a bite. That quiet moment of shared delight made all the frenzy worth it.
This recipe stuck with me because it’s not just about looking pretty on a patriotic table. It’s about whipping up something simple yet special when time is short, and excitement is high. If you want a red white blue cake that feels homemade, approachable, and just a little bit magic, this one’s got your back.
Why You’ll Love This Perfect Red White Blue Layer Cake with Cream Cheese Frosting
- Quick & Easy: Comes together in under 90 minutes, making it perfect for a last-minute celebration or busy weeknight baking.
- Simple Ingredients: No specialty stores needed—everything’s likely in your kitchen already, from pantry staples to basic dairy.
- Perfect for Patriotic Occasions: Whether it’s Independence Day, Memorial Day, or any red-white-blue themed party, this cake shines on the dessert table.
- Crowd-Pleaser: Kids and adults alike rave about the moist layers and the tangy cream cheese frosting that isn’t too sweet.
- Unbelievably Delicious: The moist, tender crumb with just the right amount of color and flavor contrast makes this cake a standout.
What sets this Perfect Red White Blue Layer Cake apart? The secret is in the perfectly balanced flavors and the fresh cream cheese frosting that adds a slight tang, cutting through the sweetness. Plus, the red and blue layers get their color from natural food coloring, so you’re not just making a cake, you’re making memories with a homemade touch. Honestly, it’s the kind of recipe I find myself coming back to every summer — it’s festive but not fussy, classic but with a little twist, and always a hit.
It’s the kind of cake that makes you close your eyes after the first bite and remember why simple, fun baking is worth the mess.
What Ingredients You Will Need
This Perfect Red White Blue Layer Cake with Cream Cheese Frosting uses straightforward, wholesome ingredients to deliver that bold, festive look and satisfying flavor without any fuss. Most ingredients are pantry staples, and you can easily swap or adjust based on what you have.
- For the Cake Batter:
- 2 ½ cups (315g) all-purpose flour (for a tender crumb, I prefer King Arthur brand)
- 2 ½ teaspoons baking powder
- ½ teaspoon salt
- 1 cup (226g) unsalted butter, softened (room temperature for easy mixing)
- 2 cups (400g) granulated sugar
- 4 large eggs, room temperature (helps with fluffiness)
- 1 cup (240ml) whole milk, room temperature (you can swap with buttermilk for tang)
- 2 teaspoons pure vanilla extract
- Red and blue gel food coloring (gel colors give richer hues without watering down batter)
- For the Cream Cheese Frosting:
- 1 package (8 oz / 225g) cream cheese, softened
- ½ cup (113g) unsalted butter, softened
- 4 cups (480g) powdered sugar, sifted
- 1 teaspoon pure vanilla extract
- Pinch of salt (balances sweetness)
If you want a dairy-free version, try swapping the butter and cream cheese with plant-based alternatives, but be prepared for a slight change in texture. For a gluten-free option, substitute the flour with a 1:1 gluten-free baking flour blend, and add a teaspoon of xanthan gum for structure.
Equipment Needed
- Three 8-inch (20 cm) round cake pans – ideally non-stick or well-greased and floured for easy release. If you don’t have three, bake layers in batches.
- Electric mixer (stand or hand) to cream butter and mix batter smoothly. I’ve tried this by hand, but honestly, it’s a workout and the texture isn’t as good.
- Mixing bowls – at least two: one for dry ingredients, one for wet.
- Measuring cups and spoons – precise measurements make a difference.
- Rubber spatula for folding and scraping bowls clean.
- Cooling racks to cool the layers evenly before frosting.
- Offset spatula or butter knife for spreading the cream cheese frosting evenly.
- Optional: piping bag and tips if you want to decorate the cake with a professional touch.
For budget-friendly baking, I recommend silicone baking mats or parchment paper liners to prevent sticking without extra oil. And if you’re in a pinch without round pans, square pans work too—just slice the layers carefully later.
Preparation Method
- Preheat your oven to 350°F (175°C). Grease and flour three 8-inch round cake pans or line with parchment paper circles. This prevents sticking and helps the layers come out cleanly. (10 minutes prep)
- Mix dry ingredients: In a medium bowl, whisk together 2 ½ cups flour, 2 ½ teaspoons baking powder, and ½ teaspoon salt. Set aside. This keeps the leavening even throughout the batter. (5 minutes)
- Cream butter and sugar: In a large bowl, beat 1 cup softened butter with 2 cups sugar on medium speed until light and fluffy—about 3-4 minutes. This step is crucial for a tender crumb. (5 minutes)
- Add eggs one at a time: Beat in 4 large eggs, one by one, fully incorporating each before the next. This helps with the cake’s structure. (3 minutes)
- Mix in vanilla and milk: Stir in 2 teaspoons vanilla extract and 1 cup whole milk alternately with the dry ingredients, starting and ending with dry. Mix just until combined—don’t overmix or the cake might get dense. The batter should be smooth and pourable. (5 minutes)
- Divide and color the batter: Pour the batter evenly into three bowls. Tint one bowl with red gel food coloring until you get a bright red (start with 1 teaspoon and add more if needed). Leave the second bowl plain for the white layer. Add blue gel food coloring to the third bowl to get a vibrant blue shade. Gel colors work best here since they don’t thin the batter. (10 minutes)
- Pour batter into pans: Pour each colored batter into the prepared pans, smoothing the tops gently with a spatula. Don’t overfill pans; about ⅔ full is perfect for even rising. (5 minutes)
- Bake: Place pans in the oven on the middle rack. Bake for 25-30 minutes or until a toothpick inserted in the center comes out clean. Rotate pans halfway through baking for even color and rise. (30 minutes)
- Cool layers: Let cakes cool in the pans for 10 minutes, then run a knife around edges and invert onto cooling racks. Cool completely before frosting to avoid melting the cream cheese frosting. (1 hour)
- Prepare cream cheese frosting: Beat 8 oz softened cream cheese and ½ cup softened butter together until smooth and creamy. Gradually add 4 cups powdered sugar, one cup at a time, beating well after each addition. Stir in 1 teaspoon vanilla and a pinch of salt. The frosting should be thick but spreadable. (10 minutes)
- Assemble the cake: Place the red layer on your cake stand or plate. Spread a generous layer of frosting on top. Repeat with the white and then the blue layers, frosting between each. Use the remaining frosting to cover the top and sides evenly. Smooth with an offset spatula or create swirls for texture. (15 minutes)
- Chill and serve: Chill the cake for at least 30 minutes to let the frosting set. This makes slicing cleaner and flavors blend nicely. (30 minutes)
Pro tip: If your frosting feels too soft, pop it in the fridge for 10-15 minutes before assembling. And if the cake layers dome a bit while baking, slice off the tops with a serrated knife for neat stacking.
Cooking Tips & Techniques
Making this Perfect Red White Blue Layer Cake with Cream Cheese Frosting isn’t rocket science, but a few tricks will make your baking life easier and the results better. When creaming butter and sugar, patience is key—don’t rush this step or your cake might turn out dense.
Also, using room temperature ingredients helps the batter combine smoothly without lumps. When mixing in the flour, go slow and fold gently to avoid overworking the batter, which can make the cake tough.
Coloring the batter with gel food coloring instead of liquid prevents thinning, so your layers stay perfect and vibrant. If you’re worried about uneven layers, use a kitchen scale to weigh batter portions—it’s what professionals do!
For frosting, softened cream cheese and butter should be very soft but not melted. If the frosting is too runny, add more powdered sugar gradually to reach the right consistency.
One mistake I made the first time? Frosting the cake before it was fully cool—melty frosting everywhere. Letting layers cool completely avoids that mess. Also, chilling the assembled cake before slicing helps keep neat, clean slices.
Multitasking tip: While the cake layers bake, whip up the cream cheese frosting to save time. And if you’re short on cooling racks, placing layers on a cutting board lined with a clean towel works in a pinch.
Variations & Adaptations
- Flavor Twists: Add lemon zest and a teaspoon of lemon juice to the batter for a bright citrus note that pairs beautifully with the cream cheese frosting.
- Dietary Adjustments: Use almond flour instead of all-purpose flour for a gluten-free version, but add an extra egg to help with binding.
- Alternative Frostings: Swap cream cheese frosting with whipped vanilla buttercream for a sweeter, lighter finish if you prefer less tang.
- Seasonal Fruit Layers: Incorporate fresh blueberries into the blue layer or swirl strawberry puree into the red layer for a natural flavor boost and texture.
- Different Cake Shapes: Try making this as cupcakes for smaller, portable patriotic treats—just reduce baking time to around 18-20 minutes.
Personally, I once added a sprinkle of edible glitter to the frosting just before serving, and it gave the cake a fun sparkle that my kids loved. It’s a simple way to make any party feel extra festive.
Serving & Storage Suggestions
Serve this cake chilled or at room temperature—the cream cheese frosting tastes best when it’s cool but not rock hard. For a pretty presentation, garnish with fresh berries or a handful of mini marshmallows for extra charm.
This cake pairs wonderfully with a cold glass of lemonade or an iced tea, balancing the sweetness with refreshing acidity. It’s a showstopper on any picnic table or backyard barbecue spread, especially alongside easy patriotic classics like colorful pinwheel sandwiches or the light and fruity red white and blue berry trifle.
Store leftover cake covered tightly in the fridge for up to 4 days. You can freeze individual slices wrapped well in plastic wrap and foil for up to 2 months—just thaw in the fridge overnight before serving. When reheating, avoid the microwave for frosting’s sake; instead, let it come to room temp naturally.
Over time, the flavors in the cake meld beautifully, making the next day’s slice even more satisfying—a little secret reward for your patience.
Nutritional Information & Benefits
Each slice of this Perfect Red White Blue Layer Cake with Cream Cheese Frosting offers approximately 350-400 calories, with moderate amounts of fat and sugar typical for celebratory desserts. The cream cheese adds a dose of calcium and protein, while the eggs contribute essential nutrients like vitamin D and B12.
Using real butter and whole milk keeps the flavor rich, but you can lighten it by swapping half the butter for applesauce or using low-fat dairy. For gluten-free needs, almond flour substitution helps those sensitive to gluten without sacrificing texture.
This cake is a festive treat best enjoyed in moderation, but it’s made with real ingredients you can feel good about sharing with family and friends.
Conclusion
This Perfect Red White Blue Layer Cake with Cream Cheese Frosting is one of those recipes that manages to be both special and super doable. It’s the kind of dessert that brightens the table and, honestly, makes you feel like a pro baker—even if you’re juggling a million other things. I love how the layers come out bright and moist, and that frosting strikes just the right balance of tangy and sweet.
Feel free to tweak it to your taste—whether that’s adding lemon, switching up the frosting, or turning it into cupcakes for easier serving. I hope it becomes your go-to for patriotic celebrations and beyond. If you try it, I’d love to hear how you made it your own!
FAQs about Perfect Red White Blue Layer Cake with Cream Cheese Frosting
Can I make this cake ahead of time?
Yes! You can bake the layers a day ahead and keep them wrapped tightly in the fridge. Assemble and frost the cake the next day for freshest taste.
What’s the best way to get vibrant red and blue colors?
Gel food coloring is your best bet—it gives bright colors without thinning the batter like liquid dyes do.
Can I use a different size pan?
You can use 9-inch pans, but the layers will be thinner. You might want to bake for a slightly shorter time and adjust frosting quantities accordingly.
How do I prevent the cream cheese frosting from melting?
Use room temperature (not warm) cream cheese and butter. Chill the cake after frosting, and avoid frosting warm cake layers.
Is this recipe suitable for kids to help make?
Absolutely! Kids can help mix batter, color it, and spread frosting. Just supervise oven use and sharp tools.
Pin This Recipe!
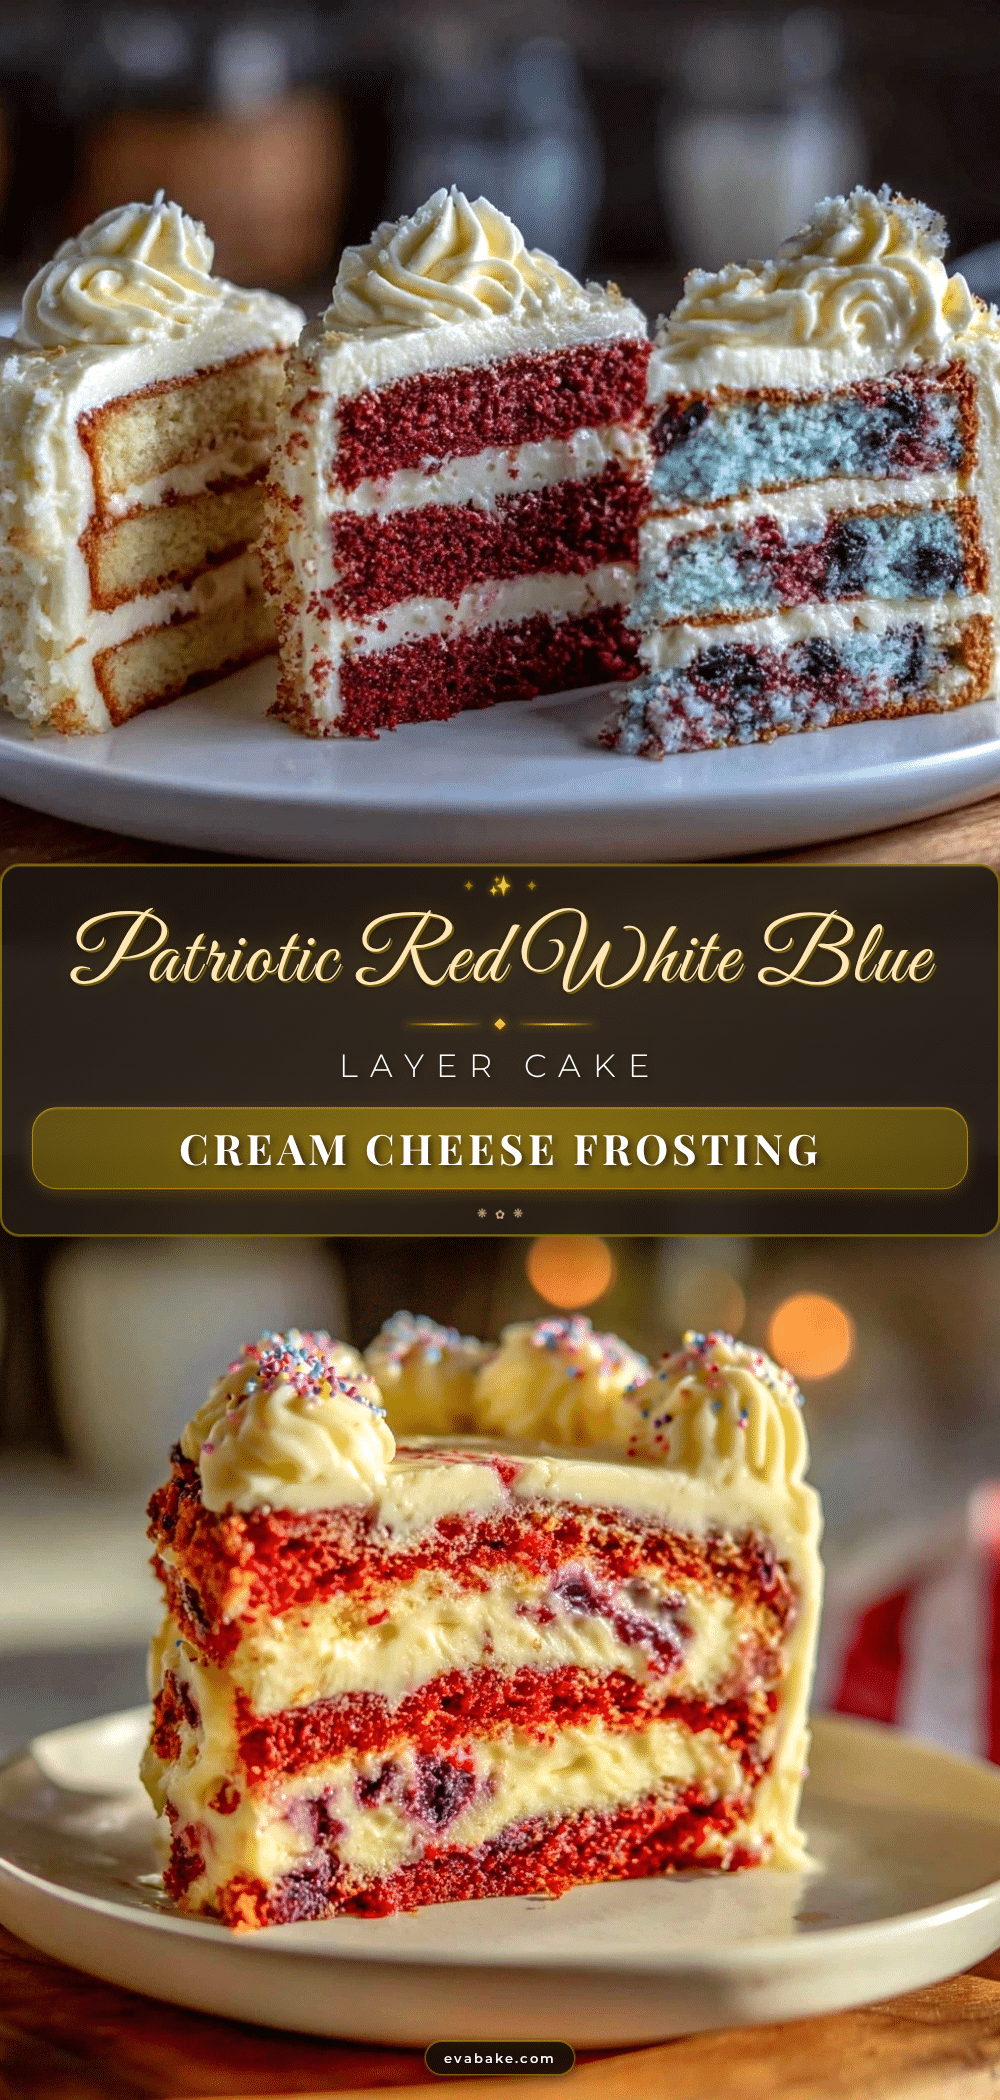
Perfect Red White Blue Layer Cake Recipe with Cream Cheese Frosting
A festive and easy-to-make red, white, and blue layered cake with tangy cream cheese frosting, perfect for patriotic celebrations like the 4th of July.
- Prep Time: 30 minutes
- Cook Time: 30 minutes
- Total Time: 1 hour
- Yield: 12 servings 1x
- Category: Dessert
- Cuisine: American
Ingredients
- 2 ½ cups (315g) all-purpose flour
- 2 ½ teaspoons baking powder
- ½ teaspoon salt
- 1 cup (226g) unsalted butter, softened
- 2 cups (400g) granulated sugar
- 4 large eggs, room temperature
- 1 cup (240ml) whole milk, room temperature
- 2 teaspoons pure vanilla extract
- Red gel food coloring
- Blue gel food coloring
- 1 package (8 oz / 225g) cream cheese, softened
- ½ cup (113g) unsalted butter, softened
- 4 cups (480g) powdered sugar, sifted
- 1 teaspoon pure vanilla extract
- Pinch of salt
Instructions
- Preheat oven to 350°F (175°C). Grease and flour three 8-inch round cake pans or line with parchment paper circles.
- In a medium bowl, whisk together flour, baking powder, and salt. Set aside.
- In a large bowl, beat softened butter with sugar on medium speed until light and fluffy, about 3-4 minutes.
- Add eggs one at a time, beating well after each addition.
- Stir in vanilla extract and milk alternately with dry ingredients, starting and ending with dry. Mix until just combined.
- Divide batter evenly into three bowls. Tint one with red gel food coloring, leave one plain, and tint the third with blue gel food coloring.
- Pour each colored batter into prepared pans, filling about ⅔ full.
- Bake for 25-30 minutes or until a toothpick inserted in the center comes out clean. Rotate pans halfway through baking.
- Cool cakes in pans for 10 minutes, then invert onto cooling racks and cool completely.
- Beat cream cheese and softened butter until smooth. Gradually add powdered sugar, beating well after each addition. Stir in vanilla and salt.
- Assemble cake by layering red, white, and blue cakes with frosting between each layer. Cover top and sides with remaining frosting.
- Chill cake for at least 30 minutes before serving.
Notes
Use gel food coloring for vibrant colors without thinning the batter. Ensure cream cheese and butter are softened but not melted for frosting. Chill cake before slicing for cleaner cuts. For gluten-free, substitute flour with gluten-free blend and add xanthan gum. For dairy-free, use plant-based butter and cream cheese alternatives.
Nutrition
- Serving Size: 1 slice
- Calories: 375
- Sugar: 38
- Sodium: 280
- Fat: 18
- Saturated Fat: 11
- Carbohydrates: 52
- Fiber: 1
- Protein: 5
Keywords: red white blue cake, patriotic cake, cream cheese frosting, 4th of July dessert, layered cake, easy cake recipe