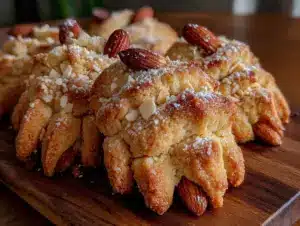
There used to be a little bakery tucked into a strip mall on the corner of Elm and Third, right next to a dry cleaner that always smelled like starch and regret. They made these cookies every October that looked exactly like gnarled old witch fingers, complete with a slivered almond fingernail and a little “blood” at the cuticle. When the bakery closed two years ago — the owner retired to Florida, which honestly felt like a betrayal — I panicked. My kids had already started asking about “the scary cookies” in August.
After seven tries — seven, you guys, including one batch that looked more like sad potatoes than fingers — I finally cracked it. The secret was in the chill time and the almond extract ratio. I mean, I burned through a lot of butter getting here. Let me tell you, my kitchen looked like a crime scene for a solid month. But now? These witch finger cookies are our family’s Halloween tradition, and honestly, they’re better than the bakery version. They’re creepier, for one thing, and they taste exactly like the kind of cookie you want to bite the head off of.
Maybe you’ve been there — that frantic search for a Halloween treat that actually looks spooky but doesn’t taste like cardboard. These cookies are the answer. They come together in 30 minutes flat, which is crucial when you’re wrestling with costume zippers and last-minute pumpkin carving. The kids help shape them, which is both adorable and mildly terrifying when they get creative with the “knuckles.”
This recipe stuck with me because it’s not just a cookie. It’s the memory of my youngest shrieking with laughter when she bit the fingernail off. It’s the neighbor who knocked on our door thinking we were actually eating human fingers. It’s the kind of fun that makes Halloween feel like Halloween. So grab your almonds and your food coloring — we’re getting creepy.
Why You’ll Love This Recipe
Look, I’ve tested a lot of Halloween cookies in my time. Some are too dry, some are too sweet, and some just look like blobs with sprinkles. These witch finger cookies are different. They’re the real deal.
- Quick & Easy : From start to finish, you’re looking at about 30 minutes. That’s less time than it takes to argue with a six-year-old about wearing a coat over their costume.
- Simple Ingredients : You probably have everything already. Butter, sugar, flour, eggs, vanilla, almond extract. The only special thing is slivered almonds for the fingernails.
- Perfect for Halloween Parties : These are the star of any spooky spread. Kids lose their minds. Adults pretend to be grossed out but eat six of them.
- Crowd-Pleaser : I’ve brought these to school parties, neighborhood gatherings, and family dinners. They disappear every single time.
- Unbelievably Delicious : Here’s the thing — they actually taste amazing. The almond extract gives them that marzipan-like flavor that’s totally addictive. They’re buttery, slightly crisp on the outside, and soft in the middle.
What makes these different from every other witch finger recipe out there? It’s the technique. I figured out that chilling the shaped fingers for just 10 minutes before baking keeps them from puffing up and losing their creepy shape. Plus, I use a specific ratio of almond to vanilla extract that makes them taste like something from a fancy bakery, not a box mix.
Honestly, this is the kind of cookie that makes you feel like a Halloween hero. Your kids will think you’re a witch — in the best way possible. And when you see their faces light up as they bite into a gnarled green finger, you’ll know it was worth every second.
What Ingredients You Will Need
This recipe uses simple, wholesome ingredients to deliver that perfect spooky cookie experience. Most of these are pantry staples, which means you can whip up a batch on a whim when the Halloween mood strikes.
For the Cookie Dough
- 1 cup (226g) unsalted butter, softened (I use Kerrygold for the best flavor, but any good butter works)
- 1 cup (200g) granulated sugar (adds sweetness and helps with that slightly crisp edge)
- 1 large egg, room temperature (cold eggs can make the dough seize up)
- 1 teaspoon vanilla extract (pure, not imitation — it makes a difference)
- 1 teaspoon almond extract (this is the secret to that marzipan flavor — don’t skip it)
- 2 ½ cups (312g) all-purpose flour (spoon and level it, don’t scoop straight from the bag)
- 1 teaspoon baking powder (helps them puff just slightly without losing shape)
- ½ teaspoon salt (balances the sweetness, trust me on this)
For the Decoration
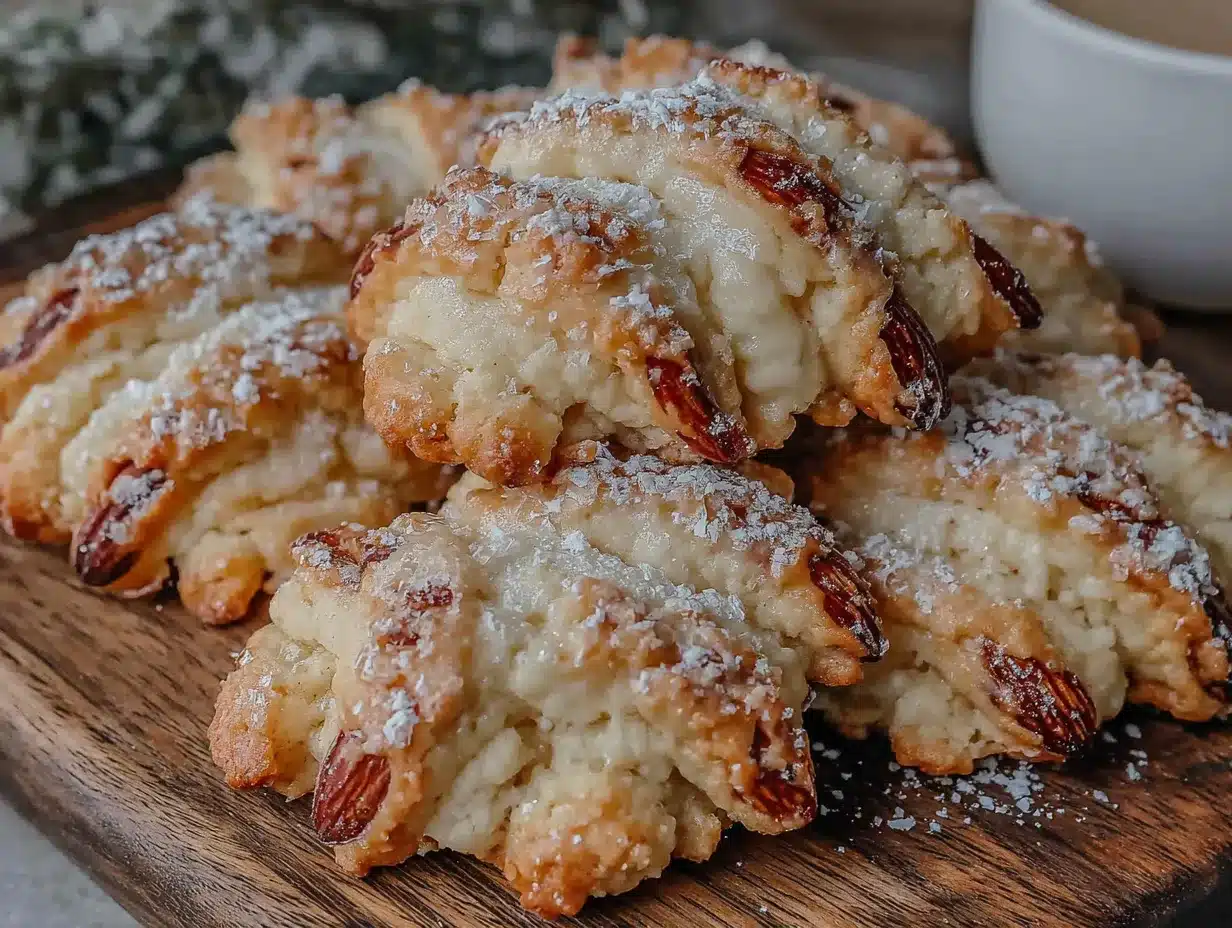
- About 40 slivered almonds (one per cookie — these are the fingernails)
- Green gel food coloring (I recommend Americolor or Wilton — liquid coloring will mess up the dough texture)
- Red jam or jelly (strawberry or raspberry works best for that “blood” look at the cuticle)
- Optional: Cocoa powder for dusting (makes them look dirty and more realistic)
Ingredient Tips: For the best texture, make sure your butter is truly softened — you should be able to press a finger into it easily. If you’re in a hurry, cut the butter into small cubes and let it sit for 15 minutes. For the almond extract, I prefer Nielsen-Massey, but store brand works fine. Just don’t use almond flavoring — that’s different stuff and tastes fake.
Substitution Guidance: If you need a dairy-free version, use vegan butter sticks (not tub margarine) — I’ve had good luck with Earth Balance. For a gluten-free option, swap the all-purpose flour with a 1:1 gluten-free baking flour. The texture will be slightly different, but they’ll still look creepy and taste great.
Equipment Needed
You don’t need much for these witch finger cookies, which is part of the beauty. Here’s what you’ll want to have on hand:
- Electric hand mixer or stand mixer — Creaming the butter and sugar by hand is possible but exhausting. Your arm will thank you for using a mixer.
- Large mixing bowl — Nothing fancy, just big enough to hold everything without flour flying everywhere.
- Baking sheets — Two standard-sized ones work perfectly. No need to grease them — the butter in the dough prevents sticking.
- Parchment paper or silicone baking mats — Parchment is cheaper and disposable. Silicone mats are reusable and give a slightly more even bake.
- Small offset spatula or butter knife — For making those creepy knuckle marks and wrinkles.
- Pastry brush — For brushing on the red jam. A clean paintbrush works in a pinch (one you’ve never used for paint, obviously).
- Plastic wrap — For chilling the dough if needed. I use reusable beeswax wraps to cut down on waste.
Budget-Friendly Tip: Don’t have a pastry brush? Use the back of a spoon to dab on the jam. It looks more rustic and creepy that way anyway. And if you don’t have a stand mixer, a hand mixer works exactly the same — I actually prefer it for small batches like this.
Personal Experience: I used to use a wooden spoon and elbow grease for these cookies. Then I got a hand mixer for my birthday, and honestly, it changed my life. The dough comes together in half the time, and I’m not exhausted before I even start shaping the fingers.
Preparation Method
Alright, let’s make some creepy cookies. This is where the magic happens.
Step 1: Cream the Butter and Sugar
In your large mixing bowl, beat the softened butter and granulated sugar together until light and fluffy — about 2-3 minutes. You want it to look pale and airy. Scrape down the sides of the bowl halfway through. If it looks greasy, you’ve gone too far. Stop when it looks like fluffy clouds.
Step 2: Add the Wet Ingredients
Beat in the egg, vanilla extract, and almond extract until everything is well combined. The mixture might look slightly separated — that’s fine. Don’t panic. Just keep mixing until it comes back together. Add the green gel food coloring now. Start with a small amount — about ¼ teaspoon — and add more until you get that sickly witch-green color. I usually end up using about ½ teaspoon total.
Step 3: Mix the Dry Ingredients
In a separate bowl, whisk together the flour, baking powder, and salt. Gradually add this to the wet mixture, mixing on low speed. Stop as soon as the dough comes together. Overmixing will make the cookies tough, and nobody wants a tough witch finger.
Step 4: Chill the Dough
This is crucial. Wrap the dough in plastic wrap and refrigerate for at least 20 minutes. I know you’re in a hurry — I am too — but this step makes the dough easier to shape. If you skip it, the fingers will be sticky and hard to work with. Trust me, I learned this the hard way on attempt number three.
Step 5: Shape the Fingers
Preheat your oven to 350°F (175°C). Line your baking sheets with parchment paper. Take a small piece of dough — about 1 tablespoon — and roll it into a finger shape. Make it slightly thicker at the base and tapering at the tip. Use the back of a knife to make indents for the knuckles. Press a slivered almond into the tip for the fingernail. Squeeze the dough around the almond slightly so it looks like it’s growing out of the finger. Use a toothpick to make a small indent around the almond for the cuticle area.
Step 6: Add the Creepy Details
Now’s the fun part. Use the offset spatula or knife to make little wrinkles and lines on the fingers. Press down gently to create “wrinkles” at the knuckles. You can also make a few small cuts to look like cuts or scars. Don’t overthink it — real witch fingers would be gnarled and imperfect. The uglier they look, the better.
Step 7: Bake
Place the shaped fingers on the prepared baking sheets, spacing them about 2 inches apart. Bake for 10-12 minutes, or until the edges are just barely golden. The cookies will still be soft in the middle — that’s what you want. They’ll firm up as they cool. If you overbake them, they’ll be hard instead of tender.
Step 8: Add the “Blood”
While the cookies are still warm, use your pastry brush to dab a tiny bit of red jam on the cuticle area where the almond meets the dough. This creates that “blood” effect that makes them so delightfully gross. Let the cookies cool completely on the baking sheet before moving them.
Step 9: Optional Dusting
If you want them to look even more realistic, dust the cookies lightly with cocoa powder. This gives them a dirty, aged appearance. Use a fine-mesh strainer for even dusting. Don’t overdo it — you want them to look like they’ve been digging in the dirt, not like they fell into a chocolate cake.
Cooking Tips & Techniques
I’ve made these witch finger cookies more times than I care to count, and I’ve learned a few things along the way. Here are my best tips for success.
Don’t Skip the Chill Time
I know it’s tempting to skip straight to shaping, but chilled dough is so much easier to work with. Warm dough is sticky and won’t hold the finger shape. On attempt number two, I got impatient and ended up with green blobs that looked more like alien slugs than fingers. Not my finest moment.
Use Gel Food Coloring
Liquid food coloring will mess with the dough’s texture and make it too wet. Gel coloring is concentrated, so you use less, and it doesn’t affect the consistency. I learned this after a disastrous batch that turned into a sticky mess. Plus, gel colors are more vibrant — your fingers will be properly creepy green, not pastel.
Make the Knuckles Deep Enough
When you press in the knuckle marks, make them deeper than you think they need to be. The dough will puff slightly during baking, and shallow marks will disappear. I use the edge of a butter knife and press down firmly. You should see a clear indent before baking.
Watch the Baking Time
Every oven is different. Start checking at 10 minutes. The cookies should look set around the edges but still soft in the center. They’ll continue to cook on the hot baking sheet after you pull them out. If you wait until they look fully done, they’ll be overbaked and crunchy.
Work in Batches
Don’t try to shape all the fingers at once. The dough warms up from your hands and gets sticky. Work with half the dough at a time, keeping the rest in the fridge. This is especially important if you have warm hands like I do.
Get the Kids Involved
This is the best part. Let your kids help shape the fingers. They’ll make them look even more grotesque, which is perfect. My youngest once made a finger with three knuckles and an extra fingernail. It was terrifying and wonderful. Just supervise the almond placement so nobody eats raw almonds.
Variations & Adaptations
One of the best things about this recipe is how customizable it is. Here are some ways to make it your own.
Vegan Version
Replace the butter with vegan butter sticks and use a flax egg (1 tablespoon ground flaxseed mixed with 3 tablespoons water, let sit for 5 minutes). The texture will be slightly different — a bit more crumbly — but they still look fantastic. I tested this for a friend’s vegan Halloween party, and nobody could tell the difference.
Gluten-Free Adaptation
Use a 1:1 gluten-free baking flour blend. I recommend King Arthur’s Measure for Measure blend. Add an extra tablespoon of flour if the dough feels too sticky. The cookies won’t spread as much, so you might need to shape them a bit thinner.
Different Colors
Don’t want green fingers? Make them purple, blue, or even gray. Gray fingers with black fingernails look like zombie hands. My neighbor’s kids requested “rainbow witch fingers” last year, and honestly, they looked like something from a psychedelic nightmare. The kids loved them.
Spooky Variations
Add a pinch of cinnamon or pumpkin pie spice to the dough for a fall flavor twist. Or dip the finished cookies in melted white chocolate and call them “mummy fingers.” You can also press a candy corn into the tip instead of an almond for a sweeter version.
Savory Twist
This is weird, but hear me out. Reduce the sugar to ¼ cup, omit the vanilla and almond extract, and add 1 teaspoon garlic powder and 1 teaspoon dried rosemary. Shape them the same way and bake. They make hilarious savory appetizers for a Halloween party. I brought these to a potluck once, and people were genuinely confused.
Personal Variation I Love
My favorite version uses a pinch of matcha powder in addition to the green food coloring. It gives the cookies a more natural green color and adds a subtle earthy flavor that pairs beautifully with the almond extract. Plus, it makes me feel slightly healthier about eating a cookie shaped like a human finger.
Serving & Storage Suggestions
These witch finger cookies are best served at room temperature, which is convenient because that’s how they’ll be after they cool. Arrange them on a platter with the fingers pointing in different directions for maximum creep factor. I like to scatter a few around a “graveyard” made of chocolate pudding and crushed Oreos.
What to Serve With Them
These cookies pair perfectly with a glass of cold milk — it makes the “blood” stand out more. For an adult Halloween party, try them with a dark stout or a pumpkin beer. The bitterness of the beer balances the sweetness of the cookie. My husband swears by them with hot apple cider.
Storage Instructions
Store the cookies in an airtight container at room temperature for up to 5 days. Layer them between sheets of parchment paper to prevent the fingernails from breaking off. Do not refrigerate them — the fridge will make them dry and sad.
Freezing Tips
These freeze beautifully. Place the baked, cooled cookies in a single layer on a baking sheet and freeze until solid. Transfer to a freezer-safe bag or container. They’ll keep for up to 3 months. Thaw at room temperature for about 30 minutes before serving. You can also freeze the unbaked, shaped fingers on a baking sheet, then transfer to a bag. Bake from frozen, adding 2-3 minutes to the baking time.
How Flavors Develop
Here’s a secret: these cookies actually taste better the next day. The almond extract mellows and blends with the butter, creating a more complex flavor. If you can resist eating them all on day one, you’ll be rewarded on day two. Not that I’ve ever managed to wait that long.
Presentation Ideas
Serve them on a black platter or a wooden board for that rustic, witchy vibe. Add some fake spiderwebs around the edges. For a truly terrifying display, arrange the fingers so they look like they’re crawling out of a bowl of dip. My kids screamed when they saw that. It was glorious.
Nutritional Information & Benefits
Let’s be real — these are cookies. They’re not health food. But here’s what you’re working with per cookie (based on a batch of 40):
- Calories: Approximately 110 per cookie
- Fat: 6g
- Carbohydrates: 13g
- Protein: 1g
- Sugar: 5g
Health Highlights: The almonds provide a small amount of vitamin E and healthy fats. The butter, while high in saturated fat, does contain some vitamin A. If you use the matcha powder variation, you’ll get a tiny dose of antioxidants. I mean, it’s a stretch, but every little bit counts, right?
Dietary Considerations: This recipe contains dairy, eggs, gluten, and tree nuts (almonds). For allergen-friendly versions, check the variations section above. These cookies are naturally low in sodium and contain no artificial preservatives, which is more than you can say for most store-bought Halloween treats.
Personal Wellness Perspective: Look, Halloween comes once a year. I firmly believe in enjoying treats in moderation and not feeling guilty about it. These cookies are part of the fun — the memory of making them with your kids, the laughter when you serve them, the joy on little faces. That’s worth a few extra calories. Balance it out with a healthy dinner and call it a win.
Conclusion
These witch finger cookies are everything a Halloween treat should be — spooky, delicious, and ridiculously fun to make. They come together in 30 minutes, use ingredients you probably already have, and will make you the hero of any Halloween gathering. Your kids will brag about them at school. Your neighbors will ask for the recipe. You’ll feel like a kitchen witch with mad baking skills.
I love this recipe because it’s not just about the cookies. It’s about the tradition we’re building — the annual ritual of rolling green dough into creepy fingers, the shrieks of laughter when the “blood” goes on, the pride on my kids’ faces when they present their creations to visitors. That’s the real magic of Halloween.
So go ahead — make these cookies your own. Add extra knuckles. Use purple food coloring. Dip them in chocolate. The beauty of this recipe is that it’s forgiving and flexible. And if your first batch doesn’t look perfect? That’s okay. They’ll still taste amazing, and honestly, imperfect witch fingers are even creepier.
I’d love to hear how yours turn out! Drop a comment below with your spooky creations — did your kids help? Did you try a wild color variation? Did anyone in your family refuse to eat them because they looked too real? Share your stories and tag me in your photos. Happy Halloween, friends. Now go make some magic.
Frequently Asked Questions
Can I make these witch finger cookies ahead of time?
Absolutely! You can make the dough up to 3 days ahead and keep it wrapped in the fridge. You can also bake them up to 5 days in advance and store them in an airtight container. They actually taste better the next day, so making them ahead is a smart move.
Why did my cookies puff up and lose their shape?
This usually happens when the dough isn’t chilled enough before baking. Make sure you chill the shaped fingers for at least 10 minutes before they go in the oven. Also, check that your baking powder isn’t expired — old baking powder can cause excessive puffing.
Can I use a different nut for the fingernails?
Sure! Sliced almonds are traditional, but you can use whole almonds (cut in half lengthwise), pecan halves, or even cashews. For a nut-free version, use a small piece of dried apricot or a candy corn. Just make sure whatever you use is secure in the dough so it doesn’t fall off during baking.
My dough is too sticky to shape. What should I do?
Pop it back in the fridge for another 15-20 minutes. If it’s still sticky after that, dust your hands lightly with flour. Don’t add more flour to the dough itself — that will make the cookies tough. You can also try wetting your hands slightly with cold water before shaping.
How do I get the “blood” to look realistic?
Use a thick red jam or jelly, not liquid food coloring. Strawberry or raspberry jam works best because it has that dark, congealed look. Apply it while the cookies are still warm so it melts slightly into the dough. For extra gore, add a tiny drop of red food coloring to the jam before applying.
Pin This Recipe!

30-Minute Easy Witch Finger Cookies for Halloween Treats
These spooky witch finger cookies look exactly like gnarled old witch fingers, complete with a slivered almond fingernail and a little ‘blood’ at the cuticle. They come together in 30 minutes flat and taste like a buttery, almond-infused treat that’s perfect for Halloween.
- Prep Time: 20 minutes
- Cook Time: 10-12 minutes
- Total Time: 30 minutes
- Yield: 40 cookies 1x
- Category: Dessert
- Cuisine: American
Ingredients
- 1 cup (226g) unsalted butter, softened
- 1 cup (200g) granulated sugar
- 1 large egg, room temperature
- 1 teaspoon vanilla extract
- 1 teaspoon almond extract
- 2 ½ cups (312g) all-purpose flour
- 1 teaspoon baking powder
- ½ teaspoon salt
- About 40 slivered almonds
- Green gel food coloring
- Red jam or jelly (strawberry or raspberry)
- Optional: Cocoa powder for dusting
Instructions
- Cream the butter and sugar together until light and fluffy, about 2-3 minutes.
- Beat in the egg, vanilla extract, and almond extract until well combined. Add green gel food coloring (about ¼ to ½ teaspoon) until desired color is reached.
- In a separate bowl, whisk together flour, baking powder, and salt. Gradually add to the wet mixture, mixing on low speed until just combined.
- Wrap dough in plastic wrap and refrigerate for at least 20 minutes.
- Preheat oven to 350°F (175°C). Line baking sheets with parchment paper.
- Shape dough into finger shapes (about 1 tablespoon each), making them thicker at the base and tapering at the tip. Use the back of a knife to make knuckle indents. Press a slivered almond into the tip for the fingernail and squeeze dough around it. Use a toothpick to make a small indent around the almond for the cuticle.
- Use an offset spatula or knife to add wrinkles and lines to the fingers. Press down gently to create ‘wrinkles’ at the knuckles.
- Place shaped fingers on prepared baking sheets, spacing about 2 inches apart. Bake for 10-12 minutes, until edges are just barely golden.
- While cookies are still warm, use a pastry brush to dab a tiny bit of red jam on the cuticle area for the ‘blood’ effect.
- Optional: Dust cooled cookies lightly with cocoa powder for a dirty, aged appearance.
Notes
Chill the shaped fingers for at least 10 minutes before baking to prevent puffing. Use gel food coloring instead of liquid to avoid altering dough texture. For best results, use pure almond extract. Cookies taste even better the next day.
Nutrition
- Serving Size: 1 cookie
- Calories: 110
- Sugar: 5
- Sodium: 50
- Fat: 6
- Saturated Fat: 3.5
- Carbohydrates: 13
- Protein: 1
Keywords: witch finger cookies, Halloween cookies, spooky cookies, almond cookies, easy Halloween treats, 30-minute cookies