Rushing around the kitchen with a half-empty box of graham crackers and a fridge that looked suspiciously bare—that’s exactly how the idea for these Perfect Red White & Blue Cheesecake Flag Bars came about. I was juggling dinner, a chaotic pile of laundry, and a last-minute invite to a neighborhood barbecue. Honestly, I didn’t have time for a complicated dessert, but I knew I wanted something festive that screamed summer and celebration. The usual store-bought options just wouldn’t cut it, and let’s face it, I can’t resist a good cheesecake.
So, there I was, smashing together a quick crust, whipping up a creamy filling, and layering vibrant berries in a way that somehow looked like an edible flag. The kitchen smelled like vanilla and buttery graham crackers, with that tangy hint of cream cheese hanging in the air. I remember thinking, “If this turns out half as good as it looks, it’ll be a winner.” And it was. The bars were creamy, sweet, and packed with just the right pop of freshness from the blueberries and strawberries.
Since then, this red white & blue cheesecake recipe has become my go-to for any patriotic celebration—whether it’s the Fourth of July, Memorial Day, or just a sunny weekend gathering. It’s simple enough to pull off when you’re in a pinch but festive enough to impress. Honestly, it’s that balance that makes it stick around in my baking rotation. It’s a quiet little nod to the holidays, wrapped in a delicious, sliceable bar.
Why You’ll Love This Recipe
After testing this recipe a few times (and sneaking more than a few bites), I can say it’s a crowd-pleaser that’s surprisingly easy to make. Here’s why it’s worth having in your recipe arsenal:
- Quick & Easy: Ready in under 45 minutes of active prep, perfect when you’re juggling a million things but still want a festive dessert.
- Simple Ingredients: No exotic stuff here—just pantry staples and fresh berries that you probably already have or can easily grab.
- Perfect for Patriotic Occasions: Whether it’s a family barbecue or a neighborhood potluck, these bars bring that seasonal vibe without the fuss.
- Crowd-Pleaser: Kids love the creamy texture and bright colors, while adults appreciate the balance of sweet and tangy flavors.
- Unique Yet Familiar: Unlike regular cheesecakes, these bars have the flag design baked in, making them a fun centerpiece without complicated decorating.
This recipe isn’t just another cheesecake bar—it’s the one I trust when I want to look like I put in effort but didn’t spend hours in the kitchen. The secret? A perfectly smooth cream cheese filling that’s flavored just right, paired with a buttery graham cracker crust. Plus, the fresh berries add that natural sweetness and color that makes every bite feel like a little celebration.
If you want more inspiration for your summer spread, pairing these bars with a fresh watermelon feta salad or some smoky bourbon baby back ribs can really round out your patriotic feast.
What Ingredients You Will Need
This recipe uses straightforward, wholesome ingredients that create a classic cheesecake bar with a festive twist. The ingredients are pantry staples for the most part, with fresh seasonal berries bringing the red and blue star power.
- For the Crust:
- 1 1/2 cups graham cracker crumbs (about 12 full sheets) – I like using Honey Maid for that perfect crunch
- 1/4 cup granulated sugar
- 1/2 cup unsalted butter, melted (adds richness and binds the crust)
- Pinch of salt
- For the Cheesecake Filling:
- 16 oz (450g) cream cheese, softened (room temperature for smooth mixing)
- 2/3 cup granulated sugar
- 2 large eggs, room temperature
- 1 tsp pure vanilla extract
- 1/2 cup sour cream or Greek yogurt (for tang and creaminess; use coconut yogurt for dairy-free)
- 1 tbsp all-purpose flour (helps keep the filling firm)
- For the Red, White & Blue Topping:
- 1 cup fresh strawberries, sliced (or frozen, thawed and drained)
- 1 cup fresh blueberries
- Optional: 2 tbsp powdered sugar to dust for an extra touch
If you want to make this gluten-free, try swapping regular graham crumbs with gluten-free ones or almond flour for the crust. The fresh berries can be switched out depending on season, too—raspberries work well for the red, and blackberries can stand in for blueberries if needed.
Equipment Needed
- 9×13 inch (23×33 cm) baking pan – I prefer glass for even baking, but metal works fine
- Mixing bowls (one large for crust, one medium for filling)
- Electric mixer or stand mixer – helps get that ultra-smooth cheesecake filling
- Measuring cups and spoons – precision matters here for the best texture
- Spatula – for folding ingredients gently and scraping the bowl
- Knife – to slice the bars neatly
- Parchment paper or cooking spray – to prevent sticking
If you don’t have a mixer, a sturdy whisk and some patience can work, but the texture might not be as silky. A handheld electric mixer is a budget-friendly option worth having if you bake often. I’ve found using parchment paper lined in the pan saves a lot of cleanup hassle and helps lift the bars out easily.
Preparation Method
- Prepare the Crust: Preheat your oven to 325°F (163°C). Line your 9×13 inch pan with parchment paper or lightly grease it. In a large bowl, combine the graham cracker crumbs, sugar, and salt. Pour in the melted butter and stir until the mixture looks evenly moistened and feels like wet sand—this usually takes about 2 minutes. Press the crust mixture firmly and evenly into the bottom of the pan using the back of a spoon or your fingers. Bake for 8–10 minutes until it’s just starting to turn golden. Remove from oven and let cool slightly while you prepare the filling.
- Make the Cheesecake Filling: In a medium bowl, beat the softened cream cheese until smooth and creamy, about 2-3 minutes on medium speed. Gradually add sugar and continue mixing until fully incorporated. Add eggs one at a time, beating just until combined after each. Stir in vanilla extract, sour cream, and flour. Mix gently but thoroughly until the batter is silky and lump-free—about 1-2 minutes. Avoid over-beating to prevent cracks.
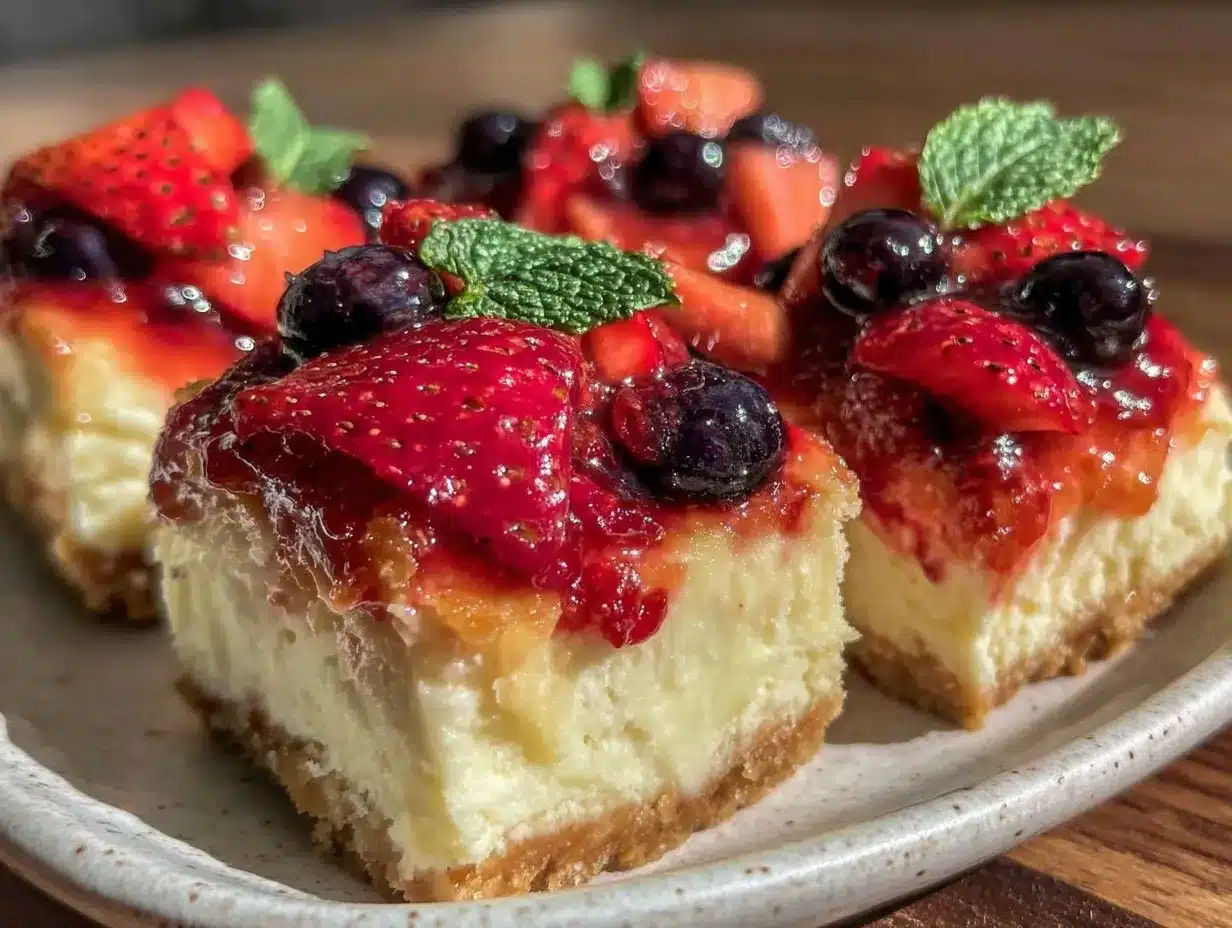
- Assemble the Bars: Pour the cheesecake filling over the warm crust, spreading it out evenly with a spatula. Smooth the top as best you can. Now comes the fun part: arrange your strawberries and blueberries in a flag pattern. I like to create the “blue” section in the top left corner with blueberries, then lay out rows of sliced strawberries and leave the rest of the filling white for the stripes. This takes a bit of patience but trust me, it’s worth it for that patriotic wow factor.
- Bake: Place the pan back in the oven and bake for 35–40 minutes, or until the edges are set but the center still jiggles slightly when you shake the pan. This gentle jiggle means the cheesecake will set perfectly as it cools.
- Cool and Chill: Remove from the oven and let the cheesecake bars cool to room temperature on a wire rack. Once cooled, refrigerate for at least 4 hours or overnight to firm up completely. This step is key to slicing clean bars and getting that creamy texture.
- Serve: Dust lightly with powdered sugar if desired, slice into bars, and enjoy! For best results, use a sharp knife wiped clean between cuts.
Keep an eye on the baking time—overbaking can dry out your filling. If you notice the top browning too fast, tent loosely with foil halfway through baking. The smell of vanilla and baking berries will fill your kitchen, signaling that patriotic dessert magic is happening.
Cooking Tips & Techniques
One thing I learned quickly is that room temperature cream cheese is non-negotiable. If it’s cold, you’ll end up with lumps no matter how much you beat. Leaving it out for an hour or microwaving for a few seconds (but not melting!) helps it mix smoothly.
When mixing the batter, avoid overbeating once eggs are added. Overmixing can introduce air bubbles, causing cracks or a crumbly texture. Gently folding in the sour cream and flour keeps the filling dense but creamy.
Arranging the berries can feel a bit fiddly. I find using a small spoon to place blueberries and a butter knife to line up strawberry slices works best. Don’t worry about perfection—this is homemade charm.
For neat slices, chill the cheesecake fully and use a knife dipped in hot water before each cut. Wipe the blade clean to prevent smearing. This trick makes your bars look as good as they taste.
If you’re pressed for time, you can skip the baking step and make no-bake cheesecake bars instead, but the baked version has that richer, denser texture that’s hard to beat.
Variations & Adaptations
Want to switch things up? Here are some ways I’ve adapted this recipe to fit different needs and occasions:
- Berry Mix-Up: Swap strawberries and blueberries for raspberries and blackberries for a slightly different flavor and color tone.
- Gluten-Free: Use almond flour or gluten-free graham crackers for the crust. The texture changes slightly but stays delicious.
- Dairy-Free: Substitute cream cheese with a vegan dairy-free alternative and use coconut yogurt instead of sour cream.
- Chocolate Twist: Add 1/4 cup cocoa powder to the crust or swirl melted chocolate into the cheesecake filling for a festive flag with a chocolate kick.
- Mini Bars: Make individual servings using a muffin tin lined with parchment or silicone liners. Great for parties where finger foods are king.
Personally, I once made a version with a graham cracker crust spiked with cinnamon and a drizzle of honey on top. It brought a subtle warmth that paired surprisingly well with the fresh berries. Feel free to experiment and find your own signature spin!
Serving & Storage Suggestions
These cheesecake bars are best served chilled or at cool room temperature to let the creamy texture shine. I like to arrange them on a platter with fresh mint sprigs or edible flowers for a touch of elegance.
They pair wonderfully with refreshing summer sides like a fresh watermelon feta salad or smoky mains like baby back ribs with bourbon BBQ sauce. For drinks, a sparkling strawberry lemonade or a red white & blue sangria completes the vibe beautifully.
Store leftover bars covered in the refrigerator for up to 4 days. They freeze well too—wrap individual bars tightly in plastic wrap and place in a freezer bag for up to 2 months. Thaw overnight in the fridge before serving.
Reheating isn’t necessary, but if you prefer a softer texture, let them sit out for 15-20 minutes before slicing. The flavors actually deepen and meld after a day or two, so these bars taste even better the next day.
Nutritional Information & Benefits
Each bar packs a creamy dose of protein thanks to the cream cheese and eggs, along with antioxidants and vitamins from the fresh berries. The graham cracker crust provides a satisfying crunch with moderate carbs, making it a balanced treat.
Approximate nutrition per serving (1 bar, makes 12): 280 calories, 17g fat, 24g carbs, 5g protein.
This recipe can easily fit into gluten-free or dairy-free diets with the substitutions mentioned earlier. Just watch for added sugars if you’re managing intake.
For me, this dessert strikes a nice balance between indulgence and fresh flavor. It’s a way to enjoy a classic cheesecake without feeling weighed down, especially during hot summer celebrations when something too heavy just won’t do.
Conclusion
Perfect Red White & Blue Cheesecake Flag Bars are a festive, delicious way to bring a little Americana sweetness to your celebrations. They’re simple enough to make on a busy day but special enough to impress guests or delight family. The creamy texture, fresh berry topping, and buttery crust come together in a way that’s both comforting and celebratory. I love how this recipe lets me enjoy cheesecake without the stress of complicated decorating or long bake times.
Feel free to tweak the berries or crust to fit your taste or dietary needs. If you try making these bars, I’d love to hear how you customized them! Sharing your versions makes this recipe feel like part of a bigger summer story.
So go ahead—grab those berries, dust off your mixer, and make a batch for your next patriotic gathering. It’s a sweet way to show you care.
FAQs
Can I make these cheesecake bars ahead of time?
Yes! They actually taste better after chilling overnight. Just cover and refrigerate. You can also freeze them for longer storage.
What’s the best way to slice the bars without cracking?
Use a sharp knife dipped in hot water and wiped clean between cuts. Chilling the bars fully before slicing helps keep the edges neat.
Can I use frozen berries for the topping?
Absolutely. Just thaw and drain them well to avoid excess moisture making the crust soggy.
How do I prevent cracks in the cheesecake filling?
Don’t overmix after adding eggs, bake at a moderate temperature, and avoid sudden temperature changes. A water bath isn’t necessary for bars but helps in full cheesecakes.
Is there a dairy-free version of this recipe?
Yes, use dairy-free cream cheese and coconut yogurt instead of sour cream. Make sure your crust ingredients are also dairy-free if needed.
Pin This Recipe!
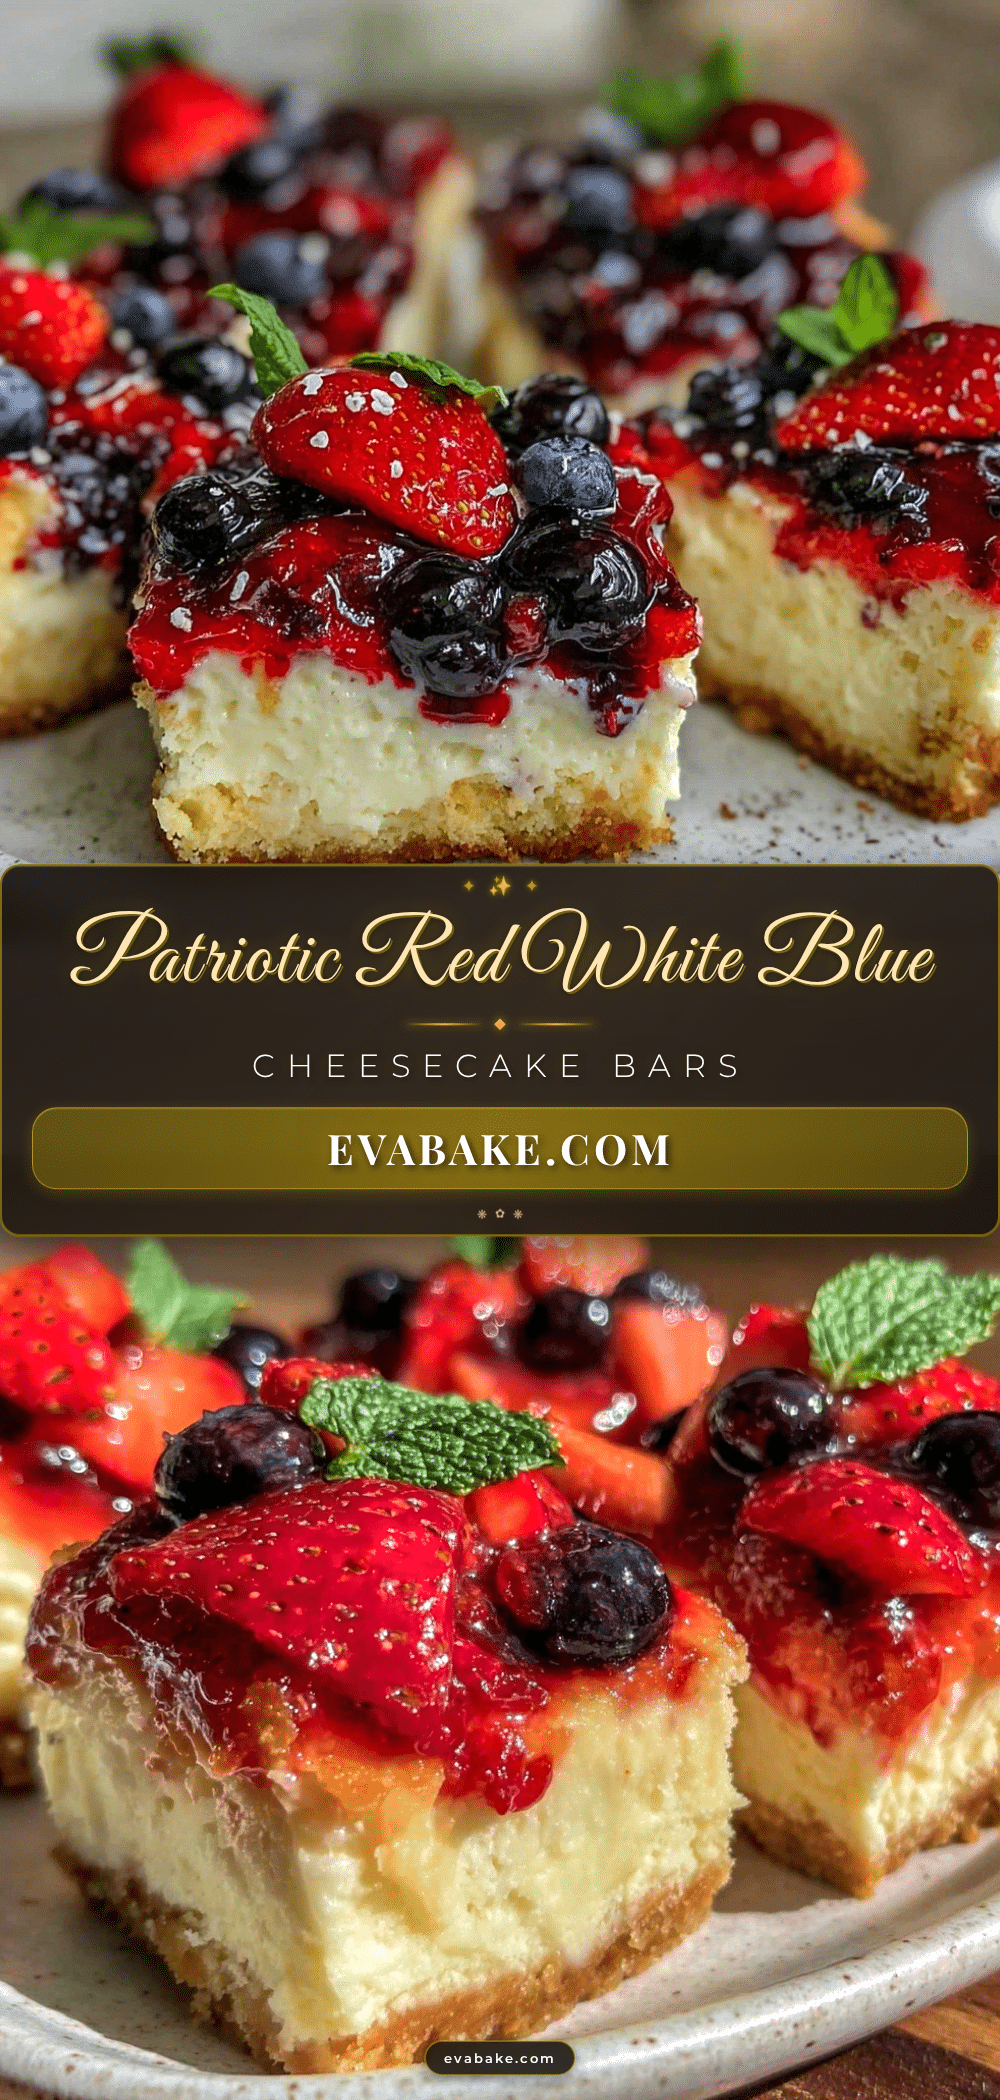
Red White & Blue Cheesecake Flag Bars
These festive cheesecake bars feature a buttery graham cracker crust, creamy cheesecake filling, and a patriotic topping of fresh strawberries and blueberries arranged like a flag. Perfect for summer celebrations and easy to make.
- Prep Time: 15 minutes
- Cook Time: 45 minutes
- Total Time: 4 hours 60 minutes
- Yield: 12 servings 1x
- Category: Dessert
- Cuisine: American
Ingredients
- 1 1/2 cups graham cracker crumbs (about 12 full sheets)
- 1/4 cup granulated sugar
- 1/2 cup unsalted butter, melted
- Pinch of salt
- 16 oz (450g) cream cheese, softened
- 2/3 cup granulated sugar
- 2 large eggs, room temperature
- 1 tsp pure vanilla extract
- 1/2 cup sour cream or Greek yogurt
- 1 tbsp all-purpose flour
- 1 cup fresh strawberries, sliced
- 1 cup fresh blueberries
- Optional: 2 tbsp powdered sugar for dusting
Instructions
- Preheat oven to 325°F (163°C). Line a 9×13 inch baking pan with parchment paper or lightly grease it.
- In a large bowl, combine graham cracker crumbs, sugar, and salt. Pour in melted butter and stir until mixture resembles wet sand.
- Press crust mixture firmly and evenly into the bottom of the pan. Bake for 8–10 minutes until just starting to turn golden. Remove and let cool slightly.
- In a medium bowl, beat softened cream cheese until smooth, about 2-3 minutes.
- Gradually add sugar and mix until incorporated. Add eggs one at a time, beating just until combined after each.
- Stir in vanilla extract, sour cream, and flour. Mix gently until silky and lump-free, about 1-2 minutes. Avoid over-beating.
- Pour cheesecake filling over warm crust and spread evenly.
- Arrange strawberries and blueberries in a flag pattern on top of the filling.
- Bake for 35–40 minutes until edges are set but center jiggles slightly.
- Remove from oven and cool to room temperature on a wire rack.
- Refrigerate for at least 4 hours or overnight to firm up.
- Dust with powdered sugar if desired, slice into bars, and serve.
Notes
Use room temperature cream cheese for smooth mixing. Avoid over-beating after adding eggs to prevent cracks. Chill bars fully before slicing and use a knife dipped in hot water for clean cuts. You can substitute gluten-free or dairy-free ingredients as needed. Optional to dust with powdered sugar before serving.
Nutrition
- Serving Size: 1 bar
- Calories: 280
- Fat: 17
- Carbohydrates: 24
- Protein: 5
Keywords: cheesecake bars, patriotic dessert, red white and blue, Fourth of July dessert, berry cheesecake, easy cheesecake bars