The icing bag slipped right out of my hand. There I was, at 11 PM on a Tuesday, staring at a ghost-shaped cookie that now had a bright orange splatter across its face instead of a neat little smile. My kitchen looked like a powdered sugar bomb had gone off, and I was seriously questioning why I thought making Halloween cookies from scratch was a good idea after a full day of work.
But here’s the thing — I couldn’t stop. I scraped off the messy icing, popped that cookie back in my mouth (waste not, want not), and started over. By the third try, something clicked. The royal icing flowed just right, the colors stayed where I put them, and that little ghost actually looked cute. I made another, and another, and before I knew it, I had a whole tray of Halloween cookies that looked like they belonged in a bakery window.
These perfect Halloween sugar cookies with easy royal icing recipe became my annual tradition after that night. Every October, I block off an evening, put on a scary movie (or The Great British Bake Off — no judgment), and lose myself in decorating. There’s something deeply satisfying about turning simple sugar cookies into little works of art. And honestly, the messy ones taste just as good.
What I love most about this recipe is that it doesn’t require professional skills. If I can make these cookies look good after that disastrous first attempt, anyone can. The sugar cookie base stays soft in the middle with slightly crisp edges, and the royal icing dries to a perfect glossy finish that won’t smear when you stack them. These are the cookies that make people say, “Wait, you made these?” with genuine surprise in their voice.
Why You’ll Love This Recipe
Let me tell you why these Halloween sugar cookies have become my most-requested recipe every October. I’ve tested this dough more times than I can count, tweaking the butter temperature and flour ratio until it was absolutely foolproof.
- No Spreading Dough — This cookie dough holds its shape perfectly when chilled. Your bat wings won’t melt into blobs, and your pumpkin shapes will actually look like pumpkins.
- Royal Icing That Actually Works — I’ve had my fair share of icing disasters. Runny icing, icing that dried too fast, icing that never dried at all. This version hits the sweet spot every time.
- Make-Ahead Friendly — The dough freezes beautifully for up to 3 months. You can prep everything in advance and decorate whenever you have time.
- Crowd-Pleasing Flavor — These cookies have a buttery vanilla flavor with a hint of almond that makes them irresistible. They’re not too sweet, which means the icing doesn’t put you into a sugar coma.
- Perfect for Halloween Parties — Whether you’re hosting a spooky gathering or sending treats to school, these cookies look impressive with minimal effort. I’ve brought them to countless fall gatherings, and they always disappear first.
What sets this recipe apart is the texture. Most sugar cookies are either too cakey or too crunchy. These have that perfect snap on the outside with a tender, almost melt-in-your-mouth center. The royal icing recipe uses meringue powder instead of raw egg whites, so it’s safe for everyone and has a reliable consistency every single time. No guessing, no crossing your fingers — just beautiful, delicious cookies.
What Ingredients You Will Need
This recipe uses simple pantry ingredients to create something truly special. The magic happens in how they come together, not in fancy specialty items.
For the Sugar Cookies
- Unsalted butter, 1 cup (226g), softened — Make sure it’s truly at room temperature. Cold butter won’t cream properly, and melted butter will make your cookies spread. I leave mine out for about an hour before starting.
- Granulated sugar, 1 cup (200g) — Regular white sugar gives these cookies their classic sweetness and helps create that slightly crisp edge.
- Large egg, 1, room temperature — A room-temperature egg incorporates more evenly into the butter mixture. If you forgot to take it out early, place it in warm water for 5 minutes.
- Vanilla extract, 2 teaspoons — Use pure vanilla extract if you can. The flavor difference is noticeable, especially in a simple cookie like this.
- Almond extract, ½ teaspoon — This is my secret ingredient. It adds a subtle nutty warmth that makes people wonder what makes these cookies taste so good. Leave it out if you prefer, but try it once first.
- All-purpose flour, 2½ cups (312g) — Spoon and level your flour. Scooping directly from the bag packs it down and gives you too much flour, which makes dry cookies.
- Baking powder, 1 teaspoon — This gives the cookies just a tiny bit of lift without making them puffy.
- Salt, ½ teaspoon — Salt balances the sweetness and enhances the buttery flavor. Don’t skip it.
For the Royal Icing

- Meringue powder, 3 tablespoons — I recommend Wilton brand for consistent results. This replaces raw egg whites and gives the icing structure.
- Powdered sugar, 4 cups (480g), sifted — Sifting is non-negotiable here. Lumps in your powdered sugar create lumps in your icing that clog decorating tips.
- Warm water, 5-6 tablespoons — Start with less and add more as needed. Humidity affects how much liquid you’ll need.
- Vanilla extract, ½ teaspoon — Optional, but I like the subtle flavor it adds.
- Gel food coloring, assorted Halloween colors — Gel colors are concentrated and won’t thin out your icing like liquid food coloring does. I use black, orange, purple, and green.
For Decorating
- Halloween cookie cutters — Ghosts, pumpkins, bats, cats, and moons are my go-to shapes. You can find sets at most craft stores or online.
- Piping bags or squeeze bottles — I prefer squeeze bottles for flooding and piping bags with small tips for details.
- Edible glitter or sanding sugar — Optional, but adds a fun sparkle that kids especially love.
Equipment Needed
You don’t need a professional bakery setup to make these cookies look amazing. Here’s what I use in my own kitchen.
- Stand mixer or hand mixer — A stand mixer makes creaming butter and sugar effortless, but a hand mixer works just fine. I’ve made these cookies with both.
- Rolling pin — A standard rolling pin works, but I love my adjustable rolling pin with thickness rings. It ensures every cookie is the same thickness, which means even baking.
- Baking sheets — Heavy-duty aluminum sheets give the most even heat distribution. Darker sheets can cause cookies to brown faster on the bottom.
- Parchment paper or silicone baking mats — Parchment paper is my preference because it’s disposable and gives clean edges. Silicone mats work great too.
- Cookie cutters — Metal cutters cut cleaner edges than plastic ones. Look for sharp, sturdy shapes.
- Piping bags and tips — I use Wilton round tips #2 for outlines and #3 for flooding. You can also use disposable piping bags with the tip snipped off.
- Squeeze bottles — These are game-changers for flooding large areas. I got a set of four for under $10, and they’ve saved me so much time.
- Cooling racks — Cookies need to cool completely before icing. Stacking warm cookies creates steam that makes them soft and sticky.
Preparation Method
Let’s walk through this step by step. I’ve included every little detail I wish someone had told me when I first started making decorated sugar cookies.
Making the Cookie Dough
- Cream the butter and sugar — In your stand mixer fitted with the paddle attachment, beat the softened butter and granulated sugar together on medium speed for 3-4 minutes. You want it light, fluffy, and pale in color. Scrape down the sides of the bowl halfway through. This step adds air to your dough, which affects the final texture.
- Add the wet ingredients — Beat in the egg, vanilla extract, and almond extract until fully combined. The mixture might look slightly curdled at this point — that’s normal, don’t panic.
- Mix the dry ingredients — In a separate bowl, whisk together the flour, baking powder, and salt. This ensures the baking powder is evenly distributed throughout the dough.
- Combine wet and dry — With the mixer on low speed, gradually add the flour mixture to the butter mixture. Mix just until the dough comes together. Overmixing develops gluten, which makes tough cookies. You should see a few streaks of flour remaining — stop there.
- Divide and chill — Turn the dough out onto a lightly floured surface and divide it in half. Flatten each half into a disk about 1 inch thick, wrap tightly in plastic wrap, and refrigerate for at least 2 hours. Overnight is even better. Chilling solidifies the butter, which prevents spreading during baking.
Rolling and Cutting
- Preheat your oven — Set it to 350°F (175°C). Line your baking sheets with parchment paper.
- Roll out the dough — Lightly flour your work surface and rolling pin. Roll one disk of dough to about ¼-inch thickness. If you have an adjustable rolling pin, set it to the ¼-inch mark. Roll from the center outward, turning the dough occasionally to prevent sticking.
- Cut your shapes — Dip your cookie cutters in flour before each cut to prevent sticking. Press straight down without twisting — twisting seals the edges and affects how cleanly the cookies bake. Place cut shapes on your prepared baking sheets, leaving about 1½ inches between each cookie.
- Chill again — This step is crucial. Place the cut cookies on their baking sheets into the refrigerator for 15-20 minutes before baking. This firms up the butter one last time and guarantees sharp edges. I learned this trick after my first batch of ghost cookies turned into unrecognizable blobs.
- Bake — Bake for 8-10 minutes, rotating the pan halfway through. The cookies should look set around the edges but still pale on top. They will continue to set as they cool. Overbaked cookies become too hard for decorating.
- Cool completely — Let the cookies cool on the baking sheet for 5 minutes, then transfer to a wire rack to cool completely. Do not attempt to ice warm cookies — the icing will melt and slide right off.
Making and Using Royal Icing
- Mix the icing base — In your stand mixer bowl, combine the meringue powder and sifted powdered sugar. Add 5 tablespoons of warm water and the vanilla extract. Beat on low speed until combined, then increase to medium-high speed and beat for 5-7 minutes. The icing should be thick, glossy, and hold stiff peaks.
- Check the consistency — Lift the beater — the icing should form a peak that holds its shape. This is your stiff consistency icing, perfect for outlines and details.
- Divide and color — Portion the icing into separate bowls for each color you plan to use. Add gel food coloring a tiny bit at a time until you reach your desired shade. Remember that colors darken slightly as they dry.
- Thin for flooding — For the icing you’ll use to fill in large areas, add water one teaspoon at a time until the icing reaches a “15-second” consistency. This means when you drizzle a ribbon of icing back into the bowl, the surface smooths out in about 15 seconds. Too thin, and it will run off your cookies.
- Fill your bags — Transfer stiff icing to piping bags fitted with small round tips. Transfer flooding icing to squeeze bottles or piping bags with slightly larger tips.
Decorating the Cookies
- Outline first — Using your stiff consistency icing, pipe an outline around the edge of each cookie. This creates a dam that will hold your flooding icing in place.
- Flood the center — Fill the outlined area with your thinner flooding icing. Use a toothpick to guide the icing into corners and pop any air bubbles that form.
- Add details while wet — If you’re adding multiple colors or details, do it while the flood icing is still wet. This allows the colors to blend together smoothly. For example, add orange dots to a ghost while the white is still wet for a seamless look.
- Let dry completely — Royal icing needs 6-8 hours to dry completely. Overnight is ideal. Don’t stack or package the cookies until the icing is hard to the touch.
Cooking Tips & Techniques
After years of making these cookies, I’ve collected a few tricks that make the process smoother and the results more consistent. Let me share the ones that saved my sanity.
Temperature matters more than you think. I once made these cookies on a humid summer day without adjusting anything. The dough was sticky, the icing wouldn’t dry, and I nearly cried. On humid days, add an extra tablespoon of flour to the dough and use slightly less water in your icing. On dry winter days, you might need an extra splash of water.
Don’t skip the second chill. I know it’s tempting to pop those cut cookies straight into the oven, but that 15-minute chill in the fridge is what gives you those sharp, professional-looking edges. I learned this the hard way when my first batch of bat cookies came out looking more like potato chips.
Use a scribe tool or toothpick for details. When you’re flooding icing and need to guide it into corners or pop bubbles, a toothpick works perfectly. I keep a small cup of toothpicks next to my decorating station. They’re also great for dragging through wet icing to create marbled effects.
Practice on parchment paper first. Before I decorate the actual cookies, I always pipe a few practice shapes on a piece of parchment paper. This lets me check the icing consistency and get comfortable with the flow. Plus, you can scrape it up and reuse it if the consistency is off.
Work in batches. Decorating 40 cookies in one sitting is exhausting. I usually bake and outline one day, then flood and detail the next day. This makes the process feel less overwhelming and gives the outlines time to set properly.
Variations & Adaptations
One of the best things about this recipe is how adaptable it is. Here are some variations I’ve tried and loved.
Gluten-Free Version — Substitute the all-purpose flour with a 1:1 gluten-free baking flour blend. I’ve used Bob’s Red Mill and King Arthur brands with great results. Add an extra tablespoon of milk if the dough seems too dry. The texture will be slightly more tender, but the cookies still hold their shape beautifully.
Vegan Sugar Cookies — Replace the butter with vegan butter (I like Miyoko’s), use a flax egg (1 tablespoon ground flaxseed mixed with 3 tablespoons water), and skip the almond extract. The dough will be a bit softer, so chill it for an extra 30 minutes before rolling.
Chocolate Sugar Cookies — Replace ¼ cup of the flour with unsweetened cocoa powder. This creates a deep chocolate base that looks amazing with orange and green royal icing. The chocolate flavor pairs perfectly with the vanilla in the royal icing.
Spiced Halloween Cookies — Add 1 teaspoon of pumpkin pie spice to the dry ingredients. This gives the cookies a warm, autumnal flavor that’s perfect for fall. I make these for Thanksgiving too, using leaf and turkey cookie cutters.
Different Icing Flavors — Add a few drops of peppermint extract to the royal icing for a refreshing twist. Or try lemon extract for a bright, citrusy note that cuts through the sweetness. I made a batch with orange extract last year, and they tasted just like Halloween candy oranges.
Serving & Storage Suggestions
These cookies are best served at room temperature, which lets the royal icing maintain its perfect snap. Arrange them on a platter with other Halloween treats for a stunning dessert table. I love pairing them with warm apple cider or a cozy pumpkin spice latte.
For storage, place the fully dried cookies in an airtight container with parchment paper between each layer. They will stay fresh for up to 2 weeks at room temperature. Do not refrigerate them — the moisture in the fridge can make the royal icing sticky and cause the cookies to soften.
These cookies also freeze beautifully. Place them in a single layer in a freezer-safe container with parchment paper between layers. Freeze for up to 3 months. Thaw at room temperature for about 30 minutes before serving. The royal icing stays perfectly intact through freezing and thawing.
If you’re making these for a party, I recommend baking and decorating them at least a day in advance. The flavors actually meld together and improve after 24 hours. Plus, having one less thing to do on party day is always a win.
For gifting, arrange the cookies in a decorative tin or box with tissue paper. They make wonderful homemade gifts for neighbors, teachers, and coworkers. I always include a little card with the recipe so they can make their own.
Nutritional Information & Benefits
Let’s be honest — these are a treat, not a health food. But knowing what’s in them helps you enjoy them mindfully. Per cookie (based on a 3-inch ghost shape with icing), here’s the approximate breakdown:
- Calories: 180-200
- Fat: 8g
- Carbohydrates: 28g
- Protein: 2g
- Sugar: 18g
The butter provides a small amount of vitamin A and healthy fats, while the egg adds protein. The almond extract adds a touch of vitamin E. The royal icing is mostly sugar, but it’s what makes these cookies so visually stunning.
If you’re watching your sugar intake, you can reduce the sugar in the cookie dough by ¼ cup without affecting the texture too much. The royal icing is harder to modify, but you can use a thinner layer for less sugar per cookie.
These cookies are nut-free if you skip the almond extract, making them safe for school events. They do contain dairy and gluten, so keep that in mind for guests with allergies.
Conclusion
These perfect Halloween sugar cookies with easy royal icing recipe have become more than just a dessert in my house — they’re a cherished tradition. Every October, my kitchen turns into a tiny cookie decorating studio, with sprinkles on the floor and icing smudges on the cabinets. And honestly, I wouldn’t have it any other way.
What I love most is watching people’s faces when they see the finished cookies. Kids light up at the sight of a ghost with a crooked smile, and adults appreciate the craftsmanship. These cookies bring joy, and that’s the best ingredient of all.
I’d love to see your creations! Tag me when you make these, and don’t be afraid to get creative with your designs. The beautiful thing about Halloween cookies is that they’re supposed to be a little spooky — imperfections just add character. So grab your rolling pin, put on your favorite Halloween playlist, and get baking. You’ve got this.
Frequently Asked Questions
Can I use store-bought cookie dough instead?
You can, but the results won’t be the same. Homemade dough holds its shape better during baking and has a superior texture. Store-bought dough tends to spread more, which can ruin your Halloween shapes. If you’re short on time, make the dough a day ahead and refrigerate it.
How do I get my royal icing to dry faster?
Royal icing needs time and airflow to dry properly. You can speed things up by using a fan pointed at the cookies (not directly on them) or placing them in a warm, dry room. Avoid the refrigerator or freezer — moisture will ruin the finish. A dehumidifier in the room works wonders.
My royal icing is too runny. Can I fix it?
Absolutely. Add more sifted powdered sugar, one tablespoon at a time, and mix well until the icing thickens to the right consistency. If it’s too thick, add water one drop at a time. Always test the consistency on a piece of parchment paper before using it on actual cookies.
How far in advance can I make these cookies?
You can bake the cookies up to a week in advance and store them in an airtight container. Decorate them up to 3 days before serving. Fully decorated cookies can be stored for up to 2 weeks. The dough itself can be frozen for up to 3 months.
Why did my cookies spread during baking?
This usually happens for one of three reasons: the dough wasn’t chilled long enough, the butter was too soft, or the baking sheet was too warm. Always chill your cut cookies for at least 15 minutes before baking. Use cold baking sheets — rotate them in and out of the refrigerator if you’re baking multiple batches.
Pin This Recipe!
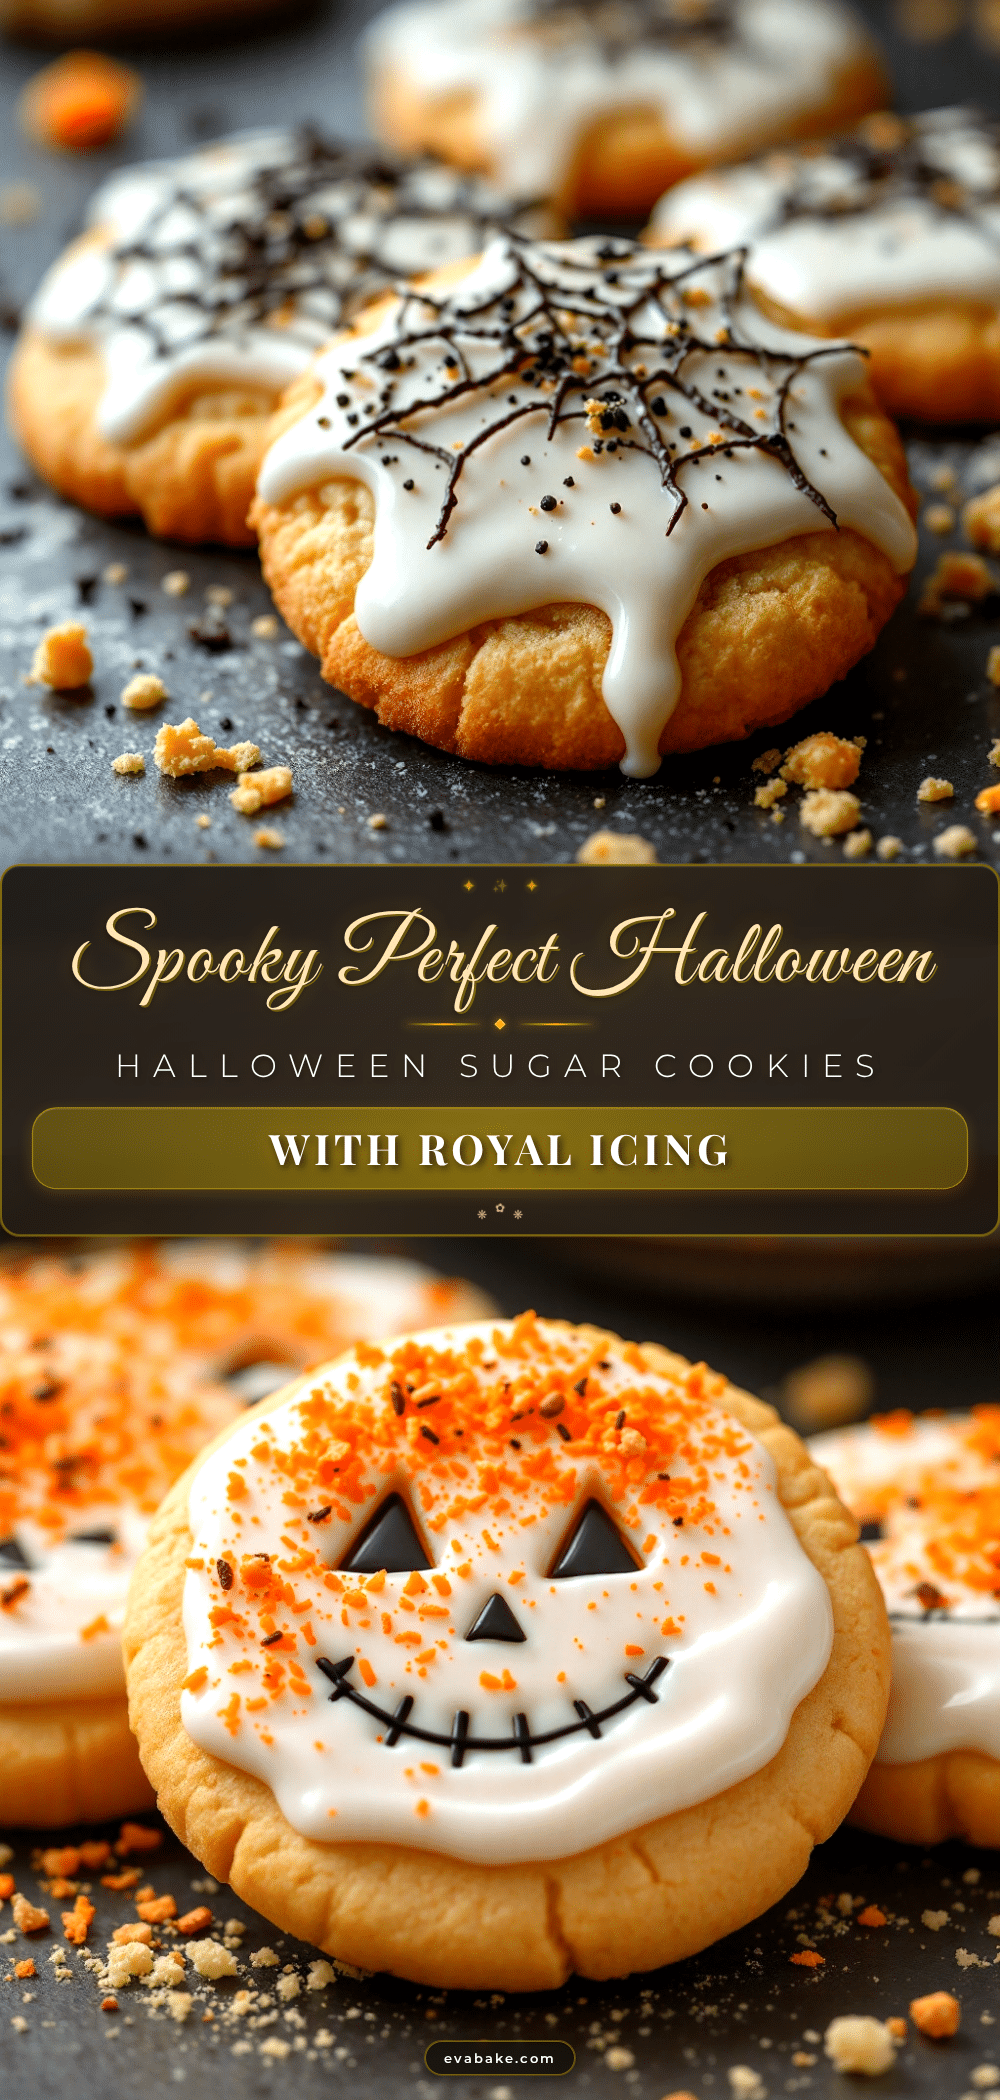
Perfect Halloween Sugar Cookies with Easy Royal Icing

These buttery vanilla-almond sugar cookies hold their shape perfectly and are topped with a glossy royal icing that dries to a flawless finish. A foolproof recipe that turns simple cookies into spooky works of art, perfect for Halloween parties and gifting.
- Prep Time: 30 minutes
- Cook Time: 10 minutes
- Total Time: 2 hours 40 minutes (includes 2 hours chilling)
- Yield: 24-36 cookies (depending on cutter size) 1x
- Category: Dessert
- Cuisine: American
Ingredients
- 1 cup (226g) unsalted butter, softened
- 1 cup (200g) granulated sugar
- 1 large egg, room temperature
- 2 teaspoons vanilla extract
- ½ teaspoon almond extract
- 2½ cups (312g) all-purpose flour
- 1 teaspoon baking powder
- ½ teaspoon salt
- 3 tablespoons meringue powder
- 4 cups (480g) powdered sugar, sifted
- 5–6 tablespoons warm water
- ½ teaspoon vanilla extract (for icing)
- Gel food coloring (black, orange, purple, green)
- Halloween cookie cutters (ghosts, pumpkins, bats, cats, moons)
- Piping bags or squeeze bottles
- Edible glitter or sanding sugar (optional)
Instructions
- Cream the butter and sugar: In a stand mixer with paddle attachment, beat softened butter and granulated sugar on medium speed for 3-4 minutes until light, fluffy, and pale. Scrape down sides halfway through.
- Add wet ingredients: Beat in egg, vanilla extract, and almond extract until fully combined. Mixture may look slightly curdled.
- Mix dry ingredients: In a separate bowl, whisk together flour, baking powder, and salt.
- Combine wet and dry: With mixer on low, gradually add flour mixture to butter mixture. Mix just until dough comes together; a few streaks of flour should remain.
- Divide and chill: Turn dough onto floured surface, divide in half, flatten each into a 1-inch thick disk, wrap in plastic wrap, and refrigerate at least 2 hours or overnight.
- Preheat oven to 350°F (175°C). Line baking sheets with parchment paper.
- Roll out dough: Lightly flour surface and rolling pin. Roll one disk to ¼-inch thickness. Cut shapes with floured cookie cutters, pressing straight down without twisting.
- Chill cut cookies: Place cut cookies on baking sheets and refrigerate for 15-20 minutes before baking.
- Bake for 8-10 minutes, rotating pan halfway through. Cookies should look set around edges but still pale on top.
- Cool completely: Let cookies cool on baking sheet for 5 minutes, then transfer to wire rack to cool completely.
- Make royal icing: In stand mixer bowl, combine meringue powder and sifted powdered sugar. Add 5 tablespoons warm water and ½ teaspoon vanilla. Beat on low until combined, then medium-high for 5-7 minutes until thick, glossy, and holds stiff peaks.
- Check consistency: Lift beater; icing should form a peak that holds its shape (stiff consistency for outlines).
- Divide and color: Portion icing into bowls, add gel food coloring a tiny bit at a time.
- Thin for flooding: Add water 1 teaspoon at a time to portion of icing until it reaches ’15-second’ consistency (ribbon smooths in 15 seconds).
- Fill bags: Transfer stiff icing to piping bags with small round tips. Transfer flooding icing to squeeze bottles or piping bags with larger tips.
- Outline first: Pipe outline around edge of each cookie with stiff icing.
- Flood center: Fill outlined area with thinner flooding icing. Use toothpick to guide into corners and pop bubbles.
- Add details while wet: Add multiple colors or details while flood icing is still wet for seamless blending.
- Let dry completely: Royal icing needs 6-8 hours to dry completely; overnight is ideal.
Notes
For sharp edges, don’t skip the second chill before baking. On humid days, add 1 extra tablespoon flour to dough and use slightly less water in icing. Cookies can be baked up to a week ahead; decorate up to 3 days before serving. Store in airtight container at room temperature for up to 2 weeks. Freeze decorated cookies for up to 3 months.
Nutrition
- Serving Size: 1 cookie (3-inch sha
- Calories: 190
- Sugar: 18
- Sodium: 75
- Fat: 8
- Saturated Fat: 5
- Carbohydrates: 28
- Protein: 2
Keywords: Halloween cookies, sugar cookies, royal icing, decorated cookies, holiday baking, spooky cookies, cut-out cookies


