That first whiff of cinnamon and nutmeg—the kind that curls through the kitchen before you’ve even pulled the baking dish from the oven—still takes me straight to my friend Jenna’s tiny apartment on a drizzly October afternoon. I was there to help her prep for a casual get-together, and she pulled out a baking dish full of what looked like blondies but smelled like fall in a pan. “Just throw it together,” she said, wiping flour on her jeans. “It’s impossible to mess up.” She wasn’t wrong. One bite—soft, pumpkin-spiced, with melty pockets of chocolate—and I was hooked. I asked for the recipe before I left, and she scribbled it on a napkin. That napkin is long gone, but the recipe? It’s become my secret weapon for every autumn gathering since. These Easy Pumpkin Chocolate Chip Cookie Bars are that perfect intersection of a chewy cookie and a tender cake, all without the fuss of scooping individual dough balls. They’re the kind of dessert that makes people hover around the kitchen island, waiting for you to cut the next square.
Honestly, I’ve made versions of this recipe more times than I can count. I’ve tweaked the spice blend, swapped in dark chocolate chips (a game-changer, by the way), and even tried a gluten-free version for a friend. And every single time, the pan disappears. There’s something about that combination—earthy pumpkin, warm spices, and rich chocolate—that just works. It feels like comfort, you know? Like the edible equivalent of wrapping up in a chunky knit sweater. And because it’s a bar recipe, you skip the chilling, the rolling, and the multiple baking sheets. One bowl, one pan, and about 35 minutes later, you’ve got a kitchen that smells like a bakery and a dessert that looks like you fussed way more than you actually did. That’s the kind of recipe I want in my back pocket, and I have a feeling you will too.
Why You’ll Love This Recipe
I’ve tested this recipe through three different pumpkin purée brands, two types of butter, and one very questionable batch where I accidentally used pumpkin pie filling instead of plain purée (don’t do that). Through all those trials, I landed on a version that’s consistently soft, perfectly spiced, and just sweet enough. Here’s why I think you’ll love it as much as I do:
- Quick & Easy: From start to finish, you’re looking at about 40 minutes. No stand mixer required, no chilling the dough, and no rolling individual cookies. Just mix, spread, and bake.
- Simple Ingredients: You probably have most of these in your pantry right now. Pumpkin purée, butter, sugar, eggs, flour, and your favorite chocolate chips. No weird extracts or hard-to-find spices.
- Perfect for Fall Gatherings: Whether it’s a Halloween party, a Friendsgiving, or just a Tuesday night that needs a little coziness, these bars fit right in. They’re sturdy enough to pack for a potluck, too.
- Crowd-Pleaser: I’ve brought these to work events, book club meetings, and family dinners. They get devoured every single time. Kids love them, adults love them, and nobody guesses how simple they are.
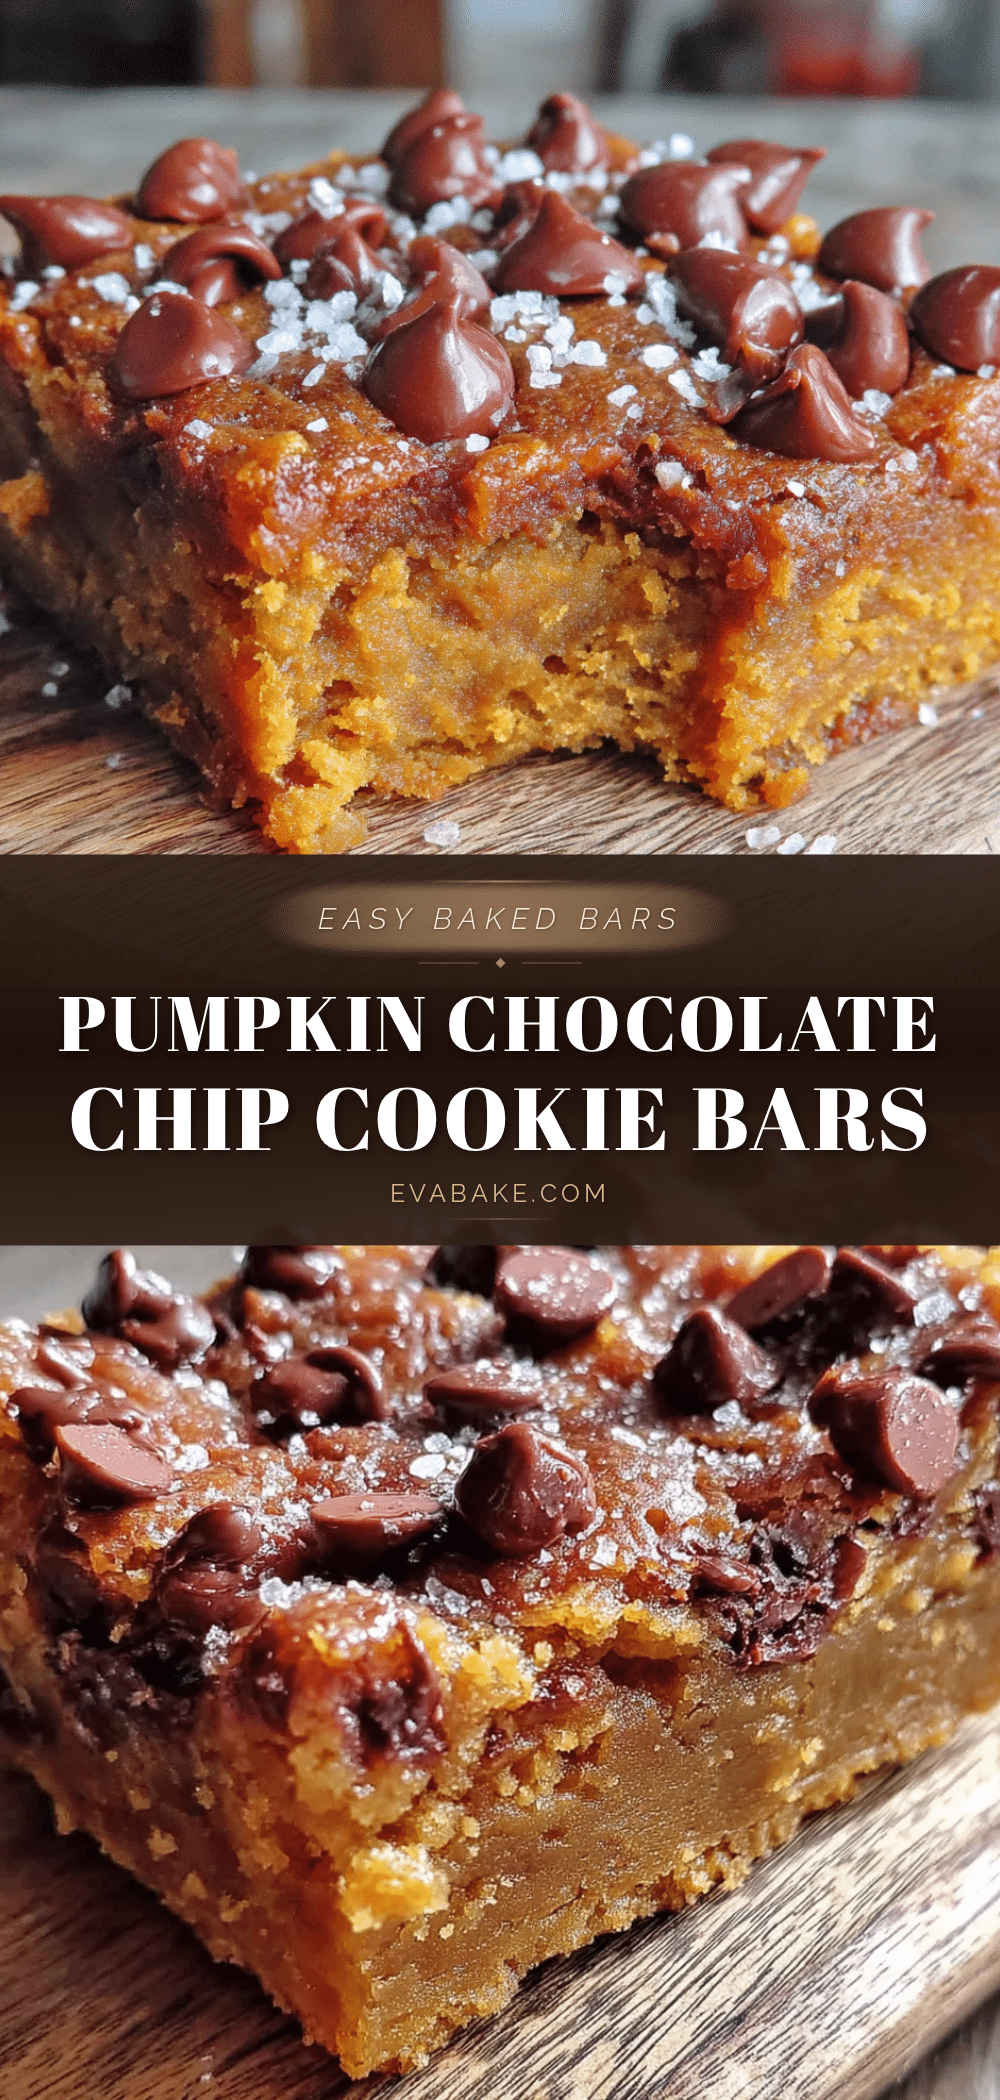
- Unbelievably Delicious: The texture is the real star here. They’re denser than a cake but softer than a traditional cookie, with that slight crackle on top that gives way to a tender, almost fudgy center. The chocolate chips melt into little pockets of richness against the warm pumpkin spice backdrop.
What makes this version different from the dozens of pumpkin bar recipes out there? It’s the balance. I played with the ratio of pumpkin to butter until the bars stayed moist without being gummy. I also bumped up the vanilla and added a touch more salt to make the chocolate really pop. It’s not just another pumpkin dessert—it’s the one I reach for first when the craving hits.
This recipe is the kind that makes you close your eyes after the first bite. It’s comfort food reimagined—faster, simpler, but with the same soul-soothing satisfaction. Perfect for impressing guests without stress, or turning a simple evening into something memorable.
What Ingredients You Will Need
This recipe uses simple, wholesome ingredients to deliver bold flavor and satisfying texture without the fuss. Most of these are pantry staples, which is exactly what you want when a fall baking craving strikes on a weeknight.
- Unsalted butter, melted and slightly cooled (1/2 cup, or 1 stick). I prefer unsalted so I can control the salt level. If you only have salted butter, just reduce the added salt in the recipe by half.
- Pumpkin purée (1 cup, not pumpkin pie filling). This is crucial! Pumpkin pie filling has added sugar and spices that will throw off the whole recipe. I usually grab a standard 15-ounce can and use about two-thirds of it. Libby’s is my go-to brand for consistent texture, but any 100% pumpkin purée works.
- Granulated sugar (3/4 cup) and light brown sugar (1/4 cup, packed). The brown sugar adds a hint of molasses flavor that deepens the pumpkin spice. If you’re out of brown sugar, you can use all granulated, but the bars will be slightly less tender.
- Large egg (1, at room temperature). Let it sit out for about 15 minutes if you remember. A room-temperature egg blends more smoothly into the batter, creating a better texture.
- Vanilla extract (1 teaspoon). Pure vanilla extract adds warmth. I’ve used imitation in a pinch, and it works fine, but pure is better.
- All-purpose flour (1 and 1/2 cups). Spoon and level it into your measuring cup—don’t scoop directly from the bag or you’ll pack in too much flour, making the bars dry.
- Pumpkin pie spice (1 and 1/2 teaspoons). You can use store-bought or make your own with a mix of cinnamon, nutmeg, ginger, and cloves. If you only have cinnamon, use 1 teaspoon of cinnamon plus 1/2 teaspoon of nutmeg.
- Baking soda (1/2 teaspoon) and baking powder (1/2 teaspoon). Both help the bars rise just enough without becoming too cakey.
- Salt (1/4 teaspoon, plus a pinch for the topping). Salt balances the sweetness and makes the chocolate flavor sing.
- Semi-sweet chocolate chips (1 cup). I’m partial to Ghirardelli for their size and meltability, but any brand works. You can also use dark chocolate chips for a less sweet bar, or milk chocolate if you prefer a sweeter dessert.
- Optional topping: A sprinkle of flaky sea salt or a few extra chocolate chips pressed into the top before baking.
Equipment Needed
You don’t need a fancy kitchen to pull these off. Here’s what I use:
- 8×8-inch baking pan. A 9×9-inch pan works too, but the bars will be slightly thinner and may bake a few minutes faster. If you use a 9×13-inch pan, double the recipe.
- Mixing bowls (one large, one medium). I use glass or stainless steel—nothing fancy.
- Whisk and rubber spatula. A wooden spoon works in a pinch, but a spatula helps you get every bit of batter into the pan.
- Parchment paper. This is my number one tip for easy cleanup and perfect bar removal. Leave an overhang on two sides so you can lift the whole block out.
- Cooling rack. Essential for letting the bars cool evenly so they set properly.
If you don’t have parchment paper, you can grease the pan thoroughly with butter or non-stick spray. Just be careful when cutting the first bar—it might stick a little.
Preparation Method
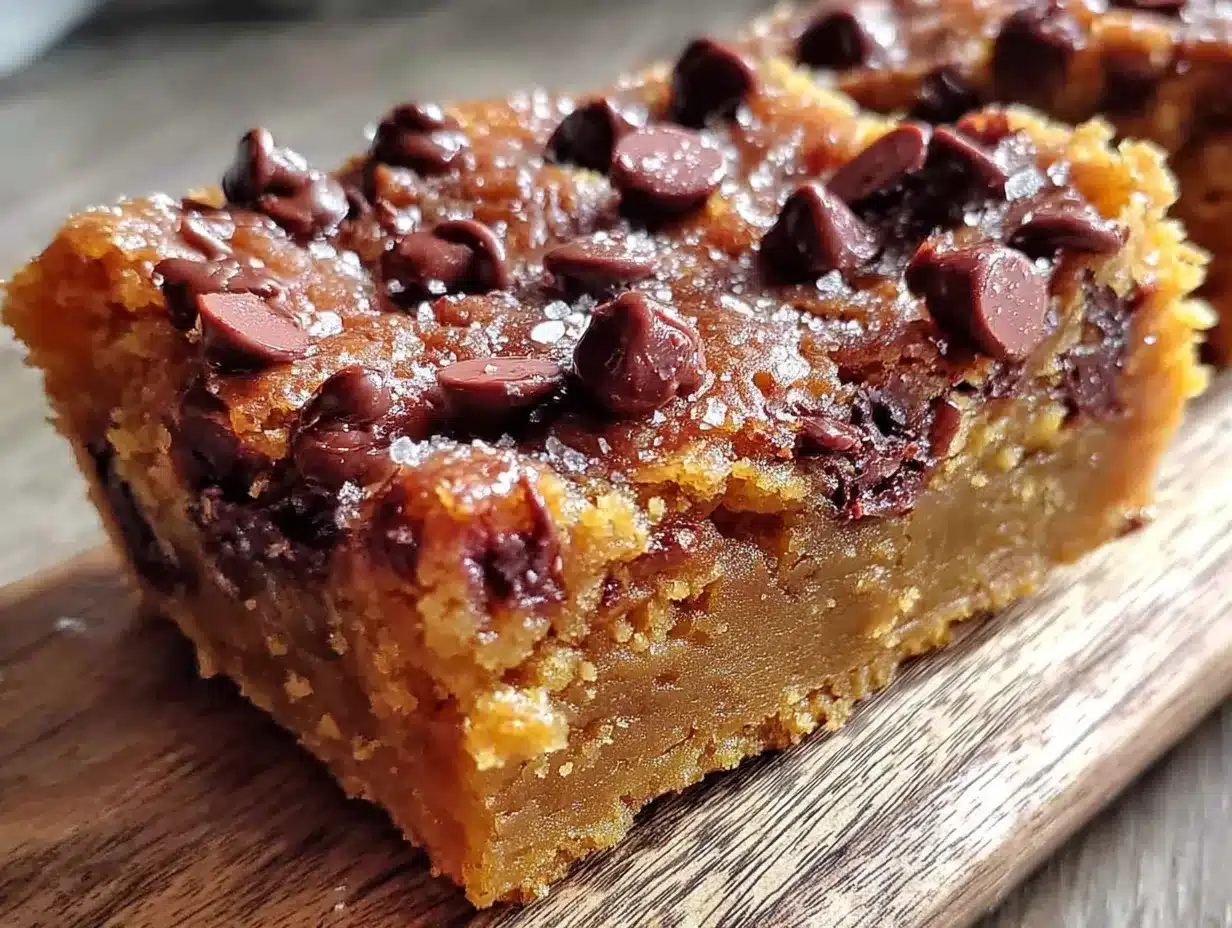
Preheat your oven to 350°F (175°C). Line your 8×8-inch baking pan with parchment paper, leaving an overhang on two opposite sides. This little trick makes lifting the bars out so much easier—trust me on this one.
- Melt the butter. In a large microwave-safe bowl, melt the butter in 20-second bursts until just melted. Let it cool for a couple of minutes—you don’t want it hot enough to cook the egg when you add it.
- Mix the wet ingredients. Add the granulated sugar, brown sugar, pumpkin purée, egg, and vanilla extract to the melted butter. Whisk until everything is smooth and well combined. The mixture will look thick and glossy, like a pumpkin-colored pudding. Don’t over-whisk; just until no streaks remain.
- Combine the dry ingredients. In a separate medium bowl, whisk together the flour, pumpkin pie spice, baking soda, baking powder, and salt. This ensures the leavening agents and spices are evenly distributed so you don’t get a pocket of baking soda in one bite.
- Fold the dry into the wet. Pour the dry ingredients into the wet mixture. Use your rubber spatula to fold gently—just until you no longer see streaks of flour. Overmixing at this stage will develop the gluten and make the bars tough. A few lumps are totally fine.
- Add the chocolate chips. Fold in 3/4 cup of the chocolate chips, reserving the remaining 1/4 cup for the top. The batter will be thick and slightly sticky, almost like a soft cookie dough.
- Transfer to the pan. Scrape the batter into your prepared baking pan. Use the spatula to spread it evenly into the corners. It will be thick, so take your time. If the batter is sticking to the spatula, lightly spray the spatula with non-stick spray.
- Top with extra chocolate chips. Sprinkle the reserved 1/4 cup of chocolate chips over the top. Press them in gently with your fingers so they stick to the batter. If you’re using flaky sea salt, sprinkle a pinch over the top now.
- Bake. Place the pan in the preheated oven and bake for 25 to 30 minutes. At the 25-minute mark, start checking. The edges should look set and golden brown, and the center should be just barely firm to the touch. A toothpick inserted into the center should come out with a few moist crumbs, not wet batter. Remember, they’ll continue to set as they cool.
- Cool completely. Let the bars cool in the pan on a wire rack for at least 30 minutes. Then, using the parchment overhang, lift the entire block out onto the rack to cool completely before cutting. I know it’s tempting to cut into them warm, but they’ll be too soft and crumbly. Patience pays off here.
Cooking Tips & Techniques
I’ve made this recipe at least a dozen times, and I’ve learned a few things the hard way. Here are my best tips for perfect bars every time:
- Don’t over-bake. This is the most common mistake. Because pumpkin adds so much moisture, it’s easy to think the bars need more time. They don’t. Pull them out when the center is just set and a toothpick comes out with a few moist crumbs. Over-baked bars turn dry and crumbly.
- Use room-temperature ingredients. I know, I know—nobody plans ahead. But if you can let your egg sit out for 15 minutes, it’ll blend into the butter mixture more smoothly, creating a more even texture. Cold egg can cause the butter to seize up slightly.
- Measure your flour correctly. This is the number one baking mistake. Spoon the flour into your measuring cup and level it off with a knife. Scooping directly from the bag can add up to 25% more flour, making your bars dense and dry.
- Let them cool completely. I learned this the hard way when I cut into a warm pan and ended up with a delicious but messy pile of pumpkin crumbs. The bars need time to set up. If you’re in a rush, pop the pan in the fridge for 20 minutes after the initial 30-minute cool-down.
- Line the pan properly. Parchment paper with an overhang is non-negotiable for me now. It makes cleanup a breeze and ensures you get clean, intact bars. If you don’t have parchment, grease the pan generously with butter and dust it lightly with flour.
Variations & Adaptations
One of the best things about this recipe is how flexible it is. Here are a few ways I’ve adapted it over the years:
- Gluten-Free Version: Substitute the all-purpose flour with a 1-to-1 gluten-free baking flour blend (I like King Arthur’s). The texture will be slightly more delicate, but the flavor is spot-on. Add an extra tablespoon of flour to help with structure.
- Dairy-Free Version: Use a plant-based butter stick (like Earth Balance) and dairy-free chocolate chips. I’ve tested this with oat milk butter, and it worked beautifully. Just make sure the butter is in stick form, not spreadable.
- Spice It Up: Add 1/4 teaspoon of ground ginger or a pinch of cayenne pepper to the dry ingredients for a little warmth. I tried this on a whim last fall, and it was a hit with my spice-loving friends.
- Mix-In Swap: Not a chocolate fan? Swap the chocolate chips for white chocolate chips, butterscotch chips, or chopped pecans. White chocolate and pumpkin is a classic combo, and the butterscotch adds a caramel-like sweetness.
- Extra Pumpkin Flavor: For a more intense pumpkin taste, add 1/2 teaspoon of pumpkin spice extract (available at specialty baking stores) along with the vanilla. It’s subtle but noticeable.
Serving & Storage Suggestions
These bars are delicious at room temperature, but I also love them slightly warm with a scoop of vanilla ice cream. The contrast of warm, spiced pumpkin and cold, creamy ice cream is pure fall bliss. If you’re serving them at a party, cut them into 16 squares and arrange them on a platter with a dusting of powdered sugar or a drizzle of caramel sauce.
For storage, place the cooled bars in an airtight container at room temperature. They’ll stay fresh for up to 4 days. If you live in a humid climate, I recommend storing them in the fridge after day two to prevent them from getting too soft. You can also freeze them for up to 3 months. Just wrap the whole block (or individual bars) tightly in plastic wrap, then foil, and pop them in a freezer bag. Thaw at room temperature for about an hour before serving.
One thing I’ve noticed: these bars actually taste better the next day. The flavors have time to meld, and the texture becomes even more fudgy. So if you can resist, make them a day ahead.
Nutritional Information & Benefits
Per bar (based on 16 servings): approximately 190 calories, 9g fat, 27g carbohydrates, 2g fiber, 16g sugar, and 3g protein. These numbers are estimates and will vary based on your specific ingredients.
Pumpkin purée is packed with vitamin A (over 200% of your daily needs in just one cup), fiber, and antioxidants. It’s also low in calories, which makes these bars a slightly more nutritious treat than a standard cookie. The dark chocolate adds a dose of antioxidants, too. While this is definitely a dessert, it’s one that brings a little something extra to the table.
If you’re watching your sugar intake, you can reduce the granulated sugar to 1/2 cup. The bars will be less sweet, but the pumpkin and chocolate will still shine. For a lower-fat option, substitute half the butter with unsweetened applesauce. The texture will be a bit more cake-like, but still delicious.
Conclusion
These Easy Pumpkin Chocolate Chip Cookie Bars have become my fall baking staple for a reason. They’re simple enough for a weeknight baking project, impressive enough for a party, and comforting enough to make any October evening feel special. The combination of tender pumpkin, warm spices, and rich chocolate is timeless, and this recipe delivers it with minimal fuss and maximum flavor.
I’d love to hear how they turn out for you. Did you try a variation? Add a different spice? Share your results in the comments below—I read every single one and love seeing your creations. And if you’re looking for more fall inspiration, don’t miss my Pumpkin Spice Cold Foam Coffee Cake or these No-Bake Pumpkin Pie with Gingersnap Crust for even more pumpkin-packed goodness. Happy baking, friends!
Frequently Asked Questions
Can I use pumpkin pie filling instead of pumpkin purée?
No, I wouldn’t recommend it. Pumpkin pie filling has added sugar and spices, which will throw off the balance of the recipe. Stick with 100% pumpkin purée for the best results.
Can I make these bars ahead of time?
Absolutely! In fact, they taste even better the next day. Bake them, cool them completely, and store them in an airtight container at room temperature for up to 4 days. You can also freeze them for up to 3 months.
Why are my bars too soft or falling apart?
This usually happens if you cut into them before they’ve cooled completely. The bars need time to set up as they cool. If you’re in a rush, pop the pan in the fridge for 20 minutes after the initial 30-minute cool-down. Also, make sure you’re measuring your flour correctly—too little flour can make them too soft.
Can I use a different size pan?
Yes, but the baking time will change. A 9×9-inch pan will yield thinner bars that bake in about 20-25 minutes. If you use a 9×13-inch pan, double the recipe and check for doneness around 25 minutes.
Can I add nuts to this recipe?
Definitely! Chopped pecans or walnuts are a great addition. Fold in about 1/2 cup with the chocolate chips. Toast the nuts first for extra flavor—just spread them on a baking sheet and bake at 350°F for 5-7 minutes until fragrant.
Pin This Recipe!
Easy Pumpkin Chocolate Chip Cookie Bars (Best Fall Recipe)
These Easy Pumpkin Chocolate Chip Cookie Bars are the perfect intersection of a chewy cookie and a tender cake, all without the fuss of scooping individual dough balls. They’re soft, pumpkin-spiced, with melty pockets of chocolate, making them an ideal fall dessert for gatherings or cozy nights in.
- Prep Time: 10 minutes
- Cook Time: 25-30 minutes
- Total Time: 40 minutes
- Yield: 16 servings 1x
- Category: Dessert
- Cuisine: American
Ingredients
- 1/2 cup (1 stick) unsalted butter, melted and slightly cooled
- 1 cup pumpkin purée (not pumpkin pie filling)
- 3/4 cup granulated sugar
- 1/4 cup light brown sugar, packed
- 1 large egg, at room temperature
- 1 teaspoon vanilla extract
- 1 and 1/2 cups all-purpose flour
- 1 and 1/2 teaspoons pumpkin pie spice
- 1/2 teaspoon baking soda
- 1/2 teaspoon baking powder
- 1/4 teaspoon salt, plus a pinch for topping
- 1 cup semi-sweet chocolate chips
- Optional: flaky sea salt for topping
Instructions
- Preheat your oven to 350°F (175°C). Line an 8×8-inch baking pan with parchment paper, leaving an overhang on two opposite sides.
- In a large microwave-safe bowl, melt the butter in 20-second bursts until just melted. Let it cool for a couple of minutes.
- Add the granulated sugar, brown sugar, pumpkin purée, egg, and vanilla extract to the melted butter. Whisk until smooth and well combined.
- In a separate medium bowl, whisk together the flour, pumpkin pie spice, baking soda, baking powder, and salt.
- Pour the dry ingredients into the wet mixture. Use a rubber spatula to fold gently until just combined—do not overmix.
- Fold in 3/4 cup of the chocolate chips, reserving the remaining 1/4 cup for the top.
- Scrape the batter into the prepared baking pan and spread it evenly into the corners.
- Sprinkle the reserved 1/4 cup of chocolate chips over the top and press them in gently. If using, sprinkle a pinch of flaky sea salt over the top.
- Bake for 25 to 30 minutes, until the edges are set and golden brown and the center is just barely firm to the touch. A toothpick inserted into the center should come out with a few moist crumbs.
- Let the bars cool in the pan on a wire rack for at least 30 minutes. Then, using the parchment overhang, lift the entire block out onto the rack to cool completely before cutting into 16 squares.
Notes
Don’t over-bake; pull them out when the center is just set. Use room-temperature ingredients for best texture. Measure flour correctly by spooning and leveling. Let bars cool completely before cutting to avoid crumbling. For a gluten-free version, use a 1-to-1 gluten-free flour blend. For dairy-free, use plant-based butter and dairy-free chocolate chips. Bars taste even better the next day.
Nutrition
- Serving Size: 1 bar
- Calories: 190
- Sugar: 16
- Sodium: 120
- Fat: 9
- Saturated Fat: 5
- Carbohydrates: 27
- Fiber: 2
- Protein: 3
Keywords: pumpkin chocolate chip cookie bars, easy pumpkin bars, fall dessert, pumpkin spice, chocolate chip bars, pumpkin recipe


