The first time I made this no-bake pumpkin pie, it was 9 PM on a Tuesday in late October, and I was supposed to be making a traditional double-crust pie for a friend’s potluck the next day. My kitchen looked like a flour bomb had gone off. The butter for the crust was too soft. The rolling pin was hiding somewhere. And honestly, I just didn’t have the energy for the wrestling match that is homemade pastry dough. So I shut the oven off, grabbed a box of gingersnap cookies from the pantry, and decided to pivot. I figured if I crushed them up, mixed them with butter, and pressed them into a pan, it would look intentional. And you know what? It worked. Better than worked.
That pie was the first thing to disappear at the potluck. People kept coming back for slices, asking if I’d spent all day on the filling. I just smiled and nodded, but inside I was thinking—this is a cheat code. The spicy snap of the ginger against the silky, cool pumpkin filling is honestly the kind of flavor combination that makes you slow down and actually taste each bite. It’s not trying to be fancy. It’s just exactly what you want a fall dessert to be: easy, comforting, and impossible to stop eating.
This easy no-bake pumpkin pie with gingersnap crust has become my go-to for every Thanksgiving, Friendsgiving, and random Tuesday when I need a little seasonal joy without the stress. No oven required. No fussing with dough. Just a few simple ingredients, a little patience while it chills, and you have a showstopper that tastes like you spent hours in the kitchen. Let’s be honest—that’s the kind of magic we all need sometimes.
Why You’ll Love This Recipe
I’ve tested this recipe about six times in the past two months, tweaking the spice ratios and the crust texture until it was just right. Here is why I keep coming back to it, and why I think you will too.
- No Oven Required : This is a true no-bake dessert. Perfect for when your oven is already full of side dishes, or when you just don’t want to turn it on at all. It’s a lifesaver during the busy holiday season.
- Simple Ingredients : You need basic pantry staples and a few fresh items. No fancy extracts, no hard-to-find spices, no specialty flours. Everything is easy to find at any grocery store.
- Perfect for Make-Ahead Desserts : This pie needs to chill for at least 4 hours, which means you can absolutely make it the day before. It actually tastes better after a full night in the fridge—the flavors meld together beautifully.
- Crowd-Pleaser : I have served this to kids, adults, and picky in-laws. It always gets the same reaction: quiet chewing followed by requests for the recipe. The gingersnap crust adds a warmth that regular graham cracker crusts just can’t match.
- Unbelievably Creamy Texture : The filling is smooth, rich, and perfectly set without any gelatin or weird ingredients. It slices cleanly and holds its shape, but melts in your mouth.
What makes this recipe different from the rest is the crust. Most no-bake pumpkin pies use a standard graham cracker crust, which is fine, but it’s a little boring. The gingersnap crust adds a deep, spicy, molasses-y kick that makes the pumpkin filling sing. It’s not just a vessel for the filling—it is an integral part of the flavor experience. Plus, the filling uses a clever trick with cream cheese to give it structure without needing to bake, so you get that classic pumpkin pie texture without ever turning on the oven. This is comfort food reimagined—faster, easier, but with the same soul-soothing satisfaction.
What Ingredients You Will Need
This recipe uses simple, wholesome ingredients to deliver bold flavor and satisfying texture without the fuss. Most of these are pantry staples, especially if you are a fall baking enthusiast.
For the Gingersnap Crust
- 2 cups crushed gingersnap cookies (about 8 ounces or 225g, from a 16-ounce box). I recommend using a brand like Anna’s or Mi-Del for a consistent, spicy flavor. You want a fine, even crumb—not big chunks.
- 6 tablespoons unsalted butter (85g), melted. Salted butter works in a pinch, but reduce any added salt in the recipe. The butter binds the crust and adds richness.
- 2 tablespoons granulated sugar (25g). This balances the spiciness of the gingersnaps.
- 1/4 teaspoon salt (a tiny pinch). Only if your butter is unsalted. It enhances all the flavors.
For the Pumpkin Filling
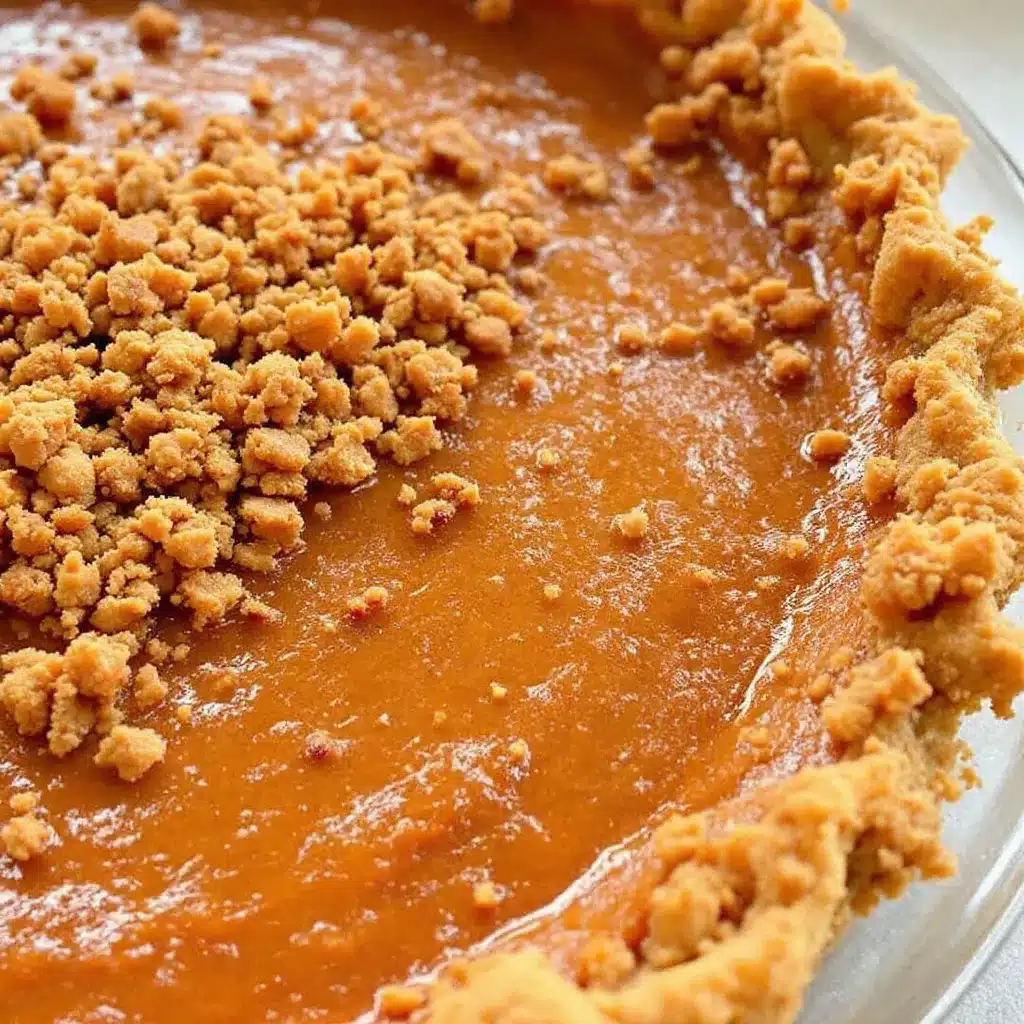
- 1 package (8 ounces or 226g) cream cheese, softened to room temperature. This is crucial for a smooth, creamy texture. Do not use cold cream cheese—it will be lumpy.
- 1 cup (200g) packed light brown sugar. Dark brown sugar works too and adds a deeper molasses flavor.
- 1 can (15 ounces or 425g) pure pumpkin puree. Not pumpkin pie filling. Make sure it is 100% pumpkin. Libby’s is my go-to brand for consistent results.
- 1 teaspoon vanilla extract. Pure vanilla is best, but imitation works fine.
- 1 1/2 teaspoons pumpkin pie spice. You can use a store-bought blend or make your own (see tip below).
- 1/2 teaspoon ground cinnamon. For extra warmth.
- 1/4 teaspoon ground ginger. It reinforces the gingersnap crust.
- 1/4 teaspoon salt. To balance the sweetness.
- 1 1/2 cups (360ml) heavy whipping cream, cold. This is what gives the filling its light, mousse-like texture. Do not substitute with half-and-half or milk—it won’t set properly.
- 1/4 cup (30g) powdered sugar. This stabilizes the whipped cream.
For the Topping (Optional but Recommended)
- 1 cup (240ml) heavy whipping cream, cold.
- 2 tablespoons powdered sugar.
- 1/2 teaspoon vanilla extract.
- Crushed gingersnap cookies and a light dusting of cinnamon for garnish.
Ingredient Substitution Note : If you need a dairy-free option, you can use a high-quality vegan cream cheese and a coconut-based whipped cream. The texture will be slightly different—a bit less firm—but still delicious. For a gluten-free version, use certified gluten-free gingersnap cookies. Most standard brands are not gluten-free, so check the label carefully.
Equipment Needed
You don’t need a lot of fancy tools for this recipe, which is part of its charm. Here is what I use every time.
- 9-inch pie plate. A standard metal or glass pie plate works perfectly. A ceramic dish will also work, but it may take a bit longer to chill through.
- Food processor or zip-top bag and rolling pin. For crushing the cookies. The food processor is faster and gives you a more consistent crumb. If you don’t have one, put the cookies in a zip-top bag and go to town with a rolling pin—it’s a great stress reliever.
- Electric hand mixer or stand mixer. For whipping the cream and beating the cream cheese. A hand mixer is totally fine; you don’t need a stand mixer for this.
- Medium and large mixing bowls. One for the crust mixture, one for the cream cheese base, and one for the whipped cream.
- Rubber spatula. For folding the whipped cream into the pumpkin mixture. A gentle hand is key here.
- Measuring cups and spoons. For accuracy.
- Plastic wrap. To cover the pie while it chills.
If you don’t have a food processor, honestly, the zip-top bag method works great. I’ve done it both ways, and the only difference is the time it takes. The bag method gives you a slightly more rustic crumb, which I actually kind of like for this crust. It adds a little texture.
Preparation Method
This is where the magic happens. Follow these steps, and you will have a perfect no-bake pumpkin pie every single time.
- Make the crust. Place the gingersnap cookies in a food processor and pulse until you have fine, even crumbs. You should have about 2 cups. Transfer the crumbs to a medium bowl. Add the melted butter, granulated sugar, and salt (if using). Stir with a fork until the mixture looks like wet sand and holds together when you squeeze it. It should clump easily.
- Press the crust into the pie plate. Pour the crumb mixture into your 9-inch pie plate. Use the bottom of a flat measuring cup or a glass to press the crumbs firmly and evenly into the bottom and up the sides of the plate. Make sure the edges are even. Don’t press too hard—you want it compact, not rock-hard. Place the crust in the refrigerator to chill while you make the filling. This helps it set and prevents it from getting soggy.
- Beat the cream cheese. In a large mixing bowl, beat the softened cream cheese with an electric hand mixer on medium speed until it is smooth and fluffy, about 2 minutes. Scrape down the sides of the bowl with a rubber spatula. Add the brown sugar and beat again for another minute until it is well combined and slightly lighter in color.
- Add the pumpkin and spices. Add the pumpkin puree, vanilla extract, pumpkin pie spice, cinnamon, ground ginger, and salt to the cream cheese mixture. Beat on medium-low speed until everything is fully incorporated and smooth. Stop and scrape the bowl a couple of times to make sure there are no streaks of cream cheese hiding. The mixture should be a uniform, beautiful orange color.
- Whip the cream. In a separate medium bowl (make sure it is very clean and cold—I like to pop my bowl and beaters in the freezer for 10 minutes before starting), pour in the 1 1/2 cups of cold heavy whipping cream. Add the 1/4 cup of powdered sugar. Beat on medium-high speed until stiff peaks form. This means when you lift the beaters, the cream stands up in peaks that don’t flop over. Do not over-whip, or you will end up with butter. It takes about 3-4 minutes with a hand mixer.
- Fold the whipped cream into the pumpkin mixture. This is the most important step. Take about one-third of the whipped cream and gently fold it into the pumpkin mixture using a rubber spatula. Use a cut-and-fold motion—cut down through the center, scrape along the bottom, and fold over the top. Do this just until combined. Add the remaining whipped cream and fold gently until no white streaks remain. Be patient and gentle. You want to keep the air in the whipped cream so the filling stays light and mousse-like.
- Fill the crust. Take the chilled crust out of the refrigerator. Spoon the pumpkin filling into the crust. Use your spatula to spread it evenly, making sure it reaches the edges. The filling will be quite thick and fluffy—that is exactly what you want.
- Chill the pie. Cover the pie loosely with plastic wrap and place it in the refrigerator. It needs to chill for at least 4 hours, but overnight is better. The filling needs time to set and firm up. Do not rush this step. A properly chilled pie will slice cleanly and hold its shape.
- Make the topping (optional). About an hour before serving, make the whipped cream topping. In a clean bowl, beat the remaining 1 cup of heavy cream with 2 tablespoons of powdered sugar and 1/2 teaspoon of vanilla extract until stiff peaks form. Spread or pipe the whipped cream over the top of the set pie. Sprinkle with crushed gingersnap cookies and a light dusting of cinnamon. Return the pie to the fridge until you are ready to serve.
Sensory Cue : When you fold the whipped cream into the pumpkin, you should see the mixture lighten in color and become fluffy. It should look like a thick, airy mousse. If it looks thin or runny, your cream was not whipped enough, or you over-mixed it.
Cooking Tips & Techniques
I have made this pie about a dozen times now, and I have definitely learned a few things the hard way. Here are my best tips to make sure yours turns out perfectly.
Soft cream cheese is non-negotiable. I once tried to speed things up and used cold cream cheese straight from the fridge. The filling was lumpy and took forever to smooth out. Let your cream cheese sit on the counter for at least 30 minutes before you start. If you forget, you can microwave it in 10-second bursts until it is soft but not hot.
Chill your bowl and beaters for the whipped cream. This is a game-changer. Cold cream whips faster and holds its shape better. I pop my metal mixing bowl and the beaters in the freezer for about 10-15 minutes before I start. It makes a noticeable difference, especially in a warm kitchen.
Don’t over-fold the whipped cream. This is the most common mistake. You want to fold just until the white streaks disappear. If you keep mixing, you will deflate the cream and the filling will be dense instead of light and airy. Use a gentle hand and stop as soon as it is combined.
Press the crust firmly. A loose crust will crumble when you try to slice the pie. Use the bottom of a flat measuring cup to really press the crumbs down. I like to use a 1-cup measuring cup—it fits perfectly into the pie plate and gives you even pressure. Make sure the edges are just as compact as the bottom.
Give it enough time to set. Four hours is the minimum. If you are in a rush, you can pop it in the freezer for 2 hours, but the texture won’t be quite as silky. Overnight is truly the best. The flavors meld together, and the texture becomes perfectly sliceable.
I once forgot to put the pie in the fridge and left it on the counter for an hour. It was a sad, soupy mess. Don’t be like me. Chill it immediately after filling.
Variations & Adaptations
One of the best things about this recipe is how easy it is to change up. Here are some of my favorite variations.
Vegan Version : Use a plant-based cream cheese (like Miyoko’s or Kite Hill) and replace the heavy cream with a full-fat coconut cream. Chill the can of coconut cream overnight, then scoop out the solid white part and whip it with a little powdered sugar. The texture will be slightly less firm but still delicious. Use a vegan butter for the crust.
Gluten-Free Version : This is super easy. Just use certified gluten-free gingersnap cookies. I have used the brand Partake and it works perfectly. Everything else in the recipe is naturally gluten-free.
Chocolate-Ginger Variation : Add 1/4 cup of unsweetened cocoa powder to the crust mixture along with the butter and sugar. It turns the crust into a dark, rich chocolate-ginger base that pairs beautifully with the pumpkin. I tried this for a Halloween party and it was a huge hit.
Maple Pumpkin Pie : Replace the brown sugar in the filling with 3/4 cup of pure maple syrup. The filling will be slightly softer, so you may need to chill it for an extra hour. The maple flavor adds a wonderful woodsy sweetness that complements the pumpkin.
Spiced Apple Topping : Instead of whipped cream, top the pie with a layer of sautéed apples. Peel and dice 2 apples, cook them in a pan with a tablespoon of butter, a tablespoon of brown sugar, and a teaspoon of cinnamon until soft. Let them cool completely, then spoon them over the set pie. It adds a nice texture contrast.
Personally, I love the chocolate-ginger version. It feels a little more decadent, and the dark crust against the bright orange filling looks stunning on a dessert table.
Serving & Storage Suggestions
This pie is best served cold, straight from the refrigerator. The filling is firm but creamy, and the crust holds together beautifully when it is well-chilled. I like to let it sit at room temperature for about 10 minutes before slicing—it takes the edge off the chill and lets the flavors open up a little.
Presentation Tips : For a beautiful look, pipe the whipped cream in rosettes around the edge of the pie using a star tip. Sprinkle the top with crushed gingersnap cookies and a light dusting of cinnamon or pumpkin pie spice. A few fresh mint leaves add a pop of green that looks lovely against the orange and brown tones.
What to Serve With It : This pie is rich enough to stand on its own, but it pairs beautifully with a cup of hot coffee, a spiced chai latte, or a glass of cold milk. If you are serving it as part of a fall spread, it goes wonderfully with a pumpkin sourdough cinnamon roll or a slice of pumpkin chocolate chip bread for a full dessert bar.
Storage : Cover the pie tightly with plastic wrap or aluminum foil and store it in the refrigerator for up to 4 days. The crust will stay crisp and the filling will remain creamy. I do not recommend freezing this pie—the texture of the cream cheese filling can become grainy when thawed.
Reheating : There is no need to reheat this pie. It is meant to be served cold. If you have leftovers, just keep them in the fridge and enjoy them straight from the cold.
The flavors actually get better after a day or two in the fridge. The spices meld together, and the crust softens just slightly, making it easier to slice. It is one of those rare desserts that is almost better on day two.
Nutritional Information & Benefits
Here is the approximate nutritional breakdown for one slice of this pie (based on 10 servings, without the optional whipped cream topping):
- Calories : 380
- Fat : 24g
- Saturated Fat : 14g
- Carbohydrates : 38g
- Sugar : 28g
- Fiber : 2g
- Protein : 4g
- Vitamin A : 180% of the Daily Value
Pumpkin is a nutritional powerhouse. It is loaded with vitamin A, which is great for your eyes and immune system. It also provides a good amount of fiber and potassium. The cream cheese and heavy cream add calcium and protein, though this is definitely a treat—not a health food. The gingersnaps contain molasses, which provides small amounts of iron and calcium.
Dietary Considerations : This recipe is vegetarian. As mentioned above, it can be made gluten-free with certified gluten-free cookies and vegan with plant-based substitutions. It is not low-fat or low-calorie, but it is a wonderful indulgence for special occasions.
I personally love that this dessert feels rich and decadent, but it uses real, recognizable ingredients. There is nothing artificial in it, and that makes me feel a little better about having a second slice.
Conclusion
This easy no-bake pumpkin pie with gingersnap crust is the kind of recipe that makes you look like a hero with almost no effort. It is creamy, spicy, perfectly sweet, and completely stress-free. No oven, no complicated techniques, no rolling pins. Just a simple, beautiful dessert that tastes like fall in every single bite.
I love that you can make it ahead of time, customize it to your dietary needs, and serve it to a crowd without breaking a sweat. It has become my signature holiday dessert, and I honestly think it will become yours too.
I would love to hear how yours turns out. Did you try the chocolate-ginger crust? Did you add the spiced apple topping? Drop a comment below and let me know what you think. And if you loved this recipe, please share it with a friend who needs a little no-bake magic in their life. Happy fall baking, friends!
Frequently Asked Questions
Can I use a store-bought graham cracker crust instead of making the gingersnap crust?
Yes, you absolutely can. The flavor will be different—less spicy and warm—but the pie will still be delicious. If you use a store-bought crust, you do not need to pre-chill it. Just fill it directly with the pumpkin mixture and proceed with the recipe.
Why is my filling runny?
There are a few common reasons. First, your cream cheese might not have been fully softened, which can prevent it from incorporating properly. Second, you might have over-folded the whipped cream, deflating it and losing the air that gives the filling structure. Third, the pie might not have chilled long enough. Make sure you chill it for at least 4 hours, preferably overnight.
Can I make this pie a day ahead of time?
Absolutely. In fact, I recommend it. The pie needs at least 4 hours to set, but making it a day ahead allows the flavors to meld together beautifully. Just cover it tightly with plastic wrap and keep it in the refrigerator. Add the whipped cream topping right before serving for the best presentation.
Can I freeze this no-bake pumpkin pie?
I do not recommend freezing it. The cream cheese and whipped cream filling can become grainy and watery when thawed. The texture will not be the same. If you have leftovers, they will keep in the refrigerator for up to 4 days, so freezing is not necessary.
What can I use instead of gingersnap cookies for the crust?
You can use graham crackers, vanilla wafers, or shortbread cookies. If you use a milder cookie, I recommend adding an extra teaspoon of pumpkin pie spice or ground ginger to the crust mixture to keep that warm, spicy flavor profile. Biscoff cookies also make an excellent substitute.
Pin This Recipe!
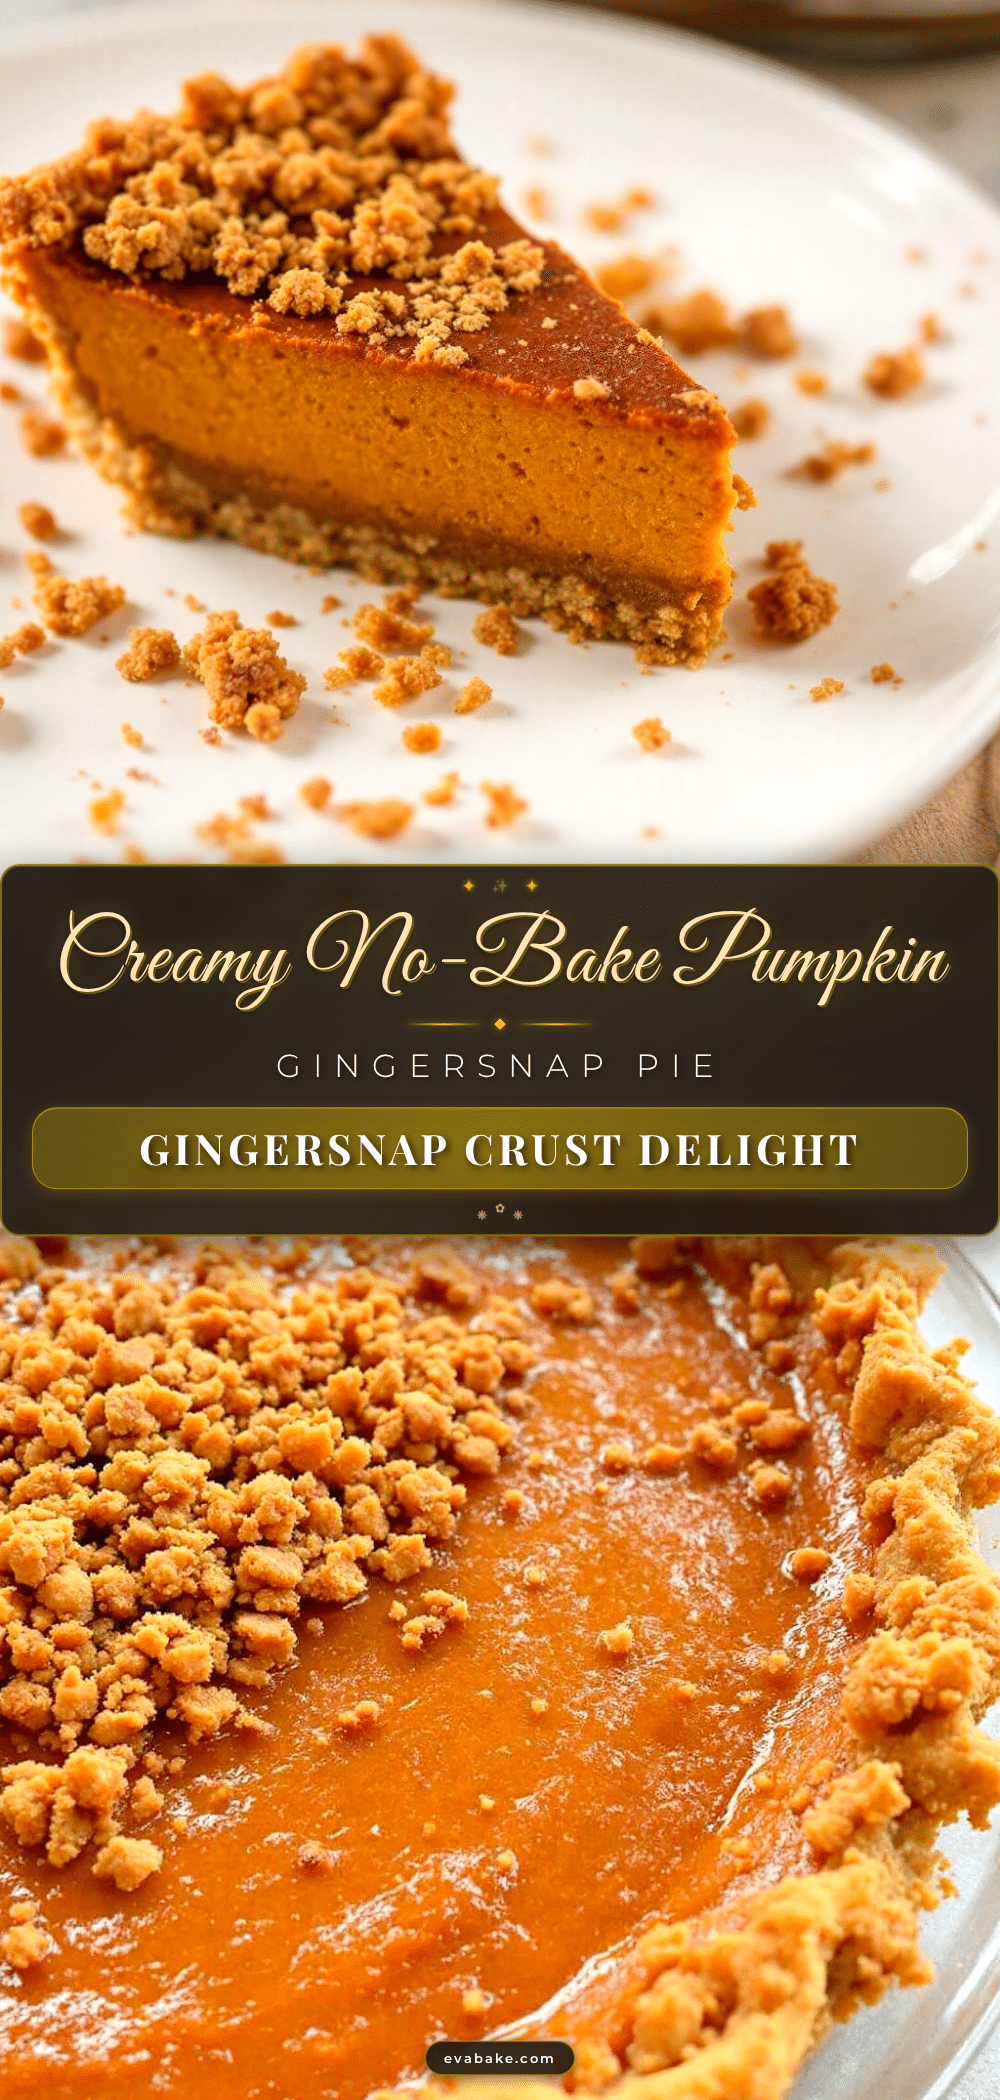
Easy No-Bake Pumpkin Pie with Gingersnap Crust
A creamy, no-bake pumpkin pie with a spicy gingersnap crust that’s perfect for fall. No oven required, simple ingredients, and a make-ahead dessert that’s a crowd-pleaser.
- Prep Time: 30 minutes
- Cook Time: 0 minutes
- Total Time: 4 hours 30 minutes (includes chilling)
- Yield: 10 servings 1x
- Category: Dessert
- Cuisine: American
Ingredients
- 2 cups crushed gingersnap cookies (about 8 ounces or 225g)
- 6 tablespoons unsalted butter (85g), melted
- 2 tablespoons granulated sugar (25g)
- 1/4 teaspoon salt (if using unsalted butter)
- 1 package (8 ounces or 226g) cream cheese, softened
- 1 cup (200g) packed light brown sugar
- 1 can (15 ounces or 425g) pure pumpkin puree
- 1 teaspoon vanilla extract
- 1 1/2 teaspoons pumpkin pie spice
- 1/2 teaspoon ground cinnamon
- 1/4 teaspoon ground ginger
- 1/4 teaspoon salt
- 1 1/2 cups (360ml) heavy whipping cream, cold
- 1/4 cup (30g) powdered sugar
- 1 cup (240ml) heavy whipping cream, cold (for topping)
- 2 tablespoons powdered sugar (for topping)
- 1/2 teaspoon vanilla extract (for topping)
- Crushed gingersnap cookies and cinnamon for garnish
Instructions
- Make the crust: Pulse gingersnap cookies in a food processor until fine crumbs form. Transfer to a bowl and mix with melted butter, granulated sugar, and salt until it resembles wet sand.
- Press the crust into a 9-inch pie plate firmly and evenly. Chill in the refrigerator while making the filling.
- Beat softened cream cheese with an electric mixer until smooth and fluffy, about 2 minutes. Add brown sugar and beat for another minute.
- Add pumpkin puree, vanilla extract, pumpkin pie spice, cinnamon, ground ginger, and salt. Beat until fully incorporated and smooth.
- In a separate cold bowl, whip 1 1/2 cups heavy cream with 1/4 cup powdered sugar until stiff peaks form.
- Gently fold one-third of the whipped cream into the pumpkin mixture using a rubber spatula. Fold in the remaining whipped cream until no white streaks remain.
- Spoon the filling into the chilled crust and spread evenly.
- Cover loosely with plastic wrap and refrigerate for at least 4 hours, preferably overnight.
- Before serving, make the topping: whip 1 cup heavy cream with 2 tablespoons powdered sugar and 1/2 teaspoon vanilla until stiff peaks form. Spread or pipe over the pie. Garnish with crushed gingersnaps and cinnamon.
Notes
Soft cream cheese is essential for a smooth filling. Chill your bowl and beaters for the whipped cream for best results. Do not over-fold the whipped cream. The pie needs at least 4 hours to set, but overnight is better. For a gluten-free version, use certified gluten-free gingersnap cookies. For a vegan version, use plant-based cream cheese and coconut cream.
Nutrition
- Serving Size: 1 slice (1/10 of pie
- Calories: 380
- Sugar: 28
- Fat: 24
- Saturated Fat: 14
- Carbohydrates: 38
- Fiber: 2
- Protein: 4
Keywords: no-bake pumpkin pie, gingersnap crust, easy pumpkin pie, fall dessert, Thanksgiving dessert, no-bake dessert


